maintenance reset LINCOLN AVIATOR 2021 Owners Manual
[x] Cancel search | Manufacturer: LINCOLN, Model Year: 2021, Model line: AVIATOR, Model: LINCOLN AVIATOR 2021Pages: 667, PDF Size: 7.01 MB
Page 10 of 667
Utilizing the Mediation/Arbitration Program
(Canada Only) ..........................................362
Getting Assistance Outside the U.S. and Canada ......................................................
363
Ordering Additional Owner's Literature ......................................................................
365
Reporting Safety Defects (U.S. Only) ......
366
Reporting Safety Defects (Canada Only) ......................................................................
366
Fuses
Fuse Specification Chart ...........................
368
Changing a Fuse ..........................................
381
Maintenance
General Information ....................................
384
Opening and Closing the Hood ..............
384
Under Hood Overview ...............................
386
Engine Oil Dipstick ......................................
387
Engine Oil Check .........................................
387
Oil Change Indicator Reset ......................
388
Changing the Engine Air Filter ................
389
Engine Coolant Check ...............................
390
Automatic Transmission Fluid Check ......
395Brake Fluid Check
......................................
395
Power Steering Fluid Check ....................
396
Changing the 12V Battery .........................
397
Adjusting the Headlamps .........................
399
Washer Fluid Check ....................................
401
Fuel Filter .......................................................
401
Checking the Wiper Blades .......................
401
Changing the Front Wiper Blades - Vehicles Without: Heated Wiper Blades
.......................................................................
401
Changing the Front Wiper Blades - Vehicles With: Heated Wiper Blades
......................................................................
402
Changing the Rear Wiper Blades ...........
403
Changing a Bulb ..........................................
403
Vehicle Care
General Information ....................................
404
Cleaning Products ......................................
404
Cleaning the Exterior .................................
405
Waxing ...........................................................
406
Cleaning the Engine ...................................
407
Cleaning the Windows and Wiper Blades ......................................................................
407 Cleaning the Interior
..................................
408
Cleaning the Instrument Panel and Instrument Cluster Lens ........................
408
Cleaning Leather Seats .............................
409
Repairing Minor Paint Damage .................
410
Cleaning the Wheels ...................................
410
Vehicle Storage ............................................
410
Body Styling Kits ...........................................
412
Wheels and Tires
General Information .....................................
413
Tire Care .........................................................
415
Using Summer Tires ...................................
427
Using Snow Chains ....................................
428
Tire Pressure Monitoring System ...........
430
Changing a Road Wheel ............................
434
Technical Specifications ............................
442
Capacities and Specifications
Engine Specifications - Excluding: Plug-In Hybrid Electric Vehicle (PHEV) ............
444
Engine Specifications - Plug-In Hybrid Electric Vehicle (PHEV) ..........................
445
7
Aviator (CTV) Canada/United States of America, enUSA, Edition date: 202007, Second-Printing Table of Contents
Page 19 of 667
WARNING: Do not connect wireless
plug-in devices to the data link connector.
Unauthorized third parties could gain
access to vehicle data and impair the
performance of safety related systems.
Only allow repair facilities that follow our
service and repair instructions to connect
their equipment to the data link connector.
We respect your privacy and are committed
to protecting it. The information contained
in this manual was correct at the time of
publication but as technology rapidly
changes, we recommend that you visit the
local Lincoln website for the latest
information.
Your vehicle has electronic control units that
have data recording functionality and the
ability to permanently or temporarily store
data. This data could include information on
the condition and status of your vehicle,
vehicle maintenance requirements, events
and malfunctions. The types of data that can
be recorded are described in this section.
Some of the data recorded is stored in event
logs or error logs. Note:
Error logs are reset following a service
or repair.
Note: We may provide information in
response to requests from law enforcement,
other government authorities and third
parties acting with lawful authority or through
a legal process. Such information could be
used by them in legal proceedings.
Data recorded includes, for example:
• Operating states of system components,
for example fuel level, tire pressure and
battery charge level.
• Vehicle and component status, for
example wheel speed, deceleration,
lateral acceleration and seatbelt status.
• Events or errors in essential systems, for
example headlamps and brakes.
• System responses to driving situations,
for example airbag deployment and
stability control.
• Environmental conditions, for example
temperature. Some of this data, when used in combination
with other information, for example an
accident report, damage to a vehicle or
eyewitness statements, could be associated
with a specific person.
Services That We Provide
If you use our services, we collect and use
data, for example account information,
vehicle location and driving characteristics,
that could identify you. We transmit this data
through a dedicated, protected connection.
We only collect and use data to enable your
use of our services to which you have
subscribed, with your consent or where
permitted by law. For additional information,
see the terms and conditions of the services
to which you have subscribed.
For additional information about our privacy
policy, refer to the local Lincoln website.
16
Aviator (CTV) Canada/United States of America, enUSA, Edition date: 202007, Second-Printing Data Privacy
Page 391 of 667
Note:
If the oil level is between the
maximum and minimum marks, the oil level
is acceptable. Do not add oil.
Note: The oil consumption of new engines
reaches its normal level after approximately
3,000 mi (5,000 km).
Adding Engine Oil WARNING:
Do not remove the filler
cap when the engine is running.
Do not use supplemental engine oil additives
because they are unnecessary and could
lead to engine damage that may not be
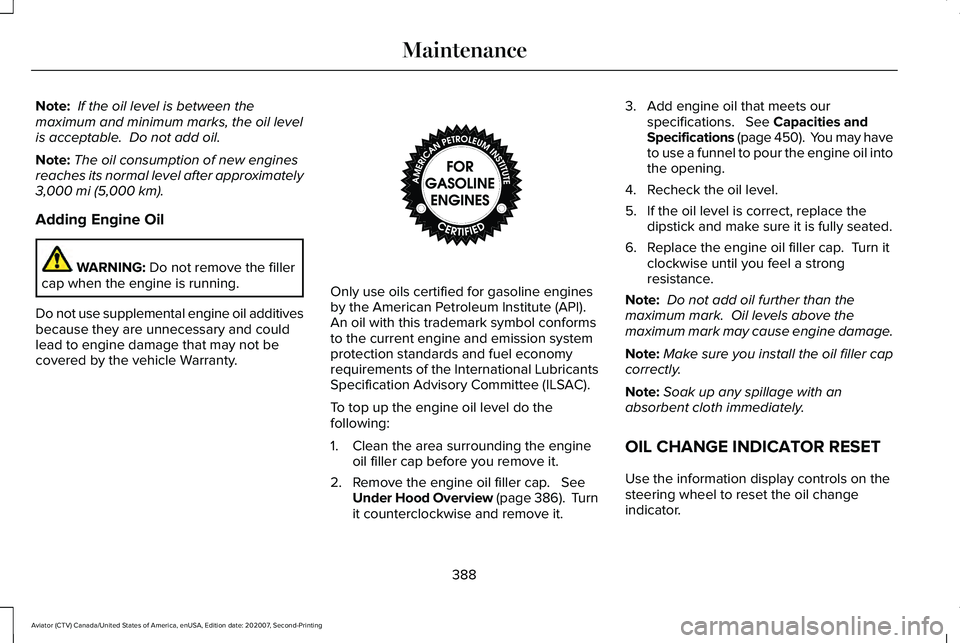
covered by the vehicle Warranty. Only use oils certified for gasoline engines
by the American Petroleum Institute (API).
An oil with this trademark symbol conforms
to the current engine and emission system
protection standards and fuel economy
requirements of the International Lubricants
Specification Advisory Committee (ILSAC).
To top up the engine oil level do the
following:
1. Clean the area surrounding the engine
oil filler cap before you remove it.
2. Remove the engine oil filler cap.
See
Under Hood Overview (page 386). Turn
it counterclockwise and remove it. 3. Add engine oil that meets our
specifications.
See Capacities and
Specifications (page 450). You may have
to use a funnel to pour the engine oil into
the opening.
4. Recheck the oil level.
5. If the oil level is correct, replace the dipstick and make sure it is fully seated.
6. Replace the engine oil filler cap. Turn it clockwise until you feel a strong
resistance.
Note: Do not add oil further than the
maximum mark. Oil levels above the
maximum mark may cause engine damage.
Note: Make sure you install the oil filler cap
correctly.
Note: Soak up any spillage with an
absorbent cloth immediately.
OIL CHANGE INDICATOR RESET
Use the information display controls on the
steering wheel to reset the oil change
indicator.
388
Aviator (CTV) Canada/United States of America, enUSA, Edition date: 202007, Second-Printing MaintenanceE142732
Page 392 of 667
From the main menu scroll to:
Action and description
Message
Press the right arrow button,
then from this menu scroll to
the following message.
Settings
Press the right arrow button,
then from this menu scroll to
the following message.
Vehicle
Press the right arrow button,
then from this menu scroll to
the following message.
Oil Life
Press and hold the OK button
until the instrument cluster
displays the following
message.
Hold OK to
Reset
Reset Successful
When the oil change indicator
resets the instrument cluster
displays 100%.
Remaining Life
{00}% Action and description
Message
If the instrument cluster
displays one of the following
messages, repeat the
process.
Not Reset
Reset Cancelled
CHANGING THE ENGINE AIR
FILTER WARNING: To reduce the risk of
vehicle damage and personal burn injuries,
do not start your engine with the air
cleaner removed and do not remove it
while the engine is running.
When changing the engine air filter, do not
allow debris or foreign material to enter the
air induction system. Engine components
are susceptible to damage not covered by
the vehicle Warranty. Change the air filter element at the correct
interval. See Scheduled Maintenance (page
564
).
Incorrect component use can cause damage
not covered by the vehicle Warranty.
See
Motorcraft Parts (page 448).
To replace the air filter element do the
following:
389
Aviator (CTV) Canada/United States of America, enUSA, Edition date: 202007, Second-Printing Maintenance
Page 396 of 667
Severe Climates
If you drive in extremely cold climates:
•
It may be necessary to increase the
coolant concentration above 50%.
• A coolant concentration of 60% provides
improved freeze point protection.
Coolant concentrations above 60%
decrease the overheat protection
characteristics of the coolant and may
cause engine damage.
If you drive in extremely hot climates:
• You can decrease the coolant
concentration to 40%.
• Coolant concentrations below 40%
decrease the freeze and corrosion
protection characteristics of the coolant
and may cause engine damage.
Vehicles driven year-round in non-extreme
climates should use prediluted coolant for
optimum cooling system and engine
protection. Coolant Change
At specific mileage intervals, as listed in the
scheduled maintenance information, the
coolant should be changed. Add prediluted
coolant approved to the correct specification.
See Capacities and Specifications (page
450).
Fail-Safe Cooling
Fail-safe cooling allows you to temporarily
drive your vehicle before any incremental
component damage occurs. The fail-safe
distance depends on ambient temperature,
vehicle load and terrain.
How Fail-Safe Cooling Works If the engine begins to overheat,
the coolant temperature gauge
moves toward the red zone:
A warning lamp illuminates and a
message may appear in the
information display.If the engine reaches a preset
over-temperature condition, the engine
automatically switches to alternating cylinder
operation. Each disabled cylinder acts as an
air pump and cools the engine.
When this occurs, your vehicle still operates,
however:
•
Engine power is limited.
• The air conditioning system turns off.
Continued operation increases the engine
temperature, causing the engine to
completely shut down. Your steering and
braking effort increases in this situation.
When the engine temperature cools, you can
re-start the engine. Have your vehicle
checked as soon as possible to minimize
engine damage.
393
Aviator (CTV) Canada/United States of America, enUSA, Edition date: 202007, Second-Printing Maintenance
Page 402 of 667
Electrical Accessory Installation
To make sure the battery management
system works correctly, do not connect an
electrical device ground connection directly
to the battery negative post. This can cause
inaccurate measurements of the battery
condition and potential incorrect system
operation.
Note:
If you add electrical accessories or
components to the vehicle, it may adversely
affect battery performance and durability.
This may also affect the performance of
other electrical systems in the vehicle.
Remove and Reinstall the Battery
To disconnect or remove the battery, do the
following:
1. Apply the parking brake and switch the ignition off.
2. Switch all electrical equipment off, for example lights and radio.
3. Wait a minimum of two minutes before disconnecting the battery. Note:
The engine management system has
a power hold function and remains powered
for a period of time after you switch the
ignition off. This is to allow diagnostic and
adaptive tables to be stored. Disconnecting
the battery without waiting can cause
damage not covered by the vehicle
Warranty.
4. Disconnect the negative battery cable terminal.
5. Disconnect the positive battery cable terminal.
6. Remove the battery securing clamp.
7. Remove the battery.
8. To install, reverse the removal procedure.
Note: Before reconnecting the battery, make
sure the ignition remains switched off.
Note: Make sure the battery cable terminals
are fully tightened. If you disconnect or replace the vehicle
battery, you must reset the following
features:
•
Window bounce-back. See Power
Windows (page 119).
• Clock Settings.
• Pre-set radio stations.
Battery Disposal Make sure that you dispose of old
batteries in an environmentally
friendly way. Seek advice from
your local authority about recycling old
batteries.
ADJUSTING THE HEADLAMPS
Vertical Aim Adjustment
If your vehicle has been involved in a crash,
have the aim of the headlamp beam checked
by an authorized dealer.
399
Aviator (CTV) Canada/United States of America, enUSA, Edition date: 202007, Second-Printing MaintenanceE107998
Page 430 of 667
Tire Rotation
WARNING: If the tire label shows
different tire pressures for the front
and rear tires and the vehicle has a
tire pressure monitoring system, then
you need to update the settings for
the system sensors. Always perform
the system reset procedure after tire
rotation. If you do not reset the system,
it may not provide a low tire pressure
warning when necessary.
Note: If your tires show uneven wear,
ask an authorized dealer to check for
and correct any wheel misalignment,
tire imbalance or mechanical problem
involved before tire rotation. Note:
Your vehicle may be equipped
with a dissimilar spare wheel and tire
assembly. A dissimilar spare wheel and
tire assembly is defined as a spare
wheel and tire assembly that is different
in brand, size or appearance from the
road tires and wheels. If you have a
dissimilar spare wheel and tire
assembly, it is intended for temporary
use only and should not be used in a
tire rotation.
Note: After having your tires rotated,
inflation pressure must be checked and
adjusted to the vehicle requirements.
Rotating your tires at the recommended
interval will help your tires wear more
evenly, providing better tire performance
and longer tire life. Sometimes irregular
tire wear can be corrected by rotating
the tires.
See Scheduled Maintenance
(page 568).
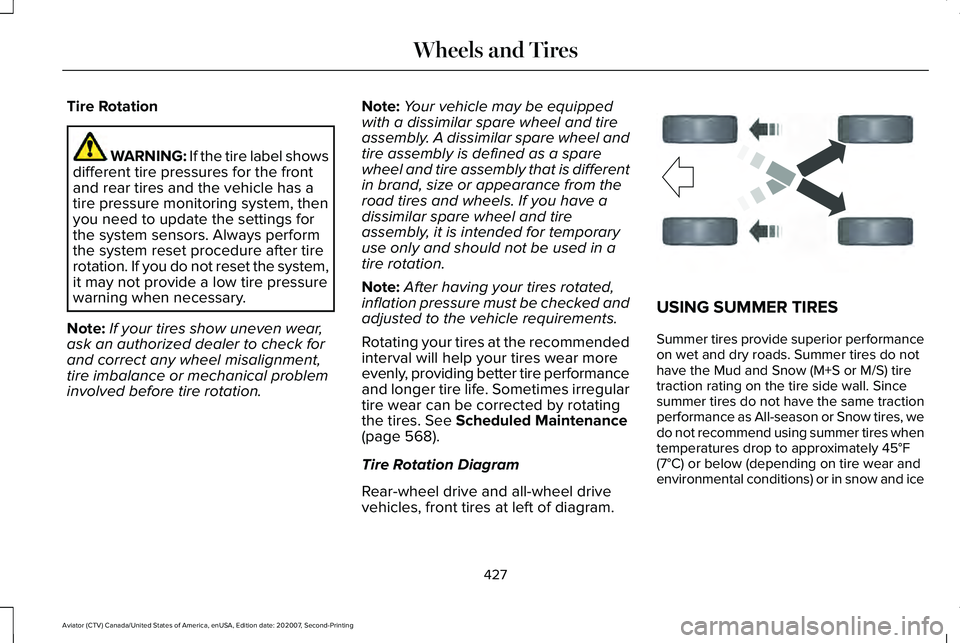
Tire Rotation Diagram
Rear-wheel drive and all-wheel drive
vehicles, front tires at left of diagram. USING SUMMER TIRES
Summer tires provide superior performance
on wet and dry roads. Summer tires do not
have the Mud and Snow (M+S or M/S) tire
traction rating on the tire side wall. Since
summer tires do not have the same traction
performance as All-season or Snow tires, we
do not recommend using summer tires when
temperatures drop to approximately 45°F
(7°C) or below (depending on tire wear and
environmental conditions) or in snow and ice
427
Aviator (CTV) Canada/United States of America, enUSA, Edition date: 202007, Second-Printing Wheels and TiresE142548
Page 568 of 667
When the oil change message appears in
the information display, it is time for an oil
change. Make sure you perform the oil
change within two weeks or 500 mi (800 km)
of the message appearing. Make sure you
reset the Intelligent Oil-Life Monitor after
each oil change. See Oil Change Indicator
Reset (page 388).
If your information display resets prematurely
or becomes inoperative, you should perform
the oil change interval at six months or
5,000 mi (8,000 km)
from your last oil
change. Never exceed one year or 10,000 mi
(16,000 km)
between oil change intervals,
Your vehicle is very sophisticated and built
with multiple, complex performance systems.
Every manufacturer develops these systems
using different specifications and
performance features. That is why it is
important to rely upon your dealership to
properly diagnose and repair your vehicle. We have recommended maintenance
intervals for various parts and component
systems based upon engineering testing.
We rely upon this testing to determine the
most appropriate mileage for replacement
of oils and fluids to protect your vehicle at
the lowest overall cost to you and
recommends against maintenance schedules
that deviate from the scheduled maintenance
information.
We strongly recommend the use of only our
genuine manufactured or our authorized
re-manufactured replacement parts
engineered for your vehicle.
Additives and Chemicals
This owner's manual and our Workshop
Manual list the recommended additives and
chemicals for your vehicle. We do not
recommend using chemicals or additives not
approved by us as part of your vehicle
’s
normal maintenance. Please consult your
warranty information. Oils, Fluids and Flushing
In many cases, fluid discoloration is a normal
operating characteristic and, by itself, does
not necessarily indicate a concern or that the
fluid needs to be changed. However, a
qualified expert, such as the factory-trained
technicians at your dealership, should
inspect discolored fluids that also show signs
of overheating or foreign material
contamination immediately.
Make sure to change your vehicle
’s oils and
fluids at the specified intervals or in
conjunction with a repair. Flushing is a viable
way to change fluid for many vehicle
sub-systems during scheduled maintenance.
It is critical that systems are flushed only with
new fluid that is the same as that required
to fill and operate the system or using our
approved flushing chemical.
Owner Checks and Services
Make sure you perform the following basic
maintenance checks and inspections every
month or at six-month intervals.
565
Aviator (CTV) Canada/United States of America, enUSA, Edition date: 202007, Second-Printing Scheduled Maintenance
Page 573 of 667
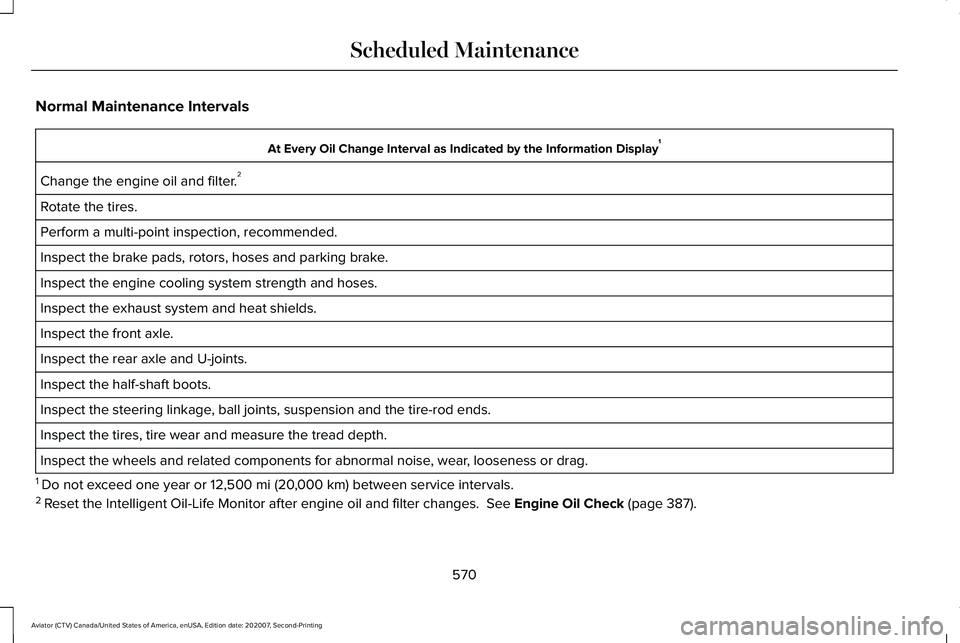
Normal Maintenance Intervals
At Every Oil Change Interval as Indicated by the Information Display
1
Change the engine oil and filter. 2
Rotate the tires.
Perform a multi-point inspection, recommended.
Inspect the brake pads, rotors, hoses and parking brake.
Inspect the engine cooling system strength and hoses.
Inspect the exhaust system and heat shields.
Inspect the front axle.
Inspect the rear axle and U-joints.
Inspect the half-shaft boots.
Inspect the steering linkage, ball joints, suspension and the tire-rod ends.
Inspect the tires, tire wear and measure the tread depth.
Inspect the wheels and related components for abnormal noise, wear, looseness or drag.
1 Do not exceed one year or 12,500 mi (20,000 km) between service intervals.
2 Reset the Intelligent Oil-Life Monitor after engine oil and filter change\
s.
See Engine Oil Check (page 387).
570
Aviator (CTV) Canada/United States of America, enUSA, Edition date: 202007, Second-Printing Scheduled Maintenance
Page 575 of 667
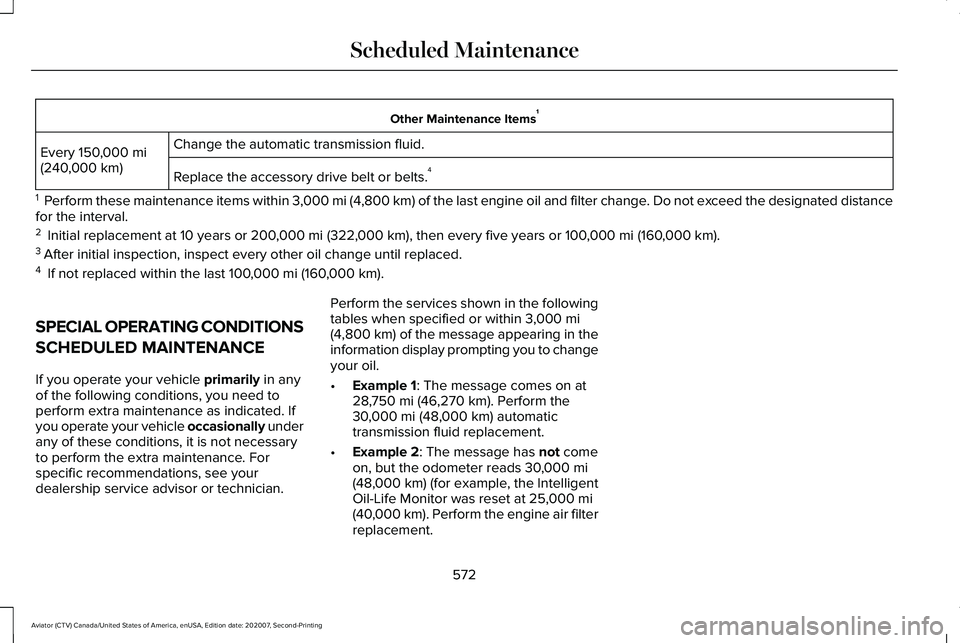
Other Maintenance Items
1
Change the automatic transmission fluid.
Every 150,000 mi
(240,000 km) Replace the accessory drive belt or belts. 4
1 Perform these maintenance items within 3,000 mi (4,800 km) of the last engine oil and filter change. Do not exceed the designated distance
for the interval.
2 Initial replacement at 10 years or
200,000 mi (322,000 km), then every five years or 100,000 mi (160,000 km).
3 After initial inspection, inspect every other oil change until replaced.\
4 If not replaced within the last
100,000 mi (160,000 km).
SPECIAL OPERATING CONDITIONS
SCHEDULED MAINTENANCE
If you operate your vehicle
primarily in any
of the following conditions, you need to
perform extra maintenance as indicated. If
you operate your vehicle occasionally under
any of these conditions, it is not necessary
to perform the extra maintenance. For
specific recommendations, see your
dealership service advisor or technician. Perform the services shown in the following
tables when specified or within
3,000 mi
(4,800 km) of the message appearing in the
information display prompting you to change
your oil.
• Example 1
: The message comes on at
28,750 mi (46,270 km). Perform the
30,000 mi (48,000 km) automatic
transmission fluid replacement.
• Example 2
: The message has not come
on, but the odometer reads 30,000 mi
(48,000 km) (for example, the Intelligent
Oil-Life Monitor was reset at 25,000 mi
(40,000 km). Perform the engine air filter
replacement.
572
Aviator (CTV) Canada/United States of America, enUSA, Edition date: 202007, Second-Printing Scheduled Maintenance