manual transmission LINCOLN AVIATOR 2023 User Guide
[x] Cancel search | Manufacturer: LINCOLN, Model Year: 2023, Model line: AVIATOR, Model: LINCOLN AVIATOR 2023Pages: 681, PDF Size: 9.33 MB
Page 266 of 681
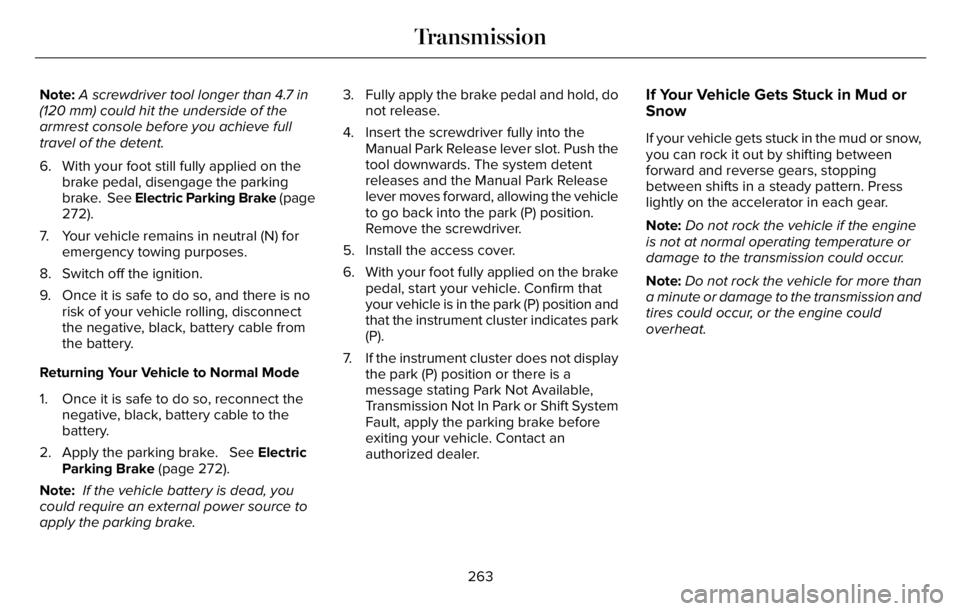
Note:A screwdriver tool longer than 4.7 in
(120 mm) could hit the underside of the
armrest console before you achieve full
travel of the detent.
6. With your foot still fully applied on the
brake pedal, disengage the parking
brake. See Electric Parking Brake (page
272).
7. Your vehicle remains in neutral (N) for
emergency towing purposes.
8. Switch off the ignition.
9. Once it is safe to do so, and there is no
risk of your vehicle rolling, disconnect
the negative, black, battery cable from
the battery.
Returning Your Vehicle to Normal Mode
1. Once it is safe to do so, reconnect the
negative, black, battery cable to the
battery.
2. Apply the parking brake. See Electric
Parking Brake (page 272).
Note: If the vehicle battery is dead, you
could require an external power source to
apply the parking brake.3. Fully apply the brake pedal and hold, do
not release.
4. Insert the screwdriver fully into the
Manual Park Release lever slot. Push the
tool downwards. The system detent
releases and the Manual Park Release
lever moves forward, allowing the vehicle
to go back into the park (P) position.
Remove the screwdriver.
5. Install the access cover.
6. With your foot fully applied on the brake
pedal, start your vehicle. Confirm that
your vehicle is in the park (P) position and
that the instrument cluster indicates park
(P).
7. If the instrument cluster does not display
the park (P) position or there is a
message stating Park Not Available,
Transmission Not In Park or Shift System
Fault, apply the parking brake before
exiting your vehicle. Contact an
authorized dealer.If Your Vehicle Gets Stuck in Mud or
Snow
If your vehicle gets stuck in the mud or snow,
you can rock it out by shifting between
forward and reverse gears, stopping
between shifts in a steady pattern. Press
lightly on the accelerator in each gear.
Note:Do not rock the vehicle if the engine
is not at normal operating temperature or
damage to the transmission could occur.
Note:Do not rock the vehicle for more than
a minute or damage to the transmission and
tires could occur, or the engine could
overheat.
263
Transmission
Page 277 of 681
HILL START ASSIST
WARNING: The system does not
replace the parking brake. When you leave
your vehicle, always apply the parking
brake.
WARNING: You must remain in your
vehicle when the system turns on. At all
times, you are responsible for controlling
your vehicle, supervising the system and
intervening, if required. Failure to take care
may result in the loss of control of your
vehicle, serious personal injury or death.
WARNING: The system will turn off
if a malfunction is apparent or if you rev
the engine excessively. Failure to take care
may result in the loss of control of your
vehicle, serious personal injury or death.
The system makes it easier to pull away
when your vehicle is on a slope without the
need to use the parking brake.When the system is active, your vehicle
remains stationary on the slope for two to
three seconds after you release the brake
pedal. This allows time to move your foot
from the brake to the accelerator pedal. The
system releases the brakes automatically
once the engine has developed sufficient
torque to prevent your vehicle from rolling
down the slope. This is an advantage when
pulling away on a slope, for example from a
car park ramp, traffic lights or when reversing
uphill into a parking space.
The system activates on any slope that
causes your vehicle to roll.
Note:There is no warning light to indicate
the system is either on or off.
Using Hill Start Assist
1. Press the brake pedal to bring your
vehicle to a complete standstill. Keep the
brake pedal pressed and shift into first
gear when facing uphill or reverse (R)
when facing downhill.
2. If the sensors detect that your vehicle is
on a slope, the system activates
automatically.3. When you remove your foot from the
brake pedal, your vehicle remains on the
slope without rolling away for about two
to three seconds. This hold time
automatically extends if you are in the
process of driving off.
4. Drive off in the normal manner. The
system releases the brakes automatically.
Note:When you remove your foot from the
brake pedal and press the pedal again when
the system is active, you will experience
significantly reduced brake pedal travel. This
is normal.
Switching the System On and Off
Vehicles with Manual Transmission
You can switch this feature on or off in the
information display. The system remembers
the last setting when you start your vehicle.
Vehicles with Automatic Transmission
You cannot turn the system on or off. When
you switch the ignition on, the system
automatically turns on.
274
Brakes
Page 302 of 681
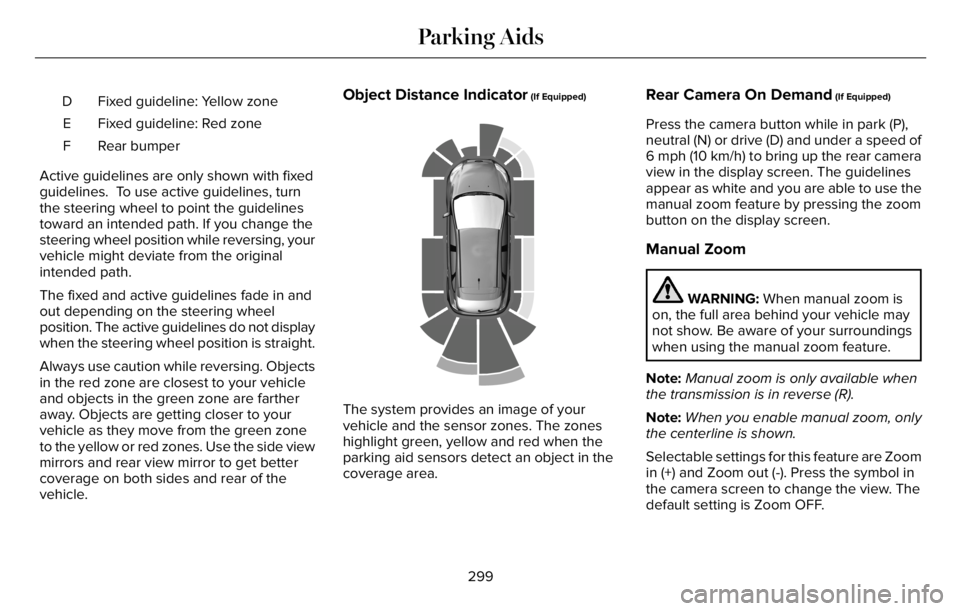
Fixed guideline: Yellow zone D
Fixed guideline: Red zone E
Rear bumper F
Active guidelines are only shown with fixed
guidelines. To use active guidelines, turn
the steering wheel to point the guidelines
toward an intended path. If you change the
steering wheel position while reversing, your
vehicle might deviate from the original
intended path.
The fixed and active guidelines fade in and
out depending on the steering wheel
position. The active guidelines do not display
when the steering wheel position is straight.
Always use caution while reversing. Objects
in the red zone are closest to your vehicle
and objects in the green zone are farther
away. Objects are getting closer to your
vehicle as they move from the green zone
to the yellow or red zones. Use the side view
mirrors and rear view mirror to get better
coverage on both sides and rear of the
vehicle.Object Distance Indicator (If Equipped)
E190459
The system provides an image of your
vehicle and the sensor zones. The zones
highlight green, yellow and red when the
parking aid sensors detect an object in the
coverage area.
Rear Camera On Demand (If Equipped)
Press the camera button while in park (P),
neutral (N) or drive (D) and under a speed of
6 mph (10 km/h) to bring up the rear camera
view in the display screen. The guidelines
appear as white and you are able to use the
manual zoom feature by pressing the zoom
button on the display screen.
Manual Zoom
WARNING: When manual zoom is
on, the full area behind your vehicle may
not show. Be aware of your surroundings
when using the manual zoom feature.
Note:Manual zoom is only available when
the transmission is in reverse (R).
Note:When you enable manual zoom, only
the centerline is shown.
Selectable settings for this feature are Zoom
in (+) and Zoom out (-). Press the symbol in
the camera screen to change the view. The
default setting is Zoom OFF.
299
Parking Aids
Page 357 of 681
TOWING A TRAILER
WARNING: Towing trailers
beyond the maximum recommended
gross trailer weight exceeds the limit
of your vehicle and could result in
engine damage, transmission damage,
structural damage, loss of vehicle
control, vehicle rollover and personal
injury.
WARNING: Do not exceed the
GVWR or the GAWR specified on the
certification label.
Note: See Recommended Towing
Weights (page 356).
Your vehicle may have electrical items,
such as fuses or relays, related to
towing. See Fuses (page 382).Your vehicle's load capacity designation
is by weight, not by volume, so you
cannot necessarily use all available
space when loading a vehicle or trailer.
Towing a trailer places an extra load on
your vehicle's engine, transmission, axle,
brakes, tires and suspension. Inspect
these components periodically during,
and after, any towing operation.
Load Placement
To help minimize how trailer movement
affects your vehicle when driving:
• Load the heaviest items closest to
the trailer floor.
• Load the heaviest items centered
between the left and right side trailer
tires.• Load the heaviest items above the
trailer axles or just slightly forward
toward the trailer tongue. Do not
allow the final trailer tongue weight
to go above or below 10-15% of the
loaded trailer weight.
• Select a ball mount with the correct
rise or drop and load capacity. When
both the loaded vehicle and trailer
are connected, the trailer frame
should be level, or slightly angled
down toward your vehicle, when
viewed from the side.
When driving with a trailer or payload, a
slight takeoff vibration or shudder may
be present due to the increased payload
weight. Additional information regarding
proper trailer loading and setting your
vehicle up for towing is located in
another chapter of this manual. See
Load Limit (page 348).
You can also find information in the RV
& Trailer Towing Guide available at your
authorized dealer, or online.
354
Towing
Page 362 of 681
Note:Reconnect the wiring to the trailer
after removing the trailer from the water.
When backing down a ramp during boat
launching or retrieval:
• Do not allow the static water level to rise
above the bottom edge of the rear
bumper.
• Do not allow waves to break higher than
6 in (15 cm) above the bottom edge of
the rear bumper.
Exceeding these limits may allow water to
enter vehicle components:
• Causing internal damage to the
components.
• Affecting driveability, emissions, and
reliability.
Replace the rear axle lubricant anytime the
rear axle has been submerged in water.
Water may have contaminated the rear axle
lubricant, which is not normally checked or
changed unless a leak is suspected or other
axle repair is required.TOWING THE VEHICLE ON FOUR
WHEELS
Emergency Towing
WARNING: If your vehicle has a
steering wheel lock make sure the ignition
is in the accessory or on position when
being towed.
If your vehicle becomes inoperable without
access to wheel dollies or a vehicle transport
trailer, it can be flat-towed with all wheels on
the ground, regardless of the powertrain and
transmission configuration, under the
following conditions:
• Your vehicle is facing forward for towing
in a forward direction.
• Refer to the Manual Park Release
procedure. See Automatic Transmission
(page 259). Failing to do so could result
in damage to the transmission.
• Maximum speed is 35 mph (56 km/h).
• Maximum distance is 50 mi (80 km).Note:If you are unsure of the vehicle’s
configuration, contact an authorized dealer.
Recreational Towing - Front-Wheel
Drive Vehicles
(If Equipped)
You cannot recreational tow your vehicle
with all wheels on the ground because
vehicle or transmission damage could occur.
Place the front wheels on a two-wheel tow
dolly. If you are using a tow dolly, follow the
instructions specified by the equipment
provider.
Recreational Towing - Rear-Wheel
Drive Vehicles (If Equipped)
You cannot recreational tow your vehicle
with all wheels on the ground because
vehicle or transmission damage could occur.
We recommend towing your vehicle with all
four wheels off the ground, such as when
using a car-hauling trailer. Otherwise, you
cannot recreational tow your vehicle.
359
Towing
Page 374 of 681
If you need to tow your vehicle, contact a
professional towing service or, if you are a
member of a roadside assistance program,
your roadside assistance service provider.
We recommend the use of a wheel lift and
dollies or flatbed equipment to tow your
vehicle. Do not tow with a slingbelt. We do
not approve a slingbelt towing procedure. If
you tow your vehicle incorrectly, or by any
other means, vehicle damage may occur.
We produce a towing manual for all
authorized tow truck operators. Have your
tow truck operator refer to this manual for
proper hook-up and towing procedures for
your vehicle.
We recommend towing a four-wheel drive
vehicle with all wheels off the ground, such
as using a wheel lift and dollies or flatbed
equipment.
We recommend towing a rear-wheel drive
vehicle with the rear wheels on a tow dolly
when towing your vehicle from the front
using wheel lift equipment. This prevents
damage to the transmission.We recommend towing a rear-wheel drive
vehicle with the front wheels on a tow dolly
when towing your vehicle from the rear using
wheel lift equipment. This prevents damage
to the front fascia.
371
Roadside Emergencies