jacking LINCOLN AVIATOR 2023 Owners Manual
[x] Cancel search | Manufacturer: LINCOLN, Model Year: 2023, Model line: AVIATOR, Model: LINCOLN AVIATOR 2023Pages: 681, PDF Size: 9.33 MB
Page 456 of 681

When driving with the full-size dissimilar
spare wheel and tire assembly additional
caution should be given to:
• Towing a trailer.
• Driving vehicles equipped with a camper
body.
• Driving vehicles with a load on the cargo
rack.
Drive cautiously when using a full-size
dissimilar spare wheel and tire assembly and
seek service as soon as possible.
Tire Change Procedure
WARNING: The jack supplied with
this vehicle is only intended for changing
a flat tire in an emergency. Do not attempt
to do any other work on your vehicle when
it is supported by the jack, as your vehicle
could slip off the jack. Failure to follow this
instruction could result in personal injury
or death.
WARNING: To help prevent your
vehicle from moving when changing a
wheel, shift the transmission into park (P),
set the parking brake and use an
appropriate block or wheel chock to
secure the wheel diagonally opposite to
the wheel being changed. For example,
when changing the front left wheel, place
an appropriate block or wheel chock on
the right rear wheel.
WARNING: Only use the jack
provided as original equipment with your
vehicle.
WARNING: Failure to follow these
guidelines could result in an increased risk
of loss of vehicle control, injury or death.
WARNING: Only use the specified
jacking points. If you use any other
locations you could damage vehicle
components, such as brake lines.
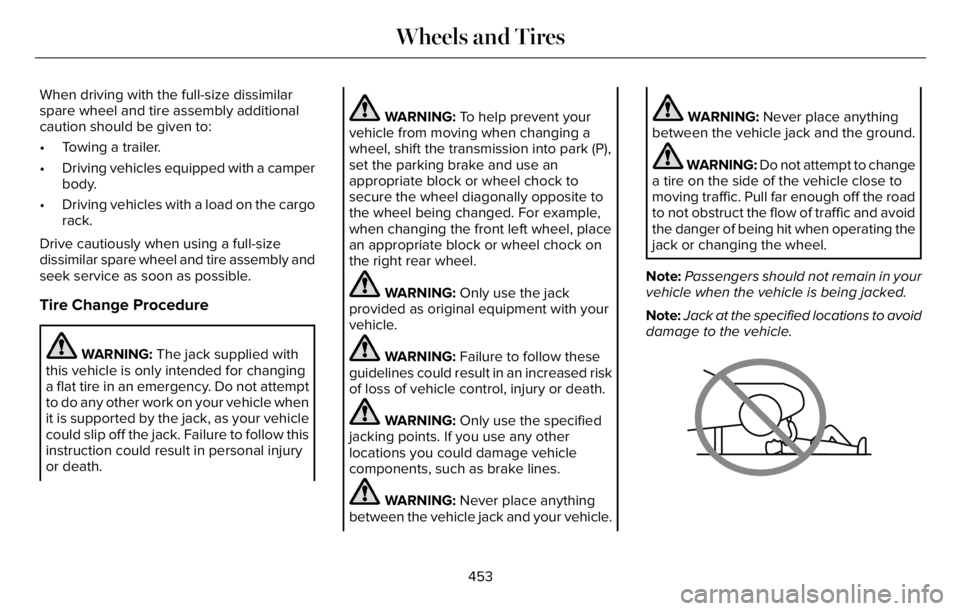
WARNING: Never place anything
between the vehicle jack and your vehicle.
WARNING: Never place anything
between the vehicle jack and the ground.
WARNING: Do not attempt to change
a tire on the side of the vehicle close to
moving traffic. Pull far enough off the road
to not obstruct the flow of traffic and avoid
the danger of being hit when operating the
jack or changing the wheel.
Note:Passengers should not remain in your
vehicle when the vehicle is being jacked.
Note:Jack at the specified locations to avoid
damage to the vehicle.
66E166722
453
Wheels and Tires
Page 457 of 681

Note:No maintenance or additional
lubrication of your jack is required over the
service life of your vehicle.
1. Park on a level surface, set the parking
brake and switch on the hazard flashers.
2. Apply the parking brake, place the
transmission in park (P) and turn the
engine off.
3. If your vehicle has air suspension, use
the touch screen to switch on the Air
Suspension Service Mode prior to
jacking.
E142551
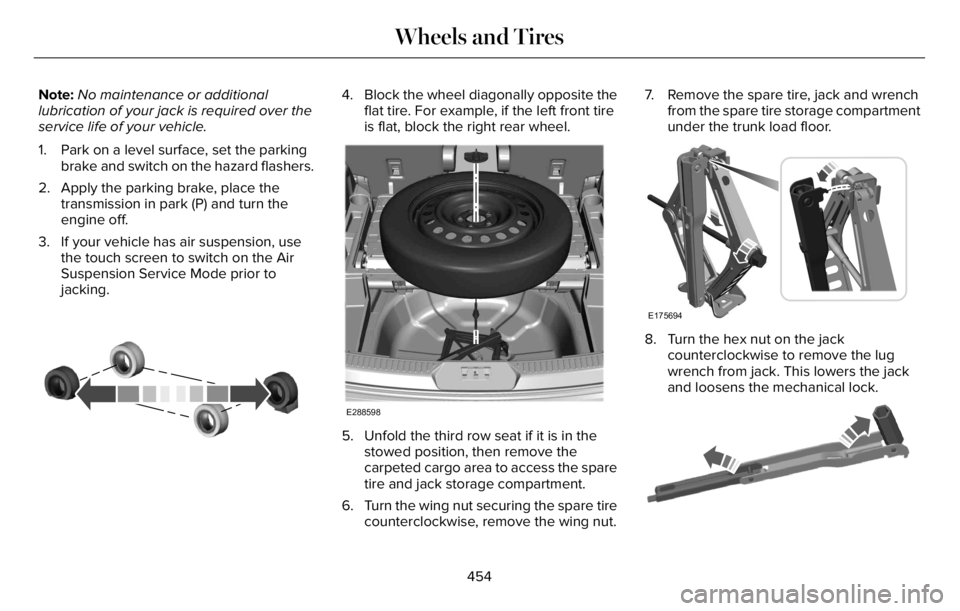
4. Block the wheel diagonally opposite the
flat tire. For example, if the left front tire
is flat, block the right rear wheel.
E288598
5. Unfold the third row seat if it is in the
stowed position, then remove the
carpeted cargo area to access the spare
tire and jack storage compartment.
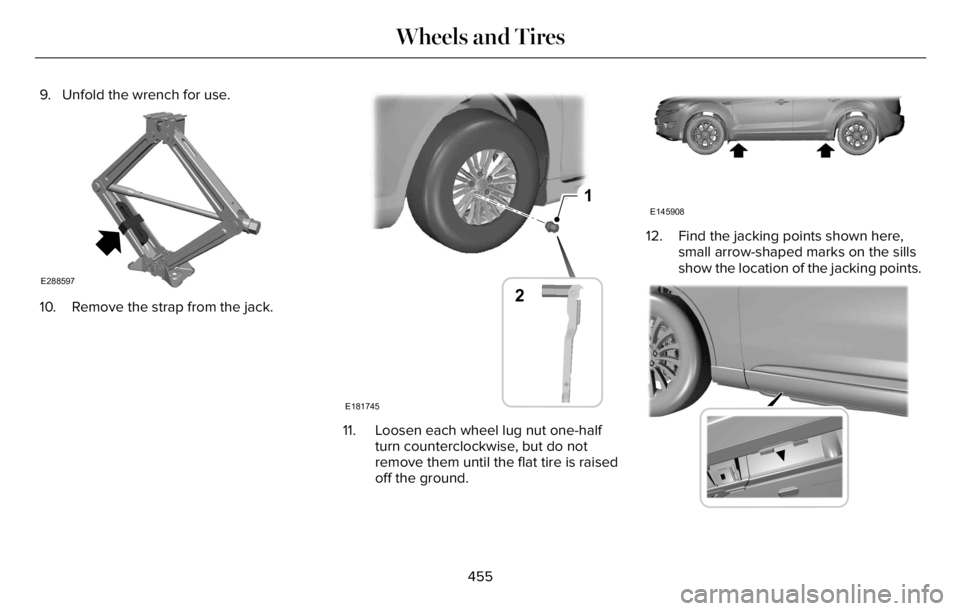
6. Turn the wing nut securing the spare tire
counterclockwise, remove the wing nut.7. Remove the spare tire, jack and wrench
from the spare tire storage compartment
under the trunk load floor.
E175694
8. Turn the hex nut on the jack
counterclockwise to remove the lug
wrench from jack. This lowers the jack
and loosens the mechanical lock.
E181744E181744
454
Wheels and Tires
Page 458 of 681

9. Unfold the wrench for use.
E288597
10. Remove the strap from the jack.
1
E181745
2
11. Loosen each wheel lug nut one-half
turn counterclockwise, but do not
remove them until the flat tire is raised
off the ground.
E145908
12. Find the jacking points shown here,
small arrow-shaped marks on the sills
show the location of the jacking points.
E307860E307860
455
Wheels and Tires
Page 459 of 681

13. If your vehicle is equipped with running
boards the jacking points will be
marked on the front and rear of the
running board.
E310613E310613E310E310E310E31011100613613613613
14. Place the jack at the jacking point next
to the tire which you are changing. Turn
the lug wrench handle clockwise until
the flat tire is completely off the ground.
E201156
15. Remove the lug nuts with the lug
wrench.
16. Replace the flat tire with the spare tire,
making sure the valve stem is facing
outward.
17. Install the lug nuts snug against the
hub. Do not fully tighten the lug nuts
until the vehicle is lowered.
18. Turn the wrench handle
counterclockwise to lower the vehicle
completely.
1
2 34
5
E306781E306781
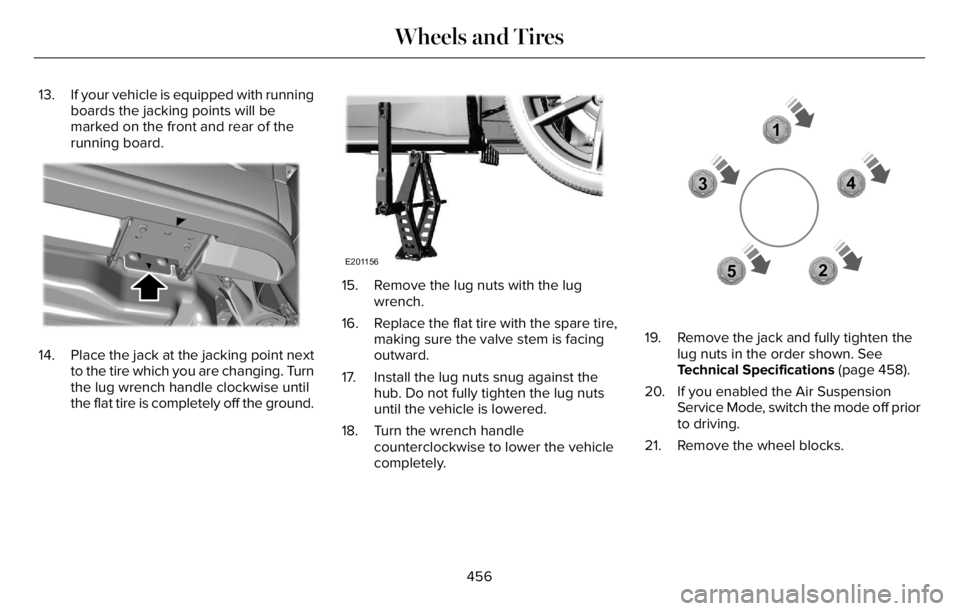
19. Remove the jack and fully tighten the
lug nuts in the order shown. See
Technical Specifications (page 458).
20. If you enabled the Air Suspension
Service Mode, switch the mode off prior
to driving.
21. Remove the wheel blocks.
456
Wheels and Tires