LINCOLN BLACKWOOD 2003 Owners Manual
BLACKWOOD 2003
LINCOLN
LINCOLN
https://www.carmanualsonline.info/img/15/6870/w960_6870-0.png
LINCOLN BLACKWOOD 2003 Owners Manual
Trending: warning light, automatic transmission fluid, maintenance schedule, buttons, remote start, wheel, suspension
Page 91 of 280
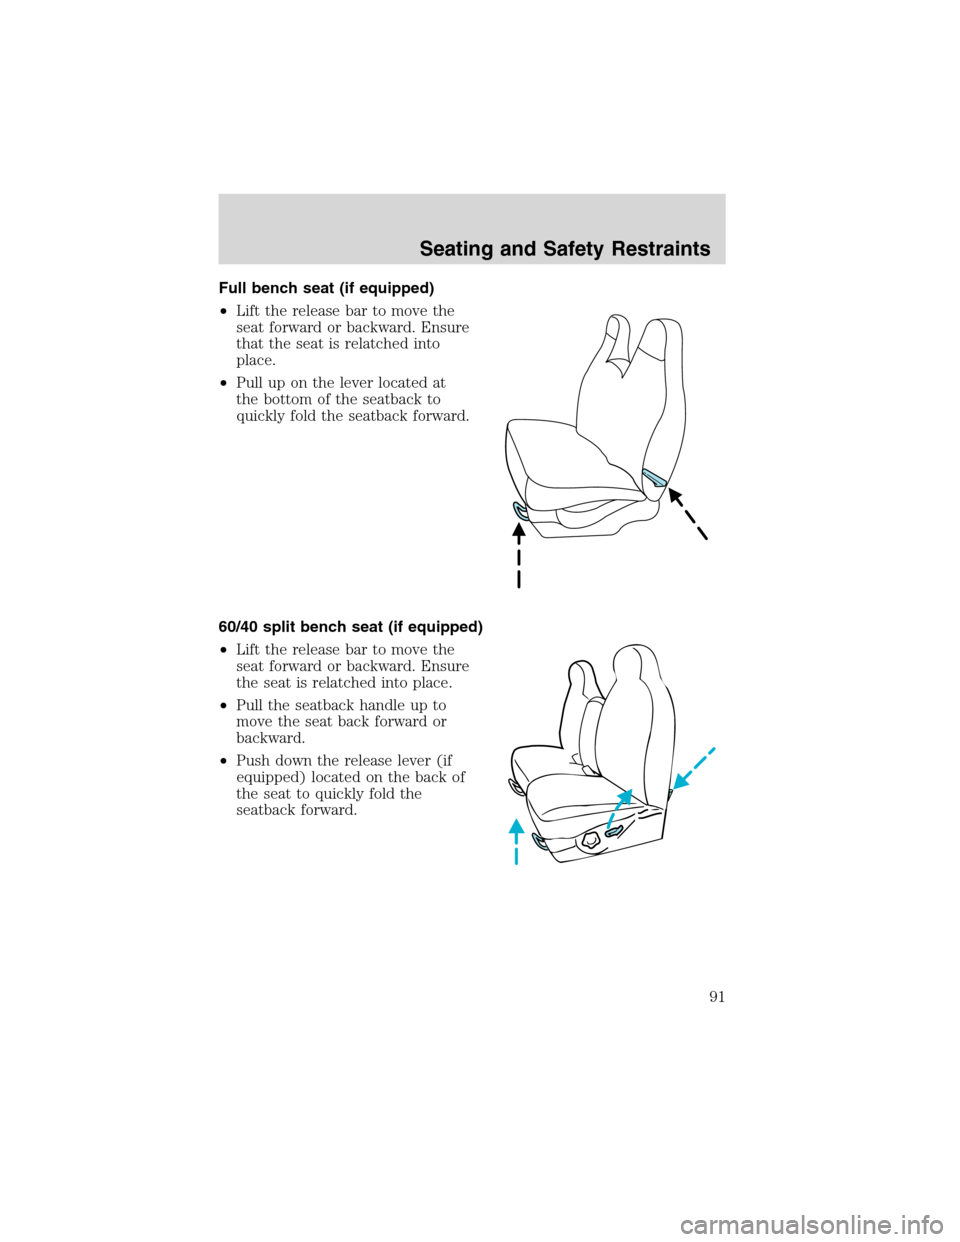
Full bench seat (if equipped)
•Lift the release bar to move the
seat forward or backward. Ensure
that the seat is relatched into
place.
•Pull up on the lever located at
the bottom of the seatback to
quickly fold the seatback forward.
60/40 split bench seat (if equipped)
•Lift the release bar to move the
seat forward or backward. Ensure
the seat is relatched into place.
•Pull the seatback handle up to
move the seat back forward or
backward.
•Push down the release lever (if
equipped) located on the back of
the seat to quickly fold the
seatback forward.
Seating and Safety Restraints
91
Page 92 of 280
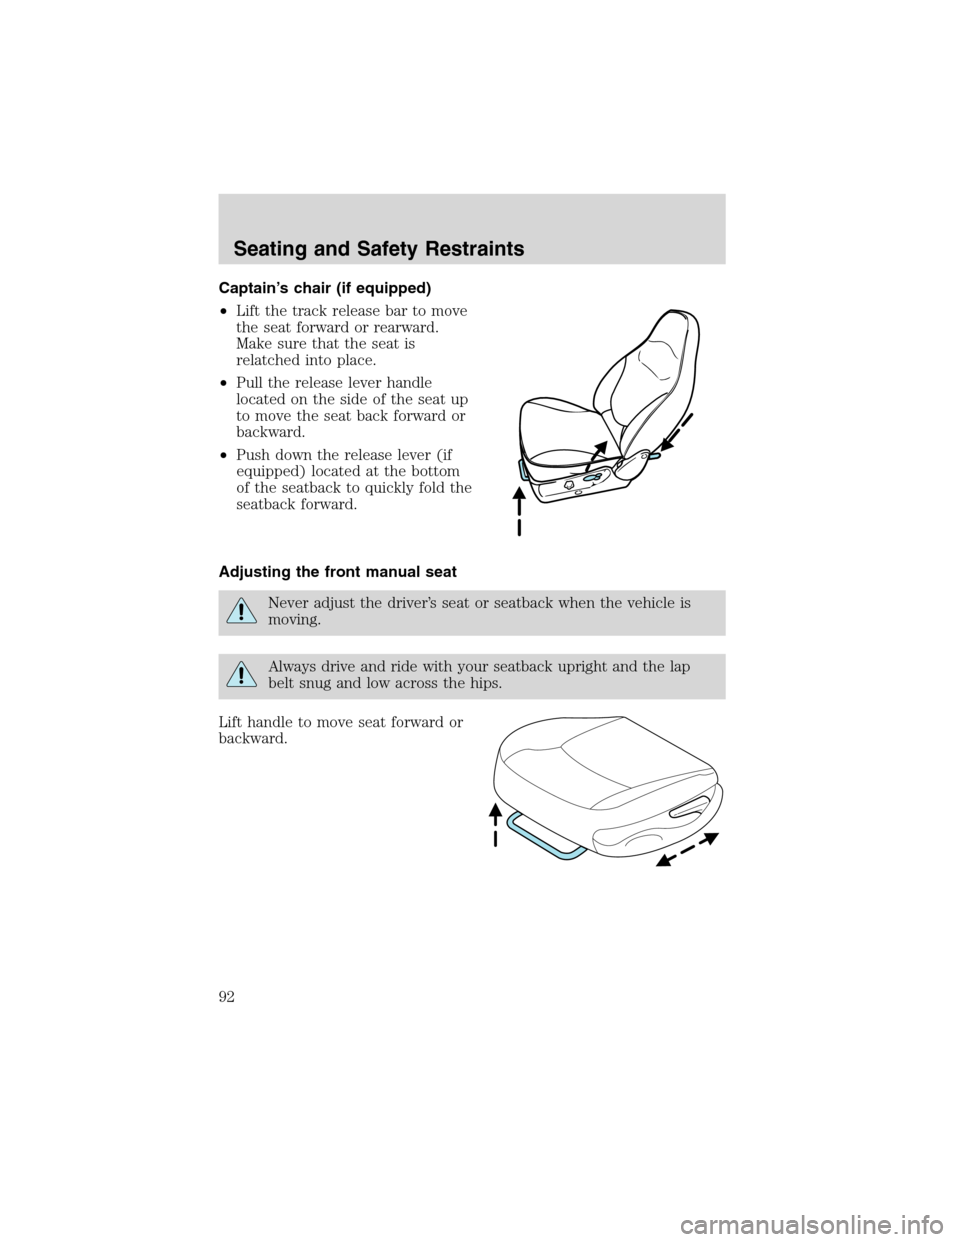
Captain’s chair (if equipped)
•Lift the track release bar to move
the seat forward or rearward.
Make sure that the seat is
relatched into place.
•Pull the release lever handle
located on the side of the seat up
to move the seat back forward or
backward.
•Push down the release lever (if
equipped) located at the bottom
of the seatback to quickly fold the
seatback forward.
Adjusting the front manual seat
Never adjust the driver’s seat or seatback when the vehicle is
moving.
Always drive and ride with your seatback upright and the lap
belt snug and low across the hips.
Lift handle to move seat forward or
backward.
Seating and Safety Restraints
92
Page 93 of 280
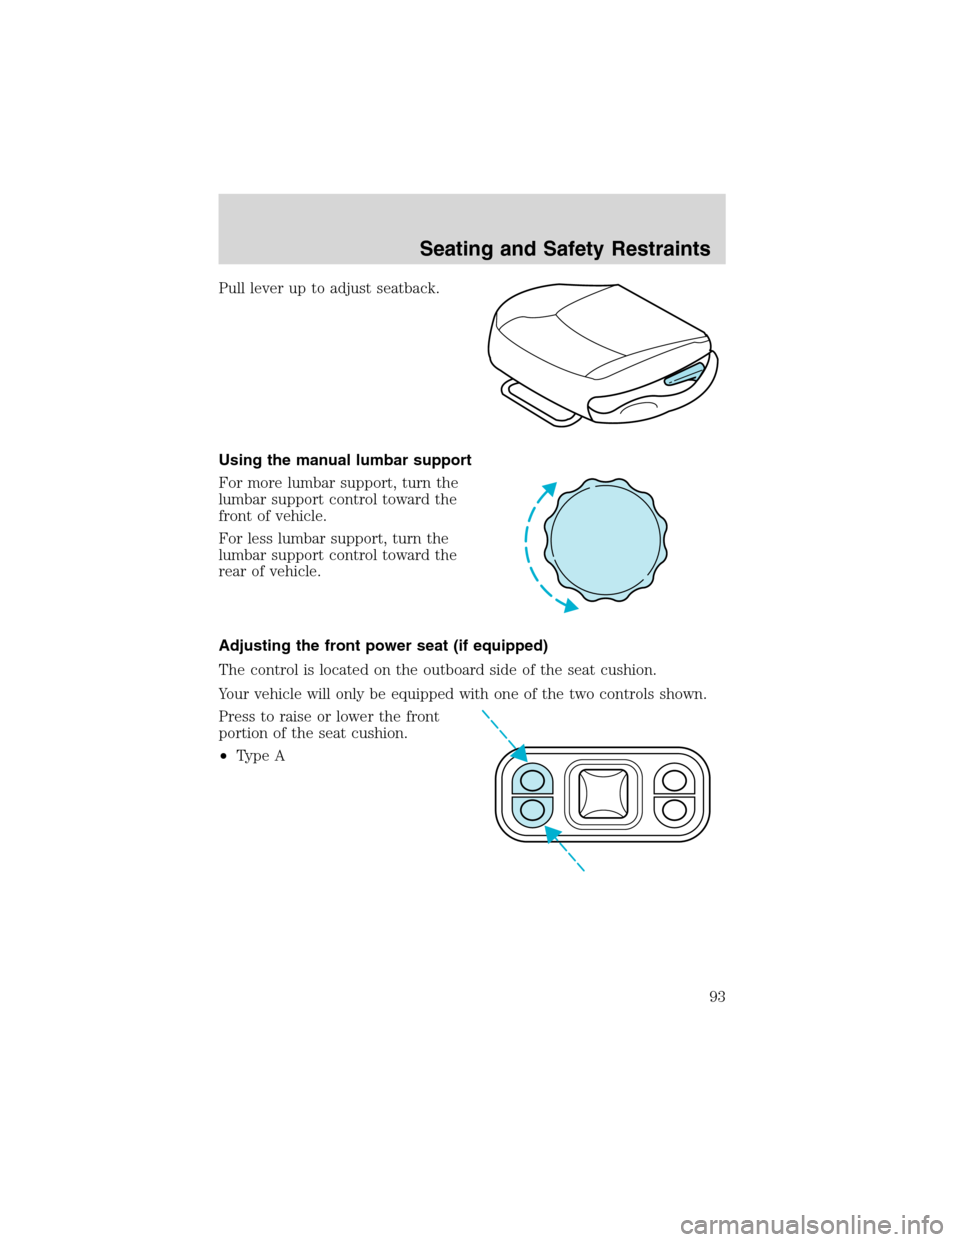
Pull lever up to adjust seatback.
Using the manual lumbar support
For more lumbar support, turn the
lumbar support control toward the
front of vehicle.
For less lumbar support, turn the
lumbar support control toward the
rear of vehicle.
Adjusting the front power seat (if equipped)
The control is located on the outboard side of the seat cushion.
Your vehicle will only be equipped with one of the two controls shown.
Press to raise or lower the front
portion of the seat cushion.
•Type A
Seating and Safety Restraints
93
Page 94 of 280
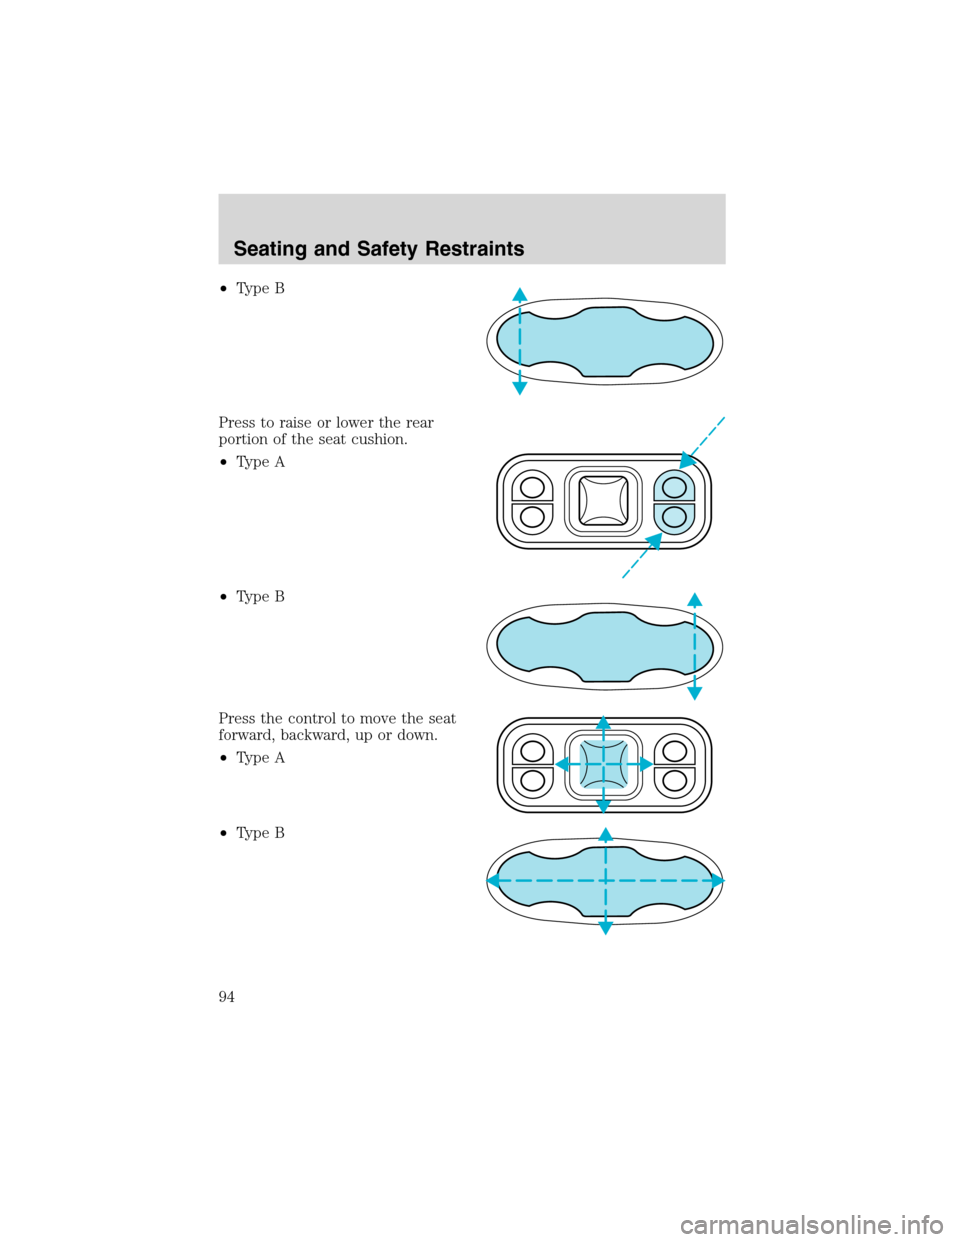
•Type B
Press to raise or lower the rear
portion of the seat cushion.
•Type A
•Type B
Press the control to move the seat
forward, backward, up or down.
•Type A
•Type B
Seating and Safety Restraints
94
Page 95 of 280
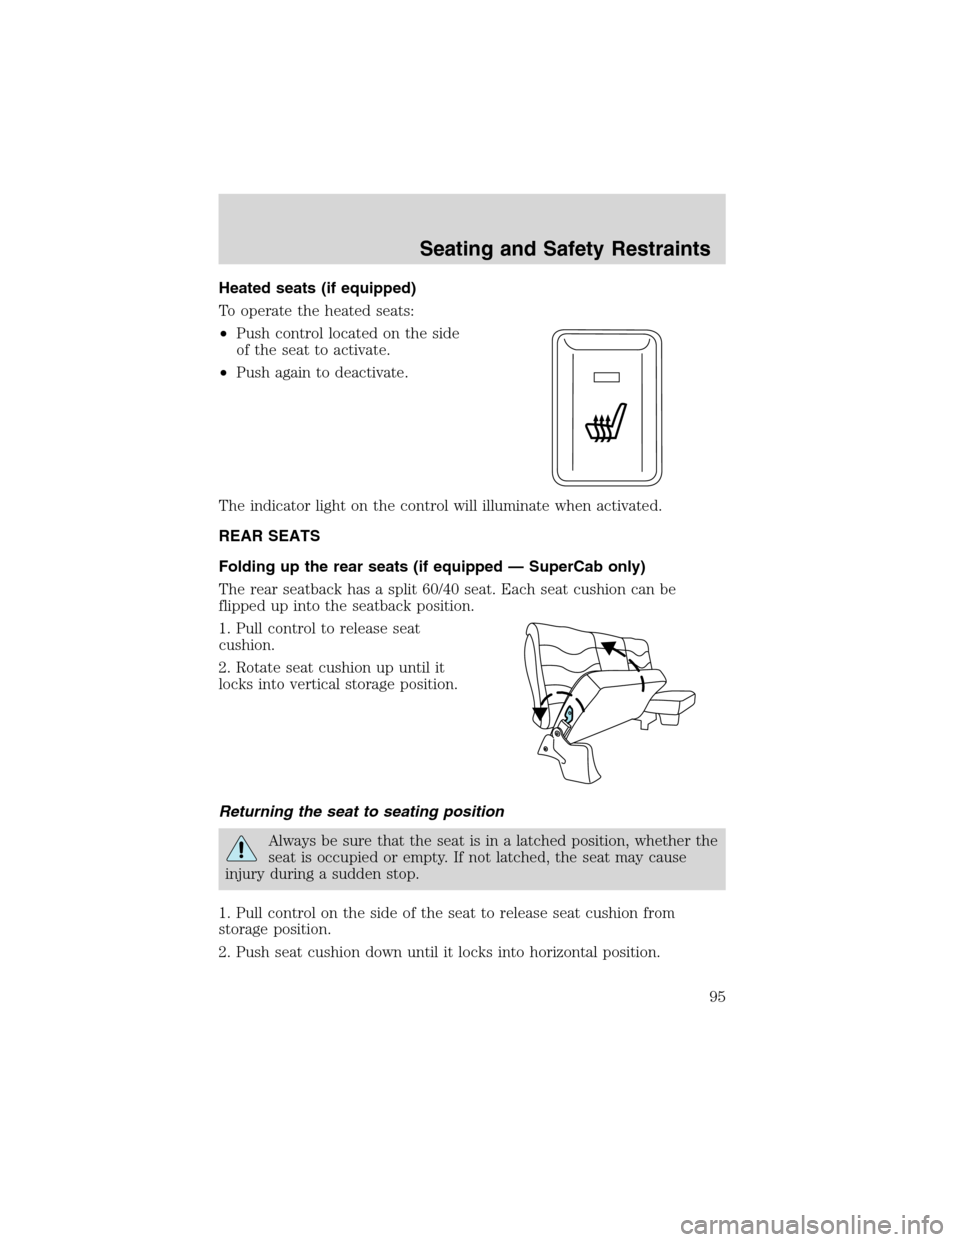
Heated seats (if equipped)
To operate the heated seats:
•Push control located on the side
of the seat to activate.
•Push again to deactivate.
The indicator light on the control will illuminate when activated.
REAR SEATS
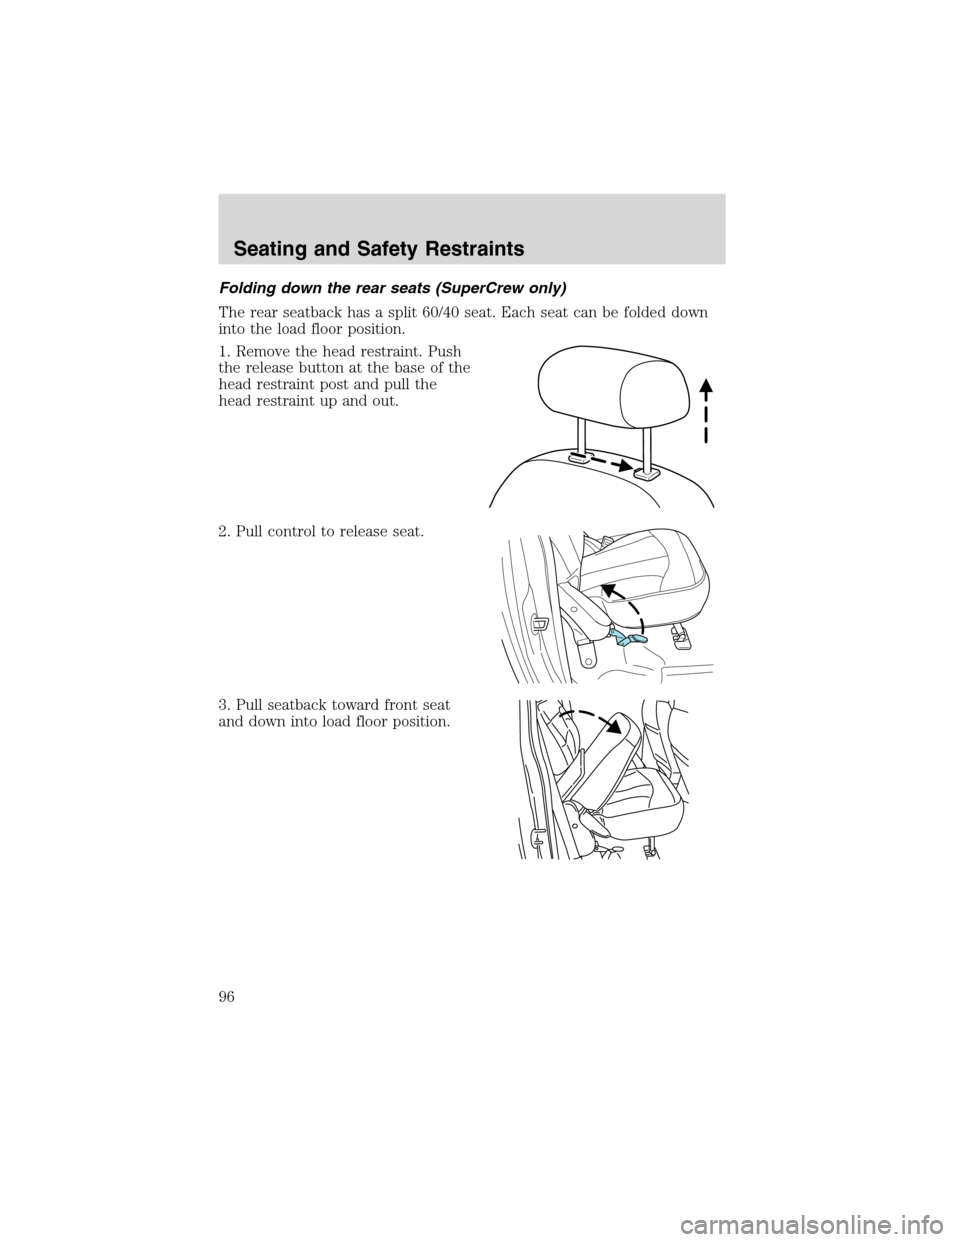
Folding up the rear seats (if equipped—SuperCab only)
The rear seatback has a split 60/40 seat. Each seat cushion can be
flipped up into the seatback position.
1. Pull control to release seat
cushion.
2. Rotate seat cushion up until it
locks into vertical storage position.
Returning the seat to seating position
Always be sure that the seat is in a latched position, whether the
seat is occupied or empty. If not latched, the seat may cause
injury during a sudden stop.
1. Pull control on the side of the seat to release seat cushion from
storage position.
2. Push seat cushion down until it locks into horizontal position.
Seating and Safety Restraints
95
Page 96 of 280
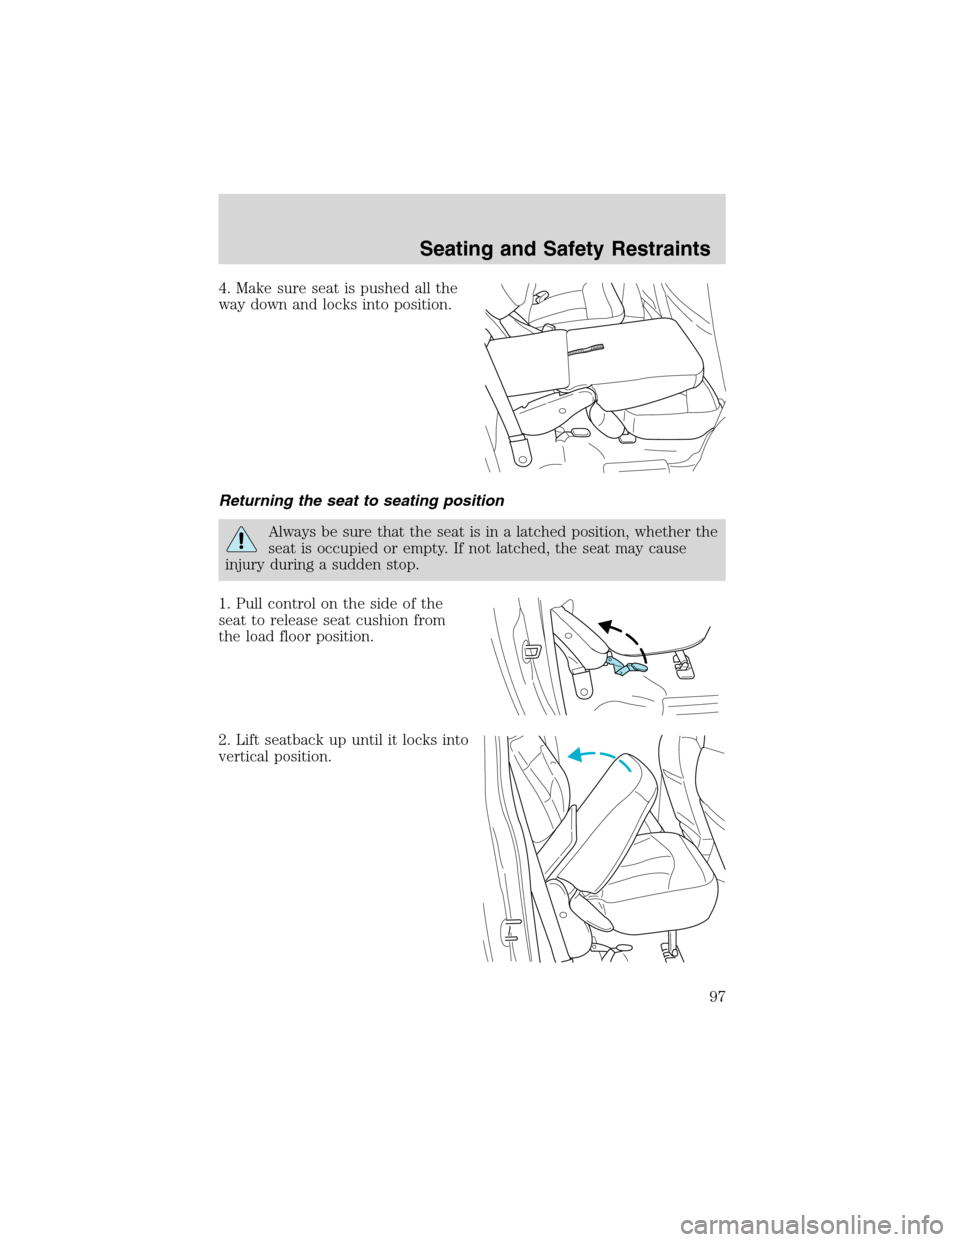
Folding down the rear seats (SuperCrew only)
The rear seatback has a split 60/40 seat. Each seat can be folded down
into the load floor position.
1. Remove the head restraint. Push
the release button at the base of the
head restraint post and pull the
head restraint up and out.
2. Pull control to release seat.
3. Pull seatback toward front seat
and down into load floor position.
Seating and Safety Restraints
96
Page 97 of 280
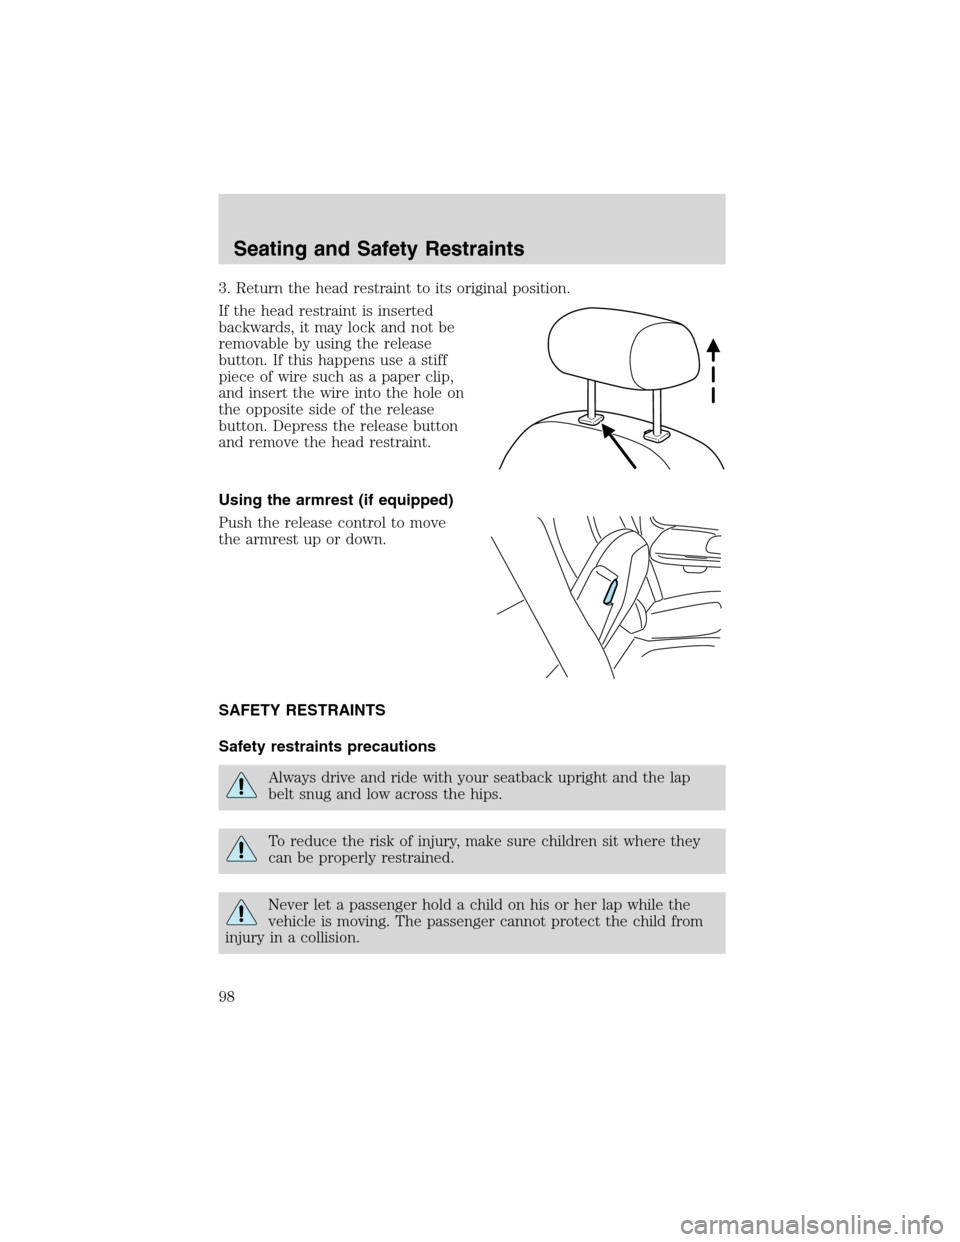
4. Make sure seat is pushed all the
way down and locks into position.
Returning the seat to seating position
Always be sure that the seat is in a latched position, whether the
seat is occupied or empty. If not latched, the seat may cause
injury during a sudden stop.
1. Pull control on the side of the
seat to release seat cushion from
the load floor position.
2. Lift seatback up until it locks into
vertical position.
Seating and Safety Restraints
97
Page 98 of 280
3. Return the head restraint to its original position.
If the head restraint is inserted
backwards, it may lock and not be
removable by using the release
button. If this happens use a stiff
piece of wire such as a paper clip,
and insert the wire into the hole on
the opposite side of the release
button. Depress the release button
and remove the head restraint.
Using the armrest (if equipped)
Push the release control to move
the armrest up or down.
SAFETY RESTRAINTS
Safety restraints precautions
Always drive and ride with your seatback upright and the lap
belt snug and low across the hips.
To reduce the risk of injury, make sure children sit where they
can be properly restrained.
Never let a passenger hold a child on his or her lap while the
vehicle is moving. The passenger cannot protect the child from
injury in a collision.
Seating and Safety Restraints
98
Page 99 of 280
All occupants of the vehicle, including the driver, should always
properly wear their safety belts, even when an air bag (SRS) is
provided.
It is extremely dangerous to ride in a cargo area, inside or
outside of a vehicle. In a collision, people riding in these areas
are more likely to be seriously injured or killed. Do not allow people to
ride in any area of your vehicle that is not equipped with seats and
safety belts. Be sure everyone in your vehicle is in a seat and using a
safety belt properly.
In a rollover crash, an unbelted person is significantly more likely
to die than a person wearing a safety belt.
Each seating position in your vehicle has a specific safety belt
assembly which is made up of one buckle and one tongue that
are designed to be used as a pair. 1) Use the shoulder belt on the
outside shoulder only. Never wear the shoulder belt under the arm. 2)
Never swing the safety belt around your neck over the inside shoulder.
3) Never use a single belt for more than one person.
Always transport children 12 years old and under in the back
seat and always properly use appropriate child restraints.
Safety belts and seats can become hot in a vehicle that has been
closed up in sunny weather; they could burn a small child. Check
seat covers and buckles before you place a child anywhere near them.
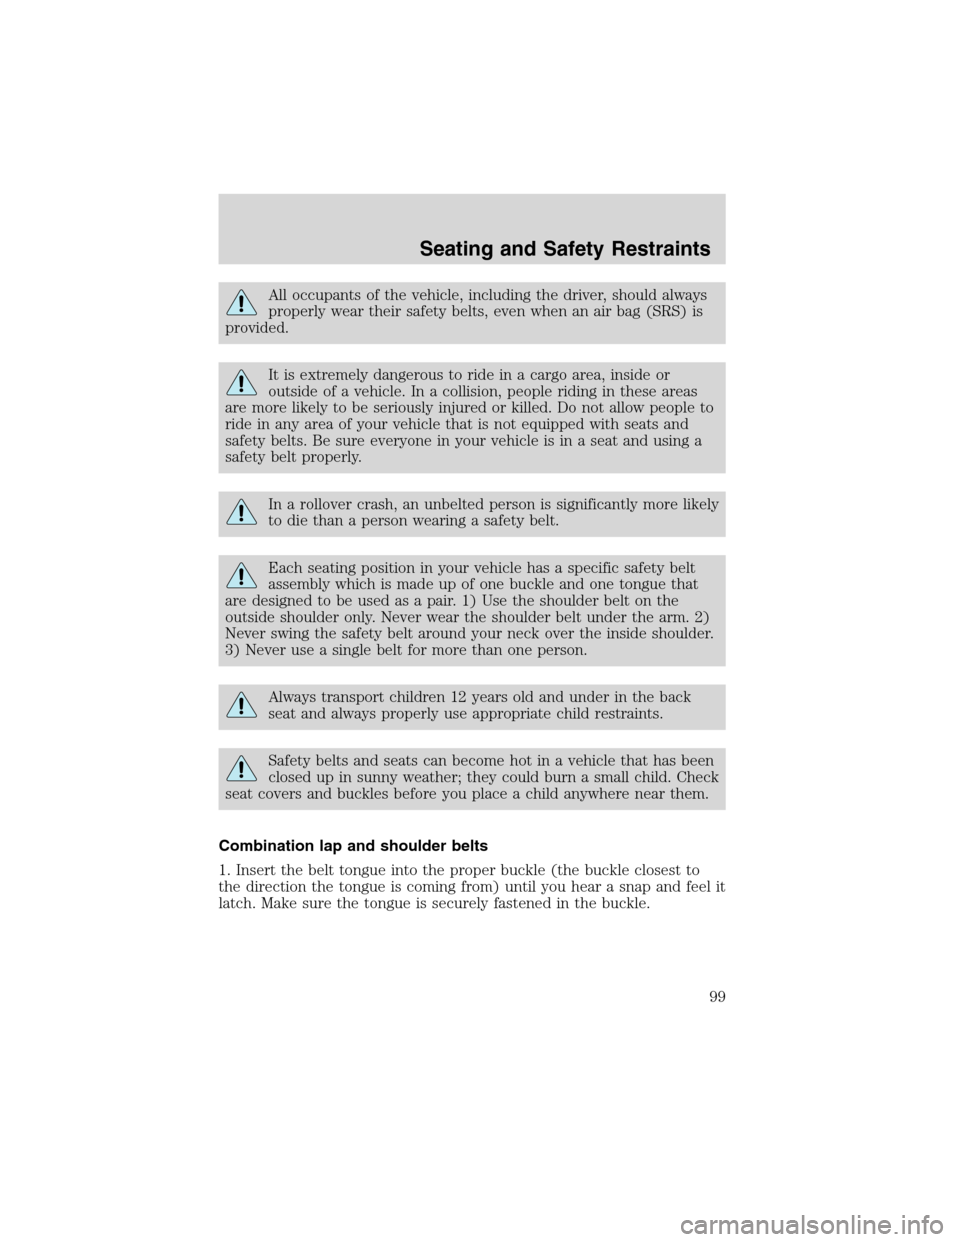
Combination lap and shoulder belts
1. Insert the belt tongue into the proper buckle (the buckle closest to
the direction the tongue is coming from) until you hear a snap and feel it
latch. Make sure the tongue is securely fastened in the buckle.
Seating and Safety Restraints
99
Page 100 of 280
•Front seats
•Rear seats (if equipped)
2. To unfasten, push the release button and remove the tongue from the
buckle.
•Front seats
Seating and Safety Restraints
100
Trending: sat nav, coolant reservoir, length, engine overheat, wipers, coolant level, adding oil
