height LINCOLN CONTINENTAL 1996 Customer Assistance Guide
[x] Cancel search | Manufacturer: LINCOLN, Model Year: 1996, Model line: CONTINENTAL, Model: LINCOLN CONTINENTAL 1996Pages: 320, PDF Size: 1.8 MB
Page 16 of 320

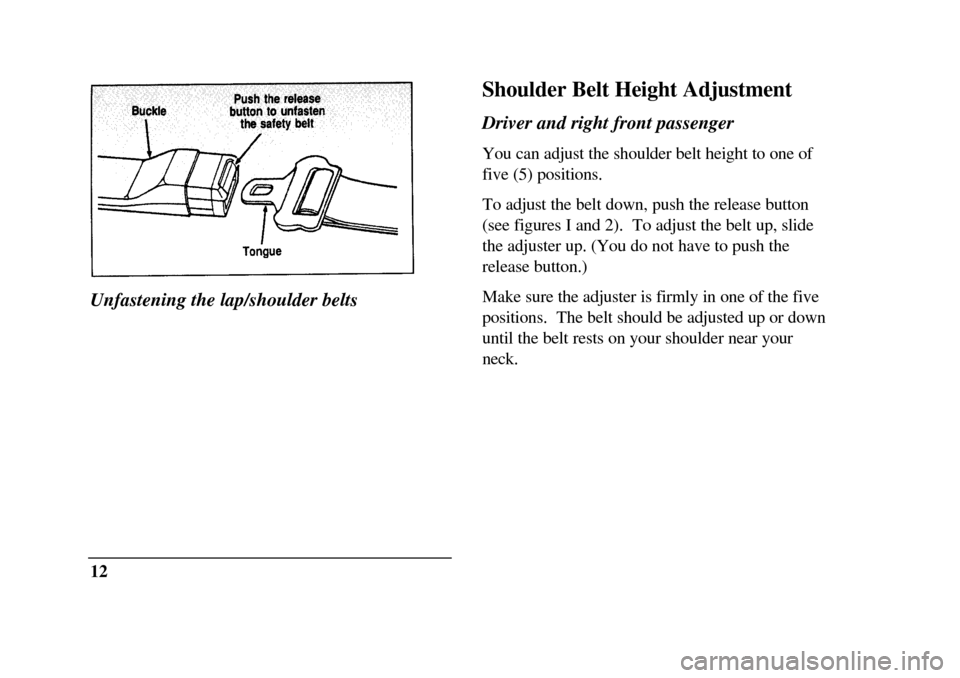
Unfastening the lap/shoulder belts
12Shoulder Belt Height Adjustment
Driver and right front passenger
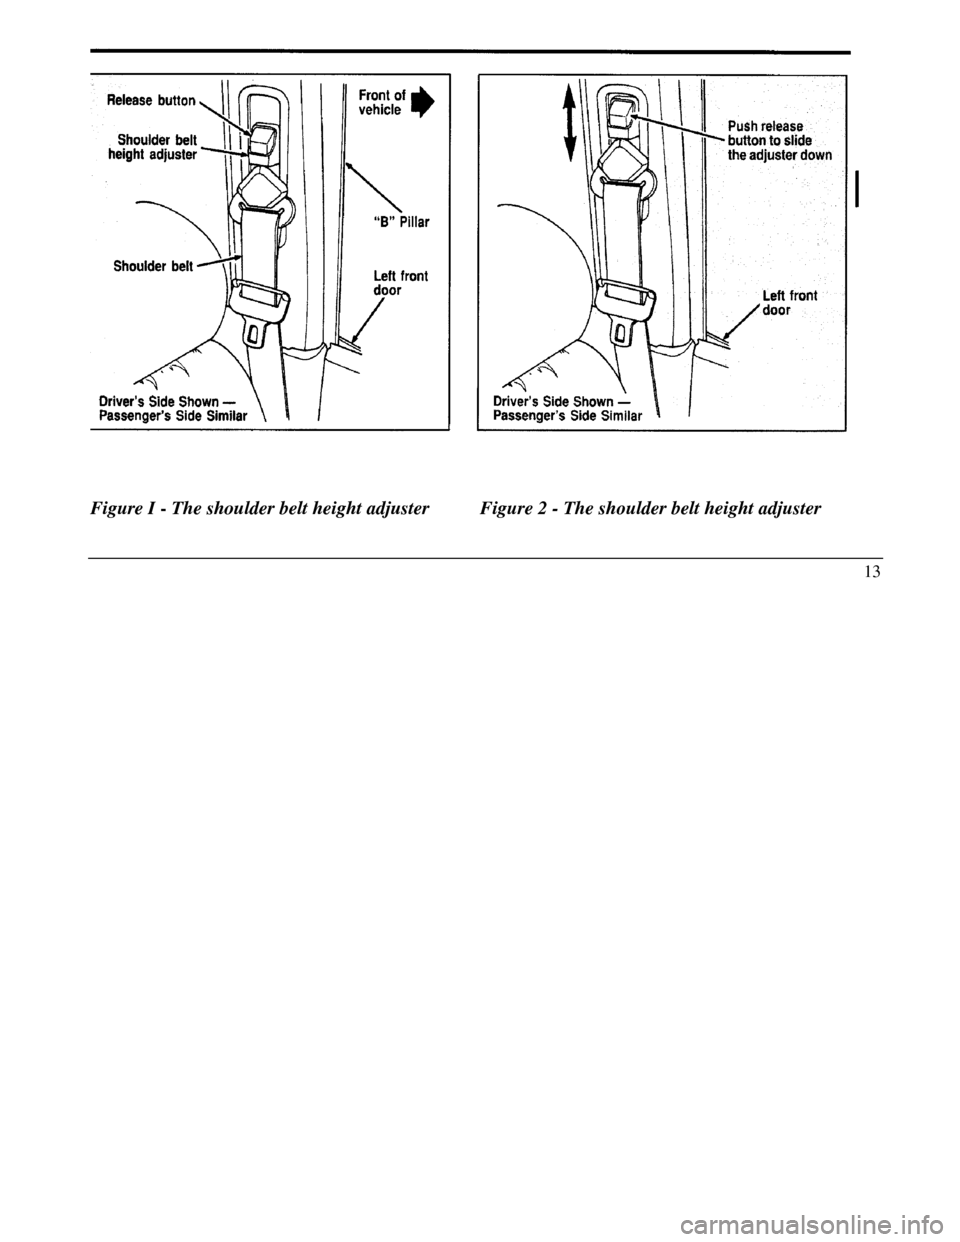
You can adjust the shoulder belt height to one of
five (5) positions.
To adjust the belt down, push the release button
(see figures I and 2). To adjust the belt up, slide
the adjuster up. (You do not have to push the
release button.)
Make sure the adjuster is firmly in one of the five
positions. The belt should be adjusted up or down
until the belt rests on your shoulder near your
neck.
Page 17 of 320

Figure I - The shoulder belt height adjusterFigure 2 - The shoulder belt height adjuster
13
Page 18 of 320

/!\ WARNINGPosition the shoulder belt height adjusterso that the belt rests across the middle ofyour shoulder. Be sure the shoulder beltis properly positioned on your shouldereach time you use the belt. If theshoulder belt is off your shoulder, on yourupper arm or neck, there is a greater riskof severe injury in a collision.Right Front or Rear Seating Positions
Your vehicle is equipped with a dual locking
mode retractor on the shoulder belt portion of
the combination lap/shoulder safety belt for the
front seat passenger and rear seat passengers.14Dual locking mode refractors operate in two
ways:
Vehicle sensitive (emergency) locking mode
In this operating mode, the shoulder belt retractor
will allow the occupant freedom of movement,
locking tight only on hard braking, hard cornering
or impacts of approximately 5 mph (8 km/h) or
more. The retractor can also be made to lock by
pulling on the belt.
Automatic locking mode
In this operating mode, the shoulder belt retractor
will be automatically locked and will remain locked
when the combination lap/shoulder safety belt is
buckled, and does not allow the occupant freedom
of movement. This mode provides the following: A tight lap/shoulder belt on the occupant. Child seat installation restraint.
Page 132 of 320

Garage Door Opener
If you own a garage door opener, the overhead
console of your Continental contains a bin to house
your hand held garage door transmitter. This
feature allows you to activate your garage door
opener with a push of the GARAGE button once
your transmitter has been installed inside the
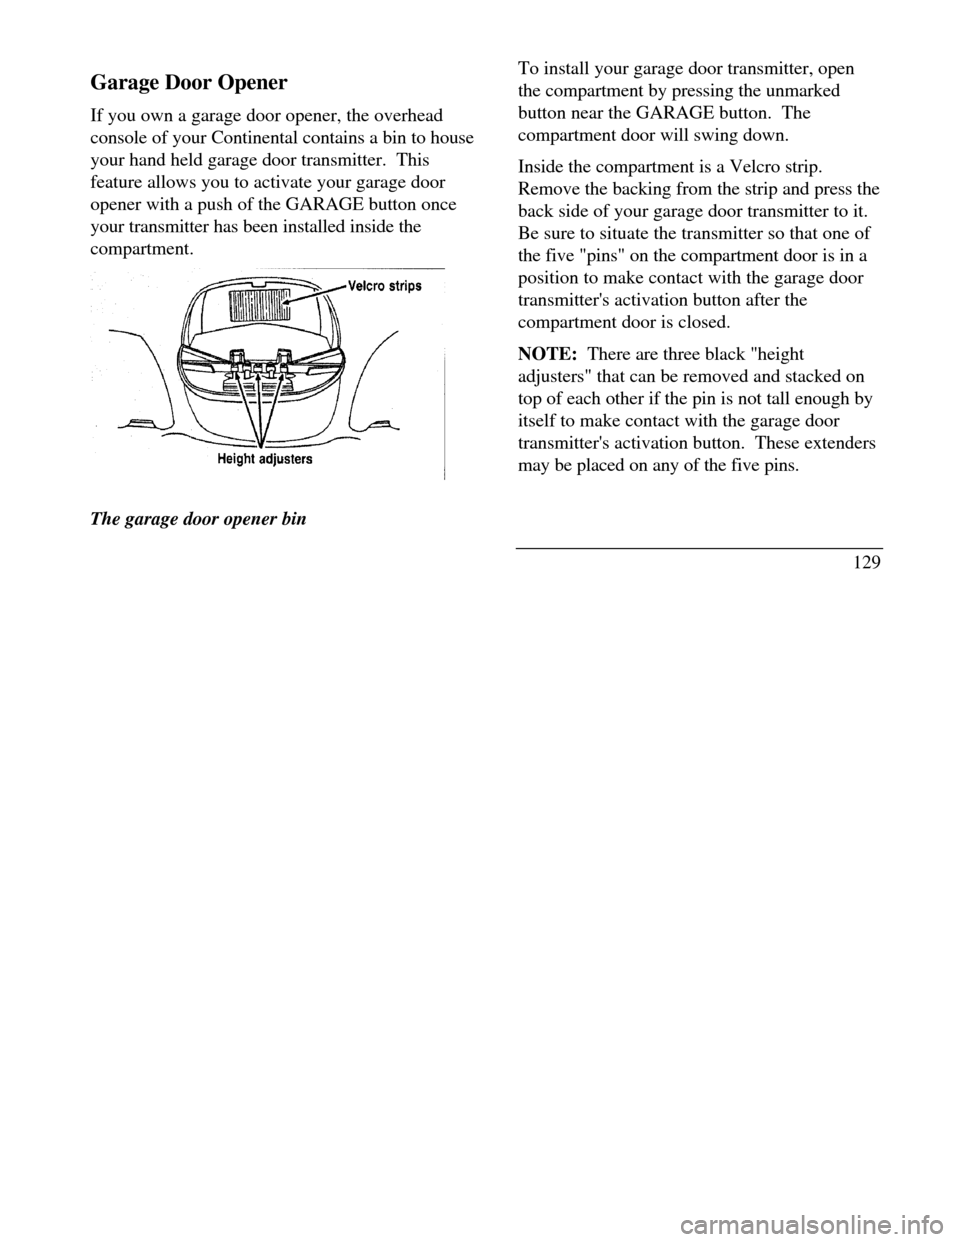
compartment.Height
adjusters Velcro strips
The garage door opener binTo install your garage door transmitter, open
the compartment by pressing the unmarked
button near the GARAGE button. The
compartment door will swing down.
Inside the compartment is a Velcro strip.
Remove the backing from the strip and press the
back side of your garage door transmitter to it.
Be sure to situate the transmitter so that one of
the five "pins" on the compartment door is in a
position to make contact with the garage door
transmitter's activation button after the
compartment door is closed.
NOTE: There are three black "height
adjusters" that can be removed and stacked on
top of each other if the pin is not tall enough by
itself to make contact with the garage door
transmitter's activation button. These extenders
may be placed on any of the five pins.
129
Page 210 of 320

2. Get out the spare tire and jack./! WARNINGTo avoid injury, never run the engine withone wheel off the ground, such as whenchanging a tire.3. Remove the center ornament from the aluminum
wheel with the tapered end of the wheel nut
wrench which came with your vehicle. Insert
and twist the handle, then pry against the wheel.
4. Loosen each wheel lug nut one-half turn
counterclockwise, but do not remove them until
the tire is raised off the ground. You should pull
up on the handle rather than push to develop
maximum force to loosen wheel lug nuts. See
Anti-Theft Wheel Lug Nuts later in this chapter
for information on removing anti-theft lug nuts.Removing and Replacing the Tire
I -Place the scissors-type jack under the side of the
vehicle and adjust the jack height with the jack
handle. The jack should fit in the notch in the
vertical rocker panel flange which is nearest to
the wheel to be changed./! WARNINGTo lessen the risk of personal injury, do notput any part of your body under the vehiclewhile changing a tire. Do not start the enginewhen your vehicle is on the jack. The jack isonly meant for changing the tire.207
Page 283 of 320

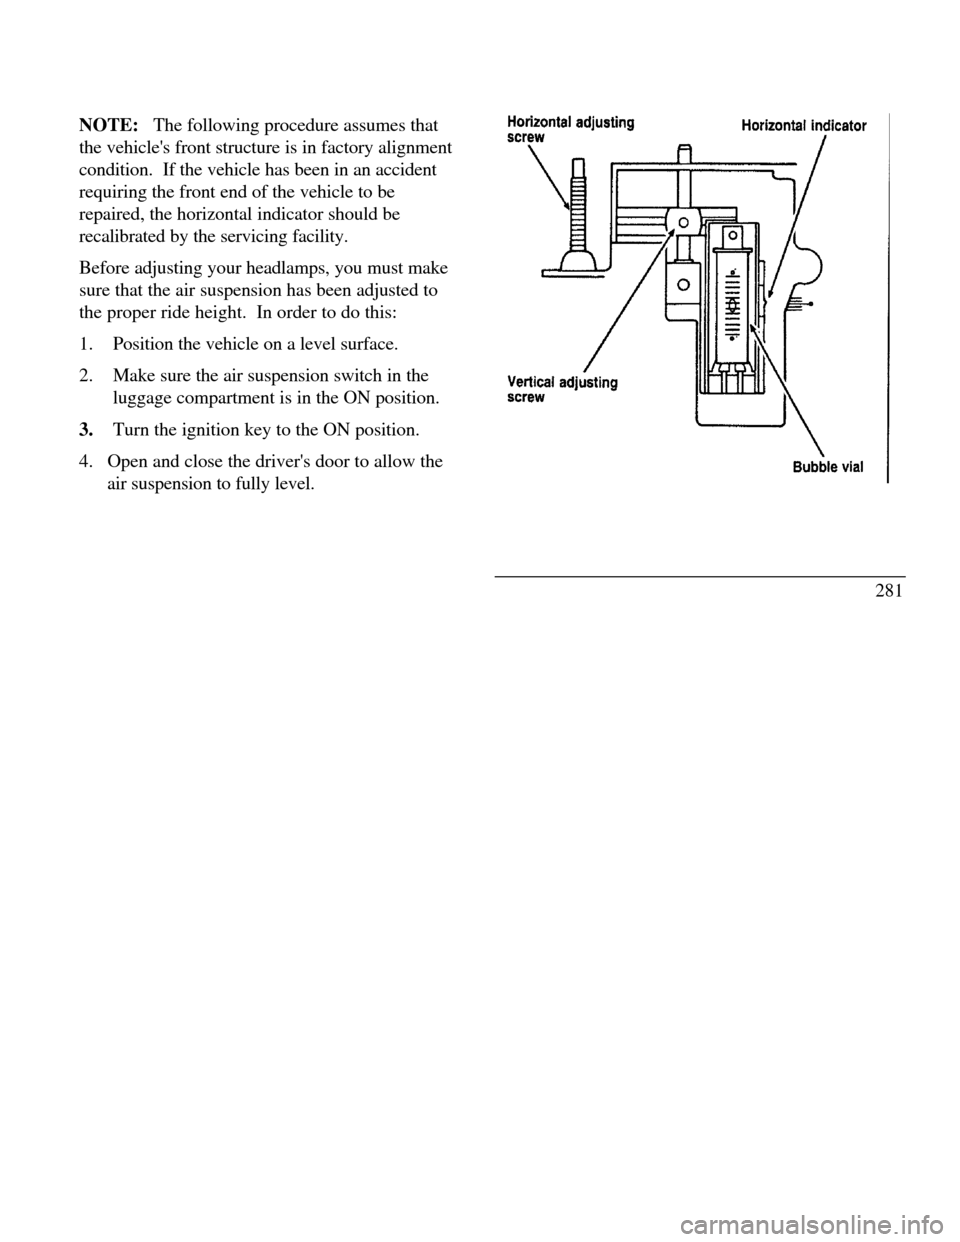
NOTE: The following procedure assumes that
the vehicle's front structure is in factory alignment
condition. If the vehicle has been in an accident
requiring the front end of the vehicle to be
repaired, the horizontal indicator should be
recalibrated by the servicing facility.
Before adjusting your headlamps, you must make
sure that the air suspension has been adjusted to
the proper ride height. In order to do this:
1.Position the vehicle on a level surface.
2.Make sure the air suspension switch in the
luggage compartment is in the ON position.
3.Turn the ignition key to the ON position.
4. Open and close the driver's door to allow the
air suspension to fully level.Hori
zontal adjusting screw Vertical adjusting screw Horizontal indicator Bubble vial
281