headlamp LINCOLN CONTINENTAL 1998 User Guide
[x] Cancel search | Manufacturer: LINCOLN, Model Year: 1998, Model line: CONTINENTAL, Model: LINCOLN CONTINENTAL 1998Pages: 176, PDF Size: 1.32 MB
Page 150 of 176
the Vehicle Emission Control Information Decal located on or near the
engine. This decal identifies engine displacement and gives some tune up
specifications.
Please consult your ªWarranty Guideº for complete emission warranty
information.
Readiness for inspection/maintenance (I/M) testing
In some localities, it may be a legal requirement to pass an I/M test of
the on-board diagnostic (OBD-II) system. If your ªcheck engine/service
engine soonº light is on, reference the applicable light description in the
Warning Lights and Chimessection of your owners guide. Your vehicle
may not pass the I/M test with the ªcheck engine/service engine soonº
light on.
If the vehicle's powertrain system or its battery has just been serviced,
the OBD-II system is reset to a ªnot ready for I/M testº condition. To
ready the OBD-II system for I/M testing, a minimum of 30 minutes of city
and highway driving is necessary as described below:
²First, at least 10 minutes of driving on an expressway or highway.
²Next, at least 20 minutes driving in stop and go, city type traffic with
at least four idle periods.
Allow the vehicle to sit for at least eight hours without starting the
engine. Then, start the engine and complete the above driving cycle. The
engine must warm up to its normal operating temperature. Once started,
do not turn off the engine until the above driving cycle is complete.
EXTERIOR BULBS
Replacing headlamp bulbs
Handle a halogen headlamp bulb carefully and keep out of
children's reach. Grasp the bulb only by its plastic base and do
not touch the glass. The oil from your hand could cause the bulb to
break the next time the headlamps are operated.
To remove the headlamp bulb:
1. Make sure headlamp switch is in OFF position.
2. Lift the hood and remove the plastic sight shield covering the back of
the headlamps by lifting up on the rear corners to release the velcro
attachments. Lift the shield and pull towards the windshield.
Maintenance and care
150
Page 151 of 176
3. At the back of the headlamp, pull back and up slightly on the two
right angle brackets to release the headlamp assembly from the vehicle.
4. Carefully pull the headlamp assembly away from the vehicle to expose
the back of the bulb and wiring connector.
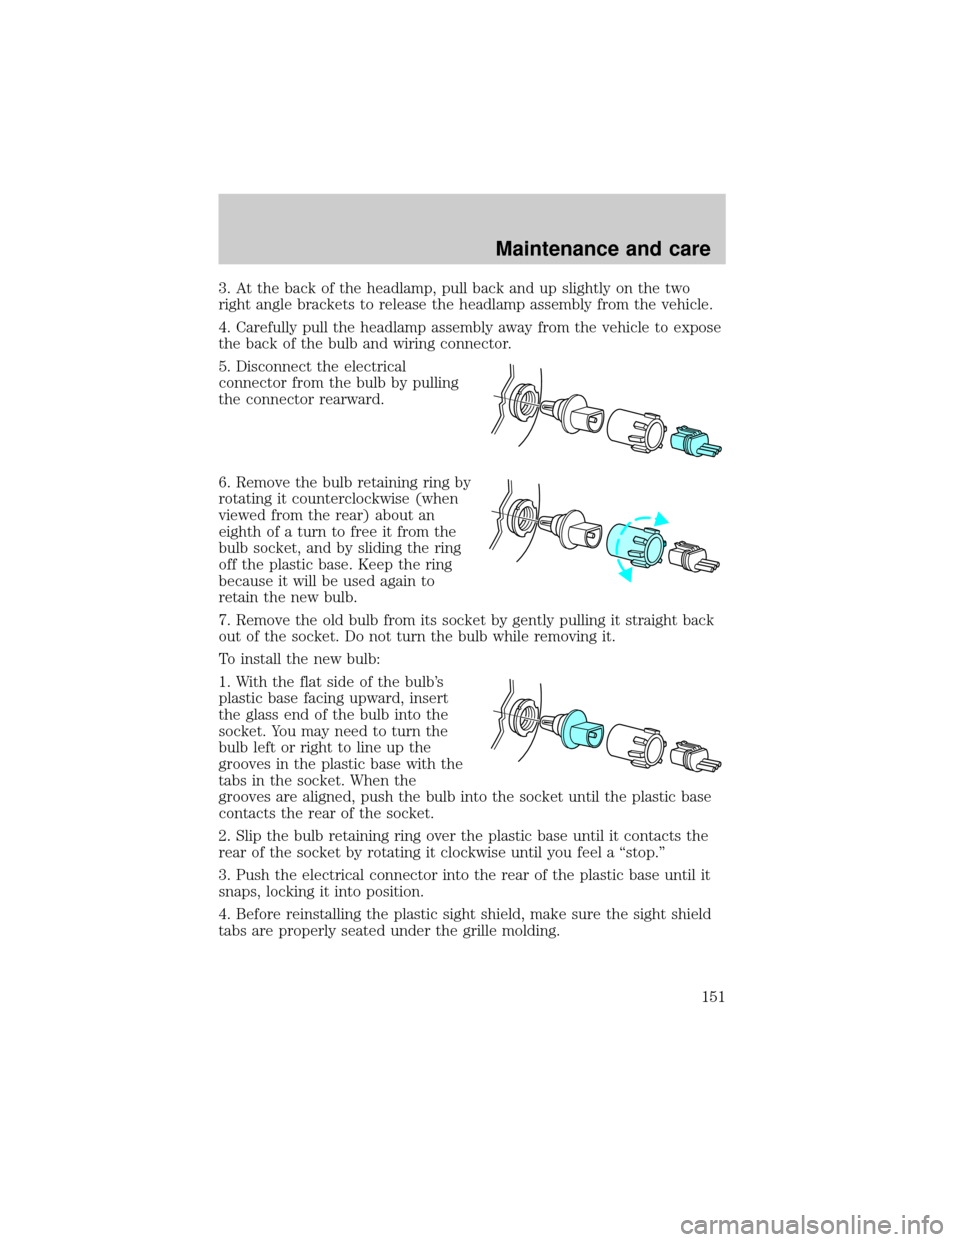
5. Disconnect the electrical
connector from the bulb by pulling
the connector rearward.
6. Remove the bulb retaining ring by
rotating it counterclockwise (when
viewed from the rear) about an
eighth of a turn to free it from the
bulb socket, and by sliding the ring
off the plastic base. Keep the ring
because it will be used again to
retain the new bulb.
7. Remove the old bulb from its socket by gently pulling it straight back
out of the socket. Do not turn the bulb while removing it.
To install the new bulb:
1. With the flat side of the bulb's
plastic base facing upward, insert
the glass end of the bulb into the
socket. You may need to turn the
bulb left or right to line up the
grooves in the plastic base with the
tabs in the socket. When the
grooves are aligned, push the bulb into the socket until the plastic base
contacts the rear of the socket.
2. Slip the bulb retaining ring over the plastic base until it contacts the
rear of the socket by rotating it clockwise until you feel a ªstop.º
3. Push the electrical connector into the rear of the plastic base until it
snaps, locking it into position.
4. Before reinstalling the plastic sight shield, make sure the sight shield
tabs are properly seated under the grille molding.
Maintenance and care
151
Page 152 of 176
5. Turn the headlamps on and make sure they work properly. If the
headlamp was correctly aligned before you changed the bulb, you should
not need to align it again.
AIMING THE HEADLAMPS
Your vehicle is equipped with a Vehicle Headlamp Aim Device (VHAD)
on each headlamp. Each headlamp may be properly aimed in the vertical
(up/down) and the horizontal (left/right) directions using your VHAD
system. The headlamps on your vehicle are properly aimed at the
assembly plant.
A bubble (vertical indicator) that is not centered between the two red
lines does not necessarily indicate out-of-aim headlamps. If your vehicle
is not positioned on a level surface, the slope will be included in the
vertical indication. Therefore, vertical and horizontal headlamp
adjustment should be performed only when the beam direction appears
to be incorrect.
You will need one 4 mm wrench or socket to make the adjustments.
If the vehicle has been in an accident, the vehicle's front structure
should be properly aligned before aiming the headlamps.
Horizontal aim adjustment
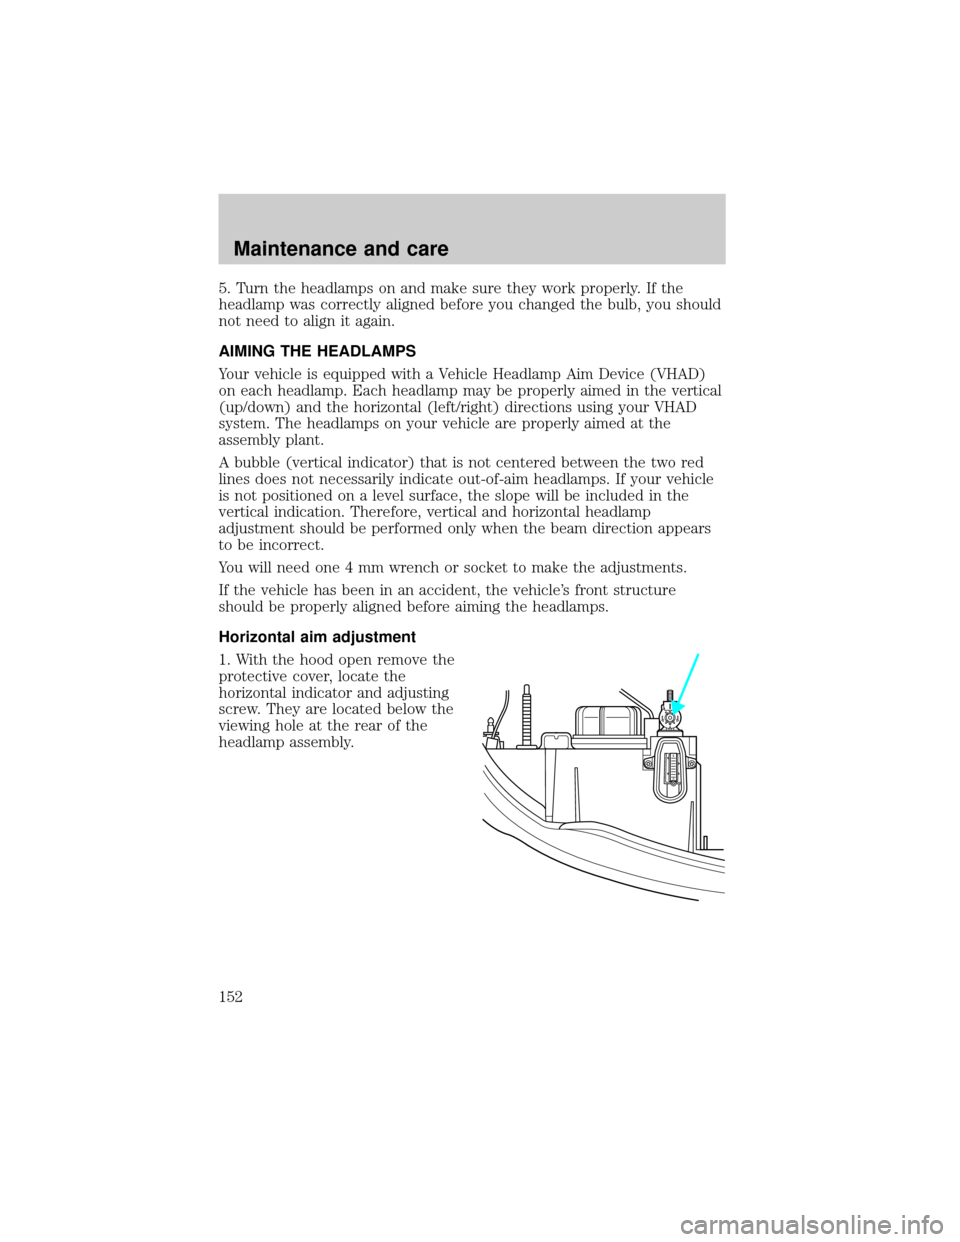
1. With the hood open remove the
protective cover, locate the
horizontal indicator and adjusting
screw. They are located below the
viewing hole at the rear of the
headlamp assembly.
U
D
Maintenance and care
152
Page 153 of 176
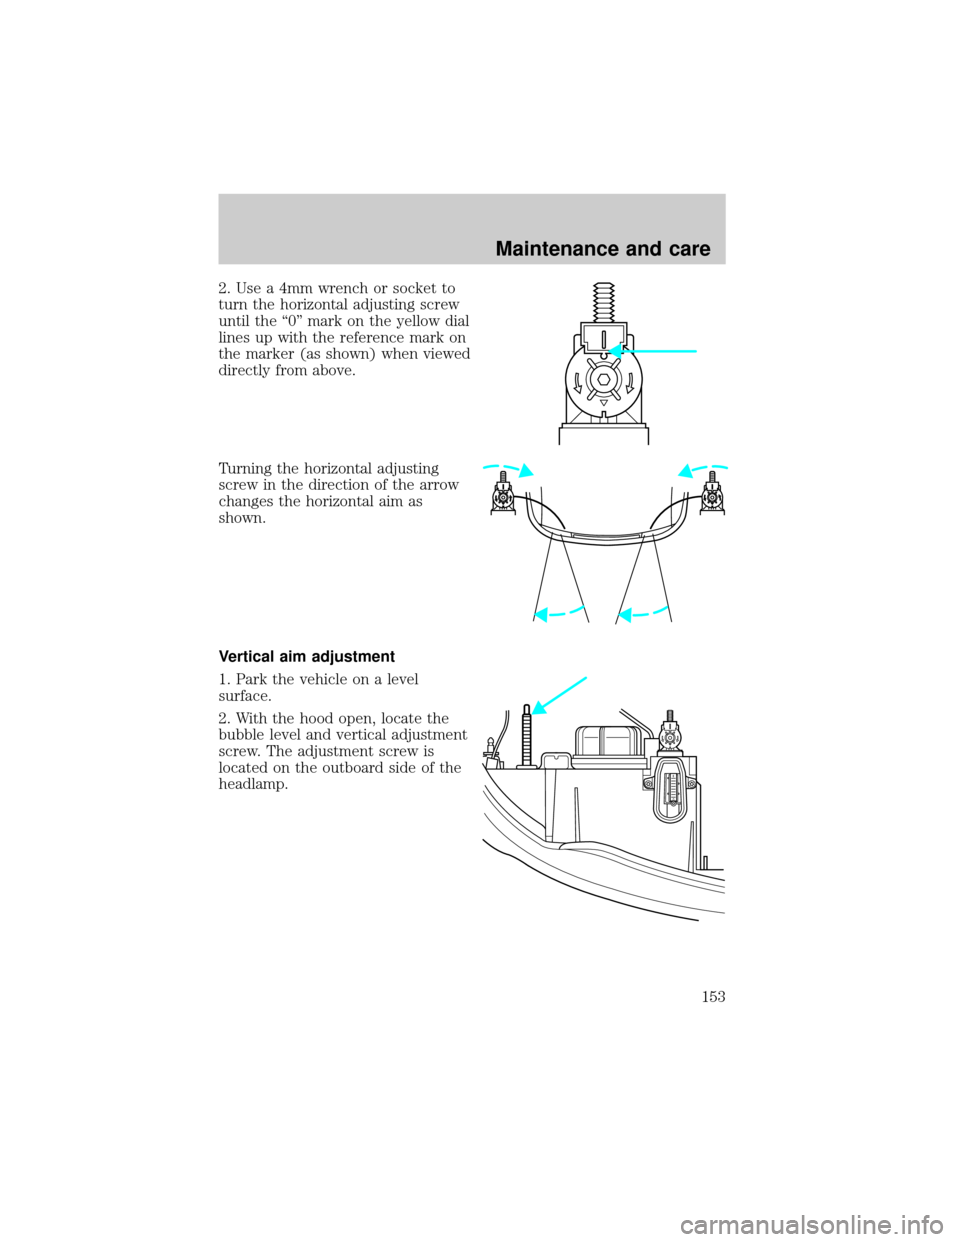
2. Use a 4mm wrench or socket to
turn the horizontal adjusting screw
until the ª0º mark on the yellow dial
lines up with the reference mark on
the marker (as shown) when viewed
directly from above.
Turning the horizontal adjusting
screw in the direction of the arrow
changes the horizontal aim as
shown.
Vertical aim adjustment
1. Park the vehicle on a level
surface.
2. With the hood open, locate the
bubble level and vertical adjustment
screw. The adjustment screw is
located on the outboard side of the
headlamp.
U
D
Maintenance and care
153
Page 154 of 176
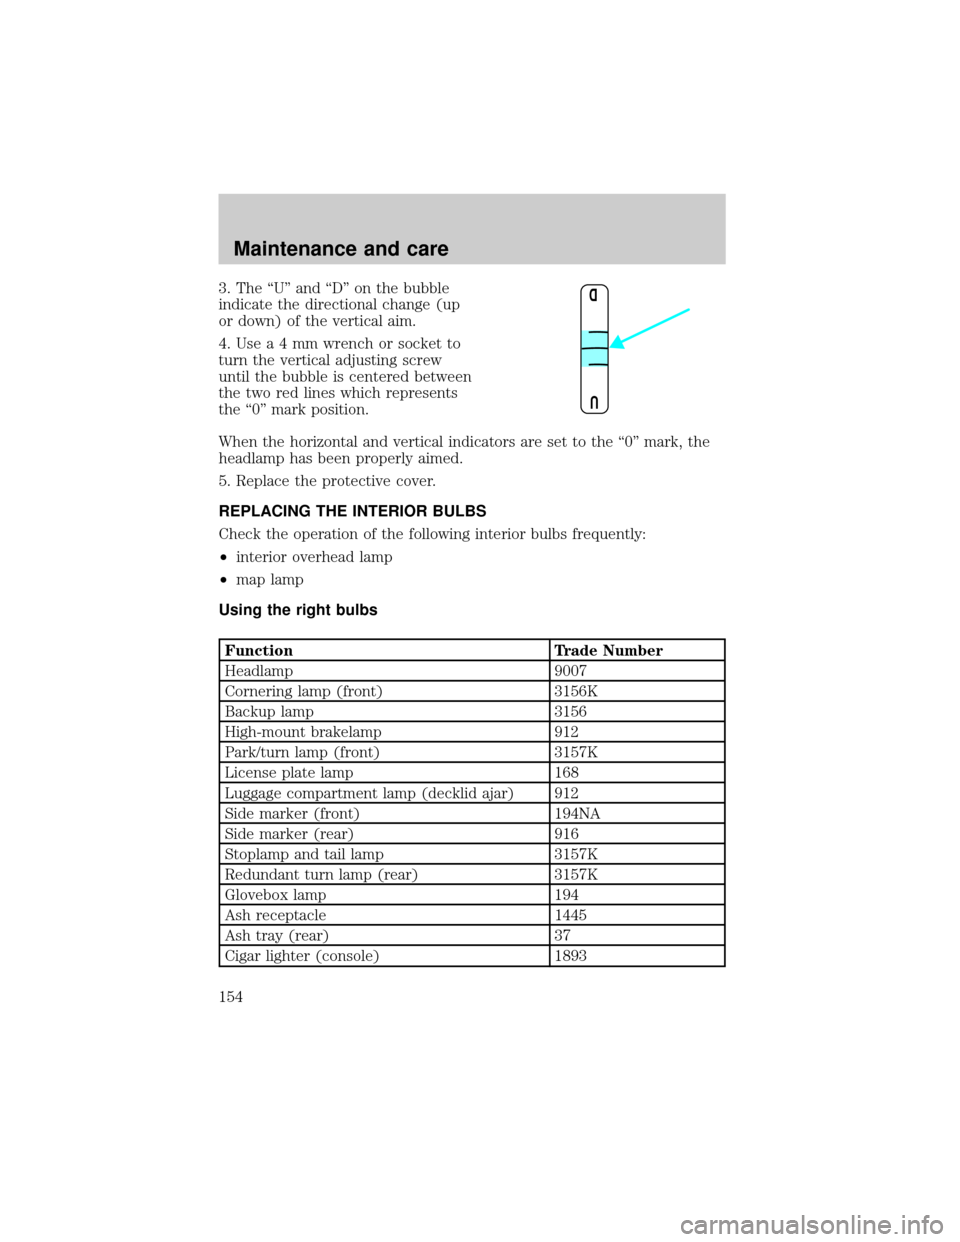
3. The ªUº and ªDº on the bubble
indicate the directional change (up
or down) of the vertical aim.
4.Usea4mmwrench or socket to
turn the vertical adjusting screw
until the bubble is centered between
the two red lines which represents
the ª0º mark position.
When the horizontal and vertical indicators are set to the ª0º mark, the
headlamp has been properly aimed.
5. Replace the protective cover.
REPLACING THE INTERIOR BULBS
Check the operation of the following interior bulbs frequently:
²interior overhead lamp
²map lamp
Using the right bulbs
Function Trade Number
Headlamp 9007
Cornering lamp (front) 3156K
Backup lamp 3156
High-mount brakelamp 912
Park/turn lamp (front) 3157K
License plate lamp 168
Luggage compartment lamp (decklid ajar) 912
Side marker (front) 194NA
Side marker (rear) 916
Stoplamp and tail lamp 3157K
Redundant turn lamp (rear) 3157K
Glovebox lamp 194
Ash receptacle 1445
Ash tray (rear) 37
Cigar lighter (console) 1893
D U
Maintenance and care
154
Page 167 of 176

Air bag supplemental restraint
system ..........................................80
and child safety seats ..............81
description ................................80
disposal ......................................83
indicator light ...........................82
passenger air bag .....................81
Air suspension
description ................................98
Anti-lock brake system
(ABS)#$description
Anti-theft system ........................63
Battery .......................................136
Brakes ..........................................95
anti-lock .....................................95
anti-lock brake system (ABS)
warning light .............................95
fluid, checking and adding ....130
traction control .........................97
Brake-shift interlock ...................99
Break-in period .............................2
Bulbs, replacing ........................150
headlamps ...............................150
specifications ..........................154
Changing a tire .........................119
Child safety seats ........................84
Childproof locks ..........................61
Chime
headlamps on ..............................9
Cleaning your vehicle ...............155
engine compartment ..............156
instrument panel ....................157
plastic parts ............................157
safety belts ..............................157
tail lamps .................................157
washing ....................................155
waxing .....................................155
wheels ......................................156
windows ..................................159
woodtone trim ........................158Climate control system
automatic temperature
control ..............27,28,29,30,31,32
Clock ............................................33
Compass, electronic ....................55
calibration .................................57
set zone adjustment .................56
Controls .......................................62
Electronic sound system ............62
Emission control system ..........149
Engine ........................................162
service points ..........................127
Engine block heater ...................93
Engine coolant
checking and adding .......131,132
disposal ....................................133
refill capacities ........................133
Engine oil ...........................128,129
changing oil and oil filter .......130
checking and adding .......128,129
Exhaust fumes ............................93
Floor mats ...................................63
Fuel
calculating fuel economy .......148
improving fuel economy ........108
octane rating ...........................147
quality ......................................147
running out of fuel .................148
safety information relating to
automotive fuels .....................146
Fuel gauge ...................................10
Fuel pump shut-off switch .......109
Fuse panels
instrument panel ....................110
power distribution box ...........117
Fuses ...................................109,110
Gauges, Mechanical ....................10
engine coolant temperature
gauge .........................................11
Headlamps
autolamp system .......................27
flashing ......................................26
Index
167
Page 169 of 176

Speed control ..............................36
canceling a set speed ...............39
resuming a set speed ...............39
tap up/tap down .......................38
turning off .................................37
Speedometer ...............................10
Starting your vehicle .............90,92
Sunvisor .......................................52
Tachometer
mechanical cluster ...................11
Tilt steering wheel ......................40
Tires ....................................142,144
changing ..................................119
checking the pressure ............144
replacing ..................................145
rotating ....................................144
snow tires and chains ............145
treadwear ................................143
Traction control
off light ........................................9
Trailer towing ............................105
tips ...........................................107
Transaxle .....................................99
automatic operation .......100,101,
102,103
Transmission .............................134
fluid, checking and adding
(automatic) .............................134
Trunk
using the remote entry
system to open .........................66
Turn signal
lever ...........................................35
Universal transmitter ..................52
erasing channels .......................55
operating ...................................54
programming .............................53
Vehicle dimensions ...................163
Vehicle headlamp aiming
device (VHAD) .........................152
Vehicle Identification Number
(VIN) ..........................................165Vehicle loading ..........................104
Ventilating your vehicle .............94
Warning chimes .............................6
Wheels
anti-theft lug nuts ..................121
Windows
accessory delay .........................60
power windows, operating .......59
Windshield washer fluid and
wipers
checking and adding fluid .....131
checking and replacing wiper
blades ......................................139
operation ...................................34
Wrecker towing .........................124
Index
169