lights LINCOLN CONTINENTAL 2002 User Guide
[x] Cancel search | Manufacturer: LINCOLN, Model Year: 2002, Model line: CONTINENTAL, Model: LINCOLN CONTINENTAL 2002Pages: 240, PDF Size: 1.79 MB
Page 46 of 240
BULBS
Replacing exterior bulbs
Check the operation of the following lamps frequently:
²Headlamps
²Tail lamps
²Brakelamps
²High-mount brakelamp
²Turn signals
²Backup lamps
²License plate lamp
Do not remove lamp bulbs unless they will be replaced immediately. If a
bulb is removed for an extended period of time, contaminants may enter
the lamp housings and affect performance.
Using the right bulbs
Replacement bulbs are specified in the chart below. Headlamp bulbs
must be marked with an authorized ªD.O.T.º for North America and an
ªEº for Europe to assure lamp performance, light brightness and pattern
and safe visibility. The correct bulbs will not damage the lamp assembly
or void the lamp assembly warranty and will provide quality bulb burn
time.
Function Trade Number
Headlamp 9007
Cornering lamp (front) 3156K
Backup lamp 3457K
High-mount brakelamp 912
Park/turn lamp (front) 3157K
License plate lamp 168
Luggage compartment lamp (decklid ajar) 912
Side marker (front) 194 AK (amber)
Side marker (rear) 916
Stoplamp and tail lamp 3157K
Redundant turn lamp (rear) 3157K
Lights
46
Page 47 of 240
Function Trade Number
Glovebox lamp 194
Ash receptacle 1445
Ash tray (rear) 37
Cigar lighter (console) 1893
Door mounted lamp (front) 214-2
Illuminated visor mirror 74
Overhead console reading lamp (without
moon roof)912
Passenger assist handle (rear seat) 211-2
All replacement bulbs are clear in color except where noted.
To replace all instrument panel lights - see your dealer.
Replacing the interior bulbs
Check the operation of the following interior bulbs frequently:
²interior overhead lamp
²map lamp
For bulb replacement, see a dealer or qualified technician.
Replacing headlamp bulbs
To remove the headlamp bulb:
1. Make sure headlamp switch is in OFF position.
2. Lift the hood and remove the protective cover from the top of the
headlamps by lifting up on the rear corners and release the velcro
attachments. Lift the cover and pull towards the windshield.
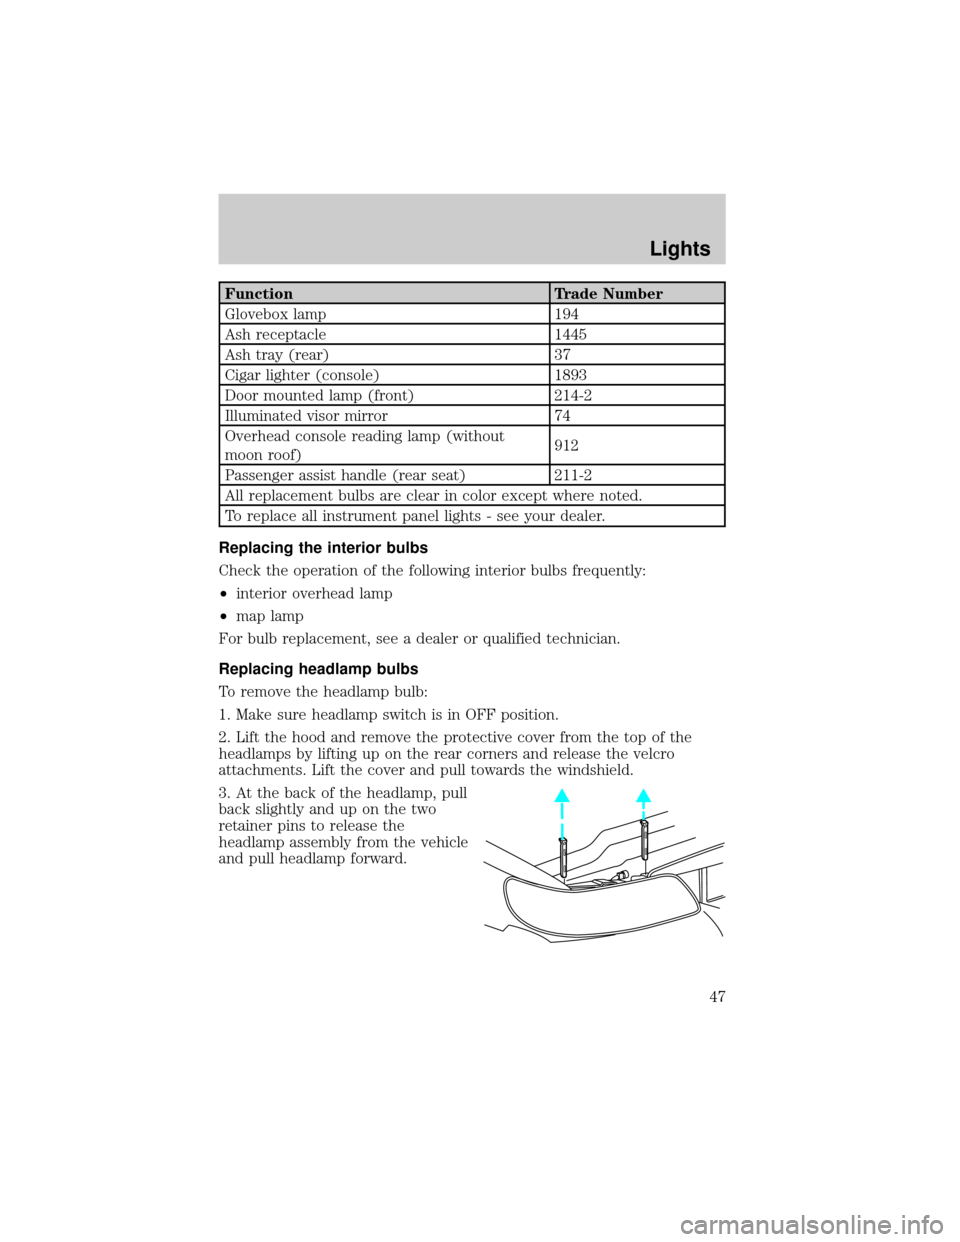
3. At the back of the headlamp, pull
back slightly and up on the two
retainer pins to release the
headlamp assembly from the vehicle
and pull headlamp forward.
Lights
47
Page 48 of 240
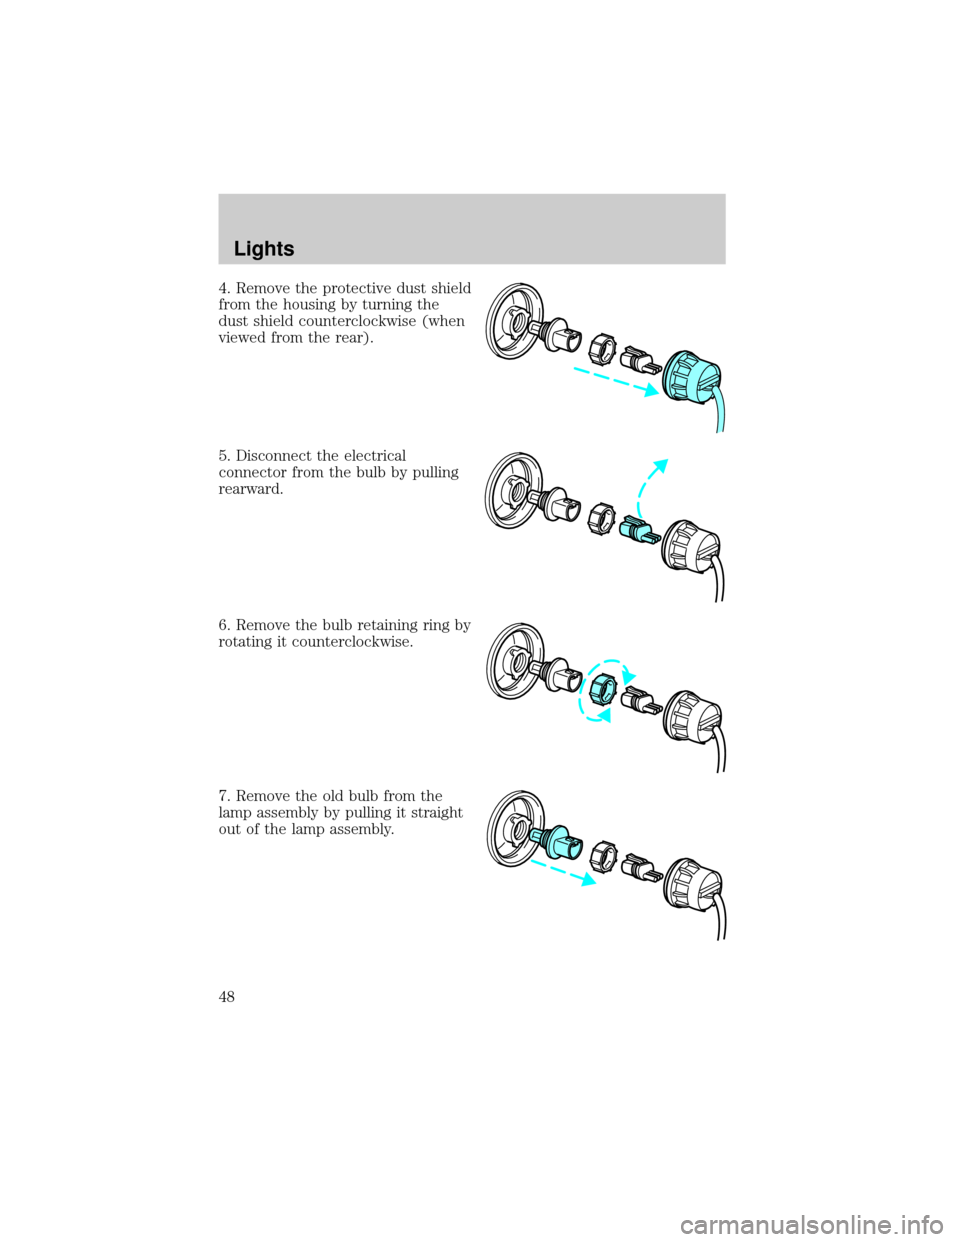
4. Remove the protective dust shield
from the housing by turning the
dust shield counterclockwise (when
viewed from the rear).
5. Disconnect the electrical
connector from the bulb by pulling
rearward.
6. Remove the bulb retaining ring by
rotating it counterclockwise.
7. Remove the old bulb from the
lamp assembly by pulling it straight
out of the lamp assembly.
Lights
48
Page 49 of 240
To install the new bulb:
Handle a halogen headlamp bulb carefully and keep out of
children's reach. Grasp the bulb only by its plastic base and do
not touch the glass. The oil from your hand could cause the bulb to
break the next time the headlamps are operated.
1. Install the new bulb in lamp assembly by pushing straight in with the
bulb's plastic base facing upward. You may need to turn the bulb slightly
to align the grooves in the plastic base with the tabs in the lamp
assembly.
2. Install the bulb retaining ring over the plastic base and lock the ring
by rotating clockwise until it snaps into place.
3. Connect the electrical connector to the bulb.
4. Install the protective dust shield and lock the shield by rotating it
clockwise until it locks into position.
5. Carefully position the headlamp assembly onto the vehicle making sure
the alignment pins are inserted into the proper holes.
6. Hold the headlamp assembly snugly against the vehicle and push down
on the retainer pins to lock the lamp into place.
7. Before reinstalling the protective cover, make sure the cover tabs are
fully seated under the grille molding.
8. Turn the headlamps on and make sure they work properly. If the
headlamp was correctly aligned before you changed the bulb, you should
not need to align it again.
Replacing front parking lamp/turn signal/cornering lamp bulbs
1. Make sure the headlamp control is in the OFF position.
2. Open the hood and remove the protective cover from the top of the
headlamps by lifting up on the rear corners and release the velcro
attachments. Lift the cover and pull towards the windshield.
Lights
49
Page 50 of 240
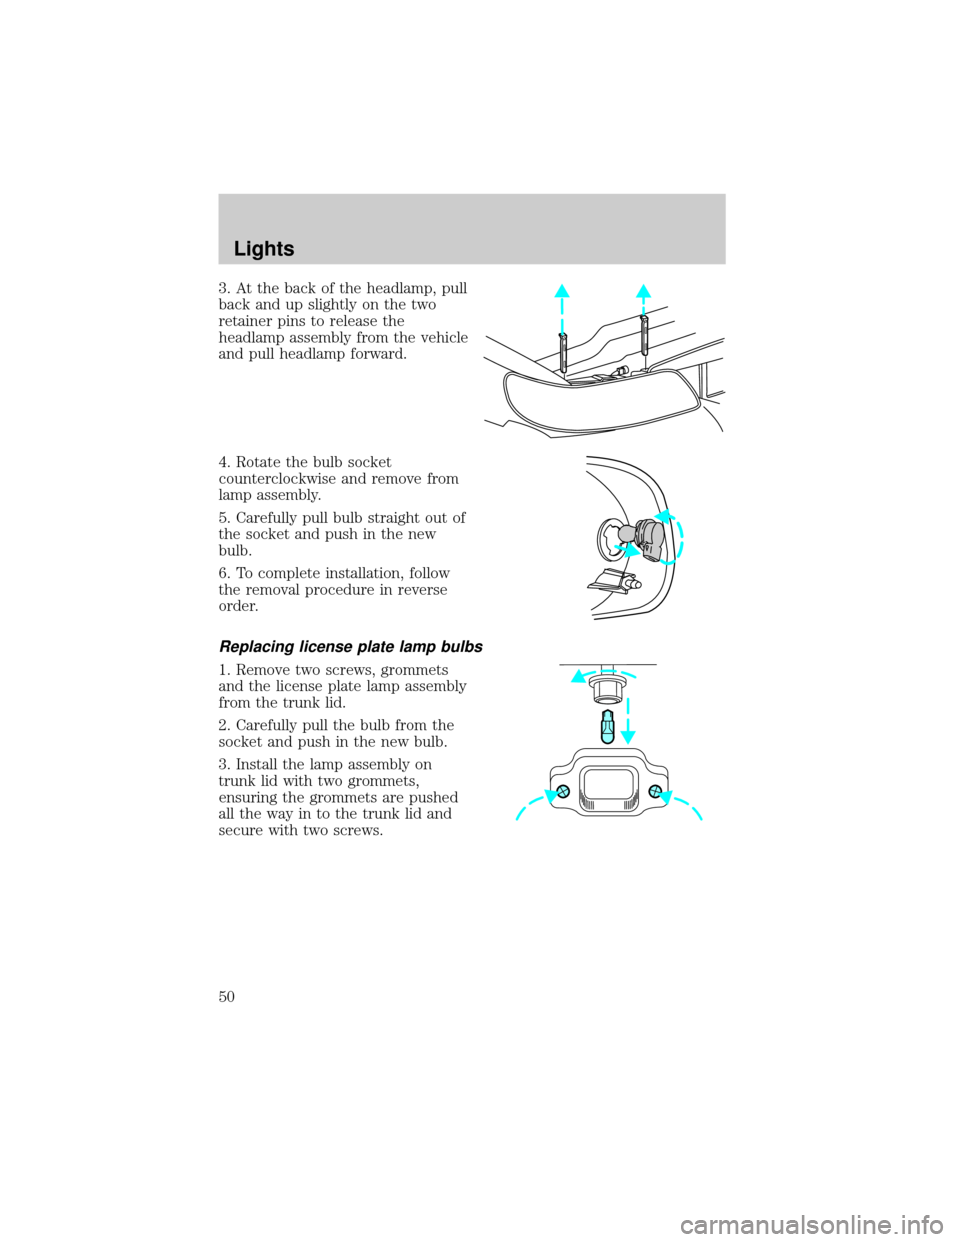
3. At the back of the headlamp, pull
back and up slightly on the two
retainer pins to release the
headlamp assembly from the vehicle
and pull headlamp forward.
4. Rotate the bulb socket
counterclockwise and remove from
lamp assembly.
5. Carefully pull bulb straight out of
the socket and push in the new
bulb.
6. To complete installation, follow
the removal procedure in reverse
order.
Replacing license plate lamp bulbs
1. Remove two screws, grommets
and the license plate lamp assembly
from the trunk lid.
2. Carefully pull the bulb from the
socket and push in the new bulb.
3. Install the lamp assembly on
trunk lid with two grommets,
ensuring the grommets are pushed
all the way in to the trunk lid and
secure with two screws.
Lights
50
Page 51 of 240

Replacing high-mount brakelamp bulbs
1. Open luggage compartment.
Note the number of the pin-type
retainers before removal.
2. Remove the pin-type retainers
from the lower back trim panel.
3. Carefully pull down the lower
back trim panel.
4. Lower the bracket and module
tray assembly.
Lights
51
Page 52 of 240

5. Carefully remove the bulb socket
from the lamp assembly.
6. Carefully pull the bulb from the
socket and push in the new bulb.
To install, reverse the removal
procedure.
Replacing backup lamp bulbs
For bulb replacement, see a dealer or qualified technician.
Replacing tail lamp/turn lamp bulbs
For bulb replacement, see a dealer or qualified technician.
Lights
52
Page 53 of 240
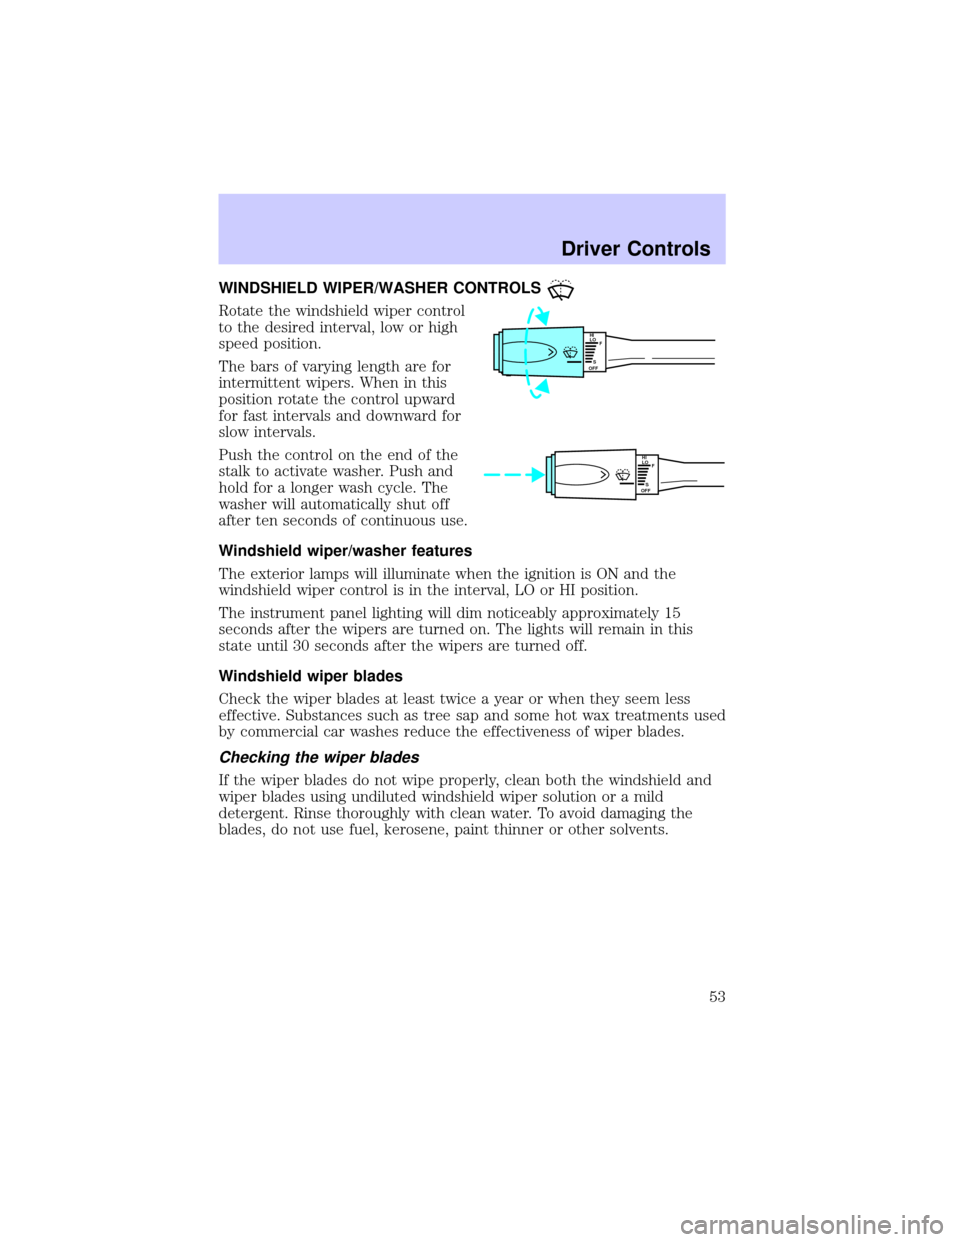
WINDSHIELD WIPER/WASHER CONTROLS
Rotate the windshield wiper control
to the desired interval, low or high
speed position.
The bars of varying length are for
intermittent wipers. When in this
position rotate the control upward
for fast intervals and downward for
slow intervals.
Push the control on the end of the
stalk to activate washer. Push and
hold for a longer wash cycle. The
washer will automatically shut off
after ten seconds of continuous use.
Windshield wiper/washer features
The exterior lamps will illuminate when the ignition is ON and the
windshield wiper control is in the interval, LO or HI position.
The instrument panel lighting will dim noticeably approximately 15
seconds after the wipers are turned on. The lights will remain in this
state until 30 seconds after the wipers are turned off.
Windshield wiper blades
Check the wiper blades at least twice a year or when they seem less
effective. Substances such as tree sap and some hot wax treatments used
by commercial car washes reduce the effectiveness of wiper blades.
Checking the wiper blades
If the wiper blades do not wipe properly, clean both the windshield and
wiper blades using undiluted windshield wiper solution or a mild
detergent. Rinse thoroughly with clean water. To avoid damaging the
blades, do not use fuel, kerosene, paint thinner or other solvents.
HI
LO
F
S
OFF
HI
LO
F
S
OFF
Driver Controls
53
Page 59 of 240

2. Move the control in the direction
you wish to tilt the mirror.
3. Return to the center position to lock mirrors in place.
Heated outside mirrors
Both mirrors are heated
automatically to remove ice, mist
and fog when the rear window
defrost is activated.
Do not remove ice from the mirrors
with a scraper or attempt to
readjust the mirror glass if it is
frozen in place. These actions could
cause damage to the glass and
mirrors.
Automatic dimming rear view mirror
Your vehicle is equipped with an inside rear view mirror and a driver's
outside mirror that has an auto-dimming function. The electronic
day/night mirrors will change from the normal state to the non-glare
state when bright lights (glare) reach the mirrors. When the inside rear
view mirror detects bright light from in front of or behind the vehicle,
the inside and driver side outside rear view mirrors will automatically
adjust (darken) to minimize glare.
MIRRORS
L R
Driver Controls
59
Page 93 of 240
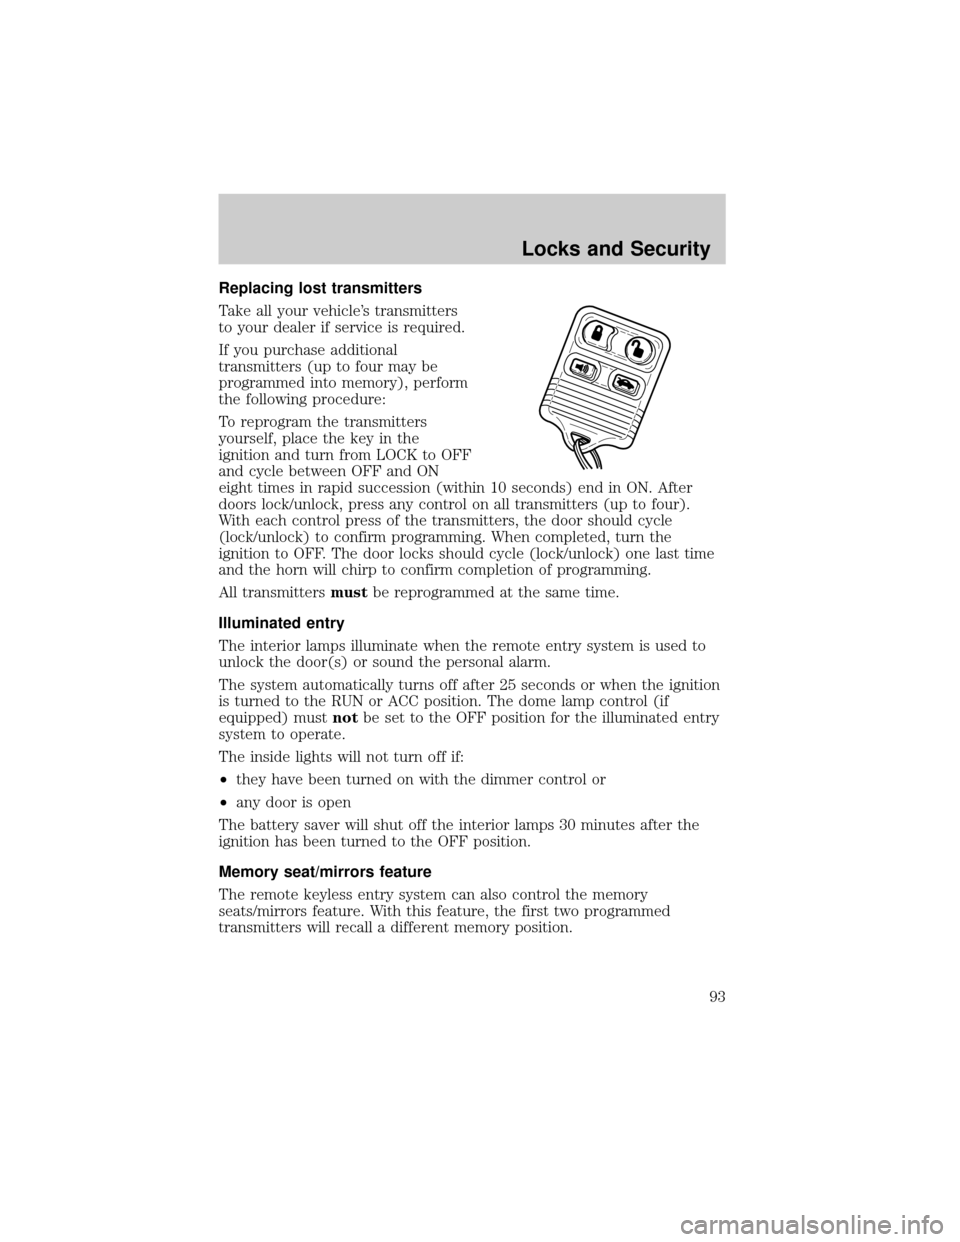
Replacing lost transmitters
Take all your vehicle's transmitters
to your dealer if service is required.
If you purchase additional
transmitters (up to four may be
programmed into memory), perform
the following procedure:
To reprogram the transmitters
yourself, place the key in the
ignition and turn from LOCK to OFF
and cycle between OFF and ON
eight times in rapid succession (within 10 seconds) end in ON. After
doors lock/unlock, press any control on all transmitters (up to four).
With each control press of the transmitters, the door should cycle
(lock/unlock) to confirm programming. When completed, turn the
ignition to OFF. The door locks should cycle (lock/unlock) one last time
and the horn will chirp to confirm completion of programming.
All transmittersmustbe reprogrammed at the same time.
Illuminated entry
The interior lamps illuminate when the remote entry system is used to
unlock the door(s) or sound the personal alarm.
The system automatically turns off after 25 seconds or when the ignition
is turned to the RUN or ACC position. The dome lamp control (if
equipped) mustnotbe set to the OFF position for the illuminated entry
system to operate.
The inside lights will not turn off if:
²they have been turned on with the dimmer control or
²any door is open
The battery saver will shut off the interior lamps 30 minutes after the
ignition has been turned to the OFF position.
Memory seat/mirrors feature
The remote keyless entry system can also control the memory
seats/mirrors feature. With this feature, the first two programmed
transmitters will recall a different memory position.
Locks and Security
93