warning LINCOLN CONTINENTAL 2002 User Guide
[x] Cancel search | Manufacturer: LINCOLN, Model Year: 2002, Model line: CONTINENTAL, Model: LINCOLN CONTINENTAL 2002Pages: 240, PDF Size: 1.79 MB
Page 76 of 240
Drivers have the responsibility to pay primary attention to the road and
drive safely. A driver may want to pull over to a safe parking spot before
using Vehicle Communication System services. Drivers who allow
themselves to become distracted may cause an accident. Please use this
technology responsibly.
Due to the specialized Lincoln software contained within the phone, your
local Sprint PCS store is unable to provide service or replacement units.
Issues or questions about equipment including the wireless phone should
be directed to your Lincoln dealer.
Phone accessories can be purchased at Sprint PCS stores. Billing or
services issues should be directed to Sprint PCS at 1±866±PCS-AUTO
(1±866±727±2886). Select ª2º for Client Services.
ELECTRONIC MESSAGE CENTER
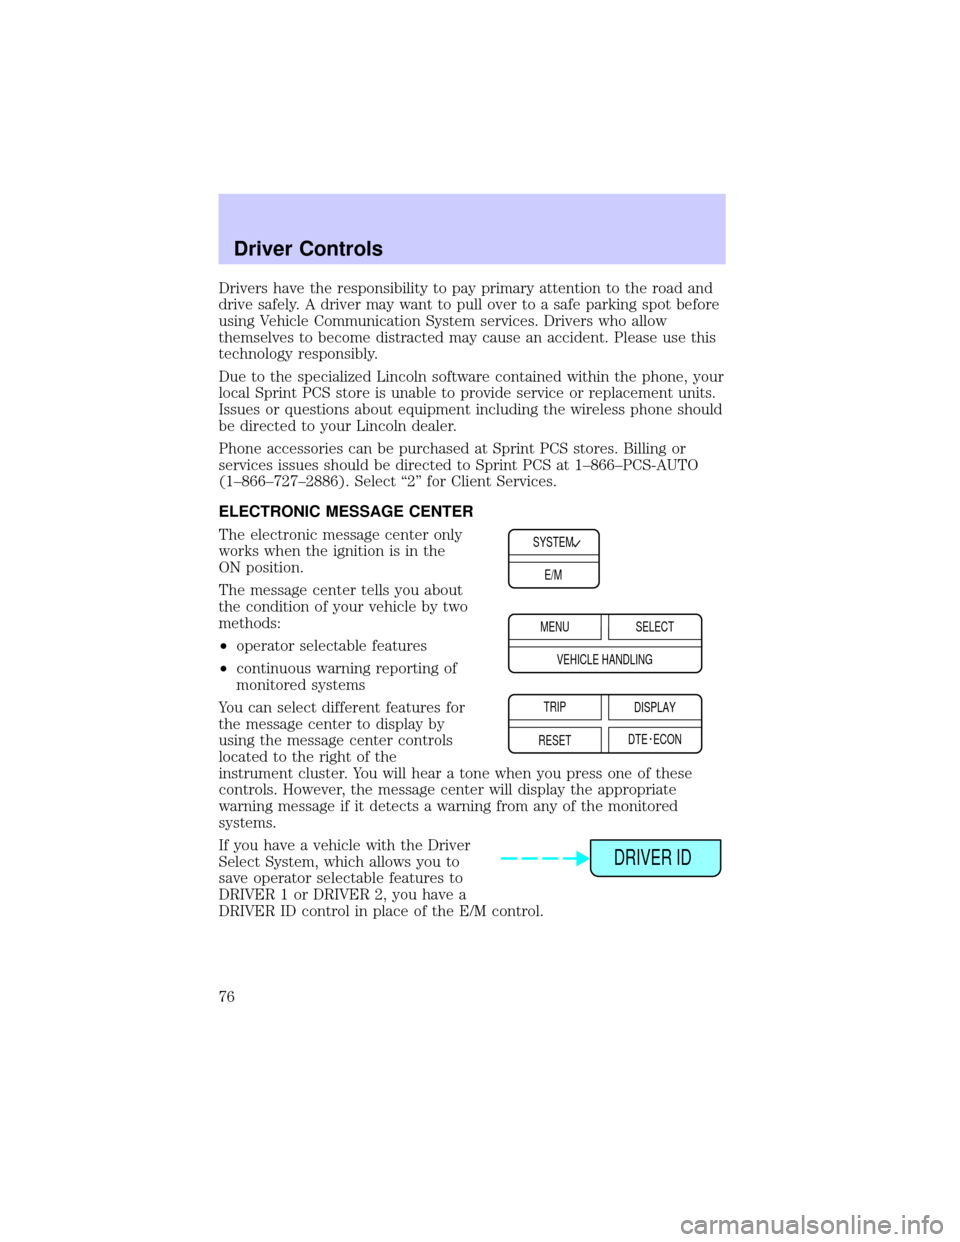
The electronic message center only
works when the ignition is in the
ON position.
The message center tells you about
the condition of your vehicle by two
methods:
²operator selectable features
²continuous warning reporting of
monitored systems
You can select different features for
the message center to display by
using the message center controls
located to the right of the
instrument cluster. You will hear a tone when you press one of these
controls. However, the message center will display the appropriate
warning message if it detects a warning from any of the monitored
systems.
If you have a vehicle with the Driver
Select System, which allows you to
save operator selectable features to
DRIVER 1 or DRIVER 2, you have a
DRIVER ID control in place of the E/M control.
SYSTEM
E/M
MENU
TRIP
RESETSELECT
DISPLAY
DTE ECON VEHICLE HANDLING
DRIVER ID
Driver Controls
76
Page 78 of 240
If Memory position 1 or Memory
position 2 wishes to make
temporary changes to their seat or
outside mirror positions without
affecting their preferred positions
they may do so by:
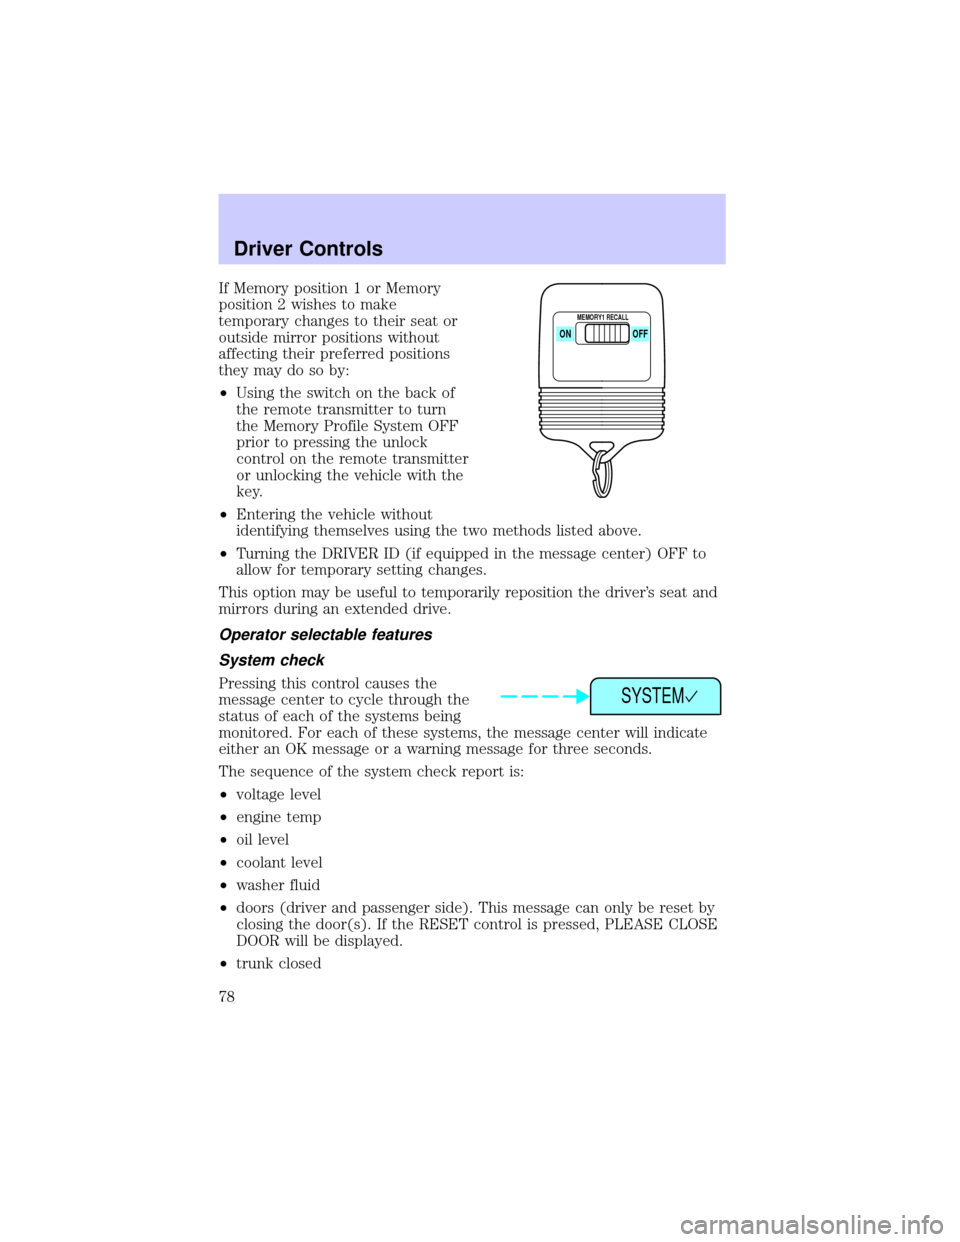
²Using the switch on the back of
the remote transmitter to turn
the Memory Profile System OFF
prior to pressing the unlock
control on the remote transmitter
or unlocking the vehicle with the
key.
²Entering the vehicle without
identifying themselves using the two methods listed above.
²Turning the DRIVER ID (if equipped in the message center) OFF to
allow for temporary setting changes.
This option may be useful to temporarily reposition the driver's seat and
mirrors during an extended drive.
Operator selectable features
System check
Pressing this control causes the
message center to cycle through the
status of each of the systems being
monitored. For each of these systems, the message center will indicate
either an OK message or a warning message for three seconds.
The sequence of the system check report is:
²voltage level
²engine temp
²oil level
²coolant level
²washer fluid
²doors (driver and passenger side). This message can only be reset by
closing the door(s). If the RESET control is pressed, PLEASE CLOSE
DOOR will be displayed.
²trunk closed
ON
MEMORY1 RECALL
OFF
SYSTEM
Driver Controls
78
Page 79 of 240
²exterior lamps (front turn, brake and tail)
²fuel level
²distance to empty
²traction control
²ride control
System warnings
System warnings alert you to possible problems or malfunctions in your
vehicle's operating systems.
The message center will display the
last selected feature if there are no
more warning messages. This allows
you to use the full functionality of
the message center after you acknowledge the warning by pressing the
RESET control and clearing the warning message.
Warning messages that have been reset are divided into two categories:
²They will reappear on the display ten minutes from the reset.
²They will not reappear until an ignition OFF-ON cycle has been
completed. This acts as a reminder that these warning conditions still
exist within the vehicle.
Door Ajar Cannot be reset
Driver's Door Ajar
Check Engine Temp Warning returns after 10 minutes
Transmission Overheat
Check Transmission
Low Oil Level
Check Charging System
Low Fuel Level
Low Engine Coolant
Low Tire Pressure (if equipped)
RESET
Driver Controls
79
Page 80 of 240
Gear Display Data ERR Warning reappears after key is
turned from OFF to ON
Check/Tighten fuel cap
Brake Lamp Out
Check Traction Control
Check Ride Control
Trunk Ajar
Check Steering Assist
Low Washer Fluid
Air Leveling Disabled
Tail Lamp Out
Check FRT Turn Lamps
Turn on Headlamps
DOOR AJAR.Displayed when a side or back door is not completely
closed.
DRIVER'S DOOR AJAR.Displayed when the driver's door is not
completely closed.
CHECK ENGINE TEMP.Displayed when the engine coolant is
overheating. Stop the vehicle as soon as safely possible, turn off the
engine and let it cool. Check the coolant and coolant level. Refer to
Engine coolantin theMaintenance and specificationschapter. If the
warning stays on or continues to come on, contact your dealer as soon as
possible.
TRANSMISSION OVERHEAT.Indicates the transmission is
overheating. This warning may appear when towing heavy loads or when
driving in a low gear at a high speed for an extended period of time.
Stop the vehicle as soon as safely possible, turn off the engine and let it
cool. Check the transmission fluid and level. Refer toTransmission
fluidin theMaintenance and specificationschapter. If the warning
stays on or continues to come on, contact your dealer for transmission
service as soon as possible.
CHECK TRANSMISSION.Indicates the transmission is not operating
properly. If this warning stays on, contact your dealer as soon as
possible.
Driver Controls
80
Page 81 of 240

CHECK CHARGING SYSTEM.Displayed when the electrical system is
not maintaining proper voltage. If you are operating electrical accessories
when the engine is idling at a low speed, turn off as many of the
electrical loads as soon as possible. If the warning stays on or comes on
when the engine is operating at normal speeds, have the electrical
system checked as soon as possible.
LOW FUEL LEVEL.Displayed when you have approximately 80 km (50
miles) to empty.
LOW ENGINE COOLANT.Displayed when the engine coolant level is
low. Stop the vehicle as soon as safely possible, turn off the engine and
let it cool. Check the coolant and level. Refer toEngine coolantin the
Maintenance and specificationschapter.
LOW TIRE PRESSURE (if equipped).Displayed when the tire
pressure is low. Check the tire pressure. Refer toChecking the tire
pressurein theMaintenance and specificationschapter.
GEAR DISPLAY DATA ERR.Displayed when the data used to provide
the redundant gear selection display on the instrument cluster is missing
or invalid. In this case, the instrument cluster redundant gear selection
display is turned off. The driver should use the mechanical position
indication on the center console gear selector as temporary indication. If
this warning stays on, contact your dealer as soon as safely possible.
CHECK/TIGHTEN FUEL CAP.Displayed when the fuel filler cap is
not properly installed. Proper fuel filler cap installation is checked
automatically as the vehicle is driven but not until after some fuel is used
(fuel gauge drops below full). Once the fuel filler cap is properly
secured, the ªCHECK/TIGHTEN FUEL CAPº message will turn off after a
short period of driving. Refer toFuel Filler Capin theMaintenance
and specificationschapter.
BRAKE LAMP OUT.Displayed when the brake lamps are activated and
at least one is burned out. Check the lamps as soon as safely possible
and have the burned out lamp replaced. The center high-mount
brakelamp is not monitored.
CHECK TRACTION CONTROL.Displayed when the Traction
Controlysystem is not operating properly. If this message is displayed
on the message centerandthe amber T/C OFF light in the Traction
Controlyon/off switch isnotilluminated, the Traction Controlysystem
will be partially operable. If this warning stays on, contact your dealer for
service as soon as possible. For further information, refer toTraction
controlyin theDrivingchapter.
Driver Controls
81
Page 82 of 240
CHECK RIDE CONTROL.Displayed when the air suspension system is
not operating properly. If this message is displayed while driving, pull off
the road as soon as safely possible. The message may also be displayed if
the vehicle is loaded beyond the recommended maximum payload. This
is a normal condition if the vehicle is overloaded. To correct this
condition:
1. Remove or redistribute the payload per the recommended maximum
requirements.
2. Turn the ignition switch from ON to OFF to ON again.
If the message reappears:
1. Turn the air suspension switch (located in the trunk) OFF.
2. Contact your dealer for service as soon as safely possible.
For more information, refer toAir suspensionin theDrivingchapter.
TRUNK AJAR.Displayed when the trunk is not completely closed.
CHECK STEERING ASSIST.Displayed when the steering system is
not operating properly. If this message is displayed while driving, pull off
the road as soon as safely possible. If this warning stays on, contact your
dealer for service as soon as possible.
LOW WASHER FLUID.Indicates the washer fluid reservoir is less than
one quarter full. Check the washer fluid level. Refer toChecking and
adding washer fluidin theMaintenance and specificationschapter.
AIR LEVELING DISABLED.Displayed when the air suspension switch
is in the OFF position.
TAIL LAMP OUT.Displayed when the tail lamps are activated and at
least one is burned out. Check the lamps as soon as possible and have
the burned out lamp replaced.
CHECK FRT TURN LAMPS.Displayed when the turn signals are
activated and at least one is burned out. Check the lamps as soon as
safely possible and have the burned out lamp replaced.
TURN ON HEADLAMPS.Displayed when the headlamps are activated
by the autolamp sensor.
E/M (if equipped)
Press this control to switch the
odometer and display readouts from
metric (kilometers) to English
(miles) units.
E/M
Driver Controls
82
Page 84 of 240
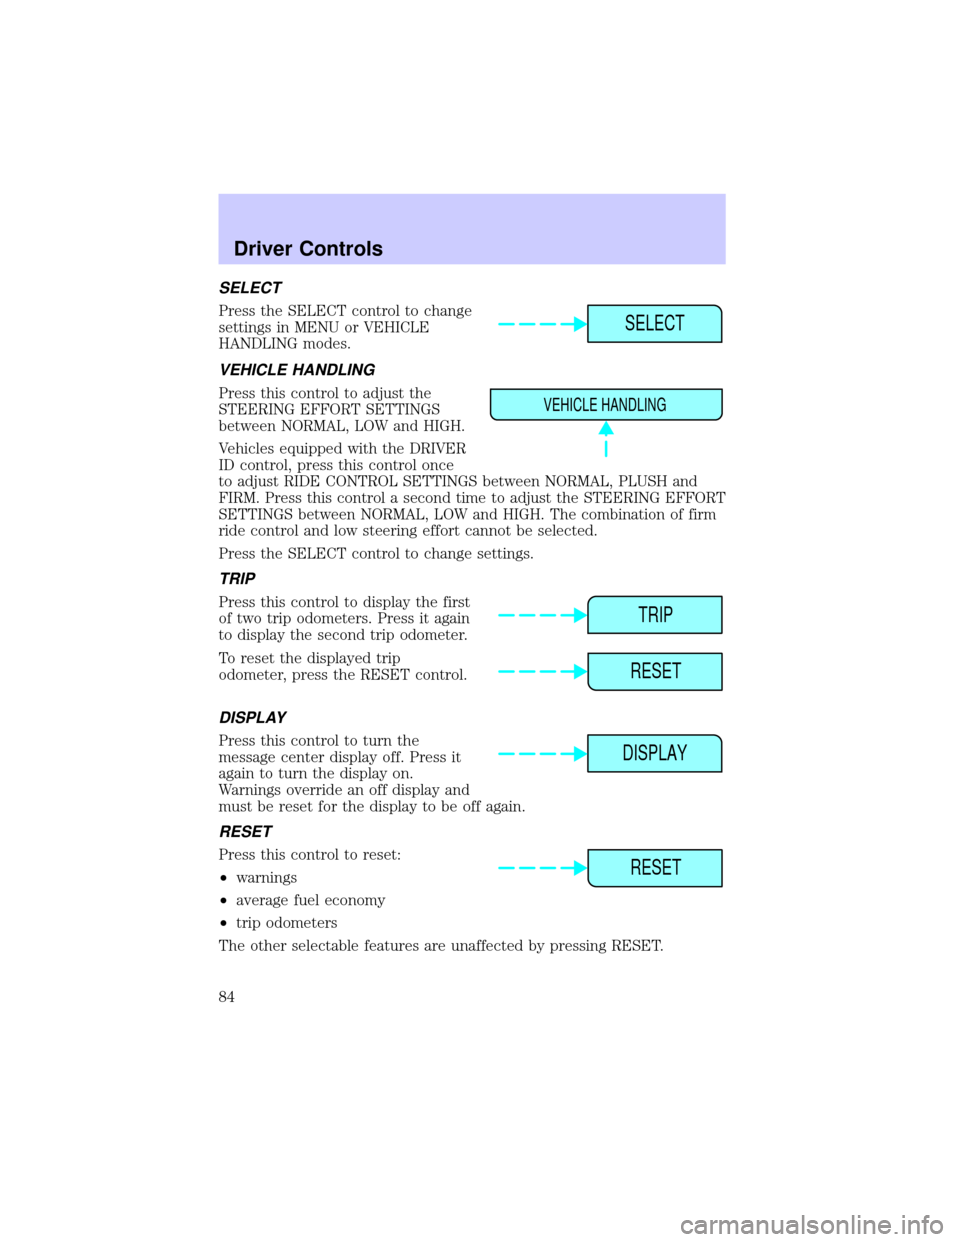
SELECT
Press the SELECT control to change
settings in MENU or VEHICLE
HANDLING modes.
VEHICLE HANDLING
Press this control to adjust the
STEERING EFFORT SETTINGS
between NORMAL, LOW and HIGH.
Vehicles equipped with the DRIVER
ID control, press this control once
to adjust RIDE CONTROL SETTINGS between NORMAL, PLUSH and
FIRM. Press this control a second time to adjust the STEERING EFFORT
SETTINGS between NORMAL, LOW and HIGH. The combination of firm
ride control and low steering effort cannot be selected.
Press the SELECT control to change settings.
TRIP
Press this control to display the first
of two trip odometers. Press it again
to display the second trip odometer.
To reset the displayed trip
odometer, press the RESET control.
DISPLAY
Press this control to turn the
message center display off. Press it
again to turn the display on.
Warnings override an off display and
must be reset for the display to be off again.
RESET
Press this control to reset:
²warnings
²average fuel economy
²trip odometers
The other selectable features are unaffected by pressing RESET.
SELECT
VEHICLE HANDLING
TRIP
RESET
DISPLAY
RESET
Driver Controls
84
Page 111 of 240
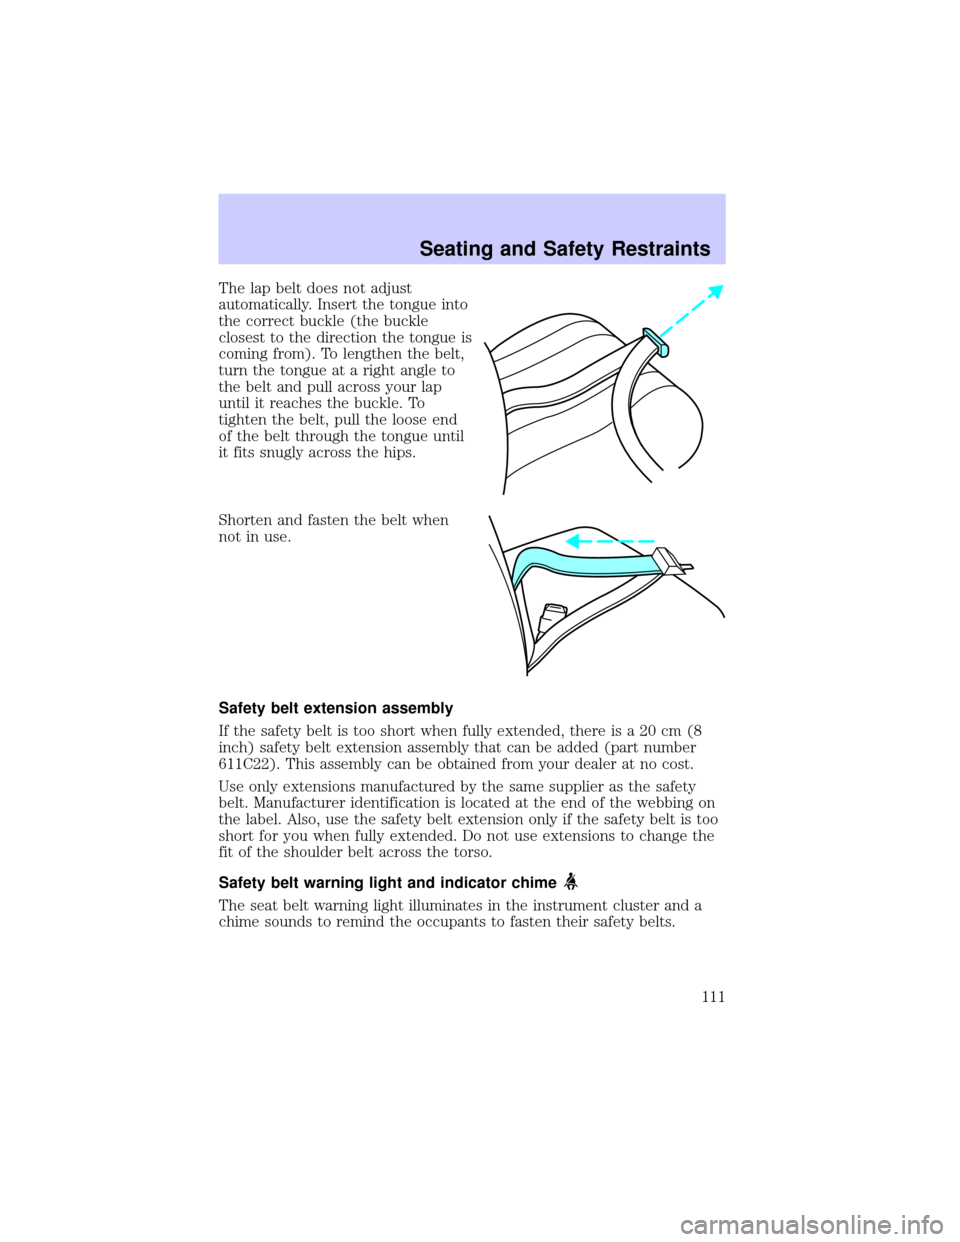
The lap belt does not adjust
automatically. Insert the tongue into
the correct buckle (the buckle
closest to the direction the tongue is
coming from). To lengthen the belt,
turn the tongue at a right angle to
the belt and pull across your lap
until it reaches the buckle. To
tighten the belt, pull the loose end
of the belt through the tongue until
it fits snugly across the hips.
Shorten and fasten the belt when
not in use.
Safety belt extension assembly
If the safety belt is too short when fully extended, there is a 20 cm (8
inch) safety belt extension assembly that can be added (part number
611C22). This assembly can be obtained from your dealer at no cost.
Use only extensions manufactured by the same supplier as the safety
belt. Manufacturer identification is located at the end of the webbing on
the label. Also, use the safety belt extension only if the safety belt is too
short for you when fully extended. Do not use extensions to change the
fit of the shoulder belt across the torso.
Safety belt warning light and indicator chime
The seat belt warning light illuminates in the instrument cluster and a
chime sounds to remind the occupants to fasten their safety belts.
Seating and Safety Restraints
111
Page 112 of 240
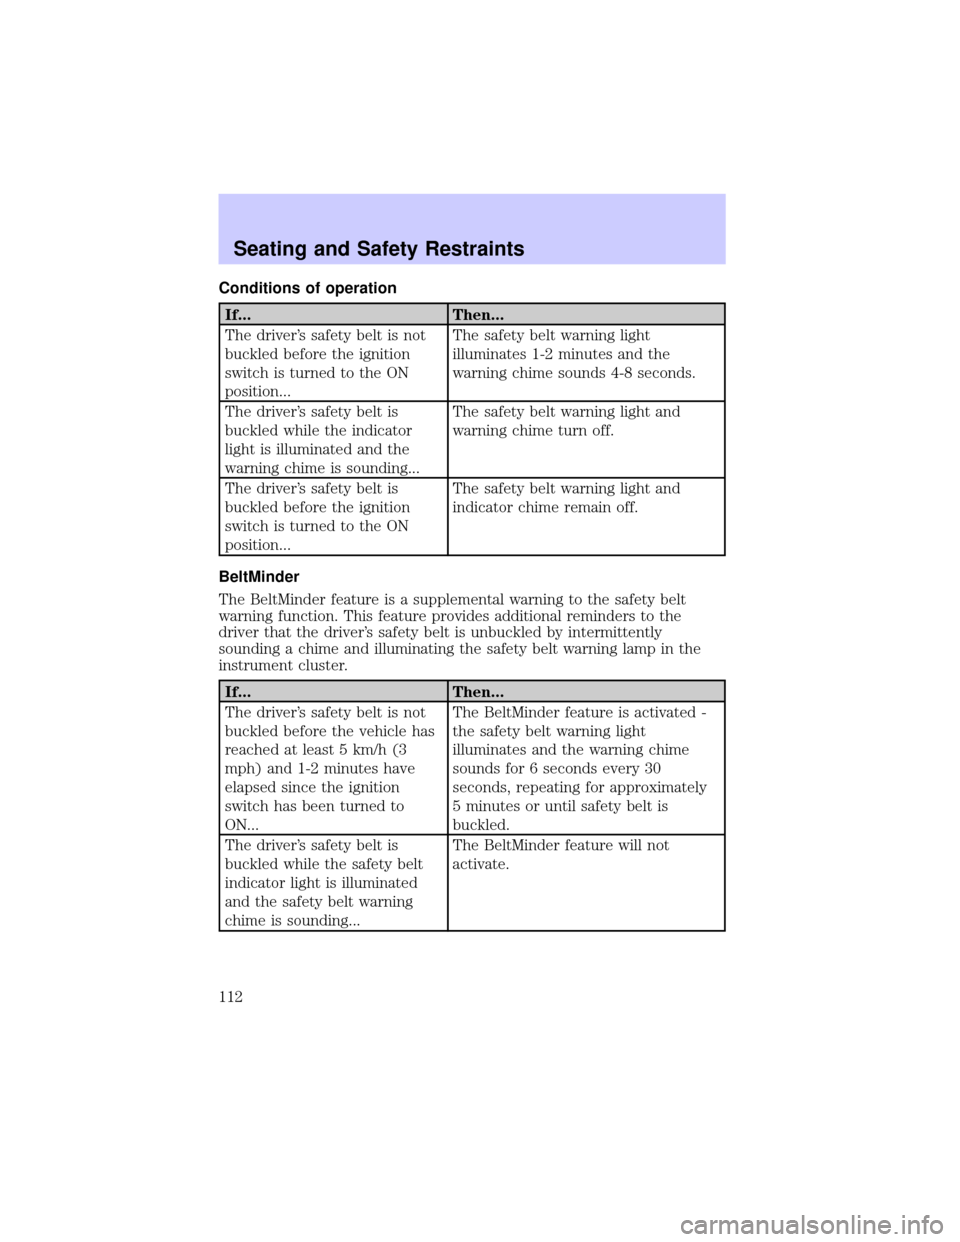
Conditions of operation
If... Then...
The driver's safety belt is not
buckled before the ignition
switch is turned to the ON
position...The safety belt warning light
illuminates 1-2 minutes and the
warning chime sounds 4-8 seconds.
The driver's safety belt is
buckled while the indicator
light is illuminated and the
warning chime is sounding...The safety belt warning light and
warning chime turn off.
The driver's safety belt is
buckled before the ignition
switch is turned to the ON
position...The safety belt warning light and
indicator chime remain off.
BeltMinder
The BeltMinder feature is a supplemental warning to the safety belt
warning function. This feature provides additional reminders to the
driver that the driver's safety belt is unbuckled by intermittently
sounding a chime and illuminating the safety belt warning lamp in the
instrument cluster.
If... Then...
The driver's safety belt is not
buckled before the vehicle has
reached at least 5 km/h (3
mph) and 1-2 minutes have
elapsed since the ignition
switch has been turned to
ON...The BeltMinder feature is activated -
the safety belt warning light
illuminates and the warning chime
sounds for 6 seconds every 30
seconds, repeating for approximately
5 minutes or until safety belt is
buckled.
The driver's safety belt is
buckled while the safety belt
indicator light is illuminated
and the safety belt warning
chime is sounding...The BeltMinder feature will not
activate.
Seating and Safety Restraints
112
Page 115 of 240
²the ignition switch is in the OFF position
²all vehicle doors are closed
²the driver's safety belt is unbuckled
²the parklamps/headlamps are in OFF position (If vehicle is equipped
with Autolamps, this will not affect the procedure.)
To reduce the risk of injury, do not deactivate/activate the Belt
Minder feature while driving the vehicle.
1. Turn the ignition switch to the RUN (or ON) position. (DO NOT
START THE ENGINE)
2. Wait until the safety belt warning light turns off. (Approximately 1±2
minutes)
²Steps 3±5 must be completed within 60 seconds or the procedure will
have to be repeated.
3. Buckle then unbuckle the safety belt three times, ending with the
safety belt unbuckled. This can be done before or during BeltMinder
warning activation.
4. Turn on the parklamps/headlamps, turn off the parklamps/headlamps.
5. Buckle then unbuckle the safety belt three times, ending with the
safety belt unbuckled.
²After step 5 the safety belt warning light will be turned on for three
seconds.
6. Within seven seconds of the safety belt warning light turning off,
buckle then unbuckle the safety belt.
²This will disable BeltMinder if it is currently enabled, or enable
BeltMinder if it is currently disabled.
7. Confirmation of disabling BeltMinder is provided by flashing the safety
belt warning light four times per second for three seconds.
8. Confirmation of enabling BeltMinder is provided by flashing the safety
belt warning light four times per second for three seconds, followed by
three seconds with the safety belt warning light off, then followed by
flashing the safety belt warning light four times per second for three
seconds again.
Seating and Safety Restraints
115