reset LINCOLN CONTINENTAL 2017 Owners Manual
[x] Cancel search | Manufacturer: LINCOLN, Model Year: 2017, Model line: CONTINENTAL, Model: LINCOLN CONTINENTAL 2017Pages: 584, PDF Size: 6.13 MB
Page 7 of 584
Steering...........................................................251
Pre-Collision Assist......................................253
Drive Control
.................................................256
Load Carrying
Load Limit.......................................................258
Towing
Towing a Trailer
.............................................263
Recommended Towing Weights..............264
Essential Towing Checks
...........................265
Towing the Vehicle on Four Wheels........267
Driving Hints
Breaking-In....................................................269
Economical Driving
......................................269
Driving Through Water...............................269
Floor Mats
......................................................270
Roadside Emergencies
Roadside Assistance
...................................272
Hazard Warning Flashers...........................273
Fuel Shutoff
....................................................273 Jump Starting the Vehicle..........................274
Post-Crash Alert System.............................277
Transporting the Vehicle.............................277
Customer Assistance
Getting the Services You Need
................279
In California (U.S. Only)
...............................280
The Better Business Bureau (BBB) Auto Line Program (U.S. Only).........................281
Utilizing the Mediation/Arbitration Program (Canada Only)
...........................................282
Getting Assistance Outside the U.S. and Canada.......................................................283
Ordering Additional Owner's Literature
....................................................284
Reporting Safety Defects (U.S. Only)......285
Reporting Safety Defects (Canada Only)............................................................285
Fuses
Fuse Specification Chart............................287
Changing a Fuse..........................................303 Maintenance
General Information
.....................................306
Opening and Closing the Hood...............306
Under Hood Overview - 2.7L EcoBoost™/ 3.7L..............................................................308
Under Hood Overview - 3.0L EcoBoost™...................................................310
Engine Oil Dipstick - 2.7L EcoBoost™.......312
Engine Oil Dipstick - 3.0L EcoBoost™.......312
Engine Oil Dipstick - 3.7L............................312
Engine Oil Check...........................................312
Oil Change Indicator Reset.........................314
Engine Coolant Check.................................314
Automatic Transmission Fluid Check
.......319
Brake Fluid Check........................................323
Washer Fluid Check.....................................323
Fuel Filter
........................................................324
Changing the 12V Battery
..........................324
Checking the Wiper Blades.......................325
Changing the Wiper Blades
......................325
Adjusting the Headlamps
..........................326
Changing a Bulb
...........................................327
Bulb Specification Chart
.............................328
4
Continental (CPL) Canada/United States of America, enUSA, First Printing Table of Contents
Page 11 of 584
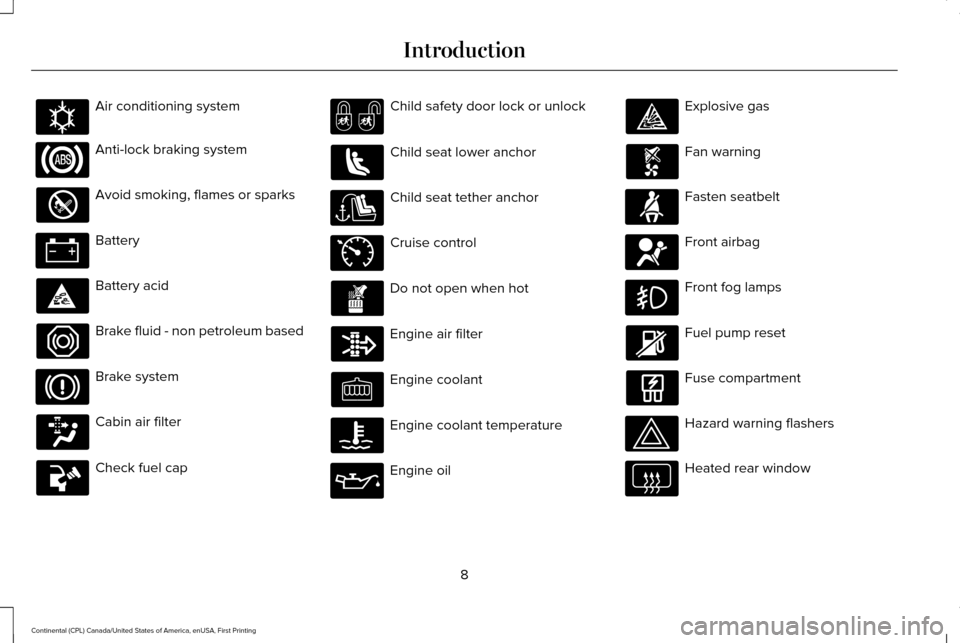
Air conditioning system
Anti-lock braking system
Avoid smoking, flames or sparks
Battery
Battery acid
Brake fluid - non petroleum based
Brake system
Cabin air filter
Check fuel cap Child safety door lock or unlock
Child seat lower anchor
Child seat tether anchor
Cruise control
Do not open when hot
Engine air filter
Engine coolant
Engine coolant temperature
Engine oil Explosive gas
Fan warning
Fasten seatbelt
Front airbag
Front fog lamps
Fuel pump reset
Fuse compartment
Hazard warning flashers
Heated rear window
8
Continental (CPL) Canada/United States of America, enUSA, First Printing IntroductionE162384 E71340
Page 67 of 584
Potential causes
Condition
· There are no MyKeys programmed to the vehicle. See Creating a
MyKey (page 61).
· An admin transmitter is present when you started your vehicle.
For vehicles with keyless start: No MyKey restrictions are available
when starting the vehicle. · There are no MyKeys programmed to the vehicle.
See Creating a
MyKey (page 61).
· The key or transmitter used to start the vehicle does not have admin
privileges.
I cannot clear the MyKeys.
· No MyKeys are created.
See Creating a MyKey (page 61).
· Purchase a new key or tranmitter from your authorized dealer.
I lost the only admin key.
· Program a spare key or transmitter. You may need to see your
authorized dealer.
See Passive Anti-Theft System (page 79).
I lost a key.
· The MyKey user is not using the MyKey.
MyKey distances do not accumulate.
· An admin key holder cleared the MyKeys and created new MyKeys.
· The key system has been reset.
64
Continental (CPL) Canada/United States of America, enUSA, First Printing MyKey™
Page 68 of 584
LOCKING AND UNLOCKING
Your vehicle has an intelligent electronically
controlled door system that is in constant
communication with overall vehicle systems.
When you lock your vehicle using the lock
switch on each door interior trim panel, or
by using the keyless entry keypad or the lock
sensor on each door exterior trim panel, the
exterior door handle switches will not release
the doors. This helps to secure your vehicle
and prevent unauthorized entry. Also, when
your vehicle reaches a speed greater than
12 mph (20 km/h) the exterior door handle
switches will not release the doors. A tone
may sound indicating the exterior door
handle switches will not release your door
and your vehicle is secure.
If the airbags deploy or the fuel pump shutoff
switch activates, all interior and exterior
unlock switches will not unlock your door for
six seconds. This helps to secure the doors
in the event of a crash. After six seconds, all
switches reset and you can open the doors
using the interior and exterior unlock
switches. Door Lock Indicator
An LED on each front door window trim
illuminates when you lock the doors. It
remains on for up to 10 minutes after you
switch the ignition off.
Door Lock Switch Inhibitor
When you electronically lock your vehicle,
the door lock switches and the interior
luggage compartment release switch do not
operate after 20 seconds. You must unlock
your vehicle with the remote control or
keyless entry keypad, or switch the ignition
on, to restore function to these switches. You
can switch this feature on or off in the
information display.
See General
Information (page 110).
Activating Intelligent Access
The intelligent access key must be within 3 ft
(1 m)
of the door or luggage compartment
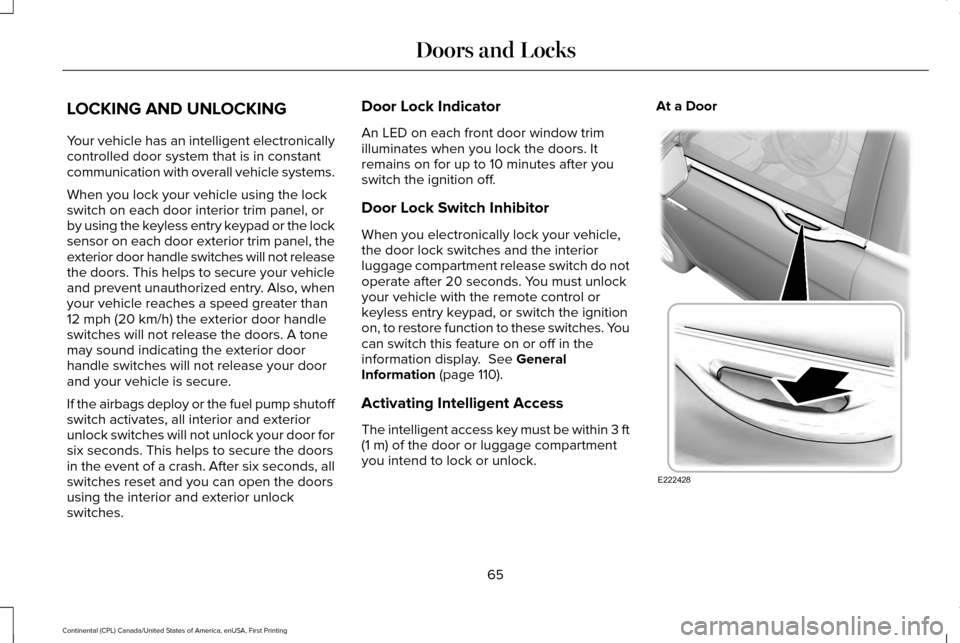
you intend to lock or unlock. At a Door
65
Continental (CPL) Canada/United States of America, enUSA, First Printing Doors and LocksE222428
Page 71 of 584
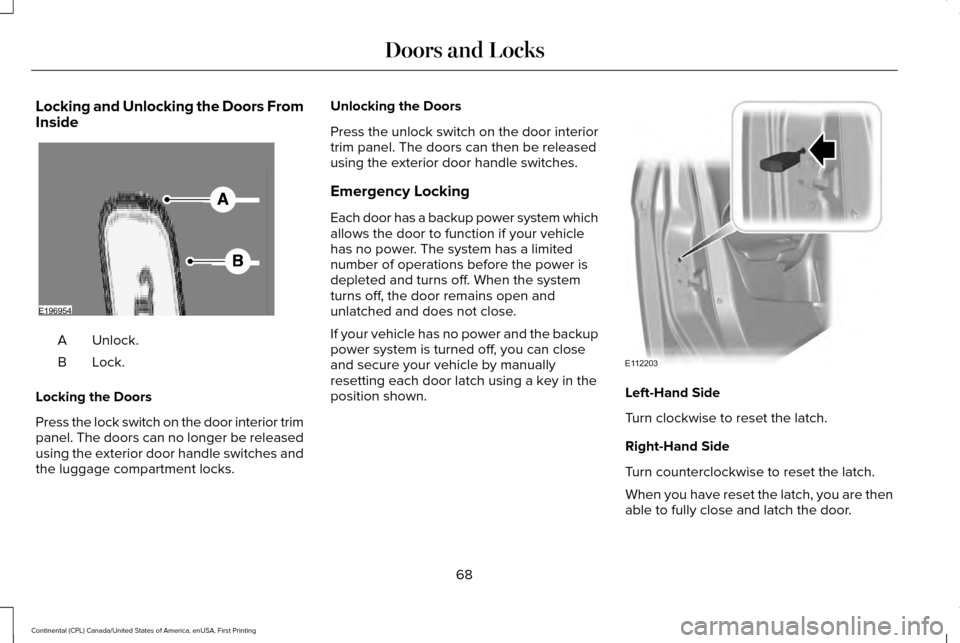
Locking and Unlocking the Doors From
Inside
Unlock.
A
Lock.B
Locking the Doors
Press the lock switch on the door interior trim
panel. The doors can no longer be released
using the exterior door handle switches and
the luggage compartment locks. Unlocking the Doors
Press the unlock switch on the door interior
trim panel. The doors can then be released
using the exterior door handle switches.
Emergency Locking
Each door has a backup power system which
allows the door to function if your vehicle
has no power. The system has a limited
number of operations before the power is
depleted and turns off. When the system
turns off, the door remains open and
unlatched and does not close.
If your vehicle has no power and the backup
power system is turned off, you can close
and secure your vehicle by manually
resetting each door latch using a key in the
position shown.
Left-Hand Side
Turn clockwise to reset the latch.
Right-Hand Side
Turn counterclockwise to reset the latch.
When you have reset the latch, you are then
able to fully close and latch the door.
68
Continental (CPL) Canada/United States of America, enUSA, First Printing Doors and LocksE196954 E112203
Page 77 of 584
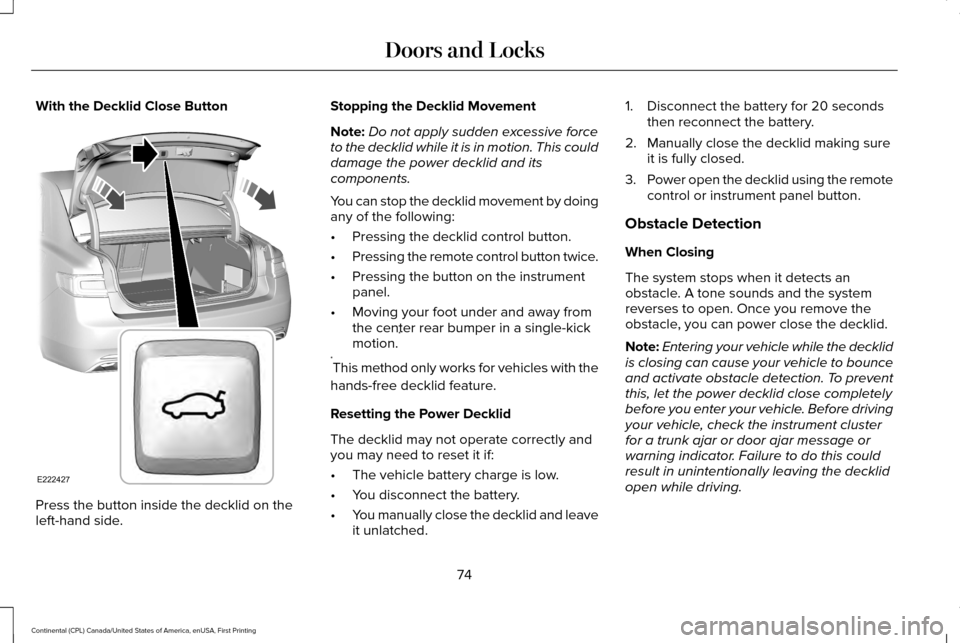
With the Decklid Close Button
Press the button inside the decklid on the
left-hand side. Stopping the Decklid Movement
Note:
Do not apply sudden excessive force
to the decklid while it is in motion. This could
damage the power decklid and its
components.
You can stop the decklid movement by doing
any of the following:
• Pressing the decklid control button.
• Pressing the remote control button twice.
• Pressing the button on the instrument
panel.
• Moving your foot under and away from
the center rear bumper in a single-kick
motion. *
* This method only works for vehicles with the
hands-free decklid feature.
Resetting the Power Decklid
The decklid may not operate correctly and
you may need to reset it if:
• The vehicle battery charge is low.
• You disconnect the battery.
• You manually close the decklid and leave
it unlatched. 1. Disconnect the battery for 20 seconds
then reconnect the battery.
2. Manually close the decklid making sure it is fully closed.
3. Power open the decklid using the remote
control or instrument panel button.
Obstacle Detection
When Closing
The system stops when it detects an
obstacle. A tone sounds and the system
reverses to open. Once you remove the
obstacle, you can power close the decklid.
Note: Entering your vehicle while the decklid
is closing can cause your vehicle to bounce
and activate obstacle detection. To prevent
this, let the power decklid close completely
before you enter your vehicle. Before driving
your vehicle, check the instrument cluster
for a trunk ajar or door ajar message or
warning indicator. Failure to do this could
result in unintentionally leaving the decklid
open while driving.
74
Continental (CPL) Canada/United States of America, enUSA, First Printing Doors and LocksE222427
Page 85 of 584
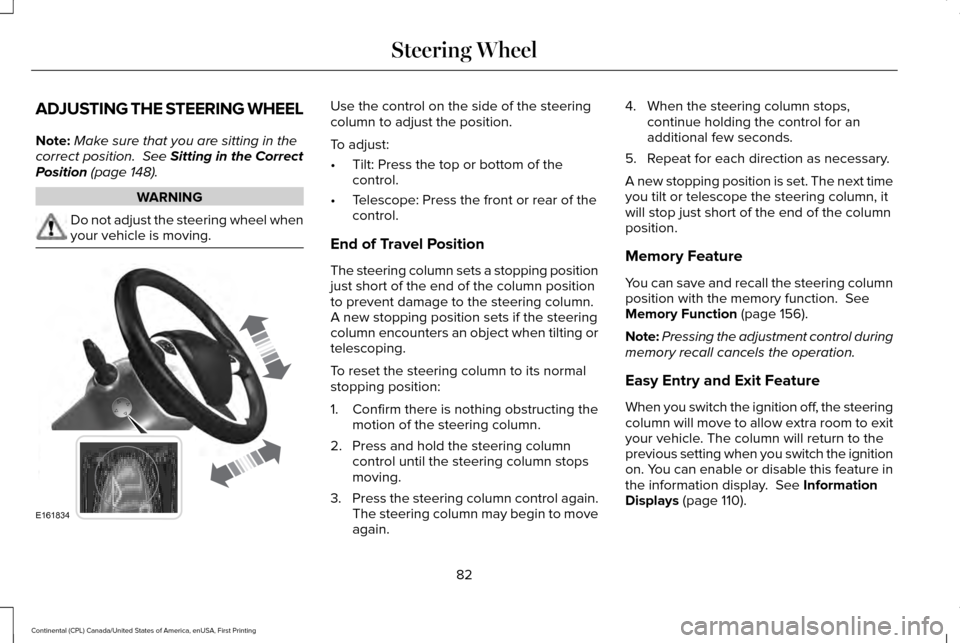
ADJUSTING THE STEERING WHEEL
Note:
Make sure that you are sitting in the
correct position. See Sitting in the Correct
Position (page 148). WARNING
Do not adjust the steering wheel when
your vehicle is moving. Use the control on the side of the steering
column to adjust the position.
To adjust:
•
Tilt: Press the top or bottom of the
control.
• Telescope: Press the front or rear of the
control.
End of Travel Position
The steering column sets a stopping position
just short of the end of the column position
to prevent damage to the steering column.
A new stopping position sets if the steering
column encounters an object when tilting or
telescoping.
To reset the steering column to its normal
stopping position:
1. Confirm there is nothing obstructing the motion of the steering column.
2. Press and hold the steering column control until the steering column stops
moving.
3. Press the steering column control again.
The steering column may begin to move
again. 4. When the steering column stops,
continue holding the control for an
additional few seconds.
5. Repeat for each direction as necessary.
A new stopping position is set. The next time
you tilt or telescope the steering column, it
will stop just short of the end of the column
position.
Memory Feature
You can save and recall the steering column
position with the memory function.
See
Memory Function (page 156).
Note: Pressing the adjustment control during
memory recall cancels the operation.
Easy Entry and Exit Feature
When you switch the ignition off, the steering
column will move to allow extra room to exit
your vehicle. The column will return to the
previous setting when you switch the ignition
on. You can enable or disable this feature in
the information display.
See Information
Displays (page 110).
82
Continental (CPL) Canada/United States of America, enUSA, First Printing Steering WheelE161834
Page 86 of 584
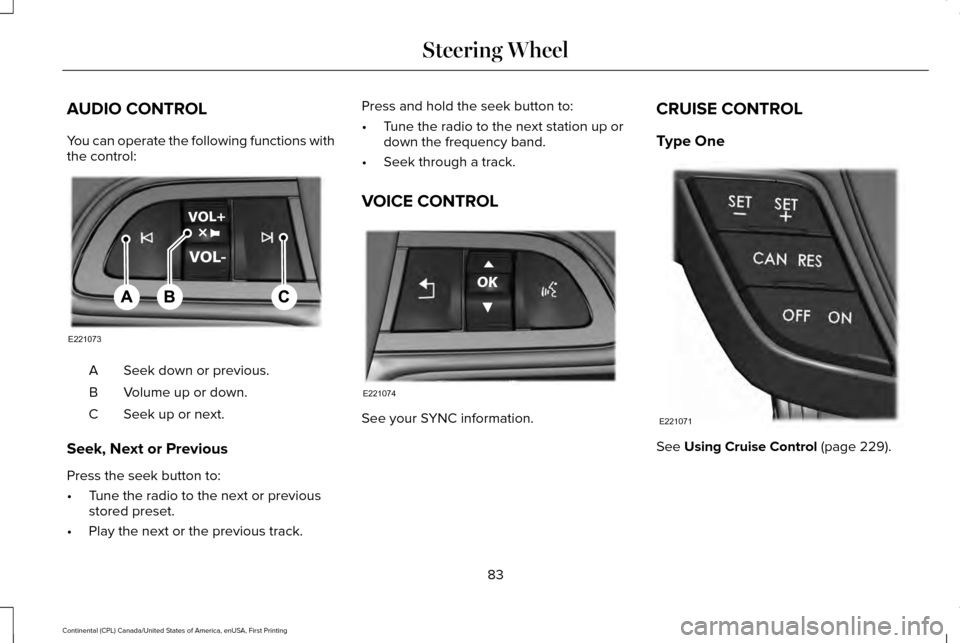
AUDIO CONTROL
You can operate the following functions with
the control:
Seek down or previous.
A
Volume up or down.
B
Seek up or next.
C
Seek, Next or Previous
Press the seek button to:
• Tune the radio to the next or previous
stored preset.
• Play the next or the previous track. Press and hold the seek button to:
•
Tune the radio to the next station up or
down the frequency band.
• Seek through a track.
VOICE CONTROL See your SYNC information.CRUISE CONTROL
Type One
See Using Cruise Control (page 229).
83
Continental (CPL) Canada/United States of America, enUSA, First Printing Steering WheelE221073 E221074 E221071
Page 102 of 584
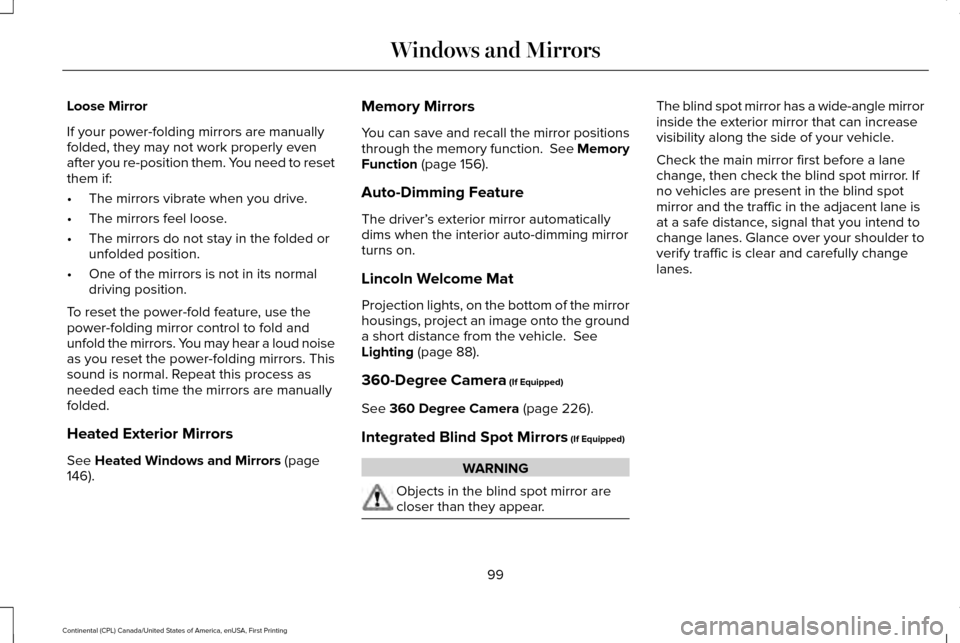
Loose Mirror
If your power-folding mirrors are manually
folded, they may not work properly even
after you re-position them. You need to reset
them if:
•
The mirrors vibrate when you drive.
• The mirrors feel loose.
• The mirrors do not stay in the folded or
unfolded position.
• One of the mirrors is not in its normal
driving position.
To reset the power-fold feature, use the
power-folding mirror control to fold and
unfold the mirrors. You may hear a loud noise
as you reset the power-folding mirrors. This
sound is normal. Repeat this process as
needed each time the mirrors are manually
folded.
Heated Exterior Mirrors
See Heated Windows and Mirrors (page
146). Memory Mirrors
You can save and recall the mirror positions
through the memory function. See Memory
Function
(page 156).
Auto-Dimming Feature
The driver’ s exterior mirror automatically
dims when the interior auto-dimming mirror
turns on.
Lincoln Welcome Mat
Projection lights, on the bottom of the mirror
housings, project an image onto the ground
a short distance from the vehicle.
See
Lighting (page 88).
360-Degree Camera
(If Equipped)
See
360 Degree Camera (page 226).
Integrated Blind Spot Mirrors
(If Equipped) WARNING
Objects in the blind spot mirror are
closer than they appear. The blind spot mirror has a wide-angle mirror
inside the exterior mirror that can increase
visibility along the side of your vehicle.
Check the main mirror first before a lane
change, then check the blind spot mirror. If
no vehicles are present in the blind spot
mirror and the traffic in the adjacent lane is
at a safe distance, signal that you intend to
change lanes. Glance over your shoulder to
verify traffic is clear and carefully change
lanes.
99
Continental (CPL) Canada/United States of America, enUSA, First Printing Windows and Mirrors
Page 117 of 584
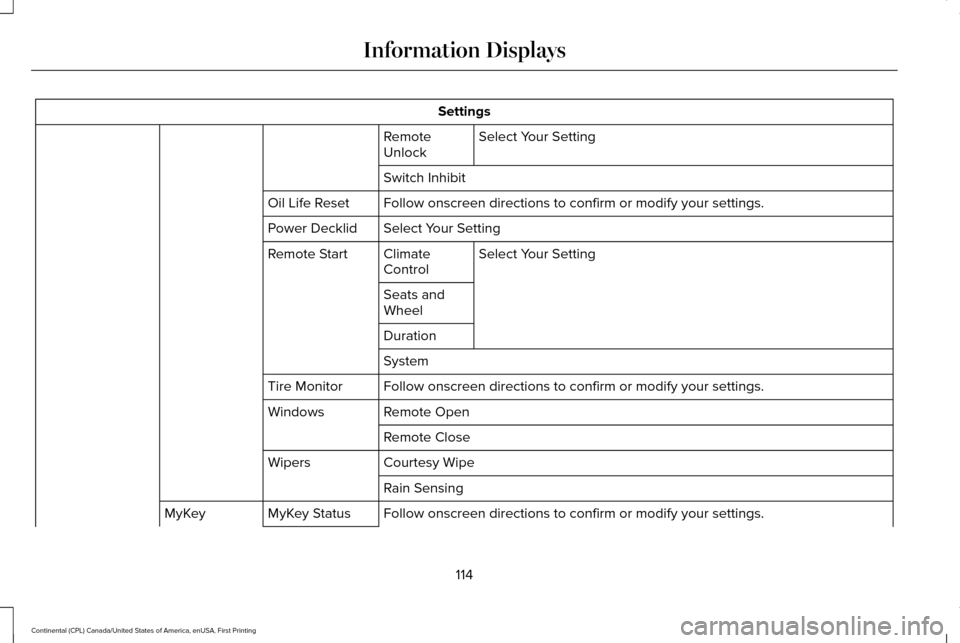
Settings
Select Your Setting
Remote
Unlock
Switch Inhibit
Follow onscreen directions to confirm or modify your settings.
Oil Life Reset
Select Your Setting
Power Decklid
Select Your Setting
Climate
Control
Remote Start
Seats and
Wheel
Duration
System
Follow onscreen directions to confirm or modify your settings.
Tire Monitor
Remote Open
Windows
Remote Close
Courtesy Wipe
Wipers
Rain Sensing
Follow onscreen directions to confirm or modify your settings.
MyKey Status
MyKey
114
Continental (CPL) Canada/United States of America, enUSA, First Printing Information Displays