wiper blades LINCOLN CONTINENTAL 2017 Owners Manual
[x] Cancel search | Manufacturer: LINCOLN, Model Year: 2017, Model line: CONTINENTAL, Model: LINCOLN CONTINENTAL 2017Pages: 584, PDF Size: 6.13 MB
Page 7 of 584
Steering...........................................................251
Pre-Collision Assist......................................253
Drive Control
.................................................256
Load Carrying
Load Limit.......................................................258
Towing
Towing a Trailer
.............................................263
Recommended Towing Weights..............264
Essential Towing Checks
...........................265
Towing the Vehicle on Four Wheels........267
Driving Hints
Breaking-In....................................................269
Economical Driving
......................................269
Driving Through Water...............................269
Floor Mats
......................................................270
Roadside Emergencies
Roadside Assistance
...................................272
Hazard Warning Flashers...........................273
Fuel Shutoff
....................................................273 Jump Starting the Vehicle..........................274
Post-Crash Alert System.............................277
Transporting the Vehicle.............................277
Customer Assistance
Getting the Services You Need
................279
In California (U.S. Only)
...............................280
The Better Business Bureau (BBB) Auto Line Program (U.S. Only).........................281
Utilizing the Mediation/Arbitration Program (Canada Only)
...........................................282
Getting Assistance Outside the U.S. and Canada.......................................................283
Ordering Additional Owner's Literature
....................................................284
Reporting Safety Defects (U.S. Only)......285
Reporting Safety Defects (Canada Only)............................................................285
Fuses
Fuse Specification Chart............................287
Changing a Fuse..........................................303 Maintenance
General Information
.....................................306
Opening and Closing the Hood...............306
Under Hood Overview - 2.7L EcoBoost™/ 3.7L..............................................................308
Under Hood Overview - 3.0L EcoBoost™...................................................310
Engine Oil Dipstick - 2.7L EcoBoost™.......312
Engine Oil Dipstick - 3.0L EcoBoost™.......312
Engine Oil Dipstick - 3.7L............................312
Engine Oil Check...........................................312
Oil Change Indicator Reset.........................314
Engine Coolant Check.................................314
Automatic Transmission Fluid Check
.......319
Brake Fluid Check........................................323
Washer Fluid Check.....................................323
Fuel Filter
........................................................324
Changing the 12V Battery
..........................324
Checking the Wiper Blades.......................325
Changing the Wiper Blades
......................325
Adjusting the Headlamps
..........................326
Changing a Bulb
...........................................327
Bulb Specification Chart
.............................328
4
Continental (CPL) Canada/United States of America, enUSA, First Printing Table of Contents
Page 8 of 584
Changing the Engine Air Filter - 3.7L......330
Changing the Engine Air Filter - 2.7L
EcoBoost™/3.0L EcoBoost™...................330
Vehicle Care
General Information.....................................332
Cleaning Products........................................332
Cleaning the Exterior...................................333
Waxing
.............................................................335
Cleaning the Engine....................................335
Cleaning the Windows and Wiper Blades.........................................................336
Cleaning the Interior
....................................336
Cleaning the Instrument Panel and Instrument Cluster Lens
.........................336
Cleaning Leather Seats...............................337
Repairing Minor Paint Damage.................338
Cleaning the Wheels
...................................338
Vehicle Storage............................................339
Wheels and Tires
Tire Care..........................................................341
Using Summer Tires....................................354
Using Snow Chains......................................355 Tire Pressure Monitoring System.............356
Changing a Road Wheel............................360
Technical Specifications
.............................366
Capacities and Specifications
Engine Specifications - 2.7L EcoBoost™..................................................368
Engine Specifications - 3.0L EcoBoost™..................................................369
Engine Specifications - 3.7L
........................371
Motorcraft Parts - 2.7L EcoBoost™............372
Motorcraft Parts - 3.0L EcoBoost™............373
Motorcraft Parts - 3.7L
.................................374
Vehicle Identification Number...................376
Vehicle Certification Label.........................376
Transmission Code Designation...............377
Capacities and Specifications - 2.7L EcoBoost™..................................................378
Capacities and Specifications - 3.0L EcoBoost™..................................................384
Capacities and Specifications - 3.7L........389
Audio System
General Information.....................................396 Audio Unit - Vehicles With: Premium AM/
FM/CD.........................................................397
USB Port
..........................................................401
Media Hub.......................................................401
SYNC™ 3
General Information
.....................................402
Home Screen.................................................418
Using Voice Recognition.............................419
Entertainment................................................430
Climate............................................................443
Phone..............................................................448
Navigation......................................................456
Apps
................................................................466
Settings...........................................................469
SYNC™ 3 Troubleshooting..........................486
Accessories
Accessories...................................................503
Lincoln Protect
Lincoln Protect
..............................................505
5
Continental (CPL) Canada/United States of America, enUSA, First Printing Table of Contents
Page 88 of 584
WINDSHIELD WIPERS
Note:
Fully defrost the windshield before
you switch the windshield wipers on.
Note: If streaks or smears appear on the
windshield, clean the windshield and the
wiper blades. See Checking the Wiper
Blades (page 325). If that does not resolve
the issue, install new wiper blades. See
Changing the Wiper Blades (page 325).
Note: Do not operate the wipers on a dry
windshield. This may scratch the glass,
damage the wiper blades or cause the wiper
motor to burn out. Always use the windshield
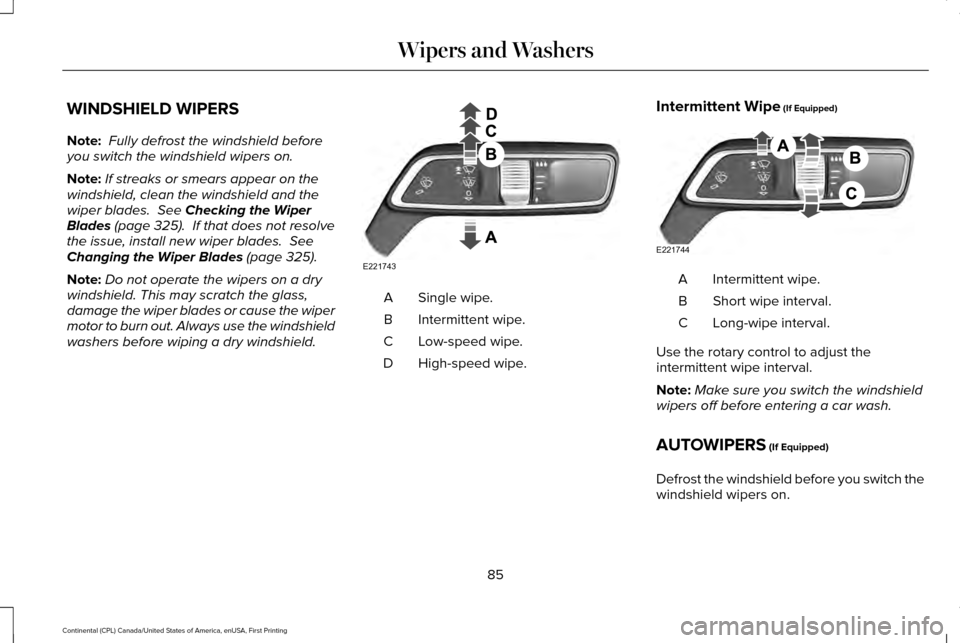
washers before wiping a dry windshield. Single wipe.
A
Intermittent wipe.
B
Low-speed wipe.
C
High-speed wipe.
D Intermittent Wipe
(If Equipped) Intermittent wipe.
A
Short wipe interval.
B
Long-wipe interval.
C
Use the rotary control to adjust the
intermittent wipe interval.
Note: Make sure you switch the windshield
wipers off before entering a car wash.
AUTOWIPERS
(If Equipped)
Defrost the windshield before you switch the
windshield wipers on.
85
Continental (CPL) Canada/United States of America, enUSA, First Printing Wipers and WashersE221743 E221744
Page 89 of 584
Do not operate the windshield wipers on a
dry windshield. This may scratch the glass,
damage the wiper blades or cause the wiper
motor to overheat. Always use the windshield
washers before you switch the windshield
wipers on.
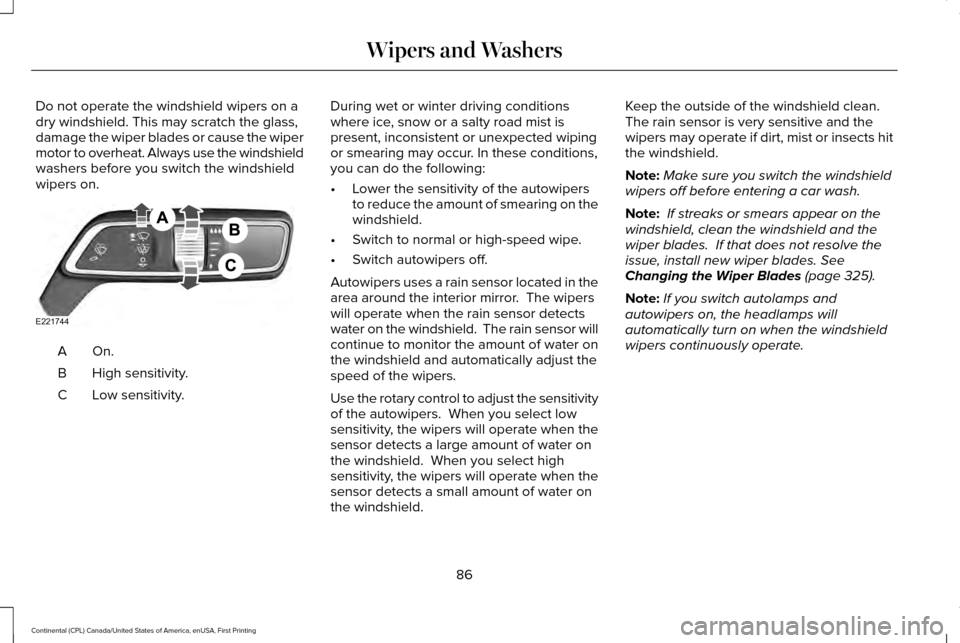
On.A
High sensitivity.
B
Low sensitivity.
C During wet or winter driving conditions
where ice, snow or a salty road mist is
present, inconsistent or unexpected wiping
or smearing may occur. In these conditions,
you can do the following:
•
Lower the sensitivity of the autowipers
to reduce the amount of smearing on the
windshield.
• Switch to normal or high-speed wipe.
• Switch autowipers off.
Autowipers uses a rain sensor located in the
area around the interior mirror. The wipers
will operate when the rain sensor detects
water on the windshield. The rain sensor will
continue to monitor the amount of water on
the windshield and automatically adjust the
speed of the wipers.
Use the rotary control to adjust the sensitivity
of the autowipers. When you select low
sensitivity, the wipers will operate when the
sensor detects a large amount of water on
the windshield. When you select high
sensitivity, the wipers will operate when the
sensor detects a small amount of water on
the windshield. Keep the outside of the windshield clean.
The rain sensor is very sensitive and the
wipers may operate if dirt, mist or insects hit
the windshield.
Note:
Make sure you switch the windshield
wipers off before entering a car wash.
Note: If streaks or smears appear on the
windshield, clean the windshield and the
wiper blades. If that does not resolve the
issue, install new wiper blades. See
Changing the Wiper Blades (page 325).
Note: If you switch autolamps and
autowipers on, the headlamps will
automatically turn on when the windshield
wipers continuously operate.
86
Continental (CPL) Canada/United States of America, enUSA, First Printing Wipers and WashersE221744
Page 149 of 584
Temperature control: Controls the temperature of the air circulated in the rear of your vehi\
cle. Turn to increase or decrease the
temperature.
E
Ventilated seats:
Press to switch the ventilated seats on and off. See Seats (page 148).
F
Power:
Press to switch the rear system on and off.
G
Note:
The rear climate system turns off automatically whenever max defrost is\
switched on, and turns back on when max defrost
is switched off. You can manually switch on the rear system with max defrost on.
Rear control lock:
When illuminated, you can only operate the rear passenger settings thro\
ugh the front controls.
H
Note:
The indicator briefly illuminates if you try to use the rear climate sy\
stem when the controls are locked.
HEATED WINDOWS AND MIRRORS
Note: Make sure the engine is running
before operating the heated windows.
Note: Depending on your remote start
settings, the heated windows, mirrors and
wipers may remain on after remote starting
the vehicle. Heated Rear Window Press the button to clear the
heated rear window of thin ice and
fog. The heated rear window will
automatically turn off after a short period of
time. Press the button again to switch it off.
Note: An indicator on the button illuminates
when active.
Note: Do not use razor blades or other
sharp objects to clean or remove decals from
the inside of the heated rear window. The
vehicle warranty does not cover damage
caused to the heated rear window grid lines. Heated Exterior Mirrors
(If Equipped)
When you switch the heated rear window
on, the heated exterior mirrors will
automatically turn on.
Note: Do not remove ice from the mirrors
with a scraper or adjust the mirror glass
when it is frozen in place.
Note: Do not clean the mirror housing or
glass with harsh abrasives, fuel or other
petroleum-based cleaning products.
146
Continental (CPL) Canada/United States of America, enUSA, First Printing Climate ControlE184884
Page 326 of 584
BRAKE FLUID CHECK
WARNINGS
Do not use any fluid other than the
recommended brake fluid as this will
reduce brake efficiency. Use of incorrect fluid
could result in the loss of vehicle control,
serious personal injury or death. Only use brake fluid from a sealed
container. Contamination with dirt,
water, petroleum products or other materials
may result in brake system damage or failure.
Failure to adhere to this warning could result
in the loss of vehicle control, serious
personal injury or death. Do not allow the fluid to touch your
skin or eyes. If this happens, rinse the
affected areas immediately with plenty of
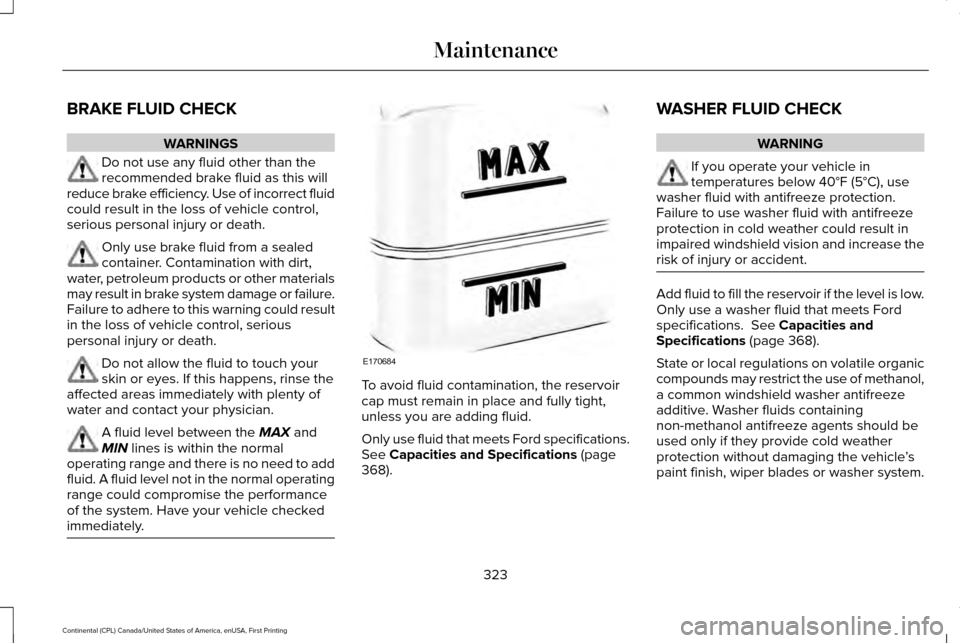
water and contact your physician. A fluid level between the MAX and
MIN lines is within the normal
operating range and there is no need to add
fluid. A fluid level not in the normal operating
range could compromise the performance
of the system. Have your vehicle checked
immediately. To avoid fluid contamination, the reservoir
cap must remain in place and fully tight,
unless you are adding fluid.
Only use fluid that meets Ford specifications.
See Capacities and Specifications (page
368). WASHER FLUID CHECK WARNING
If you operate your vehicle in
temperatures below 40°F (5°C), use
washer fluid with antifreeze protection.
Failure to use washer fluid with antifreeze
protection in cold weather could result in
impaired windshield vision and increase the
risk of injury or accident. Add fluid to fill the reservoir if the level is low.
Only use a washer fluid that meets Ford
specifications.
See Capacities and
Specifications (page 368).
State or local regulations on volatile organic
compounds may restrict the use of methanol,
a common windshield washer antifreeze
additive. Washer fluids containing
non-methanol antifreeze agents should be
used only if they provide cold weather
protection without damaging the vehicle ’s
paint finish, wiper blades or washer system.
323
Continental (CPL) Canada/United States of America, enUSA, First Printing MaintenanceE170684
Page 328 of 584
performance of the engine. The clock and
radio station presets are also maintained in
memory by power from the low-voltage
battery. These settings are erased when a
technician disconnects and connects the
low-voltage battery.
To restore the settings, do the following:
Note:
Until you switch the ignition to the on
position, you will receive a message in your
information display stating that your vehicle
is not in park.
1. Apply the parking brake.
2. Shift into park (P) or neutral (N).
3. Switch off all accessories.
4. Press the brake pedal and start your vehicle.
5. Run the engine until it reaches normal operating temperature. While the engine
is warming up, complete the following:
Reset the clock. See Audio System
(page 396). Reset the power windows
bounce-back feature. See Windows and
Mirrors
(page 96). Reset the radio station
presets. See Audio System (page 396). 6. Allow the engine to idle for at least one
minute.
7. Drive the vehicle at least 10 mi (16 km) to
completely relearn the idle trim and fuel
trim strategy.
Note: If you do not allow the engine to
relearn the idle and fuel trim strategy, the
idle quality of your vehicle may be adversely
affected until the engine computer
eventually relearns the idle trim and fuel trim
strategy.
Note: Certain features may not operate if
the battery monitor system is not reset with
a scan tool following a jump start or battery
replacement. Normal electrical accessory
operation should resume after your vehicle
is left undisturbed for 8 hours.
Make sure that you dispose of old batteries
in an environmentally friendly way. Seek
advice from your local authority about
recycling old batteries.
If storing your vehicle for more than 30 days
without recharging the battery, we
recommend that you disconnect the battery
cables to maintain battery charge for quick
starting. CHECKING THE WIPER BLADES
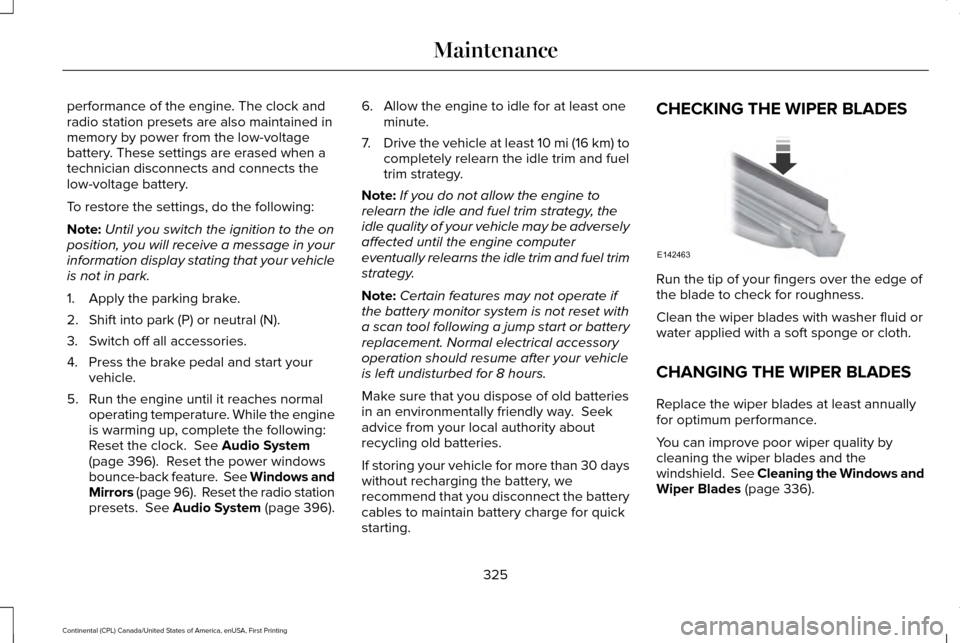
Run the tip of your fingers over the edge of
the blade to check for roughness.
Clean the wiper blades with washer fluid or
water applied with a soft sponge or cloth.
CHANGING THE WIPER BLADES
Replace the wiper blades at least annually
for optimum performance.
You can improve poor wiper quality by
cleaning the wiper blades and the
windshield. See Cleaning the Windows and
Wiper Blades (page 336).
325
Continental (CPL) Canada/United States of America, enUSA, First Printing MaintenanceE142463
Page 329 of 584
Changing the Windshield Wiper Blades
Note:
Do not hold the wiper blade when
lifting the wiper arm.
Note: Make sure that the wiper arm does
not spring back against the glass when the
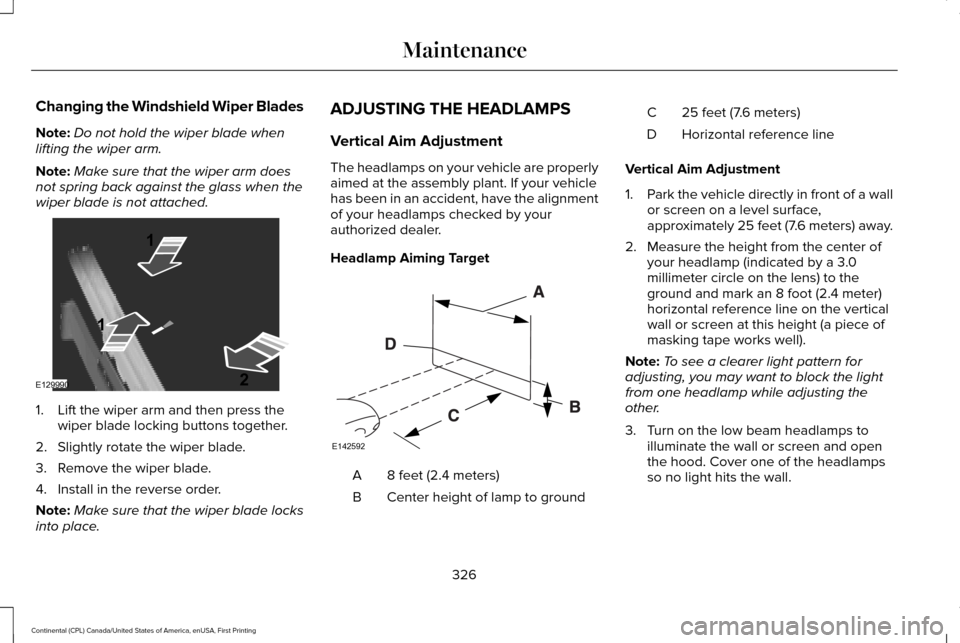
wiper blade is not attached. 1. Lift the wiper arm and then press the
wiper blade locking buttons together.
2. Slightly rotate the wiper blade.
3. Remove the wiper blade.
4. Install in the reverse order.
Note: Make sure that the wiper blade locks
into place. ADJUSTING THE HEADLAMPS
Vertical Aim Adjustment
The headlamps on your vehicle are properly
aimed at the assembly plant. If your vehicle
has been in an accident, have the alignment
of your headlamps checked by your
authorized dealer.
Headlamp Aiming Target
8 feet (2.4 meters)
A
Center height of lamp to ground
B 25 feet (7.6 meters)
C
Horizontal reference line
D
Vertical Aim Adjustment
1. Park the vehicle directly in front of a wall
or screen on a level surface,
approximately 25 feet (7.6 meters) away.
2. Measure the height from the center of your headlamp (indicated by a 3.0
millimeter circle on the lens) to the
ground and mark an 8 foot (2.4 meter)
horizontal reference line on the vertical
wall or screen at this height (a piece of
masking tape works well).
Note: To see a clearer light pattern for
adjusting, you may want to block the light
from one headlamp while adjusting the
other.
3. Turn on the low beam headlamps to illuminate the wall or screen and open
the hood. Cover one of the headlamps
so no light hits the wall.
326
Continental (CPL) Canada/United States of America, enUSA, First Printing MaintenanceE129990
1
1 2 E142592
Page 339 of 584
CLEANING THE WINDOWS AND
WIPER BLADES
Car wash chemicals and environmental
fallout can result in windshield and wiper
blade contamination. Dirty windshield and
wipers will result in poor windshield wiper
operation. Keep the windshield and wiper
blades clean to maintain windshield wiper
performance.
To clean the windshield and wiper blades:
•
Clean the windshield with a non-abrasive
glass cleaner. When cleaning the interior
of the windshield, avoid getting any glass
cleaner on the instrument panel or door
panels. Wipe any glass cleaner off these
surfaces immediately.
• For windshields contaminated with tree
sap, chemicals, wax or bugs, clean the
entire windshield using steel wool (no
greater than 0000 grade) in a circular
motion and rinse with water.
• Clean the wiper blades with isopropyl
rubbing alcohol or windshield washer
concentrate. Note:
Do not use razor blades or other
sharp objects to clean or remove decals from
the inside of the heated rear window. The
vehicle warranty does not cover damage
caused to the heated rear window grid lines.
CLEANING THE INTERIOR WARNINGS
Do not use cleaning solvents, bleach
or dye on the vehicle
’s safety belts, as
these actions may weaken the belt webbing. On vehicles equipped with
seat-mounted airbags, do not use
chemical solvents or strong detergents. Such
products could contaminate the side airbag
system and affect performance of the side
airbag in a collision. For fabric, carpets, cloth seats, safety belts
and seats equipped with side airbags:
•
Remove dust and loose dirt with a
vacuum cleaner.
• Remove light stains and soil with
Motorcraft Professional Strength Carpet
& Upholstery Cleaner. •
If grease or tar is present on the material,
spot-clean the area first with Motorcraft
Spot and Stain Remover. In Canada, use
Motorcraft Multi-Purpose Cleaner.
• If a ring forms on the fabric after spot
cleaning, clean the entire area
immediately (but do not oversaturate) or
the ring will set.
• Do not use household cleaning products
or glass cleaners, which can stain and
discolor the fabric and affect the flame
retardant abilities of the seat materials.
CLEANING THE INSTRUMENT
PANEL AND INSTRUMENT
CLUSTER LENS WARNING
Do not use chemical solvents or strong
detergents when cleaning the steering
wheel or instrument panel to avoid
contamination of the airbag system. 336
Continental (CPL) Canada/United States of America, enUSA, First Printing Vehicle Care
Page 509 of 584
Less Cost to Properly Maintain Your Vehicle
Lincoln Protect also offers a Premium
Maintenance Plan that covers all scheduled
maintenance, and selected wear items. The
coverage is prepaid, so you never have to
worry about the cost of your vehicle
’s
maintenance.
Covered maintenance includes:
• Windshield wiper blades.
• Spark plugs.
• The clutch disc.
• Brake pads and linings.
• Shock absorbers and struts.
• Engine cooling hoses, clamps and
o-rings.
• Engine belts.
• Diesel exhaust fluid replenishment. Interest Free Finance Options
Just a 10% down payment will provide you
with an affordable, no interest, no fee
payment program allowing you all the
security and benefits Lincoln Protect
Extended Service Plan has to offer while
paying over time. You are pre-approved with
no credit check or hassles. To learn more,
call our Lincoln Protect Extended Service
Plan specialists at 800-367-3377.
Complete the information below and mail to:
Lincoln Protect Extended Service Plan
P.O. Box 321067
Detroit, MI 48232
Lincoln Protect (CANADA ONLY)
You can get more protection for your vehicle
by purchasing a Lincoln Protect Extended
Service Plan. Lincoln Protect Extended
Service Plan is the only service contract
backed by Lincoln Motor Company of
Canada, Limited. Depending on the plan you
purchase, Lincoln Extended Service Plan
provides benefits such as: •
Rental reimbursement.
• Coverage for certain maintenance and
wear items.
• Protection against repair costs after your
New Vehicle Limited Warranty Coverage
expires.
• Roadside Assistance benefits.
There are several Lincoln Protect Extended
Service Plans available in various time,
distance and deductible combinations. Each
plan is tailored to fit your own driving needs,
including reimbursement for towing and
rental. When you purchase Lincoln Protect
Extended Service Plan, you receive added
peace-of-mind protection throughout
Canada, the United States and Mexico,
provided by a network of participating
authorized Lincoln Motor Company dealers.
Note: Repairs performed outside of Canada,
the United States and Mexico are not eligible
for Lincoln Protect Extended Service Plan
coverage.
506
Continental (CPL) Canada/United States of America, enUSA, First Printing Lincoln Protect