sensor LINCOLN CONTINENTAL 2019 User Guide
[x] Cancel search | Manufacturer: LINCOLN, Model Year: 2019, Model line: CONTINENTAL, Model: LINCOLN CONTINENTAL 2019Pages: 627, PDF Size: 6.39 MB
Page 71 of 627
LOCKING AND UNLOCKING
Your vehicle has an intelligent electronically
controlled door system that is in constant
communication with overall vehicle systems.
When you lock your vehicle using the lock
switch on each door interior trim panel, or
by using the keyless entry keypad or the lock
sensor on each door exterior trim panel, the
exterior door handle switches do not release
the doors. This helps to secure your vehicle
and prevent unauthorized entry. Also, when
your vehicle reaches a speed greater than
12 mph (20 km/h) the exterior door handle
switches do not release the doors.
If the airbags deploy or the fuel pump shutoff
switch activates, all interior and exterior
unlock switches do not unlock your door for
six seconds. This helps to secure the doors
in the event of a crash. After six seconds, all
switches reset and you can open the doors
using the interior and exterior unlatch
switches. Door Lock Indicator
An LED on each front door window trim
illuminates when you lock the doors. It
remains on for 2 to 5 seconds after you
switch the ignition off.
Door Lock Switch Inhibitor
When you electronically lock your vehicle,
the door lock switches and the interior
luggage compartment release switch do not
operate after 20 seconds. You must unlock
your vehicle with the remote control or
keyless entry keypad, or switch the ignition
on, to restore function to these switches.
You can switch this feature on or off in the
information display.
See General
Information (page 112).
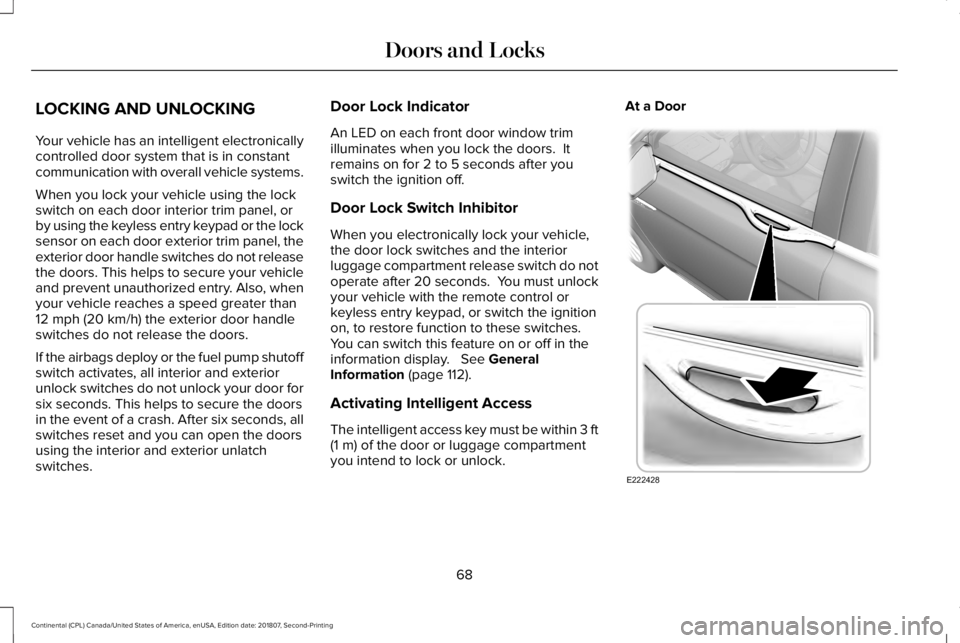
Activating Intelligent Access
The intelligent access key must be within 3 ft
(1 m)
of the door or luggage compartment
you intend to lock or unlock. At a Door
68
Continental (CPL) Canada/United States of America, enUSA, Edition date: 201807, Second-Printing Doors and LocksE222428
Page 72 of 627
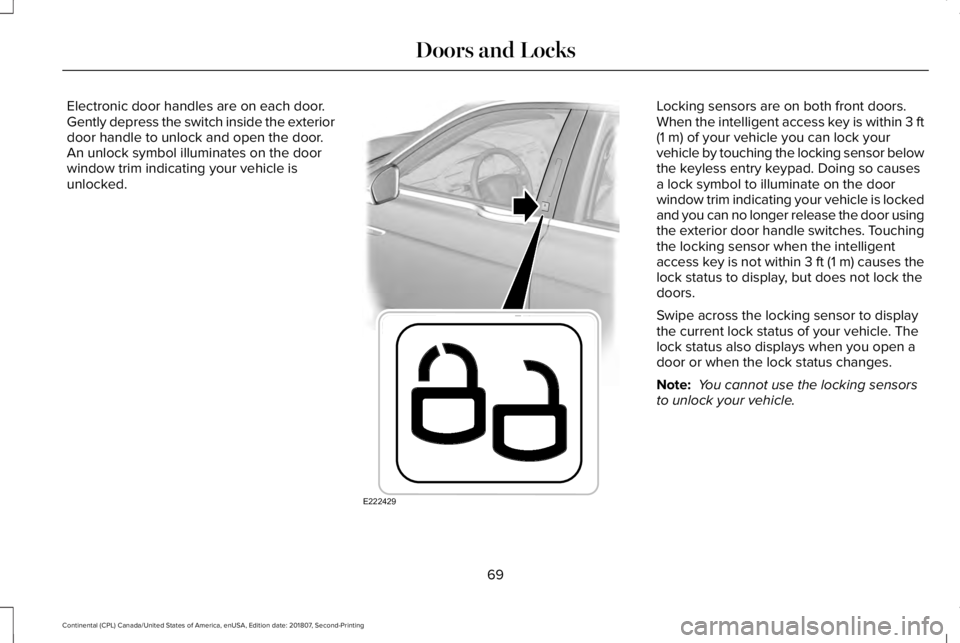
Electronic door handles are on each door.
Gently depress the switch inside the exterior
door handle to unlock and open the door.
An unlock symbol illuminates on the door
window trim indicating your vehicle is
unlocked. Locking sensors are on both front doors.
When the intelligent access key is within 3 ft
(1 m) of your vehicle you can lock your
vehicle by touching the locking sensor below
the keyless entry keypad. Doing so causes
a lock symbol to illuminate on the door
window trim indicating your vehicle is locked
and you can no longer release the door using
the exterior door handle switches. Touching
the locking sensor when the intelligent
access key is not within 3 ft (1 m) causes the
lock status to display, but does not lock the
doors.
Swipe across the locking sensor to display
the current lock status of your vehicle. The
lock status also displays when you open a
door or when the lock status changes.
Note: You cannot use the locking sensors
to unlock your vehicle.
69
Continental (CPL) Canada/United States of America, enUSA, Edition date: 201807, Second-Printing Doors and LocksE222429
Page 75 of 627
Note:
You cannot open the door again until
the vehicle battery is fully charged and
operational.
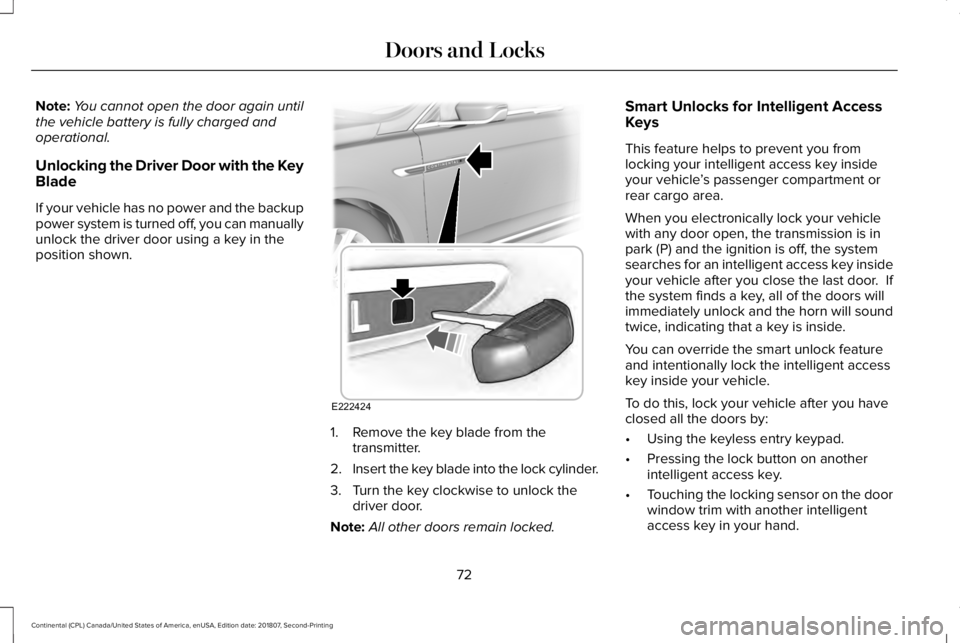
Unlocking the Driver Door with the Key
Blade
If your vehicle has no power and the backup
power system is turned off, you can manually
unlock the driver door using a key in the
position shown. 1. Remove the key blade from the
transmitter.
2. Insert the key blade into the lock cylinder.
3. Turn the key clockwise to unlock the driver door.
Note: All other doors remain locked. Smart Unlocks for Intelligent Access
Keys
This feature helps to prevent you from
locking your intelligent access key inside
your vehicle
’s passenger compartment or
rear cargo area.
When you electronically lock your vehicle
with any door open, the transmission is in
park (P) and the ignition is off, the system
searches for an intelligent access key inside
your vehicle after you close the last door. If
the system finds a key, all of the doors will
immediately unlock and the horn will sound
twice, indicating that a key is inside.
You can override the smart unlock feature
and intentionally lock the intelligent access
key inside your vehicle.
To do this, lock your vehicle after you have
closed all the doors by:
• Using the keyless entry keypad.
• Pressing the lock button on another
intelligent access key.
• Touching the locking sensor on the door
window trim with another intelligent
access key in your hand.
72
Continental (CPL) Canada/United States of America, enUSA, Edition date: 201807, Second-Printing Doors and LocksE222424
Page 82 of 627
1.
Move your foot under and away from the
rear bumper detection area in a
single-kick motion. Do not move your
foot sideways or the sensors may not
detect the motion.
2. The decklid opens or closes.
Note: Allow the power system to open the
decklid. Manually pushing or pulling the
decklid may activate the system’ s obstacle
detection feature and stop the power
operation or reverse its direction.
Note: Splashing water may cause the
hands-free decklid to open. Keep the
intelligent access key away from the rear
bumper detection area when washing your
vehicle.
SOFT CLOSING DOOR
Gently close the door until it fully latches.
The system automatically closes the door,
making sure it is fully secure.
Note: The system does not work if the
vehicle battery charge is low. Note:
The system is limited to 25 cycles
between each ignition cycle. This is to
prevent the vehicle battery from losing
charge.
Note: You can override soft close by fully
closing the door manually.
KEYLESS ENTRY
SECURICODE™ Keyless Entry Keypad
The keypad is near the driver window. It
illuminates when touched.
Note: If you enter your entry code too fast
on the keypad, the unlock function may not
work. Enter your entry code again more
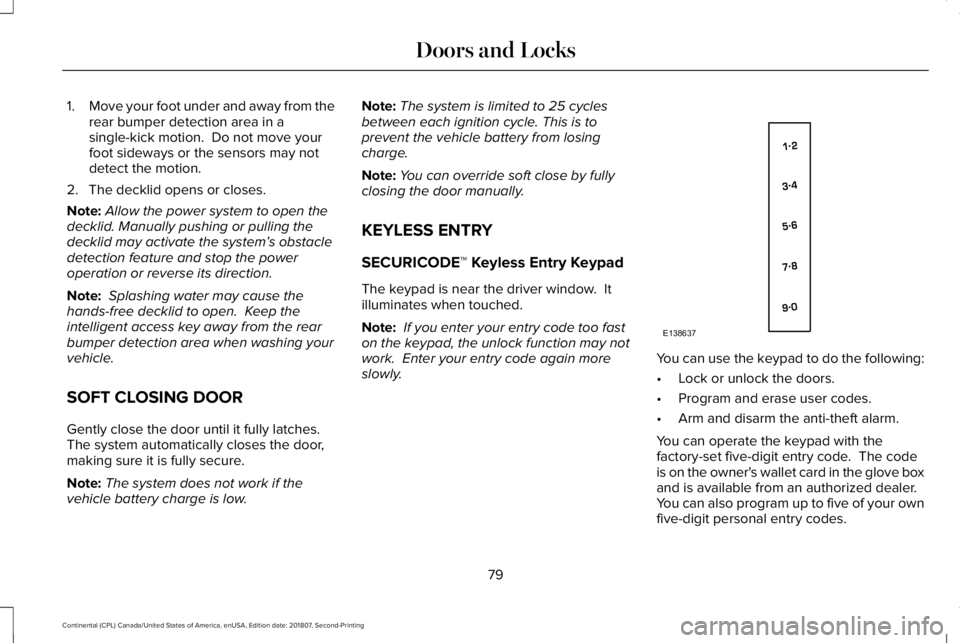
slowly. You can use the keypad to do the following:
•
Lock or unlock the doors.
• Program and erase user codes.
• Arm and disarm the anti-theft alarm.
You can operate the keypad with the
factory-set five-digit entry code. The code
is on the owner's wallet card in the glove box
and is available from an authorized dealer.
You can also program up to five of your own
five-digit personal entry codes.
79
Continental (CPL) Canada/United States of America, enUSA, Edition date: 201807, Second-Printing Doors and LocksE138637
Page 91 of 627
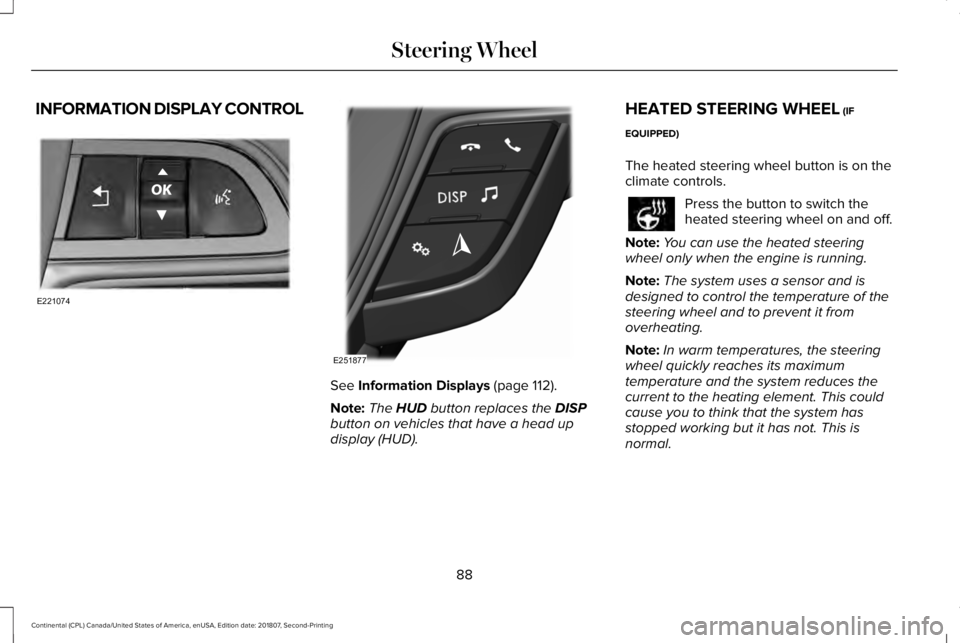
INFORMATION DISPLAY CONTROL
See Information Displays (page 112).
Note: The
HUD button replaces the DISP
button on vehicles that have a head up
display (HUD). HEATED STEERING WHEEL
(IF
EQUIPPED)
The heated steering wheel button is on the
climate controls. Press the button to switch the
heated steering wheel on and off.
Note: You can use the heated steering
wheel only when the engine is running.
Note: The system uses a sensor and is
designed to control the temperature of the
steering wheel and to prevent it from
overheating.
Note: In warm temperatures, the steering
wheel quickly reaches its maximum
temperature and the system reduces the
current to the heating element. This could
cause you to think that the system has
stopped working but it has not. This is
normal.
88
Continental (CPL) Canada/United States of America, enUSA, Edition date: 201807, Second-Printing Steering WheelE221074 E251877
Page 92 of 627
AUTOWIPERS
Wet or winter driving conditions with ice,
snow or salty road mist can cause
inconsistent and unexpected wiping or
smearing.
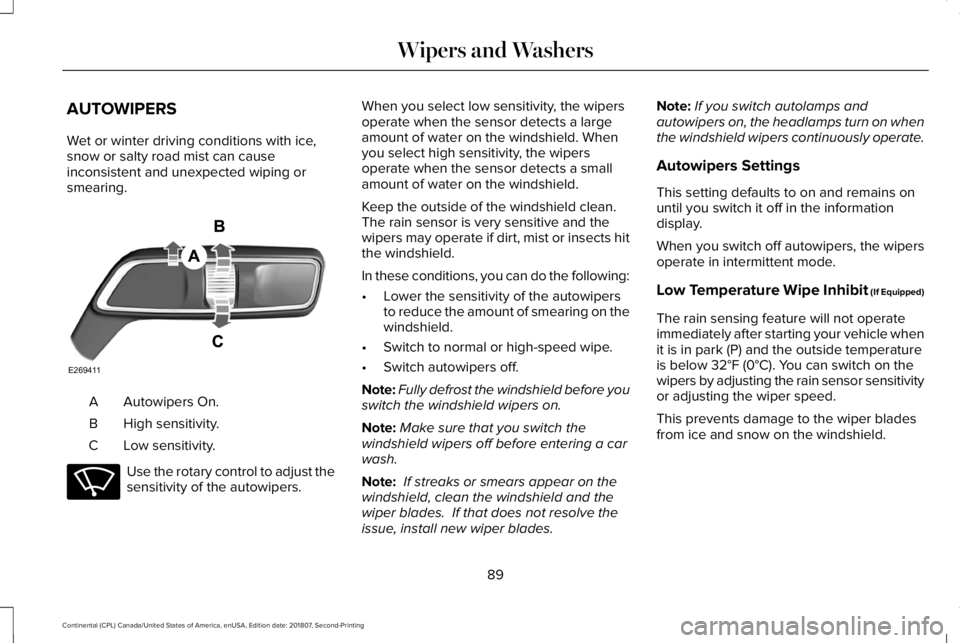
Autowipers On.
A
High sensitivity.
B
Low sensitivity.
C Use the rotary control to adjust the
sensitivity of the autowipers. When you select low sensitivity, the wipers
operate when the sensor detects a large
amount of water on the windshield. When
you select high sensitivity, the wipers
operate when the sensor detects a small
amount of water on the windshield.
Keep the outside of the windshield clean.
The rain sensor is very sensitive and the
wipers may operate if dirt, mist or insects hit
the windshield.
In these conditions, you can do the following:
•
Lower the sensitivity of the autowipers
to reduce the amount of smearing on the
windshield.
• Switch to normal or high-speed wipe.
• Switch autowipers off.
Note: Fully defrost the windshield before you
switch the windshield wipers on.
Note: Make sure that you switch the
windshield wipers off before entering a car
wash.
Note: If streaks or smears appear on the
windshield, clean the windshield and the
wiper blades. If that does not resolve the
issue, install new wiper blades. Note:
If you switch autolamps and
autowipers on, the headlamps turn on when
the windshield wipers continuously operate.
Autowipers Settings
This setting defaults to on and remains on
until you switch it off in the information
display.
When you switch off autowipers, the wipers
operate in intermittent mode.
Low Temperature Wipe Inhibit (If Equipped)
The rain sensing feature will not operate
immediately after starting your vehicle when
it is in park (P) and the outside temperature
is below
32°F (0°C). You can switch on the
wipers by adjusting the rain sensor sensitivity
or adjusting the wiper speed.
This prevents damage to the wiper blades
from ice and snow on the windshield.
89
Continental (CPL) Canada/United States of America, enUSA, Edition date: 201807, Second-Printing Wipers and WashersE269411 E270969
Page 97 of 627
Type One - Conventional (Non-
Configurable)
The daytime running lamps turn on when:
1. Switching the ignition on.
2. The transmission is not in park (P) for
vehicles with automatic transmissions, or
releasing the parking brake for vehicles
with manual transmissions.
3. The lighting control is in the off, parking lamp or autolamps positions.
4. The headlamps are off.
Type Two - Configurable
Switch the daytime running lamps on or off
using the information display. See
Information Displays (page 112).
The daytime running lamps turn on when:
1. The lamps are on in the information display.
2. Switching the ignition on.
3. The transmission is not in park (P) for vehicles with automatic transmissions, or
releasing the parking brake for vehicles
with manual transmissions. 4. The lighting control is in the autolamps
position.
5. The headlamps are off.
The other lighting control switch positions
do not turn on the daytime running lamps.
If the daytime running lamps are off in the
information display, the lamps stay off in all
switch positions.
AUTOMATIC HIGH BEAM
CONTROL WARNING:
The system does not
relieve you of your responsibility to drive
with due care and attention. You may need
to override the system if it does not turn
the high beams on or off. The system turns on high beams if it is dark
enough and no other traffic is present. If it
detects an approaching vehicle
’s headlamps
or tail lamps, or street lighting ahead, the
system turns off high beams before they can
distract other road users. Low beams remain
on.
Note: The system may not operate properly
if the sensor is blocked. Keep the windshield
free from obstruction or damage.
Note: The system may not operate properly
in cold or inclement conditions. You can
switch on the high beams by overriding the
system.
Note: If the system detects a blockage, for
example bird droppings, bug splatter, snow
or ice, the system goes into low beam mode
until you clear the blockage. A message may
appear in the information display if the
camera is blocked.
Note: Using much larger tires or equipping
vehicle accessories such as snowplows can
modify your vehicle's ride height and
degrade automatic high beam control
performance.
94
Continental (CPL) Canada/United States of America, enUSA, Edition date: 201807, Second-Printing Lighting
Page 98 of 627
A camera sensor, centrally mounted behind
the windshield of your vehicle, continuously
monitors conditions to turn the high beams
on and off.
Once the system is active, the high beams
turn on if:
•
The ambient light level is low enough.
• There is no traffic in front of your vehicle.
• The vehicle speed is greater than
approximately 32 mph (51 km/h).
The system turns the high beams off if:
• The ambient light level is high enough
that high beams are not required.
• The system detects an approaching
vehicle's headlamps or tail lamps.
• The vehicle speed falls below
approximately
27 mph (44 km/h).
• The system detects severe rain, snow or
fog.
• The camera is blocked. Switching the System On and Off
Switch the system on using the information
display.
See Information Displays (page
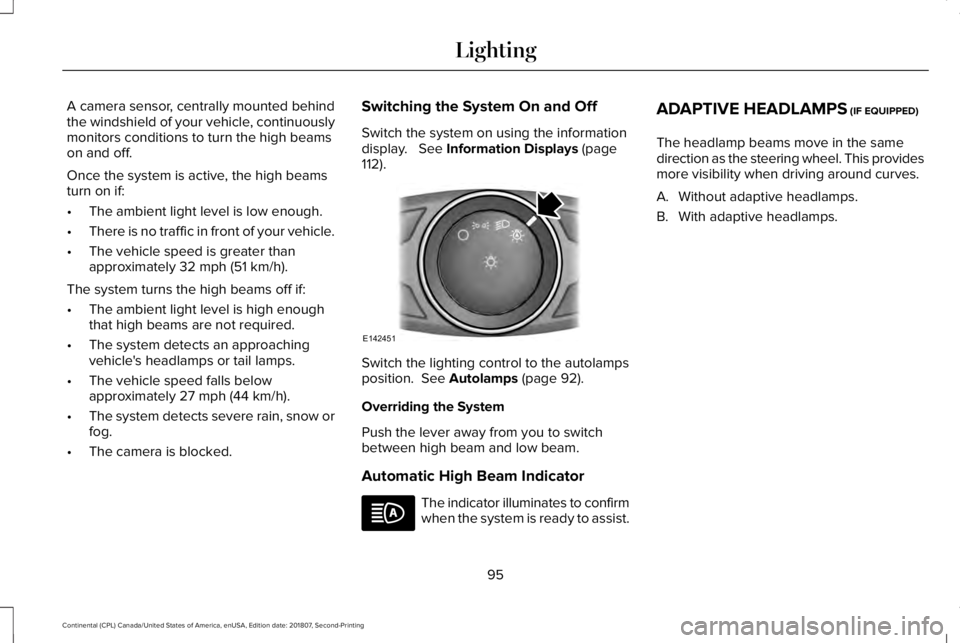
112). Switch the lighting control to the autolamps
position.
See Autolamps (page 92).
Overriding the System
Push the lever away from you to switch
between high beam and low beam.
Automatic High Beam Indicator The indicator illuminates to confirm
when the system is ready to assist.ADAPTIVE HEADLAMPS
(IF EQUIPPED)
The headlamp beams move in the same
direction as the steering wheel. This provides
more visibility when driving around curves.
A. Without adaptive headlamps.
B. With adaptive headlamps.
95
Continental (CPL) Canada/United States of America, enUSA, Edition date: 201807, Second-Printing LightingE142451
Page 106 of 627
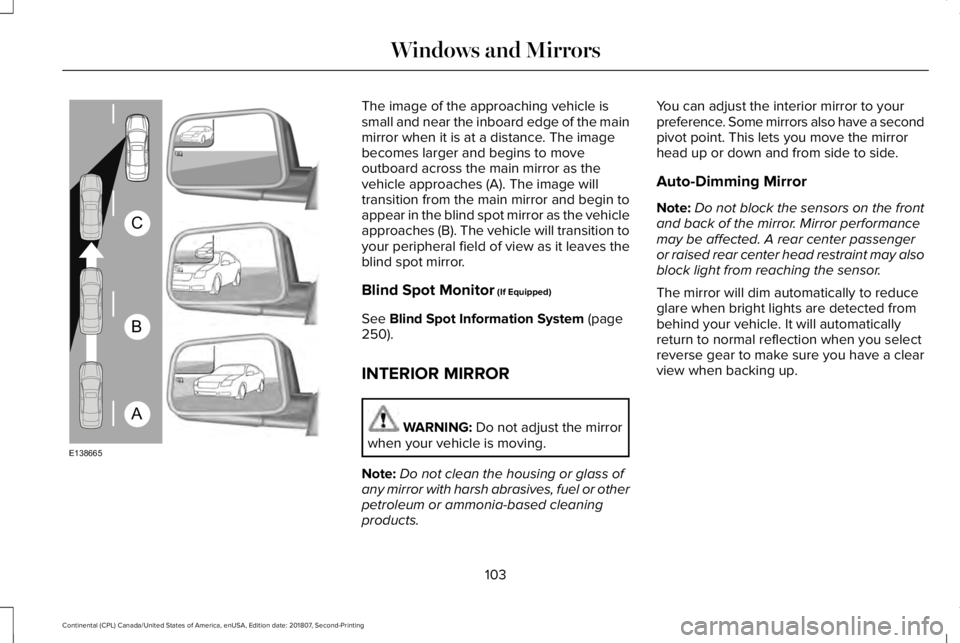
The image of the approaching vehicle is
small and near the inboard edge of the main
mirror when it is at a distance. The image
becomes larger and begins to move
outboard across the main mirror as the
vehicle approaches (A). The image will
transition from the main mirror and begin to
appear in the blind spot mirror as the vehicle
approaches (B). The vehicle will transition to
your peripheral field of view as it leaves the
blind spot mirror.
Blind Spot Monitor (If Equipped)
See
Blind Spot Information System (page
250).
INTERIOR MIRROR WARNING:
Do not adjust the mirror
when your vehicle is moving.
Note: Do not clean the housing or glass of
any mirror with harsh abrasives, fuel or other
petroleum or ammonia-based cleaning
products. You can adjust the interior mirror to your
preference. Some mirrors also have a second
pivot point. This lets you move the mirror
head up or down and from side to side.
Auto-Dimming Mirror
Note:
Do not block the sensors on the front
and back of the mirror. Mirror performance
may be affected. A rear center passenger
or raised rear center head restraint may also
block light from reaching the sensor.
The mirror will dim automatically to reduce
glare when bright lights are detected from
behind your vehicle. It will automatically
return to normal reflection when you select
reverse gear to make sure you have a clear
view when backing up.
103
Continental (CPL) Canada/United States of America, enUSA, Edition date: 201807, Second-Printing Windows and MirrorsA
B
C
E138665
Page 124 of 627
Active Park
Action
Message
The system has detected a fault that requires service. Have the system checked by an authorized dealer.
Active Park Fault
Adaptive Cruise Control Action
Message
A radar malfunction is preventing the adaptive cruise from engaging. Se\
e Using Adaptive Cruise Control (page 234).
Adaptive Cruise Malfunction
Front Sensor Not Aligned Conditions exist such that the adaptive cruise cannot function properly.
See Using Adaptive
Cruise Control (page 234).
Adaptive Cruise Not Available
The radar is blocked because of poor radar visibility due to bad weather or ice/mud/water \
infront of radar. Driver can typically clean the sensor to resolve.
See Using Adaptive Cruise
Control (page 234).
Adaptive Cruise Not Available Sensor
Blocked See Manual
Displayed when the automatic braking has been disabled.
Normal Cruise Active Automatic Braking
Turned Off
Displayed when the adaptive cruise has reinstated controls to the driver\
.
Adaptive Cruise - Driver Resume Control
Displays when the vehicle speed is too slow to activate the adaptive cru\
ise.
Adaptive Cruise Speed Too Low to
Activate
121
Continental (CPL) Canada/United States of America, enUSA, Edition date: 201807, Second-Printing Information Displays