manual transmission LINCOLN CONTINENTAL 2019 Owners Manual
[x] Cancel search | Manufacturer: LINCOLN, Model Year: 2019, Model line: CONTINENTAL, Model: LINCOLN CONTINENTAL 2019Pages: 627, PDF Size: 6.39 MB
Page 18 of 627
SPECIAL NOTICES
New Vehicle Limited Warranty
For a detailed description of what is covered
and what is not covered by your vehicle
’s
New Vehicle Limited Warranty, see the
Warranty Manual that is provided to you
along with your Owner’ s Manual.
Special Instructions
For your added safety, your vehicle is fitted
with sophisticated electronic controls. WARNING: You risk death or serious
injury to yourself and others if you do not
follow the instruction highlighted by the
warning symbol. Failure to follow the
specific warnings and instructions could
result in personal injury. WARNING: NEVER use a rearward
facing child restraint on a seat protected
by an ACTIVE AIRBAG in front of it, DEATH
or SERIOUS INJURY to the CHILD can
occur. On Board Diagnostics Data Link
Connector WARNING:
Do not connect wireless
plug-in devices to the data link connector.
Unauthorized third parties could gain
access to vehicle data and impair the
performance of safety related systems.
Only allow repair facilities that follow our
service and repair instructions to connect
their equipment to the data link connector.
Your vehicle has an OBD Data Link
Connector (DLC) that is used in conjunction
with a diagnostic scan tool for vehicle
diagnostics, repairs and reprogramming
services. Installing an aftermarket device that
uses the DLC during normal driving for
purposes such as remote insurance company
monitoring, transmission of vehicle data to
other devices or entities, or altering the
performance of the vehicle, may cause interference with or even damage to vehicle
systems. We do not recommend or endorse
the use of aftermarket plug-in devices unless
approved by Ford. The vehicle Warranty will
not cover damage caused by an aftermarket
plug-in device.
MOBILE COMMUNICATIONS
EQUIPMENT
WARNING:
Driving while distracted
can result in loss of vehicle control, crash
and injury. We strongly recommend that
you use extreme caution when using any
device that may take your focus off the
road. Your primary responsibility is the safe
operation of your vehicle. We recommend
against the use of any hand-held device
while driving and encourage the use of
voice-operated systems when possible.
Make sure you are aware of all applicable
local laws that may affect the use of
electronic devices while driving.
15
Continental (CPL) Canada/United States of America, enUSA, Edition date: 201807, Second-Printing Introduction
Page 75 of 627
Note:
You cannot open the door again until
the vehicle battery is fully charged and
operational.
Unlocking the Driver Door with the Key
Blade
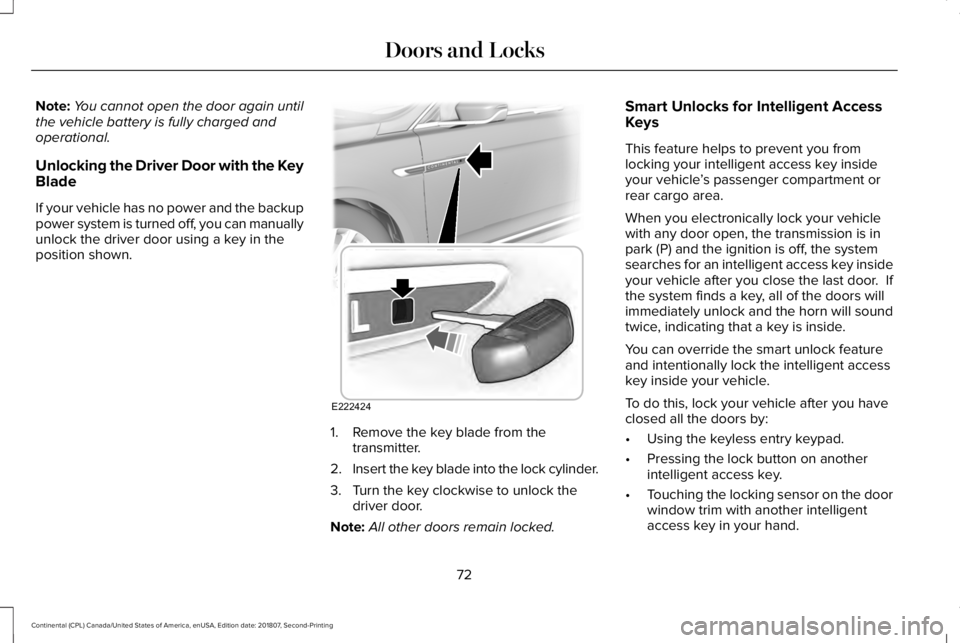
If your vehicle has no power and the backup
power system is turned off, you can manually
unlock the driver door using a key in the
position shown. 1. Remove the key blade from the
transmitter.
2. Insert the key blade into the lock cylinder.
3. Turn the key clockwise to unlock the driver door.
Note: All other doors remain locked. Smart Unlocks for Intelligent Access
Keys
This feature helps to prevent you from
locking your intelligent access key inside
your vehicle
’s passenger compartment or
rear cargo area.
When you electronically lock your vehicle
with any door open, the transmission is in
park (P) and the ignition is off, the system
searches for an intelligent access key inside
your vehicle after you close the last door. If
the system finds a key, all of the doors will
immediately unlock and the horn will sound
twice, indicating that a key is inside.
You can override the smart unlock feature
and intentionally lock the intelligent access
key inside your vehicle.
To do this, lock your vehicle after you have
closed all the doors by:
• Using the keyless entry keypad.
• Pressing the lock button on another
intelligent access key.
• Touching the locking sensor on the door
window trim with another intelligent
access key in your hand.
72
Continental (CPL) Canada/United States of America, enUSA, Edition date: 201807, Second-Printing Doors and LocksE222424
Page 97 of 627
Type One - Conventional (Non-
Configurable)
The daytime running lamps turn on when:
1. Switching the ignition on.
2. The transmission is not in park (P) for
vehicles with automatic transmissions, or
releasing the parking brake for vehicles
with manual transmissions.
3. The lighting control is in the off, parking lamp or autolamps positions.
4. The headlamps are off.
Type Two - Configurable
Switch the daytime running lamps on or off
using the information display. See
Information Displays (page 112).
The daytime running lamps turn on when:
1. The lamps are on in the information display.
2. Switching the ignition on.
3. The transmission is not in park (P) for vehicles with automatic transmissions, or
releasing the parking brake for vehicles
with manual transmissions. 4. The lighting control is in the autolamps
position.
5. The headlamps are off.
The other lighting control switch positions
do not turn on the daytime running lamps.
If the daytime running lamps are off in the
information display, the lamps stay off in all
switch positions.
AUTOMATIC HIGH BEAM
CONTROL WARNING:
The system does not
relieve you of your responsibility to drive
with due care and attention. You may need
to override the system if it does not turn
the high beams on or off. The system turns on high beams if it is dark
enough and no other traffic is present. If it
detects an approaching vehicle
’s headlamps
or tail lamps, or street lighting ahead, the
system turns off high beams before they can
distract other road users. Low beams remain
on.
Note: The system may not operate properly
if the sensor is blocked. Keep the windshield
free from obstruction or damage.
Note: The system may not operate properly
in cold or inclement conditions. You can
switch on the high beams by overriding the
system.
Note: If the system detects a blockage, for
example bird droppings, bug splatter, snow
or ice, the system goes into low beam mode
until you clear the blockage. A message may
appear in the information display if the
camera is blocked.
Note: Using much larger tires or equipping
vehicle accessories such as snowplows can
modify your vehicle's ride height and
degrade automatic high beam control
performance.
94
Continental (CPL) Canada/United States of America, enUSA, Edition date: 201807, Second-Printing Lighting
Page 107 of 627
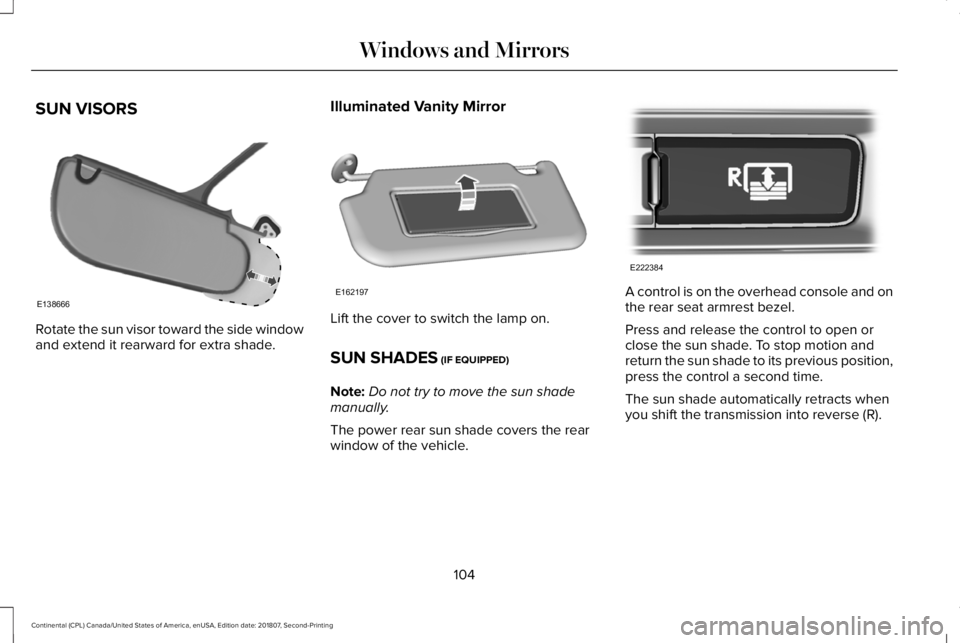
SUN VISORS
Rotate the sun visor toward the side window
and extend it rearward for extra shade.
Illuminated Vanity Mirror Lift the cover to switch the lamp on.
SUN SHADES (IF EQUIPPED)
Note: Do not try to move the sun shade
manually.
The power rear sun shade covers the rear
window of the vehicle. A control is on the overhead console and on
the rear seat armrest bezel.
Press and release the control to open or
close the sun shade. To stop motion and
return the sun shade to its previous position,
press the control a second time.
The sun shade automatically retracts when
you shift the transmission into reverse (R).
104
Continental (CPL) Canada/United States of America, enUSA, Edition date: 201807, Second-Printing Windows and MirrorsE138666 E162197 E222384
Page 141 of 627
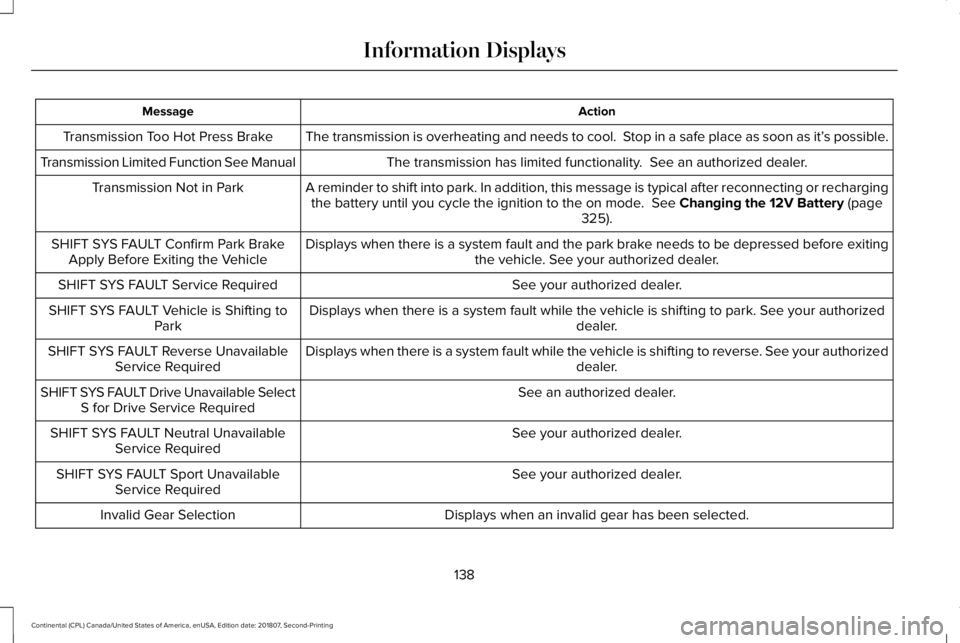
Action
Message
The transmission is overheating and needs to cool. Stop in a safe place as soon as it’ s possible.
Transmission Too Hot Press Brake
The transmission has limited functionality. See an authorized dealer.
Transmission Limited Function See Manual
A reminder to shift into park. In addition, this message is typical afte\
r reconnecting or rechargingthe battery until you cycle the ignition to the on mode. See Changing the 12V Battery (page
325).
Transmission Not in Park
Displays when there is a system fault and the park brake needs to be depressed before exitingthe vehicle. See your authorized dealer.
SHIFT SYS FAULT Confirm Park Brake
Apply Before Exiting the Vehicle
See your authorized dealer.
SHIFT SYS FAULT Service Required
Displays when there is a system fault while the vehicle is shifting to p\
ark. See your authorized dealer.
SHIFT SYS FAULT Vehicle is Shifting to
Park
Displays when there is a system fault while the vehicle is shifting to r\
everse. See your authorized dealer.
SHIFT SYS FAULT Reverse Unavailable
Service Required
See an authorized dealer.
SHIFT SYS FAULT Drive Unavailable Select
S for Drive Service Required
See your authorized dealer.
SHIFT SYS FAULT Neutral Unavailable
Service Required
See your authorized dealer.
SHIFT SYS FAULT Sport Unavailable
Service Required
Displays when an invalid gear has been selected.
Invalid Gear Selection
138
Continental (CPL) Canada/United States of America, enUSA, Edition date: 201807, Second-Printing Information Displays
Page 196 of 627
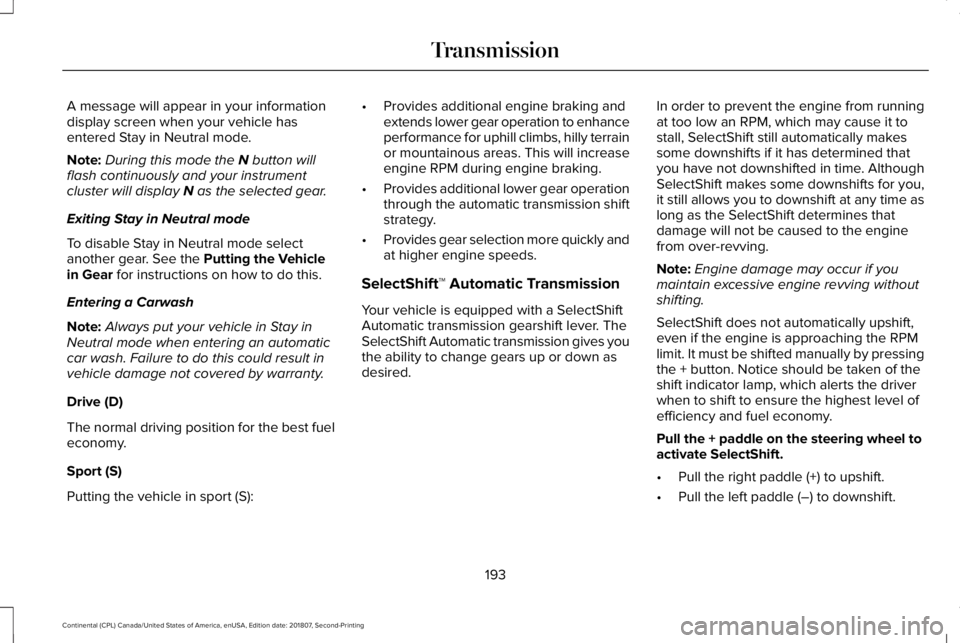
A message will appear in your information
display screen when your vehicle has
entered Stay in Neutral mode.
Note:
During this mode the N button will
flash continuously and your instrument
cluster will display
N as the selected gear.
Exiting Stay in Neutral mode
To disable Stay in Neutral mode select
another gear. See the
Putting the Vehicle
in Gear for instructions on how to do this.
Entering a Carwash
Note: Always put your vehicle in Stay in
Neutral mode when entering an automatic
car wash. Failure to do this could result in
vehicle damage not covered by warranty.
Drive (D)
The normal driving position for the best fuel
economy.
Sport (S)
Putting the vehicle in sport (S): •
Provides additional engine braking and
extends lower gear operation to enhance
performance for uphill climbs, hilly terrain
or mountainous areas. This will increase
engine RPM during engine braking.
• Provides additional lower gear operation
through the automatic transmission shift
strategy.
• Provides gear selection more quickly and
at higher engine speeds.
SelectShift™ Automatic Transmission
Your vehicle is equipped with a SelectShift
Automatic transmission gearshift lever. The
SelectShift Automatic transmission gives you
the ability to change gears up or down as
desired. In order to prevent the engine from running
at too low an RPM, which may cause it to
stall, SelectShift still automatically makes
some downshifts if it has determined that
you have not downshifted in time. Although
SelectShift makes some downshifts for you,
it still allows you to downshift at any time as
long as the SelectShift determines that
damage will not be caused to the engine
from over-revving.
Note:
Engine damage may occur if you
maintain excessive engine revving without
shifting.
SelectShift does not automatically upshift,
even if the engine is approaching the RPM
limit. It must be shifted manually by pressing
the + button. Notice should be taken of the
shift indicator lamp, which alerts the driver
when to shift to ensure the highest level of
efficiency and fuel economy.
Pull the + paddle on the steering wheel to
activate SelectShift.
• Pull the right paddle (+) to upshift.
• Pull the left paddle (–) to downshift.
193
Continental (CPL) Canada/United States of America, enUSA, Edition date: 201807, Second-Printing Transmission
Page 197 of 627
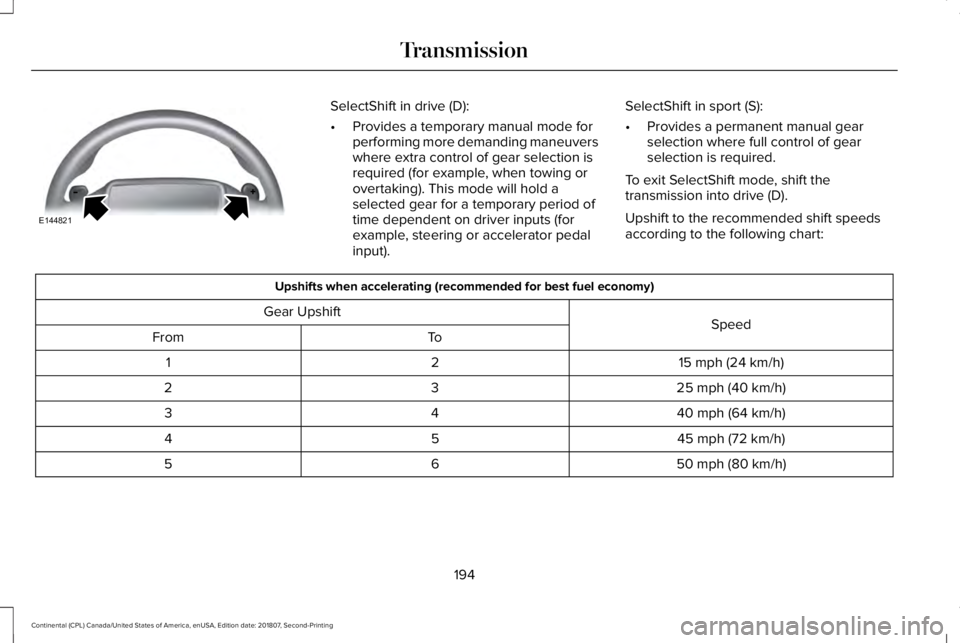
SelectShift in drive (D):
•
Provides a temporary manual mode for
performing more demanding maneuvers
where extra control of gear selection is
required (for example, when towing or
overtaking). This mode will hold a
selected gear for a temporary period of
time dependent on driver inputs (for
example, steering or accelerator pedal
input). SelectShift in sport (S):
•
Provides a permanent manual gear
selection where full control of gear
selection is required.
To exit SelectShift mode, shift the
transmission into drive (D).
Upshift to the recommended shift speeds
according to the following chart: Upshifts when accelerating (recommended for best fuel economy)
Speed
Gear Upshift
To
From
15 mph (24 km/h)
2
1
25 mph (40 km/h)
3
2
40 mph (64 km/h)
4
3
45 mph (72 km/h)
5
4
50 mph (80 km/h)
6
5
194
Continental (CPL) Canada/United States of America, enUSA, Edition date: 201807, Second-Printing TransmissionE144821
Page 205 of 627
Once through water, always try the brakes.
Wet brakes do not stop the vehicle as
effectively as dry brakes. Drying can be
improved by moving your vehicle slowly
while applying light pressure on the brake
pedal.
Be cautious of sudden changes in vehicle
speed or direction when you are driving in
mud. Even AWD vehicles can lose traction
in slick mud. As when you are driving over
sand, apply the accelerator slowly and avoid
spinning your wheels. If the vehicle does
slide, steer in the direction of the slide until
you regain control of the vehicle.
After driving through mud, clean off residue
stuck to rotating driveshafts and tires. Excess
mud stuck on tires and rotating driveshafts
causes an imbalance that could damage
drive components.
Note:
Driving through deep water may
damage the transmission.
If the front or rear axle is submerged in water,
have the power transfer unit (PTU) or rear
axle serviced by an authorized dealer. Driving on Hilly or Sloping Terrain
Note:
Avoid driving crosswise or turning on
steep slopes or hills. A danger lies in losing
traction, slipping sideways and possibly
rolling over. Whenever driving on a hill,
determine beforehand the route you will use.
Do not drive over the crest of a hill without
seeing what conditions are on the other side.
Do not drive in reverse over a hill without
the aid of an observer.
Although natural obstacles may make it
necessary to travel diagonally up or down a
hill or steep incline, you should always try to
drive straight up or straight down.
When climbing a steep slope or hill, start in
a lower gear rather than downshifting to a
lower gear from a higher gear once the
ascent has started. This reduces strain on
the engine and the possibility of stalling.
If you do stall out, do not try to turnaround
because you might roll over. It is better to
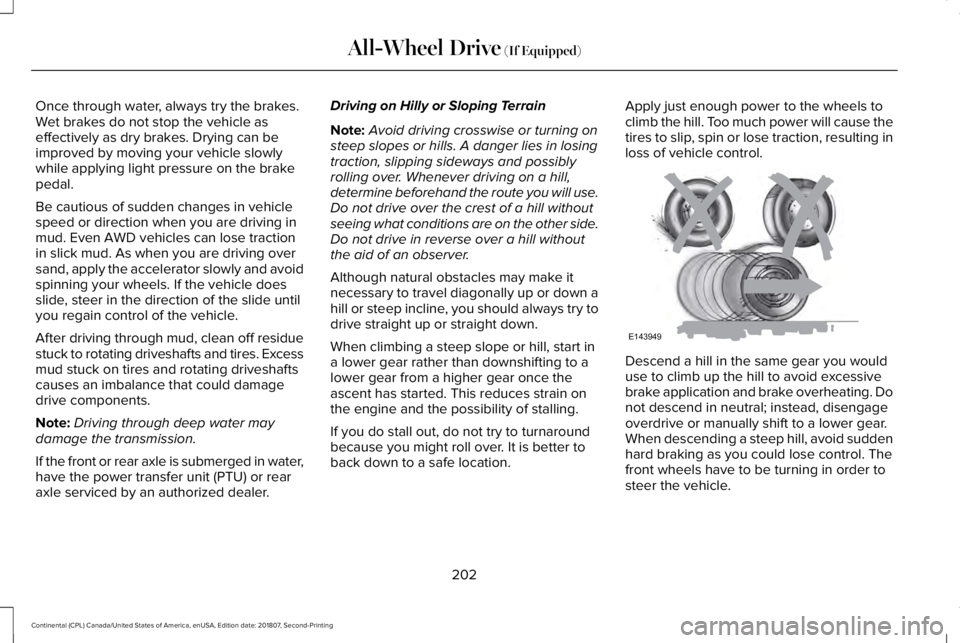
back down to a safe location. Apply just enough power to the wheels to
climb the hill. Too much power will cause the
tires to slip, spin or lose traction, resulting in
loss of vehicle control.
Descend a hill in the same gear you would
use to climb up the hill to avoid excessive
brake application and brake overheating. Do
not descend in neutral; instead, disengage
overdrive or manually shift to a lower gear.
When descending a steep hill, avoid sudden
hard braking as you could lose control. The
front wheels have to be turning in order to
steer the vehicle.
202
Continental (CPL) Canada/United States of America, enUSA, Edition date: 201807, Second-Printing All-Wheel Drive (If Equipped)E143949
Page 212 of 627
HILL START ASSIST
WARNING: The system does not
replace the parking brake. When you leave
your vehicle, always apply the parking
brake and shift the transmission into park
(P) for automatic transmission or first gear
for manual transmission. WARNING: You must remain in your
vehicle when the system turns on. At all
times, you are responsible for controlling
your vehicle, supervising the system and
intervening, if required. Failure to take care
may result in the loss of control of your
vehicle, serious personal injury or death. WARNING:
The system turns off if
there is a malfunction or if you excessively
rev the engine.
The system makes it easier to pull away
when your vehicle is on a slope without the
need to use the parking brake. When the system activates, your vehicle
remains stationary on a slope for a few
seconds after you release the brake pedal.
This allows you time to move your foot from
the brake to the accelerator pedal. The
brakes release when the engine has
developed sufficient torque to prevent your
vehicle from rolling down the slope. This is
an advantage when pulling away on a slope,
for example from a car park ramp, traffic
lights or when reversing uphill into a parking
space.
The system activates on any slope that
causes your vehicle to roll.
Note:
There is no warning lamp to indicate
the system is either on or off.
Using Hill Start Assist
1. Press the brake pedal to bring your vehicle to a complete standstill. Keep the
brake pedal pressed and shift into first
gear when facing uphill or reverse (R)
when facing downhill.
2. The system activates if the sensors detect that your vehicle is on a slope. 3. When you remove your foot from the
brake pedal, your vehicle remains on the
slope without rolling away for a few
seconds. This hold time increases if you
are in the process of driving off.
4. Pull away in the normal manner.
Switching the System On and Off
Vehicles with Manual Transmission
You can switch this feature on or off in the
information display. The system remembers
the last setting when you start your vehicle.
Vehicles with Automatic Transmission
The system turns on when you switch the
ignition on and you cannot switch the system
off.
209
Continental (CPL) Canada/United States of America, enUSA, Edition date: 201807, Second-Printing Brakes
Page 220 of 627
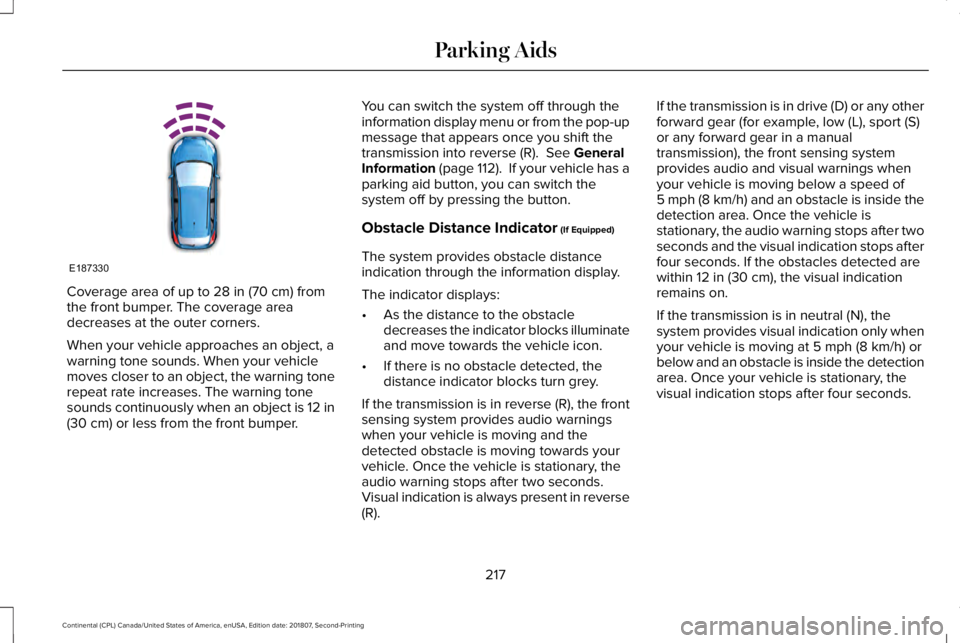
Coverage area of up to 28 in (70 cm) from
the front bumper. The coverage area
decreases at the outer corners.
When your vehicle approaches an object, a
warning tone sounds. When your vehicle
moves closer to an object, the warning tone
repeat rate increases. The warning tone
sounds continuously when an object is 12 in
(30 cm)
or less from the front bumper. You can switch the system off through the
information display menu or from the pop-up
message that appears once you shift the
transmission into reverse (R).
See General
Information (page 112). If your vehicle has a
parking aid button, you can switch the
system off by pressing the button.
Obstacle Distance Indicator
(If Equipped)
The system provides obstacle distance
indication through the information display.
The indicator displays:
• As the distance to the obstacle
decreases the indicator blocks illuminate
and move towards the vehicle icon.
• If there is no obstacle detected, the
distance indicator blocks turn grey.
If the transmission is in reverse (R), the front
sensing system provides audio warnings
when your vehicle is moving and the
detected obstacle is moving towards your
vehicle. Once the vehicle is stationary, the
audio warning stops after two seconds.
Visual indication is always present in reverse
(R). If the transmission is in drive (D) or any other
forward gear (for example, low (L), sport (S)
or any forward gear in a manual
transmission), the front sensing system
provides audio and visual warnings when
your vehicle is moving below a speed of
5 mph (8 km/h) and an obstacle is inside the
detection area. Once the vehicle is
stationary, the audio warning stops after two
seconds and the visual indication stops after
four seconds. If the obstacles detected are
within
12 in (30 cm), the visual indication
remains on.
If the transmission is in neutral (N), the
system provides visual indication only when
your vehicle is moving at
5 mph (8 km/h) or
below and an obstacle is inside the detection
area. Once your vehicle is stationary, the
visual indication stops after four seconds.
217
Continental (CPL) Canada/United States of America, enUSA, Edition date: 201807, Second-Printing Parking AidsE187330