spare tire LINCOLN LS 2000 Owners Manual
[x] Cancel search | Manufacturer: LINCOLN, Model Year: 2000, Model line: LS, Model: LINCOLN LS 2000Pages: 272, PDF Size: 2.36 MB
Page 109 of 272

Procedure to program spare SecuriLockYkeys to your vehicle
New SecuriLockykeys must have the correct mechanical key cut for
your vehicle.
Conventional (non-SecuriLocky) keyscannotbe programmed to your
vehicle.
The correct type of SecuriLockykey for your vehicle is identifiable by
the alphanumeric characters stamped on the key blade. The
SecuriLockykey identification for your vehicle is: one letter of the
English alphabet followed by the number ª1º (for example, ªS1º or ªI1º
on the key blade indicate you have the correct type of SecuriLocky
key). If the SecuriLockykey does not have this information stamped on
the key blade, the key will not operate your vehicle.
You will need to have two previously programmed SecuriLockykeys and
the new unprogrammed SecuriLockykey readily accessible for timely
implementation of each step in the procedure. Please read and
understand the entire procedure before you begin.
1. Insert the first previously programmed SecuriLockykey into the
ignition and turn the ignition from OFF to RUN (maintain ignition in
RUN for at least one second).
2. Turn ignition to OFF and remove the first SecuriLockykey from the
ignition.
3. Within five seconds of turning the ignition to OFF, insert the second
previously programmed SecuriLockykey into the ignition and turn the
ignition from OFF to RUN (maintain ignition in RUN for at least one
second but no more than five seconds).
4. Turn the ignition to OFF and remove the second SecuriLockykey
from the ignition.
5. Within 10 seconds of turning the ignition to OFF, insert the
unprogrammed SecuriLockykey (new key/valet key) into the ignition
and turn the ignition from OFF to RUN (maintain ignition in RUN for at
least one second). This step will program your new SecuriLockykey.
6. To program additional SecuriLockykey(s), repeat this procedure from
step 1.
If the programming procedure was successful, the new SecuriLocky
key(s) will start the vehicle's engine. The theft indicator (located on the
instrument panel) will light for three seconds and then go out.
Controls and features
109
Page 182 of 272
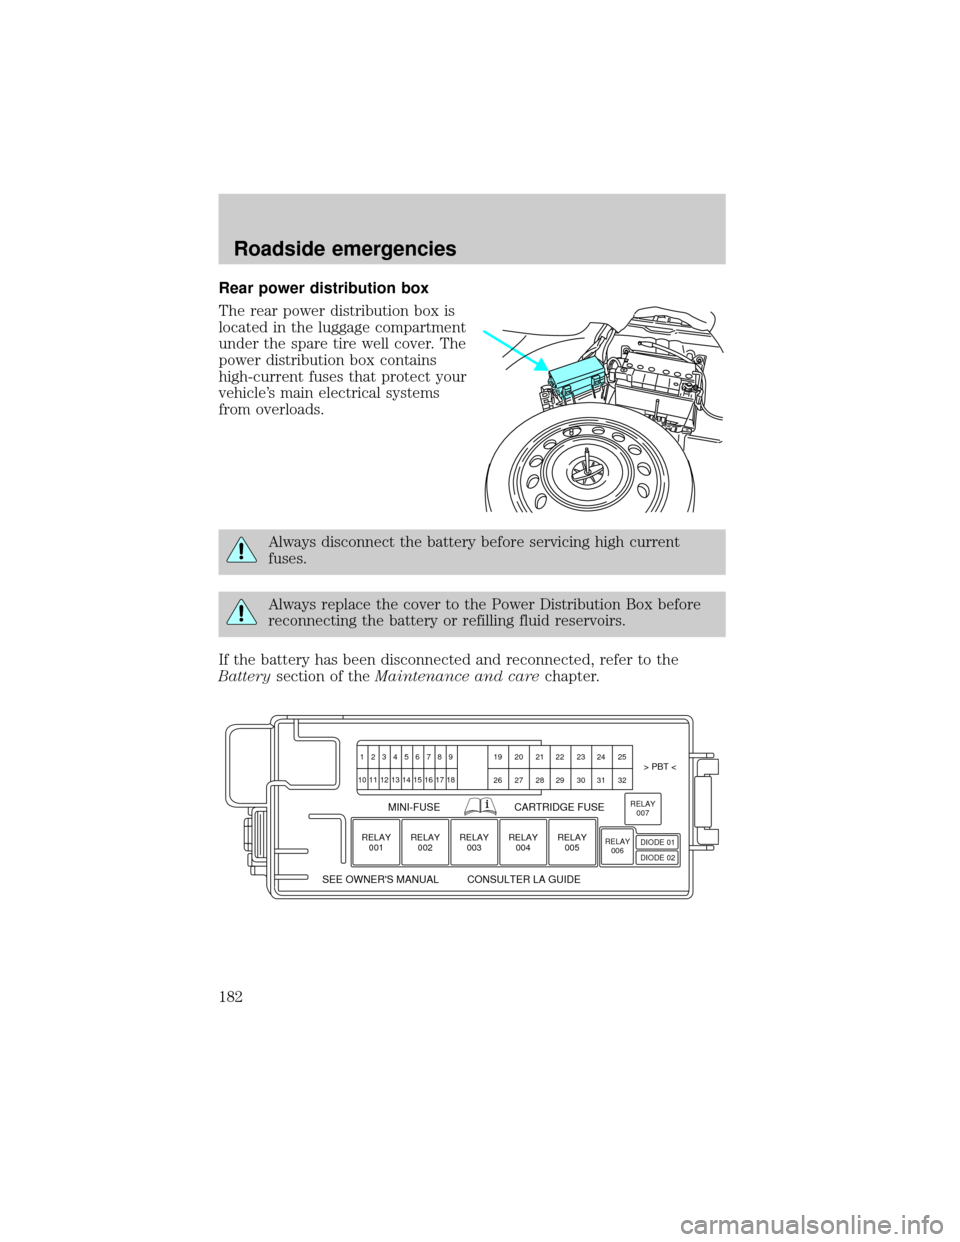
Rear power distribution box
The rear power distribution box is
located in the luggage compartment
under the spare tire well cover. The
power distribution box contains
high-current fuses that protect your
vehicle's main electrical systems
from overloads.
Always disconnect the battery before servicing high current
fuses.
Always replace the cover to the Power Distribution Box before
reconnecting the battery or refilling fluid reservoirs.
If the battery has been disconnected and reconnected, refer to the
Batterysection of theMaintenance and carechapter.
123456789 19 20 21 22 23 24 25> PBT <
MINI-FUSE
SEE OWNER'S MANUAL CONSULTER LA GUIDECARTRIDGE FUSE
26 27 28 29 30 31 32 10 11
RELAY
001
12 13 14 15 16 17 18
RELAY
002RELAY
003RELAY
004RELAY
005RELAY
006RELAY
007
DIODE 01
DIODE 02
Roadside emergencies
182
Page 184 of 272
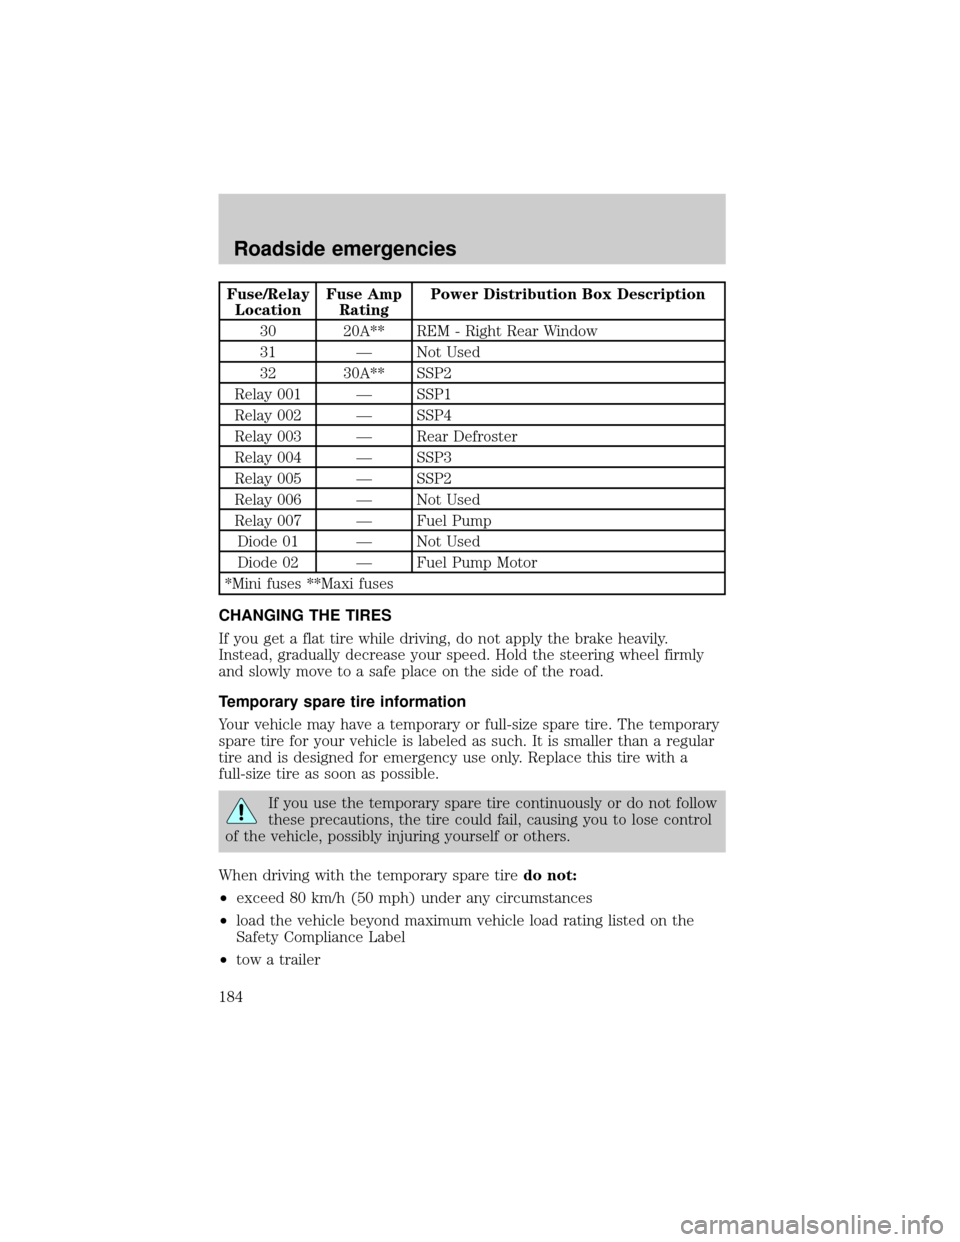
Fuse/Relay
LocationFuse Amp
RatingPower Distribution Box Description
30 20A** REM - Right Rear Window
31 Ð Not Used
32 30A** SSP2
Relay 001 Ð SSP1
Relay 002 Ð SSP4
Relay 003 Ð Rear Defroster
Relay 004 Ð SSP3
Relay 005 Ð SSP2
Relay 006 Ð Not Used
Relay 007 Ð Fuel Pump
Diode 01 Ð Not Used
Diode 02 Ð Fuel Pump Motor
*Mini fuses **Maxi fuses
CHANGING THE TIRES
If you get a flat tire while driving, do not apply the brake heavily.
Instead, gradually decrease your speed. Hold the steering wheel firmly
and slowly move to a safe place on the side of the road.
Temporary spare tire information
Your vehicle may have a temporary or full-size spare tire. The temporary
spare tire for your vehicle is labeled as such. It is smaller than a regular
tire and is designed for emergency use only. Replace this tire with a
full-size tire as soon as possible.
If you use the temporary spare tire continuously or do not follow
these precautions, the tire could fail, causing you to lose control
of the vehicle, possibly injuring yourself or others.
When driving with the temporary spare tiredo not:
²exceed 80 km/h (50 mph) under any circumstances
²load the vehicle beyond maximum vehicle load rating listed on the
Safety Compliance Label
²tow a trailer
Roadside emergencies
184
Page 185 of 272
²use tire chains
²drive through an automatic car wash, because of the vehicle's reduced
ground clearance
²try to repair the temporary spare tire or remove it from its wheel
²drive for long distances when the temporary-use spare is on
²operate the vehicle with more than one temporary-use spare tire
²improperly inflate the temporary-use spare
²use the wheel for any other type of vehicle
Tire change procedure
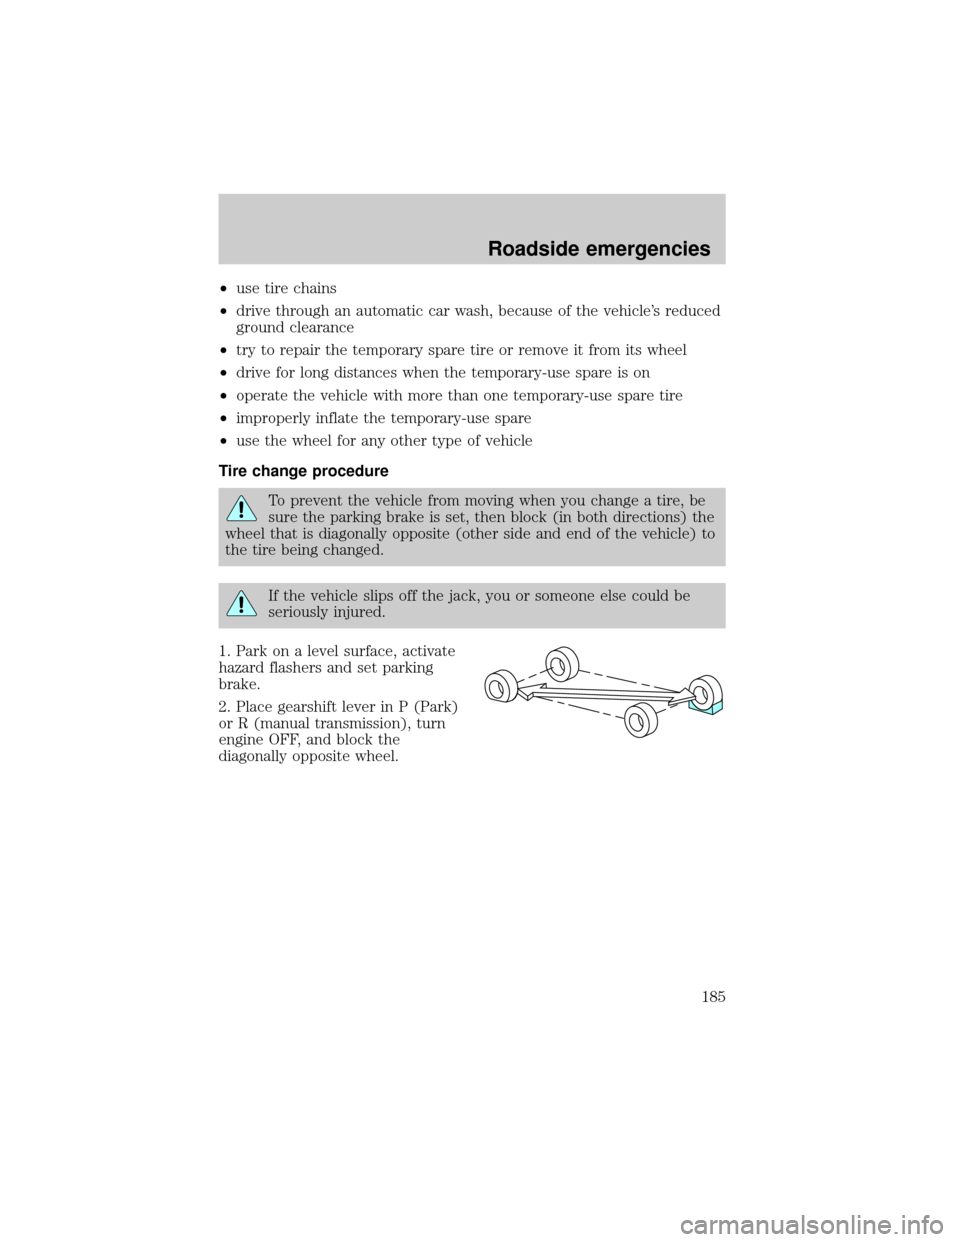
To prevent the vehicle from moving when you change a tire, be
sure the parking brake is set, then block (in both directions) the
wheel that is diagonally opposite (other side and end of the vehicle) to
the tire being changed.
If the vehicle slips off the jack, you or someone else could be
seriously injured.
1. Park on a level surface, activate
hazard flashers and set parking
brake.
2. Place gearshift lever in P (Park)
or R (manual transmission), turn
engine OFF, and block the
diagonally opposite wheel.
Roadside emergencies
185
Page 186 of 272
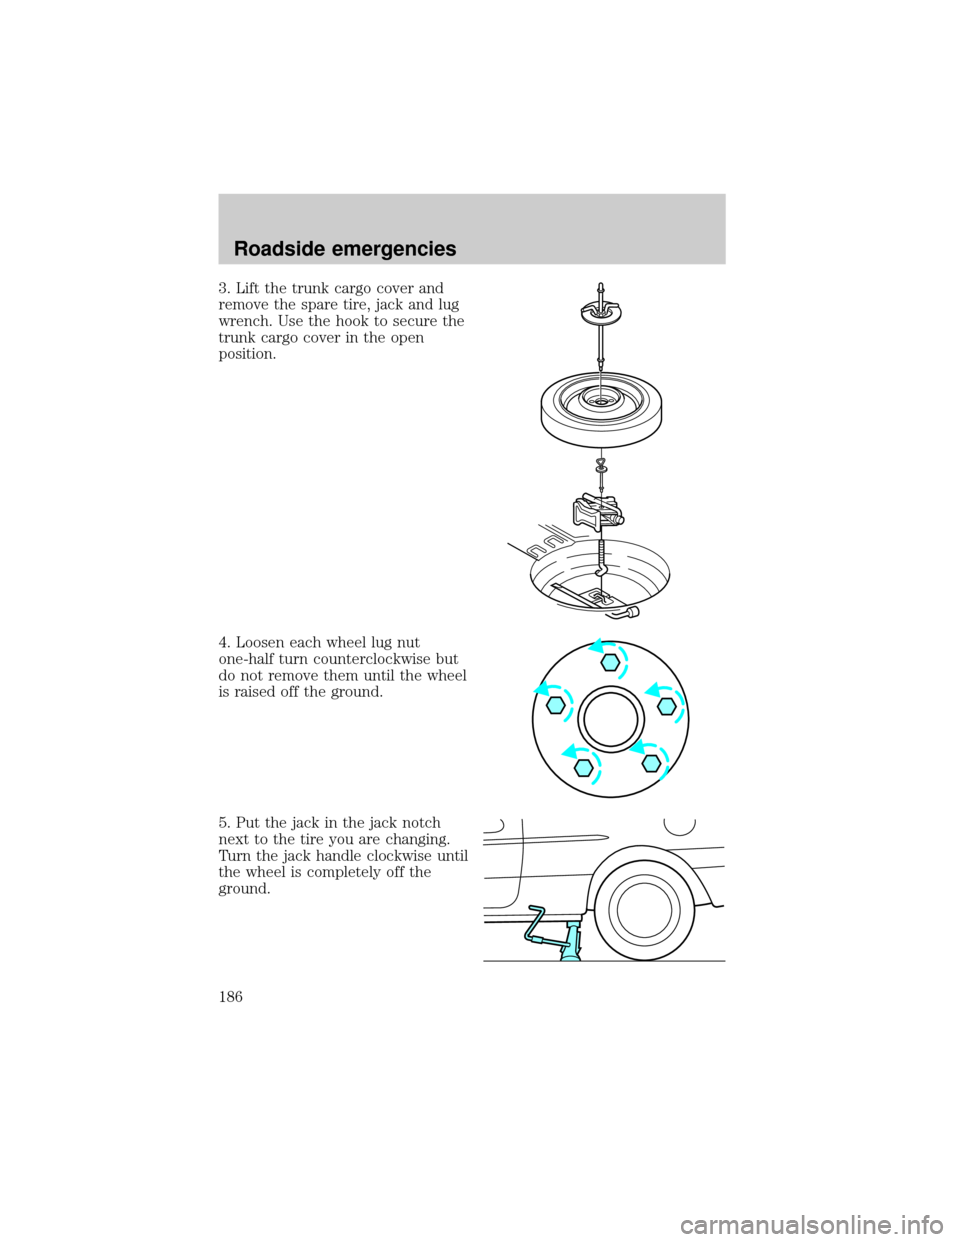
3. Lift the trunk cargo cover and
remove the spare tire, jack and lug
wrench. Use the hook to secure the
trunk cargo cover in the open
position.
4. Loosen each wheel lug nut
one-half turn counterclockwise but
do not remove them until the wheel
is raised off the ground.
5. Put the jack in the jack notch
next to the tire you are changing.
Turn the jack handle clockwise until
the wheel is completely off the
ground.
Roadside emergencies
186
Page 187 of 272
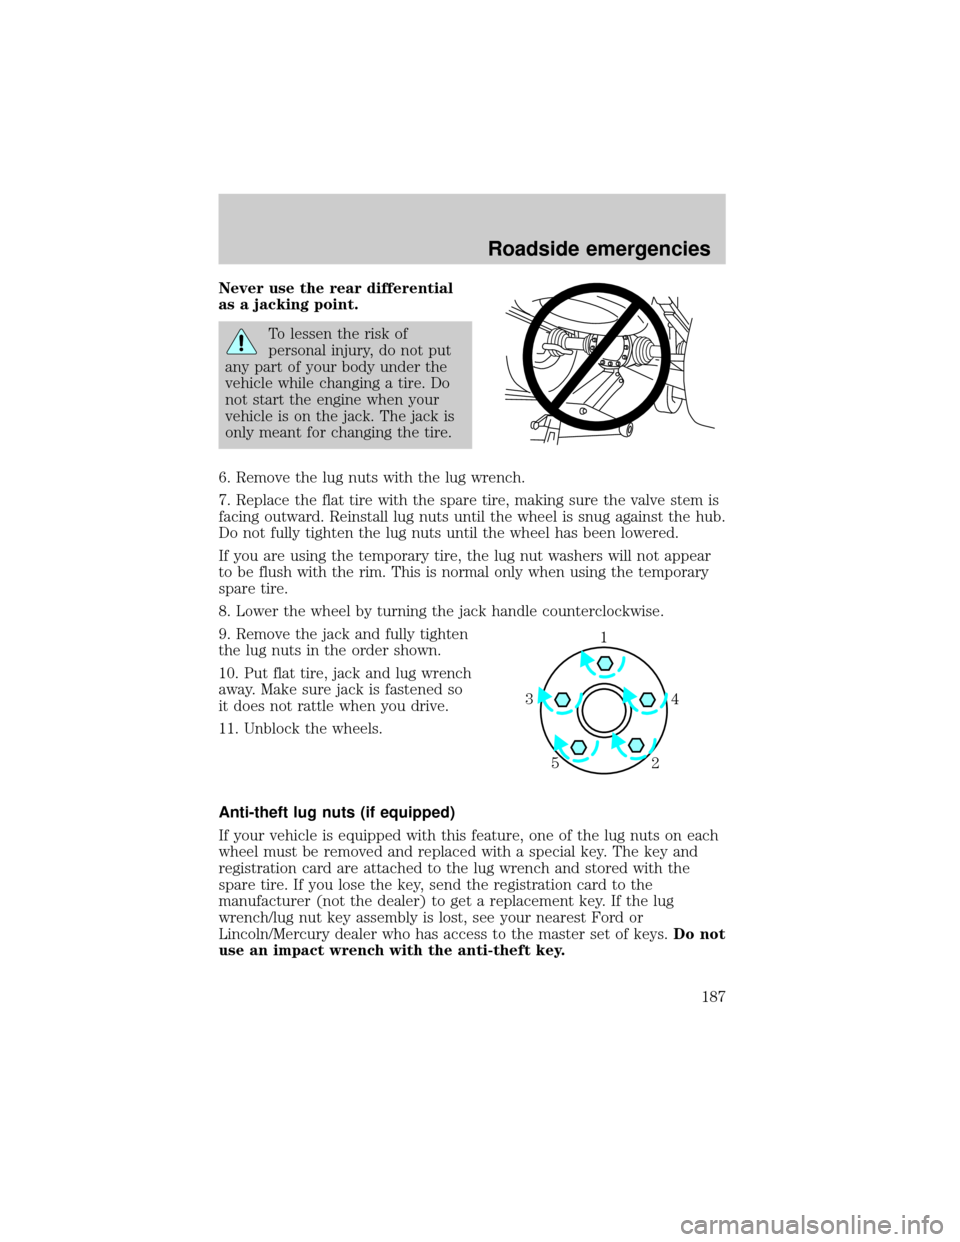
Never use the rear differential
as a jacking point.
To lessen the risk of
personal injury, do not put
any part of your body under the
vehicle while changing a tire. Do
not start the engine when your
vehicle is on the jack. The jack is
only meant for changing the tire.
6. Remove the lug nuts with the lug wrench.
7. Replace the flat tire with the spare tire, making sure the valve stem is
facing outward. Reinstall lug nuts until the wheel is snug against the hub.
Do not fully tighten the lug nuts until the wheel has been lowered.
If you are using the temporary tire, the lug nut washers will not appear
to be flush with the rim. This is normal only when using the temporary
spare tire.
8. Lower the wheel by turning the jack handle counterclockwise.
9. Remove the jack and fully tighten
the lug nuts in the order shown.
10. Put flat tire, jack and lug wrench
away. Make sure jack is fastened so
it does not rattle when you drive.
11. Unblock the wheels.
Anti-theft lug nuts (if equipped)
If your vehicle is equipped with this feature, one of the lug nuts on each
wheel must be removed and replaced with a special key. The key and
registration card are attached to the lug wrench and stored with the
spare tire. If you lose the key, send the registration card to the
manufacturer (not the dealer) to get a replacement key. If the lug
wrench/lug nut key assembly is lost, see your nearest Ford or
Lincoln/Mercury dealer who has access to the master set of keys.Do not
use an impact wrench with the anti-theft key.
1
4 3
2 5
Roadside emergencies
187
Page 191 of 272
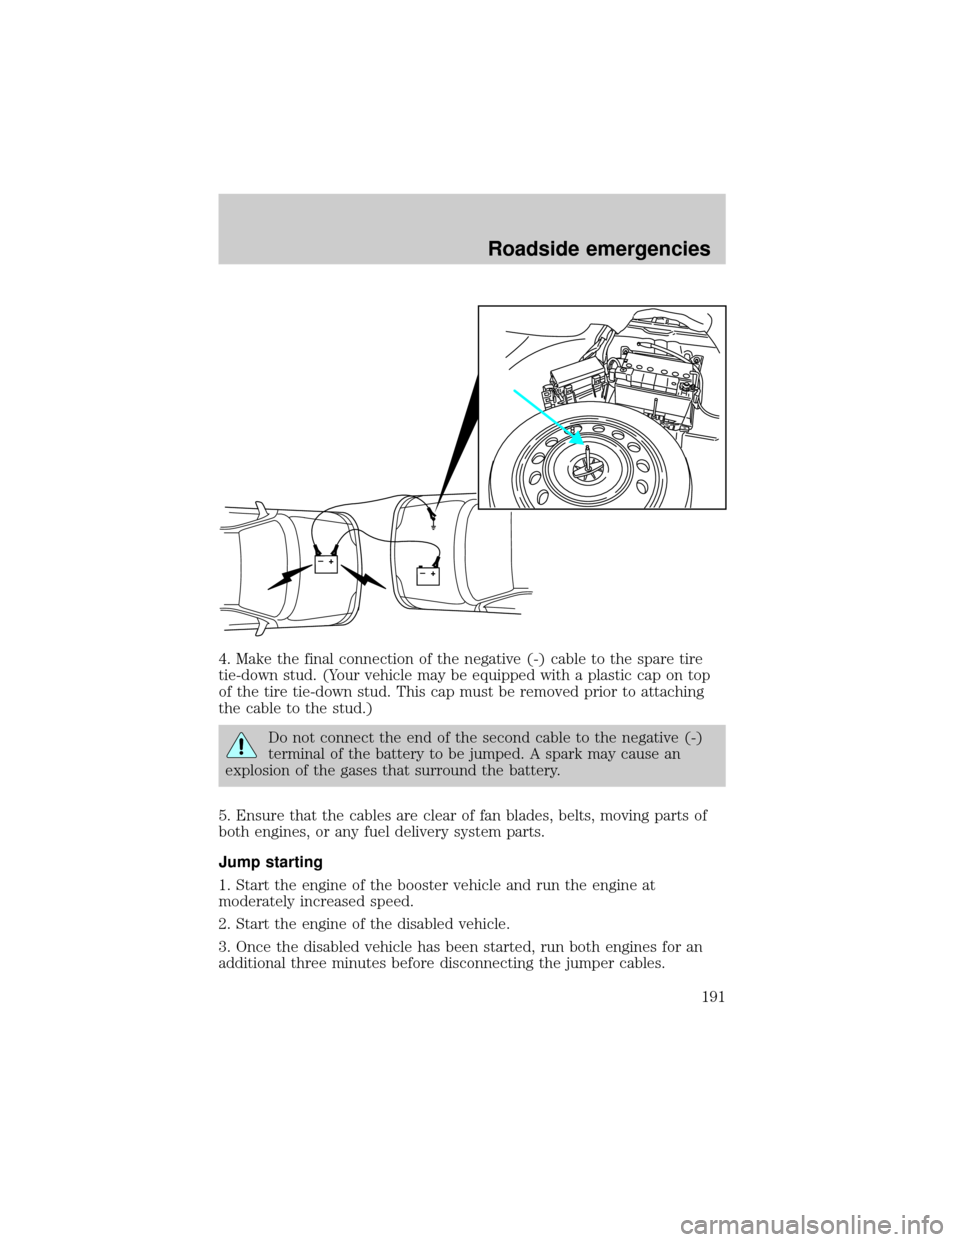
4. Make the final connection of the negative (-) cable to the spare tire
tie-down stud. (Your vehicle may be equipped with a plastic cap on top
of the tire tie-down stud. This cap must be removed prior to attaching
the cable to the stud.)
Do not connect the end of the second cable to the negative (-)
terminal of the battery to be jumped. A spark may cause an
explosion of the gases that surround the battery.
5. Ensure that the cables are clear of fan blades, belts, moving parts of
both engines, or any fuel delivery system parts.
Jump starting
1. Start the engine of the booster vehicle and run the engine at
moderately increased speed.
2. Start the engine of the disabled vehicle.
3. Once the disabled vehicle has been started, run both engines for an
additional three minutes before disconnecting the jumper cables.
+–+–
Roadside emergencies
191
Page 192 of 272
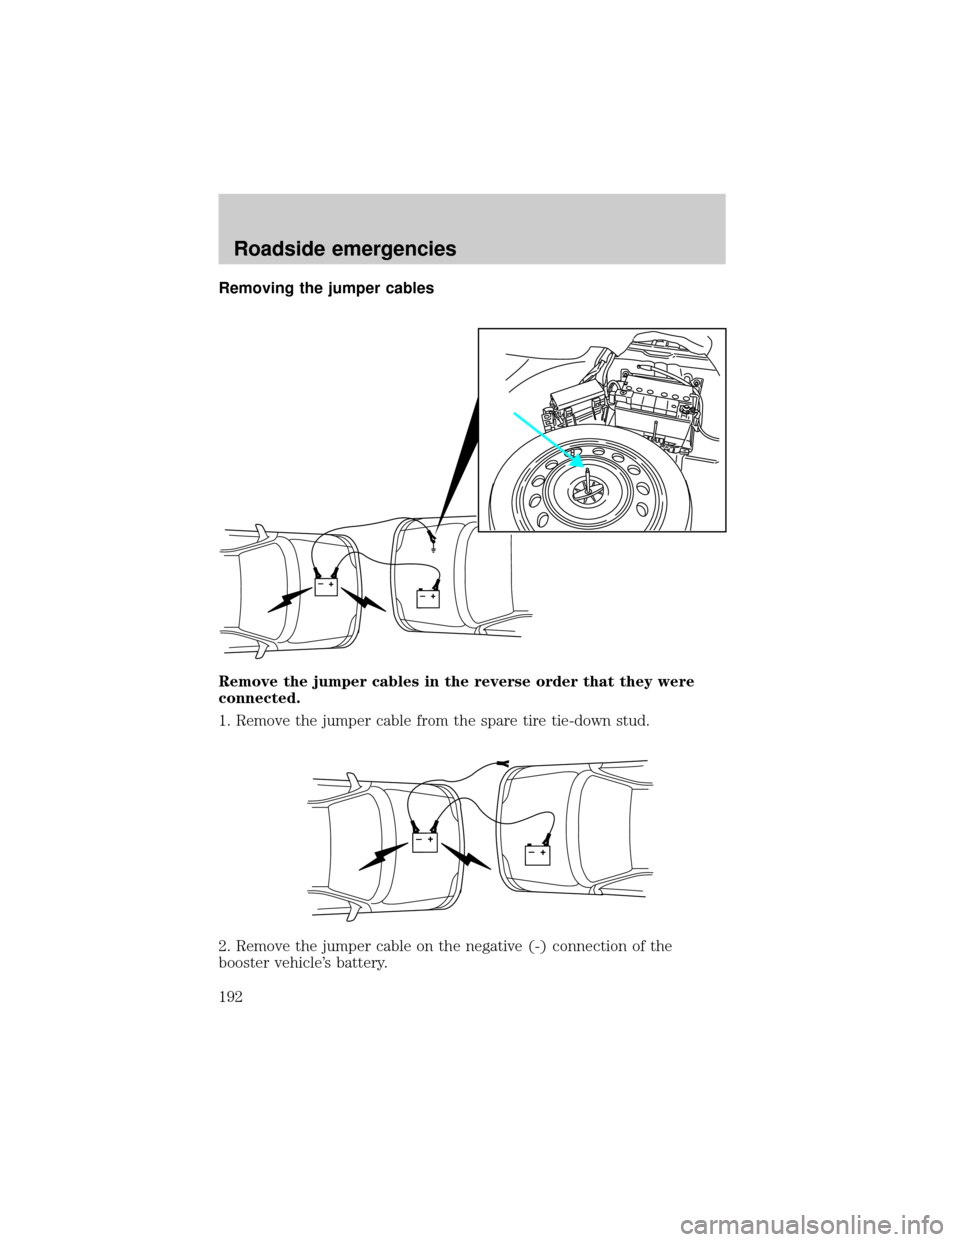
Removing the jumper cables
Remove the jumper cables in the reverse order that they were
connected.
1. Remove the jumper cable from the spare tire tie-down stud.
2. Remove the jumper cable on the negative (-) connection of the
booster vehicle's battery.
+–+–
+–+–
Roadside emergencies
192
Page 213 of 272
BATTERY
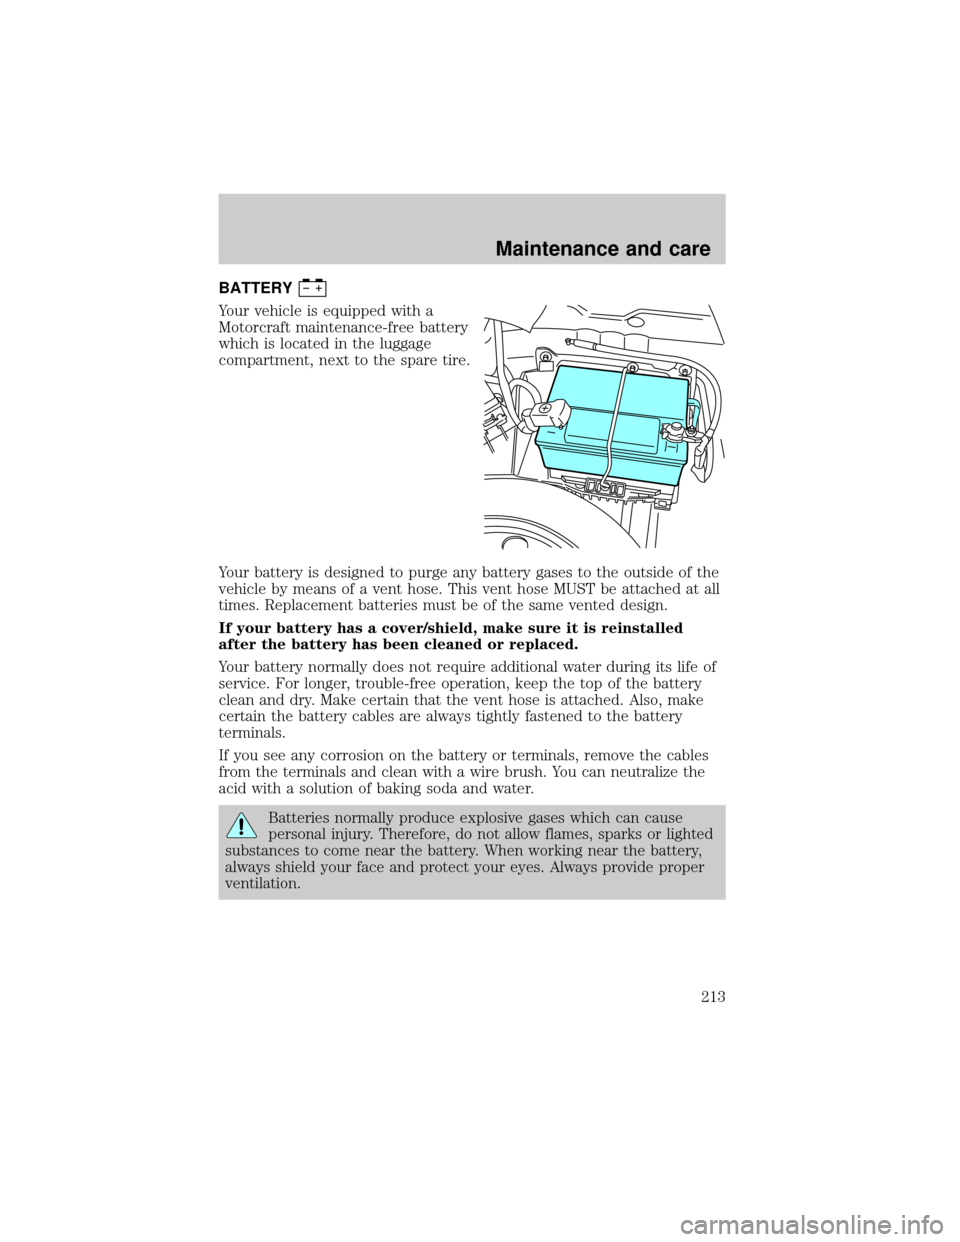
Your vehicle is equipped with a
Motorcraft maintenance-free battery
which is located in the luggage
compartment, next to the spare tire.
Your battery is designed to purge any battery gases to the outside of the
vehicle by means of a vent hose. This vent hose MUST be attached at all
times. Replacement batteries must be of the same vented design.
If your battery has a cover/shield, make sure it is reinstalled
after the battery has been cleaned or replaced.
Your battery normally does not require additional water during its life of
service. For longer, trouble-free operation, keep the top of the battery
clean and dry. Make certain that the vent hose is attached. Also, make
certain the battery cables are always tightly fastened to the battery
terminals.
If you see any corrosion on the battery or terminals, remove the cables
from the terminals and clean with a wire brush. You can neutralize the
acid with a solution of baking soda and water.
Batteries normally produce explosive gases which can cause
personal injury. Therefore, do not allow flames, sparks or lighted
substances to come near the battery. When working near the battery,
always shield your face and protect your eyes. Always provide proper
ventilation.
Maintenance and care
213
Page 222 of 272
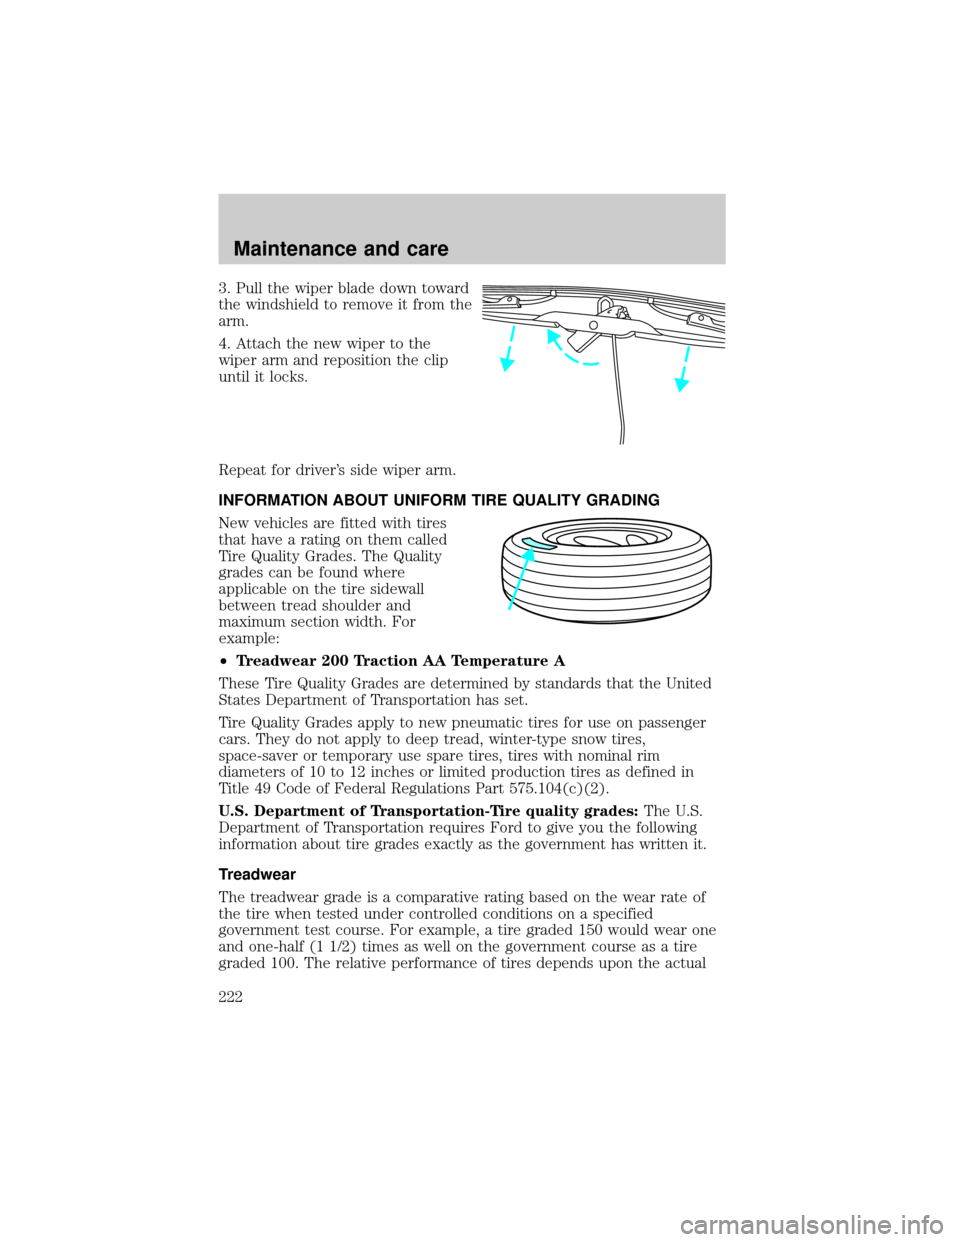
3. Pull the wiper blade down toward
the windshield to remove it from the
arm.
4. Attach the new wiper to the
wiper arm and reposition the clip
until it locks.
Repeat for driver's side wiper arm.
INFORMATION ABOUT UNIFORM TIRE QUALITY GRADING
New vehicles are fitted with tires
that have a rating on them called
Tire Quality Grades. The Quality
grades can be found where
applicable on the tire sidewall
between tread shoulder and
maximum section width. For
example:
²Treadwear 200 Traction AA Temperature A
These Tire Quality Grades are determined by standards that the United
States Department of Transportation has set.
Tire Quality Grades apply to new pneumatic tires for use on passenger
cars. They do not apply to deep tread, winter-type snow tires,
space-saver or temporary use spare tires, tires with nominal rim
diameters of 10 to 12 inches or limited production tires as defined in
Title 49 Code of Federal Regulations Part 575.104(c)(2).
U.S. Department of Transportation-Tire quality grades:The U.S.
Department of Transportation requires Ford to give you the following
information about tire grades exactly as the government has written it.
Treadwear
The treadwear grade is a comparative rating based on the wear rate of
the tire when tested under controlled conditions on a specified
government test course. For example, a tire graded 150 would wear one
and one-half (1 1/2) times as well on the government course as a tire
graded 100. The relative performance of tires depends upon the actual
Maintenance and care
222