Anti-theft LINCOLN LS 2002 Owners Manual
[x] Cancel search | Manufacturer: LINCOLN, Model Year: 2002, Model line: LS, Model: LINCOLN LS 2002Pages: 288, PDF Size: 2.44 MB
Page 1 of 288

Introduction 4
Congratulations 4
Safety and environment protection 5
Symbol glossary 8
Instrument Cluster 10
Warning and control lights 10
Gauges 16
Entertainment Systems 19
AM/FM stereo cassette 19
AM/FM stereo with CD 31
CD changer 44
Climate Controls 48
Electronic automatic temperature control 48
Lights 60
Headlamps 60
Bulb replacement 65
Driver Controls 69
Steering wheel adjustment 72
Power windows 73
Mirrors 77
Message center 94
Locks and Security 108
Keys 108
Locks 108
Anti-theft system 111
Table of Contents
1
Page 108 of 288
KEYS
The vehicle is equipped with two master keys and a valet key lock
system. The master key will access the driver's door, trunk, glove box
and ignition. The valet key will access door and ignition only.
Refer to theSecurilock Passive Anti-Theft Systemsection for
information on Securilock keys.
Valet switch
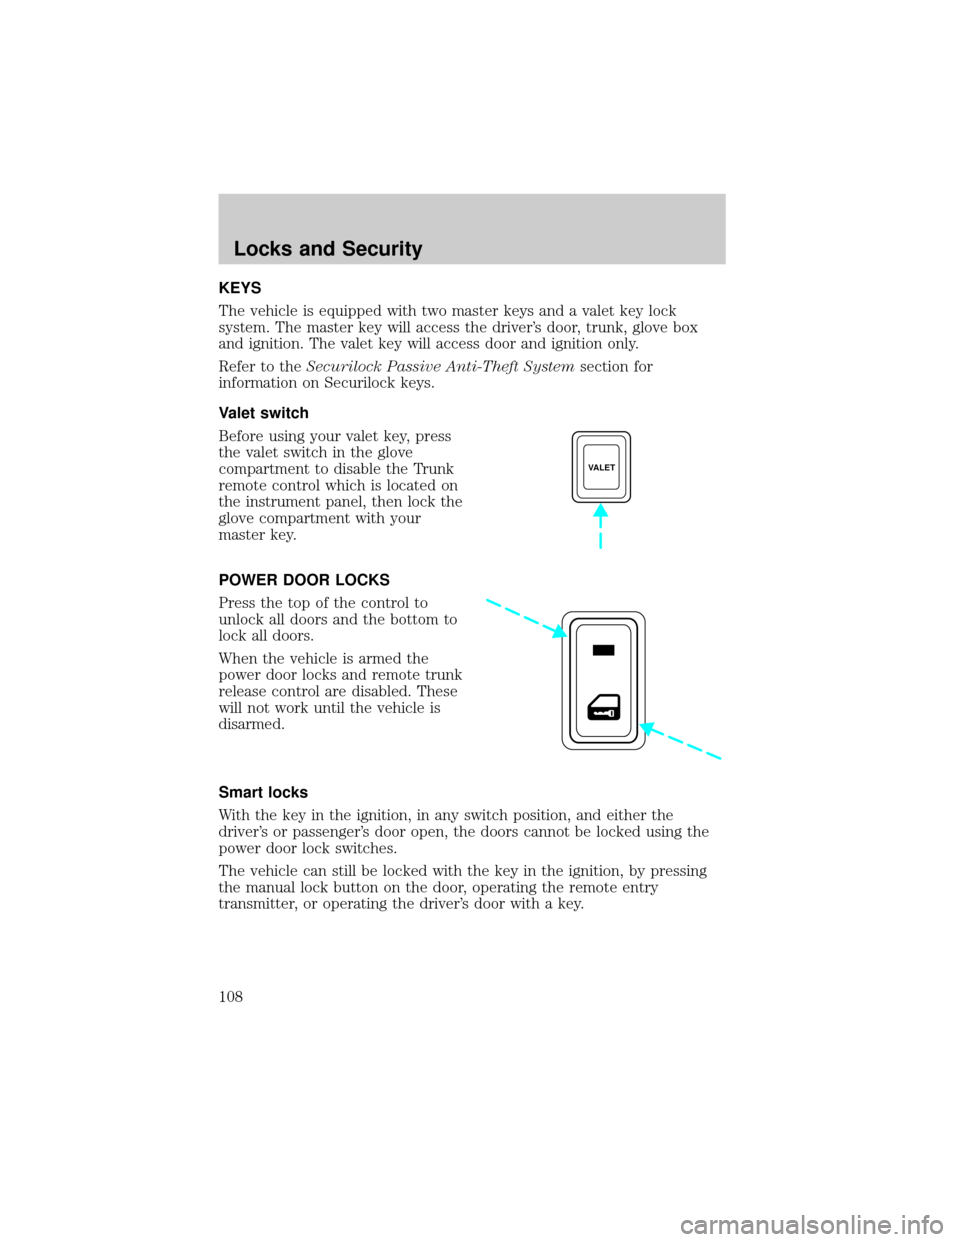
Before using your valet key, press
the valet switch in the glove
compartment to disable the Trunk
remote control which is located on
the instrument panel, then lock the
glove compartment with your
master key.
POWER DOOR LOCKS
Press the top of the control to
unlock all doors and the bottom to
lock all doors.
When the vehicle is armed the
power door locks and remote trunk
release control are disabled. These
will not work until the vehicle is
disarmed.
Smart locks
With the key in the ignition, in any switch position, and either the
driver's or passenger's door open, the doors cannot be locked using the
power door lock switches.
The vehicle can still be locked with the key in the ignition, by pressing
the manual lock button on the door, operating the remote entry
transmitter, or operating the driver's door with a key.
VALET
Locks and Security
108
Page 111 of 288

REMOTE ENTRY SYSTEM
This device complies with part 15 of the FCC rules and with RS-210 of
Industry Canada. Operation is subject to the following two conditions:
(1) This device may not cause harmful interference, and (2) This device
must accept any interference received, including interference that may
cause undesired operation.
Changes or modifications not expressly approved by the party
responsible for compliance could void the user's authority to
operate the equipment.
Your remote entry system contains two remote transmitters which
provide remote control of several features. Each remote transmitter will
allow you to:
²unlock the vehicle doors without a key.
²lock all the vehicle doors without a key.
²open the trunk without a key.
²activate the personal alarm.
²open all windows and moonroof (if equipped).
²arm and disarm the perimeter anti-theft system.
²operate the illuminated entry feature.
²operate the memory seat/mirror/steering column feature (if equipped).
The remote transmitter features only operate with the ignition in the
OFF or ACC positions. For vehicles equipped with an automatic
transmission, the remote transmitter features also operate if the ignition
is in the RUN position and the gear shift is in P (Park). The personal
alarm feature, however, will not operate when the ignition is in the RUN
position.
When the vehicle is armed the power door locks and remote trunk
release control are disabled. These will not work until the vehicle is
disarmed.
If there is any potential remote keyless entry problem with your vehicle,
ensureALL key fobs(remote entry transmitters) are brought to the
dealership, to aid in troubleshooting.
Locks and Security
111
Page 113 of 288
Locking the doors
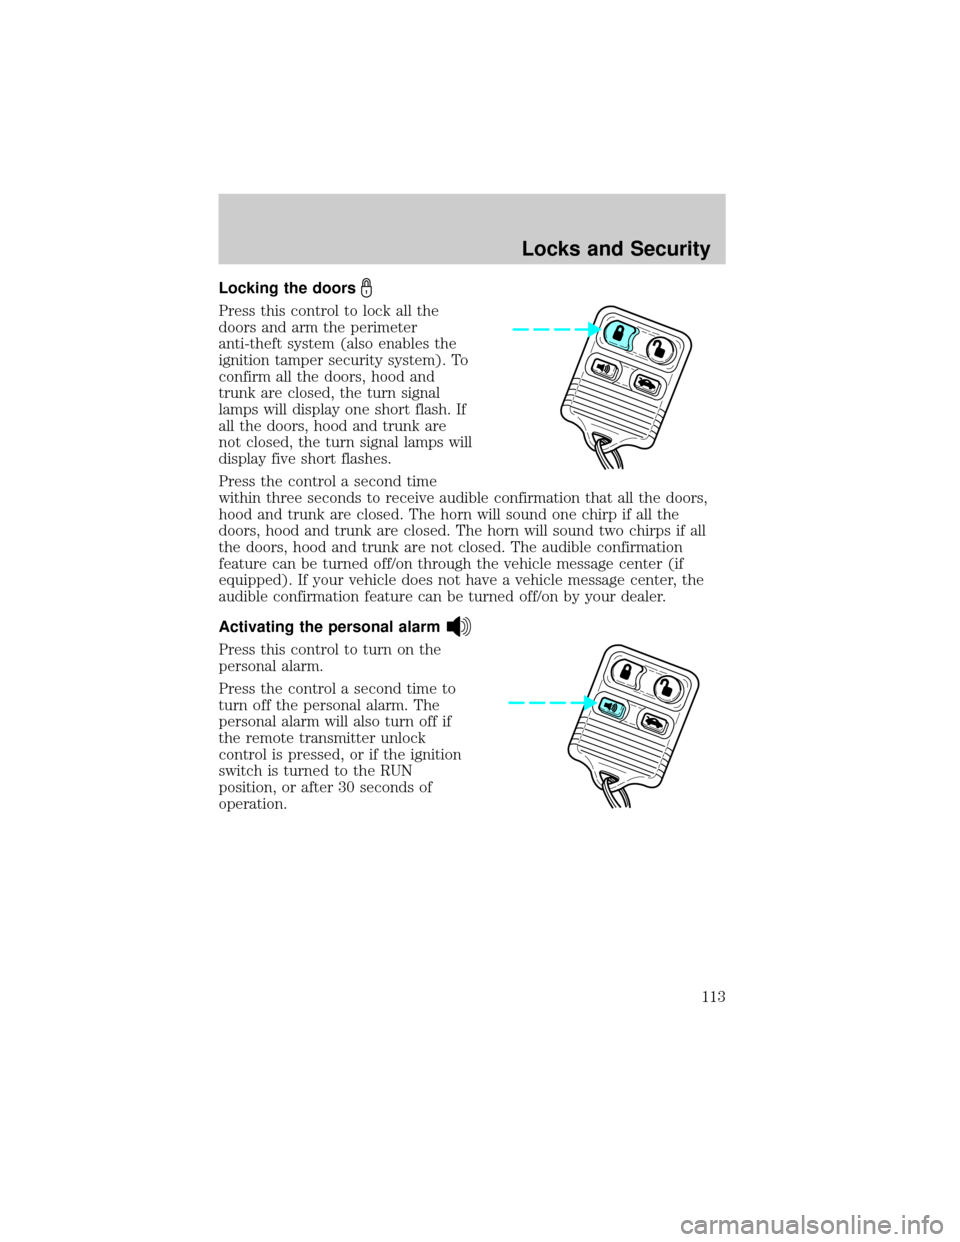
Press this control to lock all the
doors and arm the perimeter
anti-theft system (also enables the
ignition tamper security system). To
confirm all the doors, hood and
trunk are closed, the turn signal
lamps will display one short flash. If
all the doors, hood and trunk are
not closed, the turn signal lamps will
display five short flashes.
Press the control a second time
within three seconds to receive audible confirmation that all the doors,
hood and trunk are closed. The horn will sound one chirp if all the
doors, hood and trunk are closed. The horn will sound two chirps if all
the doors, hood and trunk are not closed. The audible confirmation
feature can be turned off/on through the vehicle message center (if
equipped). If your vehicle does not have a vehicle message center, the
audible confirmation feature can be turned off/on by your dealer.
Activating the personal alarm
Press this control to turn on the
personal alarm.
Press the control a second time to
turn off the personal alarm. The
personal alarm will also turn off if
the remote transmitter unlock
control is pressed, or if the ignition
switch is turned to the RUN
position, or after 30 seconds of
operation.
Locks and Security
113
Page 117 of 288
SECURILOCKYPASSIVE ANTI-THEFT SYSTEM
SecuriLockypassive anti-theft system is an engine immobilization
system. This system prevents the engine from being started unless a
coded key programmed to your vehicleis used.
The SecuriLockypassive anti-theft system is not compatible with
non-Ford aftermarket remote start systems. Use of these systems may
result in vehicle starting problems and a loss of security protection.
Automatic arming
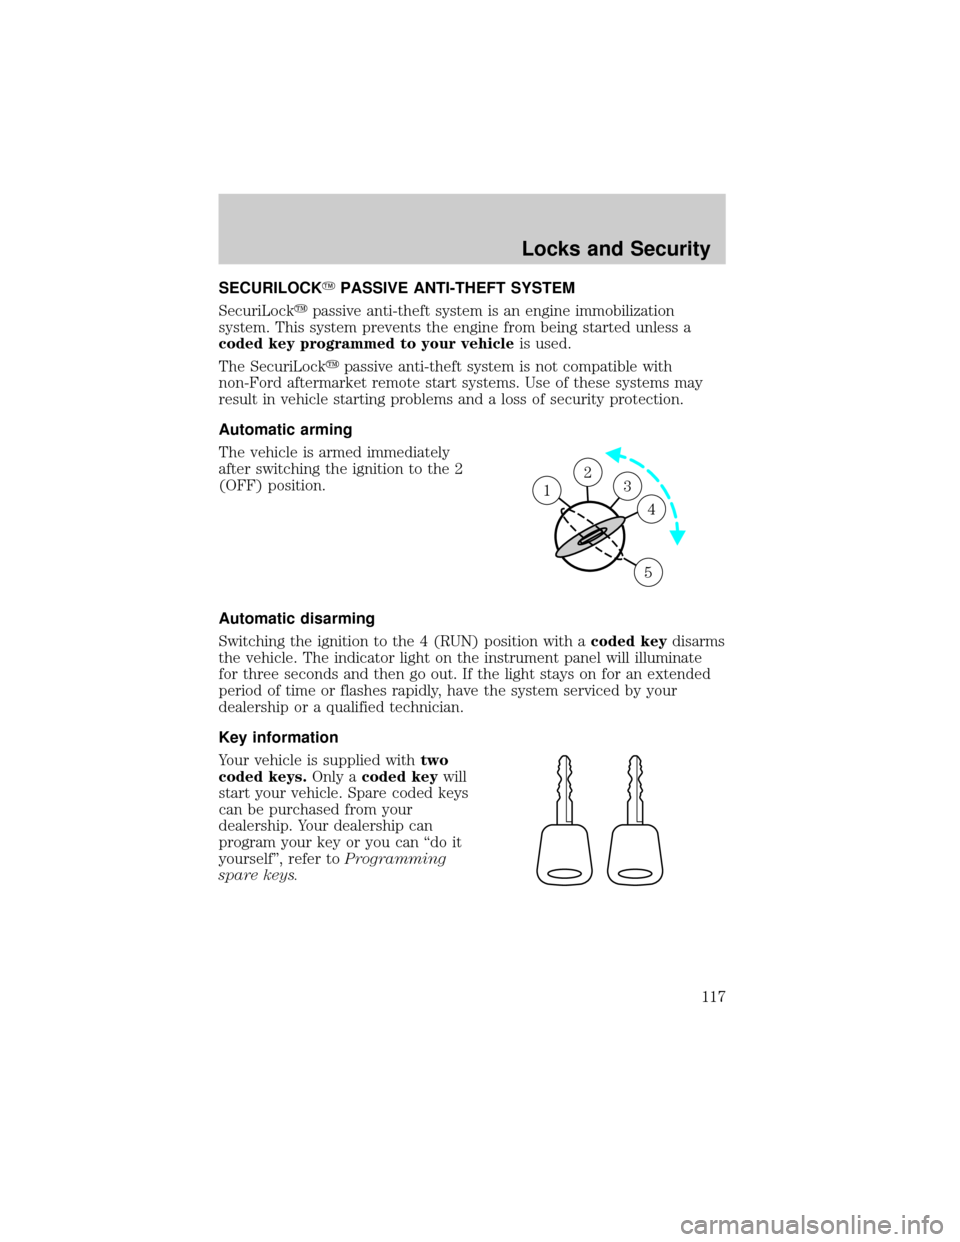
The vehicle is armed immediately
after switching the ignition to the 2
(OFF) position.
Automatic disarming
Switching the ignition to the 4 (RUN) position with acoded keydisarms
the vehicle. The indicator light on the instrument panel will illuminate
for three seconds and then go out. If the light stays on for an extended
period of time or flashes rapidly, have the system serviced by your
dealership or a qualified technician.
Key information
Your vehicle is supplied withtwo
coded keys.Only acoded keywill
start your vehicle. Spare coded keys
can be purchased from your
dealership. Your dealership can
program your key or you can ªdo it
yourselfº, refer toProgramming
spare keys.
23 1
4
5
Locks and Security
117
Page 120 of 288

PERIMETER ALARM SYSTEM
The perimeter anti-theft system will help protect your vehicle doors,
hood and trunk from unauthorized entry.
When the vehicle is armed the power door locks and remote trunk
release control are disabled. These will not work until the vehicle is
disarmed.
If there is any potential perimeter anti-theft problem with your vehicle,
ensureALL key fobs(remote entry transmitters) are brought to the
dealership, to aid in troubleshooting.
Arming the system
When armed, the perimeter alarm will help protect your vehicle from
unauthorized entry. When unauthorized entry occurs, the system will
flash the turn signal lamps and the theft indicator lamp and will sound
the horn.
The system is ready to arm whenever the key is out of the ignition. Any
of the following actions will arm the alarm system:
²Press the remote transmitter lock control.
²Open a door and press the power door lock control.
²Lock all doors with the key.
The system will wait 20 seconds after one of the arming actions is
performed before allowing an alarm to go off.
Theft indicator
When the perimeter alarm is armed, the theft indicator on the
instrument panel will flash briefly every two seconds to indicate the
perimeter alarm system is protecting your vehicle.
Disarming the system
You can disarm the system by any of the following actions:
²Unlock the doors by using your remote entry transmitter.
²Unlock the driver's door by using your key.
²Turn ignition to RUN.
Locks and Security
120
Page 192 of 288

Fuse/Relay
LocationFuse Amp
RatingPassenger Compartment Fuse
Panel Description
6 10A OBD II
7 5A DDM, DSM, Anti-theft LED,
Security Horn, PCM, Power Mirror
8 5A Right Front Turn, Right Front
Repeater, Right Front Sidemarker,
Right Front Park Lamps
9 10A Right Front Low Beam
10 5A Left Front Turn, Left Front
Repeater, Left Front Sidemarker,
Left Front Park Lamps
11 10A Left Front High Beam
12 5A Headlamp Levelling (if equipped)
13 5A Cluster
14 10A RCM, DATC
15 5A Not Used (Spare)
16 5A E/C Mirror, Heated Seat Controls,
RSM (Rain Sensor Module)
17 5A RCM, Alternator Warning Lamp
18 20A Radio, CIA
19 15A Tilt/Tele Motors
20 10A FEM, DATC, Cluster, Brake Shift
Interlock, REM
21 10A Power Folding Mirrors
22 10A DDM, Driver Door Mirror
23 10A Right Front High Beam
24 5A PATS
25 10A Left Front Low Beam
26 10A Wiper Relay, Windshield Washer
27 10A Radio, Cellphone, VCS
28 5A Not Used (Spare)
29 5A FEM
30 5A FEM, Passenger Power Mirror
Roadside Emergencies
192
Page 201 of 288
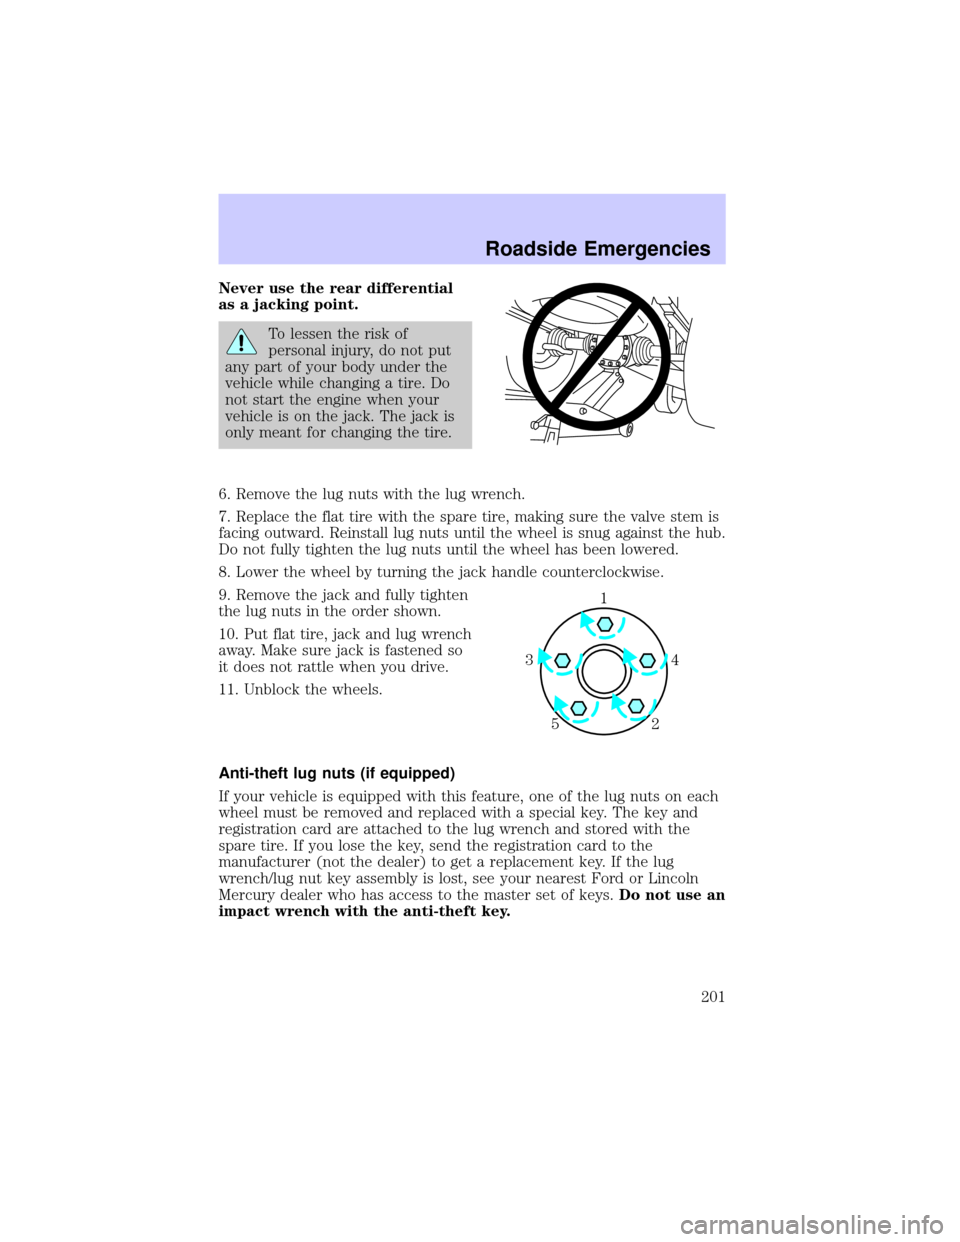
Never use the rear differential
as a jacking point.
To lessen the risk of
personal injury, do not put
any part of your body under the
vehicle while changing a tire. Do
not start the engine when your
vehicle is on the jack. The jack is
only meant for changing the tire.
6. Remove the lug nuts with the lug wrench.
7. Replace the flat tire with the spare tire, making sure the valve stem is
facing outward. Reinstall lug nuts until the wheel is snug against the hub.
Do not fully tighten the lug nuts until the wheel has been lowered.
8. Lower the wheel by turning the jack handle counterclockwise.
9. Remove the jack and fully tighten
the lug nuts in the order shown.
10. Put flat tire, jack and lug wrench
away. Make sure jack is fastened so
it does not rattle when you drive.
11. Unblock the wheels.
Anti-theft lug nuts (if equipped)
If your vehicle is equipped with this feature, one of the lug nuts on each
wheel must be removed and replaced with a special key. The key and
registration card are attached to the lug wrench and stored with the
spare tire. If you lose the key, send the registration card to the
manufacturer (not the dealer) to get a replacement key. If the lug
wrench/lug nut key assembly is lost, see your nearest Ford or Lincoln
Mercury dealer who has access to the master set of keys.Do not use an
impact wrench with the anti-theft key.
1
4 3
2 5
Roadside Emergencies
201
Page 202 of 288
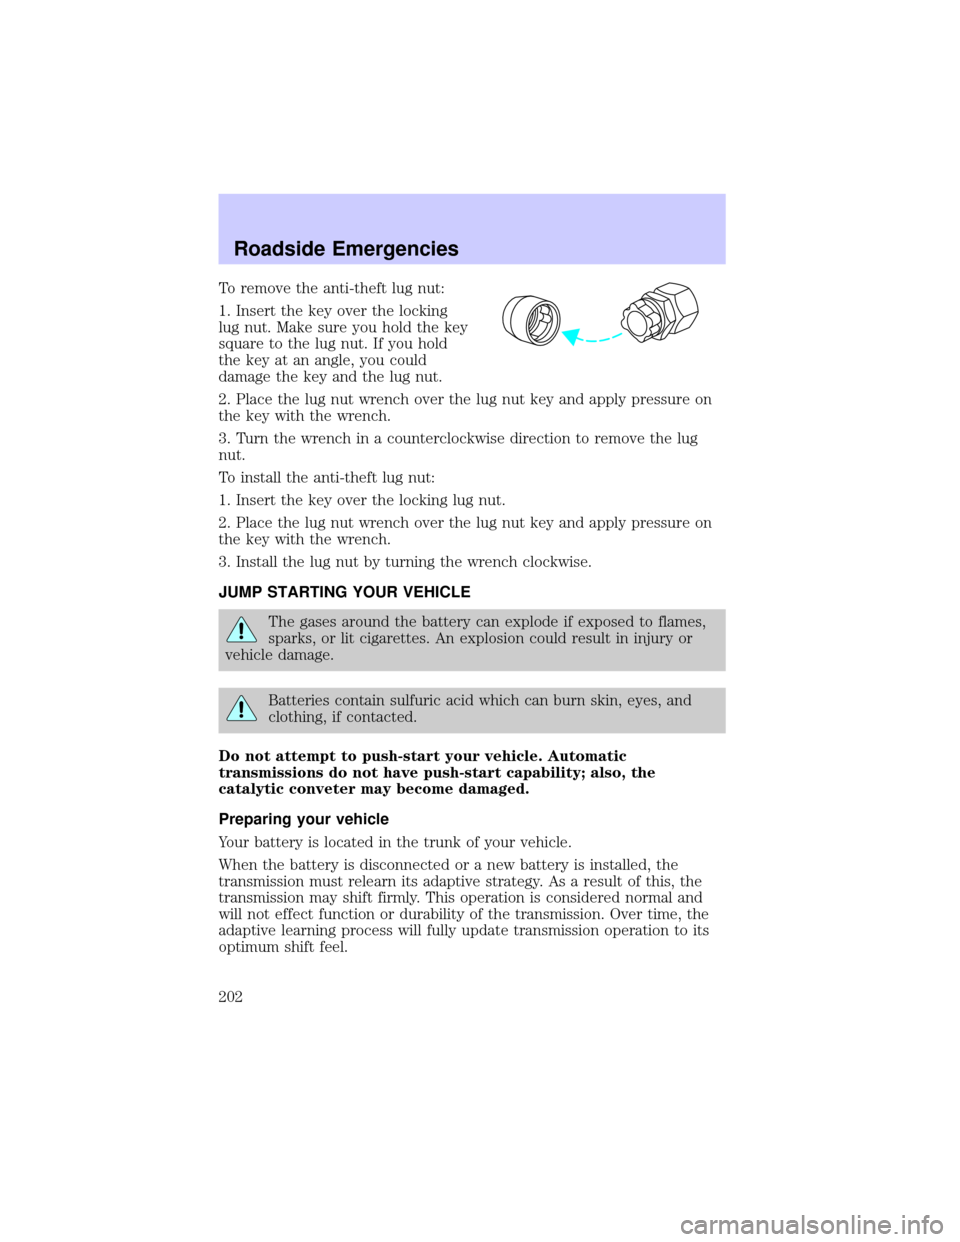
To remove the anti-theft lug nut:
1. Insert the key over the locking
lug nut. Make sure you hold the key
square to the lug nut. If you hold
the key at an angle, you could
damage the key and the lug nut.
2. Place the lug nut wrench over the lug nut key and apply pressure on
the key with the wrench.
3. Turn the wrench in a counterclockwise direction to remove the lug
nut.
To install the anti-theft lug nut:
1. Insert the key over the locking lug nut.
2. Place the lug nut wrench over the lug nut key and apply pressure on
the key with the wrench.
3. Install the lug nut by turning the wrench clockwise.
JUMP STARTING YOUR VEHICLE
The gases around the battery can explode if exposed to flames,
sparks, or lit cigarettes. An explosion could result in injury or
vehicle damage.
Batteries contain sulfuric acid which can burn skin, eyes, and
clothing, if contacted.
Do not attempt to push-start your vehicle. Automatic
transmissions do not have push-start capability; also, the
catalytic conveter may become damaged.
Preparing your vehicle
Your battery is located in the trunk of your vehicle.
When the battery is disconnected or a new battery is installed, the
transmission must relearn its adaptive strategy. As a result of this, the
transmission may shift firmly. This operation is considered normal and
will not effect function or durability of the transmission. Over time, the
adaptive learning process will fully update transmission operation to its
optimum shift feel.
Roadside Emergencies
202
Page 274 of 288

Travel equipment
Removable bike rack
Removable luggage rack
Removable luggage rack adapters
Removable ski rack
Protection and appearance equipment
Air bag anti-theft locks
Car cover
Carpet floor mats
Emergency kit
First aid kit
Front end covers (mini)
HomeLinkt
Molded splash guards
Molded vinyl floor mats
Moon roof air deflector
Park pilot/reverse park aid
Rear spoiler
Side window deflector
Wood/Leather steering wheel
For maximum vehicle performance, keep the following information in
mind when adding accessories or equipment to your vehicle:
²When adding accessories, equipment, passengers and luggage to your
vehicle, do not exceed the total weight capacity of the vehicle or of
the front or rear axle (GVWR or GAWR as indicated on the Safety
compliance certification label). Consult your dealer for specific weight
information.
Accessories
274