automatic transmission LINCOLN LS 2003 Owners Manual
[x] Cancel search | Manufacturer: LINCOLN, Model Year: 2003, Model line: LS, Model: LINCOLN LS 2003Pages: 288, PDF Size: 3.19 MB
Page 78 of 288
5. Turn the ignition to the OFF position.
6. Turn the autolamps on (The park lamps and low beams will turn on.)
7. Turn the autolamps off after the desired delay time is reached. (The
maximum programmable delay is 3 minutes. The lights that turned on in
step 6 will turn off.)
Autolamps with wipers
When the windshield wipers are on with the headlamps, the autolamp
system will provide automatic on/off control of the exterior lights based
on the status of the wipers.
•When the wipers are turned on, the exterior lights will turn on after a
short delay.
•When the wipers are turned off, the exterior lights will turn off after a
short delay.
Note: The moisture sensitive wipers feature may affect the length of the
autolamp time delay.
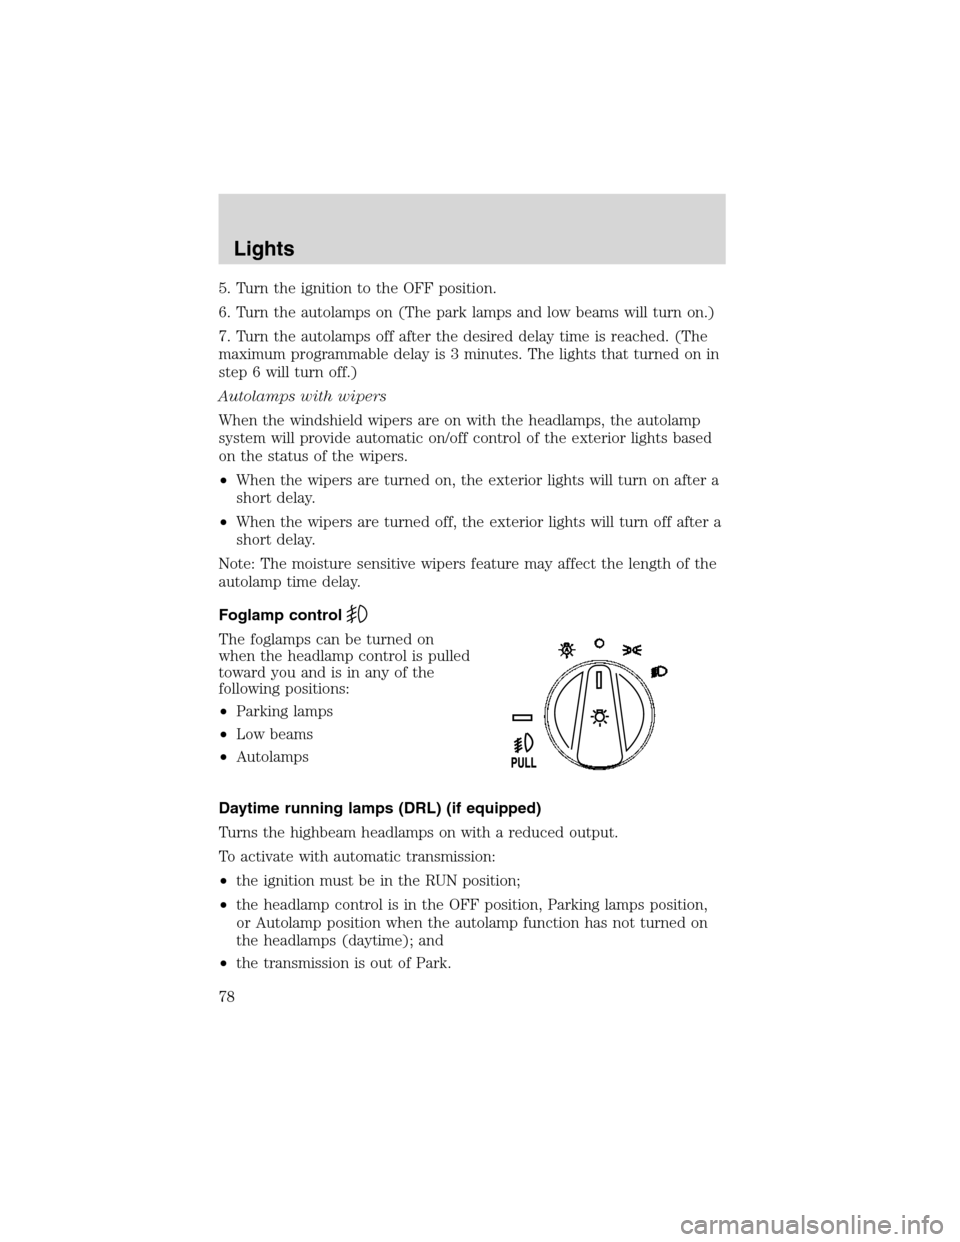
Foglamp control
The foglamps can be turned on
when the headlamp control is pulled
toward you and is in any of the
following positions:
•Parking lamps
•Low beams
•Autolamps
Daytime running lamps (DRL) (if equipped)
Turns the highbeam headlamps on with a reduced output.
To activate with automatic transmission:
•the ignition must be in the RUN position;
•the headlamp control is in the OFF position, Parking lamps position,
or Autolamp position when the autolamp function has not turned on
the headlamps (daytime); and
•the transmission is out of Park.
Lights
78
Page 138 of 288
Deactivating/activatingtheeasy-access/easy-out feature
The easy-access/easy-out feature can be turned off or on through the
vehicle message center (if equipped). If your vehicle does not have a
message center, the feature can be turned off or on by your dealer.
Memory seats/steering column/mirrors/adjustable pedals
(if equipped)
This system allows automatic
positioning of the driver seat,
adjustable pedals, outside rearview
mirrors, and power adjusted
tilt/telescope steering column to two
programmable positions.
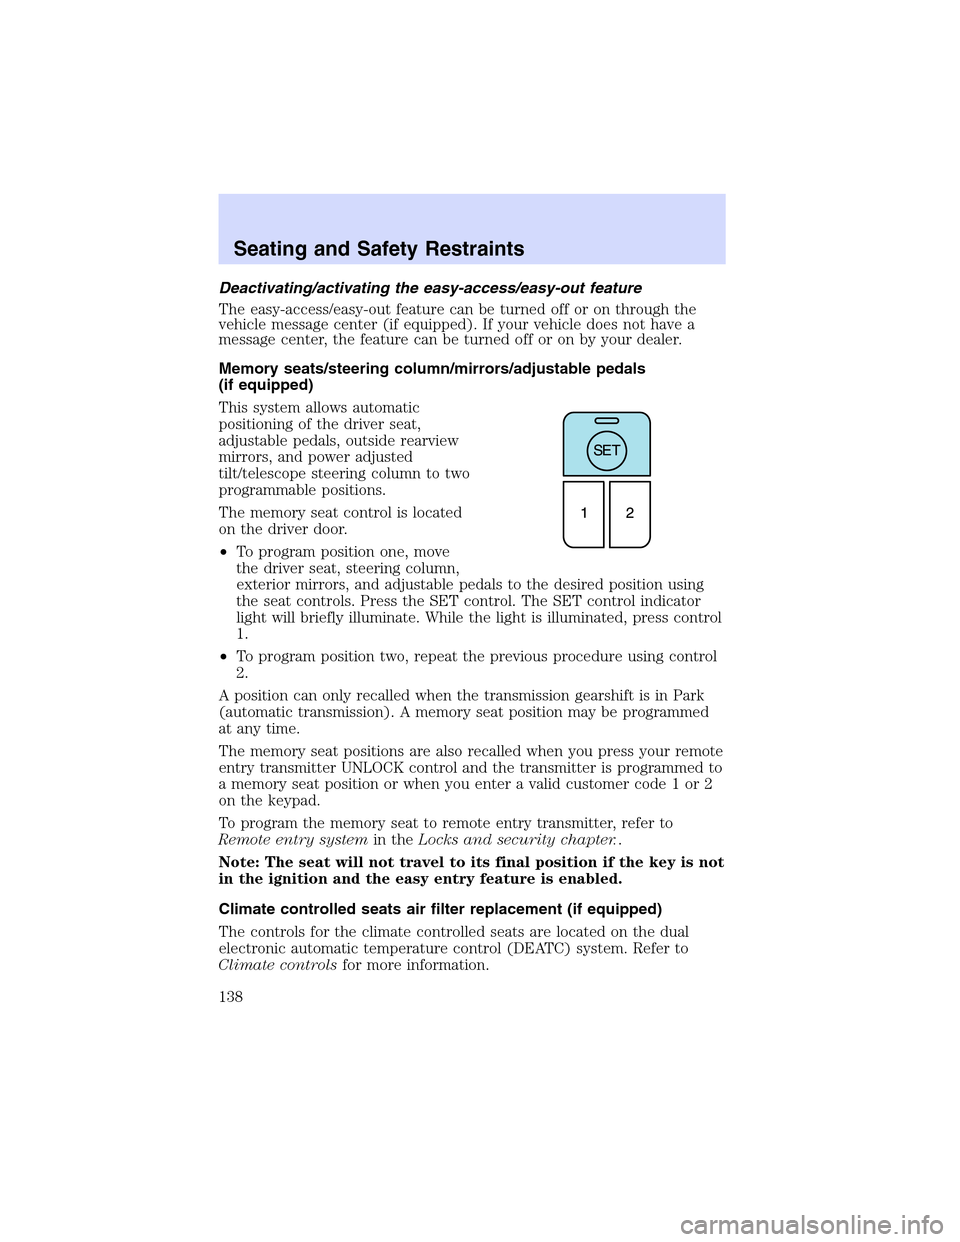
The memory seat control is located
on the driver door.
•To program position one, move
the driver seat, steering column,
exterior mirrors, and adjustable pedals to the desired position using
the seat controls. Press the SET control. The SET control indicator
light will briefly illuminate. While the light is illuminated, press control
1.
•To program position two, repeat the previous procedure using control
2.
A position can only recalled when the transmission gearshift is in Park
(automatic transmission). A memory seat position may be programmed
at any time.
The memory seat positions are also recalled when you press your remote
entry transmitter UNLOCK control and the transmitter is programmed to
a memory seat position or when you enter a valid customer code 1 or 2
on the keypad.
To program the memory seat to remote entry transmitter, refer to
Remote entry systemin theLocks and security chapter..
Note: The seat will not travel to its final position if the key is not
in the ignition and the easy entry feature is enabled.
Climate controlled seats air filter replacement (if equipped)
The controls for the climate controlled seats are located on the dual
electronic automatic temperature control (DEATC) system. Refer to
Climate controlsfor more information.
Seating and Safety Restraints
138
Page 155 of 288
Reasons given... Consider...
“I have an air bag”Air bags offer greater protection when
used with safety belts. Frontal airbags
are not designed to inflate in rear and
side crashes or rollovers.
“I’d rather be thrown clear”Not a good idea.Peoplewho are
ejected are 40 times more likely
to DIE.Safety belts help prevent
ejection, WE CAN’T“PICK OUR
CRASH”.
Do not sit on top of a buckled safety belt to avoid the Belt
Minder chime. Sitting on the safety belt will increase the risk of
injury in an accident. To disable (one-time) or deactivate the Belt
Minder feature please follow the directions stated below.
One time disable
If at any time the driver/front passenger quickly buckles then unbuckles,
the BeltMinder feature for that seating position is disabled for the
current ignition cycle. The BeltMinder feature will re-enable during the
same ignition cycle if the occupant buckles and remains buckled for
approximately 30 seconds. Confirmation is not given for the one time
disable.
Deactivating/activating the BeltMinder feature
The driver and front passenger BeltMinder are
deactivated/activated independently. When deactivating/activating
one seating position, do not buckle the other position as this will
terminate the process.
Read steps1-4thoroughly before proceeding with the
deactivation/activation programming procedure.
The driver and front passenger BeltMinder features can be
deactivated/activated by performing the following procedure:
Before following the procedure, make sure that:
•The parking brake is set
•The gearshift is in P (Park) (automatic transmission)
•The ignition switch is in the OFF position
•The driver and front passenger safety belts are unbuckled
Seating and Safety Restraints
155
Page 181 of 288
STARTING
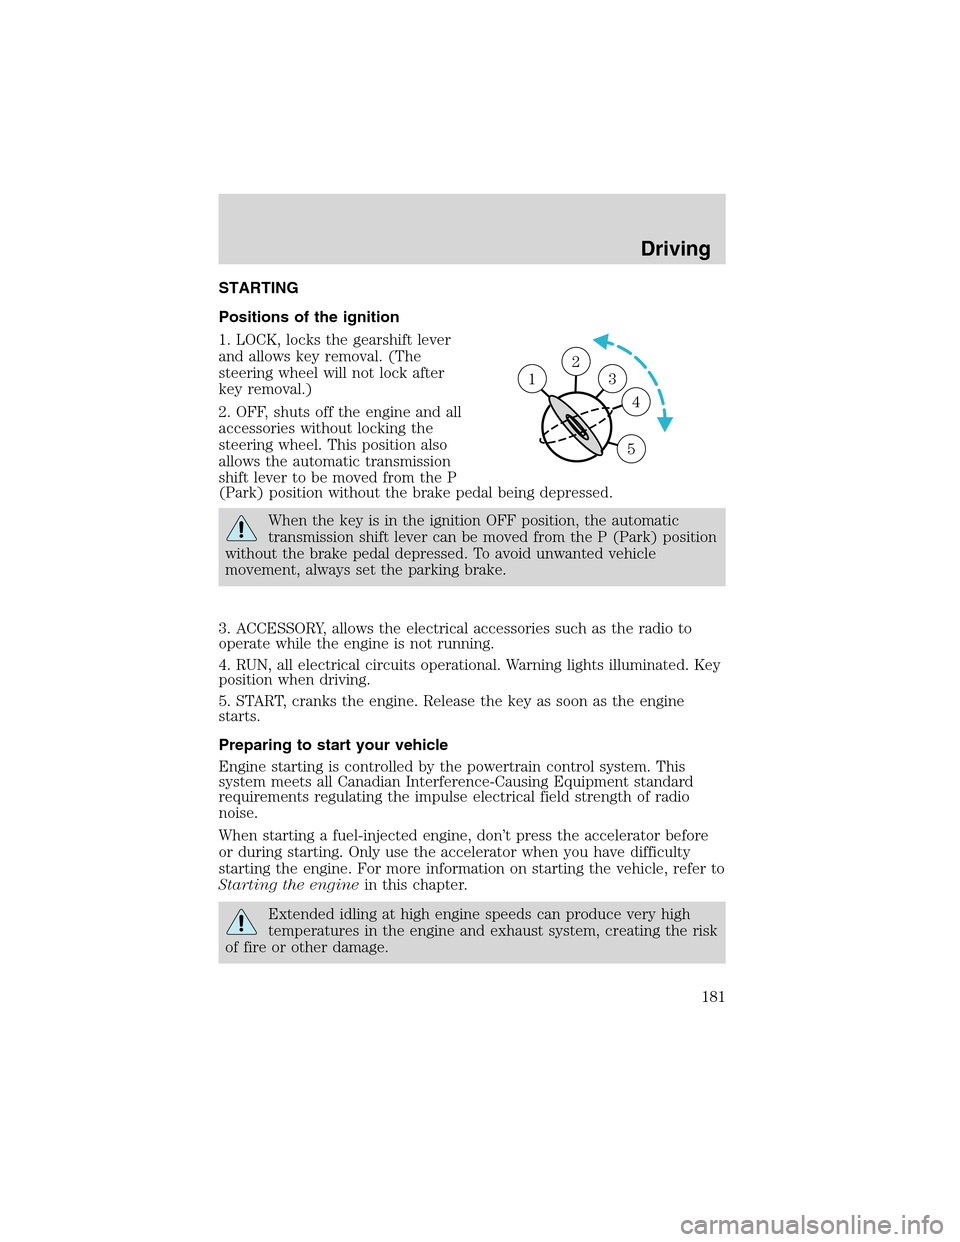
Positions of the ignition
1. LOCK, locks the gearshift lever
and allows key removal. (The
steering wheel will not lock after
key removal.)
2. OFF, shuts off the engine and all
accessories without locking the
steering wheel. This position also
allows the automatic transmission
shift lever to be moved from the P
(Park) position without the brake pedal being depressed.
When the key is in the ignition OFF position, the automatic
transmission shift lever can be moved from the P (Park) position
without the brake pedal depressed. To avoid unwanted vehicle
movement, always set the parking brake.
3. ACCESSORY, allows the electrical accessories such as the radio to
operate while the engine is not running.
4. RUN, all electrical circuits operational. Warning lights illuminated. Key
position when driving.
5. START, cranks the engine. Release the key as soon as the engine
starts.
Preparing to start your vehicle
Engine starting is controlled by the powertrain control system. This
system meets all Canadian Interference-Causing Equipment standard
requirements regulating the impulse electrical field strength of radio
noise.
When starting a fuel-injected engine, don’t press the accelerator before
or during starting. Only use the accelerator when you have difficulty
starting the engine. For more information on starting the vehicle, refer to
Starting the enginein this chapter.
Extended idling at high engine speeds can produce very high
temperatures in the engine and exhaust system, creating the risk
of fire or other damage.
2
3
4
5
1
Driving
181
Page 190 of 288
AUTOMATIC TRANSMISSION OPERATION
Brake-shift interlock
This vehicle is equipped with a brake-shift interlock feature that prevents
the gearshift lever from being moved from P (Park) when the ignition is
in the RUN position unless brake pedal is depressed.
If you cannot move the gearshift lever out of P (Park) with ignition in
the RUN position and the brake pedal depressed:
1. Apply the parking brake, turn ignition key to LOCK, then remove the
key.
2. Insert the key and turn it to OFF.Apply the brake pedal and shift
to N (Neutral).
When the key is in the ignition OFF position, the automatic
transmission shift lever can be moved from the P (Park) position
without the brake pedal depressed. To avoid unwanted vehicle
movement, always set the parking brake.
3. Start the vehicle.
If it is necessary to use the above procedure to move the gearshift lever,
it is possible that a fuse has blown or the vehicle’s brakelamps are not
operating properly. Refer toFuses and relaysin theRoadside
emergencieschapter.
Do not drive your vehicle until you verify that the brakelamps
are working.
Always set the parking brake fully and make sure the gearshift is
latched in P (Park). Turn the ignition to the LOCK position and
remove the key whenever you leave your vehicle.
If the parking brake is fully released, but the brake warning lamp
remains illuminated, the brakes may not be working properly.
See your dealer or a qualified service technician.
Driving
190
Page 191 of 288
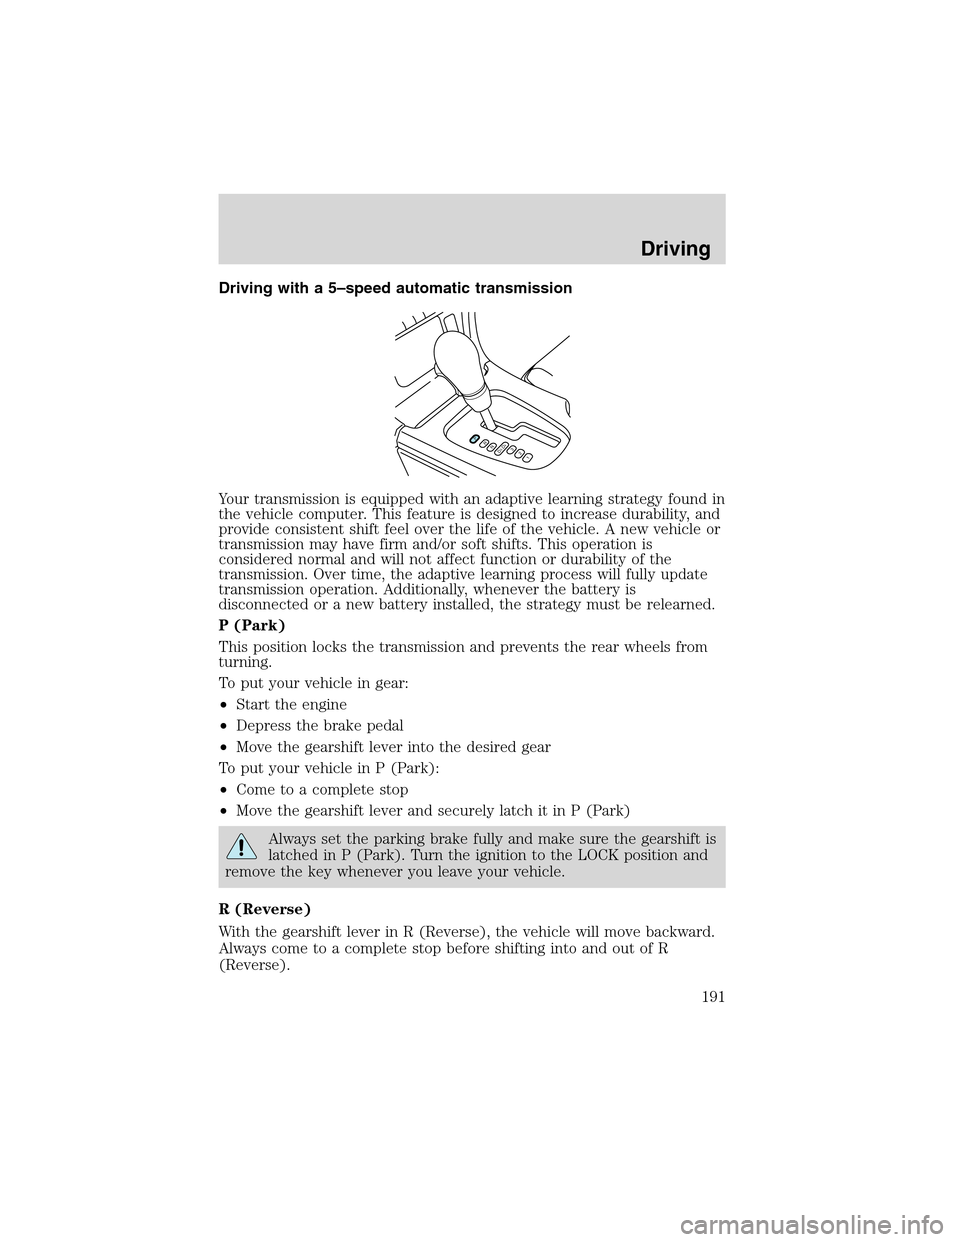
Driving with a 5–speed automatic transmission
Your transmission is equipped with an adaptive learning strategy found in
the vehicle computer. This feature is designed to increase durability, and
provide consistent shift feel over the life of the vehicle. A new vehicle or
transmission may have firm and/or soft shifts. This operation is
considered normal and will not affect function or durability of the
transmission. Over time, the adaptive learning process will fully update
transmission operation. Additionally, whenever the battery is
disconnected or a new battery installed, the strategy must be relearned.
P (Park)
This position locks the transmission and prevents the rear wheels from
turning.
To put your vehicle in gear:
•Start the engine
•Depress the brake pedal
•Move the gearshift lever into the desired gear
To put your vehicle in P (Park):
•Come to a complete stop
•Move the gearshift lever and securely latch it in P (Park)
Always set the parking brake fully and make sure the gearshift is
latched in P (Park). Turn the ignition to the LOCK position and
remove the key whenever you leave your vehicle.
R (Reverse)
With the gearshift lever in R (Reverse), the vehicle will move backward.
Always come to a complete stop before shifting into and out of R
(Reverse).
PRND5D4321
Driving
191
Page 193 of 288
1(First)
•Provides maximum engine braking.
•Allows upshifts by moving shift lever.
•Will not downshift into first gear at high speeds; will cause the
transmission to downshift to a lower gear, then allows for first gear
when the vehicle reaches slower speeds.
Forced downshifts
•Allowed in Overdrive or Drive.
•Depress the accelerator to the floor.
•Allows transmission to select an appropriate gear.
Driving with a 5–speed automatic transmission with the Select
Shift Transmission (SST) shifter (if equipped)
Understanding gearshift positions
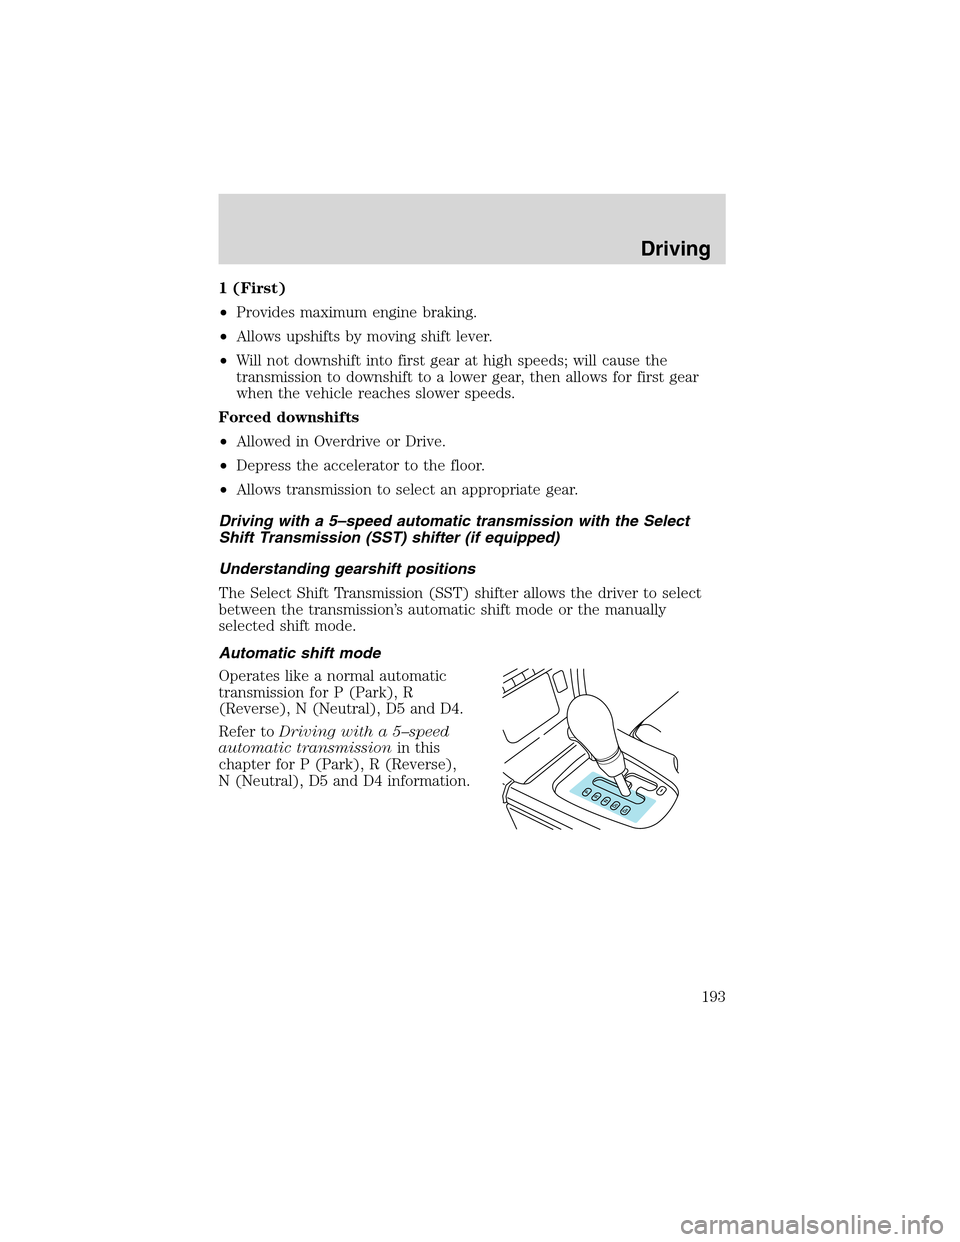
The Select Shift Transmission (SST) shifter allows the driver to select
between the transmission’s automatic shift mode or the manually
selected shift mode.
Automatic shift mode
Operates like a normal automatic
transmission for P (Park), R
(Reverse), N (Neutral), D5 and D4.
Refer toDriving with a 5–speed
automatic transmissionin this
chapter for P (Park), R (Reverse),
N (Neutral), D5 and D4 information.
Driving
193
Page 194 of 288
Manualshiftmode
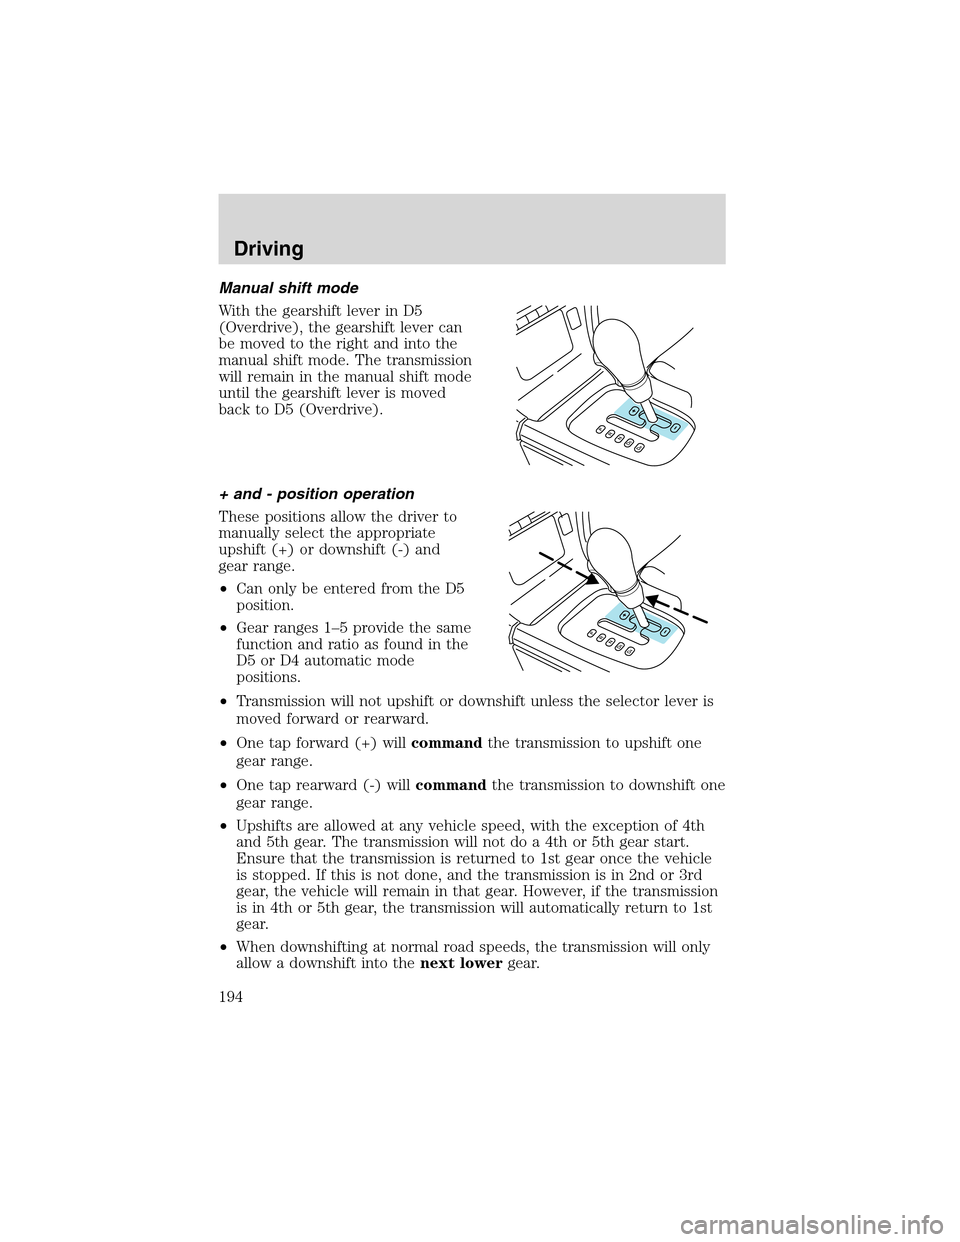
With the gearshift lever in D5
(Overdrive), the gearshift lever can
be moved to the right and into the
manual shift mode. The transmission
will remain in the manual shift mode
until the gearshift lever is moved
back to D5 (Overdrive).
+ and - position operation
These positions allow the driver to
manually select the appropriate
upshift (+) or downshift (-) and
gear range.
•Can only be entered from the D5
position.
•Gear ranges 1–5 provide the same
function and ratio as found in the
D5 or D4 automatic mode
positions.
•Transmission will not upshift or downshift unless the selector lever is
moved forward or rearward.
•One tap forward (+) willcommandthe transmission to upshift one
gear range.
•One tap rearward (-) willcommandthe transmission to downshift one
gear range.
•Upshifts are allowed at any vehicle speed, with the exception of 4th
and 5th gear. The transmission will not do a 4th or 5th gear start.
Ensure that the transmission is returned to 1st gear once the vehicle
is stopped. If this is not done, and the transmission is in 2nd or 3rd
gear, the vehicle will remain in that gear. However, if the transmission
is in 4th or 5th gear, the transmission will automatically return to 1st
gear.
•When downshifting at normal road speeds, the transmission will only
allow a downshift into thenext lowergear.
Driving
194
Page 197 of 288
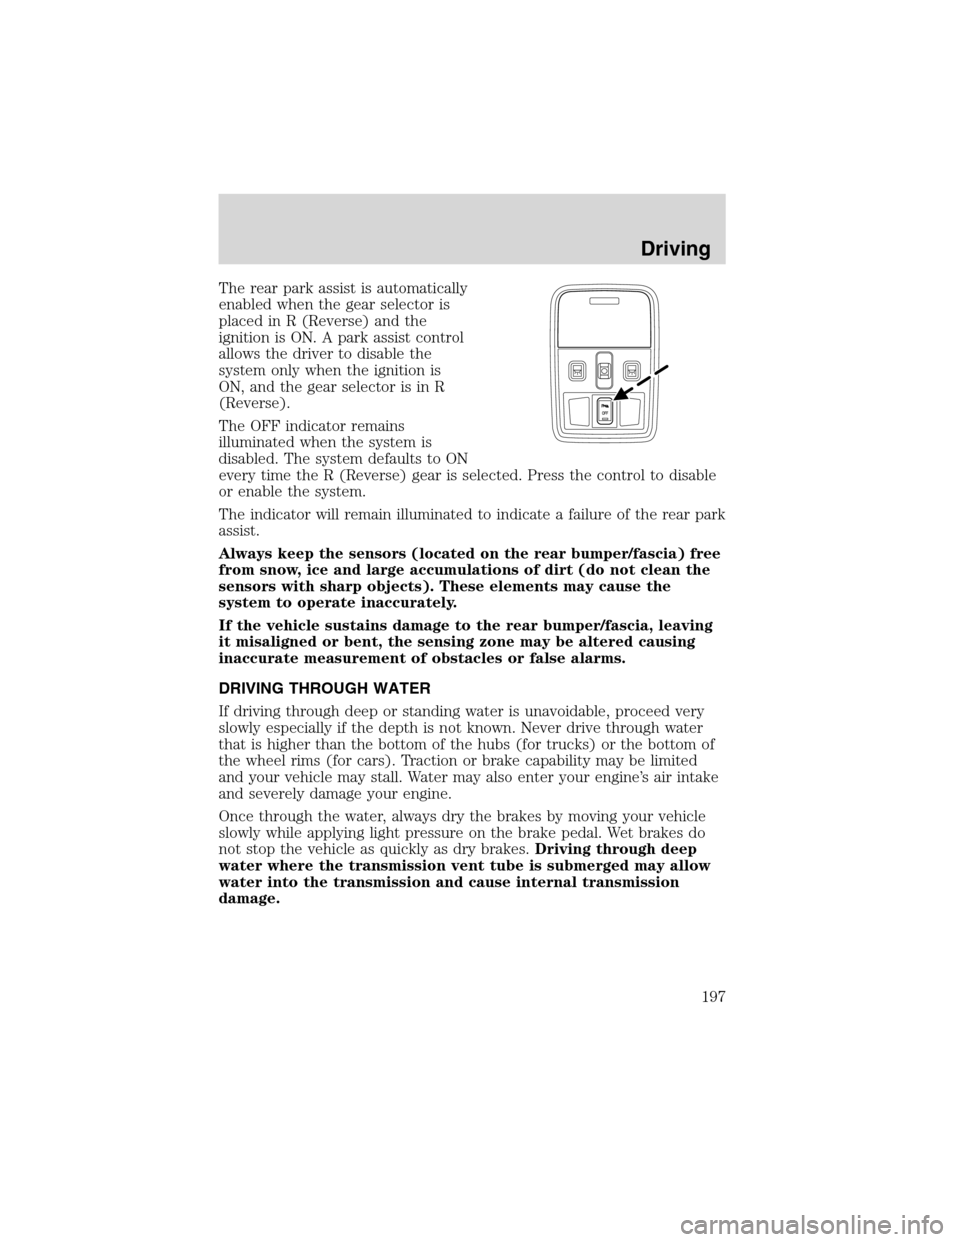
Therearpark assist is automatically
enabled when the gear selector is
placed in R (Reverse) and the
ignition is ON. A park assist control
allows the driver to disable the
system only when the ignition is
ON, and the gear selector is in R
(Reverse).
The OFF indicator remains
illuminated when the system is
disabled. The system defaults to ON
every time the R (Reverse) gear is selected. Press the control to disable
or enable the system.
The indicator will remain illuminated to indicate a failure of the rear park
assist.
Always keep the sensors (located on the rear bumper/fascia) free
from snow, ice and large accumulations of dirt (do not clean the
sensors with sharp objects). These elements may cause the
system to operate inaccurately.
If the vehicle sustains damage to the rear bumper/fascia, leaving
it misaligned or bent, the sensing zone may be altered causing
inaccurate measurement of obstacles or false alarms.
DRIVING THROUGH WATER
If driving through deep or standing water is unavoidable, proceed very
slowly especially if the depth is not known. Never drive through water
that is higher than the bottom of the hubs (for trucks) or the bottom of
the wheel rims (for cars). Traction or brake capability may be limited
and your vehicle may stall. Water may also enter your engine’s air intake
and severely damage your engine.
Once through the water, always dry the brakes by moving your vehicle
slowly while applying light pressure on the brake pedal. Wet brakes do
not stop the vehicle as quickly as dry brakes.Driving through deep
water where the transmission vent tube is submerged may allow
water into the transmission and cause internal transmission
damage.
Driving
197
Page 216 of 288
JUMP STARTING YOUR VEHICLE
The gases around the battery can explode if exposed to flames,
sparks, or lit cigarettes. An explosion could result in injury or
vehicle damage.
Batteries contain sulfuric acid which can burn skin, eyes and
clothing, if contacted.
Do not attempt to push-start your vehicle. Automatic
transmissions do not have push-start capability; also, the
catalytic converter may become damaged.
In the event of battery failure, you can open the trunk by using your
master key on the key cylinderlocated behind the driver’s seat.
Preparing your vehicle
Your battery is located in the trunk of your vehicle.
When the battery is disconnected or a new battery is installed, the
transmission must relearn its shift strategy. As a result, the transmission
may have firm and/or soft shifts. This operation is considered normal and
will not affect function or durability of the transmission. Over time, the
adaptive learning process will fully update transmission operation.
1.Use only a 12–volt supply to start your vehicle.
2. Do not disconnect the battery of your disabled vehicle as this could
damage the vehicle’s electrical system. Keep the battery vent hose
attached at all times.
3. Park the booster vehicle close to the trunk of your disabled vehicle
making sure the two vehiclesdo nottouch. Set the parking brake on
both vehicles and stay clear of the engine cooling fan and other moving
parts.
4. Check all battery terminals and remove any excessive corrosion before
you attach the battery cables. Ensure the vent caps are tight and level.
5. Turn the heater fan on in both vehicles to protect any electrical
surges. Turn all other accessories off.
Roadside Emergencies
216