bulb LINCOLN LS 2003 Owners Manual
[x] Cancel search | Manufacturer: LINCOLN, Model Year: 2003, Model line: LS, Model: LINCOLN LS 2003Pages: 288, PDF Size: 3.19 MB
Page 1 of 288
Introduction 4
Instrument Cluster 10
Warning and control lights 10
Gauges 14
Entertainment Systems 16
AM/FM stereo with CD 16
AM/FM stereo cassette with CD 20
Navigation System 24
Climate Controls 69
Electronic automatic temperature control 69
Lights 77
Headlamps 77
Turn signal control 81
Bulb replacement 81
Driver Controls 86
Windshield wiper/washer control 86
Steering wheel adjustment 88
Power windows 90
Mirrors 92
Speed control 95
Message center 106
Locks and Security 120
Keys 120
Locks 120
Anti-theft system 124
Table of Contents
1
Page 10 of 288
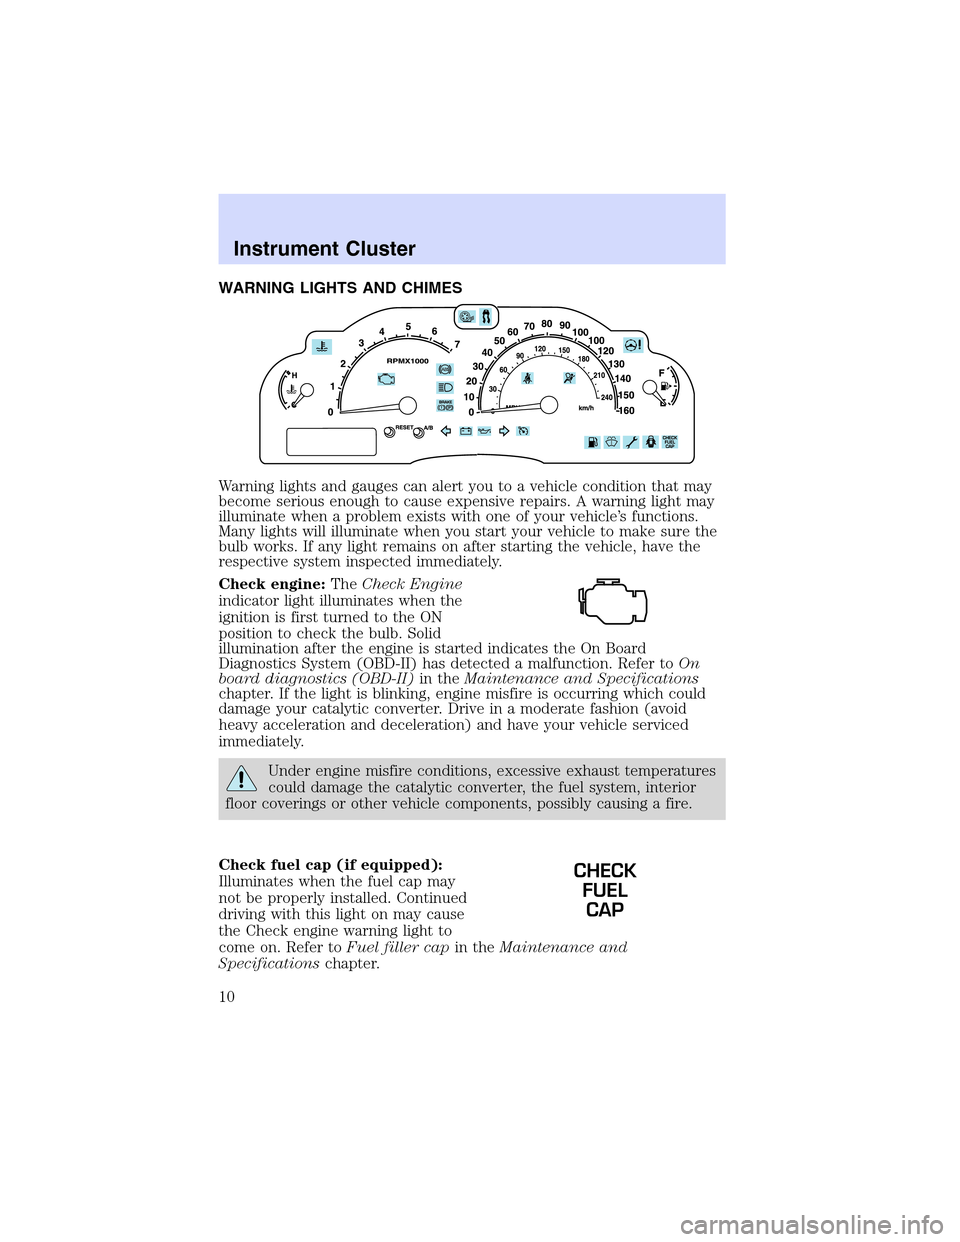
WARNING LIGHTS AND CHIMES
Warning lights and gauges can alert you to a vehicle condition that may
become serious enough to cause expensive repairs. A warning light may
illuminate when a problem exists with one of your vehicle’s functions.
Many lights will illuminate when you start your vehicle to make sure the
bulb works. If any light remains on after starting the vehicle, have the
respective system inspected immediately.
Check engine:TheCheck Engine
indicator light illuminates when the
ignition is first turned to the ON
position to check the bulb. Solid
illumination after the engine is started indicates the On Board
Diagnostics System (OBD-II) has detected a malfunction. Refer toOn
board diagnostics (OBD-II)in theMaintenance and Specifications
chapter. If the light is blinking, engine misfire is occurring which could
damage your catalytic converter. Drive in a moderate fashion (avoid
heavy acceleration and deceleration) and have your vehicle serviced
immediately.
Under engine misfire conditions, excessive exhaust temperatures
could damage the catalytic converter, the fuel system, interior
floor coverings or other vehicle components, possibly causing a fire.
Check fuel cap (if equipped):
Illuminates when the fuel cap may
not be properly installed. Continued
driving with this light on may cause
the Check engine warning light to
come on. Refer toFuel filler capin theMaintenance and
Specificationschapter.
CHECK
FUEL
CAP
Instrument Cluster
10
Page 13 of 288
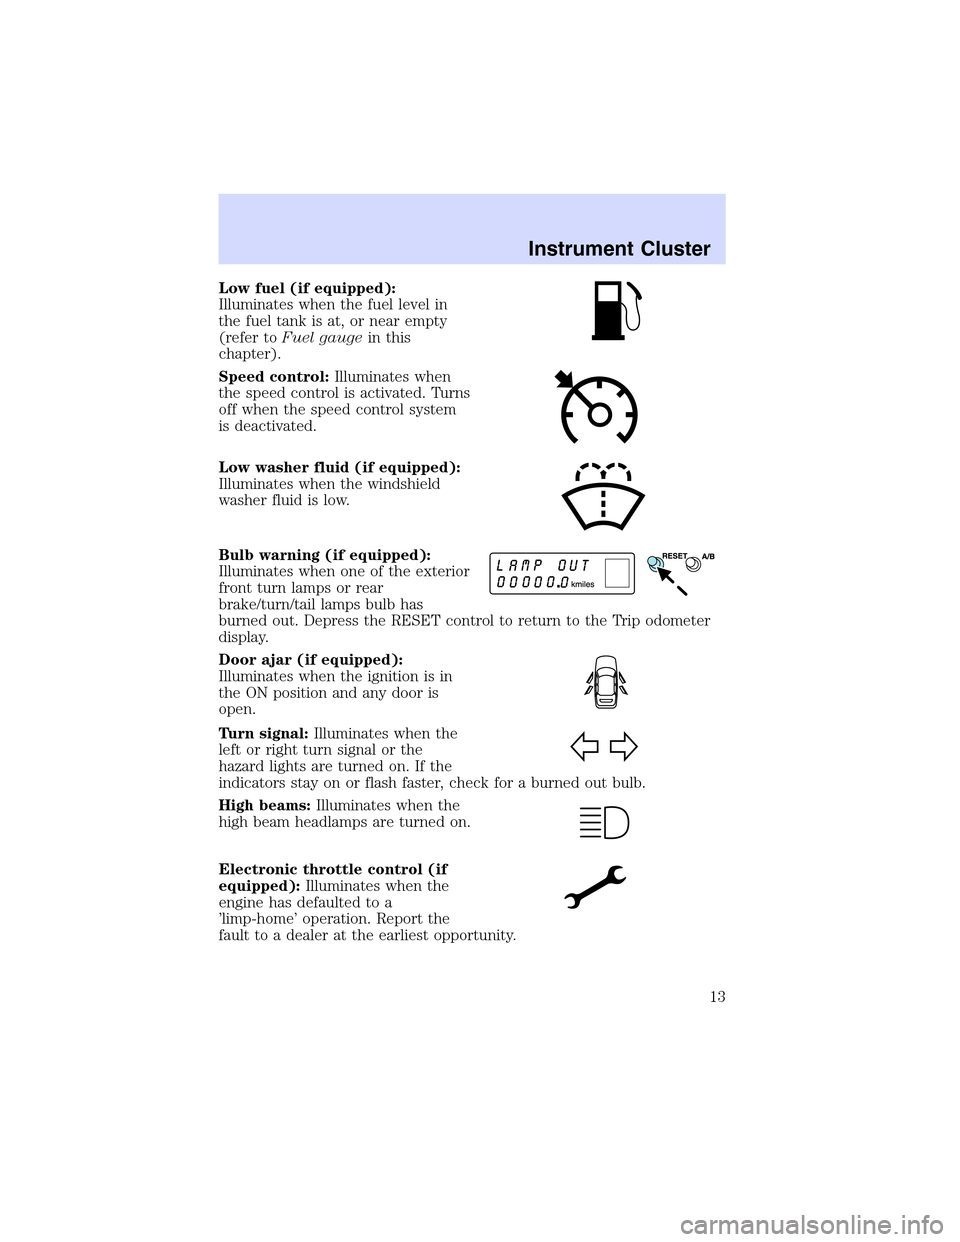
Low fuel (if equipped):
Illuminates when the fuel level in
the fuel tank is at, or near empty
(refer toFuel gaugein this
chapter).
Speed control:Illuminates when
the speed control is activated. Turns
off when the speed control system
is deactivated.
Low washer fluid (if equipped):
Illuminates when the windshield
washer fluid is low.
Bulb warning (if equipped):
Illuminates when one of the exterior
front turn lamps or rear
brake/turn/tail lamps bulb has
burned out. Depress the RESET control to return to the Trip odometer
display.
Door ajar (if equipped):
Illuminates when the ignition is in
the ON position and any door is
open.
Turn signal:Illuminates when the
left or right turn signal or the
hazard lights are turned on. If the
indicators stay on or flash faster, check for a burned out bulb.
High beams:Illuminates when the
high beam headlamps are turned on.
Electronic throttle control (if
equipped):Illuminates when the
engine has defaulted to a
’limp-home’operation. Report the
fault to a dealer at the earliest opportunity.
Instrument Cluster
13
Page 81 of 288
7. Close the hood and turn off the lamps.
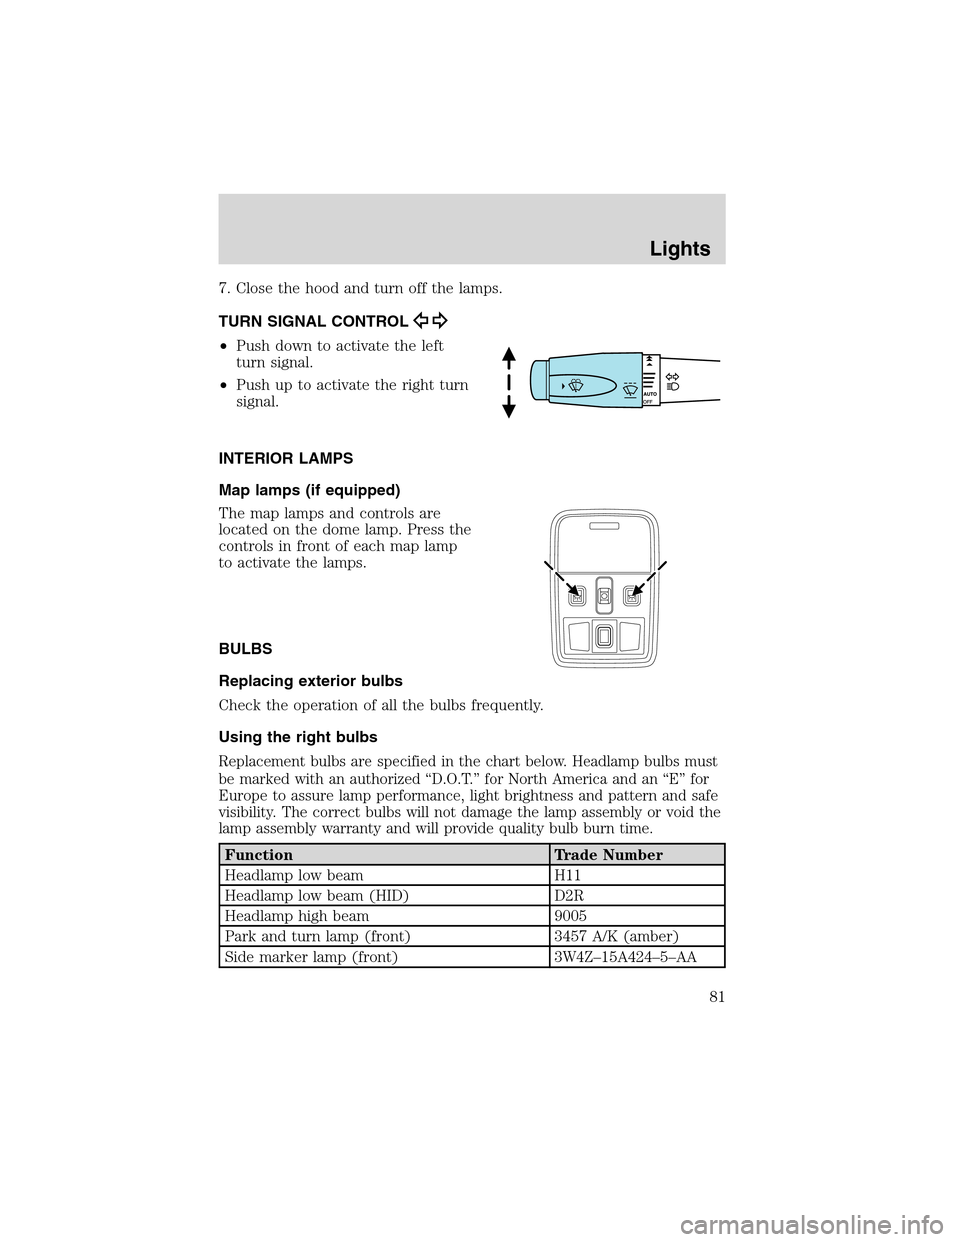
TURN SIGNAL CONTROL
•Push down to activate the left
turn signal.
•Push up to activate the right turn
signal.
INTERIOR LAMPS
Map lamps (if equipped)
The map lamps and controls are
located on the dome lamp. Press the
controls in front of each map lamp
to activate the lamps.
BULBS
Replacing exterior bulbs
Check the operation of all the bulbs frequently.
Using the right bulbs
Replacement bulbs are specified in the chart below. Headlamp bulbs must
be marked with an authorized“D.O.T.”for North America and an“E”for
Europe to assure lamp performance, light brightness and pattern and safe
visibility. The correct bulbs will not damage the lamp assembly or void the
lamp assembly warranty and will provide quality bulb burn time.
Function Trade Number
Headlamp low beam H11
Headlamp low beam (HID) D2R
Headlamp high beam 9005
Park and turn lamp (front) 3457 A/K (amber)
Side marker lamp (front) 3W4Z–15A424–5–AA
Lights
81
Page 82 of 288
Function Trade Number
Foglamp 9145
Tail lamp, brakelamp, side lamp 3157K
Rear turn lamp 3157 A/K (amber)
Backup lamp 921
License plate lamp 168
High-mount brakelamp 3W4Z–13A613–AA
Map lamp (with moon roof) 906
Rail lamp (rear) 168
Map lamp (front) 906
Sun visor lighted mirror lamp Part # E9SB-13465-BA
Glove compartment 194
Ashtray 194
Luggage compartment lamp 212-2
All replacement bulbs are clear in color except where noted.
To replace all instrument panel lights - see your dealer.
Interior bulbs
Check the operation of all bulbs frequently.
Map lamps
For bulb replacement, see a qualified service technician or your dealer.
Replacing headlamp bulbs
The headlamp assembly contains the low beam bulb, the high beam bulb,
park/turn lamp bulb and led side marker. To replace any of these items,
the headlamp assembly must be removed from the vehicle as follows:
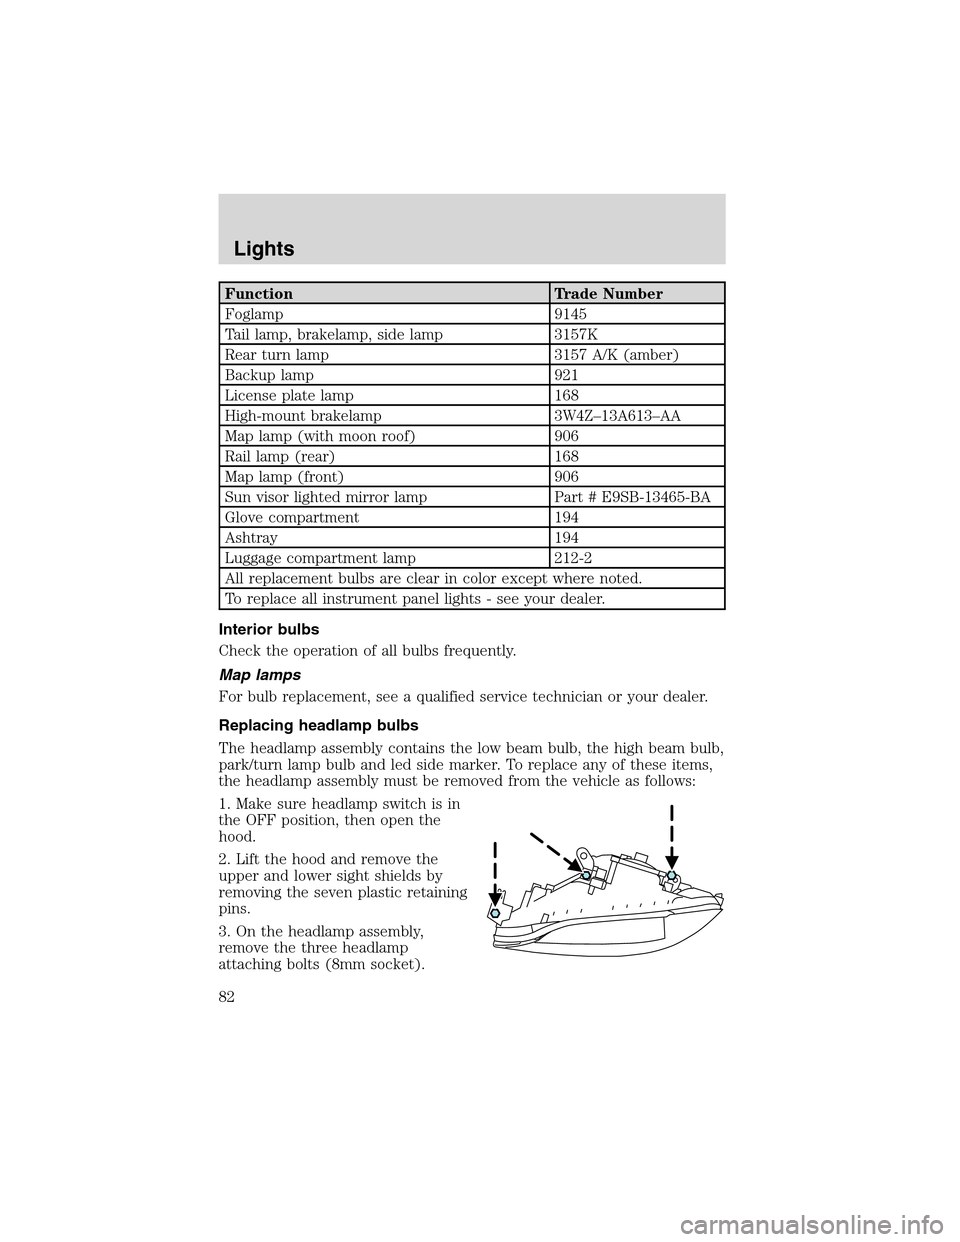
1. Make sure headlamp switch is in
the OFF position, then open the
hood.
2. Lift the hood and remove the
upper and lower sight shields by
removing the seven plastic retaining
pins.
3. On the headlamp assembly,
remove the three headlamp
attaching bolts (8mm socket).
Lights
82
Page 83 of 288
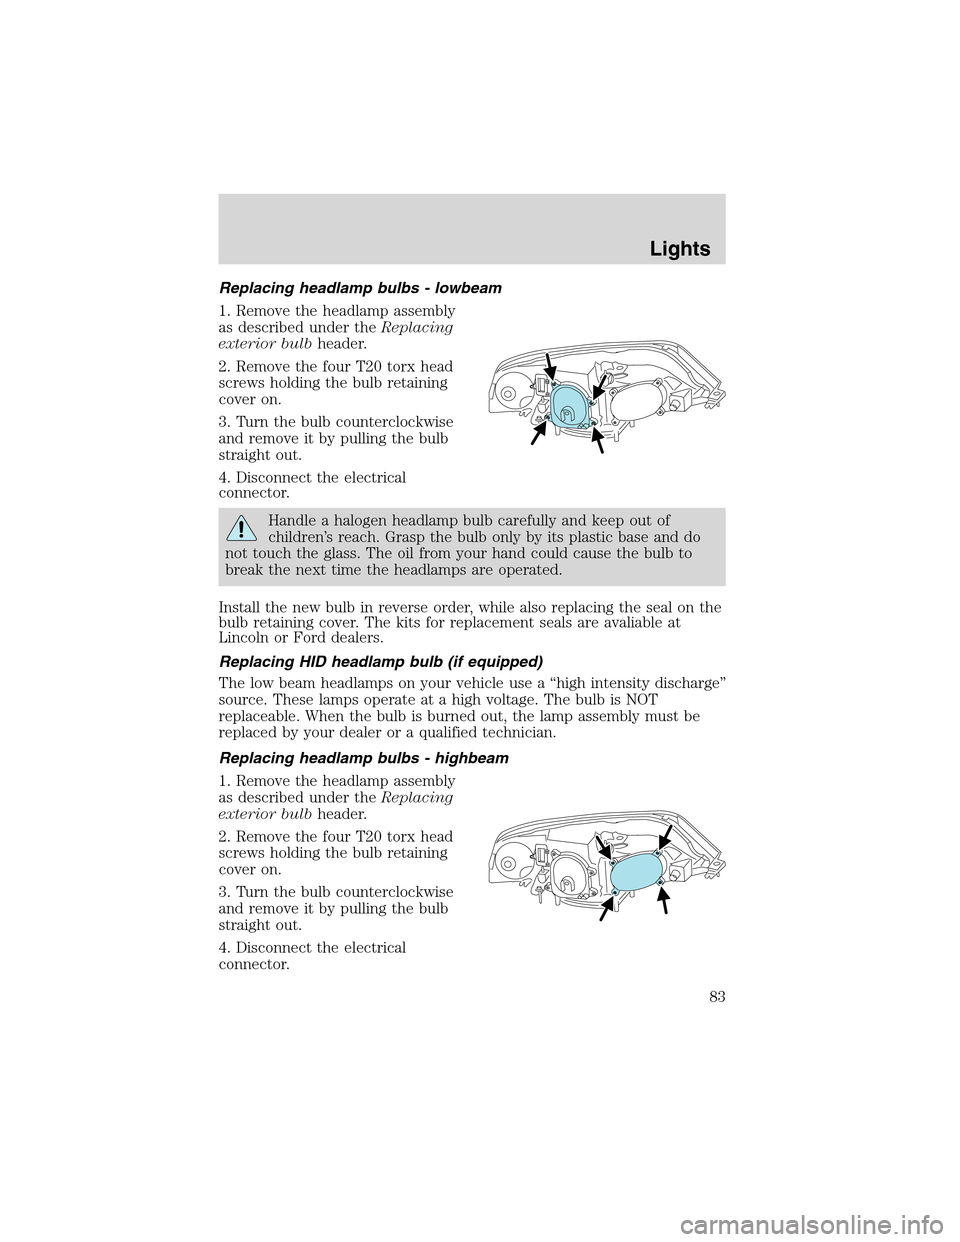
Replacing headlamp bulbs - lowbeam
1. Remove the headlamp assembly
as described under theReplacing
exterior bulbheader.
2. Remove the four T20 torx head
screws holding the bulb retaining
cover on.
3. Turn the bulb counterclockwise
and remove it by pulling the bulb
straight out.
4. Disconnect the electrical
connector.
Handle a halogen headlamp bulb carefully and keep out of
children’s reach. Grasp the bulb only by its plastic base and do
not touch the glass. The oil from your hand could cause the bulb to
break the next time the headlamps are operated.
Install the new bulb in reverse order, while also replacing the seal on the
bulb retaining cover. The kits for replacement seals are avaliable at
Lincoln or Ford dealers.
Replacing HID headlamp bulb (if equipped)
The low beam headlamps on your vehicle use a“high intensity discharge”
source. These lamps operate at a high voltage. The bulb is NOT
replaceable. When the bulb is burned out, the lamp assembly must be
replaced by your dealer or a qualified technician.
Replacing headlamp bulbs - highbeam
1. Remove the headlamp assembly
as described under theReplacing
exterior bulbheader.
2. Remove the four T20 torx head
screws holding the bulb retaining
cover on.
3. Turn the bulb counterclockwise
and remove it by pulling the bulb
straight out.
4. Disconnect the electrical
connector.
Lights
83
Page 84 of 288
Install the new bulb in reverse order, while also replacing the seal on the
bulb retaining cover. The kits for replacement seals are avaliable at
Lincoln or Ford dealers.
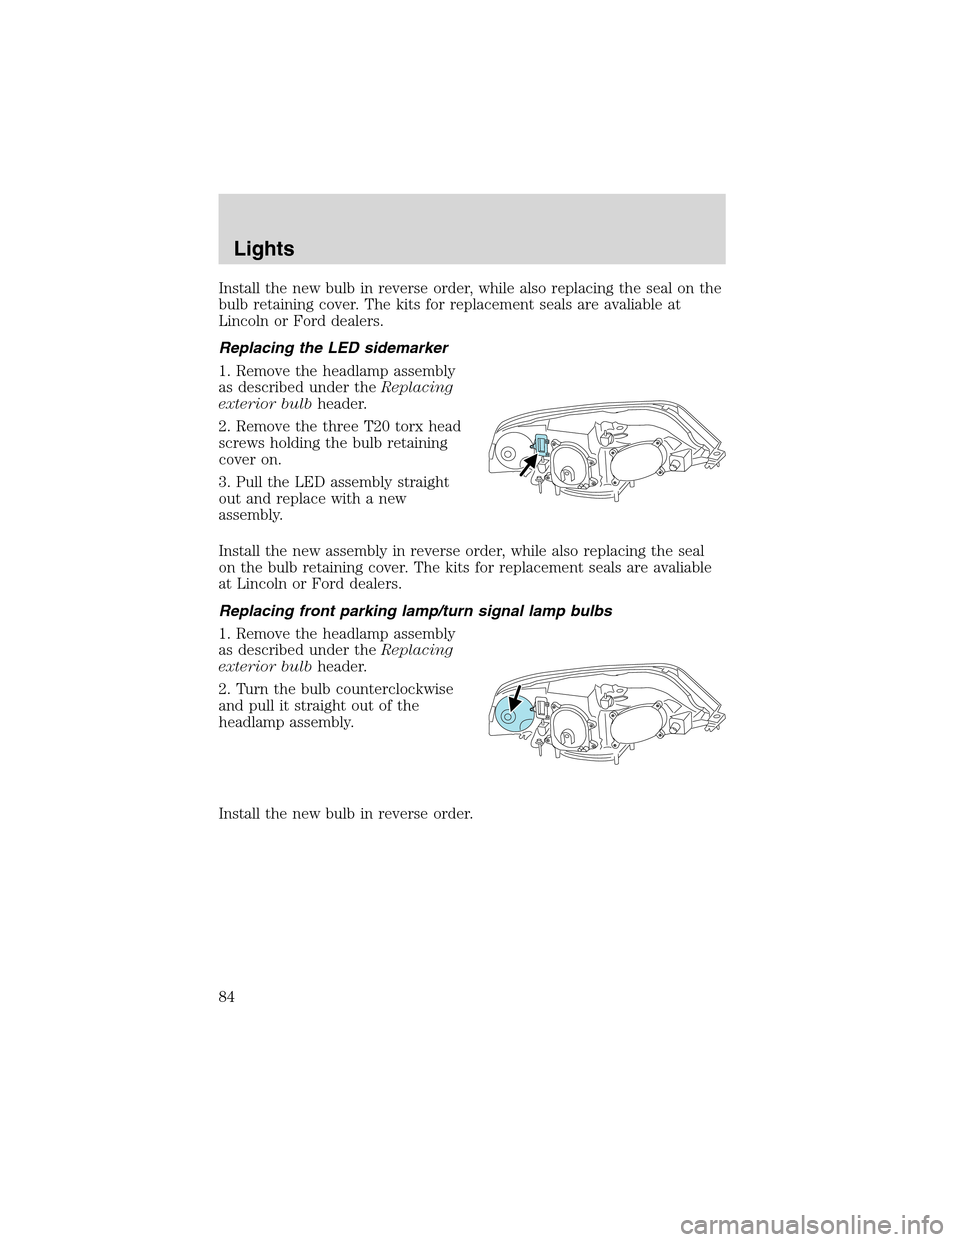
Replacing the LED sidemarker
1. Remove the headlamp assembly
as described under theReplacing
exterior bulbheader.
2. Remove the three T20 torx head
screws holding the bulb retaining
cover on.
3. Pull the LED assembly straight
out and replace with a new
assembly.
Install the new assembly in reverse order, while also replacing the seal
on the bulb retaining cover. The kits for replacement seals are avaliable
at Lincoln or Ford dealers.
Replacing front parking lamp/turn signal lamp bulbs
1. Remove the headlamp assembly
as described under theReplacing
exterior bulbheader.
2. Turn the bulb counterclockwise
and pull it straight out of the
headlamp assembly.
Install the new bulb in reverse order.
Lights
84
Page 85 of 288
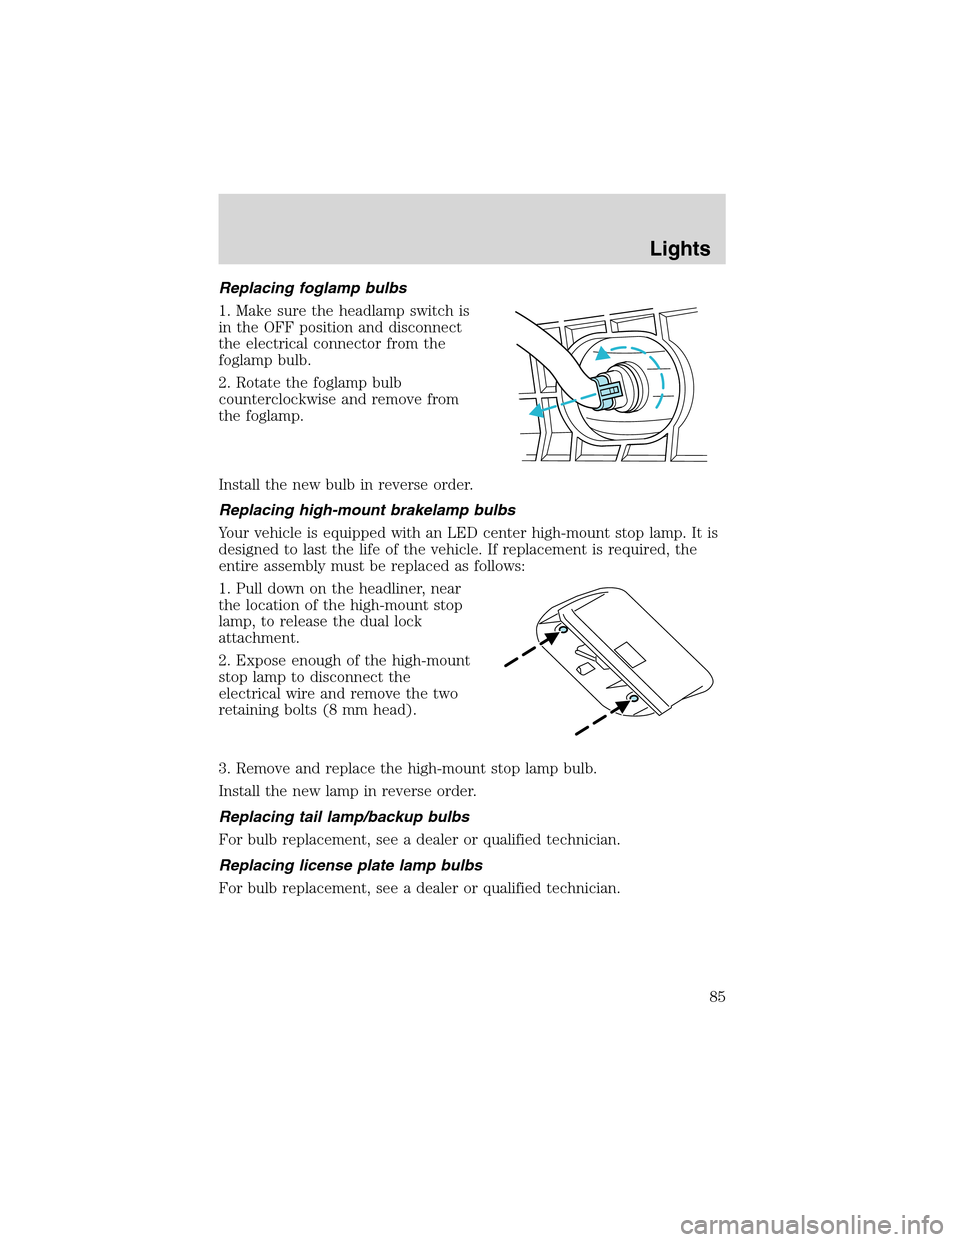
Replacing foglamp bulbs
1. Make sure the headlamp switch is
in the OFF position and disconnect
the electrical connector from the
foglamp bulb.
2. Rotate the foglamp bulb
counterclockwise and remove from
the foglamp.
Install the new bulb in reverse order.
Replacing high-mount brakelamp bulbs
Your vehicle is equipped with an LED center high-mount stop lamp. It is
designed to last the life of the vehicle. If replacement is required, the
entire assembly must be replaced as follows:
1. Pull down on the headliner, near
the location of the high-mount stop
lamp, to release the dual lock
attachment.
2. Expose enough of the high-mount
stop lamp to disconnect the
electrical wire and remove the two
retaining bolts (8 mm head).
3. Remove and replace the high-mount stop lamp bulb.
Install the new lamp in reverse order.
Replacing tail lamp/backup bulbs
For bulb replacement, see a dealer or qualified technician.
Replacing license plate lamp bulbs
For bulb replacement, see a dealer or qualified technician.
Lights
85
Page 281 of 288
A
Accessory delay ..........................91
AdvanceTrac ..............................187
Air bag supplemental restraint
system ................157–158, 162, 165
and child safety seats ............159
description ..............158, 162, 165
disposal ....................................168
driver air bag ..........160, 163, 167
indicator light .........161, 164, 168
operation .................160, 163, 167
passenger air bag ...160, 163, 167
side air bag ......................162, 165
Air cleaner filter ...............265, 271
Air conditioning ....................69, 71
Antifreeze (see
Engine coolant) ........................248
Anti-lock brake system
(see Brakes) ......................184–185
Anti-theft system ......................133
arming the system ..................134
disarming a triggered
system .....................................134
Audio system (see Radio) ...16, 20
Automatic transmission
driving an automatic
overdrive .................................191
fluid, adding ............................264
fluid, checking ........................264
fluid, refill capacities ..............272
fluid, specification ..................275
Axle
lubricant
specifications ..................274–275
refill capacities ........................272
B
Battery .......................................246acid, treating emergencies .....246
jumping a disabled battery ....216
maintenance-free ....................246
replacement, specifications ...271
servicing ..................................246
BeltMinder .................................152
Brakes ........................................184
anti-lock ...........................184–185
anti-lock brake system
(ABS) warning light ...............184
fluid, checking and adding ....264
fluid, refill capacities ..............272
fluid, specifications .........274–275
lubricant specifications ..274–275
parking ....................................185
shift interlock ..........................190
Bulbs ............................................81
C
Capacities for refilling fluids ....272
Cargo net ...................................119
Cassette tape player ...................16
CD-single premium .....................20
Cell phone use ..........................106
Certification Label ....................277
Changing a tire .........................211
Child safety restraints ..............169
child safety belts ....................169
Child safety seats ......................172
attaching with tether straps ..176
in front seat ............................173
in rear seat ..............................173
Cleaning your vehicle
engine compartment ..............234
instrument panel ....................236
interior .............................236–237
interior trim ............................237
Index
281
Page 283 of 288
F
Fail safe cooling ........................253
Floor mats .................................119
Fluid capacities .........................272
Foglamps .....................................78
Fuel ............................................254
calculating fuel economy ......108,
259
cap ...........................................256
capacity ...................................272
choosing the right fuel ...........257
comparisons with EPA
fuel economy estimates .........261
detergent in fuel .....................258
filling your vehicle
with fuel ..................254, 256, 259
filter, specifications ........258, 271
improving fuel economy ........259
octane rating ...........257, 275–276
quality ......................................257
running out of fuel .................258
safety information relating
to automotive fuels ................254
Fuses ..................................202–203
G
Garage door opener ..................102
Gas cap (see Fuel cap) ............256
Gas mileage (see Fuel
economy) ...................................259
Gauges .........................................14
GAWR (Gross Axle
Weight Rating) ..........................198
definition .................................198
driving with a heavy load ......198
location ....................................198GVWR (Gross Vehicle
Weight Rating) ..........................198
calculating ...............................198
definition .................................198
driving with a heavy load ......198
location ....................................198
H
Head restraints .................135, 140
Headlamps ...................................77
aiming ........................................80
autolamp system .......................77
bulb specifications ....................81
daytime running lights .............78
flash to pass ..............................79
replacing bulbs ...................82–83
turning on and off ....................77
Heating
heating and air conditioning
system .................................69, 71
HomeLink universal
transceiver (see Garage
door opener) .............102–103, 105
Hood ..........................................240
I
Ignition .......................181, 275–276
Infant seats
(see Safety seats) .....................172
Inspection/maintenance
(I/M) testing ..............................263
Instrument panel
cleaning ...................................236
cluster ........................................10
lighting up panel
and interior ...............................79
Index
283