seats LINCOLN LS 2003 Owners Manual
[x] Cancel search | Manufacturer: LINCOLN, Model Year: 2003, Model line: LS, Model: LINCOLN LS 2003Pages: 288, PDF Size: 3.19 MB
Page 6 of 288
SPECIAL NOTICES
Emission warranty
The New Vehicle Limited Warranty includes Bumper-to-Bumper
Coverage, Safety Restraint Coverage, Corrosion Coverage, and 7.3L
Power Stroke Diesel Engine Coverage. In addition, your vehicle is eligible
for Emissions Defect and Emissions Performance Warranties. For a
detailed description of what is covered and what is not covered, refer to
theWarranty Guidethat is provided to you along with your Owner’s
Guide.
Special instructions
For your added safety, your vehicle is fitted with sophisticated electronic
controls.
Please read the sectionSupplemental Restraint System (SRS)
in theSeating and safety restraintschapter. Failure to follow
the specific warnings and instructions could result in personal injury.
Front seat mounted rear facing child or infant seats should
NEVERbe used in front of a passenger side air bag unless the
air bag can be and is turned OFF.
Data Recording
Computers in your vehicle are capable of recording detailed data
potentially including but not limited to information such as:
•the use of restraint systems including seat belts by the driver and
passengers,
•information about the performance of various systems and modules in
the vehicle, and
•information related to engine, throttle, steering, brake or other system
status.
Any of this information could potentially include information regarding
how the driver operates the vehicle potentially including but not limited
to information regarding vehicle speed, brake or accelerator application
or steering input. This information may be stored during regular
operation or in a crash or near crash event.
Introduction
6
Page 16 of 288
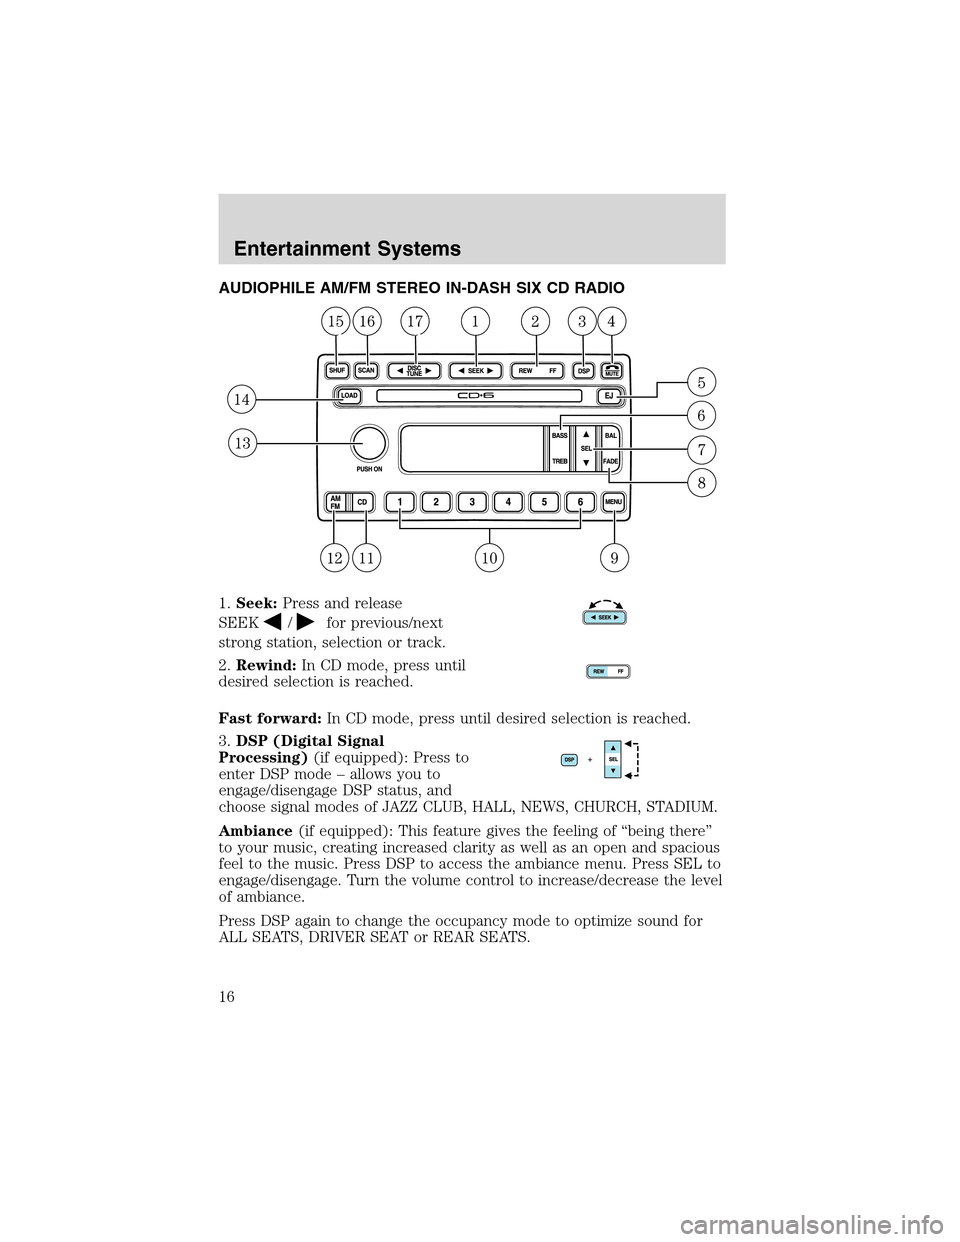
AUDIOPHILE AM/FM STEREO IN-DASH SIX CD RADIO
1.Seek:Press and release
SEEK
/for previous/next
strong station, selection or track.
2.Rewind:In CD mode, press until
desired selection is reached.
Fast forward:In CD mode, press until desired selection is reached.
3.DSP (Digital Signal
Processing)(if equipped): Press to
enter DSP mode–allows you to
engage/disengage DSP status, and
choose signal modes of JAZZ CLUB, HALL, NEWS, CHURCH, STADIUM.
Ambiance(if equipped): This feature gives the feeling of“being there”
to your music, creating increased clarity as well as an open and spacious
feel to the music. Press DSP to access the ambiance menu. Press SEL to
engage/disengage. Turn the volume control to increase/decrease the level
of ambiance.
Press DSP again to change the occupancy mode to optimize sound for
ALL SEATS, DRIVER SEAT or REAR SEATS.
Entertainment Systems
16
Page 35 of 288
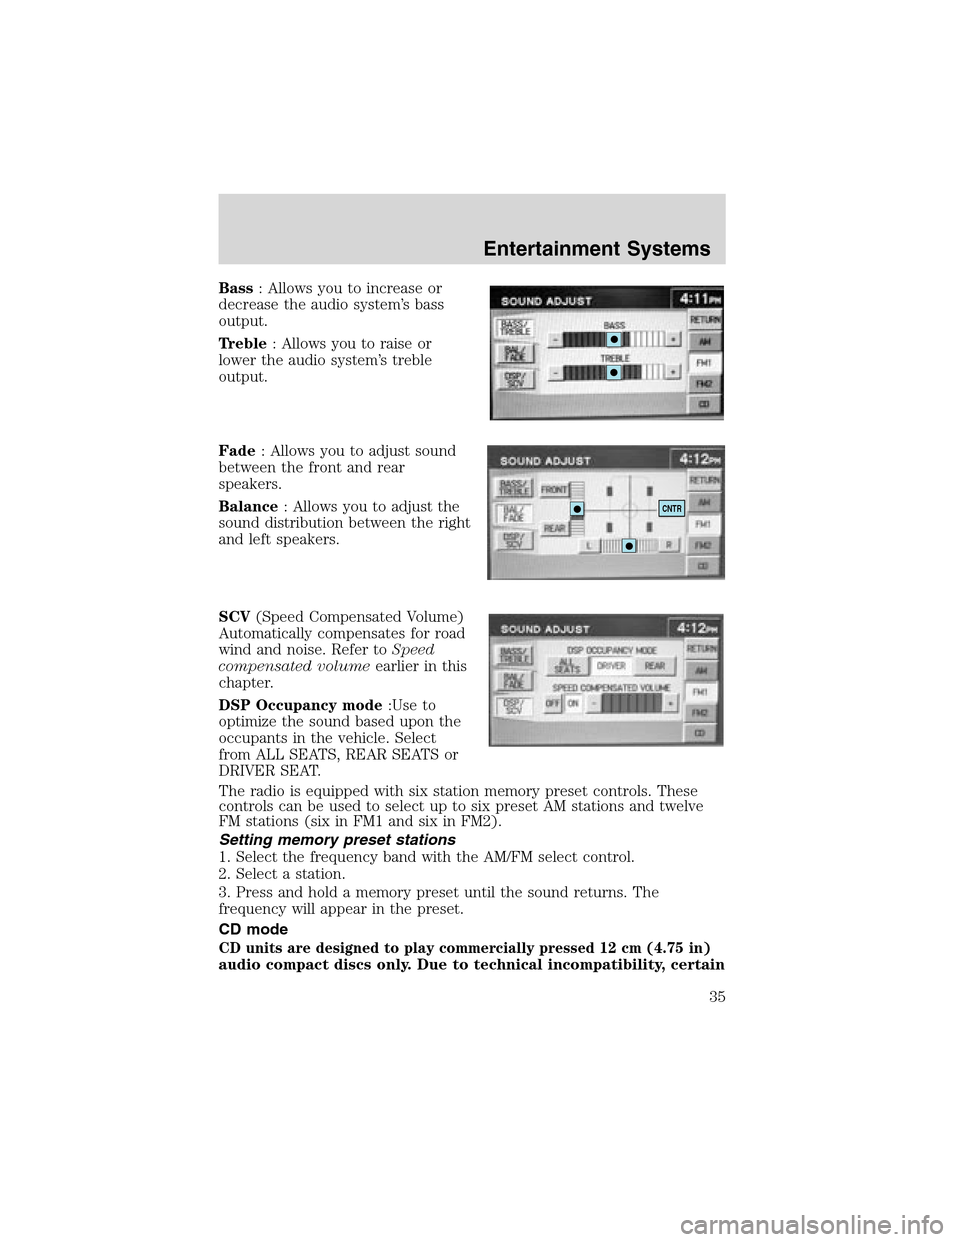
Bass:Allowsyoutoincreaseor
decreasetheaudiosystem’s bass
output.
Treble: Allows you to raise or
lower the audio system’s treble
output.
Fade: Allows you to adjust sound
between the front and rear
speakers.
Balance: Allows you to adjust the
sound distribution between the right
and left speakers.
SCV(Speed Compensated Volume)
Automatically compensates for road
wind and noise. Refer toSpeed
compensated volumeearlier in this
chapter.
DSP Occupancy mode:Use to
optimize the sound based upon the
occupants in the vehicle. Select
from ALL SEATS, REAR SEATS or
DRIVER SEAT.
The radio is equipped with six station memory preset controls. These
controls can be used to select up to six preset AM stations and twelve
FM stations (six in FM1 and six in FM2).
Setting memory preset stations
1. Select the frequency band with the AM/FM select control.
2. Select a station.
3. Press and hold a memory preset until the sound returns. The
frequency will appear in the preset.
CD mode
CD units are designed to play commercially pressed 12 cm (4.75 in)
audio compact discs only. Due to technical incompatibility, certain
CNTR
Entertainment Systems
35
Page 71 of 288
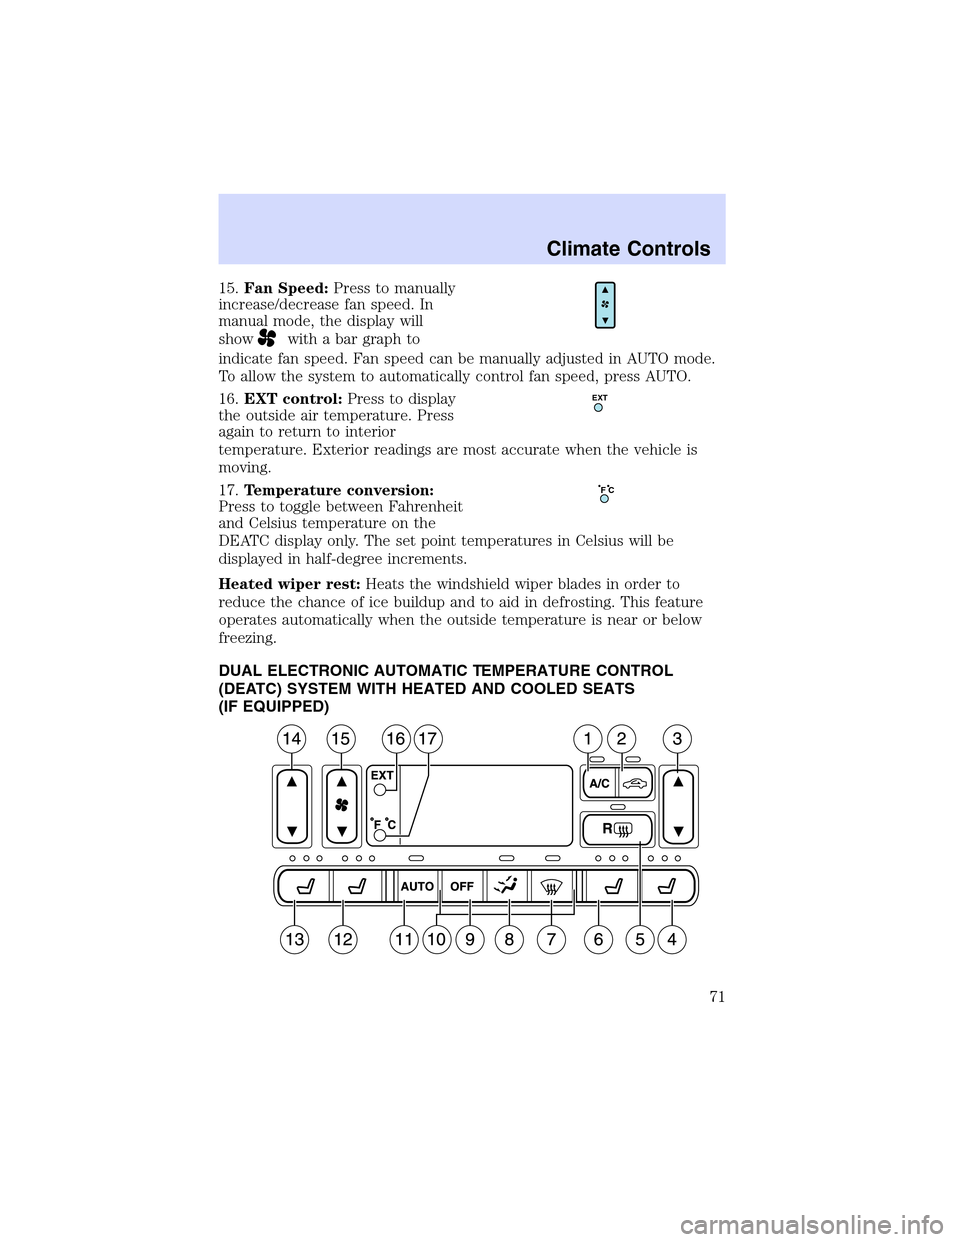
15.Fan Speed:Press to manually
increase/decrease fan speed. In
manual mode, the display will
show
with a bar graph to
indicate fan speed. Fan speed can be manually adjusted in AUTO mode.
To allow the system to automatically control fan speed, press AUTO.
16.EXT control:Press to display
the outside air temperature. Press
again to return to interior
temperature. Exterior readings are most accurate when the vehicle is
moving.
17.Temperature conversion:
Press to toggle between Fahrenheit
and Celsius temperature on the
DEATC display only. The set point temperatures in Celsius will be
displayed in half-degree increments.
Heated wiper rest:Heats the windshield wiper blades in order to
reduce the chance of ice buildup and to aid in defrosting. This feature
operates automatically when the outside temperature is near or below
freezing.
DUAL ELECTRONIC AUTOMATIC TEMPERATURE CONTROL
(DEATC) SYSTEM WITH HEATED AND COOLED SEATS
(IF EQUIPPED)
EXT
F C
Climate Controls
71
Page 74 of 288
show. This allows the seats to automatically heat or cool based on
the climate control temperature selected. Press either control to
disengage.
14.Driver’s side temperature
control:Controls the temperature
on the driver side of the vehicle in
dual zone and controls the
temperature of the entire vehicle in single zone.
15.Fan Speed:Press to manually
increase/decrease fan speed. In
manual mode, the display will
show
with a bar graph to
indicate fan speed. Fan speed can be manually adjusted in AUTO mode.
To allow the system to automatically control fan speed, press AUTO.
16.EXT control:Press to display
the outside air temperature. Press
again to return to interior
temperature. Exterior readings are most accurate when the vehicle is
moving.
17.Temperature conversion:
Press to toggle between Fahrenheit
and Celsius temperature on the
DEATC display only. The set point temperatures in Celsius will be
displayed in half-degree increments.
Heated wiper rest:Heats the windshield wiper blades in order to
reduce the chance of ice buildup and to aid in defrosting. This feature
operates automatically when the outside temperature is near or below
freezing.
OPERATING TIPS
•To reduce fog build up on the windshield during humid weather, place
the air flow selector in the
position.
•To reduce humidity build up inside the vehicle:
Do not drive with the air flow selector in the OFF position.
Do not drive with recirculation engaged.
•In order to allow the vehicle to“breathe”using the outside air inlet
vents, do not leave the air flow selector in the OFF position when the
vehicle is parked.
•Do not put objects under the front seats that will interfere with the
airflow.
EXT
F C
Climate Controls
74
Page 88 of 288
4. Attach the new wiper to the
wiper arm and reposition the clip
until it locks.
Repeat for driver’s side wiper arm.
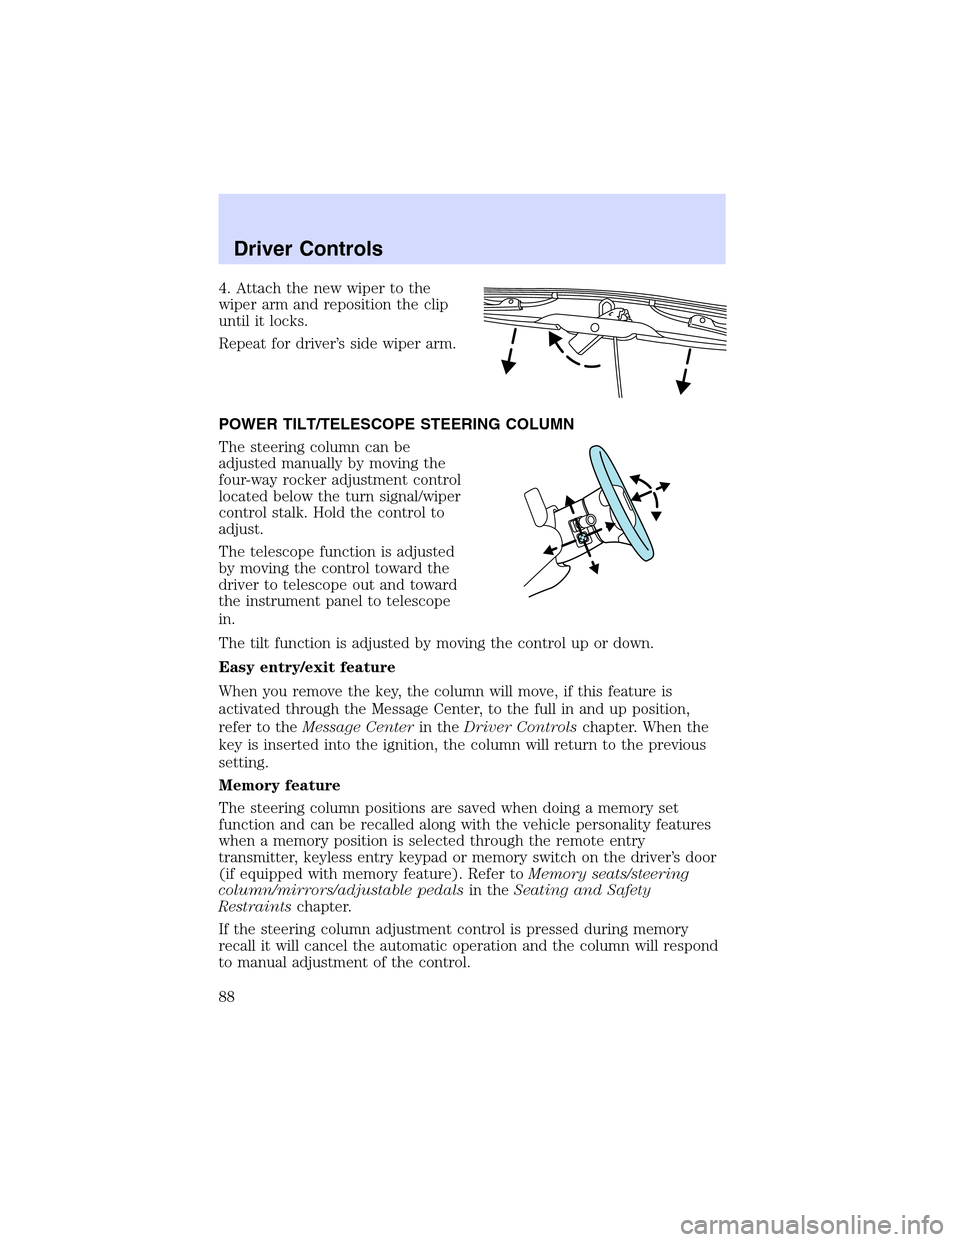
POWER TILT/TELESCOPE STEERING COLUMN
The steering column can be
adjusted manually by moving the
four-way rocker adjustment control
located below the turn signal/wiper
control stalk. Hold the control to
adjust.
The telescope function is adjusted
by moving the control toward the
driver to telescope out and toward
the instrument panel to telescope
in.
The tilt function is adjusted by moving the control up or down.
Easy entry/exit feature
When you remove the key, the column will move, if this feature is
activated through the Message Center, to the full in and up position,
refer to theMessage Centerin theDriver Controlschapter. When the
key is inserted into the ignition, the column will return to the previous
setting.
Memory feature
The steering column positions are saved when doing a memory set
function and can be recalled along with the vehicle personality features
when a memory position is selected through the remote entry
transmitter, keyless entry keypad or memory switch on the driver’s door
(if equipped with memory feature). Refer toMemory seats/steering
column/mirrors/adjustable pedalsin theSeating and Safety
Restraintschapter.
If the steering column adjustment control is pressed during memory
recall it will cancel the automatic operation and the column will respond
to manual adjustment of the control.
Driver Controls
88
Page 94 of 288
![LINCOLN LS 2003 Owners Manual 3. Drive the vehicle slowly (less than 5 km/h [3 mph]) in circles or on
your everyday routine until the display reads a direction.
4. The compass is now calibrated.
Power side view mirrors
To adjust y LINCOLN LS 2003 Owners Manual 3. Drive the vehicle slowly (less than 5 km/h [3 mph]) in circles or on
your everyday routine until the display reads a direction.
4. The compass is now calibrated.
Power side view mirrors
To adjust y](/img/15/6885/w960_6885-93.png)
3. Drive the vehicle slowly (less than 5 km/h [3 mph]) in circles or on
your everyday routine until the display reads a direction.
4. The compass is now calibrated.
Power side view mirrors
To adjust your mirrors
1. Select
to adjust the left
mirror or
to adjust the right
mirror.
2. Move the disk control in the
direction you wish to tilt the mirror.
3. Return to the center position to
disable the adjust function.
Memory feature
The power side view mirror positions are saved when doing a memory
set function and can be recalled along with the vehicle personality
features when a memory position is selected through the remote entry
transmitter, keyless entry keypad or memory switch on the driver’s door
(if equipped with memory feature). Refer toMemory seats/steering
column/mirrors/adjustable pedalsin theSeating and Safety
Restraintschapter.
Heated outside mirrors
(if equipped)
Both mirrors are heated
automatically to remove ice, mist
and fog when the rear window
defrost is activated.
Do not remove ice from the
mirrors with a scraper or
attempt to readjust the mirror
glass if it is frozen in place.
These actions could cause damage to the glass and mirrors.
Driver Controls
94
Page 95 of 288
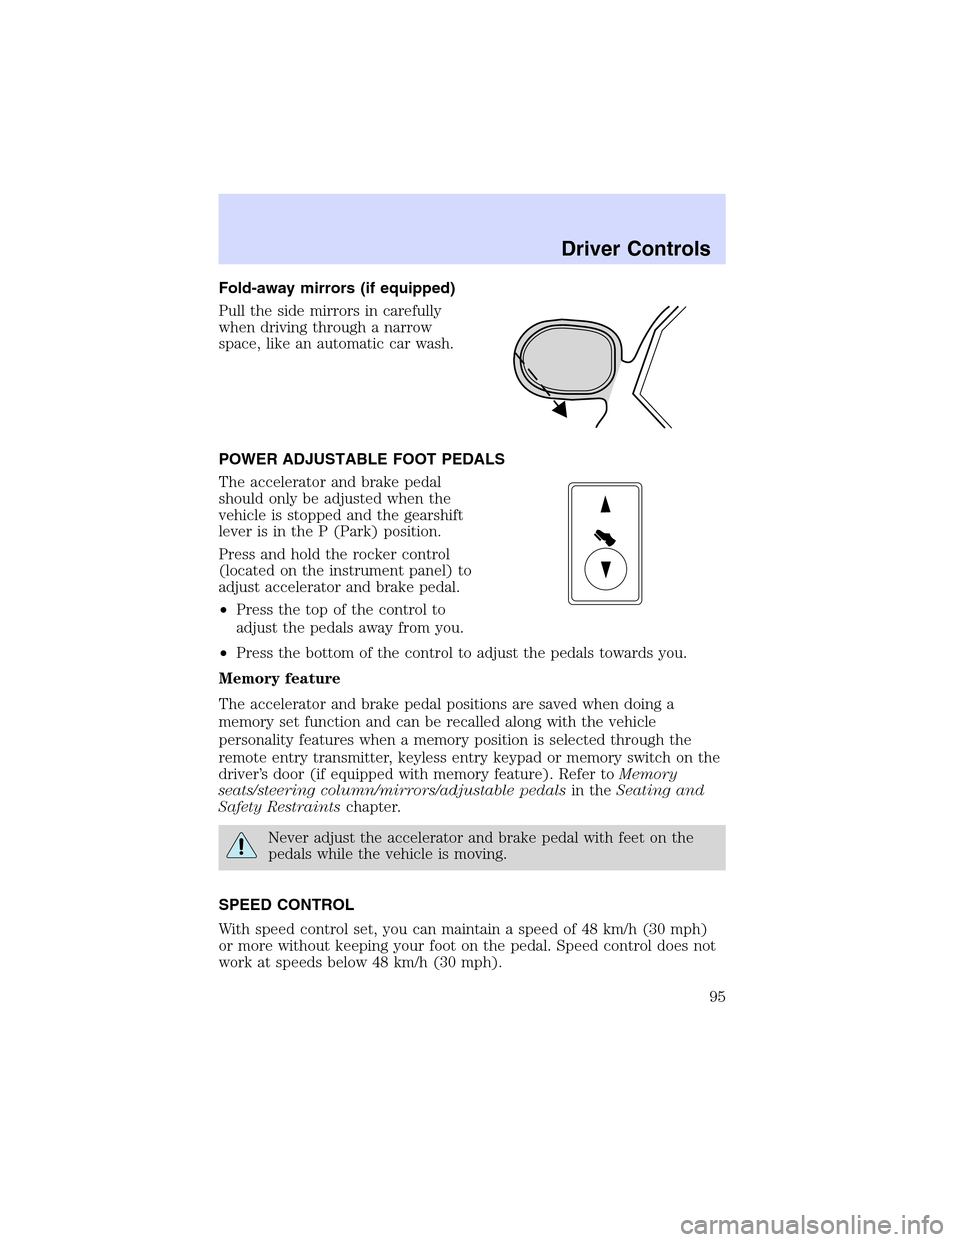
Fold-away mirrors (if equipped)
Pull the side mirrors in carefully
when driving through a narrow
space, like an automatic car wash.
POWER ADJUSTABLE FOOT PEDALS
The accelerator and brake pedal
should only be adjusted when the
vehicle is stopped and the gearshift
lever is in the P (Park) position.
Press and hold the rocker control
(located on the instrument panel) to
adjust accelerator and brake pedal.
•Press the top of the control to
adjust the pedals away from you.
•Press the bottom of the control to adjust the pedals towards you.
Memory feature
The accelerator and brake pedal positions are saved when doing a
memory set function and can be recalled along with the vehicle
personality features when a memory position is selected through the
remote entry transmitter, keyless entry keypad or memory switch on the
driver’s door (if equipped with memory feature). Refer toMemory
seats/steering column/mirrors/adjustable pedalsin theSeating and
Safety Restraintschapter.
Never adjust the accelerator and brake pedal with feet on the
pedals while the vehicle is moving.
SPEED CONTROL
With speed control set, you can maintain a speed of 48 km/h (30 mph)
or more without keeping your foot on the pedal. Speed control does not
work at speeds below 48 km/h (30 mph).
Driver Controls
95
Page 136 of 288
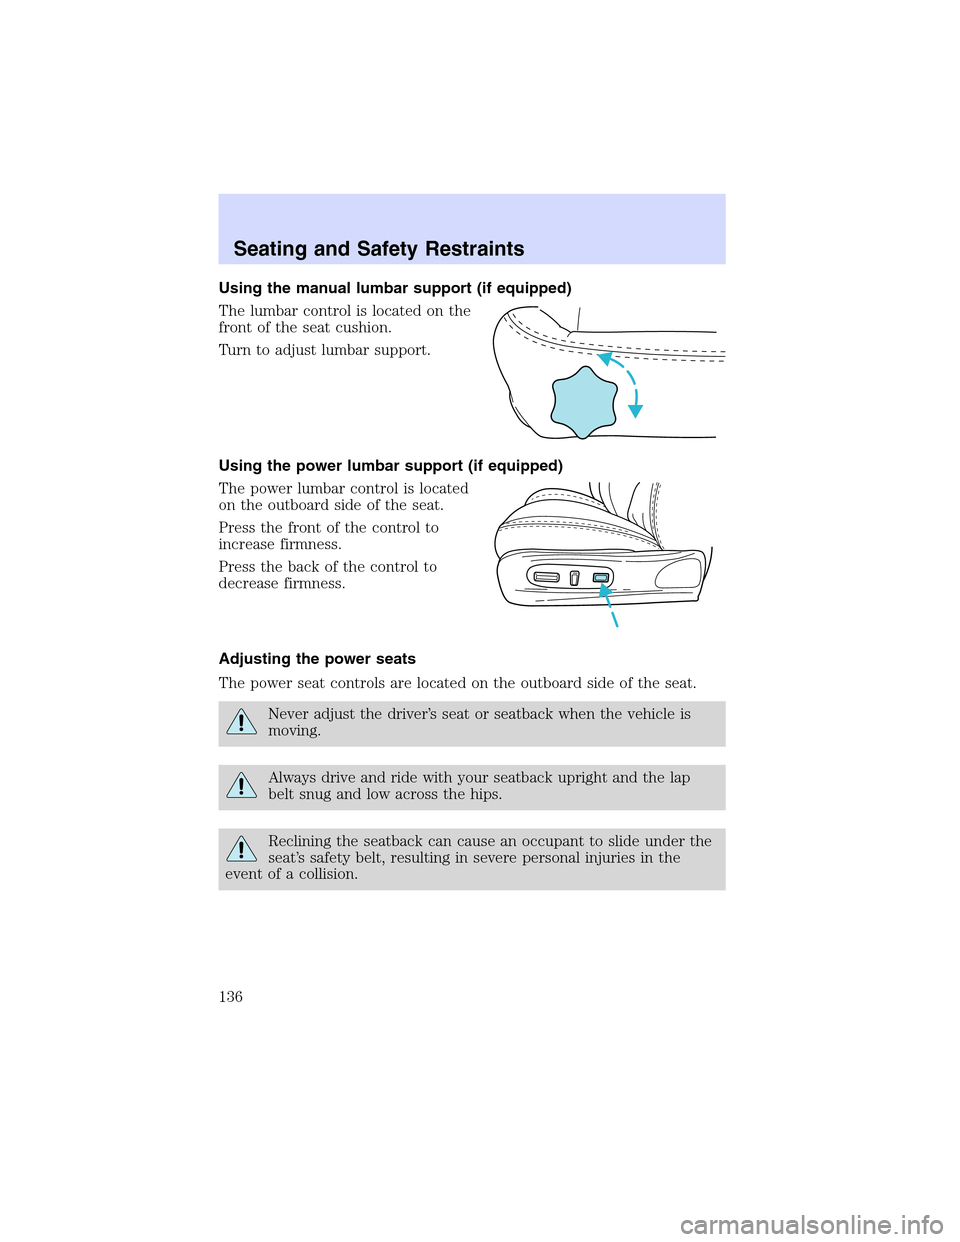
Using the manual lumbar support (if equipped)
The lumbar control is located on the
front of the seat cushion.
Turn to adjust lumbar support.
Using the power lumbar support (if equipped)
The power lumbar control is located
on the outboard side of the seat.
Press the front of the control to
increase firmness.
Press the back of the control to
decrease firmness.
Adjusting the power seats
The power seat controls are located on the outboard side of the seat.
Never adjust the driver’s seat or seatback when the vehicle is
moving.
Always drive and ride with your seatback upright and the lap
belt snug and low across the hips.
Reclining the seatback can cause an occupant to slide under the
seat’s safety belt, resulting in severe personal injuries in the
event of a collision.
Seating and Safety Restraints
136
Page 138 of 288
Deactivating/activatingtheeasy-access/easy-out feature
The easy-access/easy-out feature can be turned off or on through the
vehicle message center (if equipped). If your vehicle does not have a
message center, the feature can be turned off or on by your dealer.
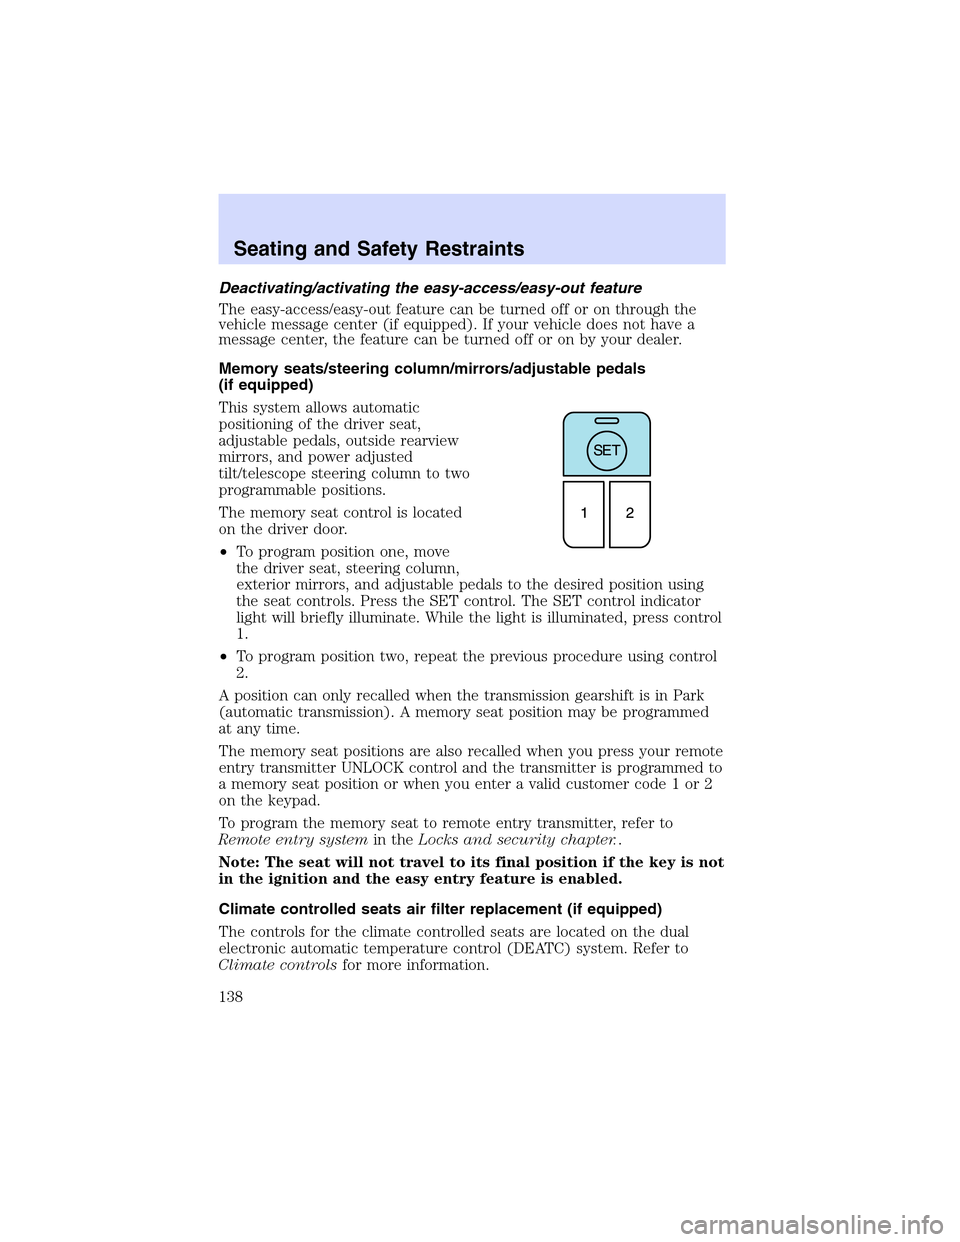
Memory seats/steering column/mirrors/adjustable pedals
(if equipped)
This system allows automatic
positioning of the driver seat,
adjustable pedals, outside rearview
mirrors, and power adjusted
tilt/telescope steering column to two
programmable positions.
The memory seat control is located
on the driver door.
•To program position one, move
the driver seat, steering column,
exterior mirrors, and adjustable pedals to the desired position using
the seat controls. Press the SET control. The SET control indicator
light will briefly illuminate. While the light is illuminated, press control
1.
•To program position two, repeat the previous procedure using control
2.
A position can only recalled when the transmission gearshift is in Park
(automatic transmission). A memory seat position may be programmed
at any time.
The memory seat positions are also recalled when you press your remote
entry transmitter UNLOCK control and the transmitter is programmed to
a memory seat position or when you enter a valid customer code 1 or 2
on the keypad.
To program the memory seat to remote entry transmitter, refer to
Remote entry systemin theLocks and security chapter..
Note: The seat will not travel to its final position if the key is not
in the ignition and the easy entry feature is enabled.
Climate controlled seats air filter replacement (if equipped)
The controls for the climate controlled seats are located on the dual
electronic automatic temperature control (DEATC) system. Refer to
Climate controlsfor more information.
Seating and Safety Restraints
138