wheel LINCOLN MARK VIII 1998 Owners Manual
[x] Cancel search | Manufacturer: LINCOLN, Model Year: 1998, Model line: MARK VIII, Model: LINCOLN MARK VIII 1998Pages: 170, PDF Size: 1.37 MB
Page 6 of 170

Engine oil pressure
Illuminates when the oil pressure
falls below the normal range. Stop
the vehicle as soon as safely
possible and switch off the engine
immediately. Check the oil level and
add oil if needed. Refer toEngine
oilin theMaintenance and Care
chapter.
This lamp also illuminates when the ignition is turned to ON and the
engine is off.
Charging system
Momentarily illuminates when the
ignition is turned to the ON position
and the engine is off. The light also
illuminates when the battery is not
charging properly, requiring
electrical system service.
Traction ControlYactive
This light momentarily illuminates
when the ignition is turned to ON. It
also illuminates when the Traction
Controlysystem begins applying
and releasing the brakes and
adjusting the engine characteristics
to limit a wheelspin condition. It will
be lit for a maximum of four
seconds or for the duration of the Traction Controlyevent.
For more information, refer to theDrivingchapter.
Instrumentation
7
Page 14 of 170
Selectable features
You can select different features for the message center to display by
using the message center controls located below the message center
display. You will hear a tone when you press one of these controls.
However, the message center will display the appropriate warning
message if it detects a warning from any of the monitored systems.
Vehicle setting
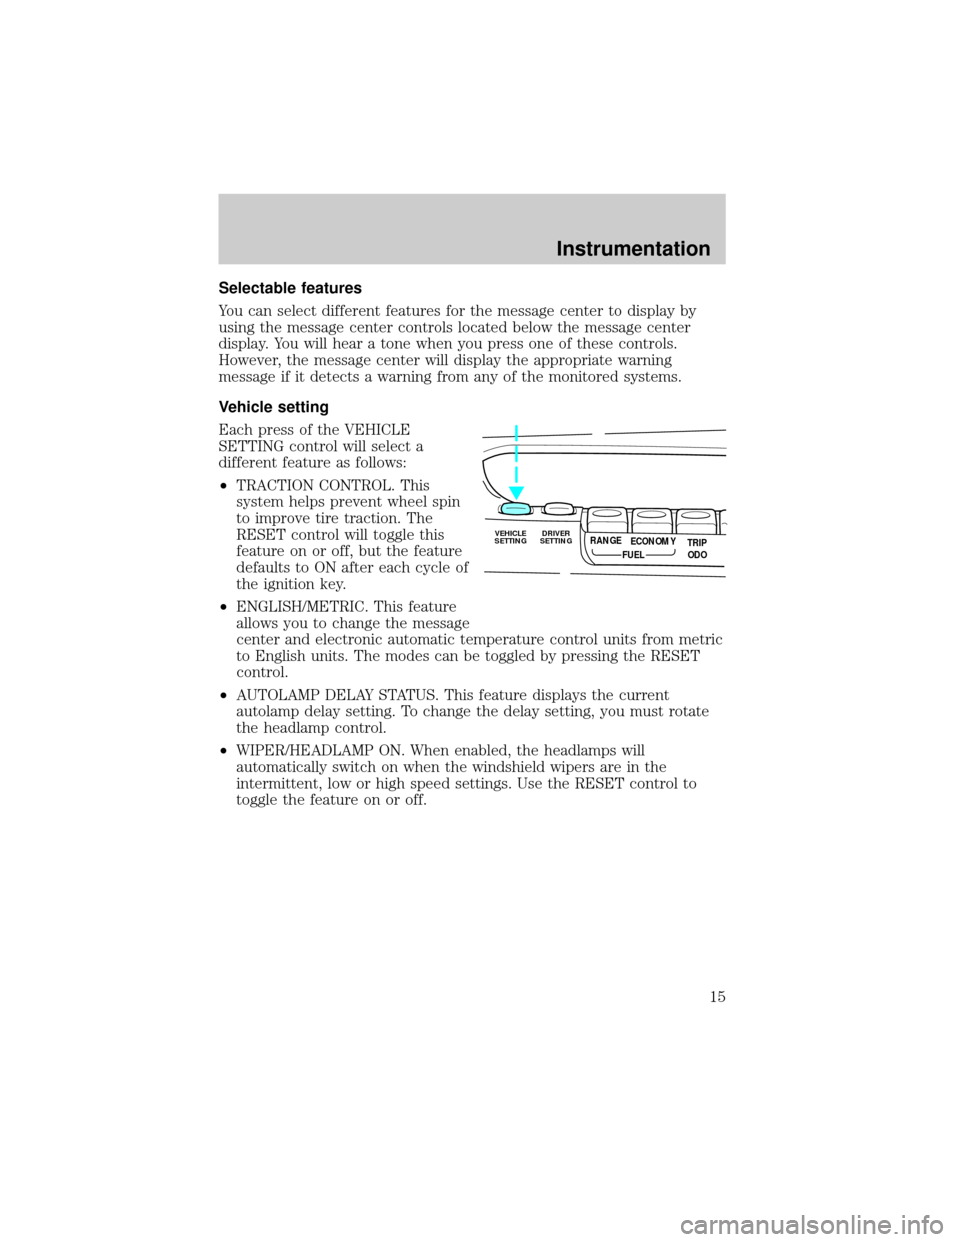
Each press of the VEHICLE
SETTING control will select a
different feature as follows:
²TRACTION CONTROL. This
system helps prevent wheel spin
to improve tire traction. The
RESET control will toggle this
feature on or off, but the feature
defaults to ON after each cycle of
the ignition key.
²ENGLISH/METRIC. This feature
allows you to change the message
center and electronic automatic temperature control units from metric
to English units. The modes can be toggled by pressing the RESET
control.
²AUTOLAMP DELAY STATUS. This feature displays the current
autolamp delay setting. To change the delay setting, you must rotate
the headlamp control.
²WIPER/HEADLAMP ON. When enabled, the headlamps will
automatically switch on when the windshield wipers are in the
intermittent, low or high speed settings. Use the RESET control to
toggle the feature on or off.
VEHICLE
SETTINGDRIVER
SETTINGTRIP
ODO RANGE
FUELECONOMY
Instrumentation
15
Page 34 of 170
Automatic operation
Press AUTOMATIC and select the desired temperature. The selected
temperature and the word AUTO will appear in the display window. The
EATC system will either heat or cool to achieve the selected
temperature. The system will automatically determine fan speed, airflow
location and if fresh outside air or recirculated air is required. Fan speed
remains automatic unless the fan speed thumbwheel is turned.
When in AUTOMATIC and weather conditions require heat, air will be
sent to the floor. However, if the engine is not warm enough to provide
heat, the fan will be at a low speed and the air will be directed to the
windshield. In 3ó minutes or less, the fan speed will start to increase
and the airflow location will change to the floor area.
If unusual conditions exist (i.e.-window fogging, etc.), the manual
override controls allow you to select airflow locations and the fan control
allows you to adjust fan speed as necessary.
Temperature selection
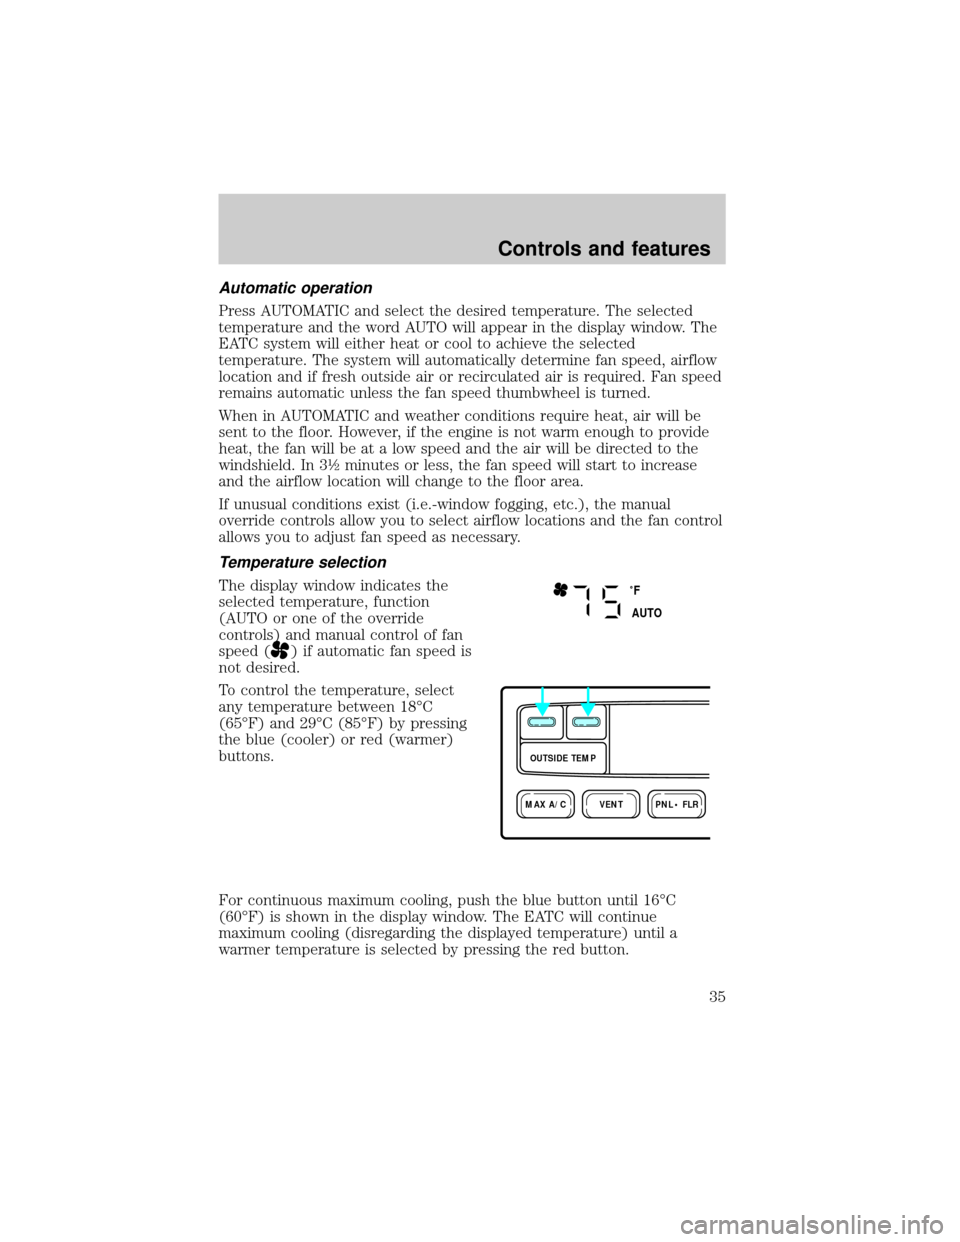
The display window indicates the
selected temperature, function
(AUTO or one of the override
controls) and manual control of fan
speed (
) if automatic fan speed is
not desired.
To control the temperature, select
any temperature between 18ÉC
(65ÉF) and 29ÉC (85ÉF) by pressing
the blue (cooler) or red (warmer)
buttons.
For continuous maximum cooling, push the blue button until 16ÉC
(60ÉF) is shown in the display window. The EATC will continue
maximum cooling (disregarding the displayed temperature) until a
warmer temperature is selected by pressing the red button.
˚F
AUTO
VENTPNL • FLRMAX A/C
OUTSIDE TEMP
Controls and features
35
Page 35 of 170
For continuous maximum heating, push the red button until 32ÉC (90ÉF)
is shown in the display window. The EATC will continue maximum
heating (disregarding the displayed temperature) until a cooler
temperature is selected by pressing the blue button.
Temperature conversion
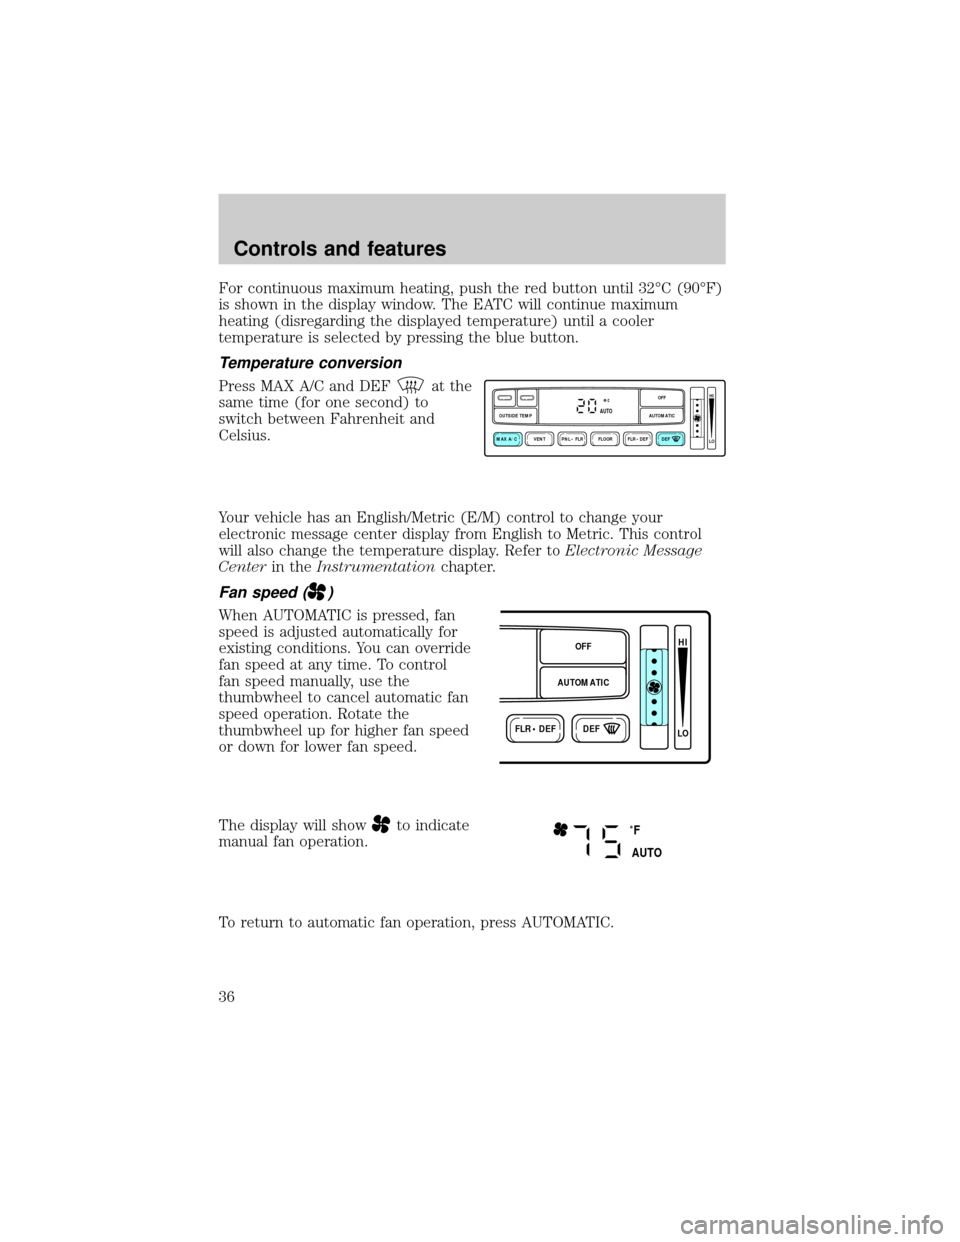
Press MAX A/C and DEFat the
same time (for one second) to
switch between Fahrenheit and
Celsius.
Your vehicle has an English/Metric (E/M) control to change your
electronic message center display from English to Metric. This control
will also change the temperature display. Refer toElectronic Message
Centerin theInstrumentationchapter.
Fan speed ()
When AUTOMATIC is pressed, fan
speed is adjusted automatically for
existing conditions. You can override
fan speed at any time. To control
fan speed manually, use the
thumbwheel to cancel automatic fan
speed operation. Rotate the
thumbwheel up for higher fan speed
or down for lower fan speed.
The display will show
to indicate
manual fan operation.
To return to automatic fan operation, press AUTOMATIC.
VENT PNL • FLR FLOOR FLR • DEF DEF
HI
LO
MAX A/C
OUTSIDE TEMP AUTOMATICOFFAUTO
FLR • DEFDEF
HI
LO
AUTOMATICOFF
˚F
AUTO
Controls and features
36
Page 39 of 170
REAR WINDOW DEFROSTER
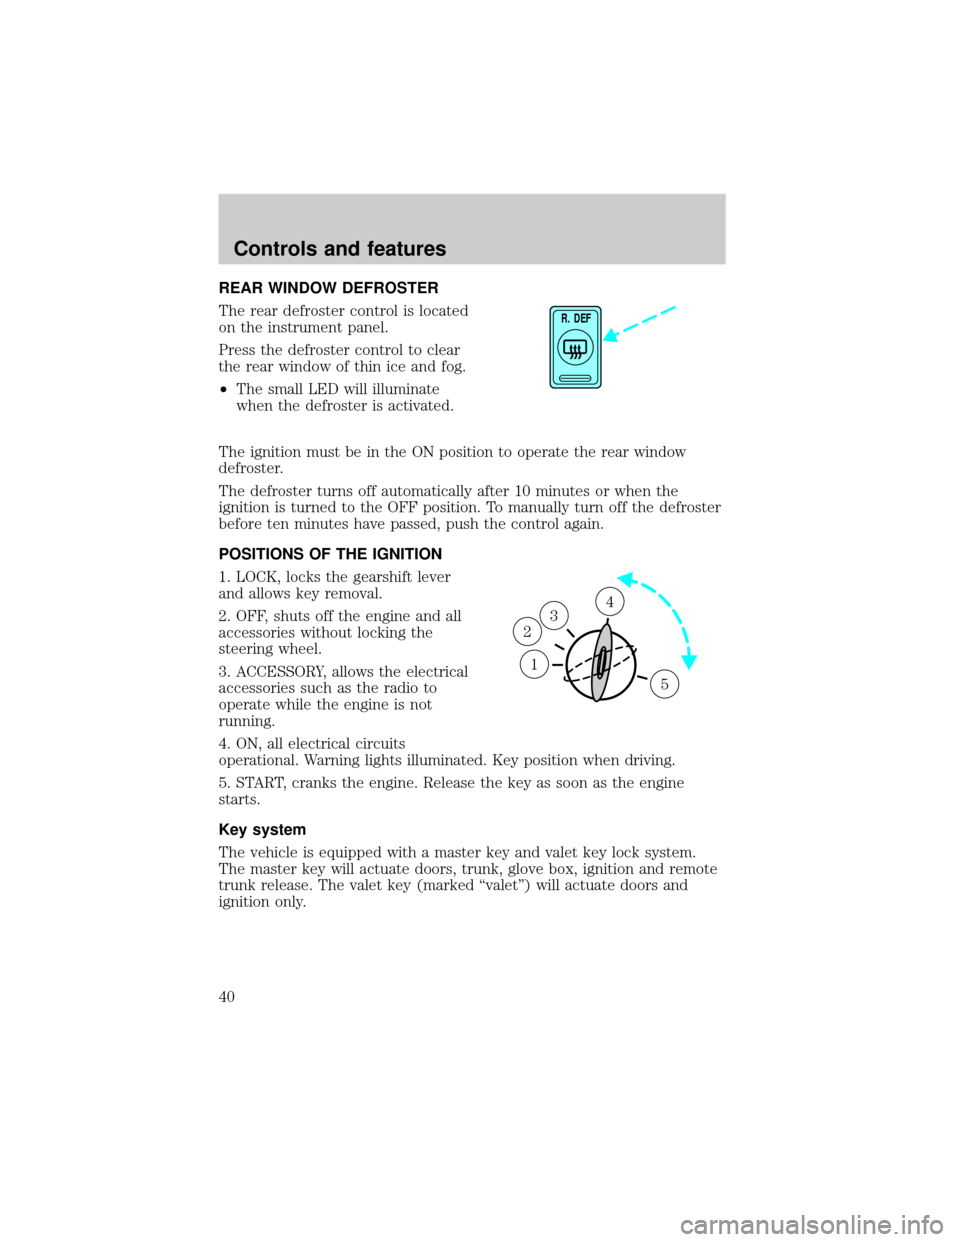
The rear defroster control is located
on the instrument panel.
Press the defroster control to clear
the rear window of thin ice and fog.
²The small LED will illuminate
when the defroster is activated.
The ignition must be in the ON position to operate the rear window
defroster.
The defroster turns off automatically after 10 minutes or when the
ignition is turned to the OFF position. To manually turn off the defroster
before ten minutes have passed, push the control again.
POSITIONS OF THE IGNITION
1. LOCK, locks the gearshift lever
and allows key removal.
2. OFF, shuts off the engine and all
accessories without locking the
steering wheel.
3. ACCESSORY, allows the electrical
accessories such as the radio to
operate while the engine is not
running.
4. ON, all electrical circuits
operational. Warning lights illuminated. Key position when driving.
5. START, cranks the engine. Release the key as soon as the engine
starts.
Key system
The vehicle is equipped with a master key and valet key lock system.
The master key will actuate doors, trunk, glove box, ignition and remote
trunk release. The valet key (marked ªvaletº) will actuate doors and
ignition only.
R. DEF
1
3
2
4
5
Controls and features
40
Page 41 of 170
POWER TILT/TELESCOPE STEERING COLUMN
Never adjust the steering wheel when the vehicle is moving.
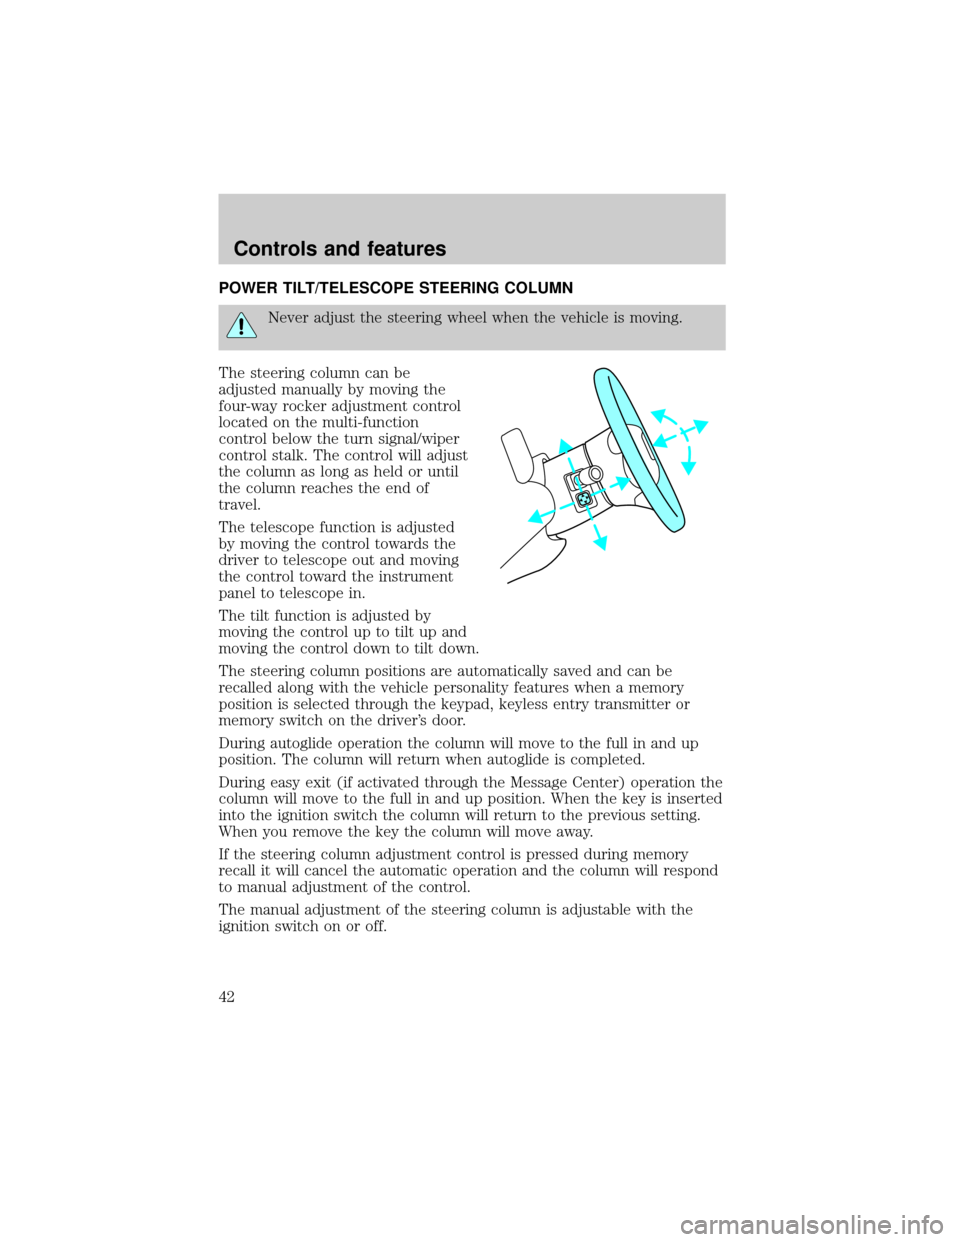
The steering column can be
adjusted manually by moving the
four-way rocker adjustment control
located on the multi-function
control below the turn signal/wiper
control stalk. The control will adjust
the column as long as held or until
the column reaches the end of
travel.
The telescope function is adjusted
by moving the control towards the
driver to telescope out and moving
the control toward the instrument
panel to telescope in.
The tilt function is adjusted by
moving the control up to tilt up and
moving the control down to tilt down.
The steering column positions are automatically saved and can be
recalled along with the vehicle personality features when a memory
position is selected through the keypad, keyless entry transmitter or
memory switch on the driver's door.
During autoglide operation the column will move to the full in and up
position. The column will return when autoglide is completed.
During easy exit (if activated through the Message Center) operation the
column will move to the full in and up position. When the key is inserted
into the ignition switch the column will return to the previous setting.
When you remove the key the column will move away.
If the steering column adjustment control is pressed during memory
recall it will cancel the automatic operation and the column will respond
to manual adjustment of the control.
The manual adjustment of the steering column is adjustable with the
ignition switch on or off.
Controls and features
42
Page 77 of 170
The right front passenger air bag is not designed to restrain
occupants in the center front seating position.
All occupants of the vehicle including the driver should always
wear their safety belts even when air bag SRS is provided.
Do not place objects or mount equipment on or near the air bag
cover on the steering wheel or in front seat areas that may come
into contact with a deploying air bag. Failure to follow this instruction
may increase the risk of personal injury in the event of a collision.
Do not attempt to service, repair, or modify the Air Bag
Supplemental Restraint System or its fuses. See your Ford or
Lincoln-Mercury dealer.
Children and air bags
For additional important safety
information, read all information on
safety restraints in this guide.
Children should always wear their
safety belts. Failure to follow these
instructions may increase the risk of
injury in a collision.
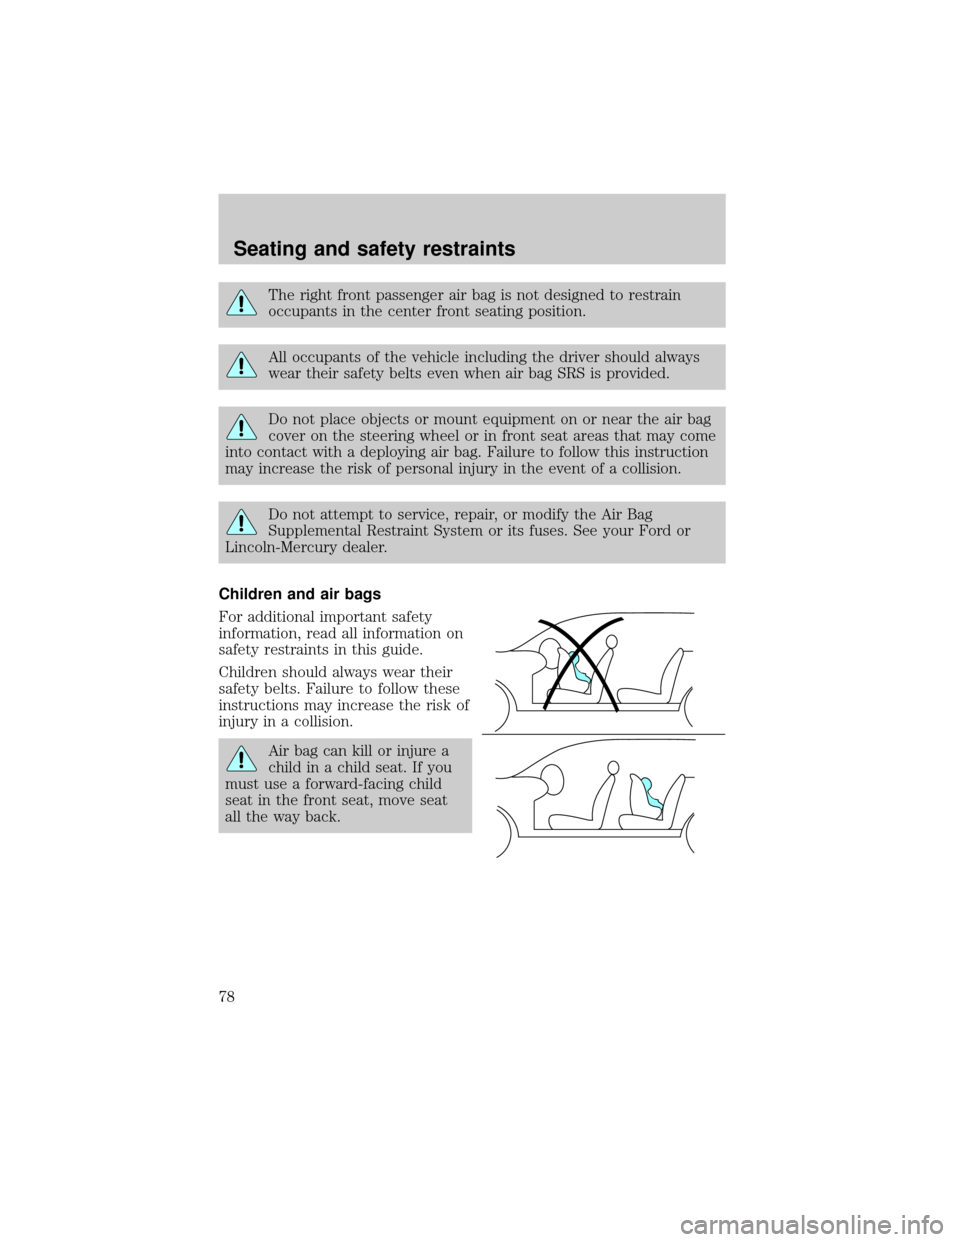
Air bag can kill or injure a
child in a child seat. If you
must use a forward-facing child
seat in the front seat, move seat
all the way back.
Seating and safety restraints
78
Page 92 of 170
BRAKES
Your brakes are self-adjusting. Refer to the ªService Guideº for scheduled
maintenance.
Occasional brake noise is normal and often does not indicate a
performance concern with the vehicle's brake system. In normal
operation, automotive brake systems may emit occasional or intermittent
squeal or groan noises when the brakes are applied. Such noises are
usually heard during the first few brake applications in the morning;
however, they may be heard at any time while braking and can be
aggravated by environmental conditions such as cold, heat, moisture,
road dust, salt or mud. If a ªmetal-to-metal,º ªcontinuous grindingº or
ªcontinuous squealº sound is present while braking, the brake linings
may be worn-out and should be inspected by a qualified service
technician.
Anti-lock brake system (ABS)
On vehicles equipped with an anti-lock braking system (ABS), a noise
from the hydraulic pump motor and pulsation in the pedal may be
observed during ABS braking events. Pedal pulsation coupled with noise
while braking under panic conditions or on loose gravel, bumps, wet or
snowy roads is normal and indicates proper functioning of the vehicle's
anti-lock brake system. If the vehicle has continuous vibration or shudder
while braking, felt mainly in the steering wheel, the vehicle most likely
needs service.
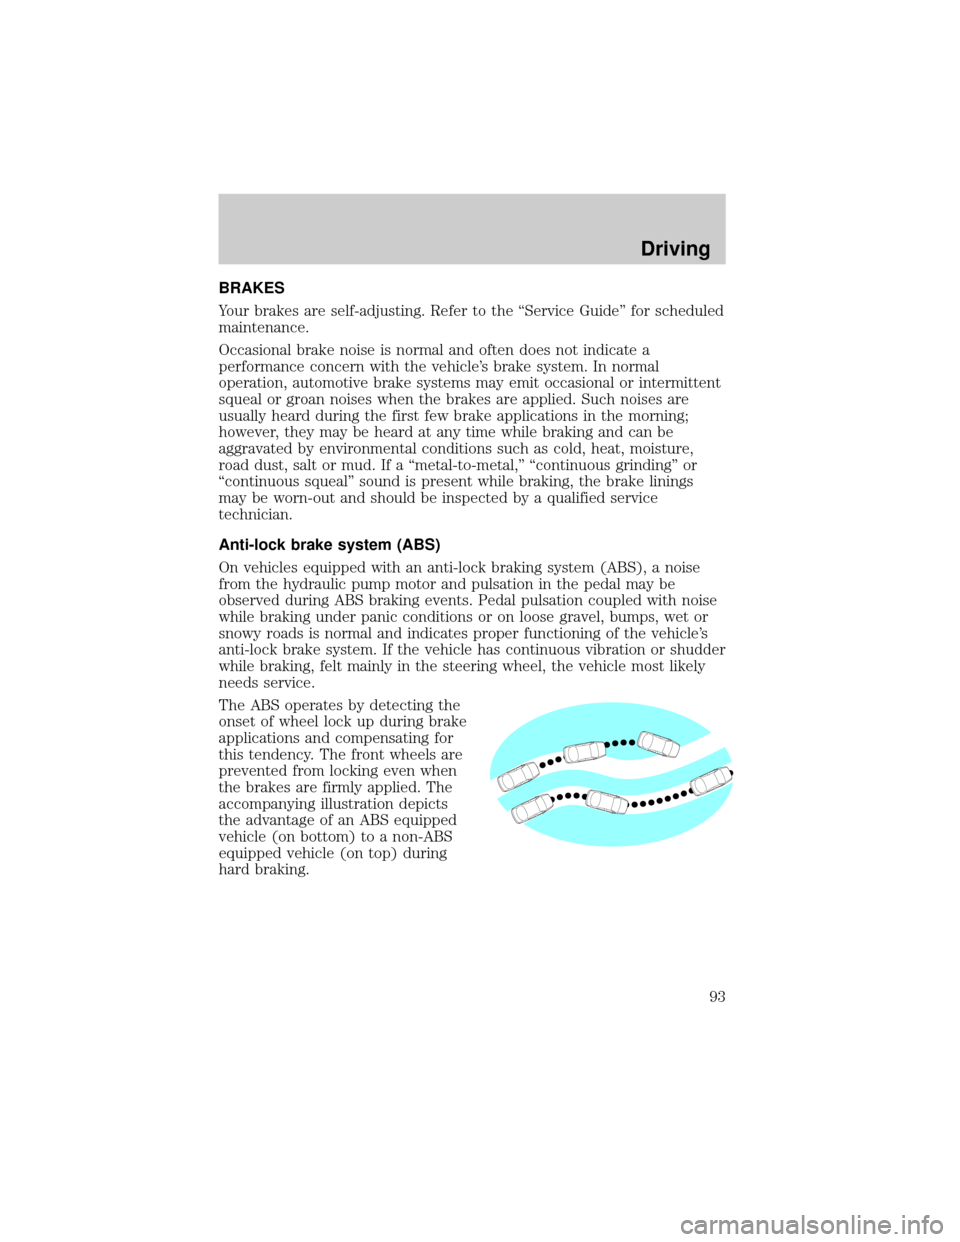
The ABS operates by detecting the
onset of wheel lock up during brake
applications and compensating for
this tendency. The front wheels are
prevented from locking even when
the brakes are firmly applied. The
accompanying illustration depicts
the advantage of an ABS equipped
vehicle (on bottom) to a non-ABS
equipped vehicle (on top) during
hard braking.
Driving
93
Page 95 of 170

TRACTION CONTROLY
Your vehicle is equipped with the Traction Controlysystem. This system
helps maintain the stability and steerability of your vehicle. It is
especially useful on slippery and/or hilly road surfaces. The system
operates at all speeds by detecting and controlling wheel spin. The
system borrows many of the electronic and mechanical elements already
present in the anti-lock braking system (ABS).
Wheel-speed sensors allow excess rear wheel spin to be detected by the
Traction Controlyportion of the ABS computer. Any excessive wheel
spin is controlled by automatically applying and releasing the rear brakes
in conjunction with engine torque reductions. Engine torque reduction is
realized via the fully electronic spark and fuel injection systems. This
process is very sensitive to driving conditions and very fast acting. The
rear wheels ªsearchº for optimum traction several times a second and
adjustments are made accordingly.
The Traction Controlysystem will allow your vehicle to make better use
of available traction on slippery surfaces. The system is a driver aid
which makes your vehicle easier to handle primarily on snow and ice
covered roads. This is especially evident if wheel spin-up should occur
while turning.
During Traction Controlyoperation you may hear an electric motor type
of sound coming from the engine compartment and the engine will not
ªrev-upº when you push further on the accelerator. This is normal
system behavior.
If you should become stuck in snow or on a very slippery road surface,
try switching the Traction Controlysystem off. This may allow excess
wheel spin to ªdigº the vehicle out or enable a successful ªrockingº
maneuver. Refer toMessage centerin theInstrumentationchapter.
If the Traction Controlysystem is cycled excessively, the brake portion
of the system will shut down to prevent the rear brakes from
overheating. A limited Traction Controlyfunction using only engine
torque reduction will still control wheels from over-spinning. When the
rear brakes have cooled down, the system will again function normally.
Anti-lock braking is not affected by this condition and will function
normally during the cool down period.
If the engine coolant temperature is below þ23ÉC (þ10ÉF) the engine
torque reduction portion of the Traction Controlysystem isNOTactive.
The system will operate normally when the engine coolant warms up.
Driving
96
Page 103 of 170
Do not exceed the GVWR or the GAWR specified on the Safety
Compliance Certification Label.
Do not use replacement tires with lower weight capacities than the
originals because they may lower the vehicle's GVWR and GAWR
limitations. Replacement tires with a higher weight limit than the
originals do not increase the GVWR and GAWR limitations.
DRIVING THROUGH WATER
Do not drive quickly through standing water, especially if the depth is
unknown. Traction or brake capability may be limited and if the ignition
system gets wet, your engine may stall. Water may also enter your
engine's air intake and severely damage your engine.
If driving through deep or standing water is unavoidable, proceed very
slowly. Never drive through water that is higher than the bottom of the
hubs (truck)/wheel rims (car).
Once through the water, always try the brakes. Wet brakes do not stop
the vehicle as effectively as dry brakes. Drying can be improved by
moving your vehicle slowly while applying light pressure on the brake
pedal.
TRAILER TOWING
Your vehicle is classified as a light duty towing vehicle. It does not come
from the factory fully equipped to tow. No towing packages are available
through Ford or Mercury/Lincoln dealers. Do not tow a trailer until your
vehicle has been driven at least 3 200 km (2 000 miles).
Towing a trailer places an additional load on your vehicle's engine,
transmission, brakes, tires and suspension. Inspect these components
carefully after towing.
The amount of weight your loaded trailer should be no more than 907 kg
(2 000 lbs.).
Do not exceed the GVWR or the GAWR specified on the Safety
Compliance Certification Label.
Driving
104