service LINCOLN MKC 2015 Workshop Manual
[x] Cancel search | Manufacturer: LINCOLN, Model Year: 2015, Model line: MKC, Model: LINCOLN MKC 2015Pages: 490, PDF Size: 4.74 MB
Page 292 of 490
WARNINGS
When lifting a plastic-cased battery,
excessive pressure on the end walls
could cause acid to flow through the vent
caps, resulting in personal injury and damage
to the vehicle or battery. Lift the battery with
a battery carrier or with your hands on
opposite corners. Keep batteries out of reach of children.
Batteries contain sulfuric acid. Avoid
contact with skin, eyes or clothing. Shield
your eyes when working near the battery to
protect against possible splashing of acid
solution. In case of acid contact with skin or
eyes, flush immediately with water for a
minimum of 15 minutes and get prompt
medical attention. If acid is swallowed, call a
physician immediately. Your vehicle is equipped with a Motorcraft®
maintenance-free battery which normally
does not require additional water during its
life of service.
Note:
If your battery has a cover or shield,
make sure it is reinstalled after the battery
has been cleaned or replaced. Note:
See an authorized dealer for low
voltage battery access, testing, or
replacement.
When a low voltage battery replacement is
necessary, see an authorized dealer to
replace the low voltage battery with a Ford
recommended replacement low voltage
battery that matches the electrical
requirements of the vehicle
To ensure proper operation of the battery
management system (BMS), do not allow a
technician to connect any electrical device
ground connection directly to the low voltage
battery negative post. A connection at the
low voltage battery negative post can cause
inaccurate measurements of the battery
condition and potential incorrect system
operation.
Note: If a person adds electrical or electronic
accessories or components to the vehicle,
the accessories or components may
adversely affect the low voltage battery
performance and durability and may also
affect the performance of other electrical
systems in the vehicle. For longer, trouble-free operation, keep the
top of the battery clean and dry. Also, make
certain the battery cables are always tightly
fastened to the battery terminals.
If you see any corrosion on the battery or
terminals, remove the cables from the
terminals and clean with a wire brush. You
can neutralize the acid with a solution of
baking soda and water.
When a battery replacement is required, the
battery should only be replaced with a Ford
recommended replacement battery that
matches the electrical requirements of the
vehicle.
Because your vehicle
’s engine is
electronically-controlled by a computer,
some engine control settings are maintained
by power from the low voltage battery. Some
engine computer settings, like the idle trim
and fuel trim strategy, optimize the
driveability and performance of the engine.
289
MKC (TME), enUSA Maintenance
Page 297 of 490
Examples of unacceptable moisture (usually
caused by a lamp water leak) are:
•
Water puddle inside the lamp.
• Large water droplets, drip marks or
streaks present on the interior of the lens.
Take your vehicle to a dealer for service if
any of the above conditions of unacceptable
moisture are present.
Replacing High Intensity Discharge
Headlamp Bulbs (If Equipped)
The headlamps on your vehicle use a high
intensity discharge source. These lamps
operate at a high voltage. When the bulb
burns out, have the bulb and starter capsule
assembly replaced by your authorized
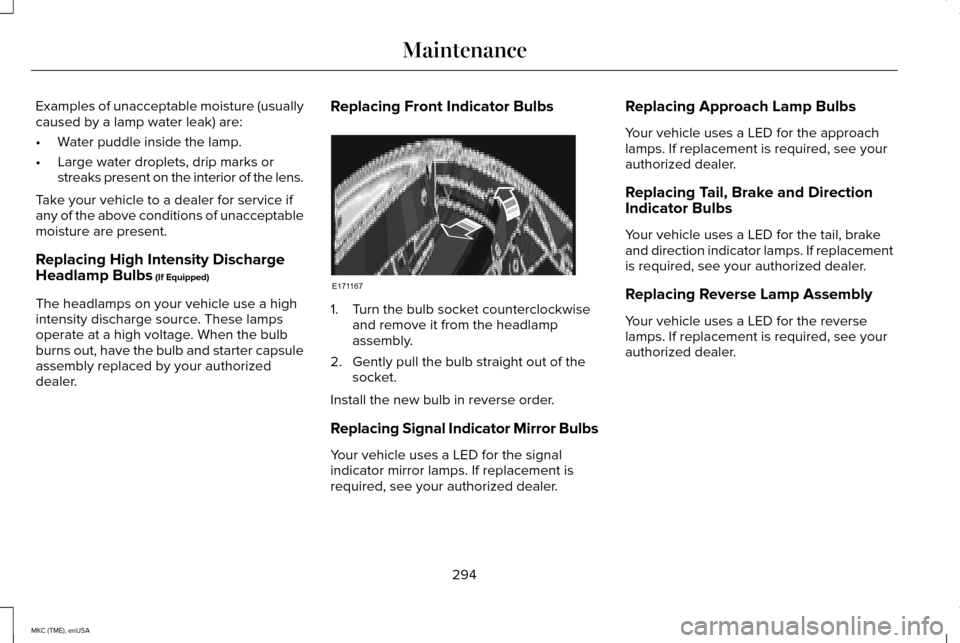
dealer. Replacing Front Indicator Bulbs 1. Turn the bulb socket counterclockwise
and remove it from the headlamp
assembly.
2. Gently pull the bulb straight out of the socket.
Install the new bulb in reverse order.
Replacing Signal Indicator Mirror Bulbs
Your vehicle uses a LED for the signal
indicator mirror lamps. If replacement is
required, see your authorized dealer. Replacing Approach Lamp Bulbs
Your vehicle uses a LED for the approach
lamps. If replacement is required, see your
authorized dealer.
Replacing Tail, Brake and Direction
Indicator Bulbs
Your vehicle uses a LED for the tail, brake
and direction indicator lamps. If replacement
is required, see your authorized dealer.
Replacing Reverse Lamp Assembly
Your vehicle uses a LED for the reverse
lamps. If replacement is required, see your
authorized dealer.
294
MKC (TME), enUSA MaintenanceE171167
Page 313 of 490
As a result of the above dimensional
differences, Sport utility vehicles and trucks
often will have a higher center of gravity and
a greater difference in center of gravity
between the loaded and unloaded condition.
These differences that make your vehicle so
versatile also make it handle differently than
an ordinary passenger car.
TIRE CARE
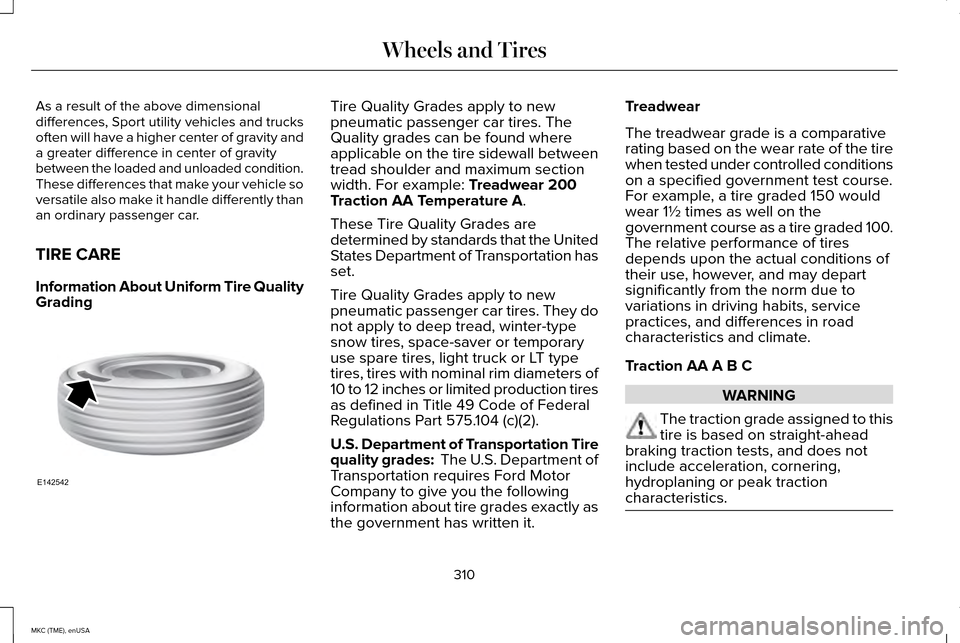
Information About Uniform Tire Quality
Grading
Tire Quality Grades apply to new
pneumatic passenger car tires. The
Quality grades can be found where
applicable on the tire sidewall between
tread shoulder and maximum section
width. For example: Treadwear 200
Traction AA Temperature A.
These Tire Quality Grades are
determined by standards that the United
States Department of Transportation has
set.
Tire Quality Grades apply to new
pneumatic passenger car tires. They do
not apply to deep tread, winter-type
snow tires, space-saver or temporary
use spare tires, light truck or LT type
tires, tires with nominal rim diameters of
10 to 12 inches or limited production tires
as defined in Title 49 Code of Federal
Regulations Part 575.104 (c)(2).
U.S. Department of Transportation Tire
quality grades: The U.S. Department of
Transportation requires Ford Motor
Company to give you the following
information about tire grades exactly as
the government has written it. Treadwear
The treadwear grade is a comparative
rating based on the wear rate of the tire
when tested under controlled conditions
on a specified government test course.
For example, a tire graded 150 would
wear 1½ times as well on the
government course as a tire graded 100.
The relative performance of tires
depends upon the actual conditions of
their use, however, and may depart
significantly from the norm due to
variations in driving habits, service
practices, and differences in road
characteristics and climate.
Traction AA A B C
WARNING
The traction grade assigned to this
tire is based on straight-ahead
braking traction tests, and does not
include acceleration, cornering,
hydroplaning or peak traction
characteristics. 310
MKC (TME), enUSA Wheels and TiresE142542
Page 316 of 490
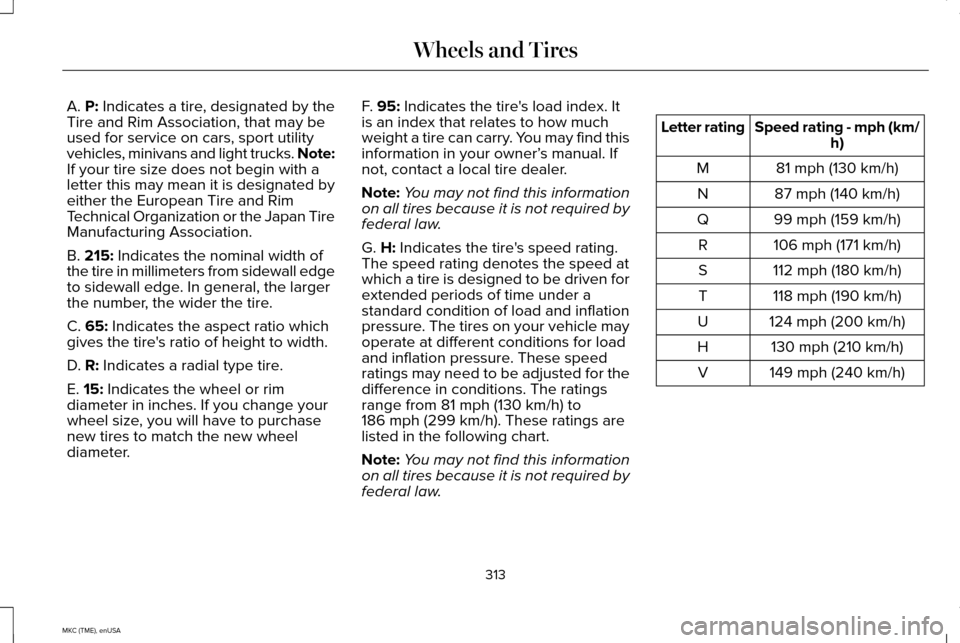
A. P: Indicates a tire, designated by the
Tire and Rim Association, that may be
used for service on cars, sport utility
vehicles, minivans and light trucks.
Note:
If your tire size does not begin with a
letter this may mean it is designated by
either the European Tire and Rim
Technical Organization or the Japan Tire
Manufacturing Association.
B.
215: Indicates the nominal width of
the tire in millimeters from sidewall edge
to sidewall edge. In general, the larger
the number, the wider the tire.
C.
65: Indicates the aspect ratio which
gives the tire's ratio of height to width.
D.
R: Indicates a radial type tire.
E.
15: Indicates the wheel or rim
diameter in inches. If you change your
wheel size, you will have to purchase
new tires to match the new wheel
diameter. F.
95: Indicates the tire's load index. It
is an index that relates to how much
weight a tire can carry. You may find this
information in your owner’ s manual. If
not, contact a local tire dealer.
Note: You may not find this information
on all tires because it is not required by
federal law.
G.
H: Indicates the tire's speed rating.
The speed rating denotes the speed at
which a tire is designed to be driven for
extended periods of time under a
standard condition of load and inflation
pressure. The tires on your vehicle may
operate at different conditions for load
and inflation pressure. These speed
ratings may need to be adjusted for the
difference in conditions. The ratings
range from
81 mph (130 km/h) to
186 mph (299 km/h). These ratings are
listed in the following chart.
Note: You may not find this information
on all tires because it is not required by
federal law. Speed rating - mph (km/
h)
Letter rating
81 mph (130 km/h)
M
87 mph (140 km/h)
N
99 mph (159 km/h)
Q
106 mph (171 km/h)
R
112 mph (180 km/h)
S
118 mph (190 km/h)
T
124 mph (200 km/h)
U
130 mph (210 km/h)
H
149 mph (240 km/h)
V
313
MKC (TME), enUSA Wheels and Tires
Page 318 of 490
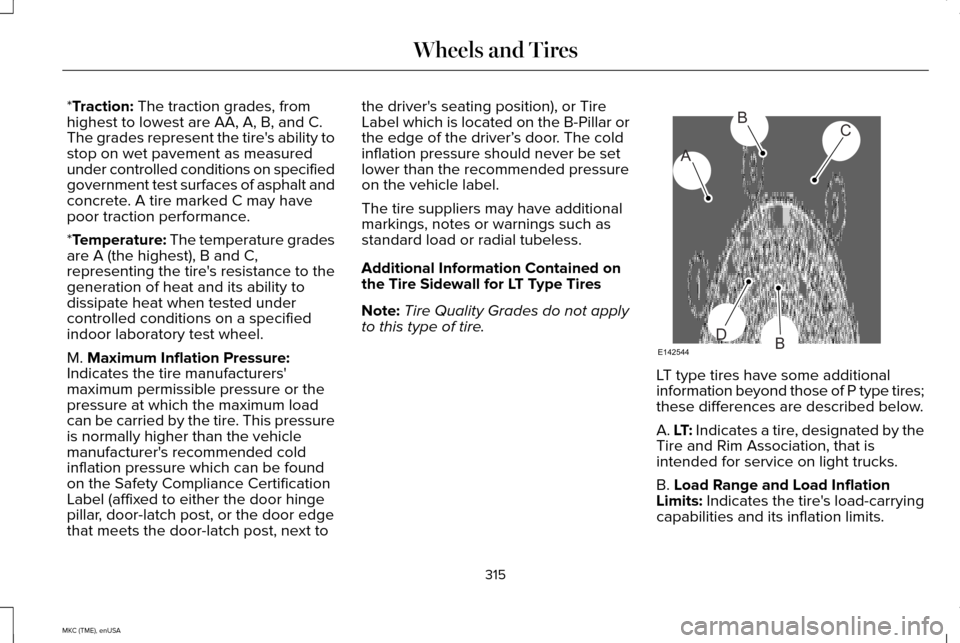
*Traction: The traction grades, from
highest to lowest are AA, A, B, and C.
The grades represent the tire's ability to
stop on wet pavement as measured
under controlled conditions on specified
government test surfaces of asphalt and
concrete. A tire marked C may have
poor traction performance.
*
Temperature: The temperature grades
are A (the highest), B and C,
representing the tire's resistance to the
generation of heat and its ability to
dissipate heat when tested under
controlled conditions on a specified
indoor laboratory test wheel.
M.
Maximum Inflation Pressure:
Indicates the tire manufacturers'
maximum permissible pressure or the
pressure at which the maximum load
can be carried by the tire. This pressure
is normally higher than the vehicle
manufacturer's recommended cold
inflation pressure which can be found
on the Safety Compliance Certification
Label (affixed to either the door hinge
pillar, door-latch post, or the door edge
that meets the door-latch post, next to the driver's seating position), or Tire
Label which is located on the B-Pillar or
the edge of the driver’
s door. The cold
inflation pressure should never be set
lower than the recommended pressure
on the vehicle label.
The tire suppliers may have additional
markings, notes or warnings such as
standard load or radial tubeless.
Additional Information Contained on
the Tire Sidewall for LT Type Tires
Note: Tire Quality Grades do not apply
to this type of tire. LT type tires have some additional
information beyond those of P type tires;
these differences are described below.
A. LT: Indicates a tire, designated by the
Tire and Rim Association, that is
intended for service on light trucks.
B.
Load Range and Load Inflation
Limits: Indicates the tire's load-carrying
capabilities and its inflation limits.
315
MKC (TME), enUSA Wheels and TiresA
BC
BDE142544
Page 319 of 490
C. Maximum Load Dual lb (kg) at psi
(kPa) cold: Indicates the maximum load
and tire pressure when the tire is used
as a dual, defined as four tires on the
rear axle (a total of six or more tires on
the vehicle).
D.
Maximum Load Single lb (kg) at psi
(kPa) cold: Indicates the maximum load
and tire pressure when the tire is used
as a single, defined as two tires (total)
on the rear axle.
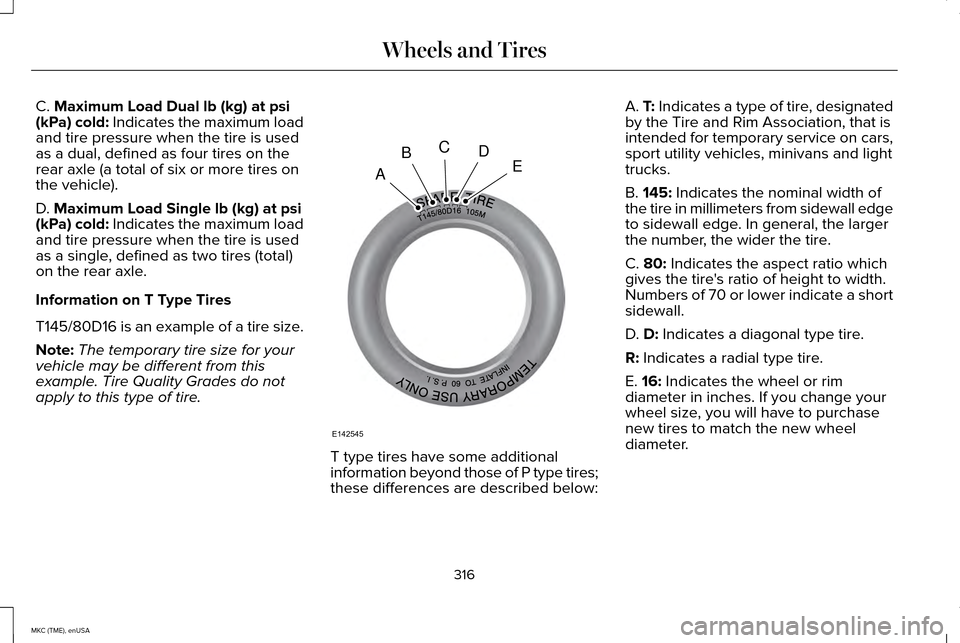
Information on T Type Tires
T145/80D16 is an example of a tire size.
Note: The temporary tire size for your
vehicle may be different from this
example. Tire Quality Grades do not
apply to this type of tire. T type tires have some additional
information beyond those of P type tires;
these differences are described below:A.
T: Indicates a type of tire, designated
by the Tire and Rim Association, that is
intended for temporary service on cars,
sport utility vehicles, minivans and light
trucks.
B.
145: Indicates the nominal width of
the tire in millimeters from sidewall edge
to sidewall edge. In general, the larger
the number, the wider the tire.
C.
80: Indicates the aspect ratio which
gives the tire's ratio of height to width.
Numbers of 70 or lower indicate a short
sidewall.
D.
D: Indicates a diagonal type tire.
R:
Indicates a radial type tire.
E.
16: Indicates the wheel or rim
diameter in inches. If you change your
wheel size, you will have to purchase
new tires to match the new wheel
diameter.
316
MKC (TME), enUSA Wheels and TiresA
BCDE
E142545
Page 320 of 490
Location of the Tire Label
You will find a Tire Label containing tire
inflation pressure by tire size and other
important information located on the
B-Pillar or the edge of the driver door.
Inflating Your Tires
Safe operation of your vehicle requires
that your tires are properly inflated.
Remember that a tire can lose up to half
of its air pressure without appearing flat.
Every day before you drive, check your
tires. If one looks lower than the others,
use a tire gauge to check pressure of all
tires and adjust if required.
At least once a month and before long
trips, inspect each tire and check the tire
pressure with a tire gauge (including
spare, if equipped). Inflate all tires to the
inflation pressure recommended by Ford
Motor Company.
You are strongly urged to buy a reliable
tire pressure gauge, as automatic
service station gauges may be
inaccurate. Ford recommends the use
of a digital or dial-type tire pressure
gauge rather than a stick-type tire
pressure gauge.
Use the recommended cold inflation
pressure for optimum tire performance
and wear. Under-inflation or
over-inflation may cause uneven
treadwear patterns
WARNING
Under-inflation is the most common
cause of tire failures and may result
in severe tire cracking, tread separation
or blowout, with unexpected loss of
vehicle control and increased risk of
injury. Under-inflation increases sidewall
flexing and rolling resistance, resulting
in heat buildup and internal damage to
the tire. It also may result in unnecessary
tire stress, irregular wear, loss of vehicle
control and accidents. A tire can lose up
to half of its air pressure and not appear
to be flat! Always inflate your tires to the Ford
recommended inflation pressure even
if it is less than the maximum inflation
pressure information found on the tire.
The Ford recommended tire inflation
pressure is found on the Safety
Compliance Certification Label (affixed
to either the door hinge pillar, door-latch
post, or the door edge that meets the
door-latch post, next to the driver's
seating position), or Tire Label which is
located on the B-Pillar or the edge of the
driver’
s door. Failure to follow the tire
pressure recommendations can cause
uneven treadwear patterns and
adversely affect the way your vehicle
handles
Maximum Inflation Pressure is the tire
manufacturer's maximum permissible
pressure and the pressure at which the
maximum load can be carried by the tire.
This pressure is normally higher than the
manufacturer’ s recommended cold
inflation pressure which can be found
on the Safety Compliance Certification
Label (affixed to either the door hinge
pillar, door-latch post, or the door edge
317
MKC (TME), enUSA Wheels and Tires
Page 324 of 490
WARNINGS
of loss of vehicle control, vehicle
rollover, personal injury and death.
Additionally the use of
non-recommended tires and wheels
could cause steering, suspension, axle,
transfer case or power transfer unit
failure. If you have questions regarding
tire replacement, contact your
authorized dealer as soon as possible. To reduce the risk of serious injury,
when mounting replacement tires
and wheels, you should not exceed the
maximum pressure indicated on the
sidewall of the tire to set the beads
without additional precautions listed
below. If the beads do not seat at the
maximum pressure indicated,
re-lubricate and try again
When inflating the tire for mounting
pressures up to 20 psi (1.38 bar) greater
than the maximum pressure on the tire
sidewall, the following precautions must
be taken to protect the person mounting
the tire: WARNINGS
1. Make sure that you have the correct
tire and wheel size.
2. Lubricate the tire bead and wheel
bead seat area again.
3. Stand at a minimum of 12 feet (3.66
meters) away from the wheel and tire
assembly.
4. Use both eye and ear protection.
For a mounting pressure more than
20 psi (1.38 bar) greater than the
maximum pressure, a Ford dealer or
other tire service professional should do
the mounting.
Always inflate steel carcass tires with a
remote air fill with the person inflating
standing at a minimum of 12 feet (3.66
meters) away from the wheel and tire
assembly Important:
Remember to replace the
wheel valve stems when the road tires
are replaced on your vehicle
It is recommended that the two front
tires or two rear tires generally be
replaced as a pair.
The tire pressure sensors mounted in
the wheels (originally installed on your
vehicle) are not designed to be used in
aftermarket wheels.
The use of wheels or tires not
recommended by Ford Motor Company
may affect the operation of your tire
pressure monitoring system.
If the tire pressure monitoring system
indicator is flashing, your system is
malfunctioning. Your replacement tire
might be incompatible with your tire
pressure monitoring system, or some
component of the system may be
damaged.
321
MKC (TME), enUSA Wheels and Tires
Page 328 of 490
Please note that the TPMS is not a substitute
for proper tire maintenance, and it is the
driver’
s responsibility to maintain correct tire
pressure, even if under-inflation has not
reached the level to trigger illumination of
the TPMS low tire pressure telltale.
Your vehicle has also been equipped with a
TPMS malfunction indicator to indicate when
the system is not operating properly. The
TPMS malfunction indicator is combined with
the low tire pressure telltale. When the
system detects a malfunction, the telltale will
flash for approximately one minute and then
remain continuously illuminated. This
sequence will continue upon subsequent
vehicle start-ups as long as the malfunction
exists.
When the malfunction indicator is illuminated,
the system may not be able to detect or
signal low tire pressure as intended. TPMS
malfunctions may occur for a variety of
reasons, including the installation of
replacement or alternate tires or wheels on
the vehicle that prevent the TPMS from functioning properly. Always check the TPMS
malfunction telltale after replacing one or
more tires or wheels on your vehicle to
ensure that the replacement or alternate tires
and wheels allow the TPMS to continue to
function properly.
The tire pressure monitoring system
complies with part 15 of the FCC rules and
with RSS-210 of Industry Canada. Operation
is subject to the following two conditions: (1)
This device may not cause harmful
interference, and (2) This device must accept
any interference received, including
interference that may cause undesired
operation.
Changing Tires With a Tire Pressure
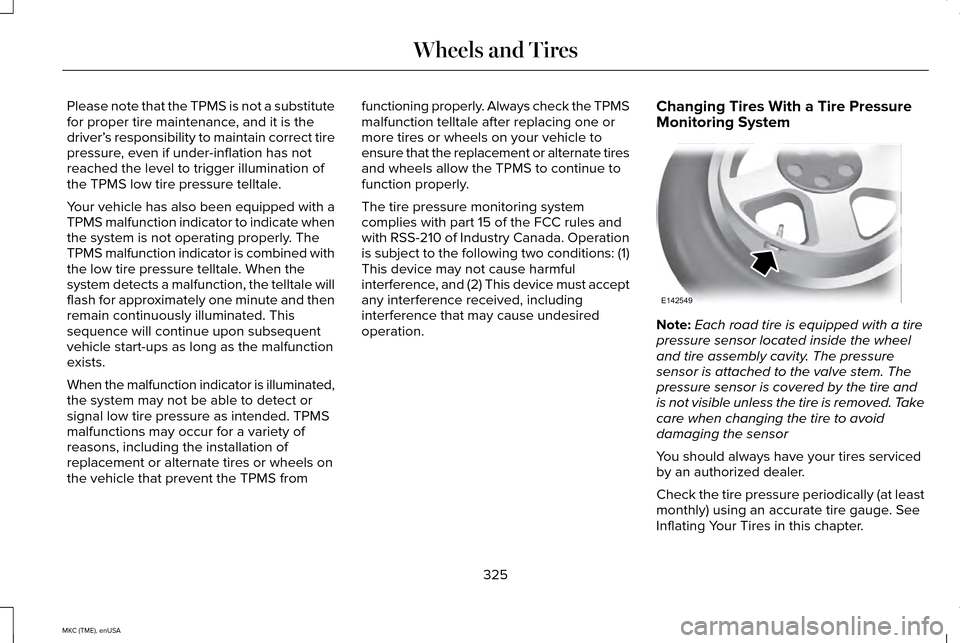
Monitoring System Note:
Each road tire is equipped with a tire
pressure sensor located inside the wheel
and tire assembly cavity. The pressure
sensor is attached to the valve stem. The
pressure sensor is covered by the tire and
is not visible unless the tire is removed. Take
care when changing the tire to avoid
damaging the sensor
You should always have your tires serviced
by an authorized dealer.
Check the tire pressure periodically (at least
monthly) using an accurate tire gauge. See
Inflating Your Tires in this chapter.
325
MKC (TME), enUSA Wheels and TiresE142549
Page 331 of 490
When Inflating Your Tires
When putting air into your tires (such as at a
gas station or in your garage), the tire
pressure monitoring system may not respond
immediately to the air added to your tires.
It may take up to two minutes of driving over
20 mph (32 km/h) for the light to turn off after
you have filled your tires to the
recommended inflation pressure
How Temperature Affects Your Tire
Pressure
The tire pressure monitoring system monitors
tire pressure in each pneumatic tire. While
driving in a normal manner, a typical
passenger tire inflation pressure may
increase about 2 to 4 psi (14 to 28 kPa) from
a cold start situation. If the vehicle is
stationary overnight with the outside
temperature significantly lower than the
daytime temperature, the tire pressure may
decrease about 3 psi (21 kPa) for a drop of
30°F (17°C) in ambient temperature. This
lower pressure value may be detected by
the tire pressure monitoring system as being
significantly lower than the recommended
inflation pressure and activate the system
warning light for low tire pressure. If the low
tire pressure warning light is on, visually
check each tire to verify that no tire is flat. If
one or more tires are flat, repair as
necessary. Check the air pressure in the road
tires. If any tire is under-inflated, carefully
drive the vehicle to the nearest location
where air can be added to the tires. Inflate
all the tires to the recommended inflation
pressure.
CHANGING A ROAD WHEEL
WARNINGS
The use of tire sealants may damage
your tire pressure monitoring system
and should not be used. However, if you
must use a sealant, the tire pressure
monitoring system sensor and valve stem on
the wheel must be replaced by an authorized
dealer. See Tire Pressure Monitoring System
(page 324). If the tire pressure monitor
sensor becomes damaged, it will no longer
function. Note:
The tire pressure monitoring system
indicator light will illuminate when the spare
tire is in use. To restore the full function of
the monitoring system, all road wheels
equipped with tire pressure monitoring
sensors must be mounted on the vehicle.
If you get a flat tire while driving, do not apply
the brake heavily. Instead, gradually
decrease your speed. Hold the steering
wheel firmly and slowly move to a safe place
on the side of the road.
Have a flat serviced by an authorized dealer
in order to prevent damage to the tire
pressure monitoring system sensors. See
Tire Pressure Monitoring System (page 324).
Replace the spare tire with a road tire as
soon as possible. During repairing or
replacing of the flat tire, have the authorized
dealer inspect the tire pressure monitoring
system sensor for damage.
328
MKC (TME), enUSA Wheels and Tires