light LINCOLN MKC 2016 User Guide
[x] Cancel search | Manufacturer: LINCOLN, Model Year: 2016, Model line: MKC, Model: LINCOLN MKC 2016Pages: 432, PDF Size: 4.89 MB
Page 46 of 432
Proper Driver and Front Passenger
Seating Adjustment
WARNING
National Highway Traffic Safety
Administration (NHTSA) recommends
a minimum distance of at least 10 inches (25
centimeters) between an occupant’ s chest
and the driver airbag module. To properly position yourself away from the
airbag:
•
Move your seat to the rear as far as you
can while still reaching the pedals
comfortably.
• Recline the seat slightly (one or two
degrees) from the upright position.
After all occupants have adjusted their seats
and put on safety belts, it is very important
that they continue to sit properly. A properly
seated occupant sits upright, leaning against
the seat back, and centered on the seat
cushion, with their feet comfortably extended
on the floor. Sitting improperly can increase the chance of injury in a crash event. For
example, if an occupant slouches, lies down,
turns sideways, sits forward, leans forward
or sideways, or puts one or both feet up, the
chance of injury during a crash is greatly
increased.
Children and Airbags
WARNING
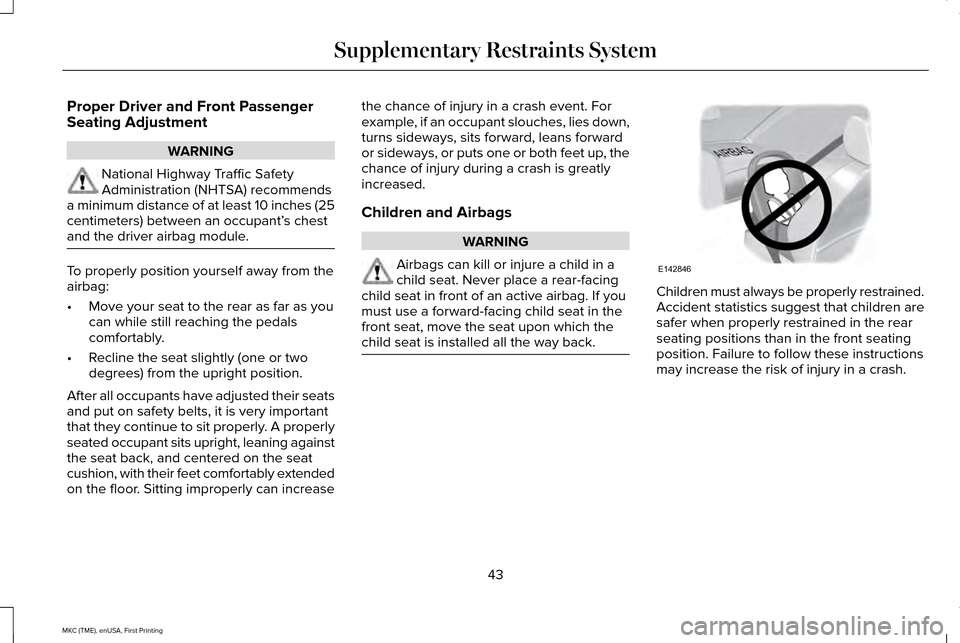
Airbags can kill or injure a child in a
child seat. Never place a rear-facing
child seat in front of an active airbag. If you
must use a forward-facing child seat in the
front seat, move the seat upon which the
child seat is installed all the way back. Children must always be properly restrained.
Accident statistics suggest that children are
safer when properly restrained in the rear
seating positions than in the front seating
position. Failure to follow these instructions
may increase the risk of injury in a crash.
43
MKC (TME), enUSA, First Printing Supplementary Restraints SystemE142846
Page 49 of 432
Note:
When the passenger airbag status
indicator OFF light is illuminated, the
passenger (seat mounted) side airbag may
be disabled to avoid the risk of airbag
deployment injuries.
After all occupants have adjusted their seats
and put on safety belts, it is very important
that they continue to sit properly. A properly
seated occupant sits upright, leaning against
the seatback, and centered on the seat
cushion, with their feet comfortably extended
on the floor. Sitting improperly can increase
the chance of injury in a crash event. For
example, if an occupant slouches, lies down,
turns sideways, sits forward, leans forward
or sideways, or puts one or both feet up, the
chance of injury during a crash is greatly
increased.
If you think that the status of the passenger
airbag off indicator lamp is incorrect, check
for the following:
• Objects lodged underneath the seat.
• Objects between the seat cushion and
the center console.
• Objects hanging off the seatback. •
Objects stowed in the seatback map
pocket.
• Objects placed on the occupant's lap.
• Cargo interference with the seat
• Other passengers pushing or pulling on
the seat.
• Rear passenger feet and knees resting
or pushing on the seat.
The conditions listed above may cause the
weight of a properly seated occupant to be
incorrectly interpreted by the front passenger
sensing system. The person in the front
passenger seat may appear heavier or lighter
due to the conditions described in the list
above. Make sure the front passenger
sensing system is operating
properly. See Crash Sensors and
Airbag Indicator (page 49).
If the airbag readiness light is lit, do the
following: The driver and adult passengers should
check for objects lodged underneath the
front passenger seat, or cargo interfering
with the seat.
If there are lodged objects, or cargo is
interfering with the seat, take the following
steps to remove the obstruction:
•
Pull the vehicle over.
• Turn the vehicle off.
• Driver and adult passengers should
check for any objects lodged underneath
the front passenger seat or cargo
interfering with the seat.
• Remove the obstruction(s) (if found).
• Restart the vehicle.
• Wait at least two minutes and verify that
the airbag readiness light is no longer
illuminated.
• If the airbag readiness light remains
illuminated, this may or may not be a
problem due to the front passenger
sensing system.
Do not attempt to repair or service the
system. Take your vehicle immediately to an
authorized dealer.
46
MKC (TME), enUSA, First Printing Supplementary Restraints System
Page 53 of 432
Your vehicle has a collection of crash and
occupant sensors which provide information
to the restraints control module which
deploys (activates) the front safety belt
pretensioners, driver airbag, passenger
airbag, knee airbag(s), seat mounted side
airbags, and the Safety Canopy. Based on
the type of accident (frontal impact, side
impact or rollover) the restraints control
module will deploy the appropriate safety
devices.
The restraints control module also monitors
the readiness of the above safety devices
plus the crash and occupant sensors. A
warning indicator light in the instrument
cluster indicates the readiness of the safety
system. If this warning indicator light is not
functioning and there is another fault within
the system, the message cluster may display
an airbag failure warning. See Information
Displays (page 109). You will hear five tones
that repeat periodically until you repair the
problem, the warning indicator light or both.
Routine maintenance of the airbag is not
required.
A difficulty with the system is indicated by
one or more of the following: •
The readiness light will not illuminate
immediately after the ignition is turned
on.
• The readiness light will either flash or
stay lit.
• A series of five beeps will be heard. The
tone pattern will repeat periodically until
the problem, the light or both are
repaired.
If any of these things happen, even
intermittently, have the supplemental
restraint system serviced at an authorized
dealer immediately. Unless serviced, the
system may not function properly in the
event of a crash.
The safety belt pretensioners and the airbag
supplemental restraint system is designed
to activate when your vehicle sustains frontal
or sideways deceleration sufficient to cause
the restraints control module to deploy a
safety device or when a certain likelihood of
a rollover event is detected by the rollover
sensor. The fact that the safety belt pretensioners or
airbags did not activate for both front seat
occupants in a crash does not mean that
something is wrong with the system. Rather,
it means the restraints control module
determined the accident conditions (for
example, crash severity, belt usage) were
not appropriate to activate these safety
devices.
•
The design of the front airbags is to
activate only in frontal and near-frontal
crashes (not rollovers, side impacts or
rear impacts) unless the crash causes
sufficient frontal deceleration.
• The safety belt pretensioners are
designed to activate in frontal,
near-frontal, side and rollover crashes.
• The design of the side airbags is to inflate
in certain side crashes. Side airbags may
activate in other types of crashes if the
vehicle experiences sufficient sideways
motion or deformation.
50
MKC (TME), enUSA, First Printing Supplementary Restraints System
Page 58 of 432
Vehicles with automatic climate control can
be configured to operate when the vehicle
is remote started. See Automatic Climate
Control (page 133).
Many states and provinces have restrictions
for the use of remote start. Check your local
and state or provincial laws for specific
requirements regarding remote start
systems.
The remote start system will not work if:
• The ignition is on.
• The alarm system is triggered.
• You switch off the feature in the
information display.
See General
Information (page 109).
• The hood is open.
• The transmission is not in
P.
• The vehicle battery voltage is too low.
• The service engine soon light is on. Remote Starting the Vehicle
Note:
You must press each button within
three seconds of each other. Your vehicle
will not remote start if you do not follow this
sequence. The tag with your transmitter details the
starting procedure.
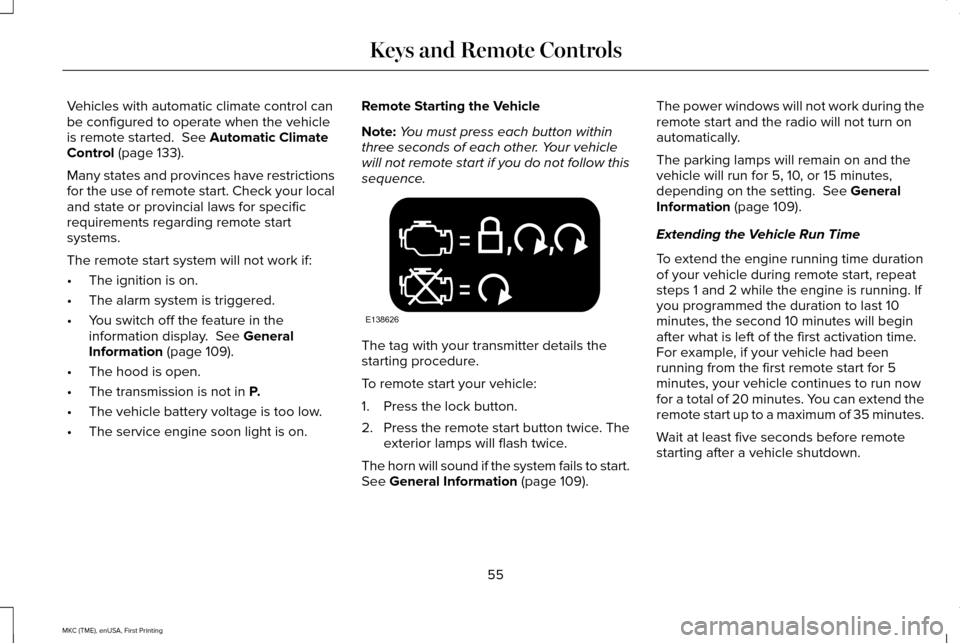
To remote start your vehicle:
1. Press the lock button.
2.
Press the remote start button twice. The
exterior lamps will flash twice.
The horn will sound if the system fails to start.
See
General Information (page 109). The power windows will not work during the
remote start and the radio will not turn on
automatically.
The parking lamps will remain on and the
vehicle will run for 5, 10, or 15 minutes,
depending on the setting.
See General
Information (page 109).
Extending the Vehicle Run Time
To extend the engine running time duration
of your vehicle during remote start, repeat
steps 1 and 2 while the engine is running. If
you programmed the duration to last 10
minutes, the second 10 minutes will begin
after what is left of the first activation time.
For example, if your vehicle had been
running from the first remote start for 5
minutes, your vehicle continues to run now
for a total of 20 minutes. You can extend the
remote start up to a maximum of 35 minutes.
Wait at least five seconds before remote
starting after a vehicle shutdown.
55
MKC (TME), enUSA, First Printing Keys and Remote ControlsE138626
Page 67 of 432
LOCKING AND UNLOCKING
You can use the power door lock or the
remote control to lock and unlock your
vehicle.
Power Door Locks
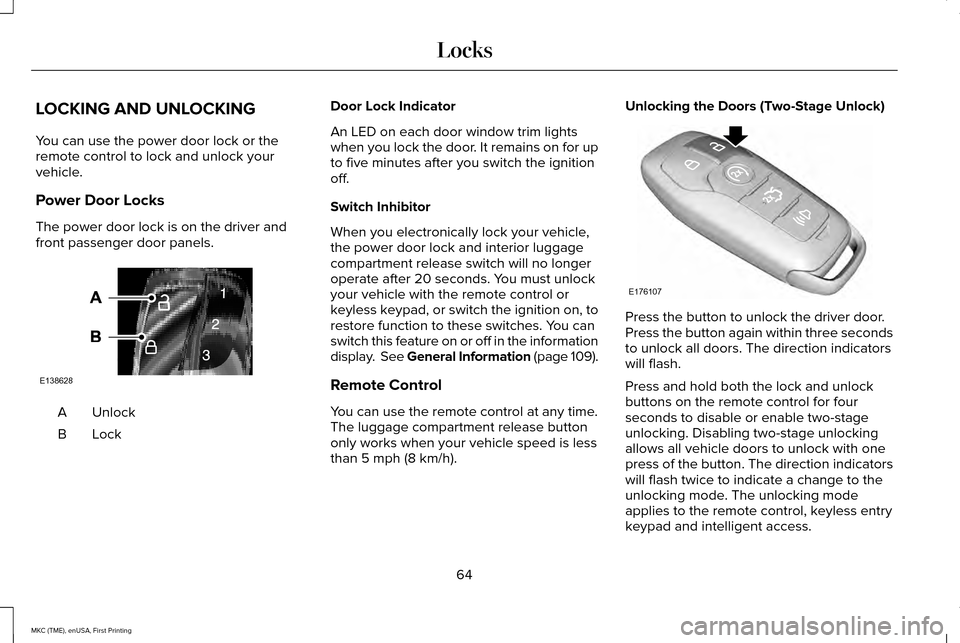
The power door lock is on the driver and
front passenger door panels.
Unlock
A
LockB Door Lock Indicator
An LED on each door window trim lights
when you lock the door. It remains on for up
to five minutes after you switch the ignition
off.
Switch Inhibitor
When you electronically lock your vehicle,
the power door lock and interior luggage
compartment release switch will no longer
operate after 20 seconds. You must unlock
your vehicle with the remote control or
keyless keypad, or switch the ignition on, to
restore function to these switches. You can
switch this feature on or off in the information
display. See General Information (page 109).
Remote Control
You can use the remote control at any time.
The luggage compartment release button
only works when your vehicle speed is less
than 5 mph (8 km/h).Unlocking the Doors (Two-Stage Unlock)
Press the button to unlock the driver door.
Press the button again within three seconds
to unlock all doors. The direction indicators
will flash.
Press and hold both the lock and unlock
buttons on the remote control for four
seconds to disable or enable two-stage
unlocking. Disabling two-stage unlocking
allows all vehicle doors to unlock with one
press of the button. The direction indicators
will flash twice to indicate a change to the
unlocking mode. The unlocking mode
applies to the remote control, keyless entry
keypad and intelligent access.
64
MKC (TME), enUSA, First Printing LocksE138628 E176107
Page 71 of 432
Illuminated Entry
The interior lamps and select exterior lamps
will light when you unlock the doors with the
remote control.
The system turns off the lights if:
•
You start your vehicle.
• You press the remote control lock button.
• They are on for 25 seconds.
The lights will not turn off if:
• You switch them on with the lamp
control.
• Any door is open.
Illuminated Exit
The interior lamps and select exterior lamps
will light when all doors are closed and you
switch the ignition off.
The lamps turn off if all the doors remain
closed and either of the following occurs:
• After 25 seconds elapse.
• You lock your vehicle from the outside. Battery Saver
If you leave the courtesy lamps or dome
lamps on and switch the ignition off, this
feature turns them off after some time.
Accessory Mode Battery Saver for
Intelligent Access Keys
If you leave your vehicle with the ignition on,
it will turn off 15 minutes after you close all
of the doors.
Welcome Lighting
This feature lights select exterior lighting as
you approach your vehicle. You must have
an intelligent access key with you. The
feature turns off when you open a door,
liftgate, or unlock your vehicle. Welcome
lighting remains on for 25 seconds or until
you start your vehicle.
The feature is active when:
•
The feature is configured on in the
information display. See General
Information (page 109).
• The ignition is off. •
All doors and the liftgate are closed.
• You lock your vehicle.
The feature is not active when:
• Your vehicle detects the intelligent
access key is inside.
• The intelligent access key is in close
range of the vehicle for more than two
minutes.
• The anti-theft alarm triggers.
• You do not start your vehicle for more
than five days.
• The vehicle battery charge is low.
Note: When this feature is disabled, you
must switch the ignition on to reset it.
Note: This feature may not correctly operate
if the intelligent access key is stored within
8–15 ft (2.4–4.6 m)
of your vehicle while not
in use.
68
MKC (TME), enUSA, First Printing Locks
Page 76 of 432
When Opening
The system stops when it detects an
obstacle and three tones sound. Once you
remove the obstacle, you can continue to
operate the liftgate.
Hands-Free Feature
Make sure you have an intelligent access
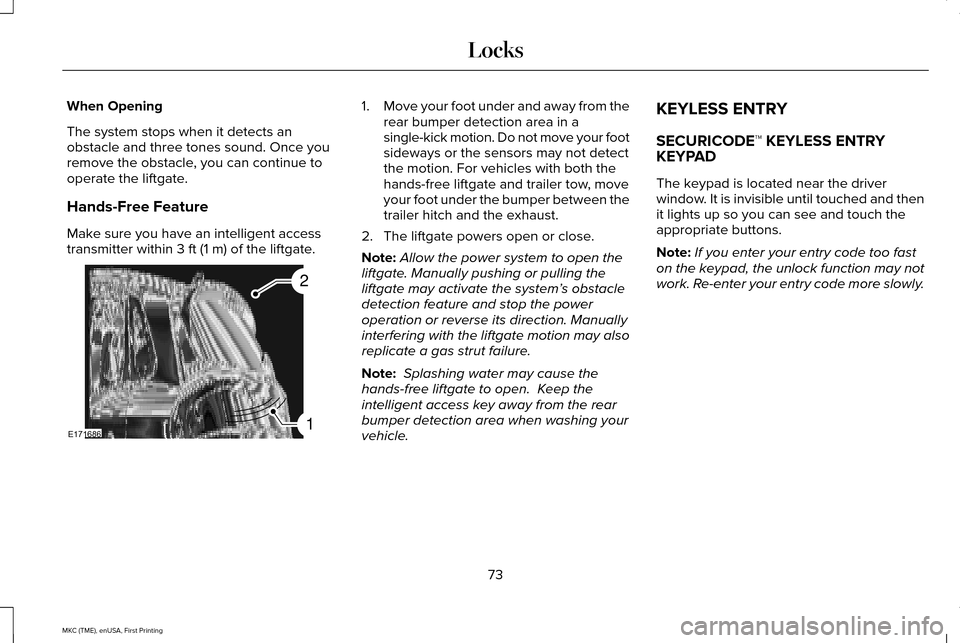
transmitter within 3 ft (1 m) of the liftgate. 1.
Move your foot under and away from the
rear bumper detection area in a
single-kick motion. Do not move your foot
sideways or the sensors may not detect
the motion. For vehicles with both the
hands-free liftgate and trailer tow, move
your foot under the bumper between the
trailer hitch and the exhaust.
2. The liftgate powers open or close.
Note: Allow the power system to open the
liftgate. Manually pushing or pulling the
liftgate may activate the system’ s obstacle
detection feature and stop the power
operation or reverse its direction. Manually
interfering with the liftgate motion may also
replicate a gas strut failure.
Note: Splashing water may cause the
hands-free liftgate to open. Keep the
intelligent access key away from the rear
bumper detection area when washing your
vehicle. KEYLESS ENTRY
SECURICODE™ KEYLESS ENTRY
KEYPAD
The keypad is located near the driver
window. It is invisible until touched and then
it lights up so you can see and touch the
appropriate buttons.
Note:
If you enter your entry code too fast
on the keypad, the unlock function may not
work. Re-enter your entry code more slowly.
73
MKC (TME), enUSA, First Printing LocksE171686
2
1
Page 90 of 432
GENERAL INFORMATION
Condensation in Lamp Assemblies
Exterior lamps have vents to accommodate
normal changes in air pressure.
Condensation can be a natural by-product
of this design. When moist air enters the
lamp assembly through the vents, there is a
possibility that condensation can occur when
the temperature is cold. When normal
condensation occurs, a fine mist can form on
the interior of the lens. The fine mist
eventually clears and exits through the vents
during normal operation.
Clearing time may take as long as 48 hours
under dry weather conditions.
Examples of acceptable condensation are:
•
The presence of a fine mist (no streaks,
drip marks or large droplets).
• A fine mist covers less than 50% of the
lens. Examples of unacceptable condensation are:
•
A water puddle inside the lamp.
• Streaks, drip marks or large droplets
present on the interior of the lens.
If you see any unacceptable condensation,
have your vehicle checked by an authorized
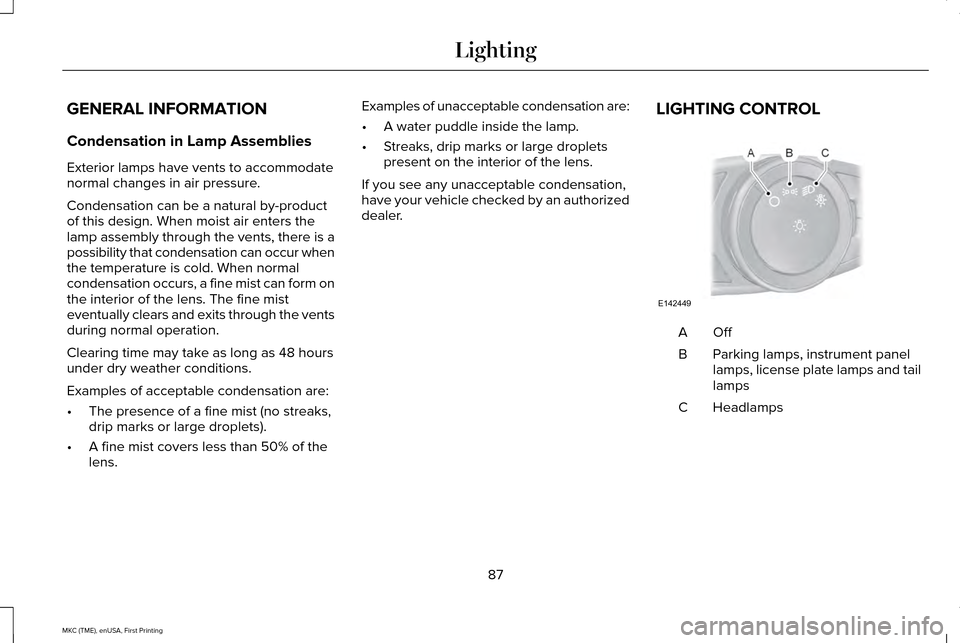
dealer. LIGHTING CONTROL OffA
Parking lamps, instrument panel
lamps, license plate lamps and tail
lamps
B
Headlamps
C
87
MKC (TME), enUSA, First Printing LightingE142449
Page 91 of 432
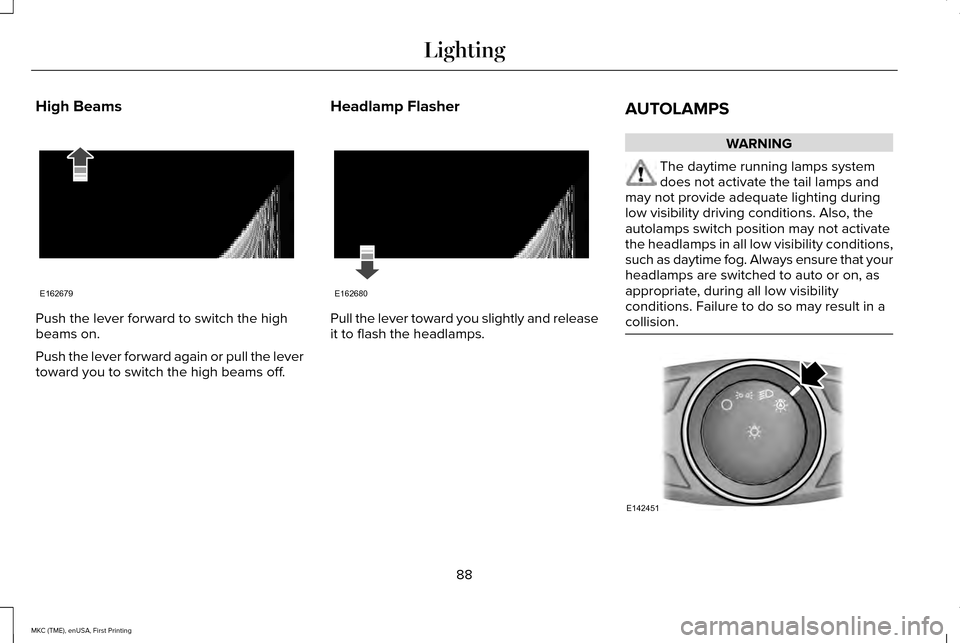
High Beams
Push the lever forward to switch the high
beams on.
Push the lever forward again or pull the lever
toward you to switch the high beams off.
Headlamp Flasher Pull the lever toward you slightly and release
it to flash the headlamps.
AUTOLAMPS WARNING
The daytime running lamps system
does not activate the tail lamps and
may not provide adequate lighting during
low visibility driving conditions. Also, the
autolamps switch position may not activate
the headlamps in all low visibility conditions,
such as daytime fog. Always ensure that your
headlamps are switched to auto or on, as
appropriate, during all low visibility
conditions. Failure to do so may result in a
collision. 88
MKC (TME), enUSA, First Printing LightingE162679 E162680 E142451
Page 92 of 432
When the lighting control is in the autolamps
position, the headlamps will automatically
turn on in low light situations or when wipers
activate.
If equipped, the following also activate when
the lighting control is in the autolamps
position and you switch them on in the
information display:
•
Configurable daytime running lamps.
• Automatic high beam control.
• Adaptive headlamp control.
The headlamps remain on for a period of
time after you switch the ignition off. Use the
information display controls to adjust the
period of time that the headlamps remain
on. See Information Displays (page 109).
Note: With the headlamps in the autolamps
position, you cannot switch the high beam
headlamps on until the autolamps system
turns the headlamps on. Note:
If the lighting control switch is in the
autolamps position and the headlamps are
off, the parking lamps will light as signature
lighting. If the headlamps are on, or the
lighting control switch is in the parking lamps
position, the parking lamps will not light as
signature lighting.
Windshield Wiper Activated Headlamps
The windshield wiper activated headlamps
turn on within 10 seconds when you switch
the windshield wipers on and the lighting
control switch is in the autolamps position.
They will turn off approximately 60 seconds
after you switch the windshield wipers off.
The headlamps will not turn on by wiper
activation:
• During a mist wipe.
• When the wipers are on to clear washer
fluid during a wash condition.
• If the wipers are in intermittent mode.
Note: If you have autolamps and autowipers
switched on, the low beam headlamps will
turn on automatically when the windshield
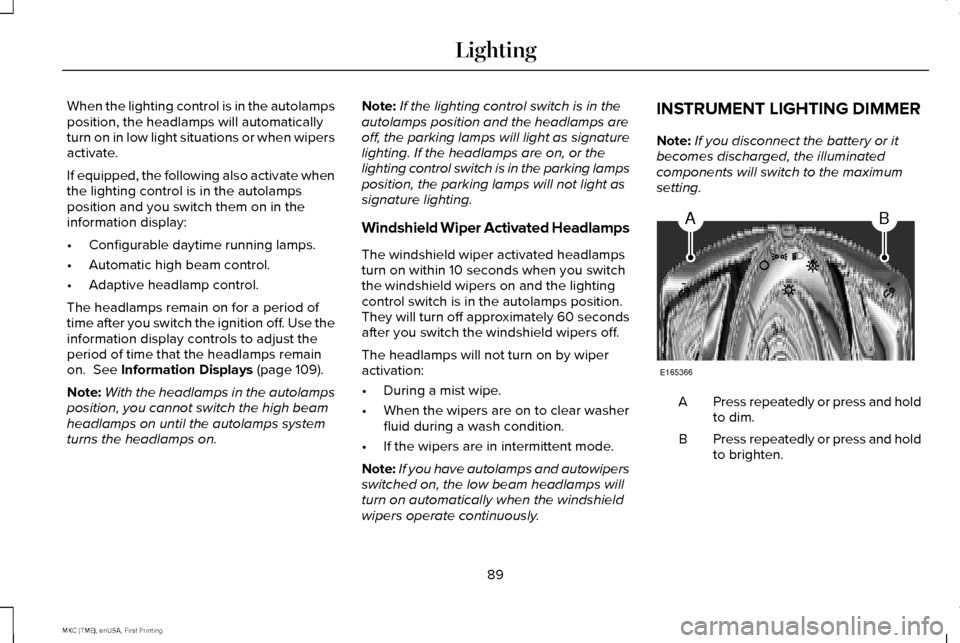
wipers operate continuously. INSTRUMENT LIGHTING DIMMER
Note:
If you disconnect the battery or it
becomes discharged, the illuminated
components will switch to the maximum
setting. Press repeatedly or press and hold
to dim.
A
Press repeatedly or press and hold
to brighten.
B
89
MKC (TME), enUSA, First Printing LightingAB
E165366