mirror LINCOLN MKC 2018 User Guide
[x] Cancel search | Manufacturer: LINCOLN, Model Year: 2018, Model line: MKC, Model: LINCOLN MKC 2018Pages: 571, PDF Size: 4.39 MB
Page 105 of 571
Note:This position helps to reduce windnoise or rumbling which may happen withthe moonroof fully open. Press and hold thecontrol again to fully open the moonroof.
Press and release the front of the control toclose the moonroof.
The sunscreen must be open before openingthe moonroof. If you touch the moonroofopen control while the sunscreen is in itsclosed position, the sunscreen will open firstfollowed by the moonroof. If both thesunscreen and moonroof are open and youtouch the moonroof close control, themoonroof will close first followed by thesunscreen.
102
MKC (TME) Canada/United States of America, JJ7J 19A321 AA enUSA, Edition date: 201707, Second Printing
Windows and Mirrors
Page 115 of 571
SettingsIn this mode, you can configure differentdriver setting choices.Note:Some items are optional and may notappear.
Note:Some MyKey items will only appear if a MyKey is set.
Settings
Drive ControlVehicle
DTE Calculation
Easy Entry/Exit
Auto Engine Off
Lighting
Locks
Mirror
Oil Life
Enable or DisablePower Liftgate
Remote Start
Windows
Wipers
Create MyKeyMyKey
112
MKC (TME) Canada/United States of America, JJ7J 19A321 AA enUSA, Edition date: 201707, Second Printing
Information Displays
Page 138 of 571
Dual
Press to switch on temperature control forthe right-hand side of the vehicle. When dualzone is off, right-hand temperature settingsremain the same as the left-hand settings.
Auto
Press to switch on automatic operation.Adjust to select the desired temperature. Fanspeed, air distribution, air conditioningoperation, and outside or recirculated airadjust to heat or cool the vehicle to maintainthe desired temperature. You can also switchoff dual zone mode by pressing and holdingfor more than two seconds.
Power
Press to switch the system on and off. Whenthe system is off, it prevents outside air fromentering the vehicle.
Defrost
Press to distribute air through the windshieldair vents and de-mister. Air directed to theinstrument panel and footwell air vents turnsoff. You can also use this setting to defogand clear the windshield of a thin coveringof ice.
Heated Rear Window
Press to switch the heated rear window onand off. See Heated Windows and Mirrors(page 136).
HINTS ON CONTROLLING THE
INTERIOR CLIMATE
General Hints
Note:Prolonged use of recirculated air maycause the windows to fog up.
Note:You may feel a small amount of airfrom the footwell air vents regardless of theair distribution setting.
Note:To reduce humidity build-up insideyour vehicle, do not drive with the systemswitched off or with recirculated air alwaysswitched on.
Note:Do not place objects under the frontseats as this may interfere with the airflowto the rear seats.
Note:Remove any snow, ice or leaves fromthe air intake area at the base of thewindshield.
Note:To improve the time to reach acomfortable temperature in hot weather,drive with the windows open until you feelcold air through the air vents.
Automatic Climate Control
Note:Adjusting the settings when yourvehicle interior is extremely hot or cold is notnecessary.
Note:The system adjusts to heat or cool theinterior to the temperature you select asquickly as possible.
Note:For the system to function efficiently,the instrument panel and side air ventsshould be fully open.
135
MKC (TME) Canada/United States of America, JJ7J 19A321 AA enUSA, Edition date: 201707, Second Printing
Climate Control
Page 139 of 571
Note:If you select AUTO during cold outsidetemperatures, the system directs air flow tothe windshield and side window vents. Inaddition, the fan may run at a slower speeduntil the engine warms up.
Note:If you select AUTO during hottemperatures and the inside of the vehicleis hot, the system uses recirculated air tomaximize interior cooling. Fan speed mayalso reduce until the air cools.
Quickly Heating the Interior
1. Press AUTO.
2. Adjust the temperature function to thedesired setting.
Recommended Settings for Heating
1. Press AUTO.
2. Adjust the temperature function to thedesired setting. Use 72°F (22°C) as astarting point, then adjust the setting asnecessary.
Quickly Cooling the Interior
1. Press MAX A/C.
Recommended Settings for Cooling
1. Press AUTO.
2. Adjust the temperature function to thedesired setting. Use 72°F (22°C) as astarting point, then adjust the setting asnecessary.
Defogging the Side Windows in ColdWeather
1. Press defrost.
2. Adjust the temperature control to thedesired setting. Use 72°F (22°C) as astarting point, then adjust the setting asnecessary.
HEATED WINDOWS AND MIRRORS
Note:Make sure the engine is runningbefore operating the heated windows.
Note:Depending on your remote startsettings, the heated windows, mirrors andwipers may remain on after remote startingthe vehicle.
Heated Rear Window
Press the button to clear theheated rear window of thin ice andfog. The heated rear window turnsoff after a short period of time. Press thebutton again to switch it off.
Note: Do not use razor blades or othersharp objects to clean or remove decals fromthe inside of the heated rear window. Thevehicle warranty does not cover damagecaused to the heated rear window grid lines.
Heated Exterior Mirrors (If Equipped)
When you switch the heated rear windowon, the heated exterior mirrors turn on.
Note:Do not remove ice from the mirrorswith a scraper or adjust the mirror glasswhen it is frozen in place.
Note:Do not clean the mirror housing orglass with harsh abrasives, fuel or otherpetroleum-based cleaning products.
136
MKC (TME) Canada/United States of America, JJ7J 19A321 AA enUSA, Edition date: 201707, Second Printing
Climate ControlE184884
Page 140 of 571
Windshield Wiper De-icer (If Equipped)
When you switch the heated rear windowon, the windshield wiper de-icer turns on.
CABIN AIR FILTER
Your vehicle is equipped with a cabin airfilter, which gives you and your passengersthe following benefits:
•It improves your driving comfort byreducing particle and odor concentration.
•It improves the interior compartmentcleanliness.
•It protects the climate controlcomponents from particle deposits.
You can locate the cabin air filter behind theglove box.
Note:Make sure you have a cabin air filterinstalled at all times. This prevents foreignobjects from entering the system. Runningthe system without a filter in place couldresult in degradation or damage to thesystem.
Replace the filter at regular intervals.
For additional cabin air filter information, orto replace the filter, see a qualifiedtechnician.
REMOTE START
The system adjusts the interior temperaturedepending on your chosen settings duringremote start.
You cannot adjust the climate control settingduring remote start operation. When youswitch the ignition on, the climate controlsystem returns to the previous settings. Youcan now make adjustments.
Some features may remain on if they turn onduring remote start:
•Driver heated seat.
•Driver ventilated seat.
•Heated steering wheel.
•Heated mirrors.
•Heated rear window.
•Windshield wiper de-icer.
Note:If the passenger heated or ventilatedseats are on when you switch the vehicleoff, they default to the driver setting whenyou switch the vehicle on.
You can adjust the default remote startsettings using the information displaycontrols. See Information Displays (page109).
Automatic Settings
In hot weather, the system sets to 72°F(22°C). The ventilated seats set to high (ifavailable, and if you select AUTO in theinformation display).
In moderate weather, the system heats orcools (based on pre-selected settings). Therear defroster, heated mirrors and heated orventilated seats do not turn on.
In cold weather, the system sets to 72°F(22°C). The heated seats and heated steeringwheel set to high (if available, and if youselect AUTO in the information display). Therear defroster and heated mirrors turn on.
137
MKC (TME) Canada/United States of America, JJ7J 19A321 AA enUSA, Edition date: 201707, Second Printing
Climate Control
Page 146 of 571
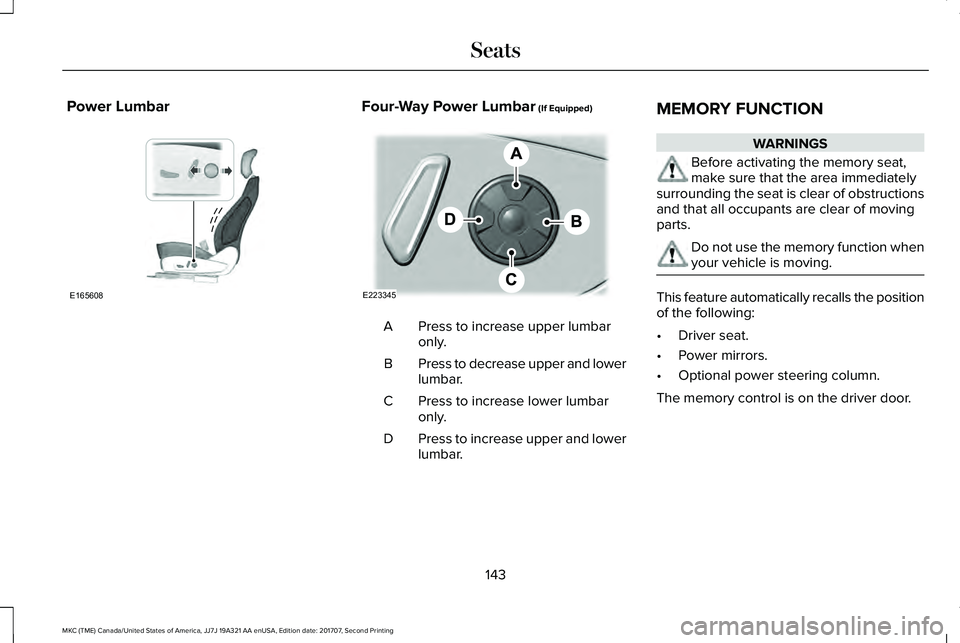
Power LumbarFour-Way Power Lumbar (If Equipped)
Press to increase upper lumbaronly.A
Press to decrease upper and lowerlumbar.B
Press to increase lower lumbaronly.C
Press to increase upper and lowerlumbar.D
MEMORY FUNCTION
WARNINGS
Before activating the memory seat,make sure that the area immediatelysurrounding the seat is clear of obstructionsand that all occupants are clear of movingparts.
Do not use the memory function whenyour vehicle is moving.
This feature automatically recalls the positionof the following:
•Driver seat.
•Power mirrors.
•Optional power steering column.
The memory control is on the driver door.
143
MKC (TME) Canada/United States of America, JJ7J 19A321 AA enUSA, Edition date: 201707, Second Printing
SeatsE165608 E223345
Page 147 of 571
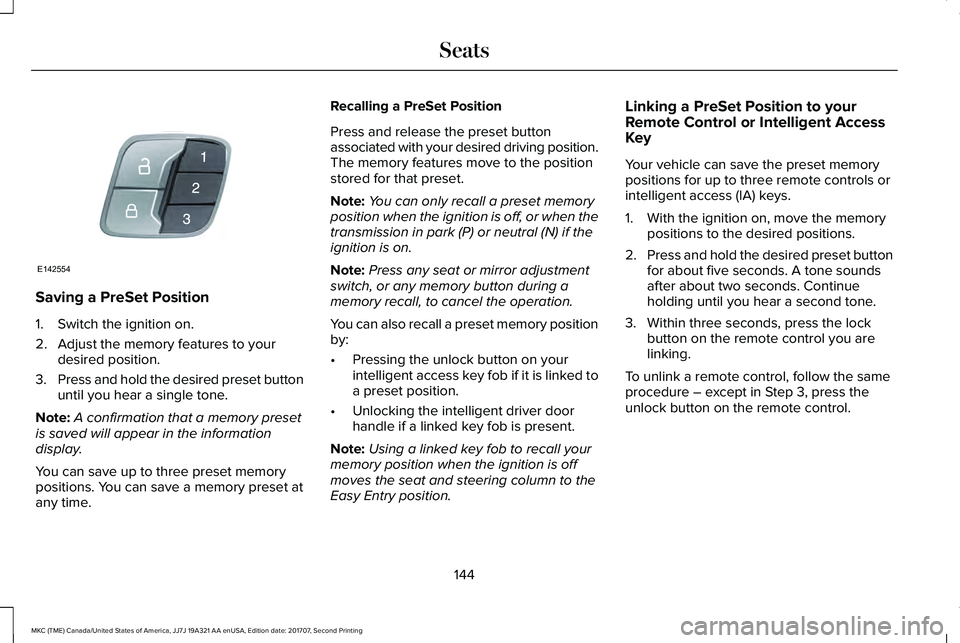
Saving a PreSet Position
1. Switch the ignition on.
2. Adjust the memory features to yourdesired position.
3.Press and hold the desired preset buttonuntil you hear a single tone.
Note:A confirmation that a memory presetis saved will appear in the informationdisplay.
You can save up to three preset memorypositions. You can save a memory preset atany time.
Recalling a PreSet Position
Press and release the preset buttonassociated with your desired driving position.The memory features move to the positionstored for that preset.
Note:You can only recall a preset memoryposition when the ignition is off, or when thetransmission in park (P) or neutral (N) if theignition is on.
Note:Press any seat or mirror adjustmentswitch, or any memory button during amemory recall, to cancel the operation.
You can also recall a preset memory positionby:
•Pressing the unlock button on yourintelligent access key fob if it is linked toa preset position.
•Unlocking the intelligent driver doorhandle if a linked key fob is present.
Note:Using a linked key fob to recall yourmemory position when the ignition is offmoves the seat and steering column to theEasy Entry position.
Linking a PreSet Position to yourRemote Control or Intelligent AccessKey
Your vehicle can save the preset memorypositions for up to three remote controls orintelligent access (IA) keys.
1. With the ignition on, move the memorypositions to the desired positions.
2.Press and hold the desired preset buttonfor about five seconds. A tone soundsafter about two seconds. Continueholding until you hear a second tone.
3. Within three seconds, press the lockbutton on the remote control you arelinking.
To unlink a remote control, follow the sameprocedure – except in Step 3, press theunlock button on the remote control.
144
MKC (TME) Canada/United States of America, JJ7J 19A321 AA enUSA, Edition date: 201707, Second Printing
SeatsE142554
Page 209 of 571
REAR VIEW CAMERA
WARNINGS
The rear view camera system is areverse aid supplement device that stillrequires the driver to use it in conjunctionwith the interior and exterior mirrors formaximum coverage.
Objects that are close to either cornerof the bumper or under the bumper,might not be seen on the screen due to thelimited coverage of the camera system.
Reverse your vehicle slowly. Failure tofollow this instruction could result inthe loss of control of your vehicle, personalinjury or death.
Use caution when the rear cargo dooris ajar. If the rear cargo door is ajar, thecamera will be out of position and the videoimage may be incorrect. All guidelinesdisappear when the rear cargo door is ajar.Failure to follow this instruction could resultin personal injury.
WARNINGS
Use caution when turning camerafeatures on or off when thetransmission is not in park (P). Make sureyour vehicle is not moving.
The rear view camera system provides avideo image of the area behind your vehicle.
During operation, lines appear in the displaywhich represent your vehicle’s path andproximity to objects behind your vehicle.
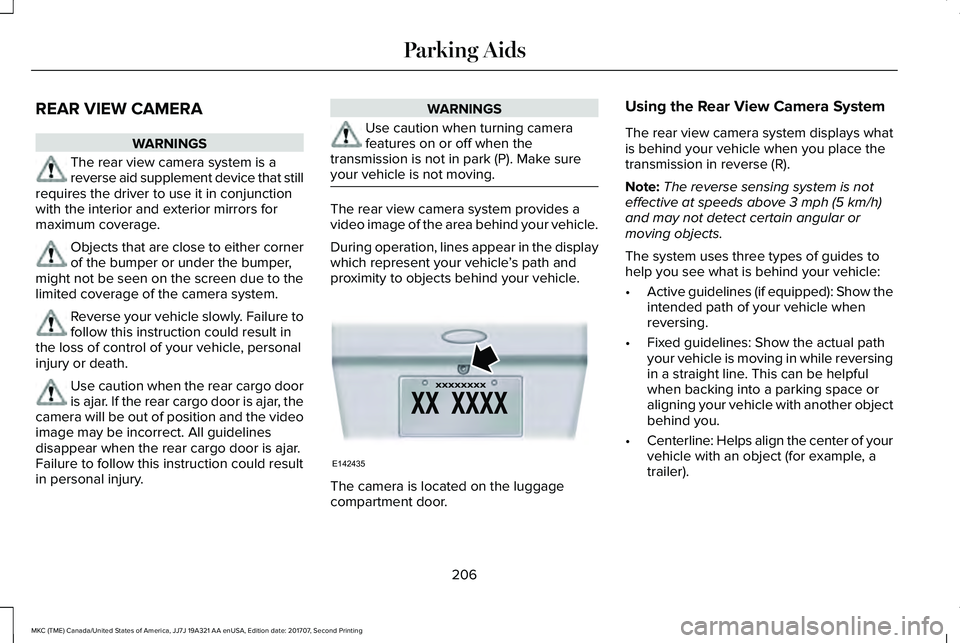
The camera is located on the luggagecompartment door.
Using the Rear View Camera System
The rear view camera system displays whatis behind your vehicle when you place thetransmission in reverse (R).
Note:The reverse sensing system is noteffective at speeds above 3 mph (5 km/h)and may not detect certain angular ormoving objects.
The system uses three types of guides tohelp you see what is behind your vehicle:
•Active guidelines (if equipped): Show theintended path of your vehicle whenreversing.
•Fixed guidelines: Show the actual pathyour vehicle is moving in while reversingin a straight line. This can be helpfulwhen backing into a parking space oraligning your vehicle with another objectbehind you.
•Centerline: Helps align the center of yourvehicle with an object (for example, atrailer).
206
MKC (TME) Canada/United States of America, JJ7J 19A321 AA enUSA, Edition date: 201707, Second Printing
Parking AidsE142435
Page 211 of 571
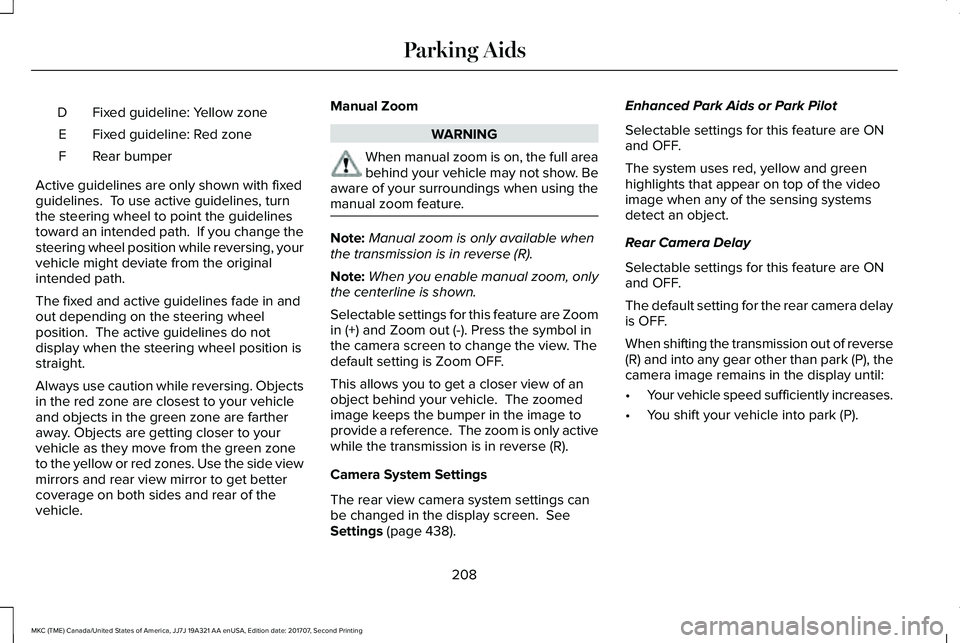
Fixed guideline: Yellow zoneD
Fixed guideline: Red zoneE
Rear bumperF
Active guidelines are only shown with fixedguidelines. To use active guidelines, turnthe steering wheel to point the guidelinestoward an intended path. If you change thesteering wheel position while reversing, yourvehicle might deviate from the originalintended path.
The fixed and active guidelines fade in andout depending on the steering wheelposition. The active guidelines do notdisplay when the steering wheel position isstraight.
Always use caution while reversing. Objectsin the red zone are closest to your vehicleand objects in the green zone are fartheraway. Objects are getting closer to yourvehicle as they move from the green zoneto the yellow or red zones. Use the side viewmirrors and rear view mirror to get bettercoverage on both sides and rear of thevehicle.
Manual Zoom
WARNING
When manual zoom is on, the full areabehind your vehicle may not show. Beaware of your surroundings when using themanual zoom feature.
Note:Manual zoom is only available whenthe transmission is in reverse (R).
Note:When you enable manual zoom, onlythe centerline is shown.
Selectable settings for this feature are Zoomin (+) and Zoom out (-). Press the symbol inthe camera screen to change the view. Thedefault setting is Zoom OFF.
This allows you to get a closer view of anobject behind your vehicle. The zoomedimage keeps the bumper in the image toprovide a reference. The zoom is only activewhile the transmission is in reverse (R).
Camera System Settings
The rear view camera system settings canbe changed in the display screen. SeeSettings (page 438).
Enhanced Park Aids or Park Pilot
Selectable settings for this feature are ONand OFF.
The system uses red, yellow and greenhighlights that appear on top of the videoimage when any of the sensing systemsdetect an object.
Rear Camera Delay
Selectable settings for this feature are ONand OFF.
The default setting for the rear camera delayis OFF.
When shifting the transmission out of reverse(R) and into any gear other than park (P), thecamera image remains in the display until:
•Your vehicle speed sufficiently increases.
•You shift your vehicle into park (P).
208
MKC (TME) Canada/United States of America, JJ7J 19A321 AA enUSA, Edition date: 201707, Second Printing
Parking Aids
Page 222 of 571
LANE KEEPING SYSTEM (If Equipped)
WARNINGS
The system is designed to aid thedriver. It is not intended to replace yourattention and judgment. You are stillresponsible to drive with due care andattention.
Always drive with due care andattention when using and operating thecontrols and features on your vehicle.
At all times, you are responsible forcontrolling your vehicle, supervisingthe system and intervening, if required.Failure to take care may result in the loss ofcontrol of your vehicle, serious personalinjury or death.
In cold and severe weather conditionsthe system may not function. Rain,snow and spray can all limit sensorperformance.
The system will not operate if thesensor cannot track the road lanemarkings.
WARNINGS
The sensor may incorrectly track lanemarkings as other structures or objects.This can result in a false or missed warning.
The system may not operate properlyif the sensor is blocked. Keep thewindshield free from obstruction.
If damage occurs in the immediate areasurrounding the sensor, have yourvehicle checked as soon as possible.
Note:The system works above 40 mph(64 km/h).
Note:The system works as long as thecamera can detect one lane marking.
Note:When you select aid or alert and aidmode and the system detects no steeringactivity for a short period, the system alertsyou to put your hands on the steering wheel.The system may detect a light grip or touchon the steering wheel as hands off driving.
Note:The system may not function if thecamera is blocked, or if the windshield isdamaged or dirty.
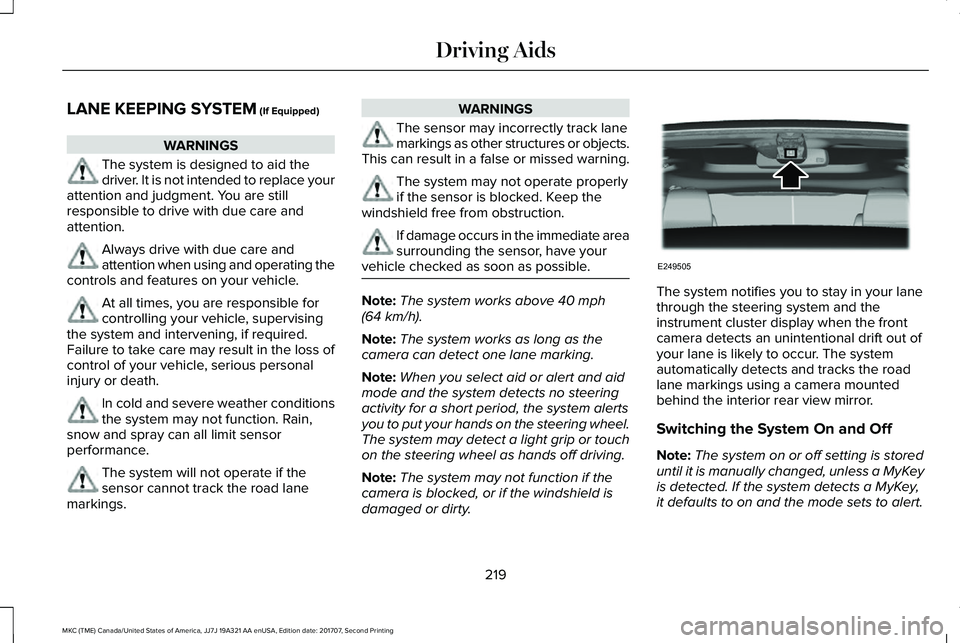
The system notifies you to stay in your lanethrough the steering system and theinstrument cluster display when the frontcamera detects an unintentional drift out ofyour lane is likely to occur. The systemautomatically detects and tracks the roadlane markings using a camera mountedbehind the interior rear view mirror.
Switching the System On and Off
Note:The system on or off setting is storeduntil it is manually changed, unless a MyKeyis detected. If the system detects a MyKey,it defaults to on and the mode sets to alert.
219
MKC (TME) Canada/United States of America, JJ7J 19A321 AA enUSA, Edition date: 201707, Second Printing
Driving AidsE249505