reset LINCOLN MKC 2018 User Guide
[x] Cancel search | Manufacturer: LINCOLN, Model Year: 2018, Model line: MKC, Model: LINCOLN MKC 2018Pages: 571, PDF Size: 4.39 MB
Page 124 of 571
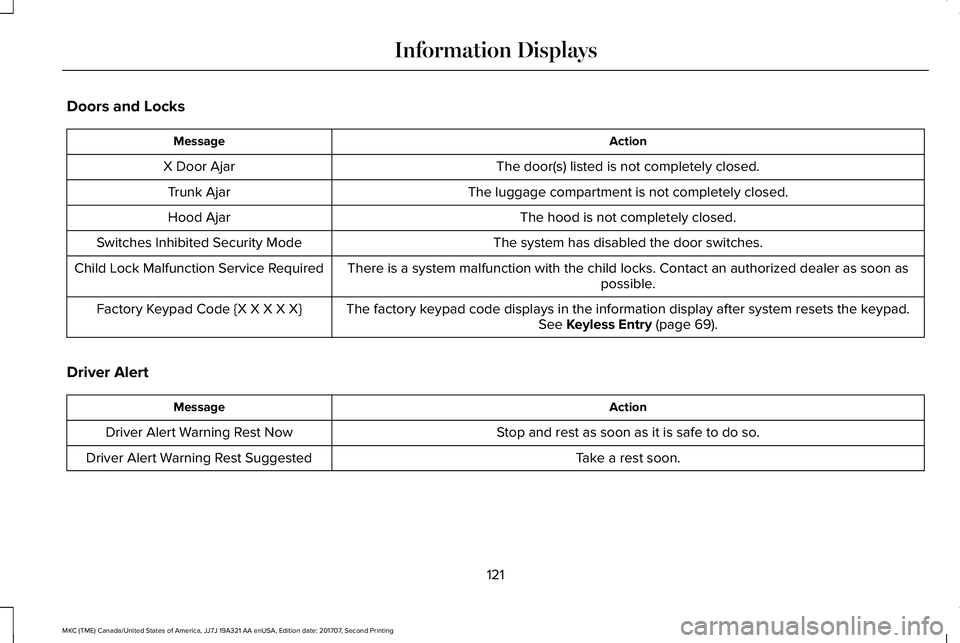
Doors and Locks
ActionMessage
The door(s) listed is not completely closed.X Door Ajar
The luggage compartment is not completely closed.Trunk Ajar
The hood is not completely closed.Hood Ajar
The system has disabled the door switches.Switches Inhibited Security Mode
There is a system malfunction with the child locks. Contact an authorized dealer as soon aspossible.Child Lock Malfunction Service Required
The factory keypad code displays in the information display after system resets the keypad.See Keyless Entry (page 69).Factory Keypad Code {X X X X X}
Driver Alert
ActionMessage
Stop and rest as soon as it is safe to do so.Driver Alert Warning Rest Now
Take a rest soon.Driver Alert Warning Rest Suggested
121
MKC (TME) Canada/United States of America, JJ7J 19A321 AA enUSA, Edition date: 201707, Second Printing
Information Displays
Page 143 of 571
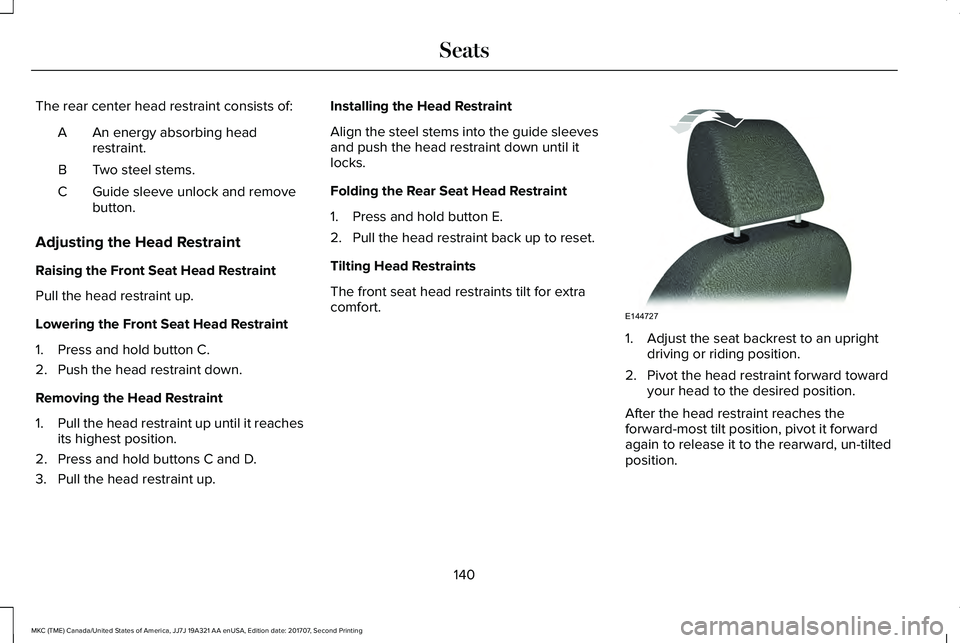
The rear center head restraint consists of:
An energy absorbing headrestraint.A
Two steel stems.B
Guide sleeve unlock and removebutton.C
Adjusting the Head Restraint
Raising the Front Seat Head Restraint
Pull the head restraint up.
Lowering the Front Seat Head Restraint
1. Press and hold button C.
2. Push the head restraint down.
Removing the Head Restraint
1.Pull the head restraint up until it reachesits highest position.
2. Press and hold buttons C and D.
3. Pull the head restraint up.
Installing the Head Restraint
Align the steel stems into the guide sleevesand push the head restraint down until itlocks.
Folding the Rear Seat Head Restraint
1. Press and hold button E.
2. Pull the head restraint back up to reset.
Tilting Head Restraints
The front seat head restraints tilt for extracomfort.
1. Adjust the seat backrest to an uprightdriving or riding position.
2. Pivot the head restraint forward towardyour head to the desired position.
After the head restraint reaches theforward-most tilt position, pivot it forwardagain to release it to the rearward, un-tiltedposition.
140
MKC (TME) Canada/United States of America, JJ7J 19A321 AA enUSA, Edition date: 201707, Second Printing
SeatsE144727
Page 147 of 571
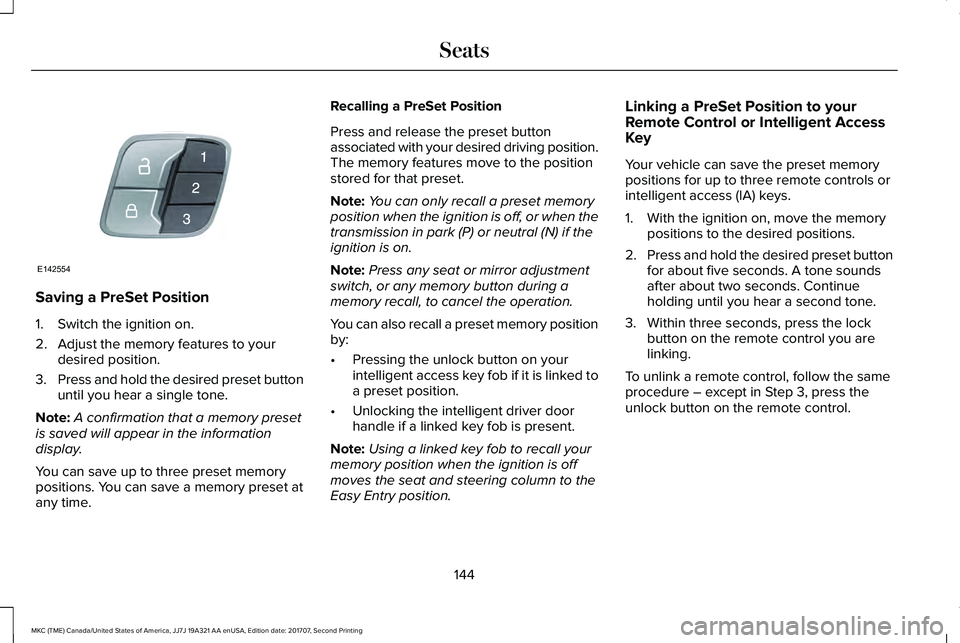
Saving a PreSet Position
1. Switch the ignition on.
2. Adjust the memory features to yourdesired position.
3.Press and hold the desired preset buttonuntil you hear a single tone.
Note:A confirmation that a memory presetis saved will appear in the informationdisplay.
You can save up to three preset memorypositions. You can save a memory preset atany time.
Recalling a PreSet Position
Press and release the preset buttonassociated with your desired driving position.The memory features move to the positionstored for that preset.
Note:You can only recall a preset memoryposition when the ignition is off, or when thetransmission in park (P) or neutral (N) if theignition is on.
Note:Press any seat or mirror adjustmentswitch, or any memory button during amemory recall, to cancel the operation.
You can also recall a preset memory positionby:
•Pressing the unlock button on yourintelligent access key fob if it is linked toa preset position.
•Unlocking the intelligent driver doorhandle if a linked key fob is present.
Note:Using a linked key fob to recall yourmemory position when the ignition is offmoves the seat and steering column to theEasy Entry position.
Linking a PreSet Position to yourRemote Control or Intelligent AccessKey
Your vehicle can save the preset memorypositions for up to three remote controls orintelligent access (IA) keys.
1. With the ignition on, move the memorypositions to the desired positions.
2.Press and hold the desired preset buttonfor about five seconds. A tone soundsafter about two seconds. Continueholding until you hear a second tone.
3. Within three seconds, press the lockbutton on the remote control you arelinking.
To unlink a remote control, follow the sameprocedure – except in Step 3, press theunlock button on the remote control.
144
MKC (TME) Canada/United States of America, JJ7J 19A321 AA enUSA, Edition date: 201707, Second Printing
SeatsE142554
Page 157 of 571
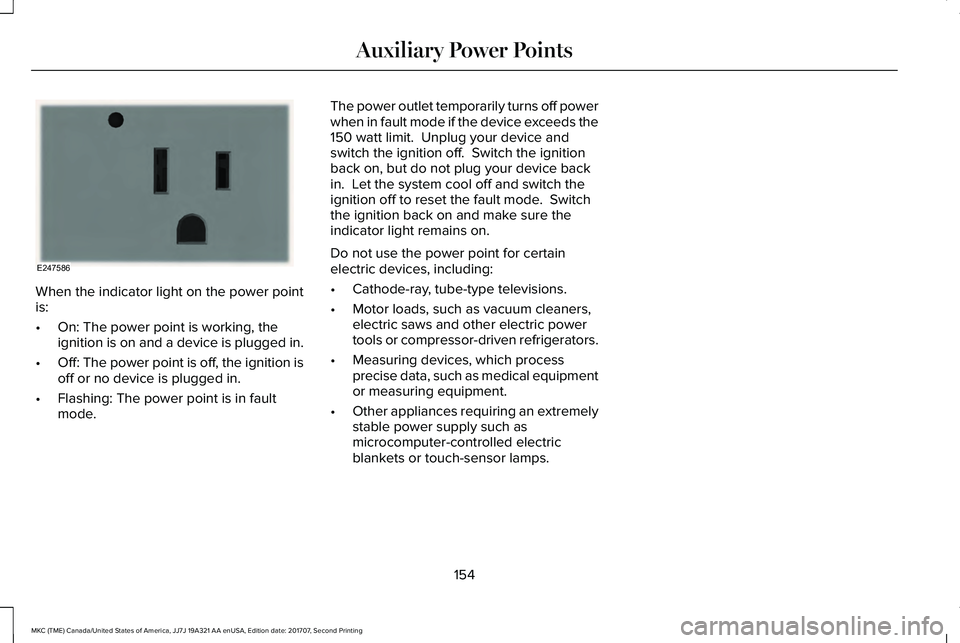
When the indicator light on the power pointis:
•On: The power point is working, theignition is on and a device is plugged in.
•Off: The power point is off, the ignition isoff or no device is plugged in.
•Flashing: The power point is in faultmode.
The power outlet temporarily turns off powerwhen in fault mode if the device exceeds the150 watt limit. Unplug your device andswitch the ignition off. Switch the ignitionback on, but do not plug your device backin. Let the system cool off and switch theignition off to reset the fault mode. Switchthe ignition back on and make sure theindicator light remains on.
Do not use the power point for certainelectric devices, including:
•Cathode-ray, tube-type televisions.
•Motor loads, such as vacuum cleaners,electric saws and other electric powertools or compressor-driven refrigerators.
•Measuring devices, which processprecise data, such as medical equipmentor measuring equipment.
•Other appliances requiring an extremelystable power supply such asmicrocomputer-controlled electricblankets or touch-sensor lamps.
154
MKC (TME) Canada/United States of America, JJ7J 19A321 AA enUSA, Edition date: 201707, Second Printing
Auxiliary Power PointsE247586
Page 161 of 571
Within 20 seconds of switching the engineoff, press the brake pedal and press thebutton. After 20 seconds have expired, youcan no longer restart the engine without thekey present inside your vehicle.
Once the engine has started, it remainsrunning until you press the button, even ifthe system does not detect a valid key. If youopen and close a door while the engine isrunning, the system searches for a valid key.You cannot restart the engine if the systemdoes not detect a valid key within 20seconds.
Failure to Start
If you cannot start the engine after threeattempts, wait 10 seconds and follow thisprocedure:
1. Fully press the brake pedal.
2. Fully press the accelerator pedal andhold it there.
3. Start the engine.
Note:You can crank the engine for a totalof 60 seconds (without the engine starting)before the starting system temporarilydisables. The 60 seconds does not have tobe all at once. For example, if you crank theengine three times for 20 seconds each time,without the engine starting, you reached the60-second time limit. A message appears inthe information display alerting you that youexceeded the cranking time. You cannotattempt to start the engine for at least 15minutes. After 15 minutes, you are limited toa 15-second engine cranking time. You needto wait 60 minutes before you can crank theengine for 60 seconds again.
Automatic Engine Shutdown
If your vehicle is equipped with a keylessignition, it has a feature that automaticallyshuts down the engine if it has been idlingfor an extended period. The ignition alsoturns off in order to save battery power.Before the engine shuts down, a messageappears in the information display showinga timer counting down from 30 seconds. If
you do not intervene within 30 seconds, theengine shuts down. Another messageappears in the information display to informyou that the engine has shut down in orderto save fuel. Start your vehicle as younormally do.
Automatic Engine Shutdown Override
Note:You cannot permanently switch off theautomatic engine shutdown feature. Whenyou switch it off temporarily, it turns on atthe next ignition cycle.
You can stop the engine shutdown, or resetthe timer, at any point before the 30-secondcountdown has expired by doing any of thefollowing:
158
MKC (TME) Canada/United States of America, JJ7J 19A321 AA enUSA, Edition date: 201707, Second Printing
Starting and Stopping the Engine
Page 162 of 571
•You can reset the timer by interactingwith your vehicle (such as pressing thebrake pedal or accelerator pedal).
•You can temporarily switch off theshutdown feature any time the ignition ison (for the current ignition cycle only).Use the information display to do so. SeeInformation Displays (page 109).
•During the countdown before engineshutdown, you are prompted to press OKor RESET (depending on your type ofinformation display) to temporarily switchthe feature off (for the current ignitioncycle only).
Stopping the Engine When YourVehicle is Stationary
1. Put the transmission in position P.
2. Press the button once.
3. Apply the parking brake.
Note:This switches off the ignition, allelectrical circuits, warning lamps andindicators.
Note:If the engine is idling for 30 minutes,the ignition and engine automatically shutdown.
Stopping the Engine When YourVehicle is Moving
WARNING
Switching off the engine when thevehicle is still moving will result in aloss of brake and steering assistance. Thesteering will not lock, but higher effort willbe required. When the ignition is switchedoff, some electrical circuits, including airbags, warning lamps and indicators may alsobe off. If the ignition was turned offaccidentally, you can shift into neutral (N) andre-start the engine.
1. Put the transmission in position N anduse the brakes to bring your vehicle to asafe stop.
2. When your vehicle has stopped, put thetransmission in position P.
3. Press and hold the button for onesecond, or press it three times within twoseconds.
4. Apply the parking brake.
Guarding Against Exhaust Fumes
WARNING
If you smell exhaust fumes inside yourvehicle, have your vehicle checked byyour authorized dealer immediately. Do notdrive your vehicle if you smell exhaust fumes.Carbon monoxide is present in exhaustfumes. Take precautions to avoid itsdangerous effects.
Important Ventilating Information
If you stop your vehicle and the leave theengine idling for long periods, werecommend that you do one of the following:
•Open the windows at least 1 in (2.5 cm).
•Set your climate control to outside air.
159
MKC (TME) Canada/United States of America, JJ7J 19A321 AA enUSA, Edition date: 201707, Second Printing
Starting and Stopping the Engine
Page 172 of 571
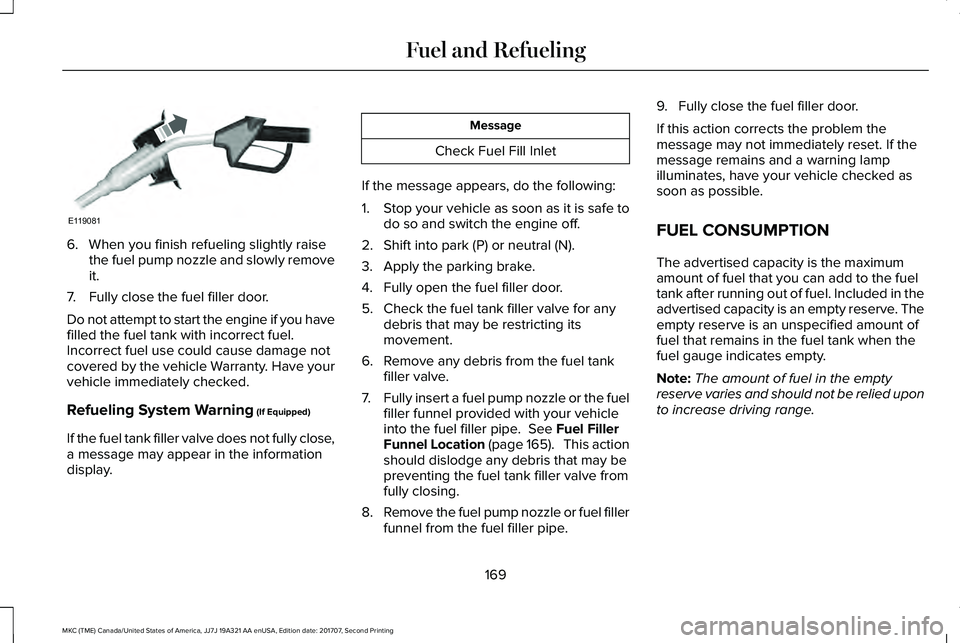
6. When you finish refueling slightly raisethe fuel pump nozzle and slowly removeit.
7. Fully close the fuel filler door.
Do not attempt to start the engine if you havefilled the fuel tank with incorrect fuel.Incorrect fuel use could cause damage notcovered by the vehicle Warranty. Have yourvehicle immediately checked.
Refueling System Warning (If Equipped)
If the fuel tank filler valve does not fully close,a message may appear in the informationdisplay.
Message
Check Fuel Fill Inlet
If the message appears, do the following:
1.Stop your vehicle as soon as it is safe todo so and switch the engine off.
2. Shift into park (P) or neutral (N).
3. Apply the parking brake.
4. Fully open the fuel filler door.
5. Check the fuel tank filler valve for anydebris that may be restricting itsmovement.
6. Remove any debris from the fuel tankfiller valve.
7.Fully insert a fuel pump nozzle or the fuelfiller funnel provided with your vehicleinto the fuel filler pipe. See Fuel FillerFunnel Location (page 165). This actionshould dislodge any debris that may bepreventing the fuel tank filler valve fromfully closing.
8.Remove the fuel pump nozzle or fuel fillerfunnel from the fuel filler pipe.
9. Fully close the fuel filler door.
If this action corrects the problem themessage may not immediately reset. If themessage remains and a warning lampilluminates, have your vehicle checked assoon as possible.
FUEL CONSUMPTION
The advertised capacity is the maximumamount of fuel that you can add to the fueltank after running out of fuel. Included in theadvertised capacity is an empty reserve. Theempty reserve is an unspecified amount offuel that remains in the fuel tank when thefuel gauge indicates empty.
Note:The amount of fuel in the emptyreserve varies and should not be relied uponto increase driving range.
169
MKC (TME) Canada/United States of America, JJ7J 19A321 AA enUSA, Edition date: 201707, Second Printing
Fuel and RefuelingE119081
Page 214 of 571
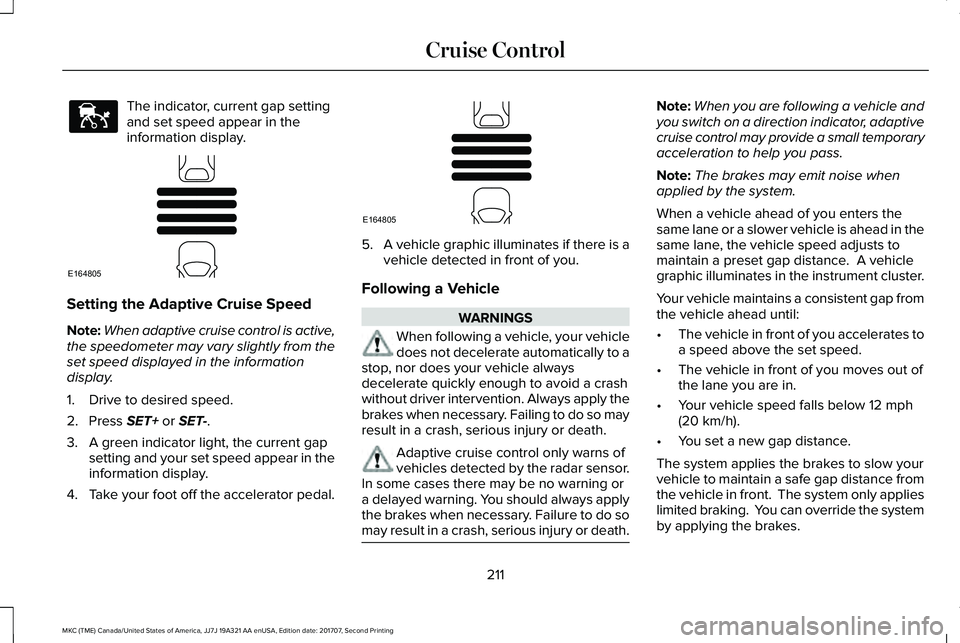
The indicator, current gap settingand set speed appear in theinformation display.
Setting the Adaptive Cruise Speed
Note:When adaptive cruise control is active,the speedometer may vary slightly from theset speed displayed in the informationdisplay.
1. Drive to desired speed.
2. Press SET+ or SET-.
3. A green indicator light, the current gapsetting and your set speed appear in theinformation display.
4.Take your foot off the accelerator pedal.
5.A vehicle graphic illuminates if there is avehicle detected in front of you.
Following a Vehicle
WARNINGS
When following a vehicle, your vehicledoes not decelerate automatically to astop, nor does your vehicle alwaysdecelerate quickly enough to avoid a crashwithout driver intervention. Always apply thebrakes when necessary. Failing to do so mayresult in a crash, serious injury or death.
Adaptive cruise control only warns ofvehicles detected by the radar sensor.In some cases there may be no warning ora delayed warning. You should always applythe brakes when necessary. Failure to do somay result in a crash, serious injury or death.
Note:When you are following a vehicle andyou switch on a direction indicator, adaptivecruise control may provide a small temporaryacceleration to help you pass.
Note:The brakes may emit noise whenapplied by the system.
When a vehicle ahead of you enters thesame lane or a slower vehicle is ahead in thesame lane, the vehicle speed adjusts tomaintain a preset gap distance. A vehiclegraphic illuminates in the instrument cluster.
Your vehicle maintains a consistent gap fromthe vehicle ahead until:
•The vehicle in front of you accelerates toa speed above the set speed.
•The vehicle in front of you moves out ofthe lane you are in.
•Your vehicle speed falls below 12 mph(20 km/h).
•You set a new gap distance.
The system applies the brakes to slow yourvehicle to maintain a safe gap distance fromthe vehicle in front. The system only applieslimited braking. You can override the systemby applying the brakes.
211
MKC (TME) Canada/United States of America, JJ7J 19A321 AA enUSA, Edition date: 201707, Second Printing
Cruise ControlE144529 E164805 E164805
Page 221 of 571
When active, the system monitors youralertness level based upon your drivingbehavior in relation to the lane markings andother factors.
System Warnings
Note:The system does not issue warningsbelow approximately 40 mph (64 km/h).
The warning system has two stages. First,the system issues a temporary warning thatyou need to take a rest. This message onlyappears for a short time. If the systemdetects further reduction in driving alertness,it may issue another warning that remains inthe information display for a longer time. Youcan press OK on the steering wheel controlto clear the warning.
System Display
When active, the system runs automaticallyin the background and only issues a warningif required. You can view the status at anytime using the information display. SeeGeneral Information (page 109).
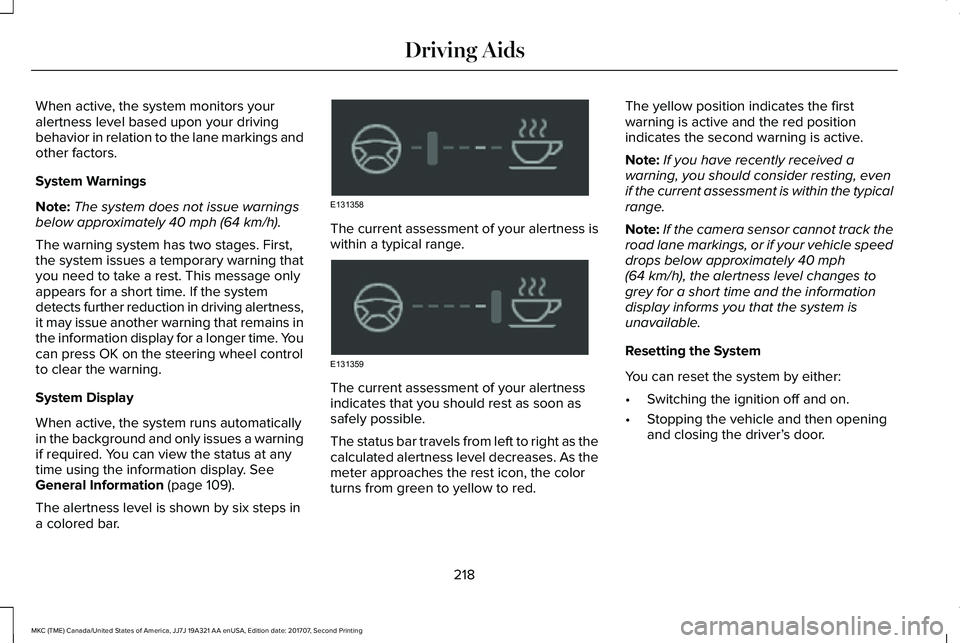
The alertness level is shown by six steps ina colored bar.
The current assessment of your alertness iswithin a typical range.
The current assessment of your alertnessindicates that you should rest as soon assafely possible.
The status bar travels from left to right as thecalculated alertness level decreases. As themeter approaches the rest icon, the colorturns from green to yellow to red.
The yellow position indicates the firstwarning is active and the red positionindicates the second warning is active.
Note:If you have recently received awarning, you should consider resting, evenif the current assessment is within the typicalrange.
Note:If the camera sensor cannot track theroad lane markings, or if your vehicle speeddrops below approximately 40 mph(64 km/h), the alertness level changes togrey for a short time and the informationdisplay informs you that the system isunavailable.
Resetting the System
You can reset the system by either:
•Switching the ignition off and on.
•Stopping the vehicle and then openingand closing the driver’s door.
218
MKC (TME) Canada/United States of America, JJ7J 19A321 AA enUSA, Edition date: 201707, Second Printing
Driving AidsE131358 E131359
Page 236 of 571
ActionCause
Clean the radar sensor cover or remove the obstruction.The radar sensor cover in the grille is dirty or obstructed.
Wait a short time. The radar may take several minutes to reset afteryou remove the obstruction.The surface of the radar sensor cover is clean but the messageremains in the display.
The collision warning system is temporarily disabled. Shortly afterweather conditions improve, the collision warning system automaticallyreactivates.
Heavy rain, spray, snow or fog in the air interferes with the radarsignals.
The collision warning system is temporarily disabled. Shortly afterweather conditions improve, the collision warning system automaticallyreactivates.
Swirling water, snow or ice on the road surface interferes with theradar signals.
System Limitations
Due to the nature of radar technology, theremay be certain instances where vehicles donot provide a collision warning. Theseinclude:
•Stationary vehicles or vehicles movingbelow 6 mph (10 km/h).
•Pedestrians or objects in the roadway.
•Oncoming vehicles in the same lane.
•Severe weather conditions (see blockedsensor section).
•Debris build-up on the grille near theheadlamps (see blocked sensor section).
•Small distance to vehicle ahead.
•Large steering wheel and pedalmovements (very active driving style).
Damage to the front end of the vehicle mayalter the radar sensor's coverage area. Thismay result in missed or false collisionwarnings. Have an authorized dealer checkyour radar sensor for proper coverage andoperation.
233
MKC (TME) Canada/United States of America, JJ7J 19A321 AA enUSA, Edition date: 201707, Second Printing
Driving Aids