parking brake LINCOLN MKS 2012 User Guide
[x] Cancel search | Manufacturer: LINCOLN, Model Year: 2012, Model line: MKS, Model: LINCOLN MKS 2012Pages: 384, PDF Size: 2.49 MB
Page 226 of 384
Parking brake
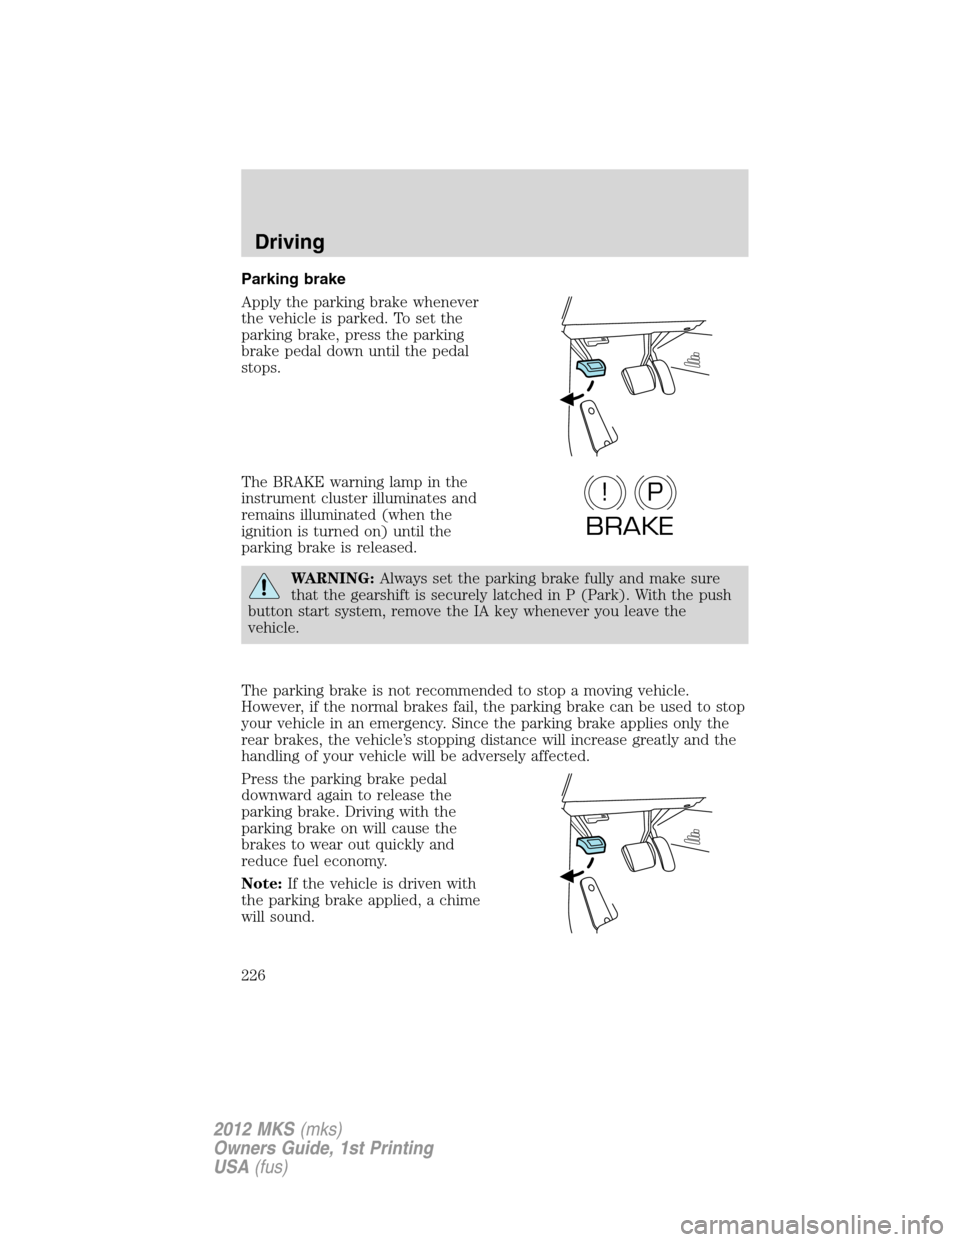
Apply the parking brake whenever
the vehicle is parked. To set the
parking brake, press the parking
brake pedal down until the pedal
stops.
The BRAKE warning lamp in the
instrument cluster illuminates and
remains illuminated (when the
ignition is turned on) until the
parking brake is released.
WARNING:Always set the parking brake fully and make sure
that the gearshift is securely latched in P (Park). With the push
button start system, remove the IA key whenever you leave the
vehicle.
The parking brake is not recommended to stop a moving vehicle.
However, if the normal brakes fail, the parking brake can be used to stop
your vehicle in an emergency. Since the parking brake applies only the
rear brakes, the vehicle’s stopping distance will increase greatly and the
handling of your vehicle will be adversely affected.
Press the parking brake pedal
downward again to release the
parking brake. Driving with the
parking brake on will cause the
brakes to wear out quickly and
reduce fuel economy.
Note:If the vehicle is driven with
the parking brake applied, a chime
will sound.
P!
BRAKE
Driving
226
2012 MKS(mks)
Owners Guide, 1st Printing
USA(fus)
Page 233 of 384
If the fuse is not blown and the brake lamps are working properly, you
will need to have your vehicle towed to an authorized dealer.
WARNING:Do not drive your vehicle until you verify that the
brake lamps are working.
WARNING:Always set the parking brake fully and make sure
the gearshift lever is latched in P (Park). Switch the ignition to
off and remove the key whenever you leave your vehicle.
WARNING:If the parking brake is fully released, but the brake
warning lamp remains illuminated, the brakes may not be
working properly. See your authorized dealer.
AUTOMATIC TRANSMISSION OPERATION
Understanding the gearshift positions of the 6–speed automatic
transmission
Your vehicle has been designed to improve fuel economy by reducing
fuel usage while coasting or decelerating. When you take your foot off
the accelerator pedal and the vehicle begins to slow down, the torque
converter clutch locks up and aggressively shuts off fuel flow to the
engine while decelerating. This fuel economy benefit may be perceived
as a light to medium braking sensation when removing your foot from
the accelerator pedal.
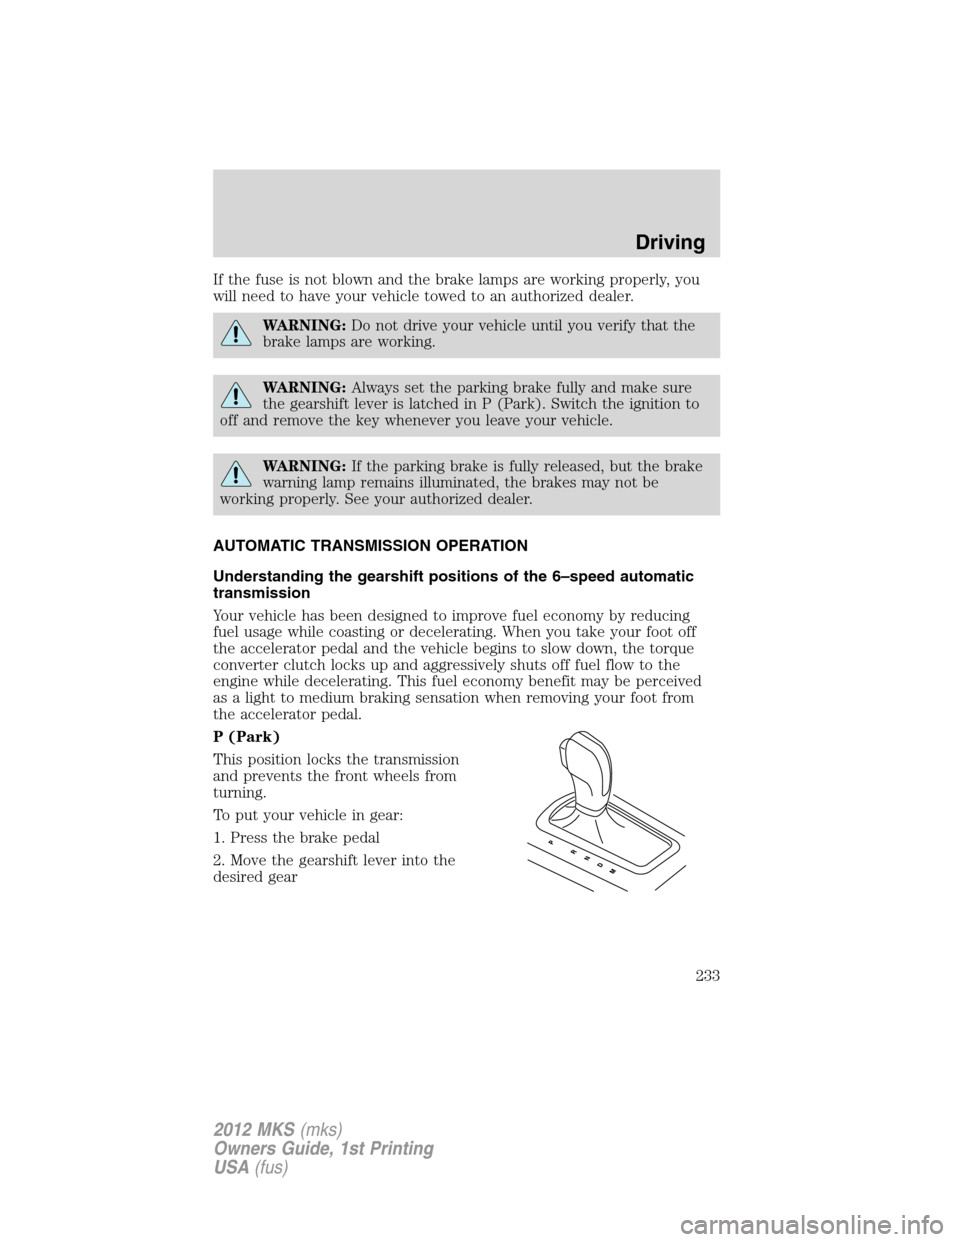
P (Park)
This position locks the transmission
and prevents the front wheels from
turning.
To put your vehicle in gear:
1. Press the brake pedal
2. Move the gearshift lever into the
desired gear
Driving
233
2012 MKS(mks)
Owners Guide, 1st Printing
USA(fus)
Page 234 of 384
To put your vehicle in P (Park):
1. Come to a complete stop
2. Move the gearshift lever and securely latch it in P (Park)
WARNING:Always set the parking brake fully and make sure
the gearshift is latched in P (Park). Switch the ignition off and
remove the key whenever you leave your vehicle.
R (Reverse)
With the gearshift lever in R (Reverse), the vehicle will move backward.
Always come to a complete stop before shifting into and out of R
(Reverse).
N (Neutral)
With the gearshift lever in N (Neutral), the vehicle can be started and is
free to roll. Hold the brake pedal down while in this position.
D (Drive)
The normal driving position for the best fuel economy. Transmission
operates in gears one through six.
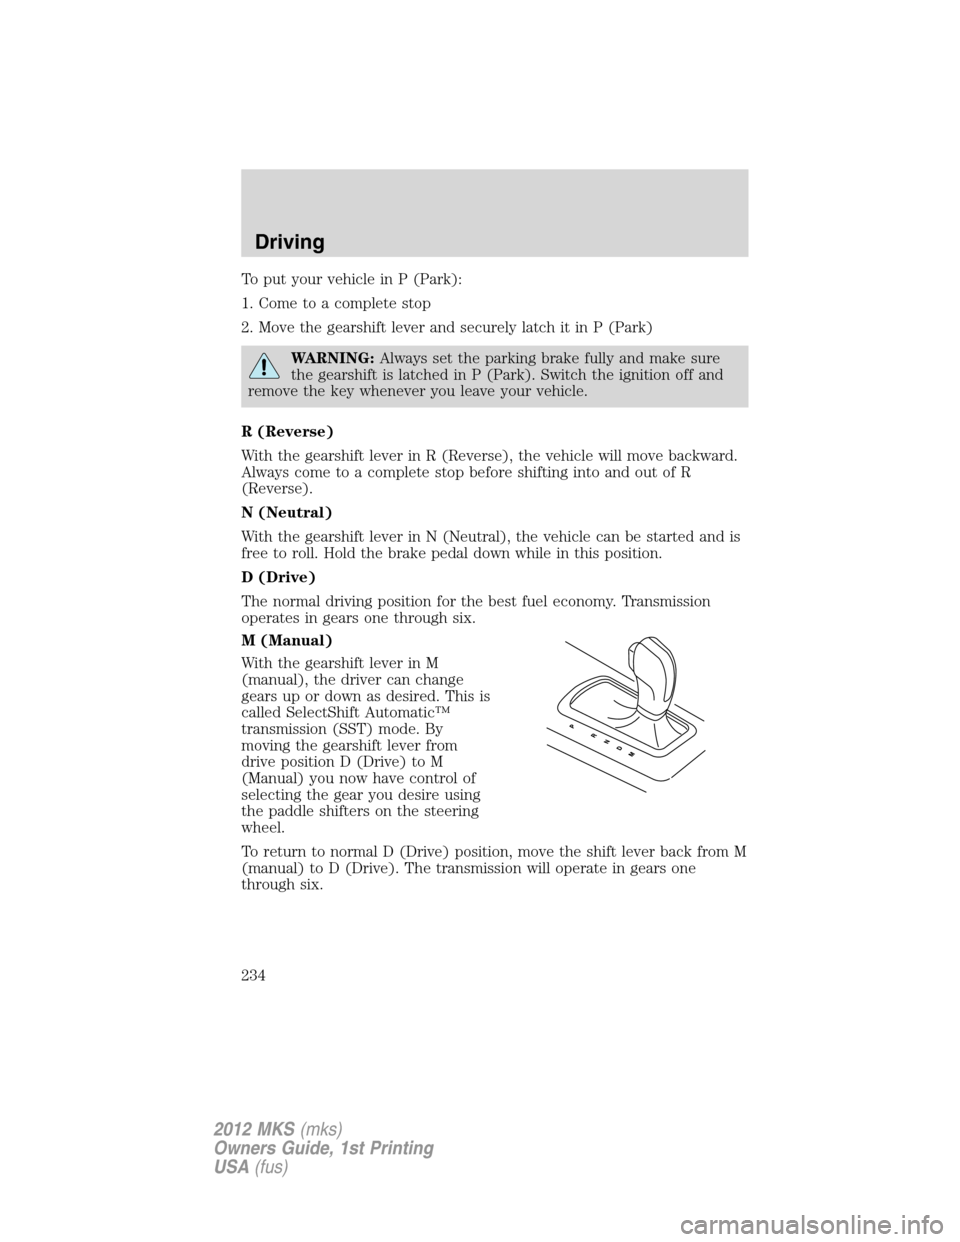
M (Manual)
With the gearshift lever in M
(manual), the driver can change
gears up or down as desired. This is
called SelectShift Automatic™
transmission (SST) mode. By
moving the gearshift lever from
drive position D (Drive) to M
(Manual) you now have control of
selecting the gear you desire using
the paddle shifters on the steering
wheel.
To return to normal D (Drive) position, move the shift lever back from M
(manual) to D (Drive). The transmission will operate in gears one
through six.
Driving
234
2012 MKS(mks)
Owners Guide, 1st Printing
USA(fus)
Page 238 of 384
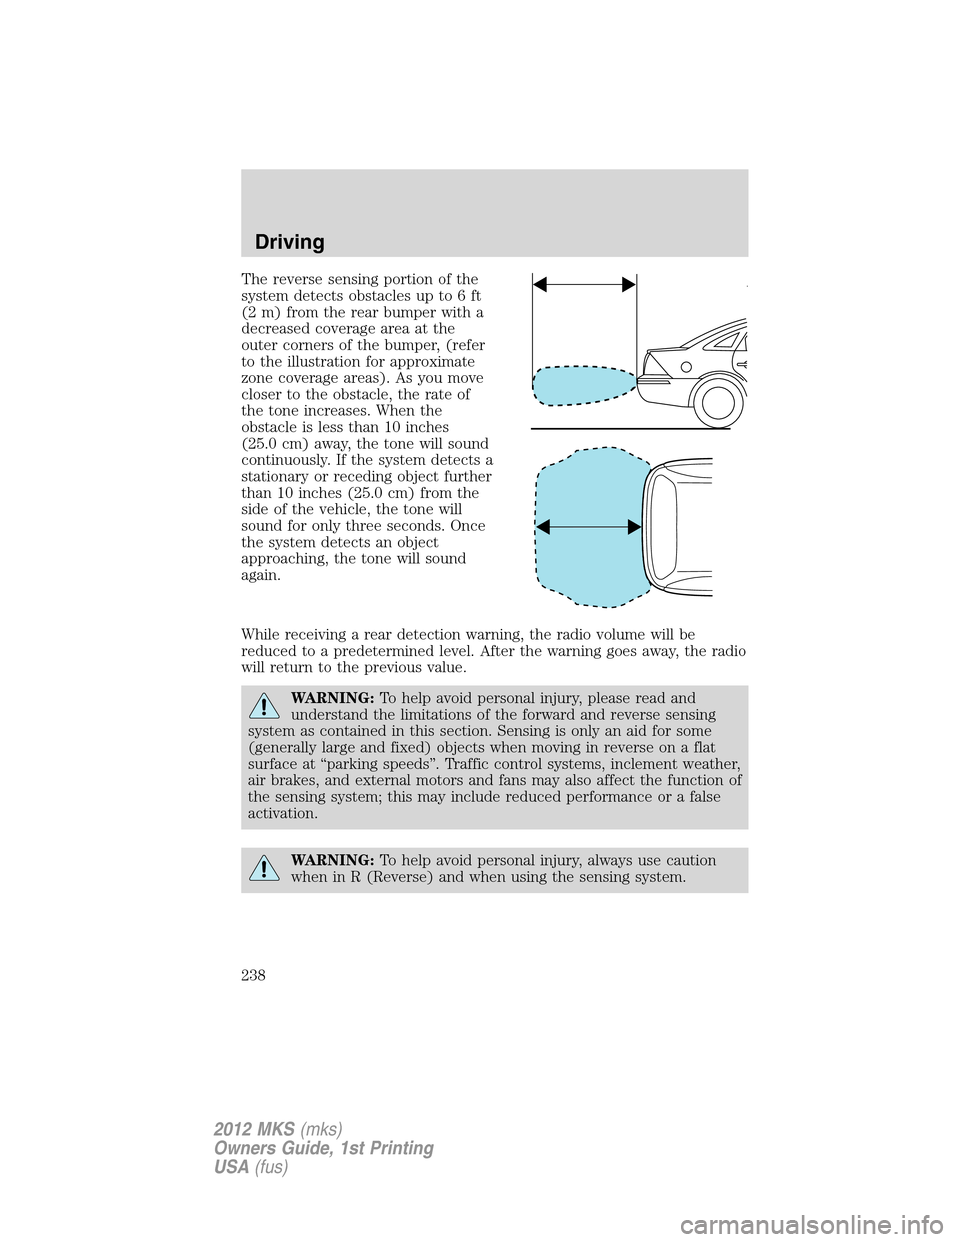
The reverse sensing portion of the
system detects obstacles up to 6 ft
(2 m) from the rear bumper with a
decreased coverage area at the
outer corners of the bumper, (refer
to the illustration for approximate
zone coverage areas). As you move
closer to the obstacle, the rate of
the tone increases. When the
obstacle is less than 10 inches
(25.0 cm) away, the tone will sound
continuously. If the system detects a
stationary or receding object further
than 10 inches (25.0 cm) from the
side of the vehicle, the tone will
sound for only three seconds. Once
the system detects an object
approaching, the tone will sound
again.
While receiving a rear detection warning, the radio volume will be
reduced to a predetermined level. After the warning goes away, the radio
will return to the previous value.
WARNING:To help avoid personal injury, please read and
understand the limitations of the forward and reverse sensing
system as contained in this section. Sensing is only an aid for some
(generally large and fixed) objects when moving in reverse on a flat
surface at “parking speeds”. Traffic control systems, inclement weather,
air brakes, and external motors and fans may also affect the function of
the sensing system; this may include reduced performance or a false
activation.
WARNING:To help avoid personal injury, always use caution
when in R (Reverse) and when using the sensing system.
Driving
238
2012 MKS(mks)
Owners Guide, 1st Printing
USA(fus)
Page 242 of 384
Night time and dark area use
At night time or in dark areas, the camera system relies on the reverse
lamp lighting to produce an image. Therefore it is necessary that both
reverse lamps are operating in order to get a clear image in the dark. If
either of the lamps are not operating, stop using the camera system, at
least in the dark, until the lamp(s) are replaced and functioning.
Servicing
•If the image comes on while the vehicle is not in R (Reverse), have
the system inspected by your authorized dealer.
•If the image is not clear, then check if there is anything covering the
lens such as dirt, mud, ice, snow, etc. If the image is still not clear
after cleaning, have your system inspected by your authorized dealer.
ACTIVE PARK ASSIST (APA) (IF EQUIPPED)
Active park assist (APA) will detect an available parallel parking space
and automatically steer the vehicle into the space (hands-free) while you
control the accelerator, gearshift and brakes. The system will visually
and/or audibly instruct the driver to park the vehicle.
WARNING:This system is designed to be a supplementary park
aid. It may not work in all conditions and is not intended to
replace the driver’s attention and judgment. The driver is responsible
for avoiding hazards and maintaining a safe distance and speed, even
when the APA is in use.
Conditions in which the system may not work:
•Something passes between the front bumper and the space such as a
pedestrian or cyclist
•The edge of the vehicle is high from the ground such as a bus, tow
truck, or flatbed truck
Driving
242
2012 MKS(mks)
Owners Guide, 1st Printing
USA(fus)
Page 247 of 384
•One of the parked vehicles has a high altitude attachment (i.e. salt
sprayer, snow plow, moving truck high bed, etc.) High altitude
attachments may not be detected by the system.
•The parking space length or parked objects position have changed
after the vehicle has passed the parking space.
•The temperature around your vehicle changes quickly, such as driving
from a heated garage into the cold or after leaving a car wash. As a
result, the outside air temperature displayed in the vehicle may not be
close enough to the actual temperature. APA relies on correctly
sensing the temperature outside for precisely positioning the vehicle.
COLLISION WARNING SYSTEM (IF EQUIPPED)
The collision warning with brake support, is designed to alert the driver
of certain collision risks with a red warning light located above the
dashboard and an audible warning chime. The brake support assists the
driver in reducing the collision speed, by pre-charging the brakes.
WARNING:This system is designed to be a supplementary
driving aid. It is not intended to replace the driver’s attention,
and judgment, or the need to apply the brakes. This system does NOT
activate the brakes automatically. Failure to press the brake pedal to
activate the brakes may result in a collision.
WARNING:The collision warning system with brake support
cannot help prevent all collisions. Do not rely on this system to
replace driver judgment and the need to maintain distance and speed.
Note:The collision warning with brake support will not detect, warn, or
respond to potential collisions with vehicles to the rear or sides of the
vehicle.
Driving
247
2012 MKS(mks)
Owners Guide, 1st Printing
USA(fus)
Page 260 of 384
If your vehicle gets stuck
If your vehicle gets stuck in mud or snow it may be rocked out by
shifting between forward and reverse gears, stopping between shifts, in a
steady pattern. Press lightly on the accelerator in each gear.
Your vehicle is equipped with traction control. It may be beneficial to
disengage the traction control system while attempting to rock the
vehicle.
Do not rock the vehicle if the engine is not at normal operating
temperature or damage to the transmission may occur.
Do not rock the vehicle for more than a few minutes or damage
to the transmission and tires may occur or the engine may
overheat.
WARNING:Always set the parking brake fully and make sure
the gearshift is latched in P (Park). Switch the ignition off and
remove the key whenever you leave your vehicle.
WARNING:If the parking brake is fully released, but the brake
warning lamp remains illuminated, the brakes may not be
working properly. See your authorized dealer.
WARNING:Do not spin the wheels at over 35 mph (56 km/h).
The tires may fail and injure a passenger or bystander.
Emergency maneuvers
•In an unavoidable emergency situation where a sudden sharp turn
must be made, remember to avoid “over-driving” your vehicle (i.e.,
turn the steering wheel only as rapidly and as far as required to avoid
the emergency). Excessive steering will result in less vehicle control,
not more. Additionally, smooth variations of the accelerator and/or
brake pedal pressure should be utilized if changes in vehicle speed are
called for. Avoid abrupt steering, acceleration or braking which could
result in an increased risk of loss of vehicle control, vehicle rollover
and/or personal injury. Use all available road surface to return the
vehicle to a safe direction of travel.
•In the event of an emergency stop, avoid skidding the tires and do not
attempt any sharp steering wheel movements.
Driving
260
2012 MKS(mks)
Owners Guide, 1st Printing
USA(fus)
Page 277 of 384
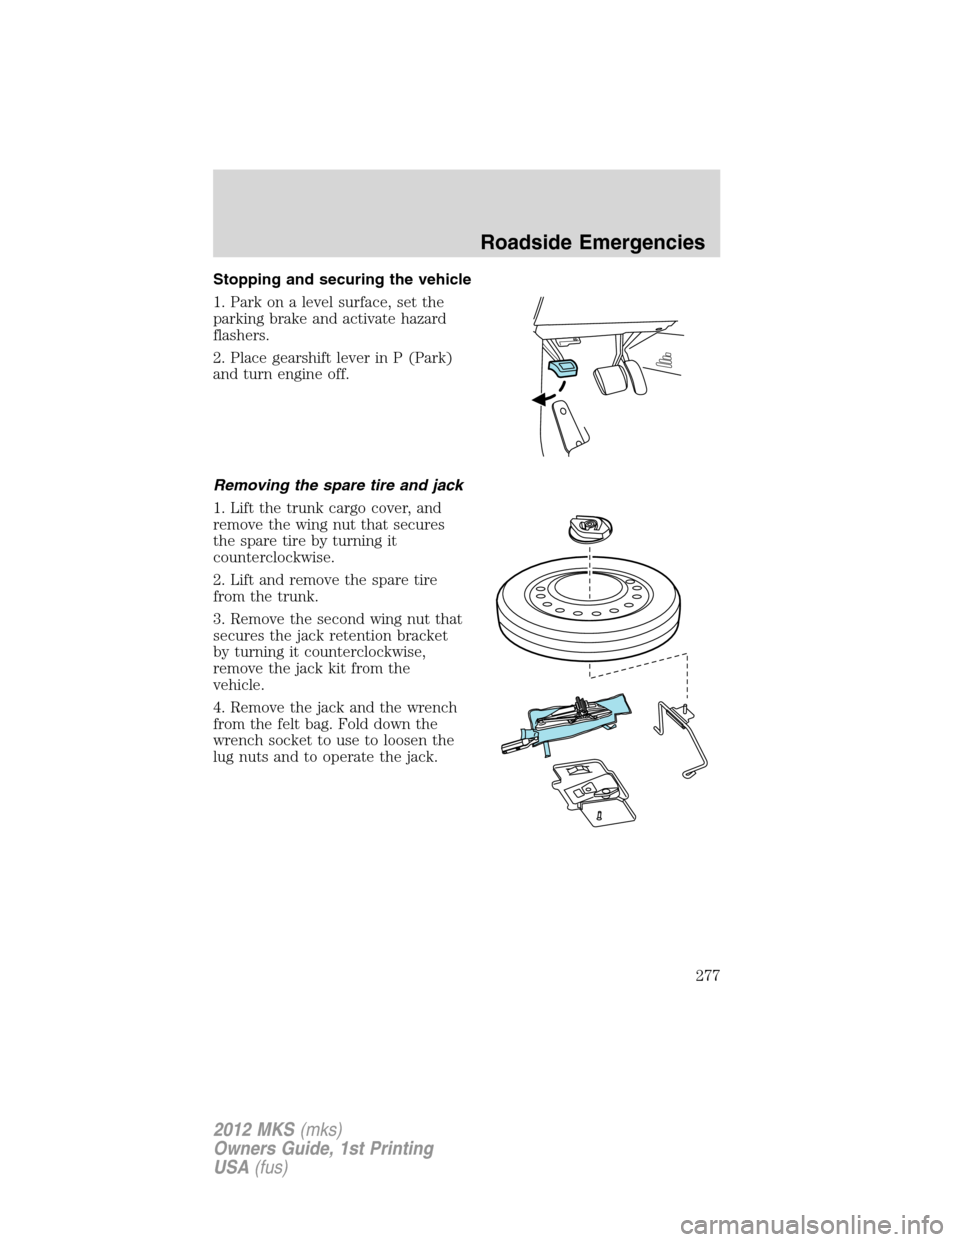
Stopping and securing the vehicle
1. Park on a level surface, set the
parking brake and activate hazard
flashers.
2. Place gearshift lever in P (Park)
and turn engine off.
Removing the spare tire and jack
1. Lift the trunk cargo cover, and
remove the wing nut that secures
the spare tire by turning it
counterclockwise.
2. Lift and remove the spare tire
from the trunk.
3. Remove the second wing nut that
secures the jack retention bracket
by turning it counterclockwise,
remove the jack kit from the
vehicle.
4. Remove the jack and the wrench
from the felt bag. Fold down the
wrench socket to use to loosen the
lug nuts and to operate the jack.
Roadside Emergencies
277
2012 MKS(mks)
Owners Guide, 1st Printing
USA(fus)
Page 278 of 384
Tire change procedure
WARNING:When one of the front wheels is off the ground, the
transmission alone will not prevent the vehicle from moving or
slipping off the jack, even if the vehicle is in P (Park).
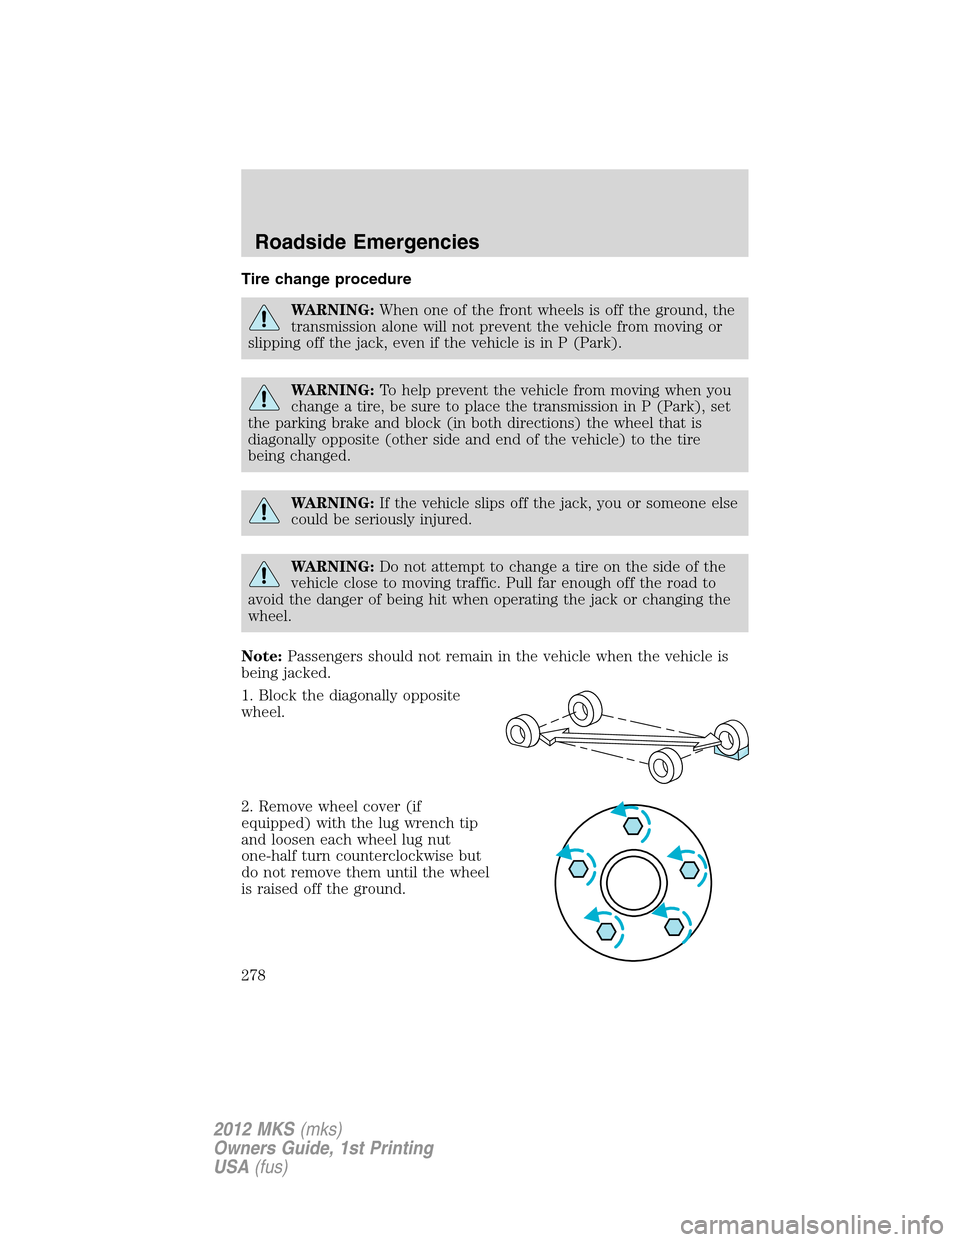
WARNING:To help prevent the vehicle from moving when you
change a tire, be sure to place the transmission in P (Park), set
the parking brake and block (in both directions) the wheel that is
diagonally opposite (other side and end of the vehicle) to the tire
being changed.
WARNING:If the vehicle slips off the jack, you or someone else
could be seriously injured.
WARNING:Do not attempt to change a tire on the side of the
vehicle close to moving traffic. Pull far enough off the road to
avoid the danger of being hit when operating the jack or changing the
wheel.
Note:Passengers should not remain in the vehicle when the vehicle is
being jacked.
1. Block the diagonally opposite
wheel.
2. Remove wheel cover (if
equipped) with the lug wrench tip
and loosen each wheel lug nut
one-half turn counterclockwise but
do not remove them until the wheel
is raised off the ground.
Roadside Emergencies
278
2012 MKS(mks)
Owners Guide, 1st Printing
USA(fus)
Page 283 of 384
Preparing your vehicle
When the battery is disconnected or a new battery is installed, the
automatic transmission must relearn its shift strategy. As a result, the
transmission may have firm and/or soft shifts. This operation is
considered normal and will not affect function or durability of the
transmission. Over time, the adaptive learning process will fully update
transmission operation.
1.Use only a 12–volt supply to start your vehicle.
2. Do not disconnect the battery of the disabled vehicle as this could
damage the vehicle’s electrical system.
3. Park the booster vehicle close to the hood of the disabled vehicle
making sure the two vehiclesdo nottouch. Set the parking brake on
both vehicles and stay clear of the engine cooling fan and other moving
parts.
4. Check all battery terminals and remove any excessive corrosion before
you attach the battery cables. Ensure that vent caps are tight and level.
5. Turn the heater fan on in both vehicles to protect from any electrical
surges. Turn all other accessories off.
Connecting the jumper cables
Note:In the illustration, the vehicle on the bottom is used to designate
the assisting (boosting) battery.
Roadside Emergencies
283
2012 MKS(mks)
Owners Guide, 1st Printing
USA(fus)