warning LINCOLN MKS 2012 Owner's Manual
[x] Cancel search | Manufacturer: LINCOLN, Model Year: 2012, Model line: MKS, Model: LINCOLN MKS 2012Pages: 384, PDF Size: 2.49 MB
Page 40 of 384
Auxiliary input jack (Line in)
WARNING:Driving while distracted can result in loss of vehicle
control, accident and injury. Ford strongly recommends that
drivers use extreme caution when using any device or feature that may
take their focus off the road. Your primary responsibility is the safe
operation of the vehicle. We recommend against the use of any
handheld device while driving, encourage the use of voice-operated
systems when possible and that you become aware of applicable state
and local laws that may affect use of electronic devices while driving.
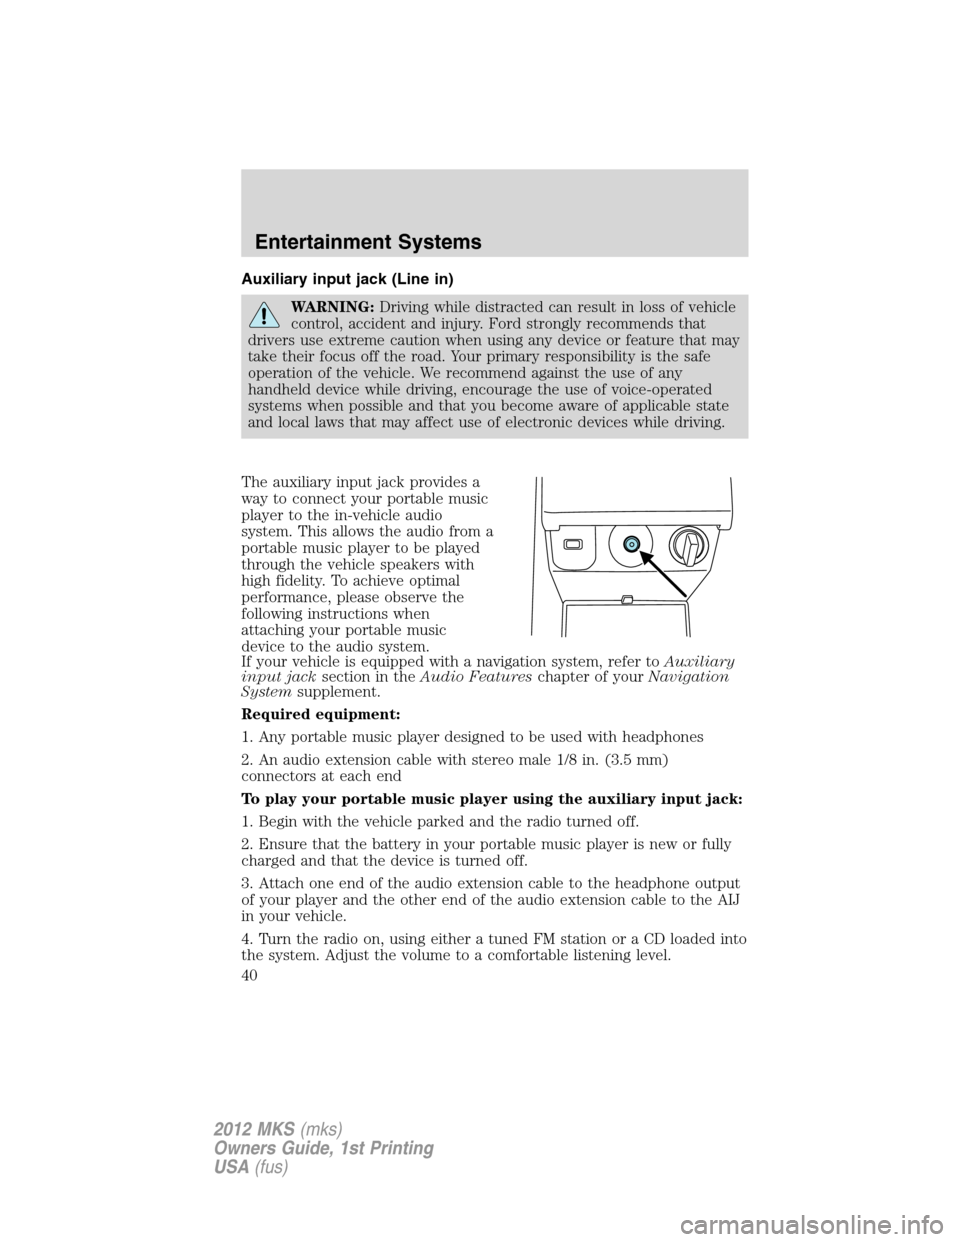
The auxiliary input jack provides a
way to connect your portable music
player to the in-vehicle audio
system. This allows the audio from a
portable music player to be played
through the vehicle speakers with
high fidelity. To achieve optimal
performance, please observe the
following instructions when
attaching your portable music
device to the audio system.
If your vehicle is equipped with a navigation system, refer toAuxiliary
input jacksection in theAudio Featureschapter of yourNavigation
Systemsupplement.
Required equipment:
1. Any portable music player designed to be used with headphones
2. An audio extension cable with stereo male 1/8 in. (3.5 mm)
connectors at each end
To play your portable music player using the auxiliary input jack:
1. Begin with the vehicle parked and the radio turned off.
2. Ensure that the battery in your portable music player is new or fully
charged and that the device is turned off.
3. Attach one end of the audio extension cable to the headphone output
of your player and the other end of the audio extension cable to the AIJ
in your vehicle.
4. Turn the radio on, using either a tuned FM station or a CD loaded into
the system. Adjust the volume to a comfortable listening level.
Entertainment Systems
40
2012 MKS(mks)
Owners Guide, 1st Printing
USA(fus)
Page 41 of 384
5. Turn the portable music player on and adjust the volume to 1/2 the
volume.
6. Press AUX on the vehicle radio repeatedly until LINE, LINE IN or
SYNC LINE IN appears in the display.
You should hear audio from your portable music player although it may
be low.
7. Adjust the sound on your portable music player until it reaches the
level of the FM station or CD by switching back and forth between the
AUX and FM or CD controls.
Troubleshooting:
1. Do not connect the audio input jack to a line level output. Line level
outputs are intended for connection to a home stereo and are not
compatible with the AIJ. The AIJ will only work correctly with devices
that have a headphone output with a volume control.
2. Do not set the portable music player’s volume level higher than is
necessary to match the volume of the CD or FM radio in your audio
system as this will cause distortion and will reduce sound quality. Many
portable music players have different output levels, so not all players
should be set at the same levels. Some players will sound best at full
volume and others will need to be set at a lower volume.
3. If the music sounds distorted at lower listening levels, turn the
portable music player volume down. If the problems persists, replace or
recharge the batteries in the portable music player.
4. The portable music player must be controlled in the same manner
when it is used with headphones as the AIJ does not provide control
(play, pause, etc.) over the attached portable music player.
5. For safety reasons, connecting or adjusting the settings on your
portable music player should not be attempted while the vehicle is
moving. Also, the portable music player should be stored in a secure
location, such as the center console or the glove box, when the vehicle is
in motion. The audio extension cable must be long enough to allow the
portable music player to be safely stored while the vehicle is in motion.
USB port
WARNING:Driving while distracted can result in loss of vehicle
control, accident and injury. Ford strongly recommends that
drivers use extreme caution when using any device or feature that may
take their focus off the road. Your primary responsibility is the safe
operation of the vehicle. We recommend against the use of any
handheld device while driving, encourage the use of voice-operated
systems when possible and that you become aware of applicable state
and local laws that may affect the use of electronic devices while
driving.
Entertainment Systems
41
2012 MKS(mks)
Owners Guide, 1st Printing
USA(fus)
Page 63 of 384
Daytime running lamps (DRL) (if equipped)
To activate:
•the ignition must be in the on position,
•the headlamp control must be in the off, autolamps or parking lamp
position and
•the transmission must be out of the P (Park) position.
WARNING:Always remember to turn on your headlamps at
dusk or during inclement weather. The Daytime Running Lamp
(DRL) system does not activate the tail lamps and generally may not
provide adequate lighting during these conditions. Failure to activate
your headlamps under these conditions may result in a collision.
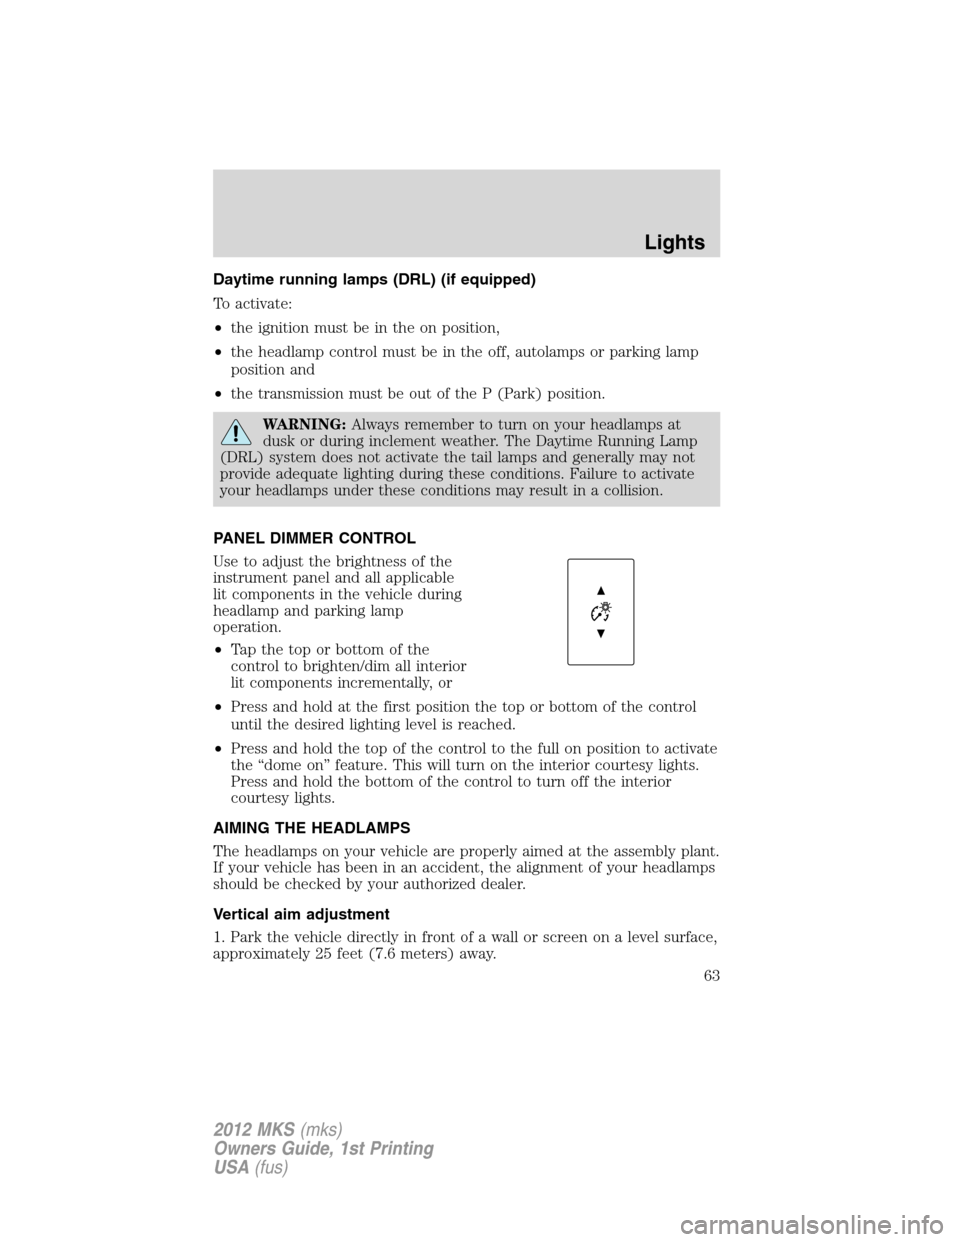
PANEL DIMMER CONTROL
Use to adjust the brightness of the
instrument panel and all applicable
lit components in the vehicle during
headlamp and parking lamp
operation.
•Tapthetoporbottomofthe
control to brighten/dim all interior
lit components incrementally, or
•Press and hold at the first position the top or bottom of the control
until the desired lighting level is reached.
•Press and hold the top of the control to the full on position to activate
the “dome on” feature. This will turn on the interior courtesy lights.
Press and hold the bottom of the control to turn off the interior
courtesy lights.
AIMING THE HEADLAMPS
The headlamps on your vehicle are properly aimed at the assembly plant.
If your vehicle has been in an accident, the alignment of your headlamps
should be checked by your authorized dealer.
Vertical aim adjustment
1. Park the vehicle directly in front of a wall or screen on a level surface,
approximately 25 feet (7.6 meters) away.
Lights
63
2012 MKS(mks)
Owners Guide, 1st Printing
USA(fus)
Page 71 of 384
Courtesy wipe feature:One extra wipe will occur a few seconds after
washing the front window to clear any excess washer fluid remaining on
the windshield.
Note:Do not operate the washer when the washer reservoir is empty.
This may cause the washer pump to overheat. Check the washer fluid
level frequently. Do not operate the wipers when the windshield is dry.
This may scratch the glass, damage the wiper blades and cause the wiper
motor to burn out. Before operating the wiper on a dry windshield,
always use the windshield washer. In freezing weather, be sure the wiper
blades are not frozen to the windshield before operating the wipers.
Windshield wiper rainlamp feature
When the windshield wipers are turned on during daylight, and the
headlamp control is in the autolamp position, the exterior lamps will turn
on after a brief delay and will remain on until the wipers are turned off.
POWER TILT/TELESCOPE STEERING COLUMN
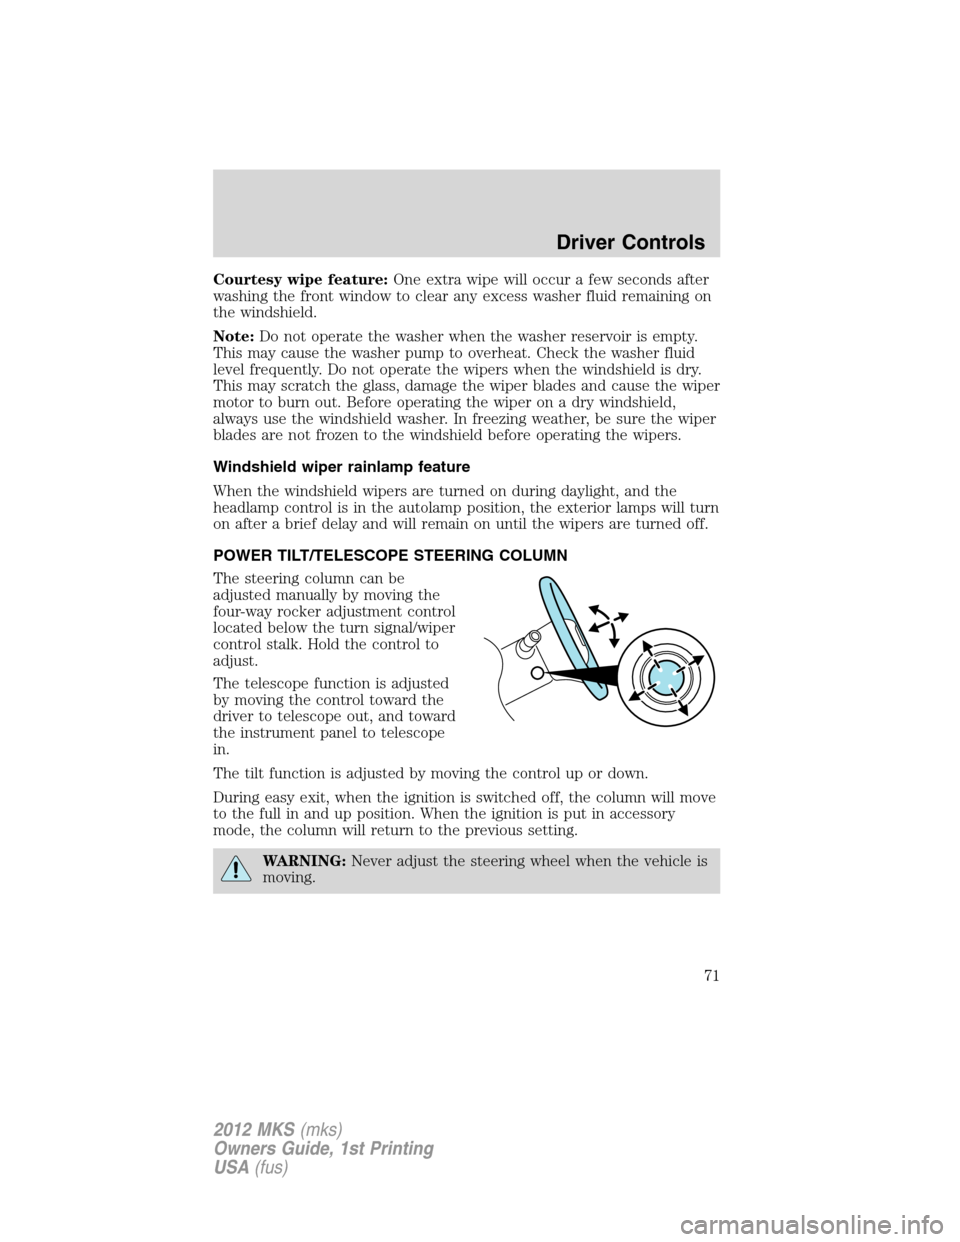
The steering column can be
adjusted manually by moving the
four-way rocker adjustment control
located below the turn signal/wiper
control stalk. Hold the control to
adjust.
The telescope function is adjusted
by moving the control toward the
driver to telescope out, and toward
the instrument panel to telescope
in.
The tilt function is adjusted by moving the control up or down.
During easy exit, when the ignition is switched off, the column will move
to the full in and up position. When the ignition is put in accessory
mode, the column will return to the previous setting.
WARNING:Never adjust the steering wheel when the vehicle is
moving.
Driver Controls
71
2012 MKS(mks)
Owners Guide, 1st Printing
USA(fus)
Page 75 of 384
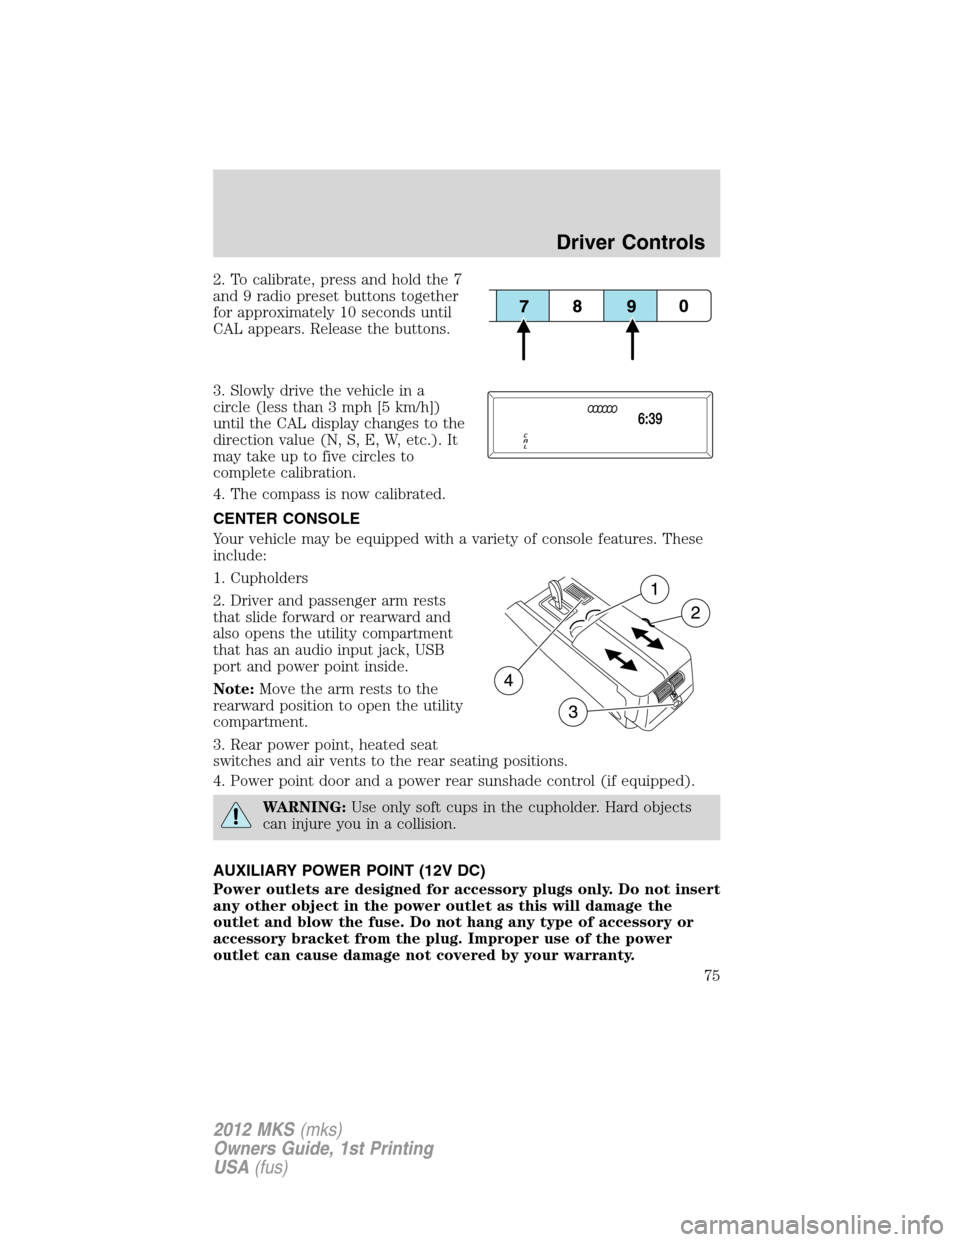
2. To calibrate, press and hold the 7
and 9 radio preset buttons together
for approximately 10 seconds until
CAL appears. Release the buttons.
3. Slowly drive the vehicle in a
circle (less than 3 mph [5 km/h])
until the CAL display changes to the
direction value (N, S, E, W, etc.). It
may take up to five circles to
complete calibration.
4. The compass is now calibrated.
CENTER CONSOLE
Your vehicle may be equipped with a variety of console features. These
include:
1. Cupholders
2. Driver and passenger arm rests
that slide forward or rearward and
also opens the utility compartment
that has an audio input jack, USB
port and power point inside.
Note:Move the arm rests to the
rearward position to open the utility
compartment.
3. Rear power point, heated seat
switches and air vents to the rear seating positions.
4. Power point door and a power rear sunshade control (if equipped).
WARNING:Use only soft cups in the cupholder. Hard objects
can injure you in a collision.
AUXILIARY POWER POINT (12V DC)
Power outlets are designed for accessory plugs only. Do not insert
any other object in the power outlet as this will damage the
outlet and blow the fuse. Do not hang any type of accessory or
accessory bracket from the plug. Improper use of the power
outlet can cause damage not covered by your warranty.
Driver Controls
75
2012 MKS(mks)
Owners Guide, 1st Printing
USA(fus)
Page 76 of 384
Auxiliary power point can be found in the following location:
•On the center console
•Inside the utility compartment
•On the rear of the center console accessible from the rear seat
Do not use the power point for operating the cigarette lighter element (if
equipped).
Note:Do not plug optional electrical accessories into the cigarette
lighter socket (if equipped). Improper use of the lighter can cause
damage not covered by your warranty, and can result in fire or serious
injury.
To prevent the fuse from being blown, do not use the power point(s)
over the vehicle capacity of 12V DC/180W. If the power point or cigar
lighter socket is not working, a fuse may have blown. Refer toFuses and
relaysin theRoadside Emergencieschapter for information on
checking and replacing fuses.
To have full capacity usage of your power point, the engine is required to
be running to avoid unintentional discharge of the battery. To prevent
the battery from being discharged:
•do not use the power point longer than necessary when the engine is
not running,
•do not leave battery chargers, video game adapters, computers and
other devices plugged in overnight or when the vehicle is parked for
extended periods.
Always keep the power point caps closed when not being used.
POWER WINDOWS
WARNING:Do not leave children unattended in the vehicle and
do not let children play with the power windows. They may
seriously injure themselves.
WARNING:When closing the power windows, you should verify
they are free of obstructions and ensure that children and/or
pets are not in the proximity of the window openings.
Driver Controls
76
2012 MKS(mks)
Owners Guide, 1st Printing
USA(fus)
Page 78 of 384
Press and hold thecontrol on the transmitter to begin to close the
windows and moon roof.
Note:The ignition must be off and the accessory delay feature must not
be activated in order for this feature to operate.
Note:This feature can be disabled or enabled by your authorized dealer.
WARNING:To avoid personal injury and vehicle damage, verify
that windows and moon roof are free of obstructions before
operating and ensure that children and/or pets are not in the proximity
of window openings.
Bounce-back
When an obstacle has been detected in the window opening as the
window is moving upward, the window will automatically reverse
direction and move down. This is known as “bounce-back”. If the ignition
is turned off (without accessory delay being active) during bounce-back,
the window will move down until the bounce-back position is reached.
Security override
To override a bounce-back condition, within two seconds after the
window reaches the bounce-back position, pull and hold the switch up
andthe window will travel up with no bounce-back or pinch
protection.If the switch is released before the window is fully closed,
the window will stop. For example, this can be used to overcome the
resistance of ice on the window or seals.
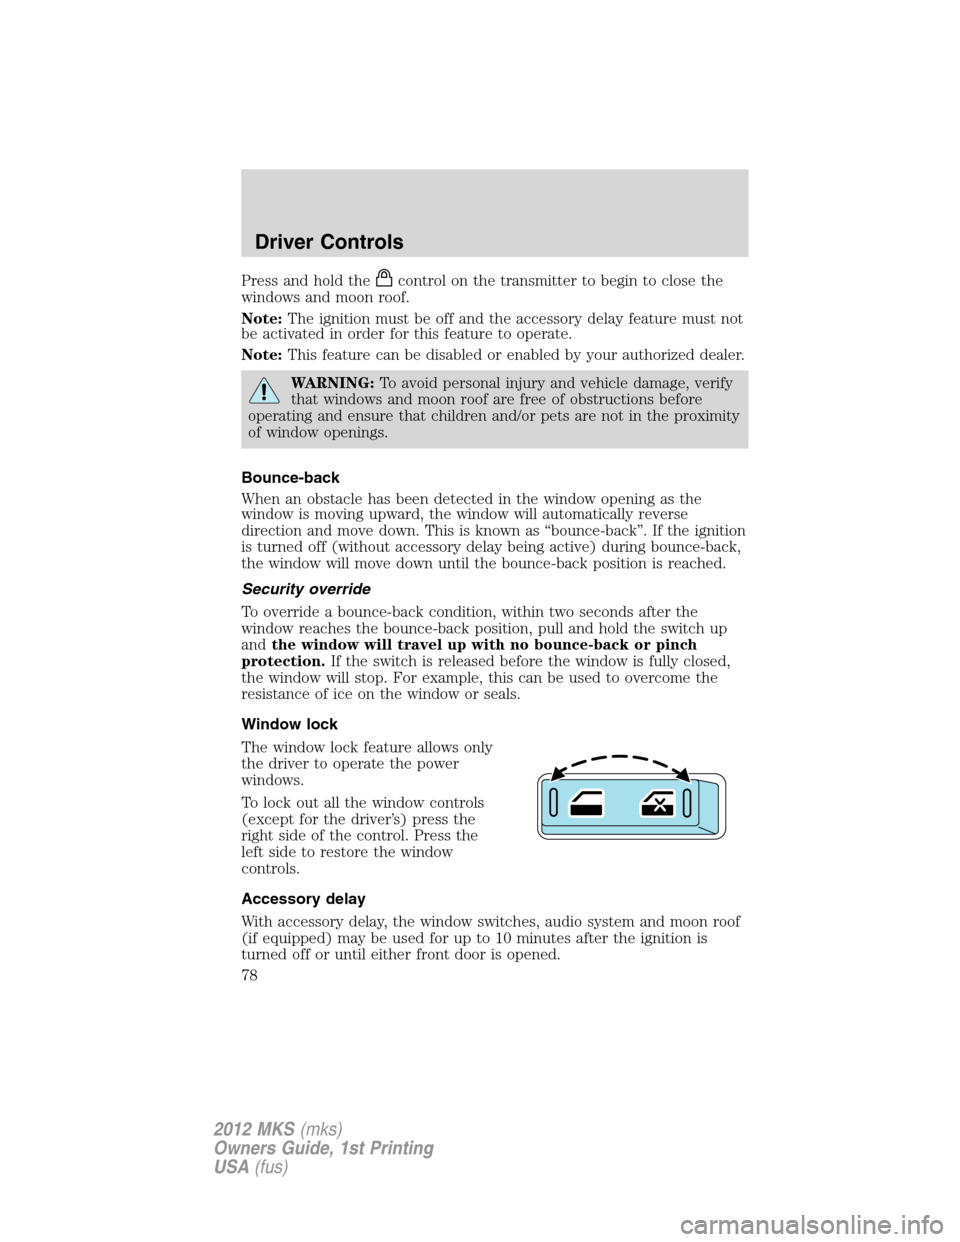
Window lock
The window lock feature allows only
the driver to operate the power
windows.
To lock out all the window controls
(except for the driver’s) press the
right side of the control. Press the
left side to restore the window
controls.
Accessory delay
With accessory delay, the window switches, audio system and moon roof
(if equipped) may be used for up to 10 minutes after the ignition is
turned off or until either front door is opened.
Driver Controls
78
2012 MKS(mks)
Owners Guide, 1st Printing
USA(fus)
Page 79 of 384
INTERIOR MIRROR
The interior rearview mirror has two pivot points on the support arm
which lets you adjust the mirror up or down and from side to side.
WARNING:Do not adjust the mirror while the vehicle is in
motion.
Automatic dimming interior rear view mirror
The interior rear view mirror and a driver’s side exterior mirror have an
auto-dimming function. The electronic day/night mirrors will change from
the normal (high reflective) state to the non-glare (darkened) state
when bright lights (glare) reach the interior mirror. When the interior
mirror detects bright light from behind the vehicle, the interior rear view
mirror and the driver’s side exterior mirror will automatically adjust
(darken) to minimize glare.
The mirrors will automatically return to the normal state whenever the
vehicle is placed in R (Reverse) to ensure a bright clear view when
backing up.
Do not block the sensors on the front and back of the interior
rear view mirror since this may impair proper mirror
performance.
Note:A rear center passenger and/or raised rear center headrest (if
equipped) may also block the light from reaching the sensor.
Do not clean the housing or glass of any mirror with harsh
abrasives, fuel or other petroleum-based cleaning products.
EXTERIOR MIRRORS
Power side view mirrors
WARNING:Do not adjust the mirror while the vehicle is in
motion.
Driver Controls
79
2012 MKS(mks)
Owners Guide, 1st Printing
USA(fus)
Page 81 of 384
SPEED CONTROL
With speed control set, you can maintain a set speed without keeping
your foot on the accelerator pedal.
WARNING:Do not use the speed control in heavy traffic or on
roads that are winding, slippery or unpaved.
Using speed control
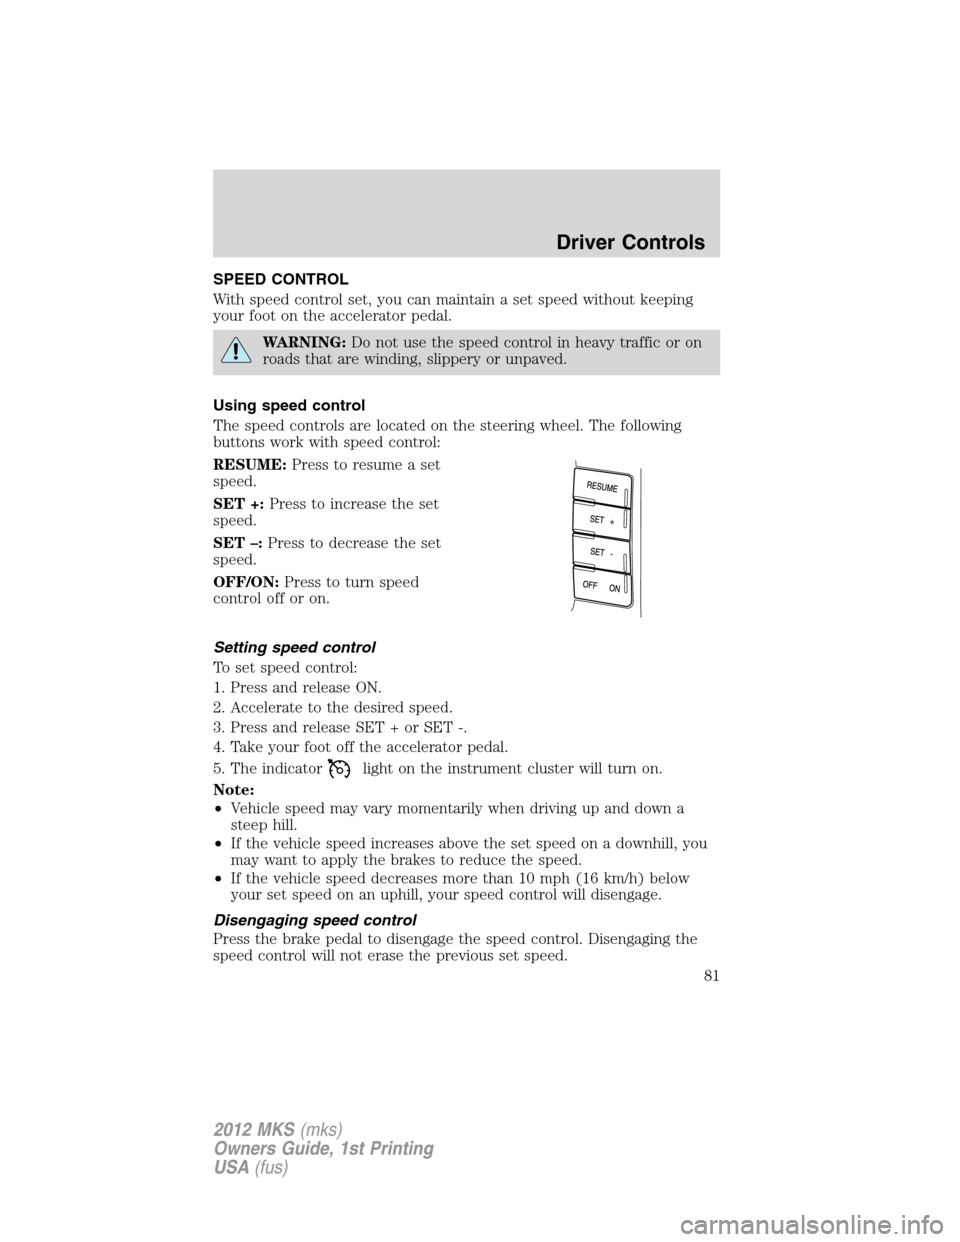
The speed controls are located on the steering wheel. The following
buttons work with speed control:
RESUME:Press to resume a set
speed.
SET +:Press to increase the set
speed.
SET –:Press to decrease the set
speed.
OFF/ON:Press to turn speed
control off or on.
Setting speed control
To set speed control:
1. Press and release ON.
2. Accelerate to the desired speed.
3. Press and release SET + or SET -.
4. Take your foot off the accelerator pedal.
5. The indicator
light on the instrument cluster will turn on.
Note:
•Vehicle speed may vary momentarily when driving up and down a
steep hill.
•If the vehicle speed increases above the set speed on a downhill, you
may want to apply the brakes to reduce the speed.
•If the vehicle speed decreases more than 10 mph (16 km/h) below
your set speed on an uphill, your speed control will disengage.
Disengaging speed control
Press the brake pedal to disengage the speed control. Disengaging the
speed control will not erase the previous set speed.
Driver Controls
81
2012 MKS(mks)
Owners Guide, 1st Printing
USA(fus)
Page 83 of 384
WARNING:Always pay close attention to changing road
conditions, especially when using Adaptive Cruise Control.
Adaptive Cruise Control cannot replace attentive driving. Failing to
follow any of the warnings below or failing to pay attention to the road
may result in a collision, serious injury or death.
WARNING:Adaptive cruise control is not a collision warning or
avoidance system. Additionally, adaptive cruise control will not
detect:
•Stationary or slow moving vehicles below 6 mph (10 km/h).
•Pedestrians or objects in the roadway.
•Oncoming vehicles in the same lane.
WARNING:Do not use the adaptive cruise control when
entering or leaving a highway, in heavy traffic or on roads that
are winding, slippery or unpaved.
WARNING:Do not use in poor visibility, specifically fog, rain,
spray or snow.
Setting adaptive cruise control
Note:It is the driver’s responsibility to stay alert, drive safely and be in
control of the vehicle at all times.
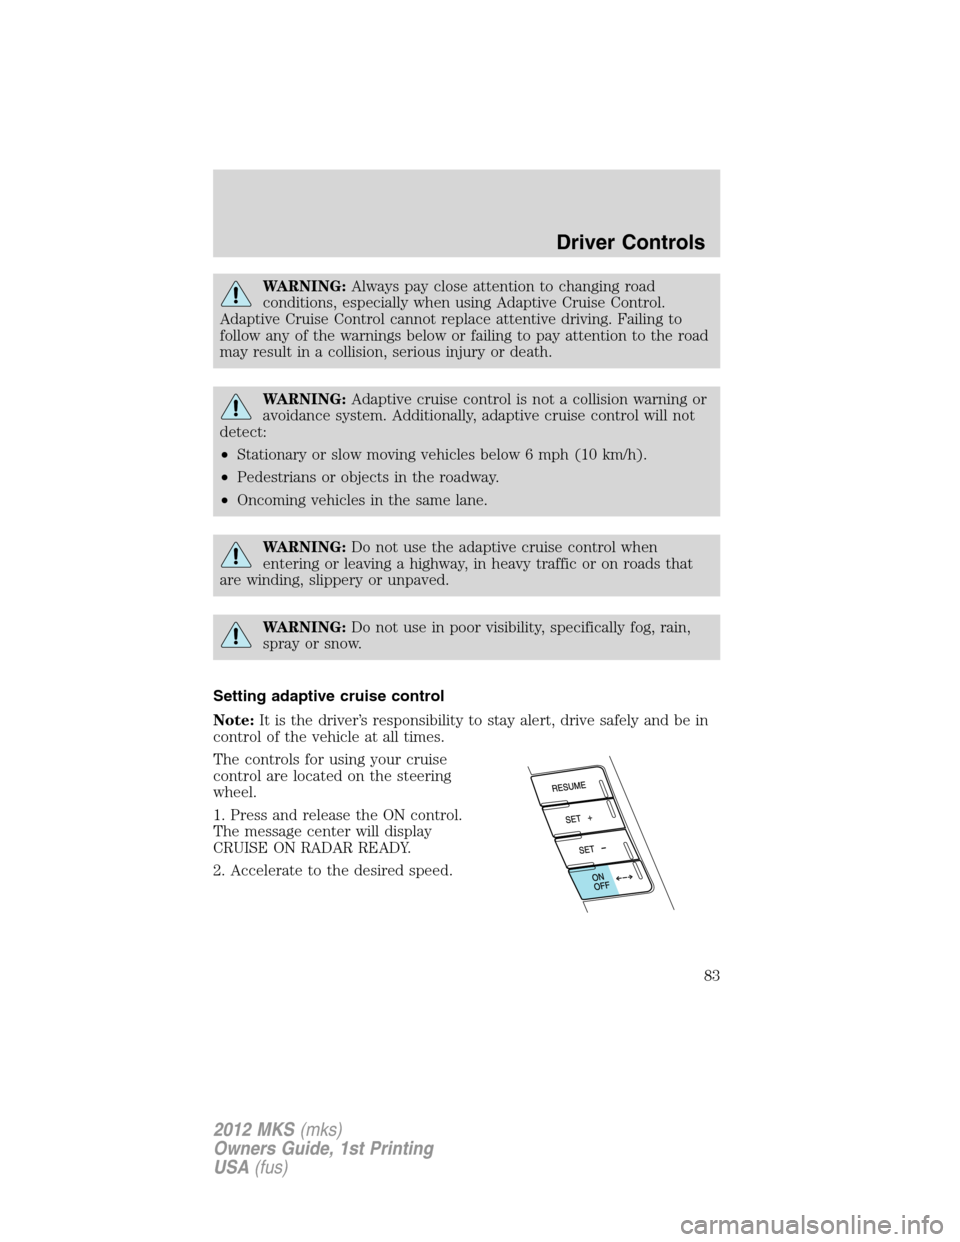
The controls for using your cruise
control are located on the steering
wheel.
1. Press and release the ON control.
The message center will display
CRUISE ON RADAR READY.
2. Accelerate to the desired speed.
Driver Controls
83
2012 MKS(mks)
Owners Guide, 1st Printing
USA(fus)