display LINCOLN MKS 2016 Service Manual
[x] Cancel search | Manufacturer: LINCOLN, Model Year: 2016, Model line: MKS, Model: LINCOLN MKS 2016Pages: 382, PDF Size: 3.81 MB
Page 117 of 382
•
Lumbar adjust: Press and hold the front
of the lumbar control (B) to increase the
firmness of the selected portion of the
seatback. Press and hold the rear of the
lumbar to decrease the firmness.
• Power seat controls (C).
We recommend first selecting the lumbar to
the desired setting and then selecting the
back or cushion massage setting.
MEMORY FUNCTION WARNINGS
Before activating the seat memory,
make sure that the area immediately
surrounding the seat is clear of
obstructions and that all occupants are clear
of moving parts. Do not use the memory function when
your vehicle is moving.
This function automatically recalls the
position of these features.
•
Driver seat.
• Power mirrors.
• Optional power adjustable pedals
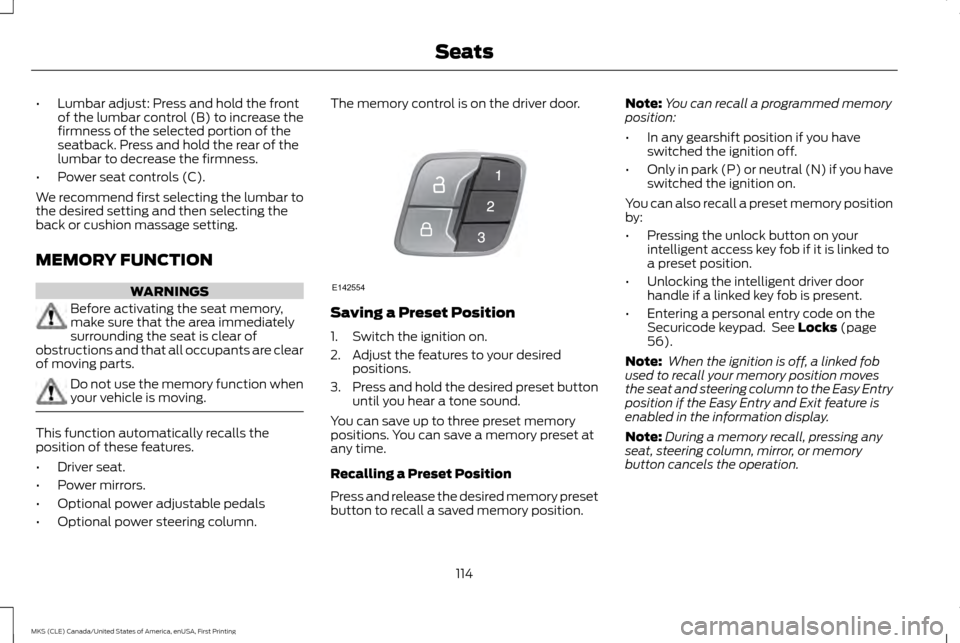
• Optional power steering column. The memory control is on the driver door.
Saving a Preset Position
1. Switch the ignition on.
2. Adjust the features to your desired
positions.
3. Press and hold the desired preset button
until you hear a tone sound.
You can save up to three preset memory
positions. You can save a memory preset at
any time.
Recalling a Preset Position
Press and release the desired memory preset
button to recall a saved memory position. Note:
You can recall a programmed memory
position:
• In any gearshift position if you have
switched the ignition off.
• Only in park (P) or neutral (N) if you have
switched the ignition on.
You can also recall a preset memory position
by:
• Pressing the unlock button on your
intelligent access key fob if it is linked to
a preset position.
• Unlocking the intelligent driver door
handle if a linked key fob is present.
• Entering a personal entry code on the
Securicode keypad. See Locks (page
56).
Note: When the ignition is off, a linked fob
used to recall your memory position moves
the seat and steering column to the Easy Entry
position if the Easy Entry and Exit feature is
enabled in the information display.
Note: During a memory recall, pressing any
seat, steering column, mirror, or memory
button cancels the operation.
114
MKS (CLE) Canada/United States of America, enUSA, First Printing SeatsE142554
Page 118 of 382
Linking a Preset Position to Your
Remote Control or Intelligent Access
Key
You can save the preset memory positions
for up to three remote controls or intelligent
access (IA) keys.
1. With the ignition on, move the memory
positions to the desired positions.
2. Press and hold the desired preset button
for five seconds. A tone sounds after
about two seconds. Continue holding
until you hear a second tone.
3. Within three seconds, press the lock button on the remote control you are
linking.
To unlink a remote control, follow the same
procedure – except in Step 3, press the
unlock button on the remote control.
Easy Entry and Exit Feature
If you enable the easy entry and exit feature,
it automatically moves the driver seat
position rearward up to two inches (five
centimeters) and the steering column up and
forward when you switch the ignition off.
When you switch the ignition on, the driver
seat and steering column return to the
previous position. You can enable or disable this feature in the
information display. See Information
Displays (page 89).
CLIMATE CONTROLLED SEATS
(If Equipped)
Heated Seats WARNING
Persons who are unable to feel pain to
the skin because of advanced age,
chronic illness, diabetes, spinal cord
injury, medication, alcohol use, exhaustion,
or other physical conditions, must exercise
care when using the seat heater. The seat
heater may cause burns even at low
temperatures, especially if used for long
periods of time. Do not place anything on the
seat that insulates against heat, such as a
blanket or cushion, because this may cause
the seat heater to overheat. Do not puncture
the seat with pins, needles, or other pointed
objects because this may damage the
heating element which may cause the seat
heater to overheat. An overheated seat may
cause serious personal injury. Note:
Do not do the following: •
Place heavy objects on the seat.
• Operate the seat heater if water or any
other liquid spills on the seat. Allow the
seat to dry thoroughly.
The heated seats will only function when the
engine is running. Press the heated seat symbol located on the
touchscreen to cycle through the various heat
settings and off. Warmer settings are
indicated by more indicator lights.
If the engine falls below 350 RPM while the
heated seats are on, the feature will turn
itself off. You will need to reactivate it.
After 60 minutes of operation, the heated
seats automatically turn off. Press the
symbol to switch the heated seats on.
115
MKS (CLE) Canada/United States of America, enUSA, First Printing SeatsE146322
Page 125 of 382
4. Press and hold both the programmed
Genie button on the hand-held
transmitter and the button you want to
program. The indicator light on the visor
will flash rapidly when the programming
is successful.
Note: The Genie transmitter will transmit for
up to 30 seconds. If HomeLink does not
program within 30 seconds the Genie
transmitter will need to be pressed again. If
the Genie transmitter indicator light displays
green and red, release the button until the
indicator light turns off before pressing the
button again.
Once HomeLink has been programmed
successfully, the Genie transmitter must be
changed out of program mode. To do this:
1. Press and hold the previously programmed Genie button on the
hand-held transmitter for 10 seconds. The
indicator light will change from red to red
and green.
2. Press the same button twice to confirm the change. If done correctly the indicator
light will turn green.
Programming HomeLink to the Genie
Intellicode Garage Door Opener Motor
Note: You may need a ladder to access the
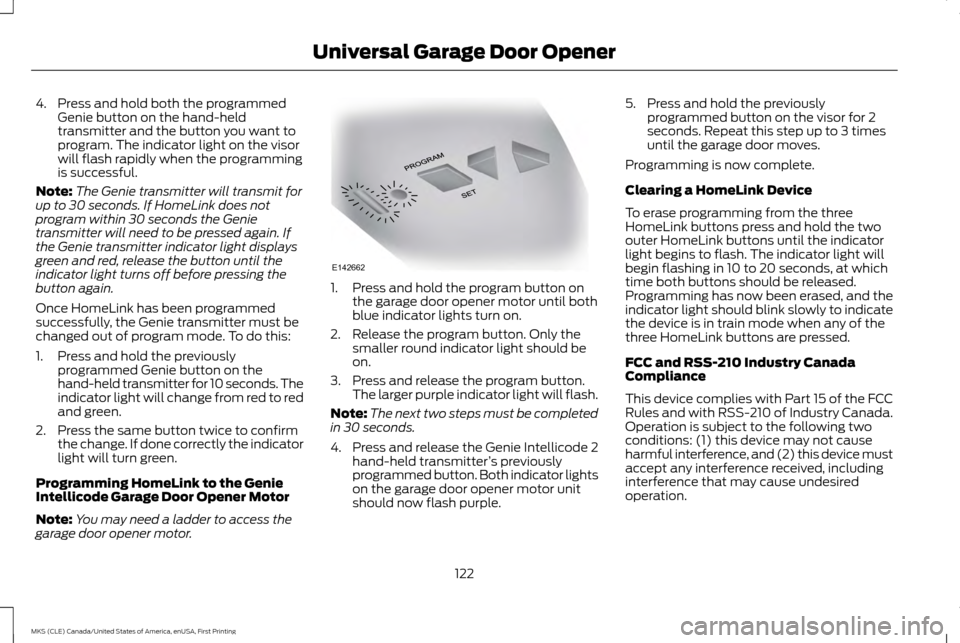
garage door opener motor. 1. Press and hold the program button on
the garage door opener motor until both
blue indicator lights turn on.
2. Release the program button. Only the smaller round indicator light should be
on.
3. Press and release the program button. The larger purple indicator light will flash.
Note: The next two steps must be completed
in 30 seconds.
4. Press and release the Genie Intellicode 2 hand-held transmitter ’s previously
programmed button. Both indicator lights
on the garage door opener motor unit
should now flash purple. 5. Press and hold the previously
programmed button on the visor for 2
seconds. Repeat this step up to 3 times
until the garage door moves.
Programming is now complete.
Clearing a HomeLink Device
To erase programming from the three
HomeLink buttons press and hold the two
outer HomeLink buttons until the indicator
light begins to flash. The indicator light will
begin flashing in 10 to 20 seconds, at which
time both buttons should be released.
Programming has now been erased, and the
indicator light should blink slowly to indicate
the device is in train mode when any of the
three HomeLink buttons are pressed.
FCC and RSS-210 Industry Canada
Compliance
This device complies with Part 15 of the FCC
Rules and with RSS-210 of Industry Canada.
Operation is subject to the following two
conditions: (1) this device may not cause
harmful interference, and (2) this device must
accept any interference received, including
interference that may cause undesired
operation.
122
MKS (CLE) Canada/United States of America, enUSA, First Printing Universal Garage Door OpenerE142662
Page 130 of 382
GENERAL INFORMATION
WARNINGS
Extended idling at high engine speeds
can produce very high temperatures in
the engine and exhaust system,
creating the risk of fire or other damage. Do not park, idle or drive your vehicle
on dry grass or other dry ground cover.
The emission system heats up the
engine compartment and exhaust system,
creating the risk of fire. Do not start the engine in a closed
garage or in other enclosed areas.
Exhaust fumes can be toxic. Always
open the garage door before you start the
engine. If you smell exhaust fumes inside your
vehicle, have your vehicle checked by
an authorized dealer immediately. Do
not drive your vehicle if you smell exhaust
fumes. If you disconnect the battery, your vehicle
may exhibit some unusual driving
characteristics for approximately 5 miles (8
kilometers) after you reconnect it. This is
because the engine management system
must realign itself with the engine. You can
disregard any unusual driving characteristics
during this period.
The powertrain control system meets all
Canadian interference-causing equipment
standard requirements regulating the impulse
electrical field or radio noise.
When you start the engine, avoid pressing
the accelerator pedal before and during
operation. Only use the accelerator pedal
when you have difficulty starting the engine.
KEYLESS STARTING
Note:
The keyless starting system may not
function if the key is close to metal objects or
electronic devices such as cellular phones.
Note: A valid key must be located inside your
vehicle to switch the ignition on and start the
engine. Note:
When locking your vehicle, any remote
controls left inside the vehicle may become
disabled. A message may appear in the
information display indicating that there is no
key detected if you try to start the engine.
Press the unlock button on the remote control
to enable it, and then start the engine.
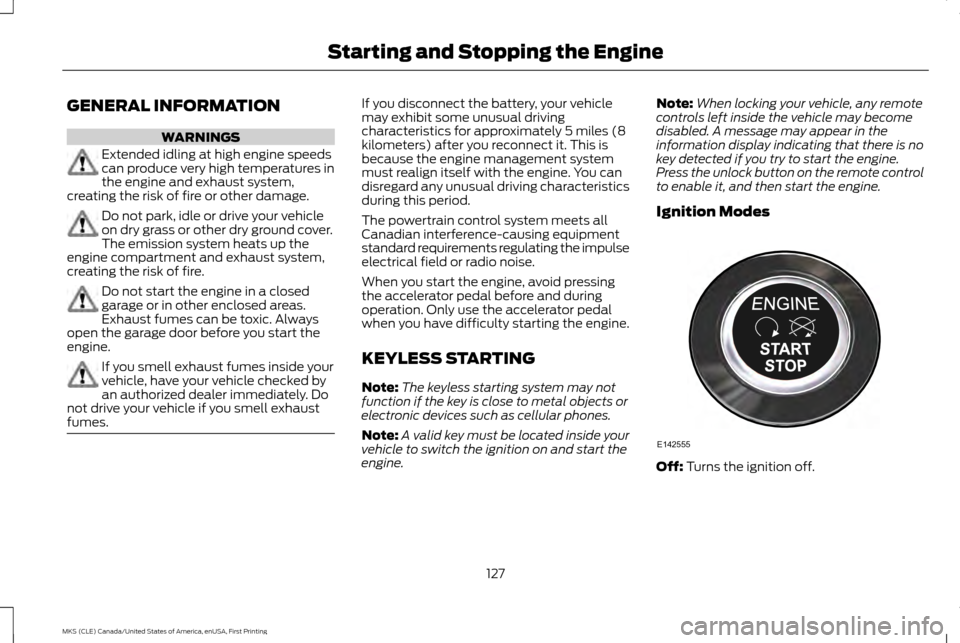
Ignition Modes Off: Turns the ignition off.
127
MKS (CLE) Canada/United States of America, enUSA, First Printing Starting and Stopping the EngineE142555
Page 131 of 382
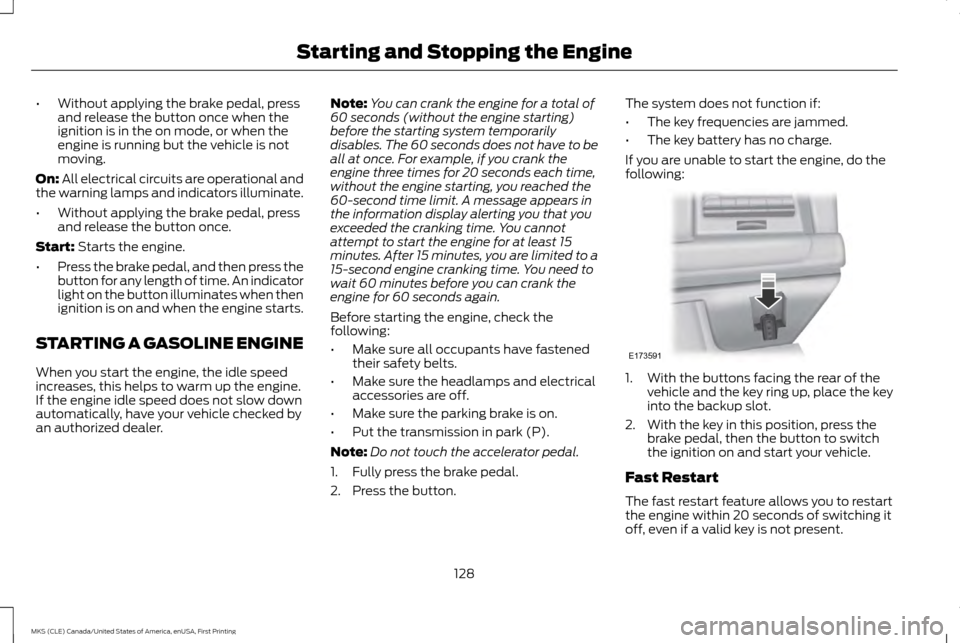
•
Without applying the brake pedal, press
and release the button once when the
ignition is in the on mode, or when the
engine is running but the vehicle is not
moving.
On: All electrical circuits are operational and
the warning lamps and indicators illuminate.
• Without applying the brake pedal, press
and release the button once.
Start:
Starts the engine.
• Press the brake pedal, and then press the
button for any length of time. An indicator
light on the button illuminates when then
ignition is on and when the engine starts.
STARTING A GASOLINE ENGINE
When you start the engine, the idle speed
increases, this helps to warm up the engine.
If the engine idle speed does not slow down
automatically, have your vehicle checked by
an authorized dealer. Note:
You can crank the engine for a total of
60 seconds (without the engine starting)
before the starting system temporarily
disables. The 60 seconds does not have to be
all at once. For example, if you crank the
engine three times for 20 seconds each time,
without the engine starting, you reached the
60-second time limit. A message appears in
the information display alerting you that you
exceeded the cranking time. You cannot
attempt to start the engine for at least 15
minutes. After 15 minutes, you are limited to a
15-second engine cranking time. You need to
wait 60 minutes before you can crank the
engine for 60 seconds again.
Before starting the engine, check the
following:
• Make sure all occupants have fastened
their safety belts.
• Make sure the headlamps and electrical
accessories are off.
• Make sure the parking brake is on.
• Put the transmission in park (P).
Note: Do not touch the accelerator pedal.
1. Fully press the brake pedal.
2. Press the button. The system does not function if:
•
The key frequencies are jammed.
• The key battery has no charge.
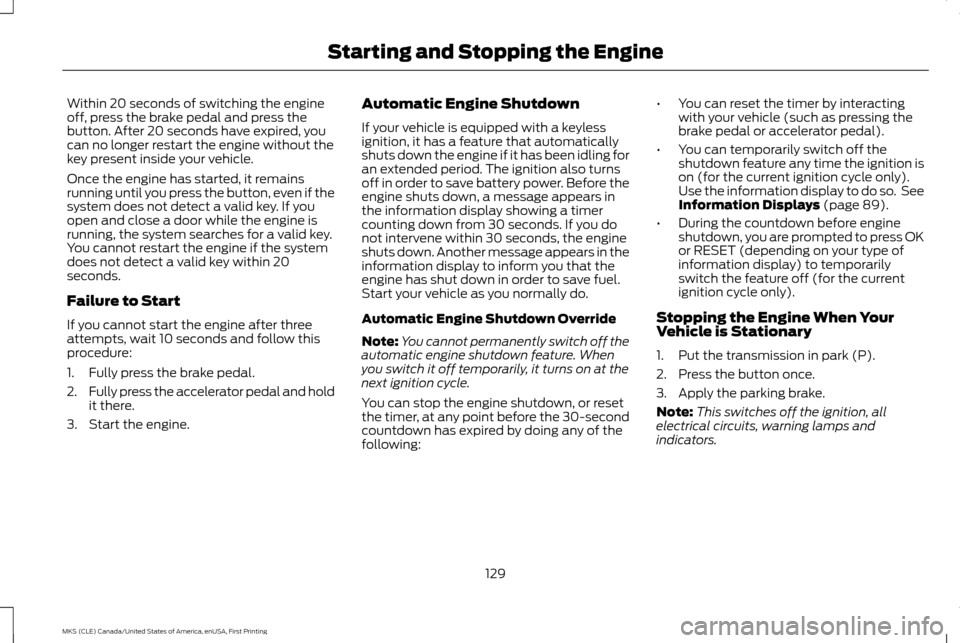
If you are unable to start the engine, do the
following: 1. With the buttons facing the rear of the
vehicle and the key ring up, place the key
into the backup slot.
2. With the key in this position, press the brake pedal, then the button to switch
the ignition on and start your vehicle.
Fast Restart
The fast restart feature allows you to restart
the engine within 20 seconds of switching it
off, even if a valid key is not present.
128
MKS (CLE) Canada/United States of America, enUSA, First Printing Starting and Stopping the EngineE173591
Page 132 of 382
Within 20 seconds of switching the engine
off, press the brake pedal and press the
button. After 20 seconds have expired, you
can no longer restart the engine without the
key present inside your vehicle.
Once the engine has started, it remains
running until you press the button, even if the
system does not detect a valid key. If you
open and close a door while the engine is
running, the system searches for a valid key.
You cannot restart the engine if the system
does not detect a valid key within 20
seconds.
Failure to Start
If you cannot start the engine after three
attempts, wait 10 seconds and follow this
procedure:
1. Fully press the brake pedal.
2.
Fully press the accelerator pedal and hold
it there.
3. Start the engine. Automatic Engine Shutdown
If your vehicle is equipped with a keyless
ignition, it has a feature that automatically
shuts down the engine if it has been idling for
an extended period. The ignition also turns
off in order to save battery power. Before the
engine shuts down, a message appears in
the information display showing a timer
counting down from 30 seconds. If you do
not intervene within 30 seconds, the engine
shuts down. Another message appears in the
information display to inform you that the
engine has shut down in order to save fuel.
Start your vehicle as you normally do.
Automatic Engine Shutdown Override
Note:
You cannot permanently switch off the
automatic engine shutdown feature. When
you switch it off temporarily, it turns on at the
next ignition cycle.
You can stop the engine shutdown, or reset
the timer, at any point before the 30-second
countdown has expired by doing any of the
following: •
You can reset the timer by interacting
with your vehicle (such as pressing the
brake pedal or accelerator pedal).
• You can temporarily switch off the
shutdown feature any time the ignition is
on (for the current ignition cycle only).
Use the information display to do so. See
Information Displays (page 89).
• During the countdown before engine
shutdown, you are prompted to press OK
or RESET (depending on your type of
information display) to temporarily
switch the feature off (for the current
ignition cycle only).
Stopping the Engine When Your
Vehicle is Stationary
1. Put the transmission in park (P).
2. Press the button once.
3. Apply the parking brake.
Note: This switches off the ignition, all
electrical circuits, warning lamps and
indicators.
129
MKS (CLE) Canada/United States of America, enUSA, First Printing Starting and Stopping the Engine
Page 144 of 382
SelectShift Automatic
™
Transmission (If Equipped)
Your SelectShift Automatic transmission
gives you the ability to change gears
manually.
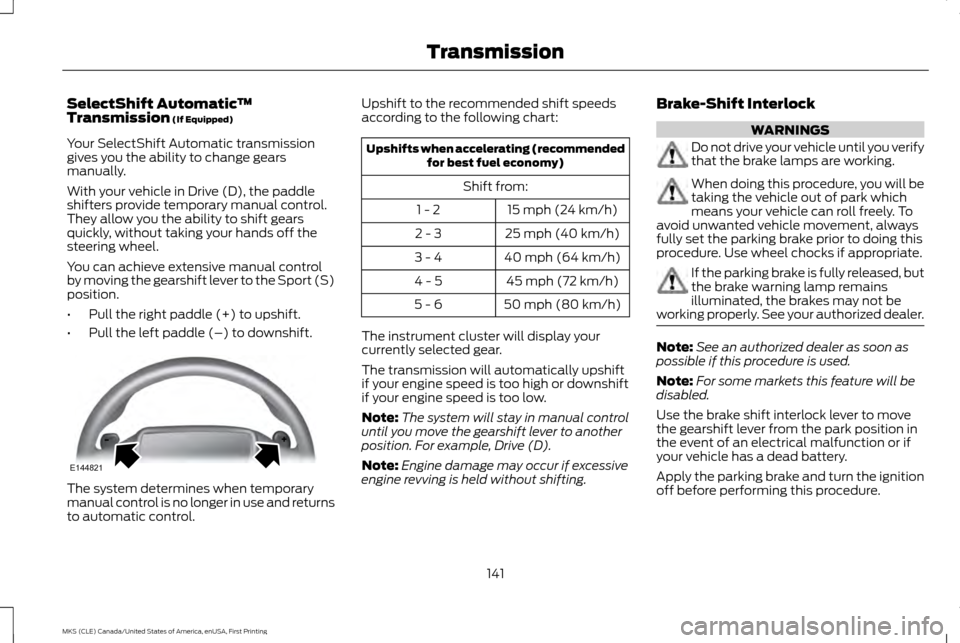
With your vehicle in Drive (D), the paddle
shifters provide temporary manual control.
They allow you the ability to shift gears
quickly, without taking your hands off the
steering wheel.
You can achieve extensive manual control
by moving the gearshift lever to the Sport (S)
position.
• Pull the right paddle (+) to upshift.
• Pull the left paddle (–) to downshift. The system determines when temporary
manual control is no longer in use and returns
to automatic control. Upshift to the recommended shift speeds
according to the following chart: Upshifts when accelerating (recommended
for best fuel economy)
Shift from: 15 mph (24 km/h)
1 - 2
25 mph (40 km/h)
2 - 3
40 mph (64 km/h)
3 - 4
45 mph (72 km/h)
4 - 5
50 mph (80 km/h)
5 - 6
The instrument cluster will display your
currently selected gear.
The transmission will automatically upshift
if your engine speed is too high or downshift
if your engine speed is too low.
Note: The system will stay in manual control
until you move the gearshift lever to another
position. For example, Drive (D).
Note: Engine damage may occur if excessive
engine revving is held without shifting. Brake-Shift Interlock WARNINGS
Do not drive your vehicle until you verify
that the brake lamps are working.
When doing this procedure, you will be
taking the vehicle out of park which
means your vehicle can roll freely. To
avoid unwanted vehicle movement, always
fully set the parking brake prior to doing this
procedure. Use wheel chocks if appropriate. If the parking brake is fully released, but
the brake warning lamp remains
illuminated, the brakes may not be
working properly. See your authorized dealer. Note:
See an authorized dealer as soon as
possible if this procedure is used.
Note: For some markets this feature will be
disabled.
Use the brake shift interlock lever to move
the gearshift lever from the park position in
the event of an electrical malfunction or if
your vehicle has a dead battery.
Apply the parking brake and turn the ignition
off before performing this procedure.
141
MKS (CLE) Canada/United States of America, enUSA, First Printing TransmissionE144821
Page 146 of 382

USING ALL-WHEEL DRIVE
All-wheel drive uses all four wheels to power
the vehicle. This increases traction, enabling
you to drive over terrain and road conditions
that a conventional two-wheel drive vehicle
cannot. The AWD system is active all the time
and requires no input from the operator.
Note:
Your AWD vehicle is not intended for
off-road use. The AWD feature gives your
vehicle some limited off-road capabilities in
which driving surfaces are relatively level,
obstruction-free and otherwise similar to
normal on-road driving conditions. Operating
your vehicle under other than those conditions
could subject the vehicle to excessive stress
which might result in damage which is not
covered under your warranty.
Note: When an AWD system fault is present,
the warning Check AWD displays in the
information display. The AWD system is not
functioning correctly and defaults to
front-wheel drive. When this warning displays,
have your vehicle serviced at an authorized
dealer. Note:
The AWD OFF message may also
appear in the information display if the AWD
system overheats and defaults to front-wheel
drive. This may occur if the vehicle is operated
in extreme conditions with excessive wheel
slip, such as deep sand. To resume normal
AWD function as soon as possible, stop the
vehicle in a safe location and stop the engine
for at least 10 minutes. After the engine has
been restarted and the AWD system has
adequately cooled, the
AWD OFF message
will turn off and normal AWD function returns.
If the engine is not stopped, the
AWD OFF
message turns off when the system cools and
normal AWD function returns.
143
MKS (CLE) Canada/United States of America, enUSA, First Printing All-Wheel Drive
(If Equipped)
Page 147 of 382
All-Wheel Drive Messages
Action / Description
AWD Messages
Displayed when the system has been automatically disabled to protect
itself. This is caused by operating the vehicle with the compact spare
tire installed or if the system is overheating. The system will resume
normal function and clear this message after cycling the ignition on
and off and driving a short distance with the road tire re-installed or
after the system is allowed to cool.
AWD OFF
Displayed in conjunction with the powertrain malfunction/reduced
power light when the system is not operating properly. If the warning
stays on or continues to come on, contact your authorized dealer as
soon as possible.
Check AWD
Operating AWD Vehicles With Spare
Tires
A spare tire of a different size other than the
tire provided should never be used. The AWD
system may disable automatically and enter
front-wheel drive only mode to protect
driveline components if a non-full sized tire
is installed. This condition may display an
AWD OFF message in the information
display. If there is an AWD OFF message in
the information display from using a non-full
sized spare tire, this indicator should turn off
after reinstalling the repaired or replaced
normal road tire and cycling the ignition off and on. It is recommended to reinstall the
repaired or replaced road tire as soon as
possible. Major dissimilar tire sizes between
the front and rear axles (for example, 17 inch
low profile tires on the front axle and 22 inch
high profile tires on the rear axle) could cause
the AWD system to stop functioning and
default to front-wheel drive or damage the
AWD system.
144
MKS (CLE) Canada/United States of America, enUSA, First Printing All-Wheel Drive
(If Equipped)
Page 150 of 382
acceleration or braking which could result
in an increased risk of loss of vehicle
control, vehicle rollover and/or personal
injury. Use all available road surface to
return the vehicle to a safe direction of
travel.
• In the event of an emergency stop, avoid
skidding the tires and do not attempt any
sharp steering wheel movements.
• If the vehicle goes from one type of
surface to another (that is, from concrete
to gravel) there will be a change in the
way the vehicle responds to a maneuver
(steering, acceleration or braking). Again,
avoid these abrupt inputs.
Sand
Most of the time traction control improves
tire traction by managing wheel slip through
Brake, Engine, and AWD calibrations.
However, during low speed driving, disabling
traction control in deep sand can help keep
the wheels moving to maintain vehicle
momentum.
When driving over sand, try to keep all four
wheels on the most solid area of the trail.
Avoid reducing the tire pressures but shift to
a lower gear and drive steadily through the
terrain. Apply the accelerator slowly and
avoid spinning the wheels. Do not drive your vehicle in deep sand for an
extended period of time. This could cause
the AWD system to overheat and default to
front-wheel drive. If this occurs, an AWD OFF
message displays in the information display.
To resume normal AWD function as soon as
possible, stop the vehicle in a safe location
and stop the engine for at least 10 minutes.
After the engine has been restarted and the
AWD system has adequately cooled, the
AWD OFF message turns off and normal
AWD function returns. In the event the engine
is not stopped, the AWD OFF message turns
off when the system cools and normal AWD
function returns.
When driving at slow speeds in deep sand
under high outside temperatures, use L (Low)
gear when possible. L (Low) gear operation
will maximize the engine and transmission
cooling capability.
Under severe operating conditions, the A/C
may cycle on and off to protect overheating
of the engine.
Avoid excessive speed because vehicle
momentum can work against you and cause
the vehicle to become stuck to the point that
assistance may be required from another
vehicle. Remember, you may be able to back
out the way you came if you proceed with
caution. Mud and Water
If you must drive through high water, drive
slowly. Traction or brake capability may be
limited.
When driving through water, determine the
depth; avoid water higher than the bottom
of the wheel rims (for cars) or the bottom of
the hubs (for trucks) (if possible) and
proceed slowly. If the ignition system gets
wet, the vehicle may stall.
Once through water, always try the brakes.
Wet brakes do not stop the vehicle as
effectively as dry brakes. Drying can be
improved by moving your vehicle slowly while
applying light pressure on the brake pedal.
Be cautious of sudden changes in vehicle
speed or direction when you are driving in
mud. Even AWD vehicles can lose traction in
slick mud. As when you are driving over sand,
apply the accelerator slowly and avoid
spinning your wheels. If the vehicle does slide,
steer in the direction of the slide until you
regain control of the vehicle.
After driving through mud, clean off residue
stuck to rotating driveshafts and tires. Excess
mud stuck on tires and rotating driveshafts
causes an imbalance that could damage
drive components.
147
MKS (CLE) Canada/United States of America, enUSA, First Printing All-Wheel Drive
(If Equipped)