manual transmission LINCOLN MKT 2012 Owners Manual
[x] Cancel search | Manufacturer: LINCOLN, Model Year: 2012, Model line: MKT, Model: LINCOLN MKT 2012Pages: 437, PDF Size: 3.56 MB
Page 26 of 437
AWD OFF (if equipped)— Displayed when the AWD system has been
automatically disabled to protect itself. This is caused by operating the
vehicle with the compact spare tire installed or if the system is
overheating. The AWD system will resume normal function and clear this
message after driving a short distance with the road tire re-installed or
after the system is allowed to cool.
CHECK AWD (if equipped)— Displayed in conjunction with the
Throttle Control/Transmission/AWD
light when the AWD system is
not operating properly. If the warning stays on or continues to come on,
contact your authorized dealer as soon as possible.
ADVANCETRAC OFF— Displayed briefly when the system has been
disabled.
ADVANCETRAC ON— Displayed briefly when the system has been
enabled.
TRACTION CONTROL ON— Displayed briefly when the system has
been enabled.
TRACTION CONTROL OFF— Displayed briefly when the system has
been disabled.
ENGINE OIL CHANGE SOON— Displayed when the engine oil life
remaining is 5% to 1%.
OIL CHANGE REQUIRED— Displayed when the oil life left reaches
0%.
TRAILER SWAY REDUCE SPEED (if equipped)— Displayed when
the trailer sway control has detected trailer sway. For more information,
refer to theDrivingchapter for more information.
INTKEY COULD NOT PROGRAM— Displayed when an attempt is
made to program a fifth integrated key to the remote keyless entry
system. For more information on integrated key, refer to theLocks and
Securitychapter in this manual.
CRUISE ON RADAR READY (if equipped)— Displayed when the
driver pressed the cruise On/Off control and ACC was off.
CRUISE OFF (if equipped)— Displayed when the driver pressed the
Cruise On/Off control and ACC was on.
SET XXX MPH GAP ACC GAP (if equipped)— Displayed when
ACC is active and driver has selected a GAP setting using the steering
wheel control <---> button.
CRUISE OVERRIDE (if equipped)— Displayed when the accelerator
pedal is being pressed while ACC is active.
Instrument Cluster
26
2012 MKT(mkt)
Owners Guide, 1st Printing
USA(fus)
Page 37 of 437
•Not compatible with discs written in Packet Write mode.
•Only the photograph(s) which meet these conditions will be displayed.
Note:When burning a CD, ensure that you ‘close’ or ‘finalize’ the disc
when the CD-burning process finishes (you should select this option
before you start burning). Consult your software manual or the program’s
Help files if you’re not sure how to finalize the disc. Also, write the audio
data into the first session of a multi-session CD as audio systems won’t
be able to sort through other sessions to find more audio tracks.
Rearview camera display (if equipped)
Your vehicle may be equipped with a rearview camera on the tailgate which
provides a video image of the area behind the vehicle. When the
transmission is in (R) Reverse, an image will automatically display on the
touchscreen. Once the vehicle is back in (D) Drive, the image will continue
to display until you are driving over 5 mph (8 km/h). To remove this image
from the screen, press any hard button on the mobile media system.
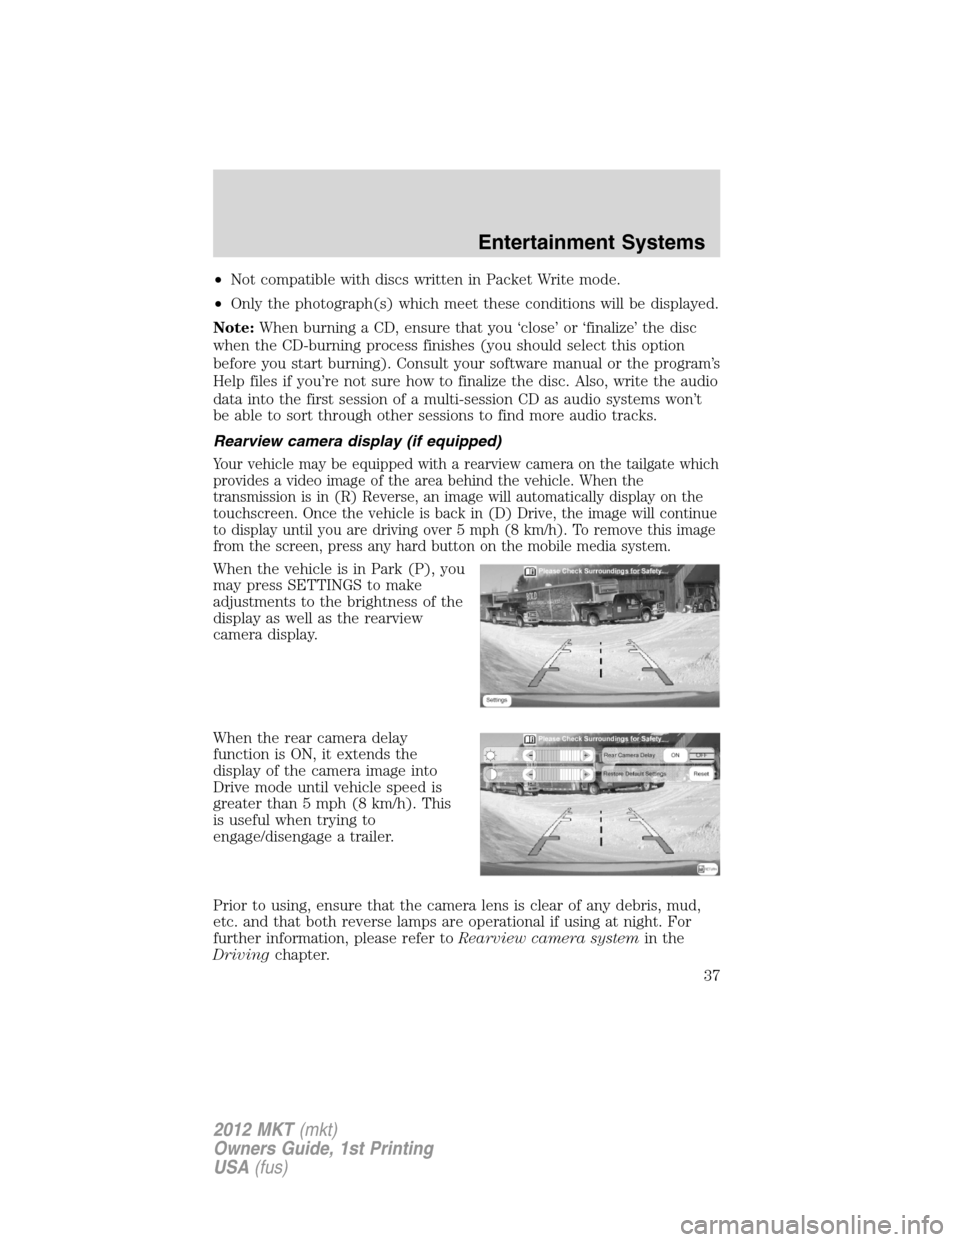
When the vehicle is in Park (P), you
may press SETTINGS to make
adjustments to the brightness of the
display as well as the rearview
camera display.
When the rear camera delay
function is ON, it extends the
display of the camera image into
Drive mode until vehicle speed is
greater than 5 mph (8 km/h). This
is useful when trying to
engage/disengage a trailer.
Prior to using, ensure that the camera lens is clear of any debris, mud,
etc. and that both reverse lamps are operational if using at night. For
further information, please refer toRearview camera systemin the
Drivingchapter.
Entertainment Systems
37
2012 MKT(mkt)
Owners Guide, 1st Printing
USA(fus)
Page 139 of 437
POWER LIFTGATE
You can power open or close the liftgate with the following controls:
•Instrument panel control button
•Transmitter button
•Outside liftgate control button
•Control button in the rear cargo area
Opening and closing the power liftgate:
WARNING:Make sure all persons are clear of the power liftgate
area before using the power liftgate control.
WARNING:To avoid injury to third-row occupants when closing
the liftgate, ensure that the head of any occupant is not in the
path of the closing liftgate.
WARNING:Keep keys out of reach of children. Do not allow
children to play near an open or moving power liftgate.
The liftgate will only operate with the vehicle in P (Park).
When the liftgate is being power closed, a chime will sound three times
as the liftgate begins to power close. A single chime indicates a problem
with the close request, caused by:
•the ignition is on and the transmission is not in P (Park);
•or the battery voltage is below the minimum operating voltage;
•or the vehicle speed is at or above 3 mph (5 km/h).
If the liftgate reverses and starts to close after an open request, a fast
continuous chime indicates excessive load on the gate or a possible strut
failure. If any excessive load is removed and you still have a faster
chime, have the system serviced immediately by your authorized dealer.
Do not attempt to manually force the liftgate to travel faster than the
power system will permit. This will activate the obstacle detection feature.
Note:Cycling the ignition prior to completely latching the liftgate could
result in damage to the liftgate and/or its power components. Make sure
the liftgate is fully latched before operating the vehicle.
Care should be exercised in starting the engine before the liftgate is fully
closed (latched). If the ignition is cycled during a liftgate power close
Driver Controls
139
2012 MKT(mkt)
Owners Guide, 1st Printing
USA(fus)
Page 287 of 437
N (Neutral)
With the gearshift lever in N (Neutral), the vehicle can be started and is
free to roll. Hold the brake pedal down while in this position.
D (Drive) with Overdrive
The normal driving position for the best fuel economy. Transmission
operates in gears one through six.
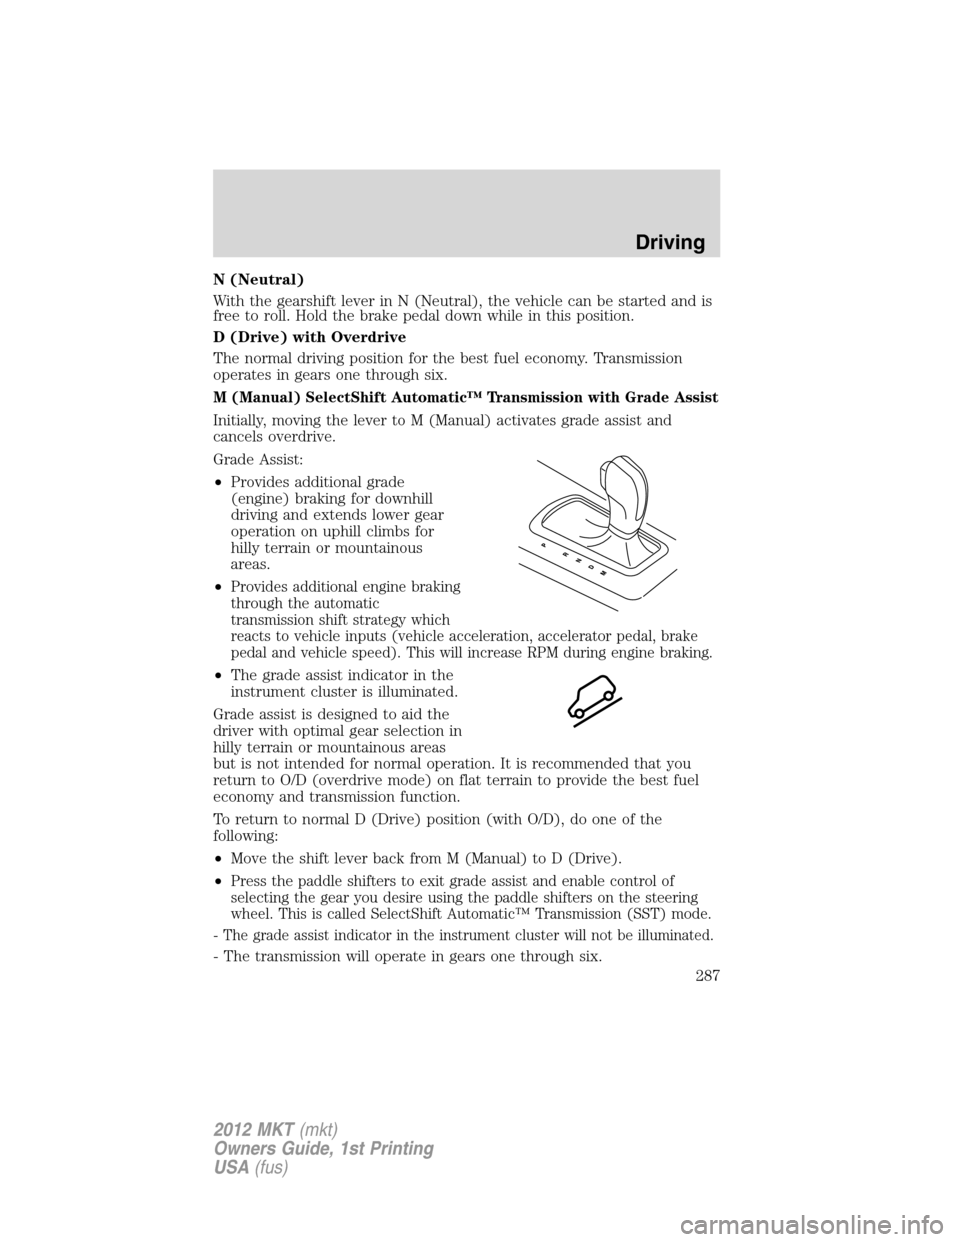
M (Manual) SelectShift Automatic™ Transmission with Grade Assist
Initially, moving the lever to M (Manual) activates grade assist and
cancels overdrive.
Grade Assist:
•Provides additional grade
(engine) braking for downhill
driving and extends lower gear
operation on uphill climbs for
hilly terrain or mountainous
areas.
•
Provides additional engine braking
through the automatic
transmission shift strategy which
reacts to vehicle inputs (vehicle acceleration, accelerator pedal, brake
pedal and vehicle speed). This will increase RPM during engine braking.
•The grade assist indicator in the
instrument cluster is illuminated.
Grade assist is designed to aid the
driver with optimal gear selection in
hilly terrain or mountainous areas
but is not intended for normal operation. It is recommended that you
return to O/D (overdrive mode) on flat terrain to provide the best fuel
economy and transmission function.
To return to normal D (Drive) position (with O/D), do one of the
following:
•Move the shift lever back from M (Manual) to D (Drive).
•
Press the paddle shifters to exit grade assist and enable control of
selecting the gear you desire using the paddle shifters on the steering
wheel. This is called SelectShift Automatic™ Transmission (SST) mode.
- The grade assist indicator in the instrument cluster will not be illuminated.
- The transmission will operate in gears one through six.
Driving
287
2012 MKT(mkt)
Owners Guide, 1st Printing
USA(fus)
Page 288 of 437
Understanding your SelectShift Automatic™ Transmission (SST)
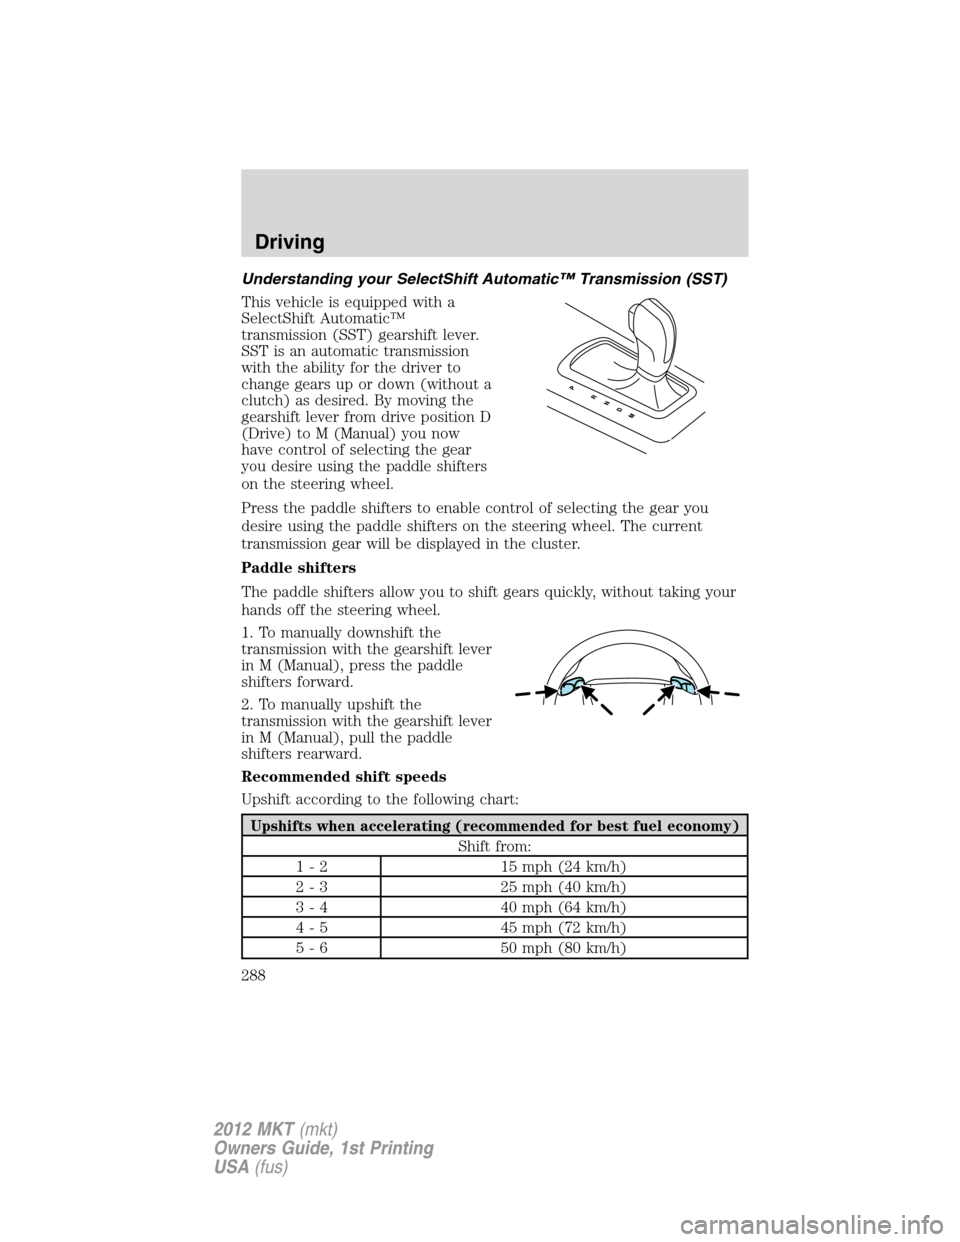
This vehicle is equipped with a
SelectShift Automatic™
transmission (SST) gearshift lever.
SST is an automatic transmission
with the ability for the driver to
change gears up or down (without a
clutch) as desired. By moving the
gearshift lever from drive position D
(Drive) to M (Manual) you now
have control of selecting the gear
you desire using the paddle shifters
on the steering wheel.
Press the paddle shifters to enable control of selecting the gear you
desire using the paddle shifters on the steering wheel. The current
transmission gear will be displayed in the cluster.
Paddle shifters
The paddle shifters allow you to shift gears quickly, without taking your
hands off the steering wheel.
1. To manually downshift the
transmission with the gearshift lever
in M (Manual), press the paddle
shifters forward.
2. To manually upshift the
transmission with the gearshift lever
in M (Manual), pull the paddle
shifters rearward.
Recommended shift speeds
Upshift according to the following chart:
Upshifts when accelerating (recommended for best fuel economy)
Shift from:
1 - 2 15 mph (24 km/h)
2 - 3 25 mph (40 km/h)
3 - 4 40 mph (64 km/h)
4 - 5 45 mph (72 km/h)
5 - 6 50 mph (80 km/h)
Driving
288
2012 MKT(mkt)
Owners Guide, 1st Printing
USA(fus)
Page 313 of 437
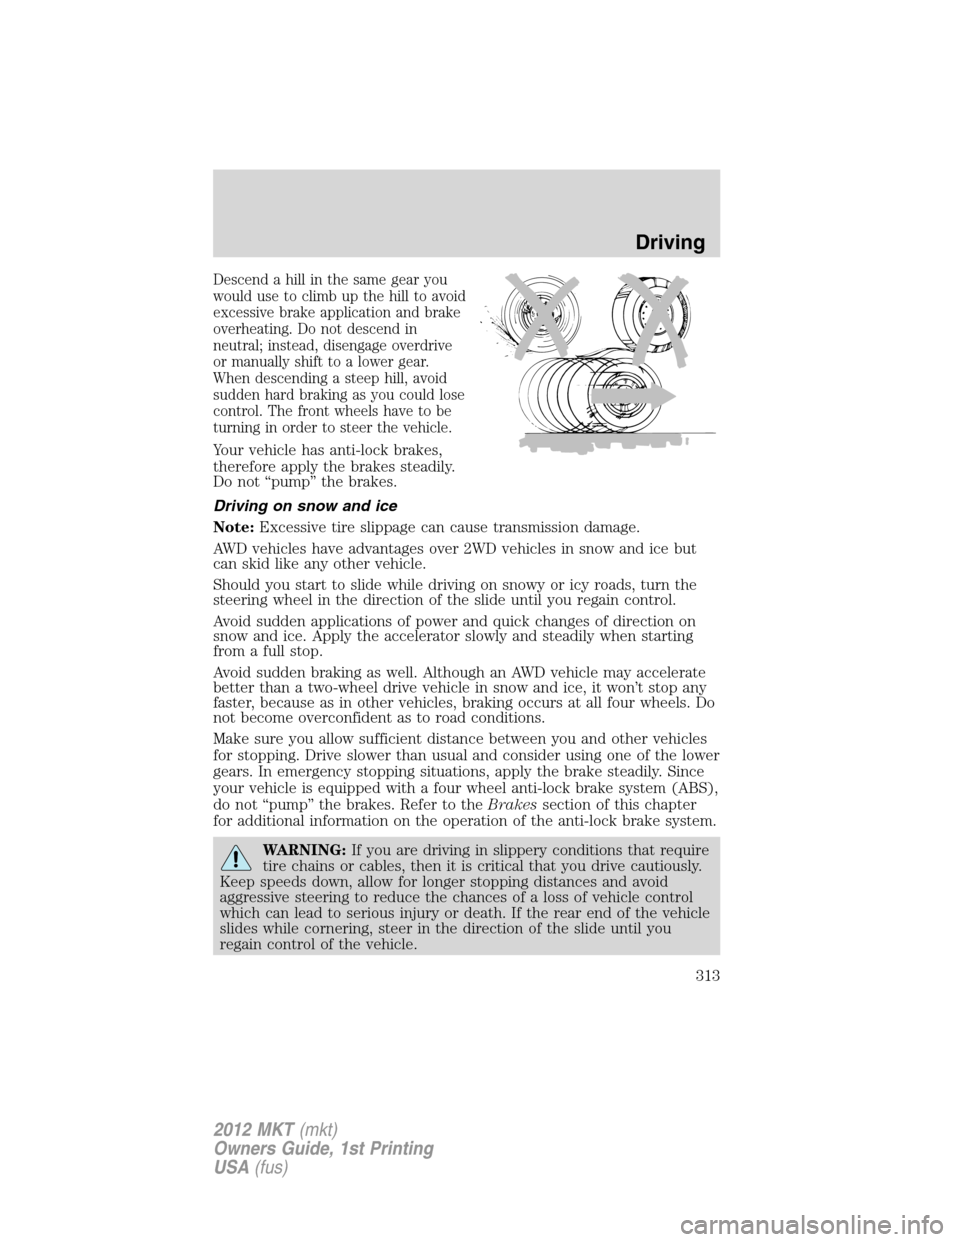
Descend a hill in the same gear you
would use to climb up the hill to avoid
excessive brake application and brake
overheating. Do not descend in
neutral; instead, disengage overdrive
or manually shift to a lower gear.
When descending a steep hill, avoid
sudden hard braking as you could lose
control. The front wheels have to be
turning in order to steer the vehicle.
Your vehicle has anti-lock brakes,
therefore apply the brakes steadily.
Do not “pump” the brakes.
Driving on snow and ice
Note:Excessive tire slippage can cause transmission damage.
AWD vehicles have advantages over 2WD vehicles in snow and ice but
can skid like any other vehicle.
Should you start to slide while driving on snowy or icy roads, turn the
steering wheel in the direction of the slide until you regain control.
Avoid sudden applications of power and quick changes of direction on
snow and ice. Apply the accelerator slowly and steadily when starting
from a full stop.
Avoid sudden braking as well. Although an AWD vehicle may accelerate
better than a two-wheel drive vehicle in snow and ice, it won’t stop any
faster, because as in other vehicles, braking occurs at all four wheels. Do
not become overconfident as to road conditions.
Make sure you allow sufficient distance between you and other vehicles
for stopping. Drive slower than usual and consider using one of the lower
gears. In emergency stopping situations, apply the brake steadily. Since
your vehicle is equipped with a four wheel anti-lock brake system (ABS),
do not “pump” the brakes. Refer to theBrakessection of this chapter
for additional information on the operation of the anti-lock brake system.
WARNING:If you are driving in slippery conditions that require
tire chains or cables, then it is critical that you drive cautiously.
Keep speeds down, allow for longer stopping distances and avoid
aggressive steering to reduce the chances of a loss of vehicle control
which can lead to serious injury or death. If the rear end of the vehicle
slides while cornering, steer in the direction of the slide until you
regain control of the vehicle.
Driving
313
2012 MKT(mkt)
Owners Guide, 1st Printing
USA(fus)
Page 337 of 437
If the vehicle is towed by other means or incorrectly, vehicle
damage may occur.
Ford Motor Company produces a towing manual for all authorized tow
truck operators. Have your tow truck operator refer to this manual for
proper hook-up and towing procedures for your vehicle.
Emergency towing
In case of a roadside emergency with a disabled vehicle (without access
to wheel dollies, car hauling trailer, or flatbed transport vehicle) your
vehicle (regardless of transmission powertrain configuration) can be flat
towed (all wheels on the ground) under the following conditions:
•Vehicle is facing forward so that it is being towed in a forward
direction.
•Place the transmission in N (Neutral). Refer toBrake-shift interlock
in theDrivingchapter for specific instructions if you cannot move the
gear shift lever into N (Neutral).
•Maximum speed is not to exceed 35 mph (56 km/h).
•Maximum distance is 50 miles (80 km).
Roadside Emergencies
337
2012 MKT(mkt)
Owners Guide, 1st Printing
USA(fus)
Page 416 of 437
Multi-point inspection
In order to keep your vehicle running right, it is important to have the
systems on your vehicle checked regularly. This can help identify
potential issues and prevent major problems. Ford Motor Company
recommends the following multi-point inspection be performed at every
scheduled maintenance interval to help ensure your vehicle keeps
running great.
Multi-point inspection – Recommended each visit
Accessory drive belt(s) Half-shaft dust boots (if equipped)
Battery performance Horn operation
Clutch operation (if equipped) Radiator, cooler, heater and A/C hoses
Engine air filter Suspension component for leaks or
damage
Exhaust system Steering and linkage
Exterior lamps and hazard
warning system operationTires for wear and proper pressure,
including spare
Fluid levels*; fill if necessary Windshield for cracks, chips or pits
For oil and fluid leaks Washer spray and wiper operation
*Brake, coolant recovery reservoir, manual and automatic transmission
(with an underhood dipstick), power steering (if equipped) and
window washer
Be sure to ask your dealership service advisor or technician about the
multi-point vehicle inspection. It’s a comprehensive way to perform a
thorough inspection of your vehicle. It’s your checklist that gives you
immediate feedback on the overall condition of your vehicle. You’ll know
what’s been checked, what’s okay, as well as those things that may
require future or immediate attention. The multi-point vehicle inspection
is one more way to keep your vehicle running great!
Scheduled Maintenance
416
2012 MKT(mkt)
Owners Guide, 1st Printing
USA(fus)
Page 420 of 437
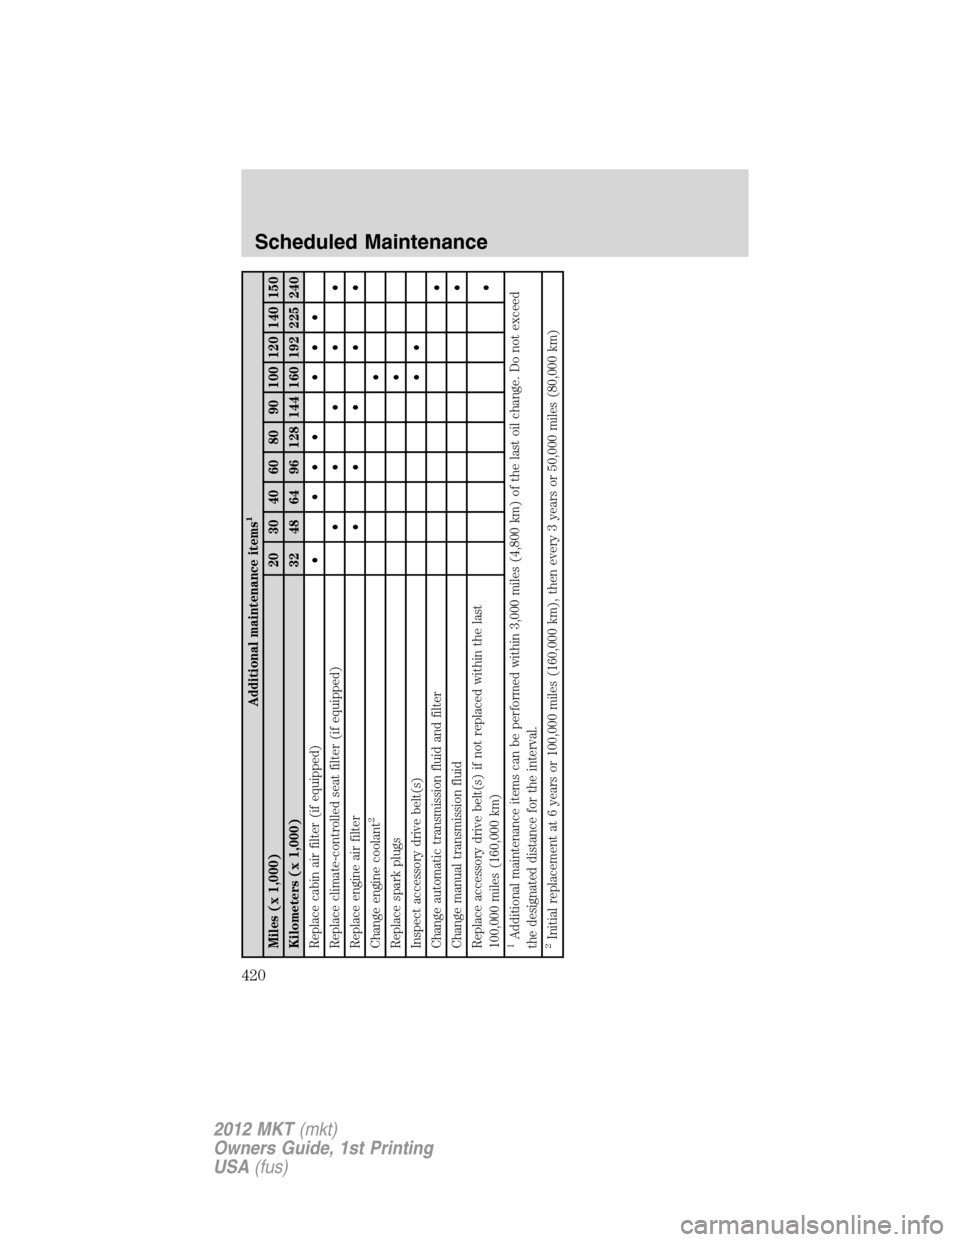
Additional maintenance items
1
Miles (x 1,000) 20 30 40 60 80 90 100 120 140 150
Kilometers (x 1,000) 32 48 64 96 128 144 160 192 225 240
Replace cabin air filter (if equipped)• ••• •••
Replace climate-controlled seat filter (if equipped)•••••
Replace engine air filter•••••
Change engine coolant
2
•
Replace spark plugs•
Inspect accessory drive belt(s)••
Change automatic transmission fluid and filter•
Change manual transmission fluid•
Replace accessory drive belt(s) if not replaced within the last
100,000 miles (160,000 km)•
1Additional maintenance items can be performed within 3,000 miles (4,800 km) of the last oil change. Do not exceed
the designated distance for the interval.2Initial replacement at 6 years or 100,000 miles (160,000 km), then every 3 years or 50,000 miles (80,000 km)
Scheduled Maintenance
420
2012 MKT(mkt)
Owners Guide, 1st Printing
USA(fus)
Page 424 of 437

SPECIAL OPERATING CONDITIONS
If you operate your vehicleprimarilyin any of the following conditions,
you need to perform additional maintenance as indicated. If you
occasionallyoperate your vehicle under any of these conditions, it is
not necessary to perform the additional maintenance. For specific
recommendations, see your dealership service advisor or technician.
Towing a trailer or using a camper or car-top carrier
As required Change engine oil and filter as indicated by
message center and perform services listed in the
Normal Scheduled Maintenance chart
Inspect frequently,
service as requiredInspect and lubricate U-joints
See axle maintenance items underExceptions
Every 30,000 miles
(48,000 km)Change automatic transmission fluid (except
Focus)
Every 60,000 miles
(96,000 km)Change manual transmission fluid
Perform the services in the preceding table when specified or within
3,000 miles (4,800 km) of the OIL CHANGE REQUIRED message
appearing in the message center.
Example #1:The OIL CHANGE REQUIRED message comes on at
28,751 miles (46,270 km); perform the 30,000 mile (48,000 km)
automatic transmission fluid replacement.
Example #2:The OIL CHANGE REQUIRED message hasnotcome on
but the odometer reads 30,000 miles (48,000 km); perform the engine air
filter replacement. (i.e., Intelligent Oil Life Monitor™ was reset at
25,000 miles [40,000 km].)
Scheduled Maintenance
424
2012 MKT(mkt)
Owners Guide, 1st Printing
USA(fus)