window LINCOLN MKT 2017 User Guide
[x] Cancel search | Manufacturer: LINCOLN, Model Year: 2017, Model line: MKT, Model: LINCOLN MKT 2017Pages: 558, PDF Size: 4.59 MB
Page 100 of 558
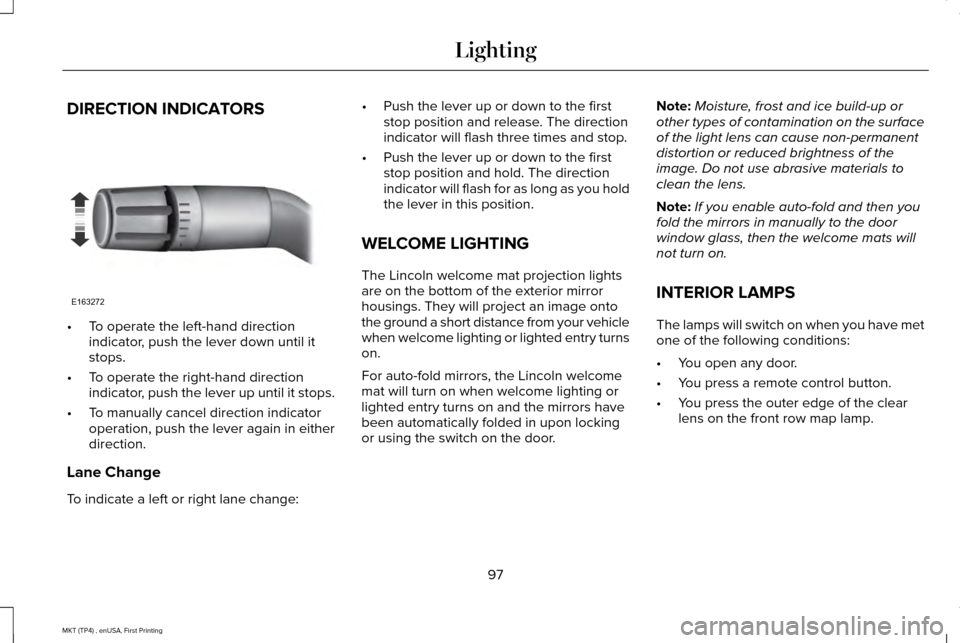
DIRECTION INDICATORS
•
To operate the left-hand direction
indicator, push the lever down until it
stops.
• To operate the right-hand direction
indicator, push the lever up until it stops.
• To manually cancel direction indicator
operation, push the lever again in either
direction.
Lane Change
To indicate a left or right lane change: •
Push the lever up or down to the first
stop position and release. The direction
indicator will flash three times and stop.
• Push the lever up or down to the first
stop position and hold. The direction
indicator will flash for as long as you hold
the lever in this position.
WELCOME LIGHTING
The Lincoln welcome mat projection lights
are on the bottom of the exterior mirror
housings. They will project an image onto
the ground a short distance from your vehicle
when welcome lighting or lighted entry turns
on.
For auto-fold mirrors, the Lincoln welcome
mat will turn on when welcome lighting or
lighted entry turns on and the mirrors have
been automatically folded in upon locking
or using the switch on the door. Note:
Moisture, frost and ice build-up or
other types of contamination on the surface
of the light lens can cause non-permanent
distortion or reduced brightness of the
image. Do not use abrasive materials to
clean the lens.
Note: If you enable auto-fold and then you
fold the mirrors in manually to the door
window glass, then the welcome mats will
not turn on.
INTERIOR LAMPS
The lamps will switch on when you have met
one of the following conditions:
• You open any door.
• You press a remote control button.
• You press the outer edge of the clear
lens on the front row map lamp.
97
MKT (TP4) , enUSA, First Printing LightingE163272
Page 102 of 558
POWER WINDOWS
WARNINGS
Do not leave children unattended in
your vehicle and do not let them play
with the power windows. They may seriously
injure themselves. When closing the power windows, you
should verify they are free of
obstructions and make sure that children and
pets are not in the proximity of the window
openings. Note:
You may hear a pulsing noise when
just one of the windows is open. Lower the
opposite window slightly to reduce this
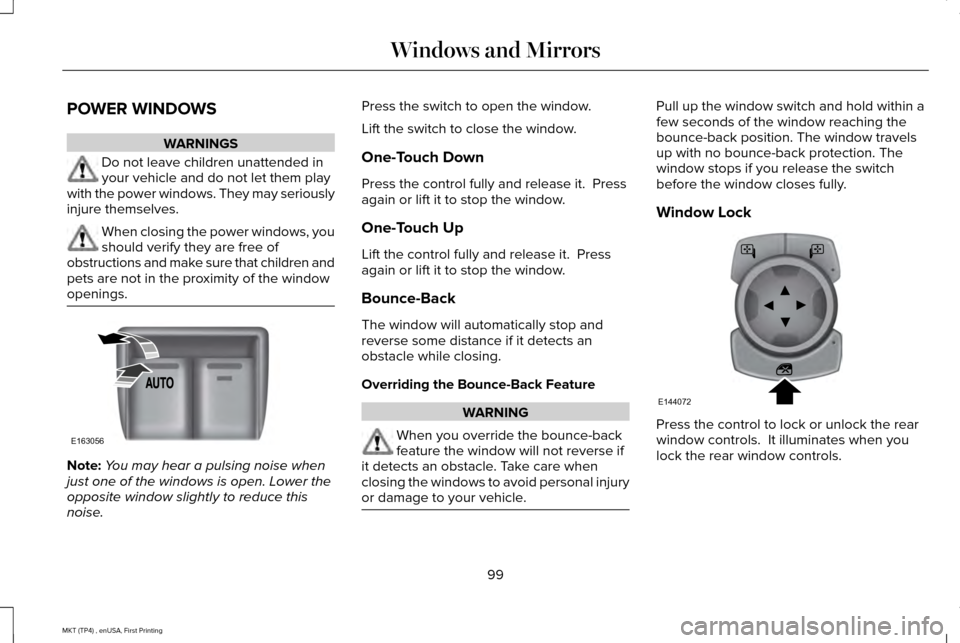
noise. Press the switch to open the window.
Lift the switch to close the window.
One-Touch Down
Press the control fully and release it. Press
again or lift it to stop the window.
One-Touch Up
Lift the control fully and release it. Press
again or lift it to stop the window.
Bounce-Back
The window will automatically stop and
reverse some distance if it detects an
obstacle while closing.
Overriding the Bounce-Back Feature
WARNING
When you override the bounce-back
feature the window will not reverse if
it detects an obstacle. Take care when
closing the windows to avoid personal injury
or damage to your vehicle. Pull up the window switch and hold within a
few seconds of the window reaching the
bounce-back position. The window travels
up with no bounce-back protection. The
window stops if you release the switch
before the window closes fully.
Window Lock
Press the control to lock or unlock the rear
window controls. It illuminates when you
lock the rear window controls.
99
MKT (TP4) , enUSA, First Printing Windows and MirrorsE163056 E144072
Page 103 of 558
Accessory Delay
The window switches remain operational for
several minutes when you switch the ignition
off or until you open either front door.
GLOBAL OPENING AND CLOSING
You can use the remote control to operate
the windows with the ignition off.
Note:
You can enable or disable this feature
in the information display or see an
authorized dealer. See General Information
(page 110).
Note: To operate this feature, accessory
delay must not be active.
Opening the Windows
You can only open the windows for a short
time after you unlock your vehicle with the
remote control. After you unlock your vehicle,
press and hold the remote control unlock
button to open the windows. Release the
button once movement starts. Press the lock
or unlock button to stop movement. Closing the Windows WARNING
When closing the power windows, you
should verify they are free of
obstructions and make sure that children and
pets are not in the proximity of the window
openings. To close the windows, press and hold the
remote control lock button. Release the
button once movement starts. Press the lock
or unlock button to stop movement.
EXTERIOR MIRRORS
Power Exterior Mirrors
WARNING
Do not adjust the mirrors when your
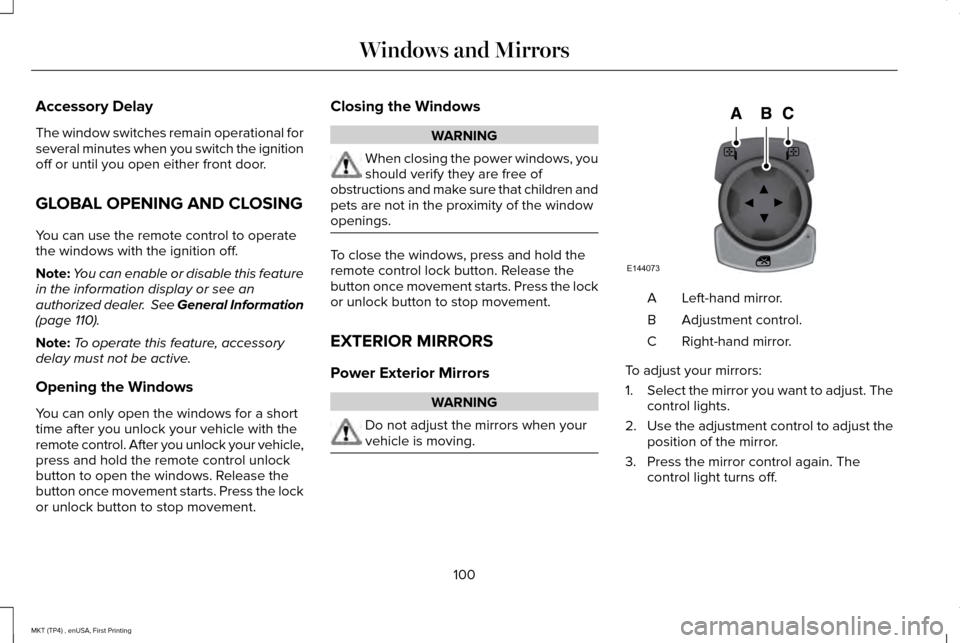
vehicle is moving. Left-hand mirror.
A
Adjustment control.
B
Right-hand mirror.
C
To adjust your mirrors:
1. Select the mirror you want to adjust. The
control lights.
2. Use the adjustment control to adjust the
position of the mirror.
3. Press the mirror control again. The control light turns off.
100
MKT (TP4) , enUSA, First Printing Windows and MirrorsE144073
Page 104 of 558

Fold-Away Exterior Mirrors
Push the mirror toward the door window
glass. Make sure that you fully engage the
mirror in its support when returning it to its
original position.
Heated Exterior Mirrors
See Heated Windows and Mirrors (page
134).
Memory Mirrors
You can save and recall the mirror positions
through the memory function. See Memory
Function
(page 141).
Auto-dimming Feature
The driver exterior mirror automatically dims
with the auto-dimming interior mirror.
Direction Indicator Mirrors
While the vehicle is running, the
forward-facing portion of the appropriate
mirror housing blinks when you switch on
the direction indicator. Puddle Lamps
The lamps on the bottom part of the mirror
housing light when you use your transmitter
to unlock the doors or when you open a
door.
Integrated Blind Spot Mirror
(If Equipped)
WARNING
Objects in the blind spot mirror are
closer than they appear.
Blind spot mirrors have an integrated convex
mirror built into the upper outboard corner
of the exterior mirrors. They can assist you
by increasing visibility along the side of your
vehicle.
Check the main mirror first before a lane
change, then check the blind spot mirror. If
no vehicles are present in the blind spot
mirror and the traffic in the adjacent lane is
at a safe distance, signal that you are going
to change lanes. Glance over your shoulder
to verify traffic is clear, and carefully change
lanes.
101
MKT (TP4) , enUSA, First Printing Windows and MirrorsA
B
C
E138665
Page 105 of 558
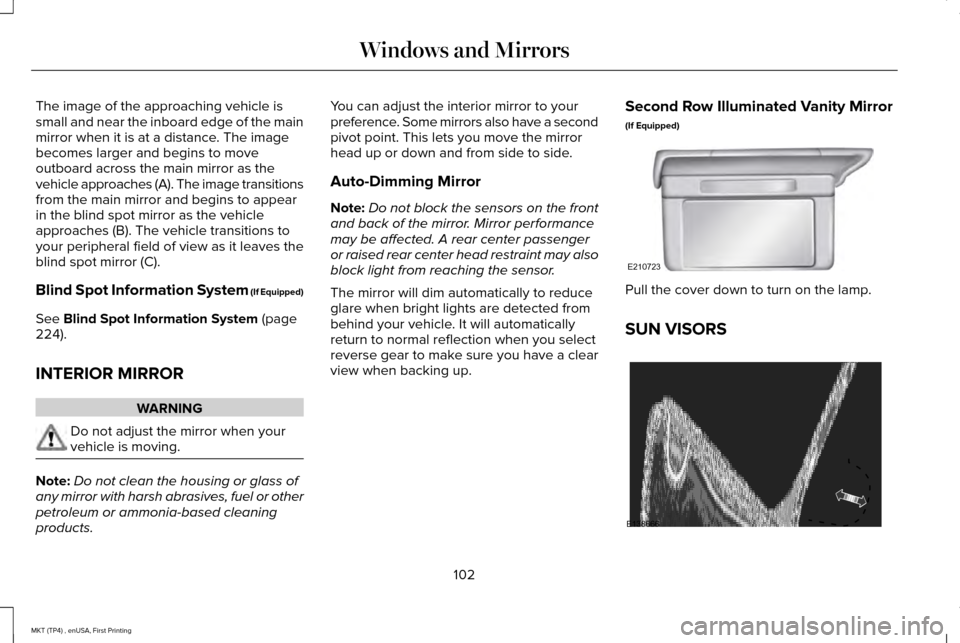
The image of the approaching vehicle is
small and near the inboard edge of the main
mirror when it is at a distance. The image
becomes larger and begins to move
outboard across the main mirror as the
vehicle approaches (A). The image transitions
from the main mirror and begins to appear
in the blind spot mirror as the vehicle
approaches (B). The vehicle transitions to
your peripheral field of view as it leaves the
blind spot mirror (C).
Blind Spot Information System (If Equipped)
See Blind Spot Information System (page
224).
INTERIOR MIRROR WARNING
Do not adjust the mirror when your
vehicle is moving.
Note:
Do not clean the housing or glass of
any mirror with harsh abrasives, fuel or other
petroleum or ammonia-based cleaning
products. You can adjust the interior mirror to your
preference. Some mirrors also have a second
pivot point. This lets you move the mirror
head up or down and from side to side.
Auto-Dimming Mirror
Note:
Do not block the sensors on the front
and back of the mirror. Mirror performance
may be affected. A rear center passenger
or raised rear center head restraint may also
block light from reaching the sensor.
The mirror will dim automatically to reduce
glare when bright lights are detected from
behind your vehicle. It will automatically
return to normal reflection when you select
reverse gear to make sure you have a clear
view when backing up. Second Row Illuminated Vanity Mirror
(If Equipped) Pull the cover down to turn on the lamp.
SUN VISORS
102
MKT (TP4) , enUSA, First Printing Windows and MirrorsE210723 E138666
Page 106 of 558
Rotate the sun visor toward the side window
and extend it rearward for extra shade.
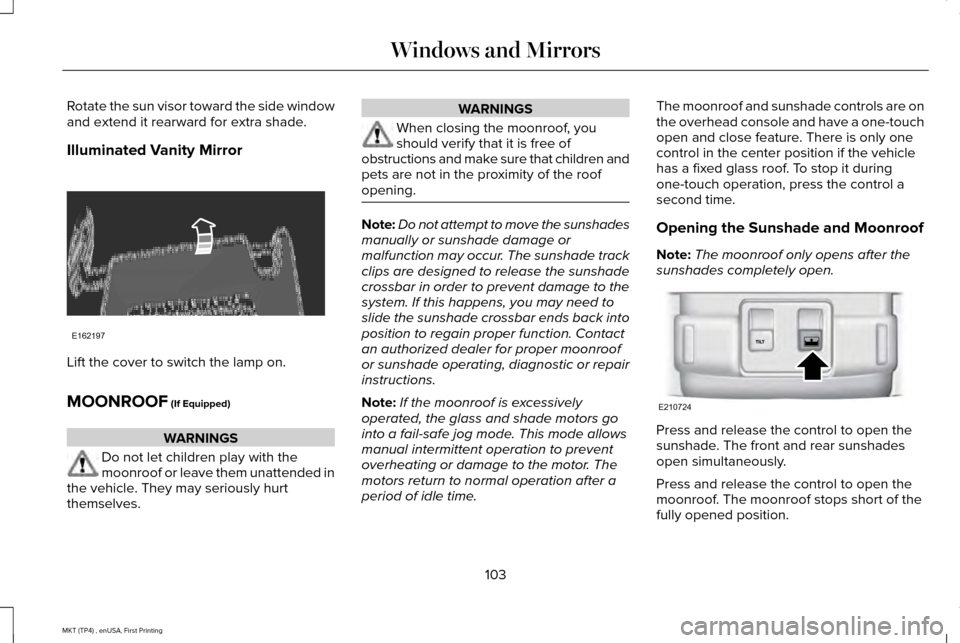
Illuminated Vanity Mirror
Lift the cover to switch the lamp on.
MOONROOF (If Equipped)
WARNINGS
Do not let children play with the
moonroof or leave them unattended in
the vehicle. They may seriously hurt
themselves. WARNINGS
When closing the moonroof, you
should verify that it is free of
obstructions and make sure that children and
pets are not in the proximity of the roof
opening. Note:
Do not attempt to move the sunshades
manually or sunshade damage or
malfunction may occur. The sunshade track
clips are designed to release the sunshade
crossbar in order to prevent damage to the
system. If this happens, you may need to
slide the sunshade crossbar ends back into
position to regain proper function. Contact
an authorized dealer for proper moonroof
or sunshade operating, diagnostic or repair
instructions.
Note: If the moonroof is excessively
operated, the glass and shade motors go
into a fail-safe jog mode. This mode allows
manual intermittent operation to prevent
overheating or damage to the motor. The
motors return to normal operation after a
period of idle time. The moonroof and sunshade controls are on
the overhead console and have a one-touch
open and close feature. There is only one
control in the center position if the vehicle
has a fixed glass roof. To stop it during
one-touch operation, press the control a
second time.
Opening the Sunshade and Moonroof
Note:
The moonroof only opens after the
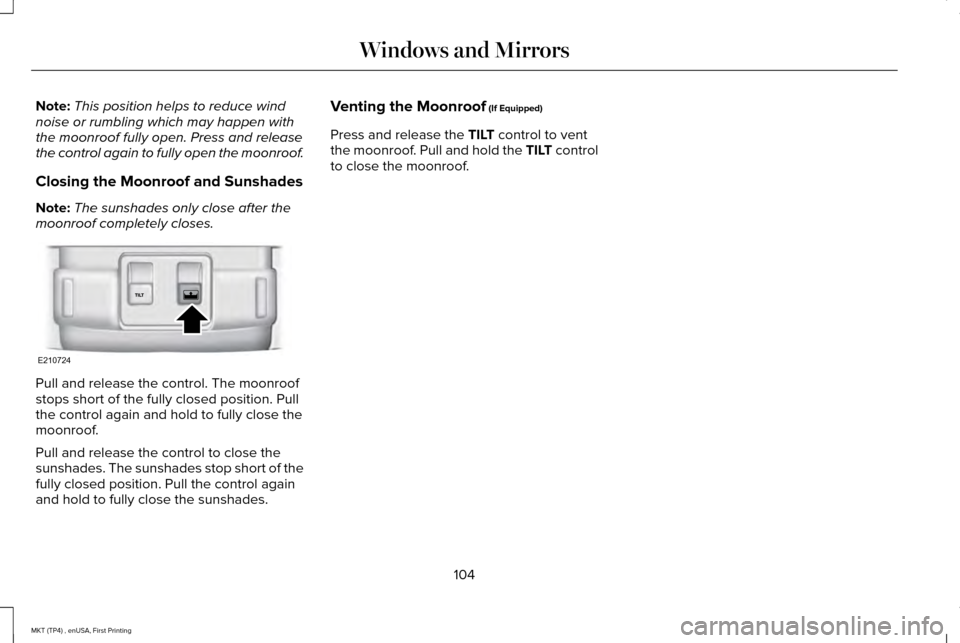
sunshades completely open. Press and release the control to open the
sunshade. The front and rear sunshades
open simultaneously.
Press and release the control to open the
moonroof. The moonroof stops short of the
fully opened position.
103
MKT (TP4) , enUSA, First Printing Windows and MirrorsE162197 E210724
Page 107 of 558
Note:
This position helps to reduce wind
noise or rumbling which may happen with
the moonroof fully open. Press and release
the control again to fully open the moonroof.
Closing the Moonroof and Sunshades
Note: The sunshades only close after the
moonroof completely closes. Pull and release the control. The moonroof
stops short of the fully closed position. Pull
the control again and hold to fully close the
moonroof.
Pull and release the control to close the
sunshades. The sunshades stop short of the
fully closed position. Pull the control again
and hold to fully close the sunshades. Venting the Moonroof (If Equipped)
Press and release the
TILT control to vent
the moonroof. Pull and hold the TILT control
to close the moonroof.
104
MKT (TP4) , enUSA, First Printing Windows and MirrorsE210724
Page 119 of 558

Settings
5, 10 or 15 minutes
Duration
System
Remote Open
Windows
Remote Close
Courtesy Wipe
Wipers
Rain Sensing
MyKeys and Admin Keys
Mykey Status
MyKey
Hold OK to Create MyKey
Create MyKey
Always On or User Selectable
911 Assist
Traction Control
Choose desired speed or off
Max Speed
Speed Minder
On or Off
Volume Limiter
Always On or User Selectable
Do Not Disturb
On or Off
MyKey Report
Hold
OK to Clear All MyKeys
Clear MyKeys
116
MKT (TP4) , enUSA, First Printing Information Displays
Page 134 of 558
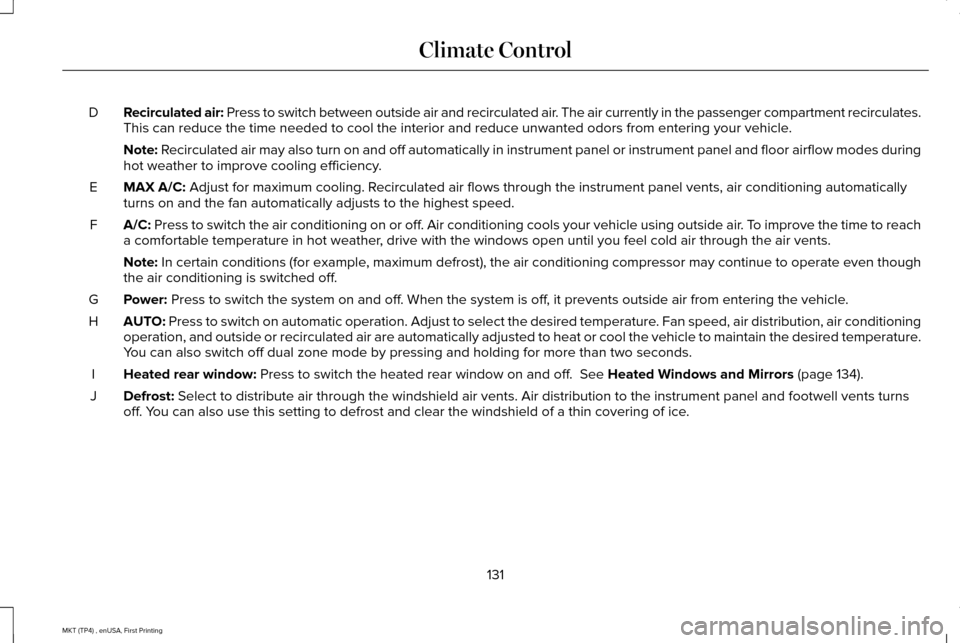
Recirculated air: Press to switch between outside air and recirculated air. The air currently in the passenger compartment recirculates.
This can reduce the time needed to cool the interior and reduce unwanted\
odors from entering your vehicle.
D
Note: Recirculated air may also turn on and off automatically in instrument pan\
el or instrument panel and floor airflow modes during
hot weather to improve cooling efficiency.
MAX A/C:
Adjust for maximum cooling. Recirculated air flows through the instrument panel vents, air conditioni\
ng automatically
turns on and the fan automatically adjusts to the highest speed.
E
A/C:
Press to switch the air conditioning on or off. Air conditioning cools your vehicle using outside air. To improve the time to reach
a comfortable temperature in hot weather, drive with the windows open until you feel cold air through the air ve\
nts.
F
Note:
In certain conditions (for example, maximum defrost), the air conditioning compressor may continue to ope\
rate even though
the air conditioning is switched off.
Power:
Press to switch the system on and off. When the system is off, it prevents outside air from entering the vehicle.
G
AUTO:
Press to switch on automatic operation. Adjust to select the desired te\
mperature. Fan speed, air distribution, air conditioning
operation, and outside or recirculated air are automatically adjusted to\
heat or cool the vehicle to maintain the desired temperature .
You can also switch off dual zone mode by pressing and holding for more t\
han two seconds.
H
Heated rear window:
Press to switch the heated rear window on and off. See Heated Windows and Mirrors (page 134).
I
Defrost:
Select to distribute air through the windshield air vents. Air distribu\
tion to the instrument panel and footwell vents turns
off. You can also use this setting to defrost and clear the windshield of a th\
in covering of ice.
J
131
MKT (TP4) , enUSA, First Printing Climate Control
Page 135 of 558
HINTS ON CONTROLLING THE
INTERIOR CLIMATE
General Hints
Note:
Prolonged use of recirculated air may
cause the windows to fog up.
Note: You may feel a small amount of air
from the footwell air vents regardless of the
air distribution setting.
Note: To reduce humidity build-up inside
your vehicle, do not drive with the system
switched off or with recirculated air always
switched on.
Note: Do not place objects under the front
seats as this may interfere with the airflow
to the rear seats.
Note: Remove any snow, ice or leaves from
the air intake area at the base of the
windshield.
Note: To improve the time to reach a
comfortable temperature in hot weather,
drive with the windows open until you feel
cold air through the air vents. Automatic Climate Control
Note:
Adjusting the settings when your
vehicle interior is extremely hot or cold is not
necessary. The system automatically adjusts
to heat or cool the cabin to your selected
temperature as quickly as possible. For the
system to function efficiently, the instrument
panel and side air vents should be fully
open.
Note: If you select AUTO during cold outside
temperatures, the system directs airflow to
the windshield and side window vents. In
addition, the fan may run at a slower speed
until the engine warms up.
Note: If you select AUTO during hot outside
temperatures and when the inside of the
vehicle is hot, the system automatically uses
recirculated air to maximize interior cooling.
When the interior reaches the selected
temperature, the system automatically
switches to using outside air.
Heating the Interior Quickly
1. Select the
AUTO function. 2. Adjust the temperature function to the
desired setting.
Recommended Settings for Heating
1. Select the
AUTO function.
2. Adjust the temperature function to the desired setting. Use 72°F (22°C) as a
starting point, then adjust the setting as
necessary.
Cooling the Interior Quickly
1. Select the
MAX A/C function.
Recommended Settings for Cooling
1. Select the
AUTO function.
2. Adjust the temperature function to the desired setting. Use 72°F (22°C) as a
starting point, then adjust the setting as
necessary.
Side Window Defogging in Cold
Weather
1. Press the defrost button.
132
MKT (TP4) , enUSA, First Printing Climate Control