four wheel drive LINCOLN MKT 2017 Owners Manual
[x] Cancel search | Manufacturer: LINCOLN, Model Year: 2017, Model line: MKT, Model: LINCOLN MKT 2017Pages: 558, PDF Size: 4.59 MB
Page 187 of 558
USING ALL-WHEEL DRIVE
All-wheel drive uses all four wheels to power
the vehicle. This increases traction, enabling
you to drive over terrain and road conditions
that a conventional two-wheel drive vehicle
cannot. The AWD system is active all the time
and requires no input from the operator.
Note:
Your AWD vehicle is not intended for
off-road use. The AWD feature gives your
vehicle some limited off-road capabilities in
which driving surfaces are relatively level,
obstruction-free and otherwise similar to
normal on-road driving conditions. Operating
your vehicle under other than those
conditions could subject the vehicle to
excessive stress which might result in
damage which is not covered under your
warranty.
Note: When an AWD system fault is present,
the warning Check AWD displays in the
information display. The AWD system is not
functioning correctly and defaults to
front-wheel drive. When this warning
displays, have your vehicle serviced at an
authorized dealer. Note:
The AWD OFF message may also
appear in the information display if the AWD
system overheats and defaults to front-wheel
drive. This may occur if the vehicle is
operated in extreme conditions with
excessive wheel slip, such as deep sand.
To resume normal AWD function as soon as
possible, stop the vehicle in a safe location
and stop the engine for at least 10 minutes.
After the engine has been restarted and the
AWD system has adequately cooled, the
AWD OFF
message will turn off and normal
AWD function returns. If the engine is not
stopped, the
AWD OFF message turns off
when the system cools and normal AWD
function returns.
184
MKT (TP4) , enUSA, First Printing All-Wheel Drive
(If Equipped)
Page 191 of 558
acceleration or braking which could result
in an increased risk of loss of vehicle
control, vehicle rollover and/or personal
injury. Use all available road surface to
return the vehicle to a safe direction of
travel.
• In the event of an emergency stop, avoid
skidding the tires and do not attempt any
sharp steering wheel movements.
• If the vehicle goes from one type of
surface to another (that is, from concrete
to gravel) there will be a change in the
way the vehicle responds to a maneuver
(steering, acceleration or braking). Again,
avoid these abrupt inputs.
Sand
Most of the time traction control improves
tire traction by managing wheel slip through
Brake, Engine, and AWD calibrations.
However, during low speed driving, disabling
traction control in deep sand can help keep
the wheels moving to maintain vehicle
momentum. When driving over sand, try to keep all four
wheels on the most solid area of the trail.
Avoid reducing the tire pressures but shift
to a lower gear and drive steadily through
the terrain. Apply the accelerator slowly and
avoid spinning the wheels.
Do not drive your vehicle in deep sand for
an extended period of time. This could cause
the AWD system to overheat and default to
front-wheel drive. If this occurs, an AWD OFF
message displays in the information display.
To resume normal AWD function as soon as
possible, stop the vehicle in a safe location
and stop the engine for at least 10 minutes.
After the engine has been restarted and the
AWD system has adequately cooled, the
AWD OFF message turns off and normal
AWD function returns. In the event the
engine is not stopped, the
AWD OFF
message turns off when the system cools
and normal AWD function returns.
When driving at slow speeds in deep sand
under high outside temperatures, use L (Low)
gear when possible. L (Low) gear operation
will maximize the engine and transmission
cooling capability. Under severe operating conditions, the A/C
may cycle on and off to protect overheating
of the engine.
Avoid excessive speed because vehicle
momentum can work against you and cause
the vehicle to become stuck to the point that
assistance may be required from another
vehicle. Remember, you may be able to back
out the way you came if you proceed with
caution.
Mud and Water
If you must drive through high water, drive
slowly. Traction or brake capability may be
limited.
When driving through water, determine the
depth; avoid water higher than the bottom
of the wheel rims (for cars) or the bottom of
the hubs (for trucks) (if possible) and proceed
slowly. If the ignition system gets wet, the
vehicle may stall.
188
MKT (TP4) , enUSA, First Printing All-Wheel Drive
(If Equipped)
Page 193 of 558
Descend a hill in the same gear you would
use to climb up the hill to avoid excessive
brake application and brake overheating. Do
not descend in neutral; instead, disengage
overdrive or manually shift to a lower gear.
When descending a steep hill, avoid sudden
hard braking as you could lose control. The
front wheels have to be turning in order to
steer the vehicle.
Your vehicle has anti-lock brakes, therefore
apply the brakes steadily. Do not “pump
” the
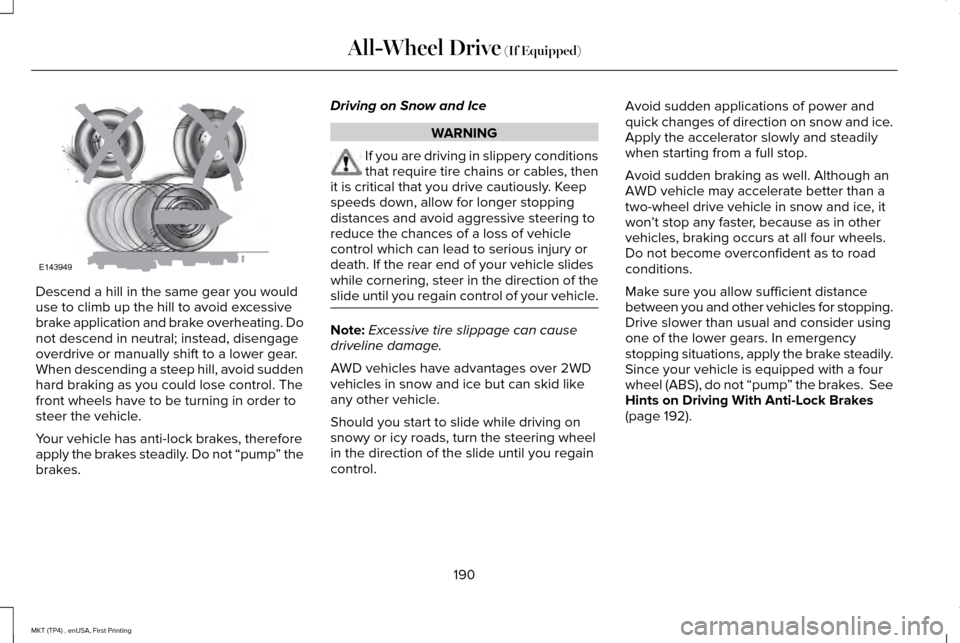
brakes. Driving on Snow and Ice WARNING
If you are driving in slippery conditions
that require tire chains or cables, then
it is critical that you drive cautiously. Keep
speeds down, allow for longer stopping
distances and avoid aggressive steering to
reduce the chances of a loss of vehicle
control which can lead to serious injury or
death. If the rear end of your vehicle slides
while cornering, steer in the direction of the
slide until you regain control of your vehicle. Note:
Excessive tire slippage can cause
driveline damage.
AWD vehicles have advantages over 2WD
vehicles in snow and ice but can skid like
any other vehicle.
Should you start to slide while driving on
snowy or icy roads, turn the steering wheel
in the direction of the slide until you regain
control. Avoid sudden applications of power and
quick changes of direction on snow and ice.
Apply the accelerator slowly and steadily
when starting from a full stop.
Avoid sudden braking as well. Although an
AWD vehicle may accelerate better than a
two-wheel drive vehicle in snow and ice, it
won
’t stop any faster, because as in other
vehicles, braking occurs at all four wheels.
Do not become overconfident as to road
conditions.
Make sure you allow sufficient distance
between you and other vehicles for stopping.
Drive slower than usual and consider using
one of the lower gears. In emergency
stopping situations, apply the brake steadily.
Since your vehicle is equipped with a four
wheel (ABS), do not “pump ” the brakes. See
Hints on Driving With Anti-Lock Brakes
(page 192).
190
MKT (TP4) , enUSA, First Printing All-Wheel Drive
(If Equipped)E143949
Page 251 of 558
•
If your transmission is equipped with a
Grade Assist or Tow/Haul feature, use
this feature when towing. This provides
engine braking and helps eliminate
excessive transmission shifting for
optimum fuel economy and transmission
cooling.
• Allow more distance for stopping with a
trailer attached. Anticipate stops and
brake gradually.
• Avoid parking on a grade. However, if
you must park on a grade:
1. Turn the steering wheel to point your vehicle tires away from traffic flow.
2. Set your vehicle parking brake.
3. Place the automatic transmission in position P.
4. Place wheel chocks in front and back of the trailer wheels. (Chocks not included
with vehicle.)
Launching or Retrieving a Boat or
Personal Watercraft (PWC)
Note: Disconnect the wiring to the trailer
before
backing the trailer into the water. Note:
Reconnect the wiring to the trailer
after
removing the trailer from the water.
When backing down a ramp during boat
launching or retrieval:
• Do not allow the static water level to rise
above the bottom edge of the rear
bumper.
• Do not allow waves to break higher than
6 inches (15 centimeters) above the
bottom edge of the rear bumper.
Exceeding these limits may allow water to
enter vehicle components:
• Causing internal damage to the
components.
• Affecting driveability, emissions, and
reliability.
Any time the rear axle submerges in water,
replace the rear axle lubricant. Water may
contaminate the rear axle lubricant, which is
not a normal maintenance inspection item
unless there is a possibility of a leak or other
axle repair is required. TOWING THE VEHICLE ON FOUR
WHEELS - 3.5L ECOBOOST™/3.7L
Emergency Towing
If your vehicle becomes inoperable (without
access to wheel dollies or vehicle transport
trailer), it can be flat-towed (all wheels on the
ground, regardless of the powertrain and
transmission configuration) under the
following conditions:
•
Your vehicle is facing forward for towing
in a forward direction.
• Shift into neutral (N). If you cannot shift
into neutral (N), you may need to override
it.
See Transmission (page 180).
• Maximum speed is
35 mph (56 km/h).
• Maximum distance is
50 mi (80 km). WARNING
If your vehicle has a steering wheel
lock make sure the ignition is in the
accessory or on position when being towed. 248
MKT (TP4) , enUSA, First Printing Towing
Page 252 of 558

Recreational Towing
Note:
Put your climate control system in
recirculated air mode to prevent exhaust
fumes from entering the vehicle. See
Climate Control (page 130).
Follow these guidelines if you have a need
for recreational (RV) towing. An example of
recreational towing would be towing your
vehicle behind a motorhome. We designed
these guidelines to prevent damage to your
transmission.
You can tow your 3.5L EcoBoost or 3.7L
Duratec equipped vehicle with all four
wheels on the ground.
If you tow your vehicle with all four wheels
on the ground:
• Tow only in the forward direction.
• Release the parking brake.
Vehicles with Keyless Start
1. Start the vehicle by pressing the brake pedal, and then pressing the keyless start
button until the vehicle starts. 2. Press the brake pedal and shift the
gearshift into neutral (N).
3. Turn the vehicle off by pressing the keyless start button once.
4. Disconnect the negative (black) cable from the battery. You need the door key
to lock and unlock doors when the
battery cable is disconnected.
See
Changing the 12V Battery (page 301).
Note: The anti-theft system does not work
until you reconnect the battery cable.
Start the engine within 15 minutes of
reconnecting the battery cable.
Vehicles with an Ignition Key
1. Start the vehicle by pressing the brake pedal, and then turning the ignition key
until the vehicle starts.
2. Press the brake pedal and shift the transmission into neutral (N).
3. Turn off your vehicle by turning the ignition key past the accessory position.
The key position is between the
accessory and off positions. 4. Disconnect the negative (black) cable
from the battery. See Changing the 12V
Battery
(page 301).
Note: The anti-theft system does not work
until you reconnect the battery cable.
Start the engine within 15 minutes of
reconnecting the battery cable.
All Vehicles
• Do not exceed
65 mph (105 km/h).
• Start the engine and allow it to run for
five minutes at the beginning of each day
and every six hours thereafter. With the
engine running and your foot on the
brake, shift into drive (D) and then into
reverse (R) before shifting back into
neutral (N).
Front-wheel Drive Vehicles
Alternatively, you can tow your front-wheel
drive vehicle with the front wheels off the
ground by using a tow dolly, or with all four
wheels off the ground using a vehicle
transport trailer. If you are using a tow dolly,
follow the instructions specified by the
equipment provider.
249
MKT (TP4) , enUSA, First Printing Towing
Page 253 of 558
All-wheel Drive Vehicles
Alternatively, you can tow your all-wheel
drive vehicle with all four wheels off the
ground using a vehicle transport trailer. Do
not tow your all-wheel drive vehicle with the
front wheels off the ground (by using a tow
dolly) and the rear wheels on the ground.
This causes damage to your all-wheel drive
system. If you are using a vehicle transport
trailer, follow the instruction specified by the
equipment provider.
250
MKT (TP4) , enUSA, First Printing Towing
Page 309 of 558
High Intensity Discharge Headlamp
These lamps operate at a high voltage. See
an authorized dealer if they fail.
Front Fog Lamp
1. Switch all of the lamps and the ignition
off. 2. Use suitable tools, for example a
screwdriver and a socket wrench to
remove the four screws from the wheel
arch liner.
3. You can now carefully reposition the wheel arch liner to allow access to the
front fog lamp bulb and electrical
connector.
4. Disconnect the electrical connector. 5. Turn the bulb holder counterclockwise
and remove it.
Note: You cannot separate the bulb from
the bulb holder.
Note: Do not touch the bulb glass. Front Direction Indicator Lamp
If a front direction indicator lamp fails, see
an authorized dealer.
LED Lamps
LED lamps are not serviceable items. See an
authorized dealer if they fail.
The following lamps are LED:
•
Side direction indicators.
• Approach lamp.
• Brake and rear lamps.
• Rear direction indicators.
• Reversing lamps.
• Central high mounted brake lamp.
• Front side marker lamps.
• Front parking lamps.
306
MKT (TP4) , enUSA, First Printing MaintenanceE220461 E174588
Page 324 of 558
GENERAL INFORMATION
Use only approved wheel and tire sizes,
using other sizes could damage your vehicle.
If you change the diameter of the tires from
that fitted at the factory, the speedometer
may not display the correct speed. Take your
vehicle to an authorized Ford dealer to have
the system reprogrammed. If you intend to
change the size of the wheels from that fitted
by the manufacturer, you can check the
suitability with an authorized dealer.
Additional information related to the
functionality and maintenance of your tires
can be found later in this chapter. See Tire
Care (page 323).
The Ford recommended tire inflation
pressures can be found on the Tire Label,
which is located on the B-pillar or the edge
of the driver's door. This information can also
be found on the Safety Compliance
Certification Label (affixed to either the door
hinge pillar, door-latch post, or the door edge
that meets the door last post; next to the
driver’ s seating position). Ford strongly recommends maintaining these
tire pressures at all times. Failure to follow
the tire pressure recommendations can
cause uneven treadwear patterns, reduced
fuel economy, and adversely affect the way
your vehicle handles.
Note:
Check and set the tire pressure at the
ambient temperature in which you are
intending to drive your vehicle and when the
tires are cold.
Note: Check your tire pressures at least once
per month.
Set the pressure for your spare tire to the
highest value given for your vehicle and tire
size combination (if equipped). Notice to utility vehicle and truck
owners WARNINGS
Utility vehicles have a significantly
higher rollover rate than other types of
vehicles. To reduce the risk of serious injury
or death from a rollover or other crash you
must avoid sharp turns and abrupt
maneuvers, drive at safe speeds for the
conditions, keep tires inflated to Ford
recommended pressures, never overload or
improperly load your vehicle, and make sure
every passenger is properly restrained. In a rollover crash, an unbelted person
is significantly more likely to die than
a person wearing a seat belt. All occupants
must wear seat belts and children/infants
must use appropriate restraints to minimize
the risk of injury or ejection. Do not become overconfident in the
ability of four-wheel drive vehicles.
Although a four-wheel drive vehicle may
accelerate better than a two-wheel drive
vehicle in low traction situations, it won't stop
any faster than two-wheel drive vehicles.
Always drive at a safe speed. 321
MKT (TP4) , enUSA, First Printing Wheels and Tires
Page 330 of 558
F. 95: Indicates the tire's load index. It
is an index that relates to how much
weight a tire can carry. You may find this
information in your owner’ s manual. If
not, contact a local tire dealer.
Note: You may not find this information
on all tires because it is not required by
federal law.
G.
H: Indicates the tire's speed rating.
The speed rating denotes the speed at
which a tire is designed to be driven for
extended periods of time under a
standard condition of load and inflation
pressure. The tires on your vehicle may
operate at different conditions for load
and inflation pressure. These speed
ratings may need to be adjusted for the
difference in conditions. The ratings
range from
81 mph (130 km/h) to
186 mph (299 km/h). These ratings are
listed in the following chart.
Note: You may not find this information
on all tires because it is not required by
federal law. Speed rating
Letter rating
81 mph (130 km/h)
M
87 mph (140 km/h)
N
99 mph (159 km/h)
Q
106 mph (171 km/h)
R
112 mph (180 km/h)
S
118 mph (190 km/h)
T
124 mph (200 km/h)
U
130 mph (210 km/h)
H
149 mph (240 km/h)
V Speed rating
Letter rating
168 mph (270 km/h)
W
186 mph (299 km/h)
Y
Note: For tires with a maximum speed
capability over 149 mph (240 km/h), tire
manufacturers sometimes use the letters
ZR. For those with a maximum speed
capability over 186 mph (299 km/h), tire
manufacturers always use the letters
ZR.
H. U.S. DOT Tire Identification Number
(TIN):
This begins with the letters DOT
and indicates that the tire meets all
federal standards. The next two
numbers or letters are the plant code
designating where it was manufactured,
the next two are the tire size code and
the last four numbers represent the
week and year the tire was built. For
example, the numbers 317 mean the 31st
week of 1997. After 2000, the numbers
327
MKT (TP4) , enUSA, First Printing Wheels and Tires
Page 331 of 558
go to four digits. For example, 2501
means the 25th week of 2001. The
numbers in between are identification
codes used for traceability. This
information is used to contact customers
if a tire defect requires a recall.
I. M+S or M/S: Mud and Snow, or
AT:
All Terrain, or
AS:
All Season.
J.
Tire Ply Composition and Material
Used: Indicates the number of plies or
the number of layers of rubber-coated
fabric in the tire tread and sidewall. Tire
manufacturers also must indicate the ply
materials in the tire and the sidewall,
which include steel, nylon, polyester,
and others. K.
Maximum Load: Indicates the
maximum load in kilograms and pounds
that can be carried by the tire. See the
Safety Compliance Certification Label
(affixed to either the door hinge pillar,
door-latch post, or the door edge that
meets the door-latch post, next to the
driver's seating position), for the correct
tire pressure for your vehicle.
L.
Treadwear, Traction and
Temperature Grades:
*
Treadwear The treadwear grade is a
comparative rating based on the wear
rate of the tire when tested under
controlled conditions on a specified
government test course. For example,
a tire graded 150 would wear one and
one-half times as well on the
government course as a tire graded 100. *
Traction: The traction grades, from
highest to lowest are AA, A, B, and C.
The grades represent the tire's ability to
stop on wet pavement as measured
under controlled conditions on specified
government test surfaces of asphalt and
concrete. A tire marked C may have
poor traction performance.
*
Temperature: The temperature grades
are A (the highest), B and C,
representing the tire's resistance to the
generation of heat and its ability to
dissipate heat when tested under
controlled conditions on a specified
indoor laboratory test wheel.
M.
Maximum Inflation Pressure:
Indicates the tire manufacturers'
maximum permissible pressure or the
pressure at which the maximum load
can be carried by the tire. This pressure
is normally higher than the vehicle
manufacturer's recommended cold
inflation pressure which can be found
on the Safety Compliance Certification
Label (affixed to either the door hinge
pillar, door-latch post, or the door edge
that meets the door-latch post, next to
328
MKT (TP4) , enUSA, First Printing Wheels and Tires