open hood LINCOLN MKT 2019 Owners Manual
[x] Cancel search | Manufacturer: LINCOLN, Model Year: 2019, Model line: MKT, Model: LINCOLN MKT 2019Pages: 575, PDF Size: 4.66 MB
Page 7 of 575
Cross Traffic Alert........................................222
Steering.........................................................225
Collision Warning System.........................226
Drive Control................................................229
Load Carrying
Rear Under Floor Storage..........................231
Cargo Nets.....................................................231
Luggage Covers...........................................231
Load Limit......................................................232
Towing
Towing a Trailer............................................237
Trailer Sway Control...................................238
Recommended Towing Weights.............238
Essential Towing Checks..........................240
Towing the Vehicle on Four Wheels......243
Driving Hints
Breaking-In...................................................245
Economical Driving.....................................245
Driving Through Water..............................245
Floor Mats.....................................................246
Roadside Emergencies
Roadside Assistance..................................248
Hazard Flashers..........................................249
Fuel Shutoff..................................................249
Jump Starting the Vehicle........................250
Post-Crash Alert System...........................252
Transporting the Vehicle...........................253
Customer Assistance
Getting the Services You Need...............254
In California (U.S. Only)..............................255
The Better Business Bureau (BBB) AutoLine Program (U.S. Only).......................256
Utilizing the Mediation/Arbitration Program(Canada Only)..........................................257
Getting Assistance Outside the U.S. andCanada......................................................258
Ordering Additional Owner's Literature......................................................................260
Reporting Safety Defects (U.S. Only)......260
Reporting Safety Defects (Canada Only).......................................................................261
Fuses
Fuse Specification Chart...........................262
Changing a Fuse.........................................278
Maintenance
General Information....................................281
Opening and Closing the Hood..............282
Under Hood Overview - 3.5L...................283
Under Hood Overview - 3.7L...................284
Engine Oil Dipstick.....................................286
Engine Oil Check........................................286
Oil Change Indicator Reset.......................287
Engine Coolant Check...............................288
Automatic Transmission Fluid Check.....292
Brake Fluid Check......................................294
Power Steering Fluid Check....................295
Washer Fluid Check...................................295
Changing the 12V Battery.........................295
Checking the Wiper Blades......................297
Changing the Wiper Blades.....................297
Adjusting the Headlamps.........................298
Removing a Headlamp..............................300
Changing a Bulb..........................................300
4
MKT (TP4) , enUSA, Edition date: 201803, Second-Printing
Table of Contents
Page 20 of 575
Air vent.A
Wiper lever. See Autowipers (page84).B
Direction Indicators. See DirectionIndicators (page 92).C
Information display control. SeeInformation Display Control (page82).
D
Instrument cluster. See InstrumentCluster (page 100).E
Information display control. SeeInformation Display Control (page82).
F
Audio system. See Audio System(page 364).G
Hazard flasher switch. See HazardFlashers (page 249).H
Information and entertainmentdisplay.I
Passenger airbag indicator light.See Front Passenger SensingSystem (page 52).
J
Climate controls. See ClimateControl (page 125).K
Keyless start button. See KeylessStarting (page 158).L
Audio control. See Audio Control(page 81).M
Horn.N
Steering wheel adjustment. SeeAdjusting the Steering Wheel(page 80).
O
Cruise control switches. SeeUsing Cruise Control (page 203).P
Hood release. See Opening andClosing the Hood (page 282).Q
Instrument panel dimmer control.See Instrument Lighting Dimmer(page 88).
R
Lighting control. See LightingControl (page 86).S
17
MKT (TP4) , enUSA, Edition date: 201803, Second-Printing
At a Glance
Page 59 of 575
WARNING: All occupants of yourvehicle, including the driver, should alwaysproperly wear their seatbelts, even whenan airbag supplemental restraint system isprovided. Failure to properly wear yourseatbelt could seriously increase the riskof injury or death.
WARNING: To reduce risk of injury,do not obstruct or place objects in thedeployment path of the airbag.
WARNING: If a supplementaryrestraint system component has deployed,it will not function again. Have the systemand associated components inspected assoon as possible. Failure to follow thisinstruction could result in personal injuryor death.
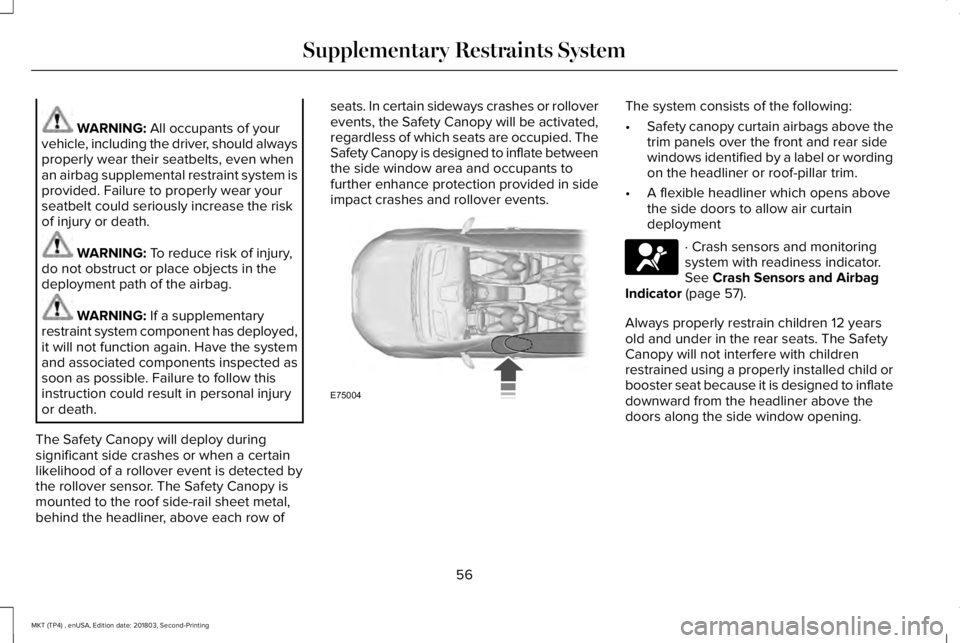
The Safety Canopy will deploy duringsignificant side crashes or when a certainlikelihood of a rollover event is detected bythe rollover sensor. The Safety Canopy ismounted to the roof side-rail sheet metal,behind the headliner, above each row of
seats. In certain sideways crashes or rolloverevents, the Safety Canopy will be activated,regardless of which seats are occupied. TheSafety Canopy is designed to inflate betweenthe side window area and occupants tofurther enhance protection provided in sideimpact crashes and rollover events.
The system consists of the following:
•Safety canopy curtain airbags above thetrim panels over the front and rear sidewindows identified by a label or wordingon the headliner or roof-pillar trim.
•A flexible headliner which opens abovethe side doors to allow air curtaindeployment
· Crash sensors and monitoringsystem with readiness indicator.See Crash Sensors and AirbagIndicator (page 57).
Always properly restrain children 12 yearsold and under in the rear seats. The SafetyCanopy will not interfere with childrenrestrained using a properly installed child orbooster seat because it is designed to inflatedownward from the headliner above thedoors along the side window opening.
56
MKT (TP4) , enUSA, Edition date: 201803, Second-Printing
Supplementary Restraints SystemE75004 E67017
Page 64 of 575
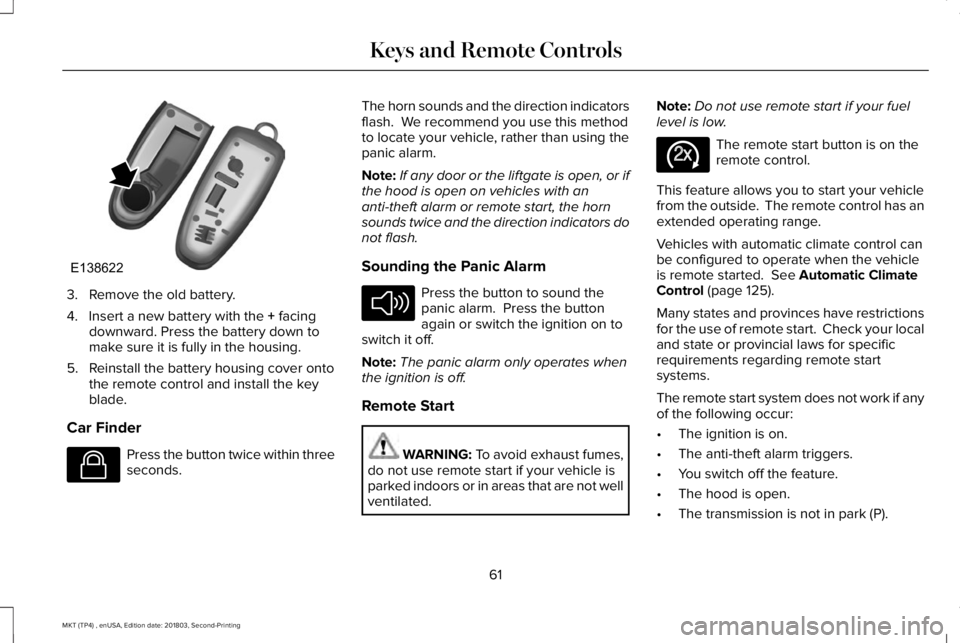
3. Remove the old battery.
4. Insert a new battery with the + facingdownward. Press the battery down tomake sure it is fully in the housing.
5. Reinstall the battery housing cover ontothe remote control and install the keyblade.
Car Finder
Press the button twice within threeseconds.
The horn sounds and the direction indicatorsflash. We recommend you use this methodto locate your vehicle, rather than using thepanic alarm.
Note:If any door or the liftgate is open, or ifthe hood is open on vehicles with ananti-theft alarm or remote start, the hornsounds twice and the direction indicators donot flash.
Sounding the Panic Alarm
Press the button to sound thepanic alarm. Press the buttonagain or switch the ignition on toswitch it off.
Note:The panic alarm only operates whenthe ignition is off.
Remote Start
WARNING: To avoid exhaust fumes,do not use remote start if your vehicle isparked indoors or in areas that are not wellventilated.
Note:Do not use remote start if your fuellevel is low.
The remote start button is on theremote control.
This feature allows you to start your vehiclefrom the outside. The remote control has anextended operating range.
Vehicles with automatic climate control canbe configured to operate when the vehicleis remote started. See Automatic ClimateControl (page 125).
Many states and provinces have restrictionsfor the use of remote start. Check your localand state or provincial laws for specificrequirements regarding remote startsystems.
The remote start system does not work if anyof the following occur:
•The ignition is on.
•The anti-theft alarm triggers.
•You switch off the feature.
•The hood is open.
•The transmission is not in park (P).
61
MKT (TP4) , enUSA, Edition date: 201803, Second-Printing
Keys and Remote ControlsE138622 E138623 E138624 E138625
Page 71 of 575
LOCKING AND UNLOCKING
You can use the power door lock control orthe remote control to lock and unlock yourvehicle.
Power Door Locks
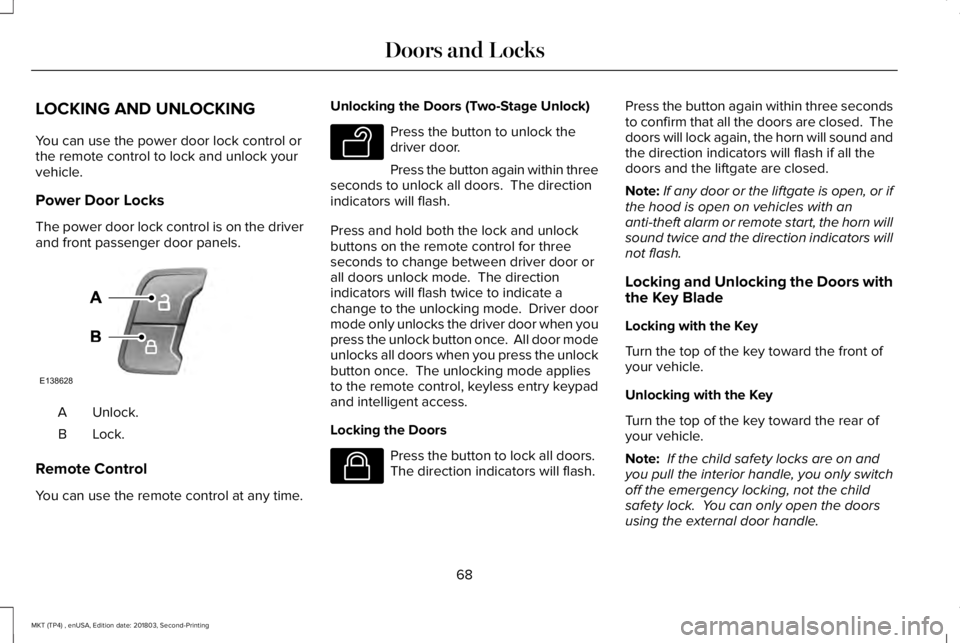
The power door lock control is on the driverand front passenger door panels.
Unlock.A
Lock.B
Remote Control
You can use the remote control at any time.
Unlocking the Doors (Two-Stage Unlock)
Press the button to unlock thedriver door.
Press the button again within threeseconds to unlock all doors. The directionindicators will flash.
Press and hold both the lock and unlockbuttons on the remote control for threeseconds to change between driver door orall doors unlock mode. The directionindicators will flash twice to indicate achange to the unlocking mode. Driver doormode only unlocks the driver door when youpress the unlock button once. All door modeunlocks all doors when you press the unlockbutton once. The unlocking mode appliesto the remote control, keyless entry keypadand intelligent access.
Locking the Doors
Press the button to lock all doors. The direction indicators will flash.
Press the button again within three secondsto confirm that all the doors are closed. Thedoors will lock again, the horn will sound andthe direction indicators will flash if all thedoors and the liftgate are closed.
Note:If any door or the liftgate is open, or ifthe hood is open on vehicles with ananti-theft alarm or remote start, the horn willsound twice and the direction indicators willnot flash.
Locking and Unlocking the Doors withthe Key Blade
Locking with the Key
Turn the top of the key toward the front ofyour vehicle.
Unlocking with the Key
Turn the top of the key toward the rear ofyour vehicle.
Note: If the child safety locks are on andyou pull the interior handle, you only switchoff the emergency locking, not the childsafety lock. You can only open the doorsusing the external door handle.
68
MKT (TP4) , enUSA, Edition date: 201803, Second-Printing
Doors and LocksE138628 E138629 E138623
Page 82 of 575
If programming was unsuccessful, wait 10seconds and repeat Steps 1 through 7. Ifprogramming remains unsuccessful, contactan authorized dealer.
ANTI-THEFT ALARM
The system will warn you of an unauthorizedentry to your vehicle. It will be triggered ifany door, the luggage compartment or thehood is opened without using the key,remote control or keyless entry keypad.
The direction indicators will flash and thehorn will sound if unauthorized entry isattempted while the alarm is armed.
Take all remote controls to an authorizeddealer if there is any potential alarm problemwith your vehicle.
Arming the Alarm
The alarm is ready to arm when there is nota key in your vehicle. Electronically lock yourvehicle to arm the alarm.
Disarming the Alarm
Disarm the alarm by any of the followingactions:
•Unlock the doors or luggagecompartment with the remote control orkeyless entry keypad.
•Switch your vehicle on or start yourvehicle.
•Use a key in the driver door to unlockyour vehicle, then switch your vehicle onwithin 12 seconds.
Note:Pressing the panic button on theremote control will stop the horn and signalindicators, but will not disarm the system.
79
MKT (TP4) , enUSA, Edition date: 201803, Second-Printing
Security
Page 165 of 575

Guarding Against Exhaust Fumes
WARNING: If you smell exhaustfumes inside your vehicle, have yourvehicle checked by your authorized dealerimmediately. Do not drive your vehicle ifyou smell exhaust fumes. Carbonmonoxide is present in exhaust fumes.Take precautions to avoid its dangerouseffects.
Important Ventilating Information
If you stop your vehicle and then leave theengine idling for long periods, werecommend that you do one of the following:
•Open the windows at least 1 in (3 cm).
•Set your climate control to outside air.
ENGINE BLOCK HEATER (If Equipped)
WARNING: Failure to follow engineblock heater instructions could result inproperty damage or serious personalinjury.
WARNING: Do not use your heaterwith ungrounded electrical systems ortwo-pronged adapters. There is a risk ofelectrical shock.
WARNING: Do not fully close thehood, or allow it to drop under its ownweight when using the engine blockheater. This could damage the power cableand may cause an electrical short resultingin fire, injury and property damage.
Note:The heater is most effective whenoutdoor temperatures are below 0°F (-18°C).
The heater acts as a starting aid by warmingthe engine coolant. This allows the climatecontrol system to respond quickly. Theequipment includes a heater element(installed in the engine block) and a wireharness. You can connect the system to agrounded 120-volt AC electrical source.
We recommend that you do the following fora safe and correct operation:
•Use a 16-gauge outdoor extension cordthat is product certified by Underwriter’sLaboratory (UL) or Canadian StandardsAssociation (CSA). This extension cordmust be suitable for use outdoors, in coldtemperatures, and be clearly markedSuitable for Use with OutdoorAppliances. Do not use an indoorextension cord outdoors. This couldresult in an electric shock or become afire hazard.
•Use as short an extension cord aspossible.
•Do not use multiple extension cords.
162
MKT (TP4) , enUSA, Edition date: 201803, Second-Printing
Starting and Stopping the Engine
Page 285 of 575
OPENING AND CLOSING THE
HOOD
Opening the Hood
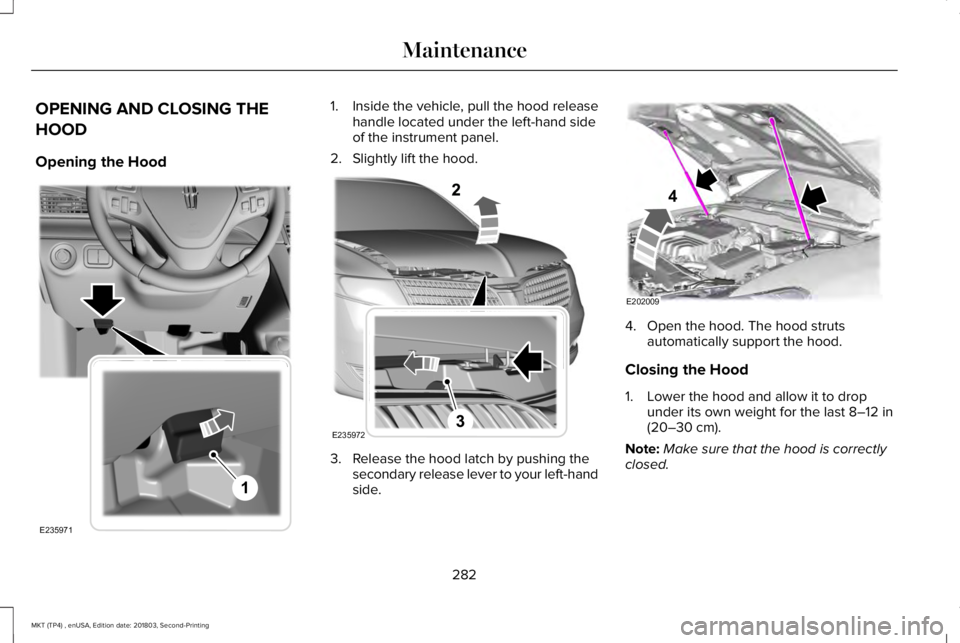
1. Inside the vehicle, pull the hood releasehandle located under the left-hand sideof the instrument panel.
2. Slightly lift the hood.
3. Release the hood latch by pushing thesecondary release lever to your left-handside.
4. Open the hood. The hood strutsautomatically support the hood.
Closing the Hood
1. Lower the hood and allow it to dropunder its own weight for the last 8–12 in(20–30 cm).
Note:Make sure that the hood is correctlyclosed.
282
MKT (TP4) , enUSA, Edition date: 201803, Second-Printing
MaintenanceE235971
1 E235972 E202009
4
Page 289 of 575
Automatic transmission dipstick.See Automatic Transmission FluidCheck (page 292).
H.
Washer fluid reservoir. SeeWasher Fluid Check (page 295).I.
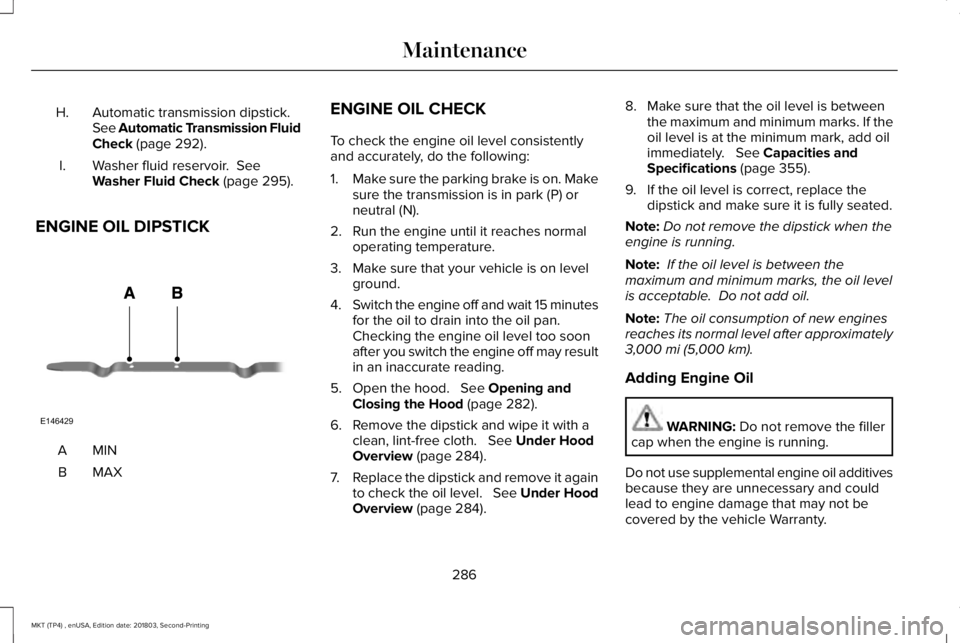
ENGINE OIL DIPSTICK
MINA
MAXB
ENGINE OIL CHECK
To check the engine oil level consistentlyand accurately, do the following:
1.Make sure the parking brake is on. Makesure the transmission is in park (P) orneutral (N).
2. Run the engine until it reaches normaloperating temperature.
3. Make sure that your vehicle is on levelground.
4.Switch the engine off and wait 15 minutesfor the oil to drain into the oil pan. Checking the engine oil level too soonafter you switch the engine off may resultin an inaccurate reading.
5. Open the hood. See Opening andClosing the Hood (page 282).
6. Remove the dipstick and wipe it with aclean, lint-free cloth. See Under HoodOverview (page 284).
7.Replace the dipstick and remove it againto check the oil level. See Under HoodOverview (page 284).
8. Make sure that the oil level is betweenthe maximum and minimum marks. If theoil level is at the minimum mark, add oilimmediately. See Capacities andSpecifications (page 355).
9. If the oil level is correct, replace thedipstick and make sure it is fully seated.
Note:Do not remove the dipstick when theengine is running.
Note: If the oil level is between themaximum and minimum marks, the oil levelis acceptable. Do not add oil.
Note:The oil consumption of new enginesreaches its normal level after approximately3,000 mi (5,000 km).
Adding Engine Oil
WARNING: Do not remove the fillercap when the engine is running.
Do not use supplemental engine oil additivesbecause they are unnecessary and couldlead to engine damage that may not becovered by the vehicle Warranty.
286
MKT (TP4) , enUSA, Edition date: 201803, Second-Printing
MaintenanceE146429
Page 290 of 575
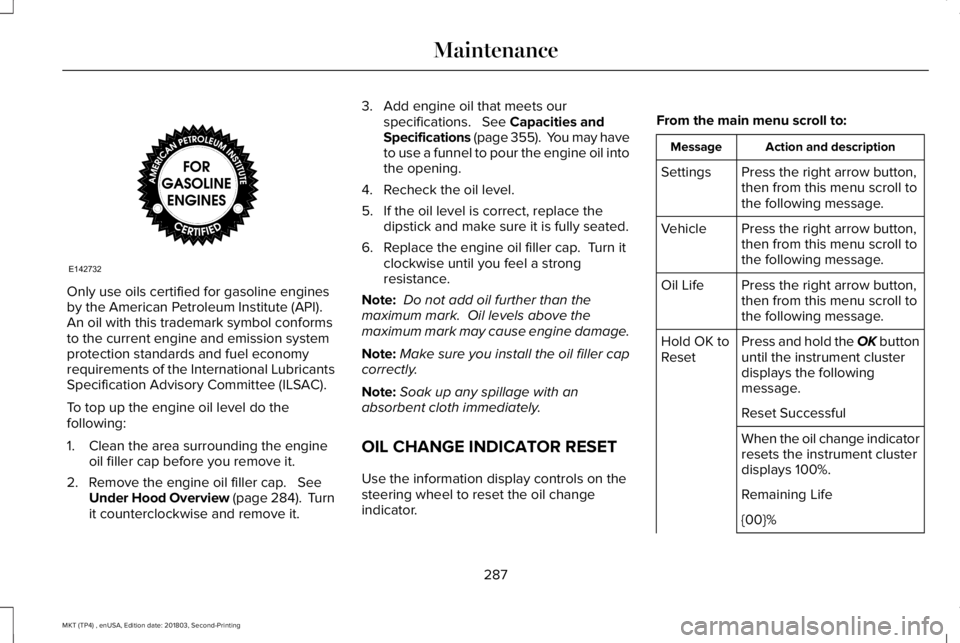
Only use oils certified for gasoline enginesby the American Petroleum Institute (API). An oil with this trademark symbol conformsto the current engine and emission systemprotection standards and fuel economyrequirements of the International LubricantsSpecification Advisory Committee (ILSAC).
To top up the engine oil level do thefollowing:
1. Clean the area surrounding the engineoil filler cap before you remove it.
2. Remove the engine oil filler cap. SeeUnder Hood Overview (page 284). Turnit counterclockwise and remove it.
3. Add engine oil that meets ourspecifications. See Capacities andSpecifications (page 355). You may haveto use a funnel to pour the engine oil intothe opening.
4. Recheck the oil level.
5. If the oil level is correct, replace thedipstick and make sure it is fully seated.
6. Replace the engine oil filler cap. Turn itclockwise until you feel a strongresistance.
Note: Do not add oil further than themaximum mark. Oil levels above themaximum mark may cause engine damage.
Note:Make sure you install the oil filler capcorrectly.
Note:Soak up any spillage with anabsorbent cloth immediately.
OIL CHANGE INDICATOR RESET
Use the information display controls on thesteering wheel to reset the oil changeindicator.
From the main menu scroll to:
Action and descriptionMessage
Press the right arrow button,then from this menu scroll tothe following message.
Settings
Press the right arrow button,then from this menu scroll tothe following message.
Vehicle
Press the right arrow button,then from this menu scroll tothe following message.
Oil Life
Press and hold the OK buttonuntil the instrument clusterdisplays the followingmessage.
Hold OK toReset
Reset Successful
When the oil change indicatorresets the instrument clusterdisplays 100%.
Remaining Life
{00}%
287
MKT (TP4) , enUSA, Edition date: 201803, Second-Printing
MaintenanceE142732