display LINCOLN MKX 2015 User Guide
[x] Cancel search | Manufacturer: LINCOLN, Model Year: 2015, Model line: MKX, Model: LINCOLN MKX 2015Pages: 453, PDF Size: 4.04 MB
Page 78 of 453
Programming a Spare Intelligent Access Key
Note:A maximum of four intelligent access keys can be programmed to
your vehicle. You must take your vehicle and all access keys to your
authorized dealer to be erased and reprogrammed if you would like to
replace a previously programmed access key with a new access key, or if
you already have four access keys programmed to your vehicle.
You must have two previously programmed intelligent access keys inside
the vehicle and the new unprogrammed intelligent access keys readily
accessible. See your authorized dealer to have the spare key
programmed if two previously programmed keys are not available.
Make sure that the vehicle is off before beginning this procedure. Make
sure that all doors are closed before beginning and that they remain
closed throughout the procedure. Perform all steps within 30 seconds of
starting the sequence. Stop and wait for at least one minute before
starting again if any steps are performed out of sequence.
Read and understand the entire procedure before you begin.
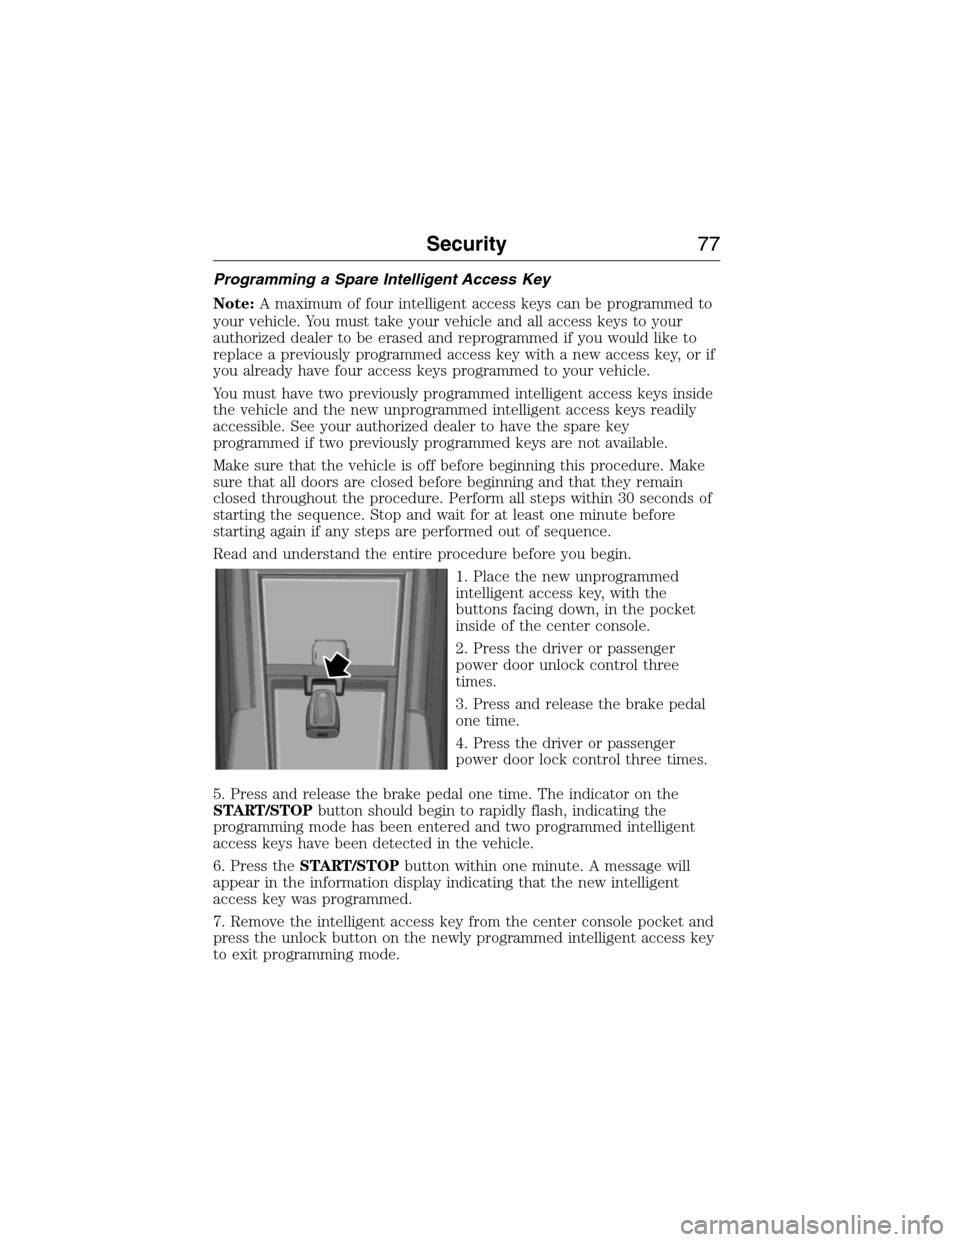
1. Place the new unprogrammed
intelligent access key, with the
buttons facing down, in the pocket
inside of the center console.
2. Press the driver or passenger
power door unlock control three
times.
3. Press and release the brake pedal
one time.
4. Press the driver or passenger
power door lock control three times.
5. Press and release the brake pedal one time. The indicator on the
START/STOPbutton should begin to rapidly flash, indicating the
programming mode has been entered and two programmed intelligent
access keys have been detected in the vehicle.
6. Press theSTART/STOPbutton within one minute. A message will
appear in the information display indicating that the new intelligent
access key was programmed.
7. Remove the intelligent access key from the center console pocket and
press the unlock button on the newly programmed intelligent access key
to exit programming mode.
Security77
2014 MKX(mkx)
Owners Guide gf, 1st Printing, June 2014
USA(fus)
Page 79 of 453
8. Verify that the remote entry functions operate (press lock then
unlock, making sure you end in unlock) and that the vehicle starts with
new intelligent access key.
ANTI-THEFT ALARM
The system will warn you of unauthorized entry to your vehicle.
The turn signal lamps will flash and sound the horn up to a total of 10
times when:
•any door, the hood or the luggage compartment is opened without
using the keypad, the remote control or the intelligent access
transmitter
•the ignition is turned on with an invalid key.
Take all keys and remote controls to an authorized dealer if there is any
potential alarm problem with your vehicle.
Arming the Alarm
The system is ready to arm whenever the ignition is off. Lock your
vehicle to arm the alarm.
The turn signal lamps will flash once after locking your vehicle to
indicate the alarm is in the pre-armed mode. It will become fully armed
in 20 seconds.
Disarming the Alarm
To disarm the alarm, do any of the following:
•Press the power door unlock button within the 20-second pre-armed
mode will.
•Press the unlock button on the remote control.
•Unlock the doors with the keyless entry pad.
•Enter your vehicle using intelligent access.
•Press the panic button on the remote control. The alarm system will
still be armed, but this shuts off the horn and turn lamps when the
alarm is sounding.
Note:If the driver door is unlocked with a key, a tone will sound when
you open the door and a message will appear in the information display.
You will have 12 seconds to disarm the alarm using any of the actions
above, otherwise the alarm will trigger.
78Security
2014 MKX(mkx)
Owners Guide gf, 1st Printing, June 2014
USA(fus)
Page 81 of 453
Power Tilt and Telescope Steering Column (If Equipped)
WARNING:Do not adjust the steering wheel when your vehicle
is moving.
Note:Make sure that you are sitting in the correct position. Refer to
Sitting in the Correct Positionin theSeatschapter.
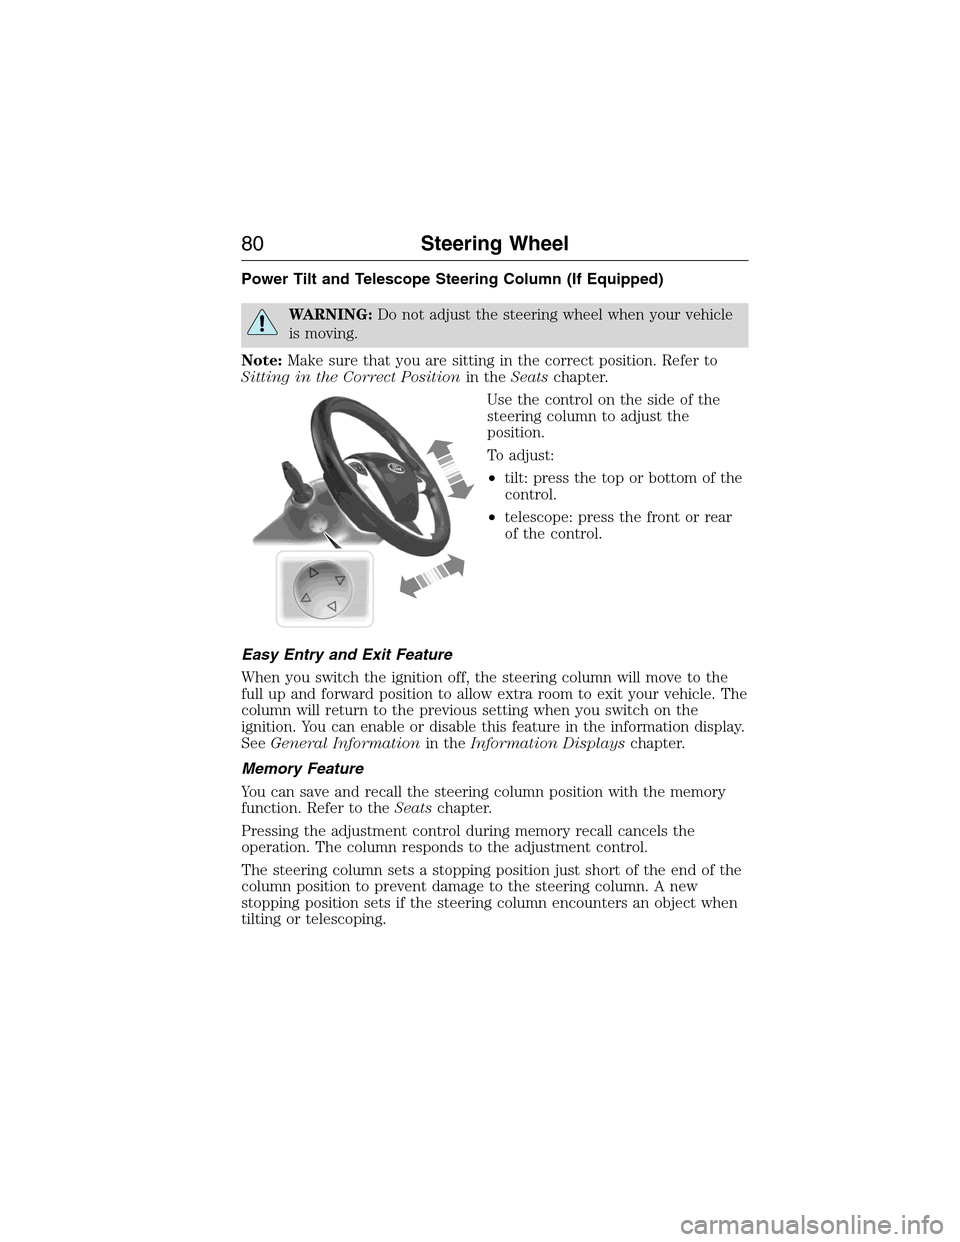
Use the control on the side of the
steering column to adjust the
position.
To adjust:
•tilt: press the top or bottom of the
control.
•telescope: press the front or rear
of the control.
Easy Entry and Exit Feature
When you switch the ignition off, the steering column will move to the
full up and forward position to allow extra room to exit your vehicle. The
column will return to the previous setting when you switch on the
ignition. You can enable or disable this feature in the information display.
SeeGeneral Informationin theInformation Displayschapter.
Memory Feature
You can save and recall the steering column position with the memory
function. Refer to theSeatschapter.
Pressing the adjustment control during memory recall cancels the
operation. The column responds to the adjustment control.
The steering column sets a stopping position just short of the end of the
column position to prevent damage to the steering column. A new
stopping position sets if the steering column encounters an object when
tilting or telescoping.
80Steering Wheel
2014 MKX(mkx)
Owners Guide gf, 1st Printing, June 2014
USA(fus)
Page 84 of 453
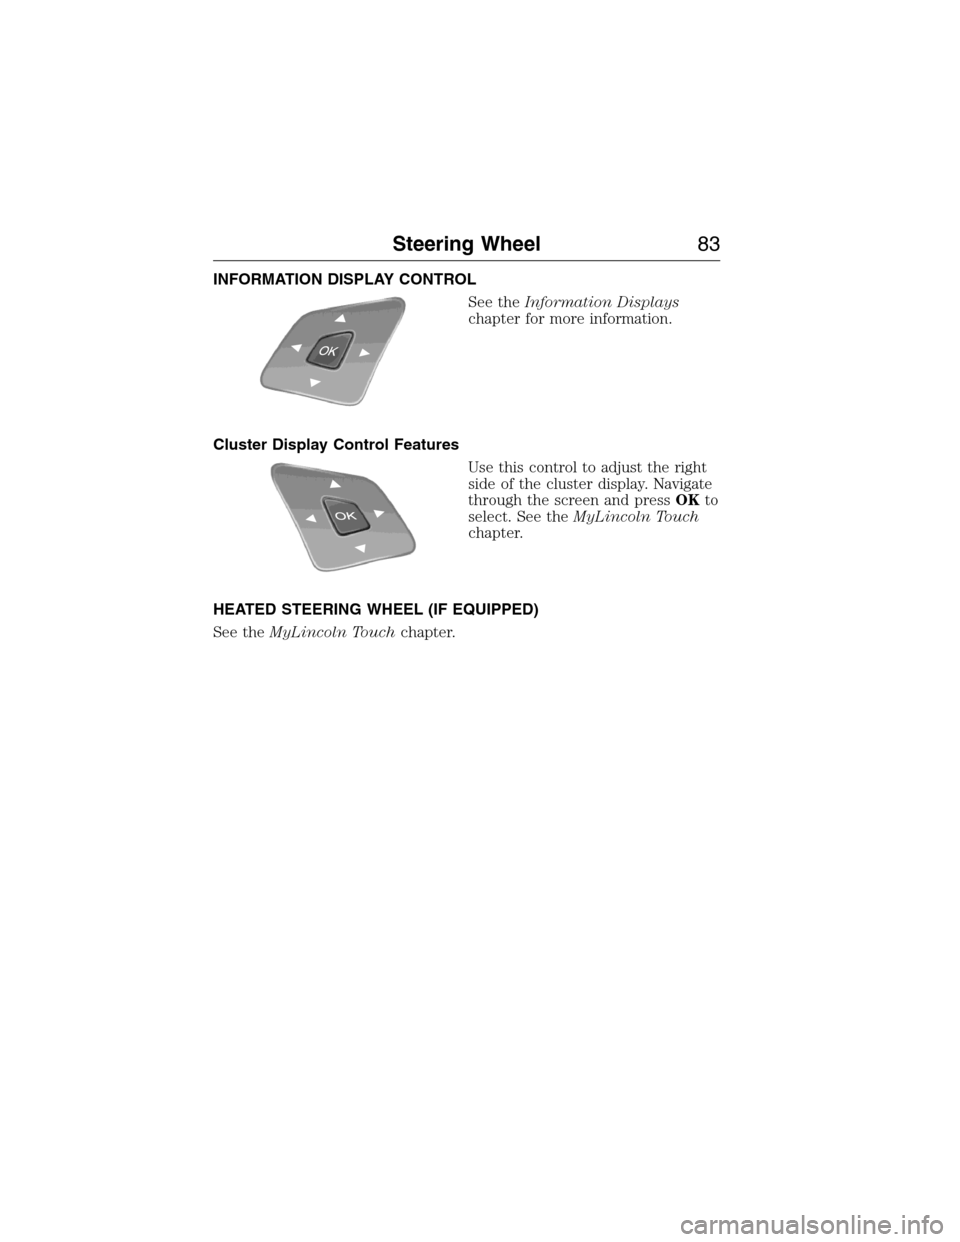
INFORMATION DISPLAY CONTROL
See theInformation Displays
chapter for more information.
Cluster Display Control Features
Use this control to adjust the right
side of the cluster display. Navigate
through the screen and pressOKto
select. See theMyLincoln Touch
chapter.
HEATED STEERING WHEEL (IF EQUIPPED)
See theMyLincoln Touchchapter.
Steering Wheel83
2014 MKX(mkx)
Owners Guide gf, 1st Printing, June 2014
USA(fus)
Page 85 of 453
WINDSHIELD WIPERS
Note:Fully defrost the windshield in icy conditions before turning on
the windshield wipers.
Note:Make sure the windshield wipers are switched off before entering
a car wash.
Note:Clean the windshield and wiper blades if they begin to leave
streaks or smears. If that does not resolve the issue, install new wiper
blades.
Note:Do not operate the wipers on a dry windshield. This may scratch
the glass, damage the wiper blades or cause the wiper motor to burn out.
Always use the windshield washers before wiping a dry windshield.
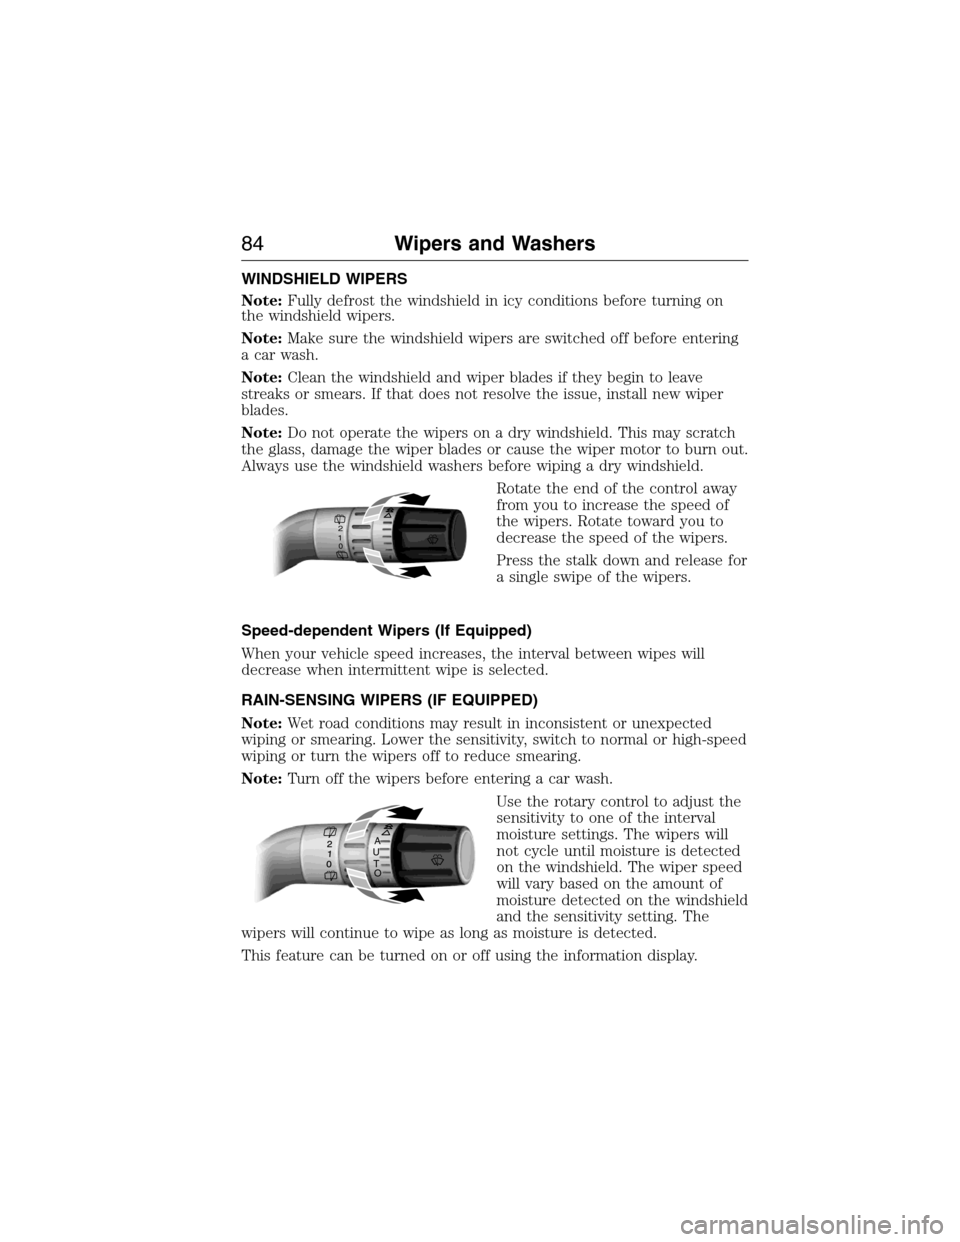
Rotate the end of the control away
from you to increase the speed of
the wipers. Rotate toward you to
decrease the speed of the wipers.
Press the stalk down and release for
a single swipe of the wipers.
Speed-dependent Wipers (If Equipped)
When your vehicle speed increases, the interval between wipes will
decrease when intermittent wipe is selected.
RAIN-SENSING WIPERS (IF EQUIPPED)
Note:Wet road conditions may result in inconsistent or unexpected
wiping or smearing. Lower the sensitivity, switch to normal or high-speed
wiping or turn the wipers off to reduce smearing.
Note:Turn off the wipers before entering a car wash.
Use the rotary control to adjust the
sensitivity to one of the interval
moisture settings. The wipers will
not cycle until moisture is detected
on the windshield. The wiper speed
will vary based on the amount of
moisture detected on the windshield
and the sensitivity setting. The
wipers will continue to wipe as long as moisture is detected.
This feature can be turned on or off using the information display.
2
1
0
A
U
T
O
84Wipers and Washers
2014 MKX(mkx)
Owners Guide gf, 1st Printing, June 2014
USA(fus)
Page 86 of 453
Keep the outside of the windshield clean, especially the area around the
interior mirror where the sensor is located, or sensor performance may
be affected.
WINDSHIELD WASHERS
Note:Do not operate the wipers on a dry windshield. This may scratch
the glass, damage the wiper blades or cause the wiper motor to burn out.
Always use the windshield washer before wiping a dry windshield.
Note:Do not operate the washer when the washer reservoir is empty.
This may cause the washer pump to overheat.
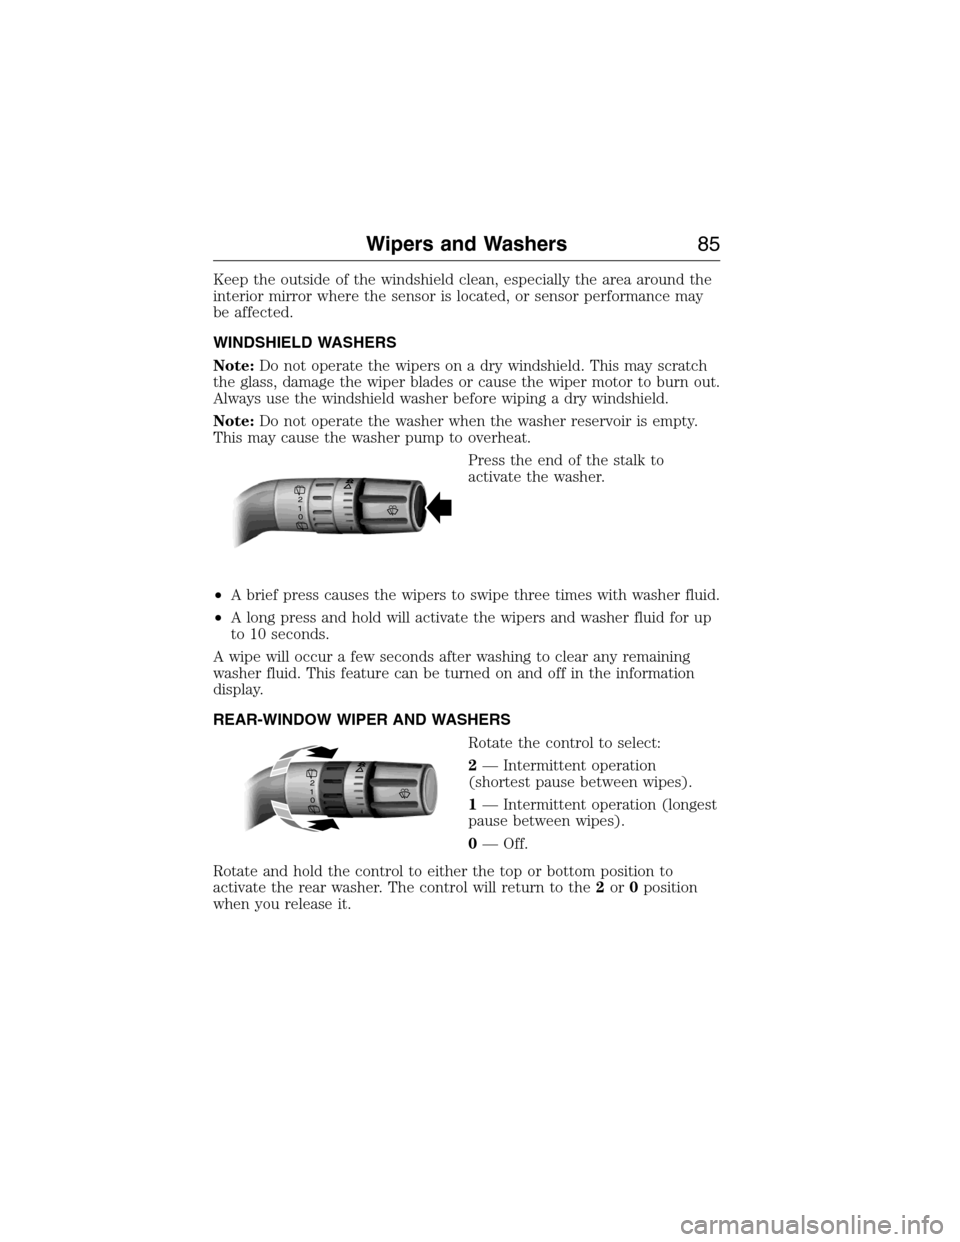
Press the end of the stalk to
activate the washer.
•A brief press causes the wipers to swipe three times with washer fluid.
•A long press and hold will activate the wipers and washer fluid for up
to 10 seconds.
A wipe will occur a few seconds after washing to clear any remaining
washer fluid. This feature can be turned on and off in the information
display.
REAR-WINDOW WIPER AND WASHERS
Rotate the control to select:
2— Intermittent operation
(shortest pause between wipes).
1— Intermittent operation (longest
pause between wipes).
0— Off.
Rotate and hold the control to either the top or bottom position to
activate the rear washer. The control will return to the2or0position
when you release it.
2
1
0
2
1
0
Wipers and Washers85
2014 MKX(mkx)
Owners Guide gf, 1st Printing, June 2014
USA(fus)
Page 88 of 453
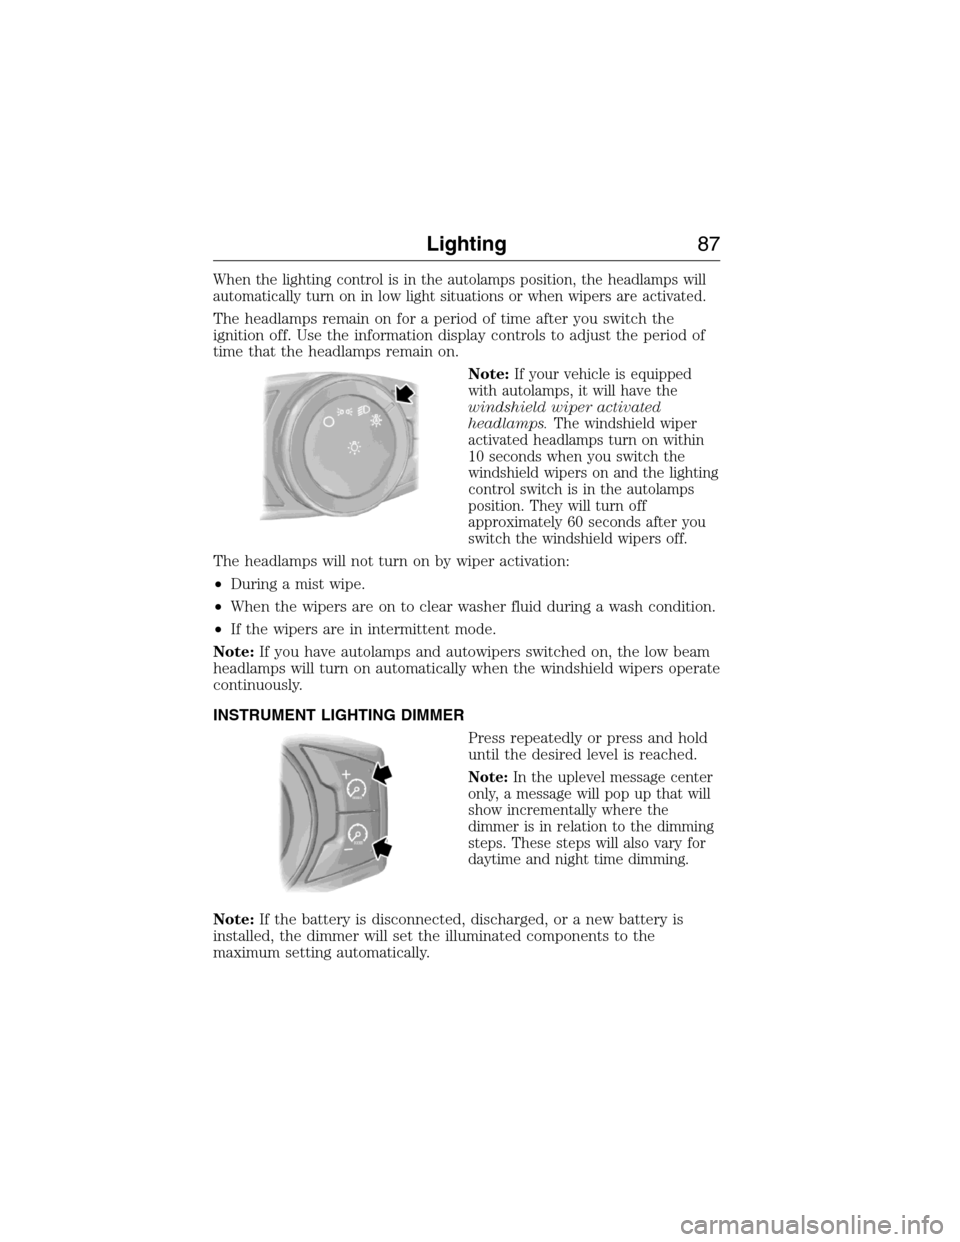
When the lighting control is in the autolamps position, the headlamps will
automatically turn on in low light situations or when wipers are activated.
The headlamps remain on for a period of time after you switch the
ignition off. Use the information display controls to adjust the period of
time that the headlamps remain on.
Note:
If your vehicle is equipped
with autolamps, it will have the
windshield wiper activated
headlamps.The windshield wiper
activated headlamps turn on within
10 seconds when you switch the
windshield wipers on and the lighting
control switch is in the autolamps
position. They will turn off
approximately 60 seconds after you
switch the windshield wipers off.
The headlamps will not turn on by wiper activation:
•During a mist wipe.
•When the wipers are on to clear washer fluid during a wash condition.
•If the wipers are in intermittent mode.
Note:If you have autolamps and autowipers switched on, the low beam
headlamps will turn on automatically when the windshield wipers operate
continuously.
INSTRUMENT LIGHTING DIMMER
Press repeatedly or press and hold
until the desired level is reached.
Note:In the uplevel message center
only, a message will pop up that will
show incrementally where the
dimmer is in relation to the dimming
steps. These steps will also vary for
daytime and night time dimming.
Note:If the battery is disconnected, discharged, or a new battery is
installed, the dimmer will set the illuminated components to the
maximum setting automatically.
Lighting87
2014 MKX(mkx)
Owners Guide gf, 1st Printing, June 2014
USA(fus)
Page 89 of 453
HEADLAMP EXIT DELAY
You can set the delay time to keep the headlamps on for up to three
minutes after the ignition is turned off.
Follow the steps below to change the delay time (Steps 1 through 6
must be done within 10 seconds):
1. Turn the ignition off.
2. Turn the lighting control to the autolamp position.
3. Turn the lighting control to the off position.
4. Turn the ignition on.
5. Turn the ignition off.
6. Turn the lighting control to the autolamp position. The headlamps and
parking lamps will turn on.
7. Turn the lighting control to the off position when the desired delay
time has been reached. The headlamps and parking lamps will turn off.
You can set the headlamp exit delay to one of the following settings:
•Off
•10 seconds
•20 seconds
•120 seconds
Note:You can also adjust the time delay using the display controls in
the instrument cluster. See theInformation Displayschapter.
DAYTIME RUNNING LAMPS (IF EQUIPPED)
WARNING:Always remember to turn on your headlamps at
dusk or during inclement weather. The Daytime Running Lamp
(DRL) system does not activate the tail lamps and generally may not
provide adequate lighting during these conditions. Failure to activate
your headlamps under these conditions may result in a collision.
The system switches the headlamps on with a reduced output (vehicles
equipped with halogen headlamps) or turns the front fog lamps on
(vehicles equipped with HID headlamps).
To switch the system on:
1. Switch the ignition on.
2. Switch the lighting control to the off, autolamp or parking lamp position.
88Lighting
2014 MKX(mkx)
Owners Guide gf, 1st Printing, June 2014
USA(fus)
Page 101 of 453
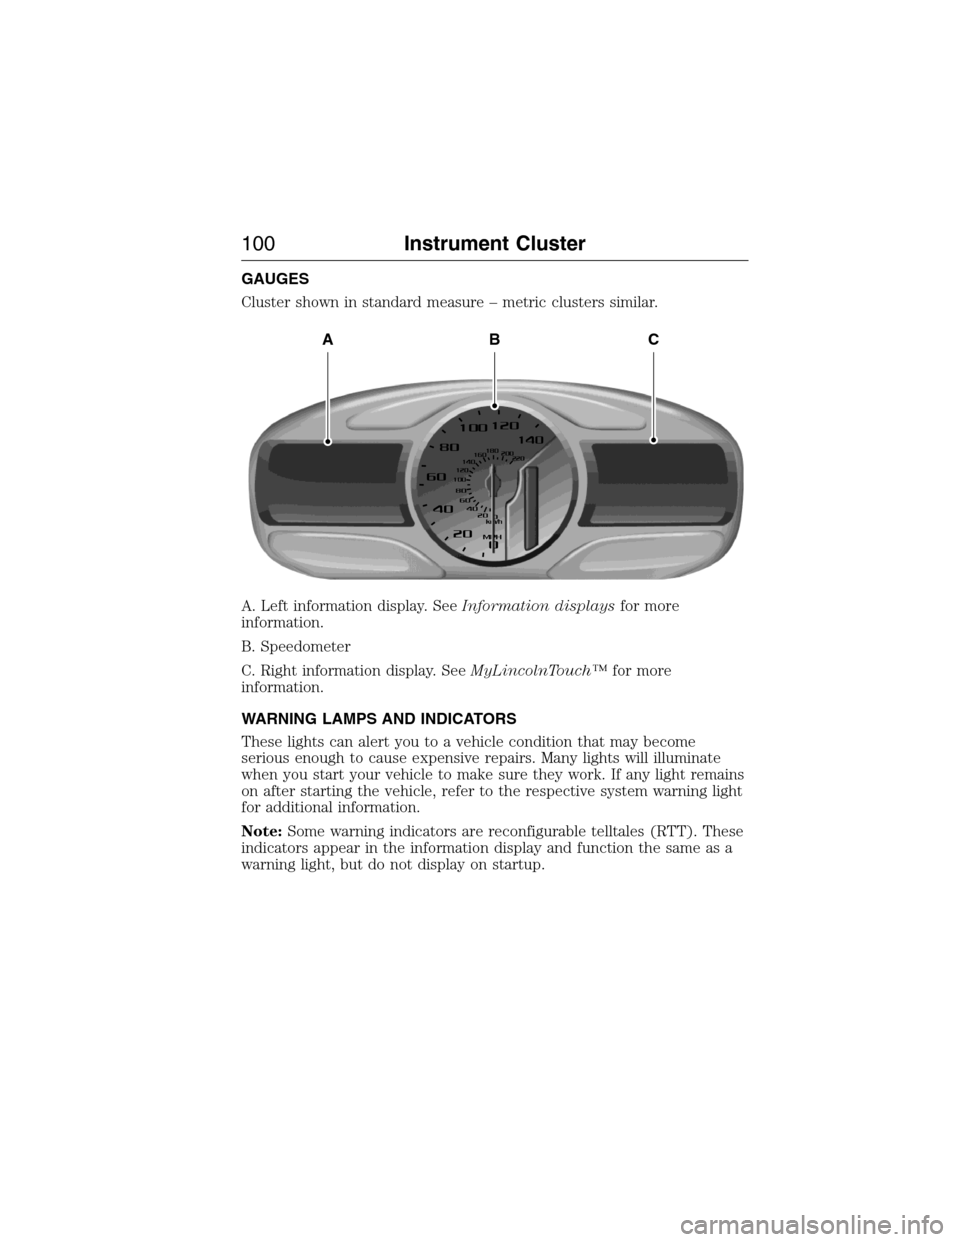
GAUGES
Cluster shown in standard measure – metric clusters similar.
A. Left information display. SeeInformation displaysfor more
information.
B. Speedometer
C. Right information display. SeeMyLincolnTouch™for more
information.
WARNING LAMPS AND INDICATORS
These lights can alert you to a vehicle condition that may become
serious enough to cause expensive repairs. Many lights will illuminate
when you start your vehicle to make sure they work. If any light remains
on after starting the vehicle, refer to the respective system warning light
for additional information.
Note:Some warning indicators are reconfigurable telltales (RTT). These
indicators appear in the information display and function the same as a
warning light, but do not display on startup.
ABC
100Instrument Cluster
2014 MKX(mkx)
Owners Guide gf, 1st Printing, June 2014
USA(fus)
Page 103 of 453
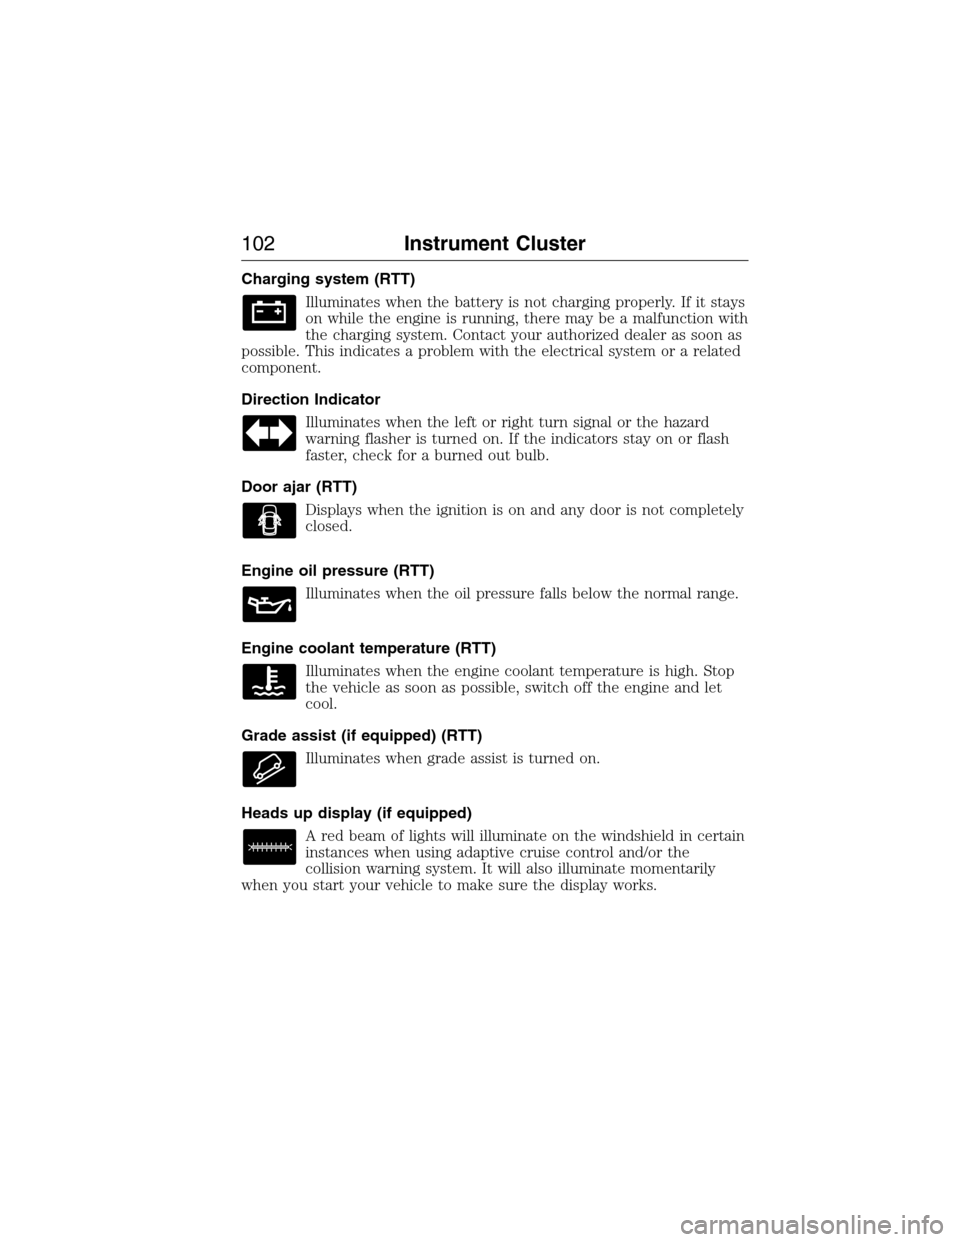
Charging system (RTT)
Illuminates when the battery is not charging properly. If it stays
on while the engine is running, there may be a malfunction with
the charging system. Contact your authorized dealer as soon as
possible. This indicates a problem with the electrical system or a related
component.
Direction Indicator
Illuminates when the left or right turn signal or the hazard
warning flasher is turned on. If the indicators stay on or flash
faster, check for a burned out bulb.
Door ajar (RTT)
Displays when the ignition is on and any door is not completely
closed.
Engine oil pressure (RTT)
Illuminates when the oil pressure falls below the normal range.
Engine coolant temperature (RTT)
Illuminates when the engine coolant temperature is high. Stop
the vehicle as soon as possible, switch off the engine and let
cool.
Grade assist (if equipped) (RTT)
Illuminates when grade assist is turned on.
Heads up display (if equipped)
A red beam of lights will illuminate on the windshield in certain
instances when using adaptive cruise control and/or the
collision warning system. It will also illuminate momentarily
when you start your vehicle to make sure the display works.
102Instrument Cluster
2014 MKX(mkx)
Owners Guide gf, 1st Printing, June 2014
USA(fus)