check engine light LINCOLN MKX 2016 User Guide
[x] Cancel search | Manufacturer: LINCOLN, Model Year: 2016, Model line: MKX, Model: LINCOLN MKX 2016Pages: 563, PDF Size: 4.96 MB
Page 305 of 563
GENERAL INFORMATION
Have your vehicle serviced regularly to help
maintain its roadworthiness and resale value.
There is a large network of authorized
dealers that are there to help you with their
professional servicing expertise. We believe
that their specially trained technicians are
best qualified to service your vehicle properly
and expertly. They are supported by a wide
range of highly specialized tools developed
specifically for servicing your vehicle.
To help you service your vehicle, we provide
scheduled maintenance information which
makes tracking routine service easy. See
Scheduled Maintenance (page 499).
If your vehicle requires professional service,
an authorized dealer can provide the
necessary parts and service. Check your
warranty information to find out which parts
and services are covered.
Use only recommended fuels, lubricants,
fluids and service parts conforming to
specifications. Motorcraft® parts are
designed and built to provide the best
performance in your vehicle. Precautions
•
Do not work on a hot engine.
• Make sure that nothing gets caught in
moving parts.
• Do not work on a vehicle with the engine
running in an enclosed space, unless you
are sure you have enough ventilation.
• Keep all open flames and other burning
material (such as cigarettes) away from
the battery and all fuel related parts.
Working with the Engine Off
1. Set the parking brake and shift to park (P).
2. Switch off the engine.
3. Block the wheels.
Working with the Engine On WARNING
To reduce the risk of vehicle damage
and/or personal burn injuries, do not
start your engine with the air cleaner
removed and do not remove it while the
engine is running. 1. Set the parking brake and shift to park
(P).
2. Block the wheels
OPENING AND CLOSING THE
HOOD
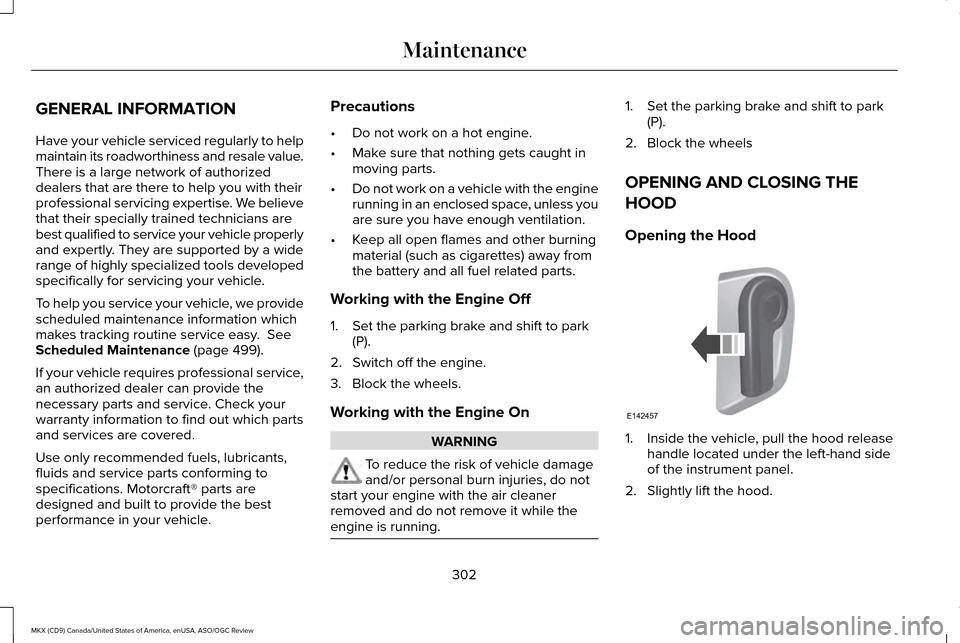
Opening the Hood 1. Inside the vehicle, pull the hood release
handle located under the left-hand side
of the instrument panel.
2. Slightly lift the hood.
302
MKX (CD9) Canada/United States of America, enUSA, ASO/OGC Review MaintenanceE142457
Page 312 of 563
3.
Remove the engine oil filler cap and use
a funnel to pour the engine oil into the
opening.
4. Wipe off any spilled oil.
5. Replace the filler cap. Turn it until you feel a strong resistance.
OIL CHANGE INDICATOR RESET
Use the information display controls on the
steering wheel to reset the oil change
indicator.
From the main menu scroll to: Action and description
Message
Press the right arrow button,
then from this menu scroll to
the following message.
Settings
Press the right arrow button,
then from this menu scroll to
the following message.
Vehicle
Press the right arrow button,
then from this menu scroll to
the following message.
Oil Life Action and description
Message
Press and hold the OK button
until the instrument cluster
displays the following
message.
Hold OK to
Reset
Reset Successful
When the oil change indicator
resets the instrument cluster
displays 100%.
Remaining Life
{00}%
If the instrument cluster
displays one of the following
messages, repeat the
process.
Not Reset
Reset Cancelled ENGINE COOLANT CHECK WARNINGS
Do not add engine coolant when the
engine is hot. Steam and scalding
liquids released from a hot cooling system
can burn you badly. Also, spilling coolant on
hot engine parts can burn you. Do not put engine coolant in the
windshield washer fluid container. If
sprayed on the windshield, engine coolant
could make it difficult to see through the
windshield. To reduce the risk of personal injury,
make sure the engine is cool before
unscrewing the coolant pressure relief cap.
The cooling system is under pressure. Steam
and hot liquid can come out forcefully when
you loosen the cap slightly. Do not add coolant further than the
MAX mark.
309
MKX (CD9) Canada/United States of America, enUSA, ASO/OGC Review Maintenance
Page 313 of 563
Checking the Engine Coolant
When the engine is cold, check the
concentration and level of the engine coolant
at the intervals listed in the scheduled
maintenance information. See Scheduled
Maintenance (page 499).
Note: Make sure that the coolant level is
between the MIN and MAX marks on the
coolant reservoir.
Note: Coolant expands when it is hot. The
level may extend beyond the MAX mark.
Note: If the level is at the MIN mark, below
the MIN mark, or empty, add coolant
immediately. See
Adding Engine Coolant
in this chapter.
Maintain coolant concentration within 48%
to 50%, which equates to a freeze point
between -30°F (-34°C) and -34°F (-37°C).
Note: For best results, coolant concentration
should be tested with a refractometer such
as Robinair® Coolant and Battery
Refractometer 75240. We do not
recommend the use of hydrometers or
coolant test strips for measuring coolant
concentrations. Note:
Automotive fluids are not
interchangeable. Do not use engine coolant,
antifreeze or windshield washer fluid outside
of its specified function and vehicle location.
Adding Engine Coolant
Note: Do not use stop leak pellets, cooling
system sealants or additives as they can
cause damage to the engine cooling or
heating systems. Your warranty may not
cover these damages.
Note: During normal vehicle operation, the
engine coolant may change color from
orange to pink or light red. As long as the
engine coolant is clear and uncontaminated,
any color change does not indicate the
engine coolant has degraded, nor does it
require the engine coolant to be drained,
the system to be flushed, or the engine
coolant to be replaced. Do not mix different colors or types of
coolant in your vehicle. Mixing of engine
coolants may harm your engine
’s cooling
system. The use of an improper coolant may
harm engine and cooling system
components and may void the warranty. Use
prediluted engine coolant meeting the Ford
specification.
See Capacities and
Specifications (page 370).
In case of emergency, you can add a large
amount of water without engine coolant in
order to reach a vehicle service location. In
this instance, qualified personnel:
1. Must drain the cooling system.
2. Chemically clean the coolant system with
Motorcraft Premium Cooling System
Flush.
3. Refill with engine coolant as soon as possible.
Water alone, without engine coolant, can
cause engine damage from corrosion,
overheating or freezing.
310
MKX (CD9) Canada/United States of America, enUSA, ASO/OGC Review Maintenance
Page 317 of 563
High Fluid Level
If the fluid level is above the maximum range
(above point A) fluid may need to be
removed. High fluid levels may be caused
by a overheating condition. If you have
operated your vehicle at high speeds, towing
a trailer or in city traffic during hot weather,
allow your vehicle to cool for a minimum of
30 minutes before rechecking the level.
Note:
An overfill conition can damage the
transmission.
Adding Transmission Fluid *
1. Rotate the automatic transmission fluid cap in a counterclockwise direction. *
2. Remove the cap and dipstick and wipe it with a clean, lint-free cloth.
3. Add fluid that meets the Ford specifications. See Capacities and
Specifications (page 376). Pour the fluid
directly into the automatic transmission
fluid cap and dipstick hole.
4. Replace the cap and dipstick and remove
it again to check the fluid level. 5.
Make sure that the fluid level is between
the MIN and the MAX marks.
6. Replace the automatic transmission fluid
cap and dipstick. Turn it clockwise until
you feel a strong resistance.
* Vehicles With 2.7L EcoBoost WARNING
Do not run the engine with the air filter
disconnected.
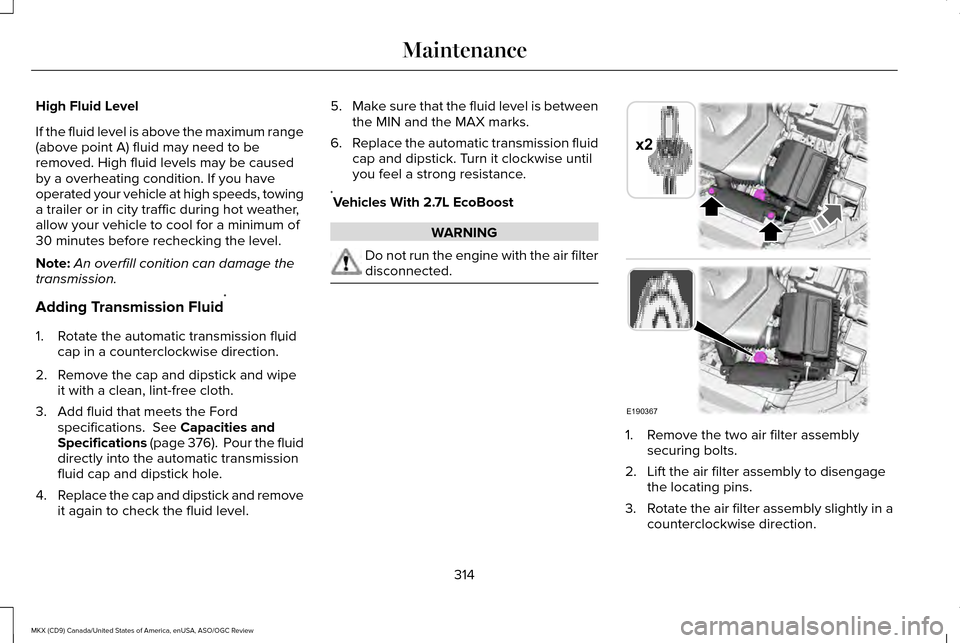
1. Remove the two air filter assembly
securing bolts.
2. Lift the air filter assembly to disengage the locating pins.
3. Rotate the air filter assembly slightly in a
counterclockwise direction.
314
MKX (CD9) Canada/United States of America, enUSA, ASO/OGC Review MaintenanceE190367
x2
Page 340 of 563
Loss of air pressure may adversely affect tire
performance. For this reason:
Note:
Do not drive the vehicle above 50 mph
(80 km/h).
Note: Do not drive further than
120 mi
(200 km). Drive only to the closest authorized
Ford dealer or tire repair shop to have your
tire inspected.
• Drive carefully and avoid abrupt steering
maneuvers.
• Periodically monitor tire inflation pressure
in the affected tire; if the tire is losing
pressure, have the vehicle towed.
• Read the information in the Tips for Use
of the Kit section to make sure safe
operation of the kit and your vehicle.
Tips for Use of the Kit
To ensure safe operation of the kit:
• Read all instructions and cautions fully.
• Before operating the kit, make sure your
vehicle is safely off the road and away
from moving traffic. Switch on the hazard
lights. •
Always set the parking brake to ensure
the vehicle does not move unexpectedly.
• Do not remove any foreign objects, such
as nails or screws, from the tire.
• When using the kit, leave the engine
running (only if the vehicle is outdoors or
in a well-ventilated area) so the
compressor does not drain the vehicle's
battery.
• Do not allow the compressor to operate
continuously for more than 15 minutes.
This will help prevent the compressor
from overheating.
• Never leave the kit unattended during
operation.
• Sealant compound contains latex. Those
with latex sensitivities should use
appropriate precautions to avoid an
allergic reaction.
• Keep the kit away from children.
• Only use the kit when the ambient
temperature is between -22°F (-30°C) and
158°F (70°C)
. •
Only use the sealing compound before
the use-by date. The use-by date is on a
label on the sealant canister, which you
can see through the rectangular viewing
window on the bottom of the compressor.
Check the use-by date regularly and
replace the canister after four years of
non-use.
• Do not store the kit unsecured inside the
passenger compartment of the vehicle
as it may cause injury during a sudden
stop or crash. Always store the kit in its
original location.
• After sealant use, an authorized Ford
dealer must replace the tire pressure
monitoring system sensor and valve stem
on the wheel.
• Operating the kit could cause an
electrical disturbance in radio, CD and
DVD player operation. * When inflation only is required for
a tire or other objects, the selector
must be in the Air position.
337
MKX (CD9) Canada/United States of America, enUSA, ASO/OGC Review Wheels and TiresE175978
Page 341 of 563
What to do When a Tire Is Punctured
You can repair a tire puncture within the tire's
tread area in two stages with the kit.
•
In the first stage, inflate the tire with a
sealing compound and air. After you
inflate the tire, you will need to drive the
vehicle a short distance (about 4 miles [6
kilometers]) to distribute the sealant in
the tire.
• In the second stage, check the tire
pressure and adjust, if necessary, to the
vehicle's specified tire inflation pressure.
First Stage: Inflating the Tire with
Sealing Compound and Air WARNINGS
Do not stand directly over the kit while
inflating the tire. If you notice any
unusual bulges or deformations in the tire's
sidewall during inflation, stop and call
roadside assistance. If the tire does not inflate to the
recommended tire pressure within 15
minutes, stop and call roadside assistance. WARNINGS
Do not run the engine during kit
operation unless the vehicle is
outdoors or in a well-ventilated area. Preparation: Park the vehicle in a safe, level
and secure area, away from moving traffic.
Switch the hazard lights on. Apply the
parking brake and switch the engine off.
Inspect the flat tire for visible damage.
Sealant compound contains latex. Use
appropriate precautions to avoid any allergic
reactions.
Do not remove any foreign object that has
pierced the tire. If a puncture is located in
the tire sidewall, stop and call roadside
assistance.
1.
Remove the valve cap from the tire valve.
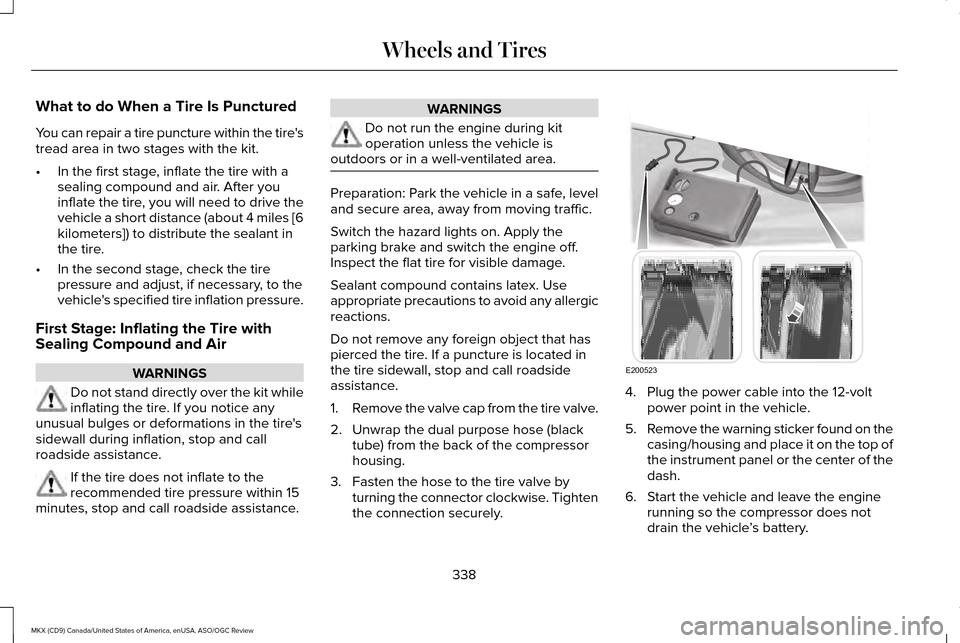
2. Unwrap the dual purpose hose (black tube) from the back of the compressor
housing.
3. Fasten the hose to the tire valve by turning the connector clockwise. Tighten
the connection securely. 4. Plug the power cable into the 12-volt
power point in the vehicle.
5. Remove the warning sticker found on the
casing/housing and place it on the top of
the instrument panel or the center of the
dash.
6. Start the vehicle and leave the engine running so the compressor does not
drain the vehicle ’s battery.
338
MKX (CD9) Canada/United States of America, enUSA, ASO/OGC Review Wheels and TiresE200523
Page 504 of 563
Make sure to change your vehicle
’s oils and
fluids at the specified intervals or in
conjunction with a repair. Flushing is a viable
way to change fluid for many vehicle
sub-systems during scheduled maintenance. It is critical that systems are flushed only with
new fluid that is the same as that required
to fill and operate the system or using a
Ford-approved flushing chemical.
Owner Checks and Services
Make sure you perform the following basic
maintenance checks and inspections every
month or at six-month intervals. Check every month
Engine oil level.
Function of all interior and exterior lights.
Tires (including spare) for wear and proper pressure. Windshield washer fluid level. Check every six months
Battery connections. Clean if necessary.
Body and door drain holes for obstructions. Clean if necessary. Cooling system fluid level and coolant strength.
Door weatherstrips for wear. Lubricate if necessary.
Hinges, latches and outside locks for proper operation. Lubricate if necessary. Parking brake for proper operation.
501
MKX (CD9) Canada/United States of America, enUSA, ASO/OGC Review Scheduled Maintenance
Page 563 of 563
W
Warning Lamps and Indicators..................109
Adaptive Cruise Control....................................109
Anti-Lock Braking System.................................109
Autohold Active...................................................109
Autohold Unavailable........................................109
Automatic High Beam Control.........................109
Battery.....................................................................110
Blind Spot Monitor...............................................110
Brake System........................................................110
Cruise Control.......................................................110
Direction Indicator................................................110
Door Ajar................................................................110
Electric Park Brake...............................................110
Engine Coolant Temperature............................110
Engine Oil................................................................111
Fasten Safety Belt.................................................111
Front Airbag............................................................111
Heads Up Display..................................................111
High Beam...............................................................111
Hood Ajar................................................................111
Liftgate Ajar.............................................................111
Low Beam Malfunction Warning........................
111
Low Fuel Level.......................................................111
Low Tire Pressure Warning.................................111
Low Washer Fluid.................................................112
Parking Lamps.......................................................112 Powertrain Fault...............................................112
Service Engine Soon...........................................112
Stability Control.....................................................112
Stability Control Off..............................................113
Washer Fluid Check......................................315
Washers See: Cleaning the Exterior...............................325
See: Wipers and Washers...................................87
Waxing............................................................326
Welcome Lighting
...........................................97
Wheel Nuts See: Changing a Road Wheel.........................363
Wheels and Tires
..........................................334
General Information...........................................334
Technical Specifications...................................368
Windows and Mirrors
...................................100
Windshield Washers......................................89
Front Camera Washer..........................................89
Windshield Wipers..........................................87 Intermittent Wipe...................................................87
Speed Dependent Wipers..................................87
Wipers and Washers......................................87
Wrecker Towing See: Transporting the Vehicle.........................266
560
MKX (CD9) Canada/United States of America, enUSA, ASO/OGC Review Index