Ets LINCOLN MKX 2016 Owner's Manual
[x] Cancel search | Manufacturer: LINCOLN, Model Year: 2016, Model line: MKX, Model: LINCOLN MKX 2016Pages: 563, PDF Size: 4.96 MB
Page 257 of 563
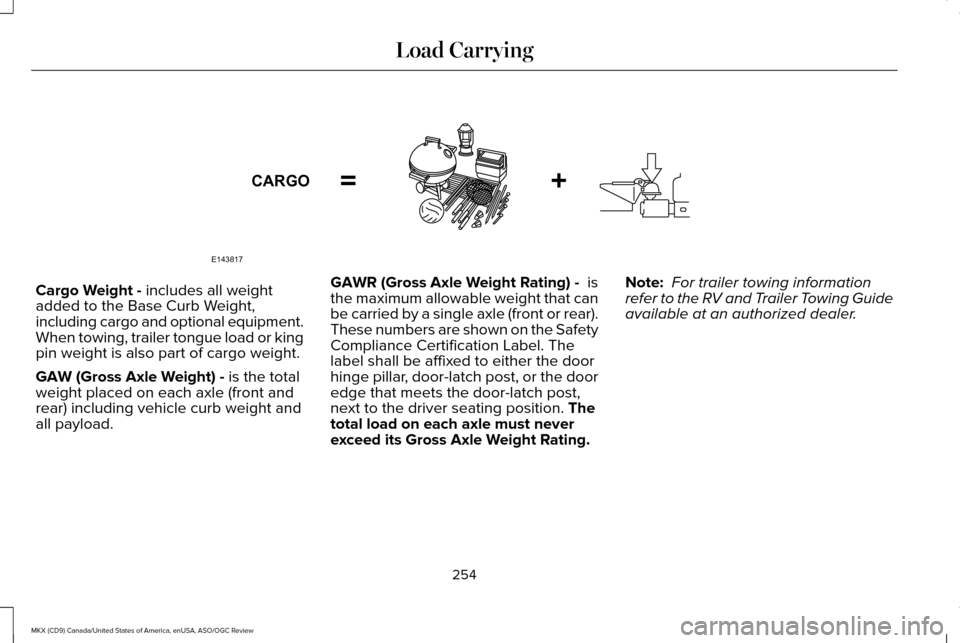
Cargo Weight - includes all weight
added to the Base Curb Weight,
including cargo and optional equipment.
When towing, trailer tongue load or king
pin weight is also part of cargo weight.
GAW (Gross Axle Weight) -
is the total
weight placed on each axle (front and
rear) including vehicle curb weight and
all payload. GAWR (Gross Axle Weight Rating) -
is
the maximum allowable weight that can
be carried by a single axle (front or rear).
These numbers are shown on the Safety
Compliance Certification Label. The
label shall be affixed to either the door
hinge pillar, door-latch post, or the door
edge that meets the door-latch post,
next to the driver seating position.
The
total load on each axle must never
exceed its Gross Axle Weight Rating. Note:
For trailer towing information
refer to the RV and Trailer Towing Guide
available at an authorized dealer.
254
MKX (CD9) Canada/United States of America, enUSA, ASO/OGC Review Load CarryingE143817CARGO
Page 258 of 563
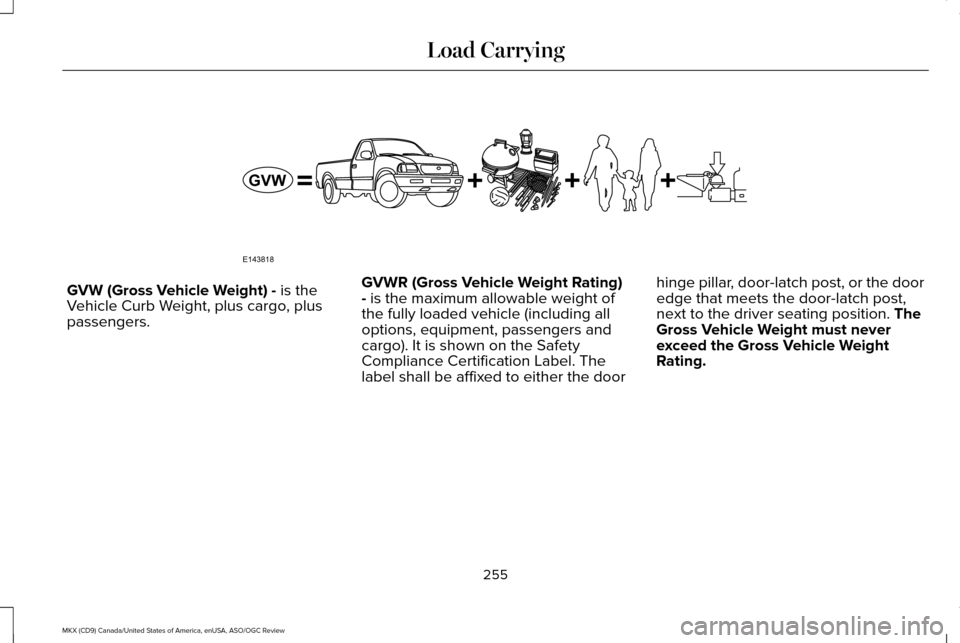
GVW (Gross Vehicle Weight) - is the
Vehicle Curb Weight, plus cargo, plus
passengers. GVWR (Gross Vehicle Weight Rating)
- is the maximum allowable weight of
the fully loaded vehicle (including all
options, equipment, passengers and
cargo). It is shown on the Safety
Compliance Certification Label. The
label shall be affixed to either the door hinge pillar, door-latch post, or the door
edge that meets the door-latch post,
next to the driver seating position. The
Gross Vehicle Weight must never
exceed the Gross Vehicle Weight
Rating.
255
MKX (CD9) Canada/United States of America, enUSA, ASO/OGC Review Load CarryingE143818GVW
Page 263 of 563
*Suppose your vehicle has a 1400-pound
(635-kilogram) cargo and luggage
capacity. You and one of your friends
decide to pick up cement from the local
home improvement store to finish that
patio you have been planning for the
past two years. Measuring the inside of
the vehicle with the rear seat folded
down, you have room for twelve
100-pound (45-kilogram) bags of
cement. Do you have enough load
capacity to transport the cement to your
home? If you and your friend each weigh
220 pounds (99 kilograms), the
calculation would be: 1400 - (2 x 220) -
(12 x 100) = 1400 - 440 - 1200 = - 240
pounds. No, you do not have enough
cargo capacity to carry that much
weight. In metric units, the calculation
would be: 635 kilograms - (2 x 99
kilograms) - (12 x 45 kilograms) = 635 -
198 - 540 = -103 kilograms. You will need
to reduce the load weight by at least
240 pounds (104 kilograms). If you
remove three 100-pound (45-kilogram)
cement bags, then the load calculation
would be:1400 - (2 x 220) - (9 x 100) =
1400 - 440 - 900 = 60 pounds. Now you
have the load capacity to transport the
cement and your friend home. In metric
units, the calculation would be: 635
kilograms - (2 x 99 kilograms) - (9 x 45
kilograms) = 635 - 198 - 405 = 32
kilograms.
The above calculations also assume that
the loads are positioned in your vehicle
in a manner that does not overload the
Front or the Rear Gross Axle Weight
Rating specified for your vehicle on the
Safety Compliance Certification Label.
The label shall be affixed to either the
door hinge pillar, door-latch post, or the
door edge that meets the door-latch
post, next to the driver seating position.
Special Loading Instructions for
Owners of Pick-up Trucks and Utility-
type Vehicles WARNING
Loaded vehicles may handle
differently than unloaded vehicles.
Extra precautions, such as slower
speeds and increased stopping
distance, should be taken when driving
a heavily loaded vehicle. Your vehicle can haul more cargo and
people than most passenger cars.
Depending upon the type and
placement of the load, hauling cargo
and people may raise the center of
gravity of the vehicle.
260
MKX (CD9) Canada/United States of America, enUSA, ASO/OGC Review Load Carrying
Page 305 of 563
GENERAL INFORMATION
Have your vehicle serviced regularly to help
maintain its roadworthiness and resale value.
There is a large network of authorized
dealers that are there to help you with their
professional servicing expertise. We believe
that their specially trained technicians are
best qualified to service your vehicle properly
and expertly. They are supported by a wide
range of highly specialized tools developed
specifically for servicing your vehicle.
To help you service your vehicle, we provide
scheduled maintenance information which
makes tracking routine service easy. See
Scheduled Maintenance (page 499).
If your vehicle requires professional service,
an authorized dealer can provide the
necessary parts and service. Check your
warranty information to find out which parts
and services are covered.
Use only recommended fuels, lubricants,
fluids and service parts conforming to
specifications. Motorcraft® parts are
designed and built to provide the best
performance in your vehicle. Precautions
•
Do not work on a hot engine.
• Make sure that nothing gets caught in
moving parts.
• Do not work on a vehicle with the engine
running in an enclosed space, unless you
are sure you have enough ventilation.
• Keep all open flames and other burning
material (such as cigarettes) away from
the battery and all fuel related parts.
Working with the Engine Off
1. Set the parking brake and shift to park (P).
2. Switch off the engine.
3. Block the wheels.
Working with the Engine On WARNING
To reduce the risk of vehicle damage
and/or personal burn injuries, do not
start your engine with the air cleaner
removed and do not remove it while the
engine is running. 1. Set the parking brake and shift to park
(P).
2. Block the wheels
OPENING AND CLOSING THE
HOOD
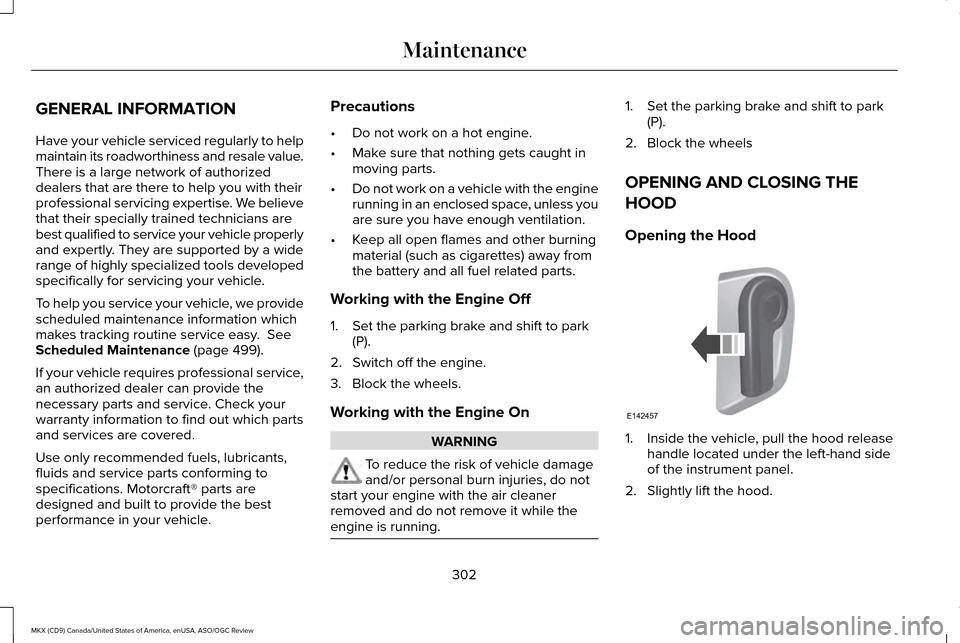
Opening the Hood 1. Inside the vehicle, pull the hood release
handle located under the left-hand side
of the instrument panel.
2. Slightly lift the hood.
302
MKX (CD9) Canada/United States of America, enUSA, ASO/OGC Review MaintenanceE142457
Page 311 of 563
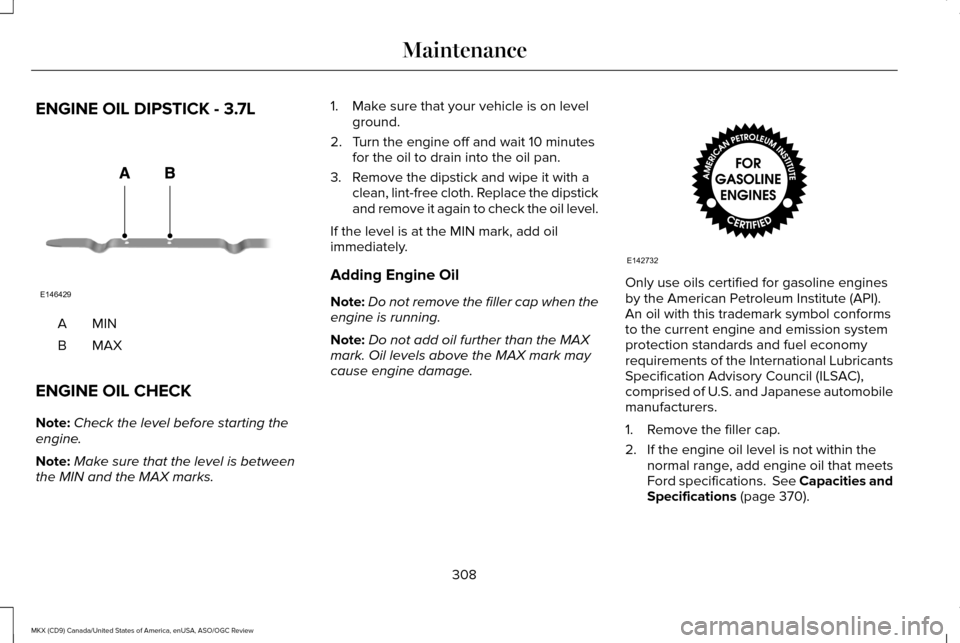
ENGINE OIL DIPSTICK - 3.7L
MINA
MAXB
ENGINE OIL CHECK
Note: Check the level before starting the
engine.
Note: Make sure that the level is between
the MIN and the MAX marks. 1. Make sure that your vehicle is on level
ground.
2. Turn the engine off and wait 10 minutes for the oil to drain into the oil pan.
3. Remove the dipstick and wipe it with a clean, lint-free cloth. Replace the dipstick
and remove it again to check the oil level.
If the level is at the MIN mark, add oil
immediately.
Adding Engine Oil
Note: Do not remove the filler cap when the
engine is running.
Note: Do not add oil further than the MAX
mark. Oil levels above the MAX mark may
cause engine damage. Only use oils certified for gasoline engines
by the American Petroleum Institute (API).
An oil with this trademark symbol conforms
to the current engine and emission system
protection standards and fuel economy
requirements of the International Lubricants
Specification Advisory Council (ILSAC),
comprised of U.S. and Japanese automobile
manufacturers.
1. Remove the filler cap.
2. If the engine oil level is not within the
normal range, add engine oil that meets
Ford specifications. See Capacities and
Specifications (page 370).
308
MKX (CD9) Canada/United States of America, enUSA, ASO/OGC Review MaintenanceE146429 E142732
Page 312 of 563
3.
Remove the engine oil filler cap and use
a funnel to pour the engine oil into the
opening.
4. Wipe off any spilled oil.
5. Replace the filler cap. Turn it until you feel a strong resistance.
OIL CHANGE INDICATOR RESET
Use the information display controls on the
steering wheel to reset the oil change
indicator.
From the main menu scroll to: Action and description
Message
Press the right arrow button,
then from this menu scroll to
the following message.
Settings
Press the right arrow button,
then from this menu scroll to
the following message.
Vehicle
Press the right arrow button,
then from this menu scroll to
the following message.
Oil Life Action and description
Message
Press and hold the OK button
until the instrument cluster
displays the following
message.
Hold OK to
Reset
Reset Successful
When the oil change indicator
resets the instrument cluster
displays 100%.
Remaining Life
{00}%
If the instrument cluster
displays one of the following
messages, repeat the
process.
Not Reset
Reset Cancelled ENGINE COOLANT CHECK WARNINGS
Do not add engine coolant when the
engine is hot. Steam and scalding
liquids released from a hot cooling system
can burn you badly. Also, spilling coolant on
hot engine parts can burn you. Do not put engine coolant in the
windshield washer fluid container. If
sprayed on the windshield, engine coolant
could make it difficult to see through the
windshield. To reduce the risk of personal injury,
make sure the engine is cool before
unscrewing the coolant pressure relief cap.
The cooling system is under pressure. Steam
and hot liquid can come out forcefully when
you loosen the cap slightly. Do not add coolant further than the
MAX mark.
309
MKX (CD9) Canada/United States of America, enUSA, ASO/OGC Review Maintenance
Page 313 of 563
Checking the Engine Coolant
When the engine is cold, check the
concentration and level of the engine coolant
at the intervals listed in the scheduled
maintenance information. See Scheduled
Maintenance (page 499).
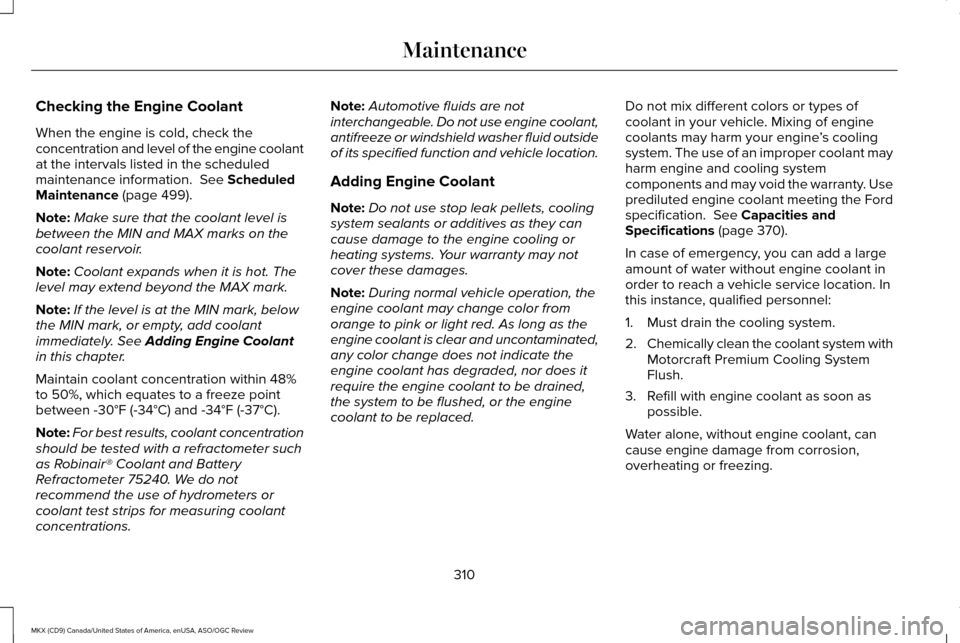
Note: Make sure that the coolant level is
between the MIN and MAX marks on the
coolant reservoir.
Note: Coolant expands when it is hot. The
level may extend beyond the MAX mark.
Note: If the level is at the MIN mark, below
the MIN mark, or empty, add coolant
immediately. See
Adding Engine Coolant
in this chapter.
Maintain coolant concentration within 48%
to 50%, which equates to a freeze point
between -30°F (-34°C) and -34°F (-37°C).
Note: For best results, coolant concentration
should be tested with a refractometer such
as Robinair® Coolant and Battery
Refractometer 75240. We do not
recommend the use of hydrometers or
coolant test strips for measuring coolant
concentrations. Note:
Automotive fluids are not
interchangeable. Do not use engine coolant,
antifreeze or windshield washer fluid outside
of its specified function and vehicle location.
Adding Engine Coolant
Note: Do not use stop leak pellets, cooling
system sealants or additives as they can
cause damage to the engine cooling or
heating systems. Your warranty may not
cover these damages.
Note: During normal vehicle operation, the
engine coolant may change color from
orange to pink or light red. As long as the
engine coolant is clear and uncontaminated,
any color change does not indicate the
engine coolant has degraded, nor does it
require the engine coolant to be drained,
the system to be flushed, or the engine
coolant to be replaced. Do not mix different colors or types of
coolant in your vehicle. Mixing of engine
coolants may harm your engine
’s cooling
system. The use of an improper coolant may
harm engine and cooling system
components and may void the warranty. Use
prediluted engine coolant meeting the Ford
specification.
See Capacities and
Specifications (page 370).
In case of emergency, you can add a large
amount of water without engine coolant in
order to reach a vehicle service location. In
this instance, qualified personnel:
1. Must drain the cooling system.
2. Chemically clean the coolant system with
Motorcraft Premium Cooling System
Flush.
3. Refill with engine coolant as soon as possible.
Water alone, without engine coolant, can
cause engine damage from corrosion,
overheating or freezing.
310
MKX (CD9) Canada/United States of America, enUSA, ASO/OGC Review Maintenance
Page 317 of 563
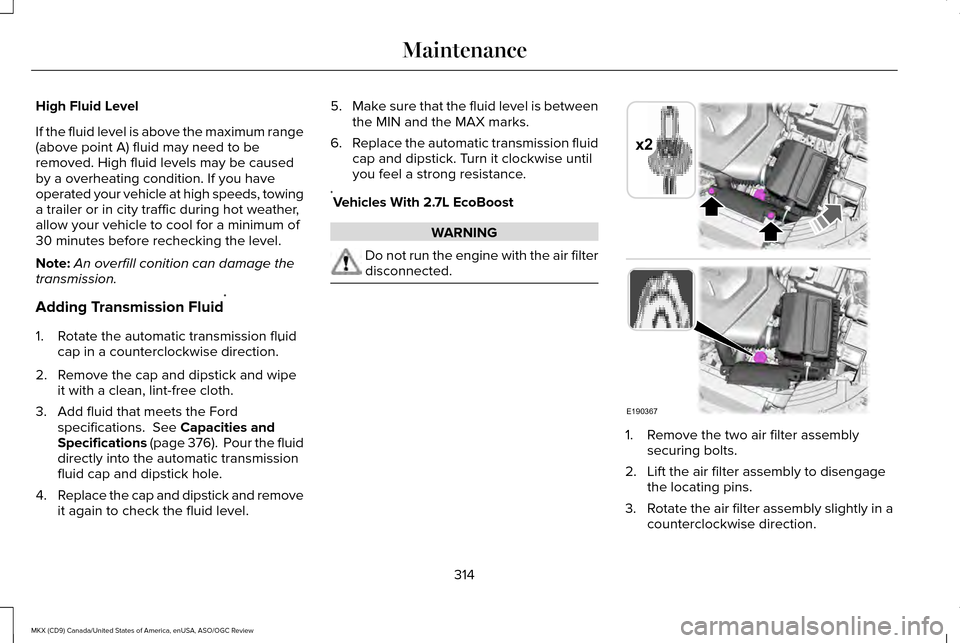
High Fluid Level
If the fluid level is above the maximum range
(above point A) fluid may need to be
removed. High fluid levels may be caused
by a overheating condition. If you have
operated your vehicle at high speeds, towing
a trailer or in city traffic during hot weather,
allow your vehicle to cool for a minimum of
30 minutes before rechecking the level.
Note:
An overfill conition can damage the
transmission.
Adding Transmission Fluid *
1. Rotate the automatic transmission fluid cap in a counterclockwise direction. *
2. Remove the cap and dipstick and wipe it with a clean, lint-free cloth.
3. Add fluid that meets the Ford specifications. See Capacities and
Specifications (page 376). Pour the fluid
directly into the automatic transmission
fluid cap and dipstick hole.
4. Replace the cap and dipstick and remove
it again to check the fluid level. 5.
Make sure that the fluid level is between
the MIN and the MAX marks.
6. Replace the automatic transmission fluid
cap and dipstick. Turn it clockwise until
you feel a strong resistance.
* Vehicles With 2.7L EcoBoost WARNING
Do not run the engine with the air filter
disconnected.
1. Remove the two air filter assembly
securing bolts.
2. Lift the air filter assembly to disengage the locating pins.
3. Rotate the air filter assembly slightly in a
counterclockwise direction.
314
MKX (CD9) Canada/United States of America, enUSA, ASO/OGC Review MaintenanceE190367
x2
Page 318 of 563
4. Check the fluid level. See Checking the
Transmission Fluid Level.
5. Install in reverse order. Tighten the two air filter assembly securing bolts until you
feel a strong resistance.
BRAKE FLUID CHECK WARNINGS
Do not use any fluid other than the
recommended brake fluid as this will
reduce brake efficiency. Use of incorrect fluid
could result in the loss of vehicle control,
serious personal injury or death. Only use brake fluid from a sealed
container. Contamination with dirt,
water, petroleum products or other materials
may result in brake system damage or failure.
Failure to adhere to this warning could result
in the loss of vehicle control, serious
personal injury or death. Do not allow the fluid to touch your
skin or eyes. If this happens, rinse the
affected areas immediately with plenty of
water and contact your physician. WARNINGS
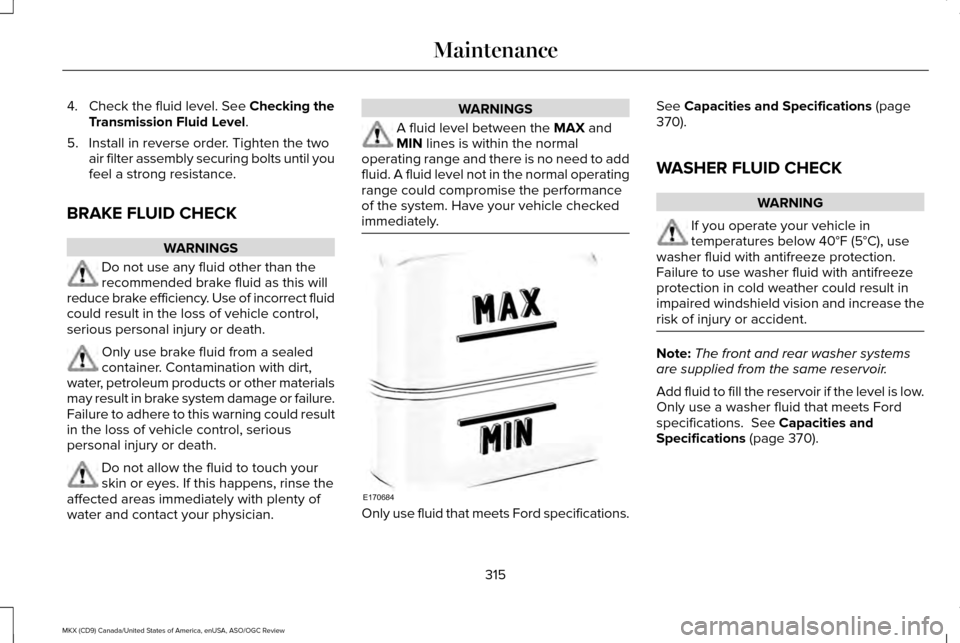
A fluid level between the MAX and
MIN lines is within the normal
operating range and there is no need to add
fluid. A fluid level not in the normal operating
range could compromise the performance
of the system. Have your vehicle checked
immediately. Only use fluid that meets Ford specifications.See
Capacities and Specifications (page
370).
WASHER FLUID CHECK WARNING
If you operate your vehicle in
temperatures below 40°F (5°C), use
washer fluid with antifreeze protection.
Failure to use washer fluid with antifreeze
protection in cold weather could result in
impaired windshield vision and increase the
risk of injury or accident. Note:
The front and rear washer systems
are supplied from the same reservoir.
Add fluid to fill the reservoir if the level is low.
Only use a washer fluid that meets Ford
specifications.
See Capacities and
Specifications (page 370).
315
MKX (CD9) Canada/United States of America, enUSA, ASO/OGC Review MaintenanceE170684
Page 320 of 563
For longer, trouble-free operation, keep the
top of the battery clean and dry. Also, make
certain the battery cables are always tightly
fastened to the battery terminals.
If you see any corrosion on the battery or
terminals, remove the cables from the
terminals and clean with a wire brush. You
can neutralize the acid with a solution of
baking soda and water.
When a battery replacement is required, the
battery should only be replaced with a Ford
recommended replacement battery that
matches the electrical requirements of the
vehicle.
Because your vehicle
’s engine is
electronically-controlled by a computer,
some engine control settings are maintained
by power from the low voltage battery. Some
engine computer settings, like the idle trim
and fuel trim strategy, optimize the
driveability and performance of the engine. Some other computer settings, like the clock
and radio station presets, are also maintained
in memory by power from the low voltage
battery. When a technician disconnects and
connects the low voltage battery, these
settings are erased.
Note:
Until you switch the ignition to the on
position, you will receive a message in your
information display stating that your vehicle
is not in park.
Complete the following procedure in order
to restore the settings:
1. With the vehicle at a complete stop, set the parking brake.
2. Shift the transmission into P.
3. Turn off all accessories.
4. Step on the brake pedal and start the vehicle. 5. Run the engine until it reaches normal
operating temperature. While the engine
is warming up, complete the following:
Reset the clock. See Audio System
(page 388). Reset the power windows
bounce-back feature. See Windows and
Mirrors (page 100).
Reset the radio station
presets. See Audio System (page 388).
6. Allow the engine to idle for at least one minute. If the engine turns off, step on
the accelerator to start the engine.
7. While the engine is running, step on the brake pedal and shift the transmission to
N.
8. Allow the engine to run for at least one minute by pressing on the accelerator
pedal.
9. Drive your vehicle at least 10 miles (16 kilometers) to completely relearn the idle
and fuel trim strategy.
Note: Certain features may not operate if
the Battery Monitor System is not reset with
a scan tool following a jump start or battery
replacement. Normal electrical accessory
operation should resume after your vehicle
is left undisturbed for 8 hours.
317
MKX (CD9) Canada/United States of America, enUSA, ASO/OGC Review Maintenance