remove battery LINCOLN MKX 2016 Owners Manual
[x] Cancel search | Manufacturer: LINCOLN, Model Year: 2016, Model line: MKX, Model: LINCOLN MKX 2016Pages: 563, PDF Size: 4.96 MB
Page 76 of 563
POWER LIFTGATE (If Equipped)
WARNINGS
It is extremely dangerous to ride in a
cargo area, inside or outside of a
vehicle. In a crash, people riding in these
areas are more likely to be seriously injured
or killed. Do not allow people to ride in any
area of your vehicle that is not equipped with
seats and safety belts. Make sure everyone
in your vehicle is in a seat and properly using
a safety belt. Failure to follow this warning
could result in serious personal injury or
death. Make sure to close and latch the
liftgate to prevent drawing exhaust
fumes into your vehicle. This will also prevent
passengers and cargo from falling out. If you
must drive with the liftgate open, keep the
vents or windows open so outside air comes
into your vehicle. Failure to follow this
warning could result in serious personal
injury. WARNINGS
Keep keys out of reach of children. Do
not allow children to operate or play
near an open or moving power liftgate. You
should supervise the operation of the power
liftgate at all times. Note:
Make sure that you close the liftgate
before operating or moving your vehicle,
especially in an enclosure, like a garage or
a parking structure. This could damage the
liftgate and its components.
Note: Do not hang anything, for example a
bike rack, from the glass or liftgate. This
could damage the liftgate and its
components.
The liftgate only operates with the
transmission in park (P). Three warning tones sound as the liftgate
begins to power close. If there is a problem
with the open or close request, one of the
following may occur:
•
One chime sounds if the ignition is on
and the transmission is not in park (P).
• Three chimes sound if the battery voltage
is below the minimum operating voltage.
• One chime sounds if the vehicle speed
is at or above
3 mph (5 km/h).
If the liftgate starts to close after it has fully
opened, this indicates there may be
excessive weight on the liftgate or a possible
gas strut failure. A repetitive chime sounds
and the liftgate closes under control. Remove
any excessive weight from the liftgate. If the
liftgate continues to close after opening,
have the system checked by an authorized
dealer.
Opening and Closing the Liftgate WARNING
Make sure all persons are clear of the
power liftgate area before using the
power liftgate control. 73
MKX (CD9) Canada/United States of America, enUSA, ASO/OGC Review Locks
Page 78 of 563
Stopping the Liftgate Movement
You can stop the liftgate movement by doing
any of the following:
•
Pressing the liftgate control button.
• Pressing the liftgate button on the remote
control twice.
• Pressing the liftgate button on the
instrument panel.
• Activating the obstacle detection feature.
• Moving your foot under and away from
the center rear bumper in a single-kick
motion. *
* This method only works for vehicles with the
hands-free liftgate feature.
Setting the Liftgate Open Height
1. Open the liftgate.
2. Stop the liftgate movement by pressing the control button on the liftgate when it
reaches the desired height.
Note: Once the liftgate has stopped moving,
you can also manually move it to the desired
height. 3.
Press and hold the liftgate control button
on the liftgate until you hear a chime,
indicating programming is complete.
Note: You can only use the liftgate control
button to program the height.
Note: You cannot program the height if the
liftgate position is too low.
The new open liftgate height is recalled
when the power liftgate is opened. To
change the programmed height, repeat the
above procedure. Once you open the power
liftgate, you can manually move it to a
different height.
Note: The system recalls the new
programmed height, even if you disconnect
the battery.
When operating the power liftgate after you
have programmed a lower height than fully
open, you can fully open the liftgate by
manually pushing it upward to the maximum
open position. Obstacle Detection
When Closing
The system stops when it detects an
obstacle. Three chimes sound and the
system reverses to open. Once you remove
the obstacle, you can power close the
liftgate.
Note:
Entering your vehicle while the liftgate
is closing can cause your vehicle to bounce
and activate obstacle detection. To prevent
this, let the power liftgate close completely
before you enter your vehicle. Before driving
off, check the instrument cluster for a liftgate
or door ajar message or warning indicator.
Failure to do this could result in
unintentionally leaving the liftgate open
while driving.
When Opening
The system stops when it detects an
obstacle and two short tones sound. Once
you remove the obstacle, you can continue
to operate the liftgate.
75
MKX (CD9) Canada/United States of America, enUSA, ASO/OGC Review Locks
Page 168 of 563
GLOVE BOX
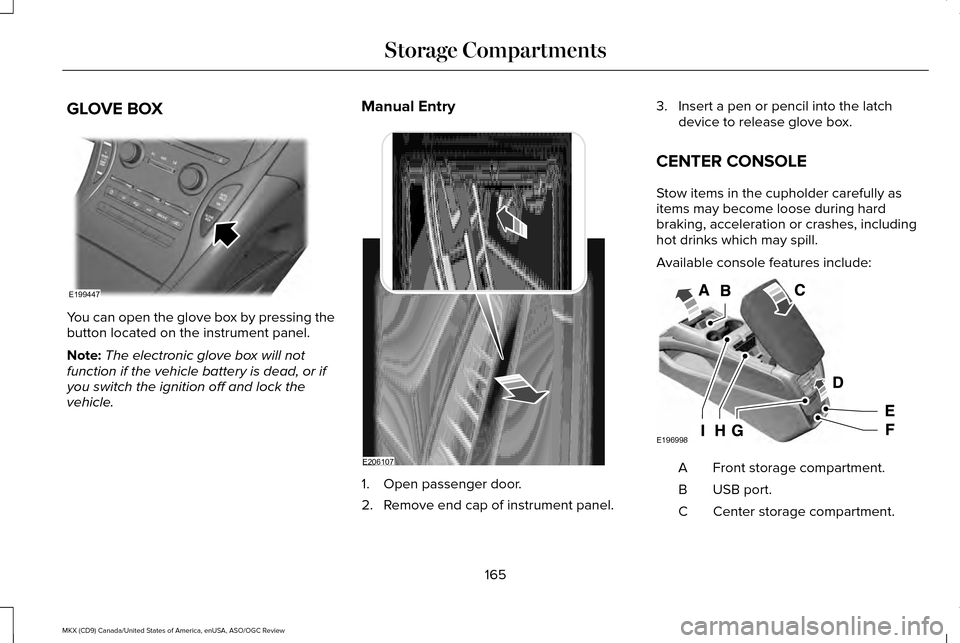
You can open the glove box by pressing the
button located on the instrument panel.
Note:
The electronic glove box will not
function if the vehicle battery is dead, or if
you switch the ignition off and lock the
vehicle. Manual Entry
1. Open passenger door.
2. Remove end cap of instrument panel.3. Insert a pen or pencil into the latch
device to release glove box.
CENTER CONSOLE
Stow items in the cupholder carefully as
items may become loose during hard
braking, acceleration or crashes, including
hot drinks which may spill.
Available console features include: Front storage compartment.
A
USB port.
B
Center storage compartment.
C
165
MKX (CD9) Canada/United States of America, enUSA, ASO/OGC Review Storage CompartmentsE199447 E206107 E196998
Page 277 of 563
Should your vehicle shut off after a collision,
you may restart your vehicle. For vehicles
equipped with a key system:
1. Switch off the ignition.
2. Switch on the ignition.
3. Repeat Steps 1 and 2 to re-enable the
fuel pump.
For vehicles equipped with a push button
start system:
1. Press the START/STOP button to switch
off the ignition.
2. Press the brake pedal and press the START/STOP button to switch on the
ignition.
3. Remove your foot from the brake pedal and press the
START/STOP button to
switch off the ignition.
4. You can either attempt to start the engine
by pressing the brake pedal and the
START/STOP
button, or switch on the
ignition only by pressing the
START/STOP
button without pressing
the brake pedal. Both ways re-enable the
fuel system. Note:
When you try to restart your vehicle
after a fuel shutoff, the vehicle makes sure
that various systems are safe to restart.
Once your vehicle determines that the
systems are safe, then the vehicle will allow
you to restart.
Note: In the event that your vehicle does not
restart after your third attempt, contact an
authorized dealer.
JUMP STARTING THE VEHICLE WARNINGS
Batteries normally produce explosive
gases which can cause personal injury.
Therefore, do not allow flames, sparks or
lighted substances to come near the battery.
When working near the battery, always shield
your face and protect your eyes. Always
provide correct ventilation. WARNINGS
Keep batteries out of reach of children.
Batteries contain sulfuric acid. Avoid
contact with skin, eyes or clothing. Shield
your eyes when working near the battery to
protect against possible splashing of acid
solution. In case of acid contact with skin or
eyes, flush immediately with water for a
minimum of 15 minutes and get prompt
medical attention. If acid is swallowed, call a
physician immediately. Use only adequately sized cables with
insulated clamps.
Preparing Your Vehicle
Do not attempt to push-start your automatic
transmission vehicle.
Note:
Attempting to push-start a vehicle with
an automatic transmission may cause
transmission damage.
Note: Use only a 12-volt supply to start your
vehicle.
Note: Do not disconnect the battery of the
disabled vehicle as this could damage the
vehicle electrical system.
274
MKX (CD9) Canada/United States of America, enUSA, ASO/OGC Review Roadside Emergencies
Page 279 of 563
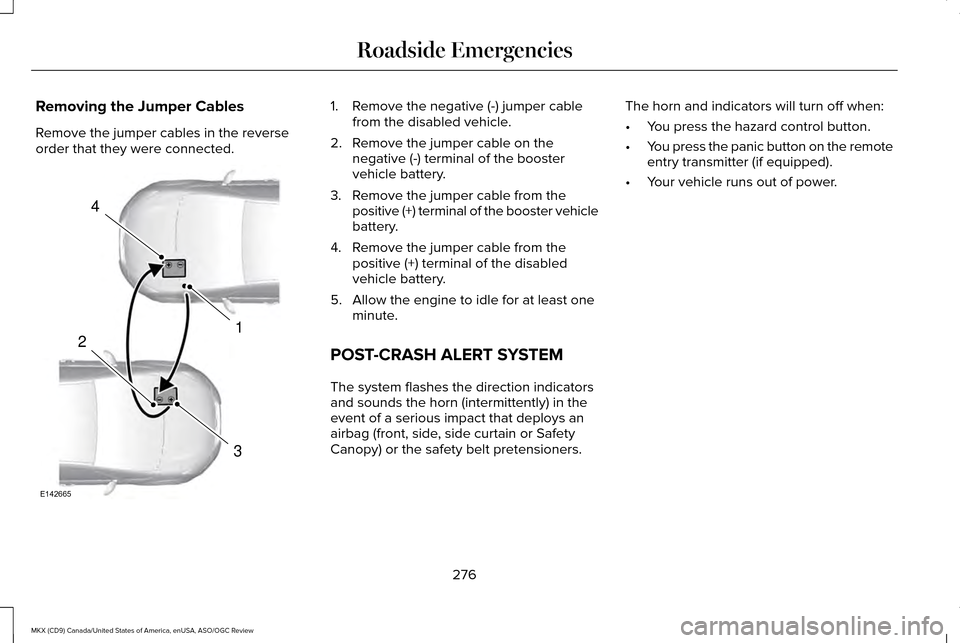
Removing the Jumper Cables
Remove the jumper cables in the reverse
order that they were connected. 1. Remove the negative (-) jumper cable
from the disabled vehicle.
2. Remove the jumper cable on the negative (-) terminal of the booster
vehicle battery.
3. Remove the jumper cable from the positive (+) terminal of the booster vehicle
battery.
4. Remove the jumper cable from the positive (+) terminal of the disabled
vehicle battery.
5. Allow the engine to idle for at least one minute.
POST-CRASH ALERT SYSTEM
The system flashes the direction indicators
and sounds the horn (intermittently) in the
event of a serious impact that deploys an
airbag (front, side, side curtain or Safety
Canopy) or the safety belt pretensioners. The horn and indicators will turn off when:
•
You press the hazard control button.
• You press the panic button on the remote
entry transmitter (if equipped).
• Your vehicle runs out of power.
276
MKX (CD9) Canada/United States of America, enUSA, ASO/OGC Review Roadside Emergencies4
1
3
2
E142665
Page 305 of 563
GENERAL INFORMATION
Have your vehicle serviced regularly to help
maintain its roadworthiness and resale value.
There is a large network of authorized
dealers that are there to help you with their
professional servicing expertise. We believe
that their specially trained technicians are
best qualified to service your vehicle properly
and expertly. They are supported by a wide
range of highly specialized tools developed
specifically for servicing your vehicle.
To help you service your vehicle, we provide
scheduled maintenance information which
makes tracking routine service easy. See
Scheduled Maintenance (page 499).
If your vehicle requires professional service,
an authorized dealer can provide the
necessary parts and service. Check your
warranty information to find out which parts
and services are covered.
Use only recommended fuels, lubricants,
fluids and service parts conforming to
specifications. Motorcraft® parts are
designed and built to provide the best
performance in your vehicle. Precautions
•
Do not work on a hot engine.
• Make sure that nothing gets caught in
moving parts.
• Do not work on a vehicle with the engine
running in an enclosed space, unless you
are sure you have enough ventilation.
• Keep all open flames and other burning
material (such as cigarettes) away from
the battery and all fuel related parts.
Working with the Engine Off
1. Set the parking brake and shift to park (P).
2. Switch off the engine.
3. Block the wheels.
Working with the Engine On WARNING
To reduce the risk of vehicle damage
and/or personal burn injuries, do not
start your engine with the air cleaner
removed and do not remove it while the
engine is running. 1. Set the parking brake and shift to park
(P).
2. Block the wheels
OPENING AND CLOSING THE
HOOD
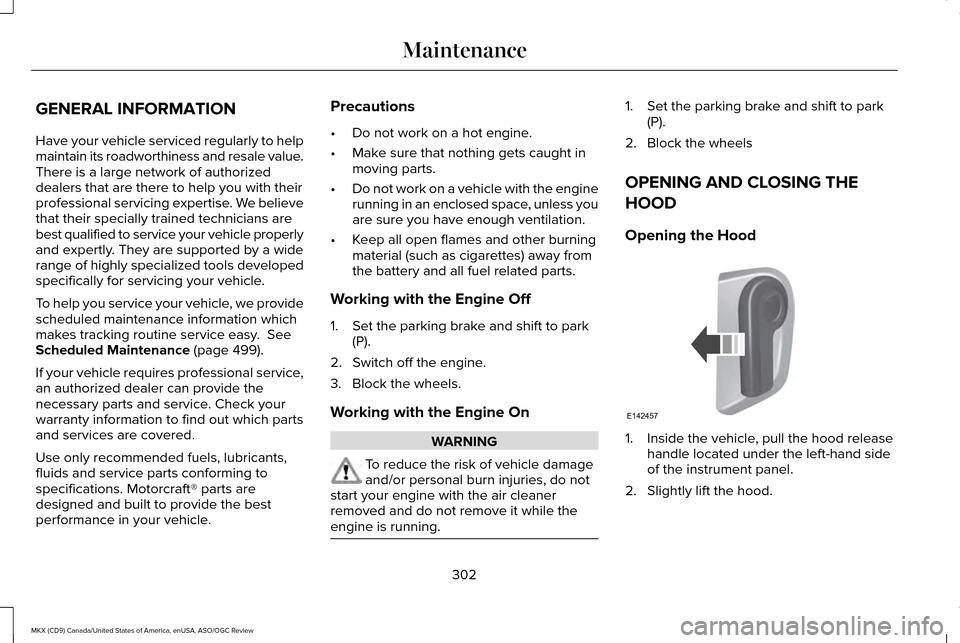
Opening the Hood 1. Inside the vehicle, pull the hood release
handle located under the left-hand side
of the instrument panel.
2. Slightly lift the hood.
302
MKX (CD9) Canada/United States of America, enUSA, ASO/OGC Review MaintenanceE142457
Page 310 of 563
Engine oil dipstick. See Engine Oil Dipstick (page 307).
C.
Brake fluid reservoir.
See Brake Fluid Check (page 315).
D.
Battery.
See Changing the 12V Battery (page 316).
E.
Power distribution box.
See Fuses (page 284).
F.
Air filter assembly.
See Changing the Engine Air Filter (page 324).
G.
Automatic transmission dipstick (under air filter assembly).
See Automatic Transmission Fluid Check (page 313).
H.
Windshield washer fluid reservoir.
See Washer Fluid Check (page 315).
I.
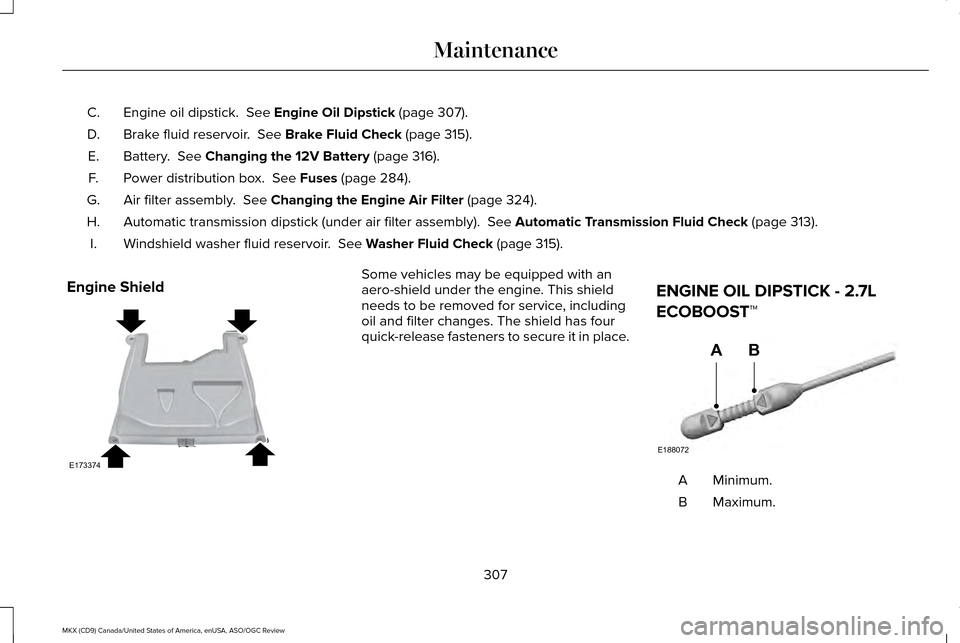
Engine Shield Some vehicles may be equipped with an
aero-shield under the engine. This shield
needs to be removed for service, including
oil and filter changes. The shield has four
quick-release fasteners to secure it in place.
ENGINE OIL DIPSTICK - 2.7L
ECOBOOST™ Minimum.
A
Maximum.
B
307
MKX (CD9) Canada/United States of America, enUSA, ASO/OGC Review MaintenanceE173374 E188072
AB
Page 320 of 563
For longer, trouble-free operation, keep the
top of the battery clean and dry. Also, make
certain the battery cables are always tightly
fastened to the battery terminals.
If you see any corrosion on the battery or
terminals, remove the cables from the
terminals and clean with a wire brush. You
can neutralize the acid with a solution of
baking soda and water.
When a battery replacement is required, the
battery should only be replaced with a Ford
recommended replacement battery that
matches the electrical requirements of the
vehicle.
Because your vehicle
’s engine is
electronically-controlled by a computer,
some engine control settings are maintained
by power from the low voltage battery. Some
engine computer settings, like the idle trim
and fuel trim strategy, optimize the
driveability and performance of the engine. Some other computer settings, like the clock
and radio station presets, are also maintained
in memory by power from the low voltage
battery. When a technician disconnects and
connects the low voltage battery, these
settings are erased.
Note:
Until you switch the ignition to the on
position, you will receive a message in your
information display stating that your vehicle
is not in park.
Complete the following procedure in order
to restore the settings:
1. With the vehicle at a complete stop, set the parking brake.
2. Shift the transmission into P.
3. Turn off all accessories.
4. Step on the brake pedal and start the vehicle. 5. Run the engine until it reaches normal
operating temperature. While the engine
is warming up, complete the following:
Reset the clock. See Audio System
(page 388). Reset the power windows
bounce-back feature. See Windows and
Mirrors (page 100).
Reset the radio station
presets. See Audio System (page 388).
6. Allow the engine to idle for at least one minute. If the engine turns off, step on
the accelerator to start the engine.
7. While the engine is running, step on the brake pedal and shift the transmission to
N.
8. Allow the engine to run for at least one minute by pressing on the accelerator
pedal.
9. Drive your vehicle at least 10 miles (16 kilometers) to completely relearn the idle
and fuel trim strategy.
Note: Certain features may not operate if
the Battery Monitor System is not reset with
a scan tool following a jump start or battery
replacement. Normal electrical accessory
operation should resume after your vehicle
is left undisturbed for 8 hours.
317
MKX (CD9) Canada/United States of America, enUSA, ASO/OGC Review Maintenance
Page 321 of 563
Note:
If you do not allow the engine to
relearn the idle and fuel trim strategy, the
idle quality of your vehicle may be adversely
affected until the engine computer
eventually relearns the idle trim and fuel trim
strategy.
Note: Always dispose of automotive
batteries in a responsible manner. Follow
your local authorized standards for disposal.
Call your local authorized recycling center
to find out more about recycling automotive
batteries.
Note: It is recommended that the negative
battery cable terminal be disconnected from
the battery if you plan to store your vehicle
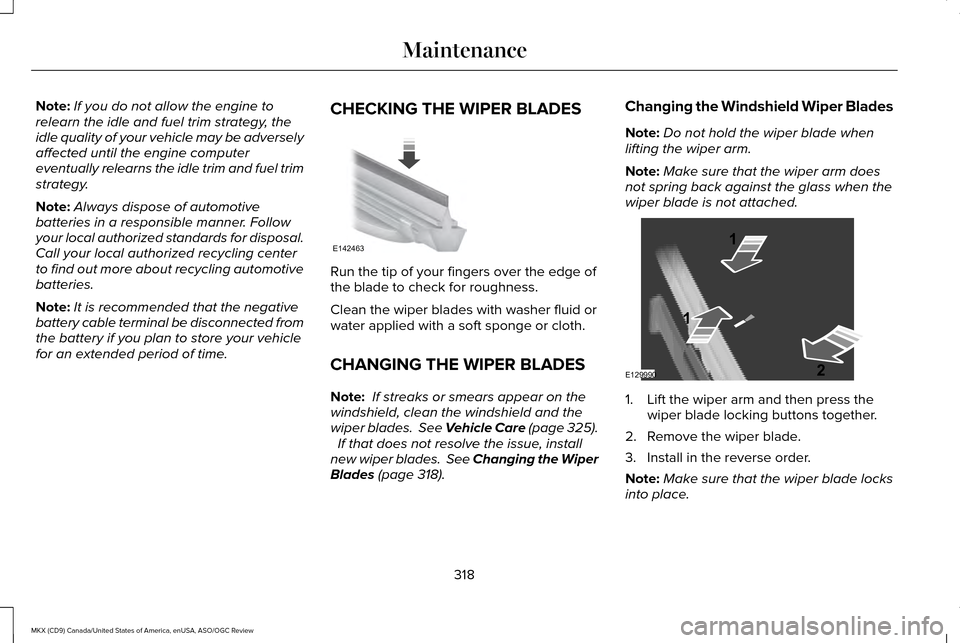
for an extended period of time. CHECKING THE WIPER BLADES Run the tip of your fingers over the edge of
the blade to check for roughness.
Clean the wiper blades with washer fluid or
water applied with a soft sponge or cloth.
CHANGING THE WIPER BLADES
Note:
If streaks or smears appear on the
windshield, clean the windshield and the
wiper blades. See Vehicle Care (page 325).
If that does not resolve the issue, install
new wiper blades. See Changing the Wiper
Blades (page 318). Changing the Windshield Wiper Blades
Note:
Do not hold the wiper blade when
lifting the wiper arm.
Note: Make sure that the wiper arm does
not spring back against the glass when the
wiper blade is not attached. 1. Lift the wiper arm and then press the
wiper blade locking buttons together.
2. Remove the wiper blade.
3. Install in the reverse order.
Note: Make sure that the wiper blade locks
into place.
318
MKX (CD9) Canada/United States of America, enUSA, ASO/OGC Review MaintenanceE142463 E129990
1
1 2
Page 330 of 563
CLEANING THE ENGINE
Engines are more efficient when they are
clean because grease and dirt buildup keep
the engine warmer than normal.
When washing:
•
Take care when using a power washer
to clean the engine. The high-pressure
fluid could penetrate the sealed parts
and cause damage.
• Do not spray a hot engine with cold water
to avoid cracking the engine block or
other engine components.
• Spray Motorcraft Engine Shampoo and
Degreaser on all parts that require
cleaning and pressure rinse clean. In
Canada, use Motorcraft Engine Shampoo.
• Never wash or rinse the engine while it
is hot or running; water in the running
engine may cause internal damage. •
Never wash or rinse any ignition coil,
spark plug wire or spark plug well, or the
area in and around these locations.
• Cover the battery, power distribution box,
and air filter assembly to prevent water
damage when cleaning the engine.
CLEANING THE WINDOWS AND
WIPER BLADES
Car wash chemicals and environmental
fallout can result in windshield and wiper
blade contamination. Dirty windshield and
wipers will result in poor windshield wiper
operation. Keep the windshield and wiper
blades clean to maintain windshield wiper
performance. To clean the windshield and wiper blades:
•
Clean the windshield with a non-abrasive
glass cleaner. When cleaning the interior
of the windshield, avoid getting any glass
cleaner on the instrument panel or door
panels. Wipe any glass cleaner off these
surfaces immediately.
• For windshields contaminated with tree
sap, chemicals, wax or bugs, clean the
entire windshield using steel wool (no
greater than 0000 grade) in a circular
motion and rinse with water.
• Clean the wiper blades with isopropyl
rubbing alcohol or windshield washer
concentrate.
Note: Do not use razor blades or other
sharp objects to clean or remove decals from
the inside of the heated rear window. The
vehicle warranty does not cover damage
caused to the heated rear window grid lines.
327
MKX (CD9) Canada/United States of America, enUSA, ASO/OGC Review Vehicle Care