lock LINCOLN MKZ 2010 User Guide
[x] Cancel search | Manufacturer: LINCOLN, Model Year: 2010, Model line: MKZ, Model: LINCOLN MKZ 2010Pages: 318, PDF Size: 2.22 MB
Page 30 of 318
Setting the clock
CLOCK:Press to set the clock. The display will read SET TIME. Use the
memory preset numbers (0–9) to enter in the desired time– hours and
minutes. The clock will then begin from that time.
AM/FM Radio
/ VOL (Power/Volume):Press to turn the radio on/off. Turn the
knob to increase/decrease volume.
If the volume is set above a certain level and the ignition is turned off,
the volume will come back on at a nominal listening level when the
ignition is turned back on.
AM/FM:Press repeatedly to select AM/FM1/FM2 frequency band.
TUNE:Turn the knob to go up/down the frequency band in individual
increments.
DIRECT:Press DIRECT and then select the desired radio frequency
(i.e. 93.9) using the memory preset numbers (0–9).
SEEK:Press
SEEKto access the previous/next strong radio
station.
SCAN:Press for a brief sampling of all strong radio stations.
MEMORY PRESETS (0–9):When tuned to any station, press and hold a
preset button until sound returns and PRESET # SAVED appears in the
display. You can save up to 30 stations, 10 in AM, 10 in FM1 and FM2.
Saving presets automatically:Autoset allows you to set the strongest
local radio stations without losing your original manually set preset
stations for AM/FM1/FM2.
To activate the autoset feature:Press MENU repeatedly until AUTO
PRESET ON/OFF appears in the display. Use
SEEKto toggle
AUTO PRESET to ON, and either wait five seconds for the search to
initiate or press OK to immediately initiate the search. If you press
another control within those five seconds, the search will not initiate.
The 10 strongest stations will be filled and the station stored in preset 1
will begin playing.
If there are fewer then 10 strong stations, the system will store the last
one in the remaining presets.
RDS Radio
Available only in FM mode. This feature allows you to search
RDS-equipped stations for a certain category of music format: CLASSIC,
COUNTRY, JAZZ/RB, ROCK, etc.
2010 MKZ(378)
Owners Guide, 1st Printing
USA(fus)
Entertainment Systems
30
Page 35 of 318
c. DELETE ALL SONGS:Press OK to delete all song’s from the
system’s memory. The display will read ARE YOU SURE ? Press OK to
confirm deletion of all saved songs and the display will read ALL
DELETED.
Note:If there are no songs presently saved, the display will read NO
SONGS.
d. DISABLE ALERTS/ENABLE ALERTS:Press OK to
enable/disable the satellite alert status which alerts you when your
selected songs are playing on a satellite radio channel. (The system
default is disabled.) SONG ALERTS ENABLED/DISABLED will appear
in the display. The menu listing will display the opposite state. For
example, if you have chosen to enable the song alerts, the menu
listing will read DISABLE as the alerts are currently on, so your other
optionistoturnthemoff.
•CHANNEL LOCKOUT MENU-Press OK to enter the Channel
Lockout menu. Press the
SEEKto scroll through the following
options:
a. LOCK/UNLOCK THIS CHANNEL:Press OK when
LOCK/UNLOCK THIS CHANNEL is displayed and the display will read
ENTER PIN. Enter your four-digit PIN number (initial PIN is 1234)
and the system will lock/unlock the channel and CHANNEL LOCKED
or UNLOCKED will be displayed.
Note: you must be tuned to the specific channel you want to
lock/unlock when using this feature.
b. CHANGE PIN:Press OK when CHANGE PIN is displayed. The
display will read ENTER OLD PIN. Enter your current (old) PIN
number and when the system accepts your entry it will display
ENTER NEW PIN. Enter your new four-digit PIN and the system will
save the new PIN and PIN SAVED will display.
c. UNLOCK ALL CHANNELS:Press OK when UNLOCK ALL
CHANNELS is displayed and the display will read ENTER PIN. Enter
your four-digit PIN and the system will unlock all channels and the
display will read CHANNEL UNLOCKED.
d. RESET PIN:Press OK when RESET PIN is displayed. The display
will read ARE YOUR SURE. Press OK again to automatically reset the
PIN number to its initial password setting (1234). PIN RESET TO
DEFAULT PIN will be displayed.
e. RETURN:Press OK when RETURN is displayed and the system
will exit back to the satellite radio menu.
Sound Adjustments
Press SOUND repeatedly to cycle through the following features:
BASS:Press
SEEKto adjust the level of bass.
2010 MKZ(378)
Owners Guide, 1st Printing
USA(fus)
Entertainment Systems
35
Page 43 of 318
Radio Display Condition Action Required
NO TEXT Category information
not available.Category information
not available at this
time on this channel.
The system is working
properly.
NO SIGNAL Loss of signal from
the SIRIUS satellite or
SIRIUS tower to the
vehicle antenna.You are in a location
that is blocking the
SIRIUS signal (i.e.,
tunnel, under an
overpass, dense foliage,
etc). The system is
working properly. When
you move into an open
area, the signal should
return.
UPDATING _ XX Update of channel
programming in
progress. The XX
number indicates the
% complete.No action required. The
process should take no
longer than one
minute.
CALL SIRIUS
1–888–539–7474Satellite service has
been deactivated by
SIRIUS Satellite
Radio.Call SIRIUS at
1–888–539–7474 to
re-activate or resolve
subscription issues.
ANTENNA FAIL Internal failure or
configuration failure
to satellite radio
antennaIf this message does
not clear within a short
period of time, or with
an ignition key cycle,
your receiver may have
a fault. See your
authorized dealer for
service.
SUB UPDATE Satellite service
subscription has been
updated by SIRIUS
Satellite RadioNo action required. The
process should take no
longer than one
minute.
2010 MKZ(378)
Owners Guide, 1st Printing
USA(fus)
Entertainment Systems
43
Page 56 of 318
•Press and hold the top or bottom of the control until the desired
lighting level is reached.
•Press and hold the top of the control to the full on position to activate
the “dome on” feature. This will turn on the interior courtesy lights.
The lights will remain on until the bottom of the control is pressed.
Note:If the battery is disconnected, discharged, or a new battery is
installed, the dimmer control requires re-calibration. Press the dimmer
control from the full dim position to the full on position to reset. This
will ensure that your displays are visible under all lighting conditions.
AIMING THE HEADLAMPS
The headlamps on your vehicle are properly aimed at the assembly plant.
If your vehicle has been in an accident, the alignment of your headlamps
should be checked by your authorized dealer.
Vertical aim adjustment
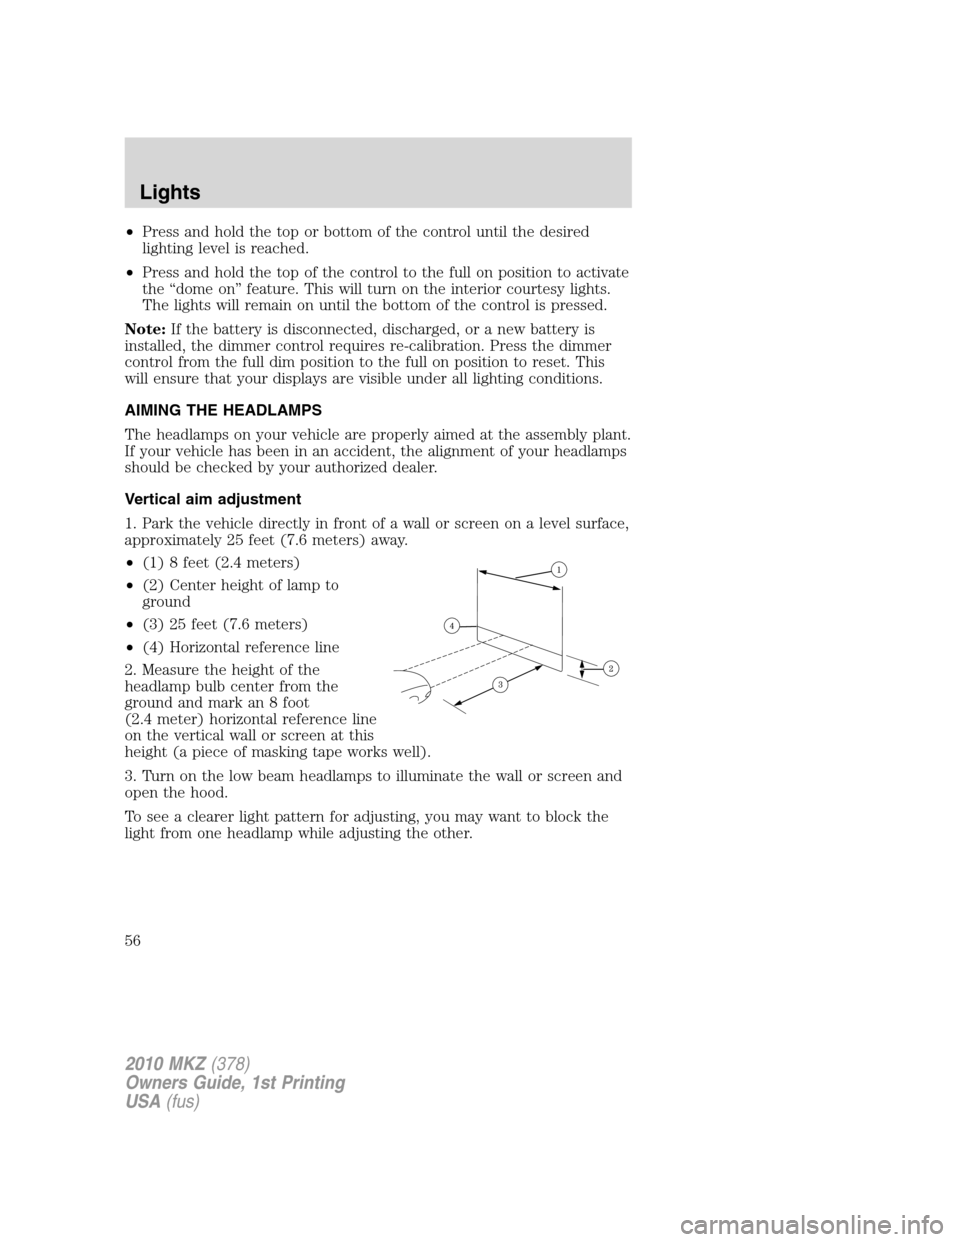
1. Park the vehicle directly in front of a wall or screen on a level surface,
approximately 25 feet (7.6 meters) away.
•(1) 8 feet (2.4 meters)
•(2) Center height of lamp to
ground
•(3) 25 feet (7.6 meters)
•(4) Horizontal reference line
2. Measure the height of the
headlamp bulb center from the
ground and mark an 8 foot
(2.4 meter) horizontal reference line
on the vertical wall or screen at this
height (a piece of masking tape works well).
3. Turn on the low beam headlamps to illuminate the wall or screen and
open the hood.
To see a clearer light pattern for adjusting, you may want to block the
light from one headlamp while adjusting the other.
2010 MKZ(378)
Owners Guide, 1st Printing
USA(fus)
Lights
56
Page 57 of 318
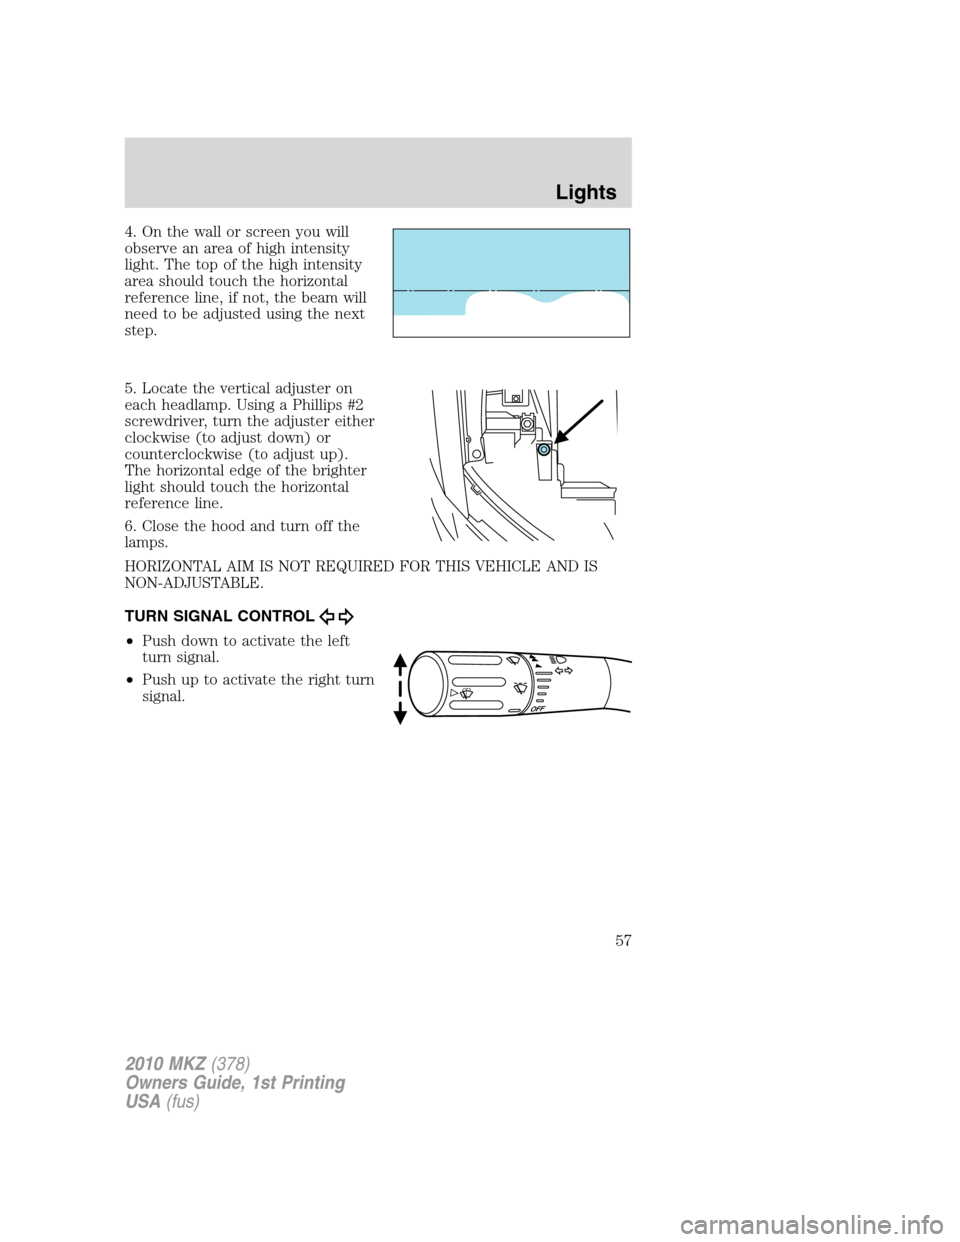
4. On the wall or screen you will
observe an area of high intensity
light. The top of the high intensity
area should touch the horizontal
reference line, if not, the beam will
need to be adjusted using the next
step.
5. Locate the vertical adjuster on
each headlamp. Using a Phillips #2
screwdriver, turn the adjuster either
clockwise (to adjust down) or
counterclockwise (to adjust up).
The horizontal edge of the brighter
light should touch the horizontal
reference line.
6. Close the hood and turn off the
lamps.
HORIZONTAL AIM IS NOT REQUIRED FOR THIS VEHICLE AND IS
NON-ADJUSTABLE.
TURN SIGNAL CONTROL
•Push down to activate the left
turn signal.
•Push up to activate the right turn
signal.
2010 MKZ(378)
Owners Guide, 1st Printing
USA(fus)
Lights
57
Page 61 of 318
Replacing headlamp bulbs
High beam/low beam bulb replacement
For driver side replacement of the high beam/low beam bulbs, do the
following:
1. Make sure the headlamp switch is in the off position, then open the
hood.
2. Reach over the front bolster and remove the rubber bulb access cover
from the headlamp housing.
3. Remove the bulb socket by rotating it counterclockwise, then pull it
straight out of the lamp assembly.
4. Disconnect the electrical connector.
For passenger side replacement of the high beam bulb, see your
authorized dealer.
For passenger side replacement of the low beam bulb, do the
following:
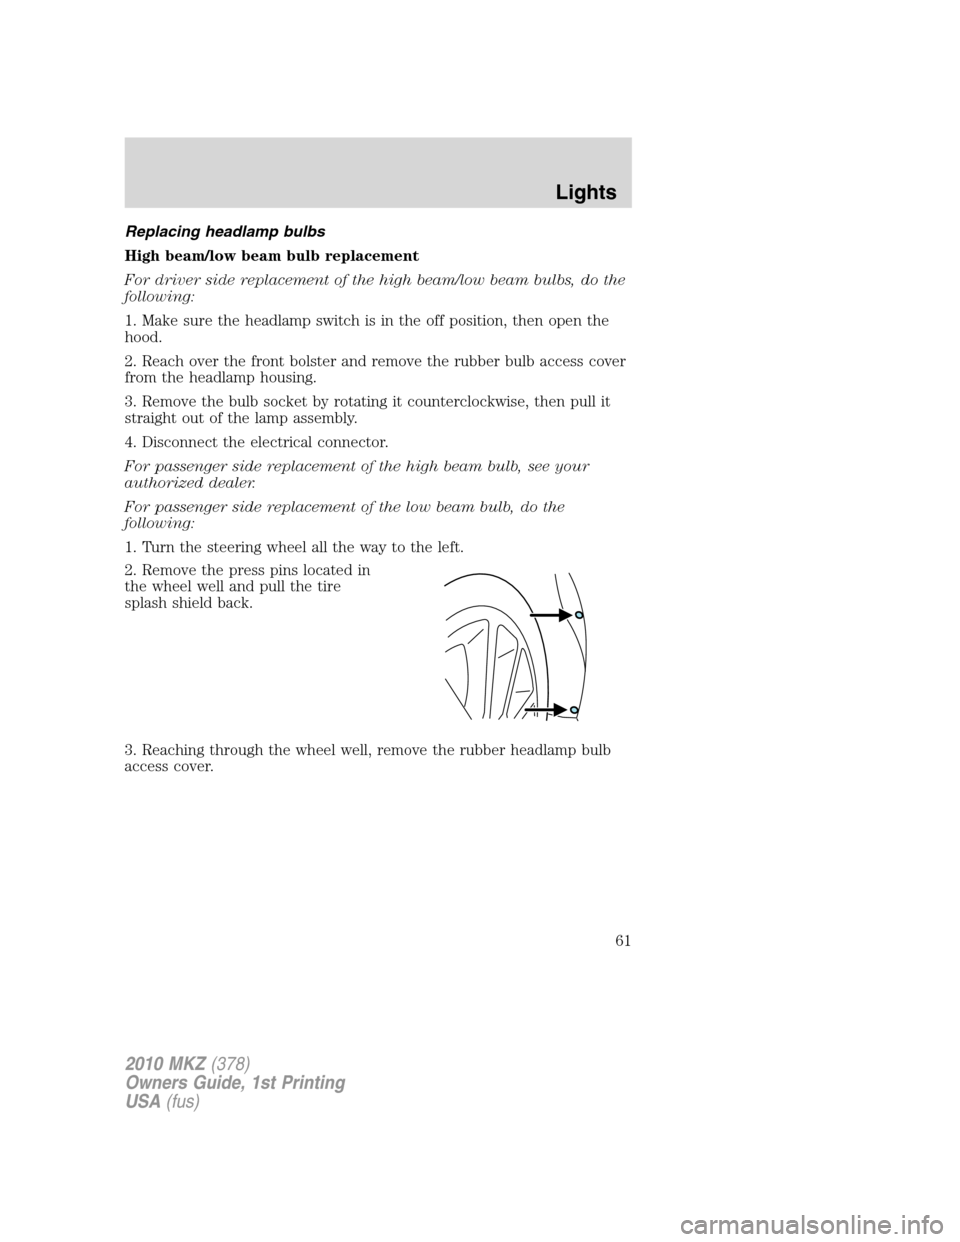
1. Turn the steering wheel all the way to the left.
2. Remove the press pins located in
the wheel well and pull the tire
splash shield back.
3. Reaching through the wheel well, remove the rubber headlamp bulb
access cover.
2010 MKZ(378)
Owners Guide, 1st Printing
USA(fus)
Lights
61
Page 62 of 318
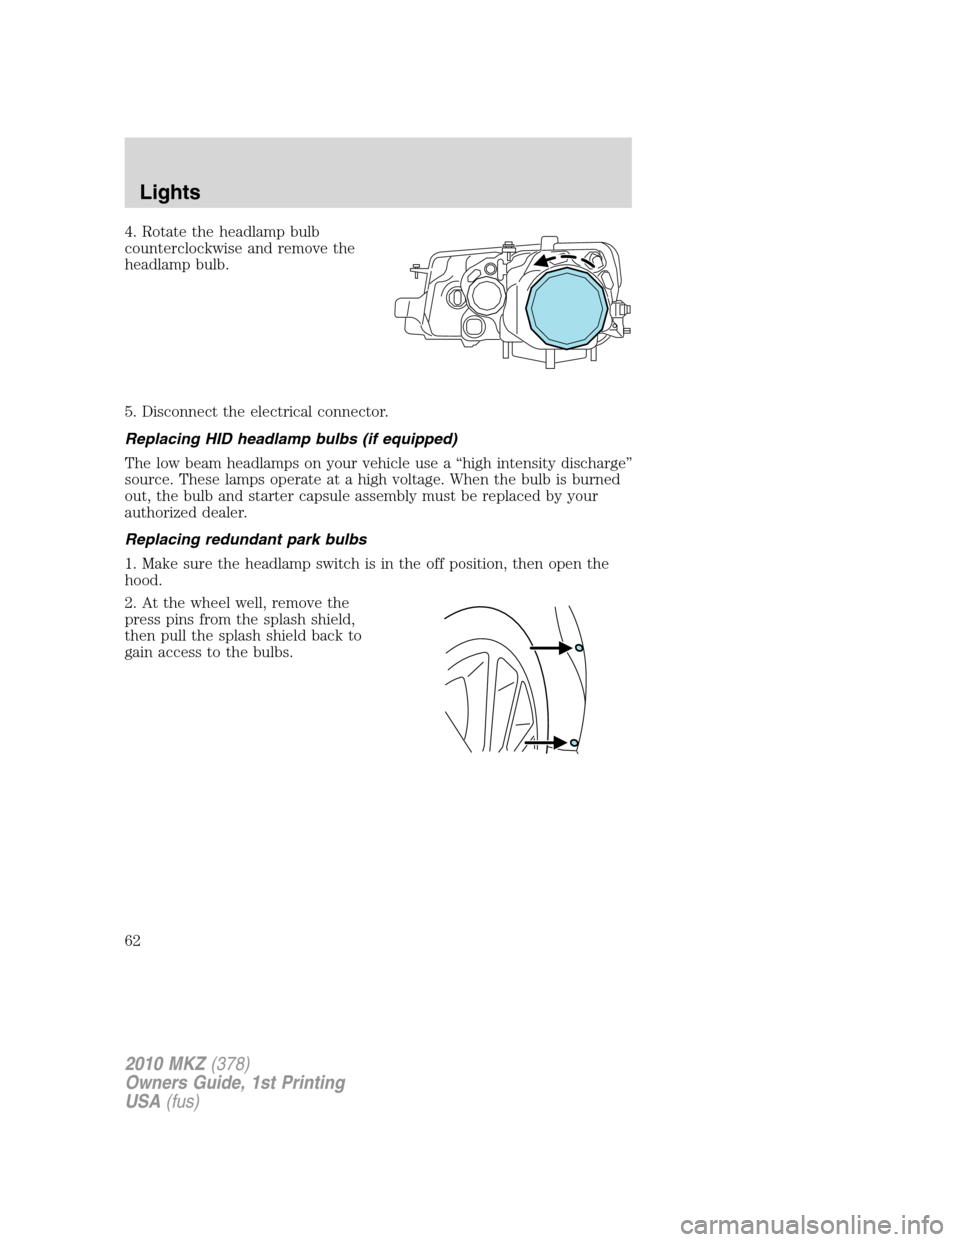
4. Rotate the headlamp bulb
counterclockwise and remove the
headlamp bulb.
5. Disconnect the electrical connector.
Replacing HID headlamp bulbs (if equipped)
The low beam headlamps on your vehicle use a “high intensity discharge”
source. These lamps operate at a high voltage. When the bulb is burned
out, the bulb and starter capsule assembly must be replaced by your
authorized dealer.
Replacing redundant park bulbs
1. Make sure the headlamp switch is in the off position, then open the
hood.
2. At the wheel well, remove the
press pins from the splash shield,
then pull the splash shield back to
gain access to the bulbs.
2010 MKZ(378)
Owners Guide, 1st Printing
USA(fus)
Lights
62
Page 63 of 318
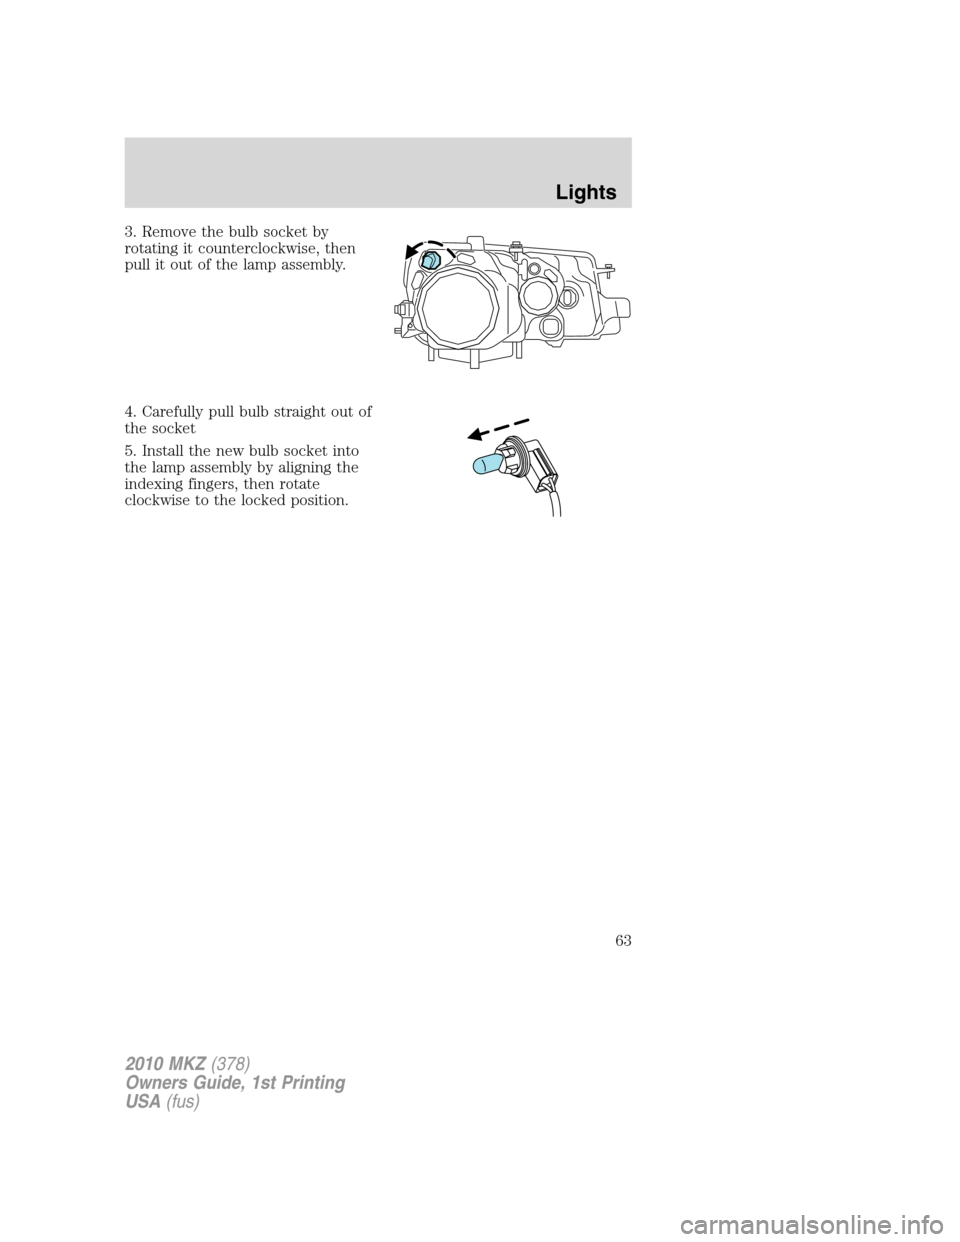
3. Remove the bulb socket by
rotating it counterclockwise, then
pull it out of the lamp assembly.
4. Carefully pull bulb straight out of
the socket
5. Install the new bulb socket into
the lamp assembly by aligning the
indexing fingers, then rotate
clockwise to the locked position.
2010 MKZ(378)
Owners Guide, 1st Printing
USA(fus)
Lights
63
Page 64 of 318
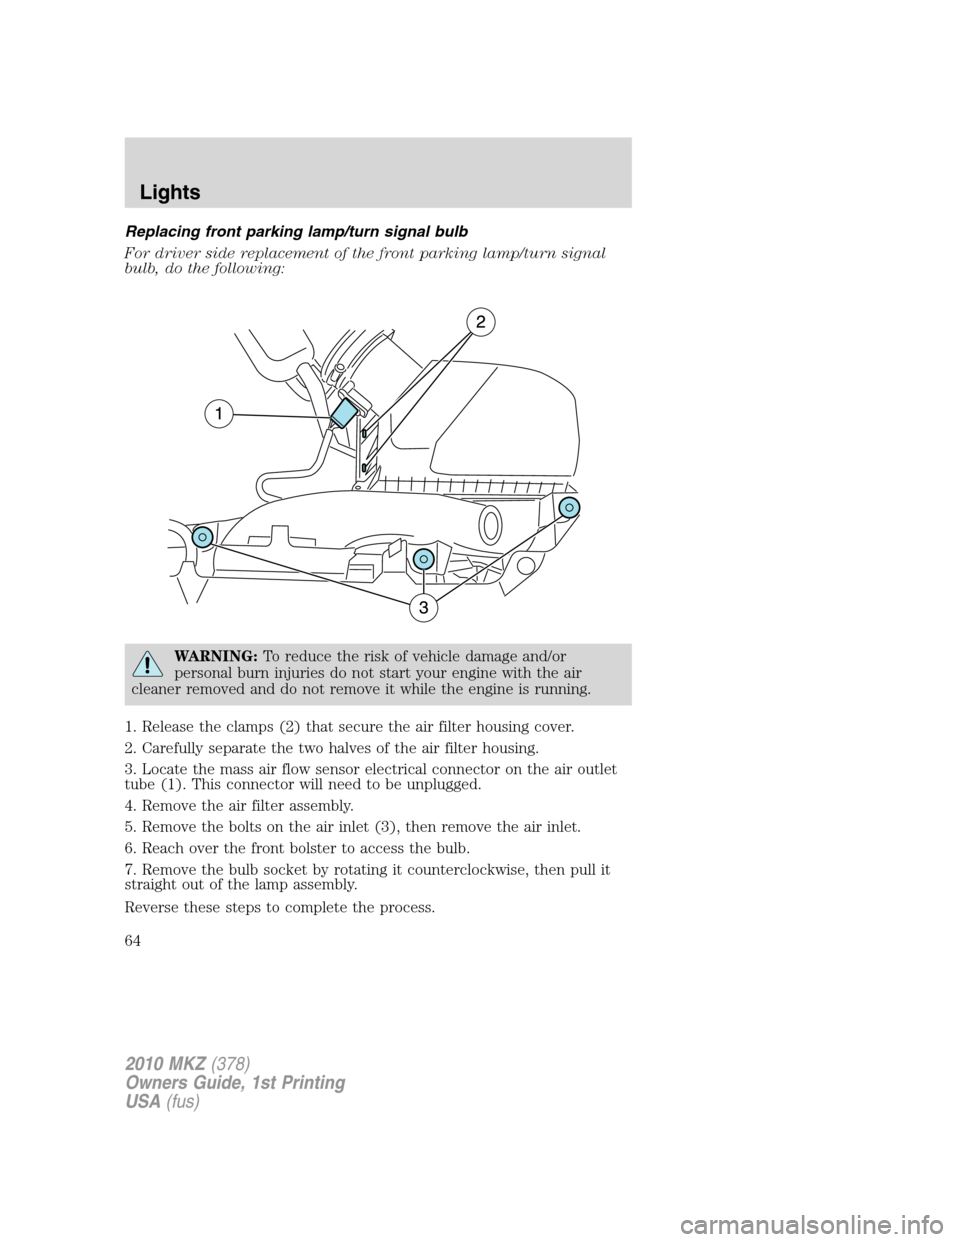
Replacing front parking lamp/turn signal bulb
For driver side replacement of the front parking lamp/turn signal
bulb, do the following:
WARNING:To reduce the risk of vehicle damage and/or
personal burn injuries do not start your engine with the air
cleaner removed and do not remove it while the engine is running.
1. Release the clamps (2) that secure the air filter housing cover.
2. Carefully separate the two halves of the air filter housing.
3. Locate the mass air flow sensor electrical connector on the air outlet
tube (1). This connector will need to be unplugged.
4. Remove the air filter assembly.
5. Remove the bolts on the air inlet (3), then remove the air inlet.
6. Reach over the front bolster to access the bulb.
7. Remove the bulb socket by rotating it counterclockwise, then pull it
straight out of the lamp assembly.
Reverse these steps to complete the process.
2010 MKZ(378)
Owners Guide, 1st Printing
USA(fus)
Lights
64
Page 65 of 318
For passenger side replacement of the front park/turn signal bulb,
see your authorized dealer.
Replacing stop/tail/turn and side marker bulbs
Your vehicle is equipped with a rear lamp that has a stop/tail/turn and
side marker lamp module containing integral multiple light emitting
diodes (LED). If one or more LEDs burn out, the complete lamp module
has to be replaced. See your authorized dealer for the replacement lamp.
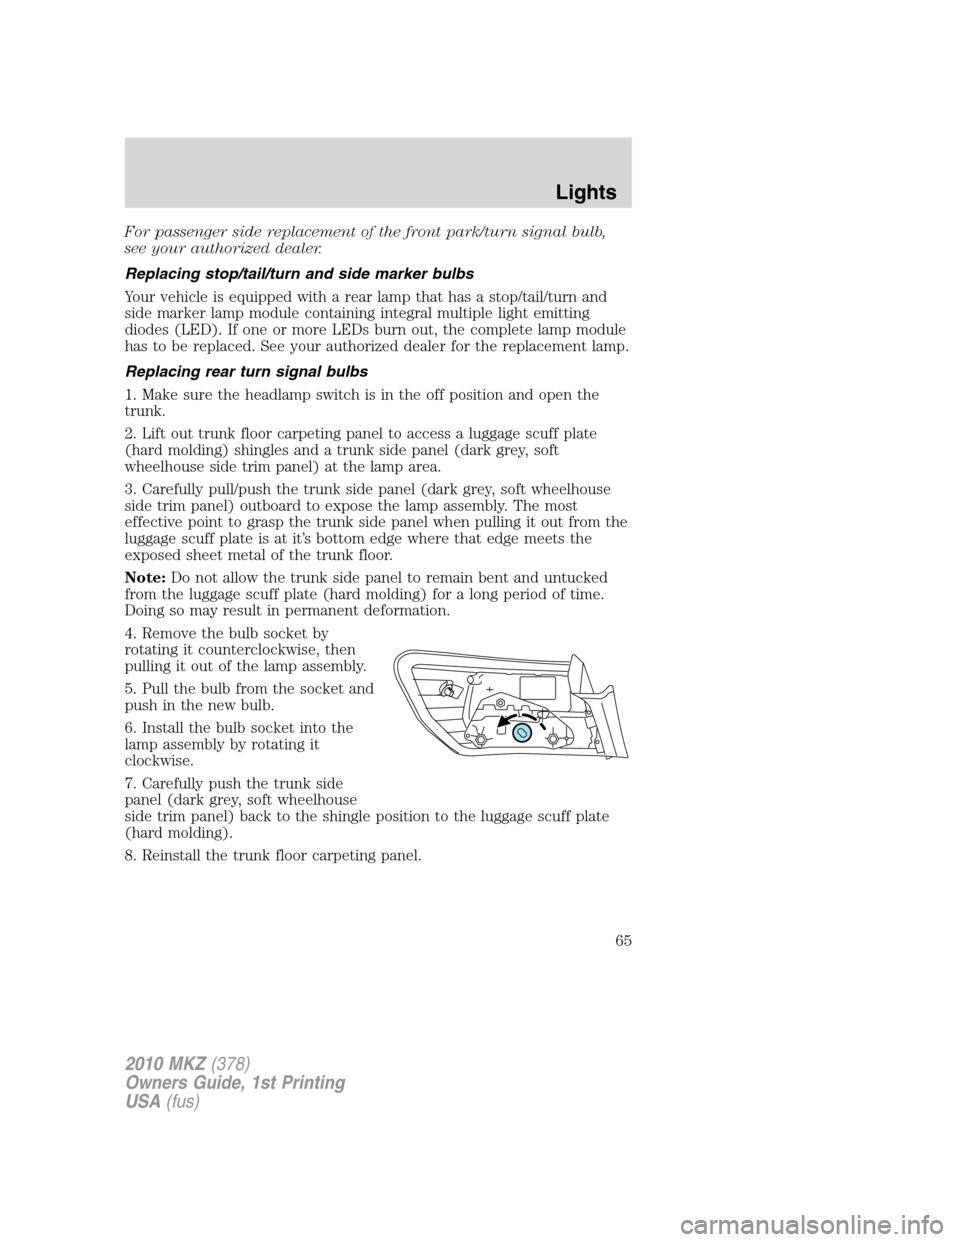
Replacing rear turn signal bulbs
1. Make sure the headlamp switch is in the off position and open the
trunk.
2. Lift out trunk floor carpeting panel to access a luggage scuff plate
(hard molding) shingles and a trunk side panel (dark grey, soft
wheelhouse side trim panel) at the lamp area.
3. Carefully pull/push the trunk side panel (dark grey, soft wheelhouse
side trim panel) outboard to expose the lamp assembly. The most
effective point to grasp the trunk side panel when pulling it out from the
luggage scuff plate is at it’s bottom edge where that edge meets the
exposed sheet metal of the trunk floor.
Note:Do not allow the trunk side panel to remain bent and untucked
from the luggage scuff plate (hard molding) for a long period of time.
Doing so may result in permanent deformation.
4. Remove the bulb socket by
rotating it counterclockwise, then
pulling it out of the lamp assembly.
5. Pull the bulb from the socket and
push in the new bulb.
6. Install the bulb socket into the
lamp assembly by rotating it
clockwise.
7. Carefully push the trunk side
panel (dark grey, soft wheelhouse
side trim panel) back to the shingle position to the luggage scuff plate
(hard molding).
8. Reinstall the trunk floor carpeting panel.
2010 MKZ(378)
Owners Guide, 1st Printing
USA(fus)
Lights
65