driver LINCOLN MKZ 2010 Owner's Manual
[x] Cancel search | Manufacturer: LINCOLN, Model Year: 2010, Model line: MKZ, Model: LINCOLN MKZ 2010Pages: 318, PDF Size: 2.22 MB
Page 59 of 318
Welcome and farewell lighting are included in the Lincoln white signature
color. The transition from signature color to ambient occurs when the
key is placed in the ignition and all doors are closed. Farewell lighting
occurs when the key is removed from the ignition and the driver door is
opened.
Note:The ambient color will stay on until after the ignition is placed in
the off position and either of the front doors are opened or the accessory
delay timer expires. At that time, the ambient color changes to the
signature color.
BULB REPLACEMENT
Lamp assembly condensation
Exterior lamps are vented to accommodate normal changes in pressure.
Condensation can be a natural by-product of this design. When moist air
enters the lamp assembly through the vents, there is a possibility that
condensation can occur when the temperature is cold. When normal
condensation occurs, a thin film of mist can form on the interior of the
lens. The thin mist eventually clears and exits through the vents during
normal operation. Clearing time may take as long as 48 hours under dry
weather conditions.
Examples of acceptable condensation are:
•Presence of thin mist (no streaks, drip marks or droplets)
•Fine mist covers less than 50% of the lens
Examples of unacceptable moisture (usually caused by a lamp water
leak) are:
•Water puddle inside the lamp
•Large water droplets, drip marks or streaks present on the interior of
the lens
Take your vehicle to dealer for service if any of the above conditions of
unacceptable moisture are present.
Using the right bulbs
Replacement bulbs are specified in the chart below. Headlamp bulbs
must be marked with an authorized “D.O.T.” for North America and an
“E” for Europe to ensure lamp performance, light brightness and pattern
and safe visibility. The correct bulbs will not damage the lamp assembly
or void the lamp assembly warranty and will provide quality bulb burn
time.
2010 MKZ(378)
Owners Guide, 1st Printing
USA(fus)
Lights
59
Page 61 of 318
Replacing headlamp bulbs
High beam/low beam bulb replacement
For driver side replacement of the high beam/low beam bulbs, do the
following:
1. Make sure the headlamp switch is in the off position, then open the
hood.
2. Reach over the front bolster and remove the rubber bulb access cover
from the headlamp housing.
3. Remove the bulb socket by rotating it counterclockwise, then pull it
straight out of the lamp assembly.
4. Disconnect the electrical connector.
For passenger side replacement of the high beam bulb, see your
authorized dealer.
For passenger side replacement of the low beam bulb, do the
following:
1. Turn the steering wheel all the way to the left.
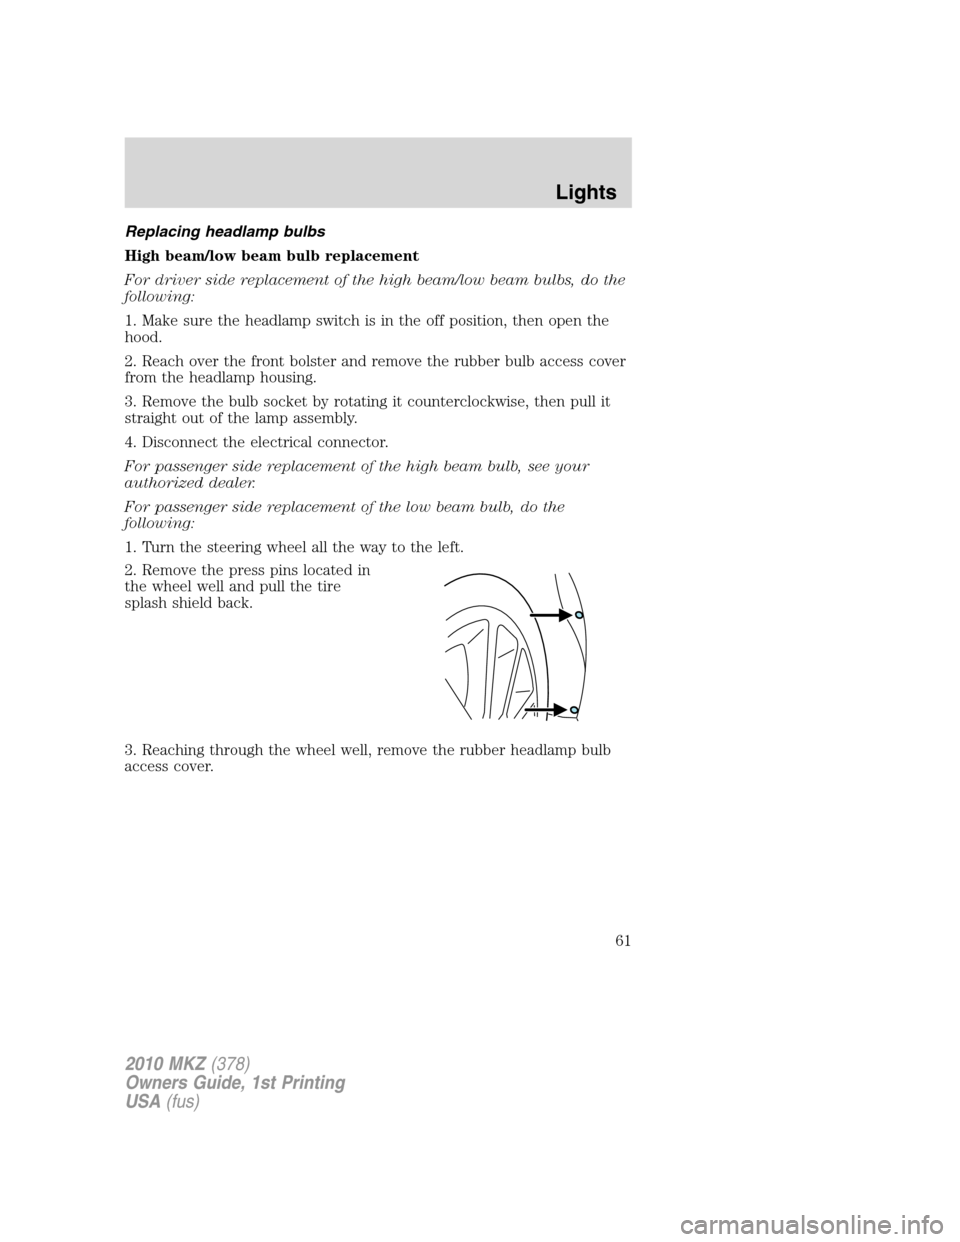
2. Remove the press pins located in
the wheel well and pull the tire
splash shield back.
3. Reaching through the wheel well, remove the rubber headlamp bulb
access cover.
2010 MKZ(378)
Owners Guide, 1st Printing
USA(fus)
Lights
61
Page 64 of 318
Replacing front parking lamp/turn signal bulb
For driver side replacement of the front parking lamp/turn signal
bulb, do the following:
WARNING:To reduce the risk of vehicle damage and/or
personal burn injuries do not start your engine with the air
cleaner removed and do not remove it while the engine is running.
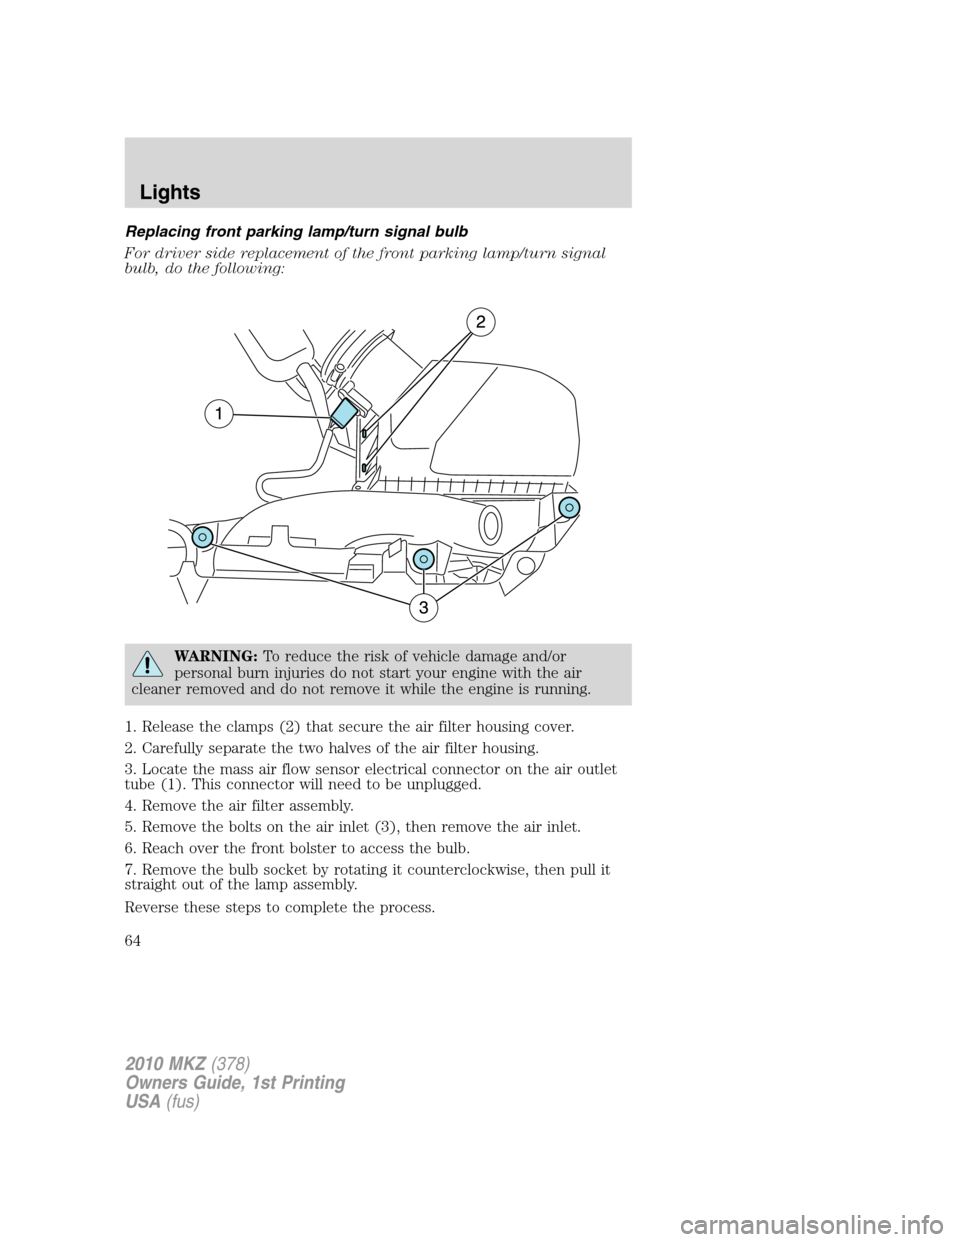
1. Release the clamps (2) that secure the air filter housing cover.
2. Carefully separate the two halves of the air filter housing.
3. Locate the mass air flow sensor electrical connector on the air outlet
tube (1). This connector will need to be unplugged.
4. Remove the air filter assembly.
5. Remove the bolts on the air inlet (3), then remove the air inlet.
6. Reach over the front bolster to access the bulb.
7. Remove the bulb socket by rotating it counterclockwise, then pull it
straight out of the lamp assembly.
Reverse these steps to complete the process.
2010 MKZ(378)
Owners Guide, 1st Printing
USA(fus)
Lights
64
Page 68 of 318
MULTI-FUNCTION LEVER
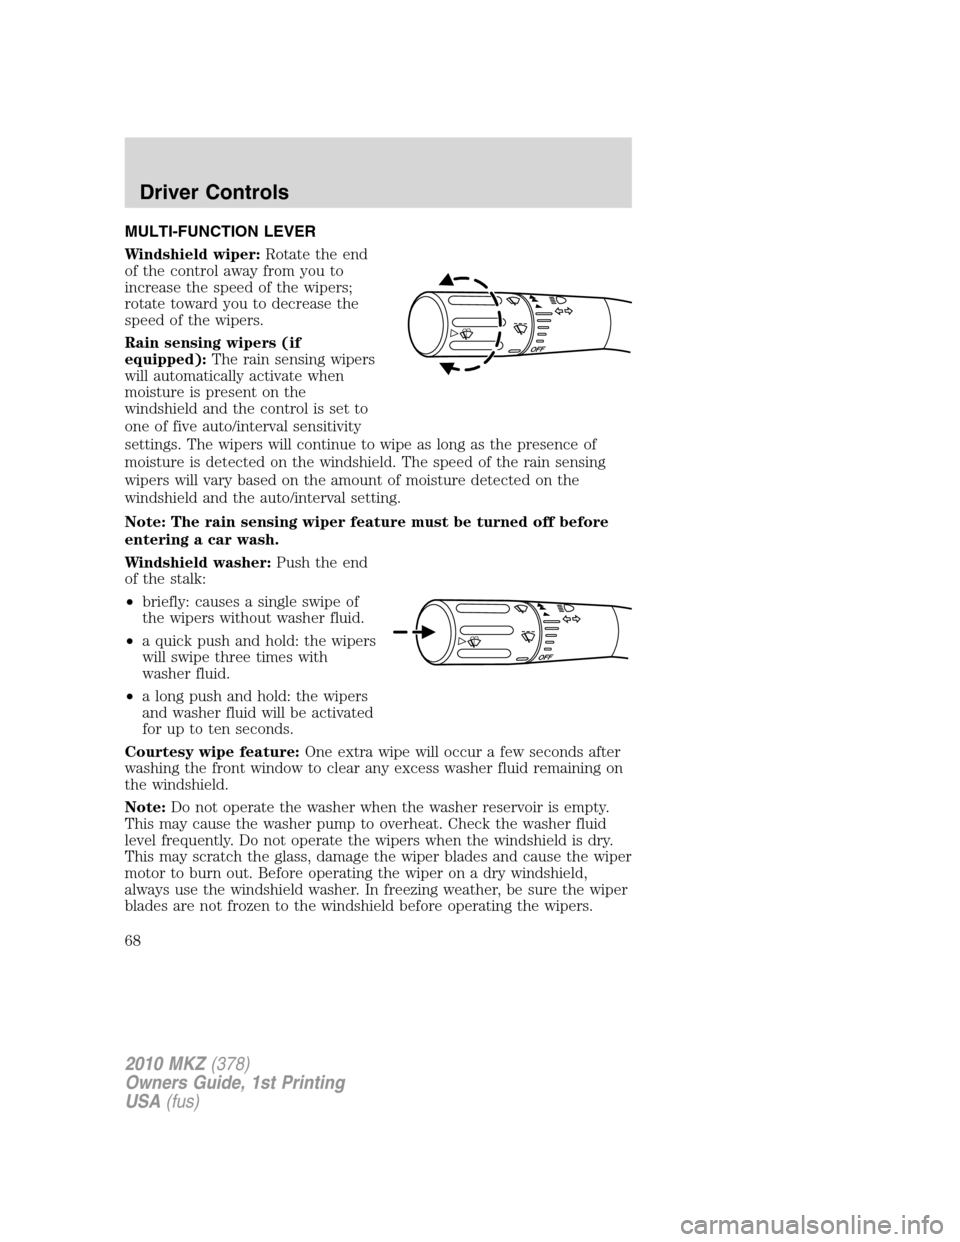
Windshield wiper:Rotate the end
of the control away from you to
increase the speed of the wipers;
rotate toward you to decrease the
speed of the wipers.
Rain sensing wipers (if
equipped):The rain sensing wipers
will automatically activate when
moisture is present on the
windshield and the control is set to
one of five auto/interval sensitivity
settings. The wipers will continue to wipe as long as the presence of
moisture is detected on the windshield. The speed of the rain sensing
wipers will vary based on the amount of moisture detected on the
windshield and the auto/interval setting.
Note: The rain sensing wiper feature must be turned off before
entering a car wash.
Windshield washer:Push the end
of the stalk:
•briefly: causes a single swipe of
the wipers without washer fluid.
•a quick push and hold: the wipers
will swipe three times with
washer fluid.
•a long push and hold: the wipers
and washer fluid will be activated
for up to ten seconds.
Courtesy wipe feature:One extra wipe will occur a few seconds after
washing the front window to clear any excess washer fluid remaining on
the windshield.
Note:Do not operate the washer when the washer reservoir is empty.
This may cause the washer pump to overheat. Check the washer fluid
level frequently. Do not operate the wipers when the windshield is dry.
This may scratch the glass, damage the wiper blades and cause the wiper
motor to burn out. Before operating the wiper on a dry windshield,
always use the windshield washer. In freezing weather, be sure the wiper
blades are not frozen to the windshield before operating the wipers.
2010 MKZ(378)
Owners Guide, 1st Printing
USA(fus)
Driver Controls
68
Page 69 of 318
Windshield wiper rainlamp feature
When the windshield wipers are turned on during daylight, and the
headlamp control is in the autolamp position, the exterior lamps will turn
on after a brief delay and will remain on until the wipers are turned off.
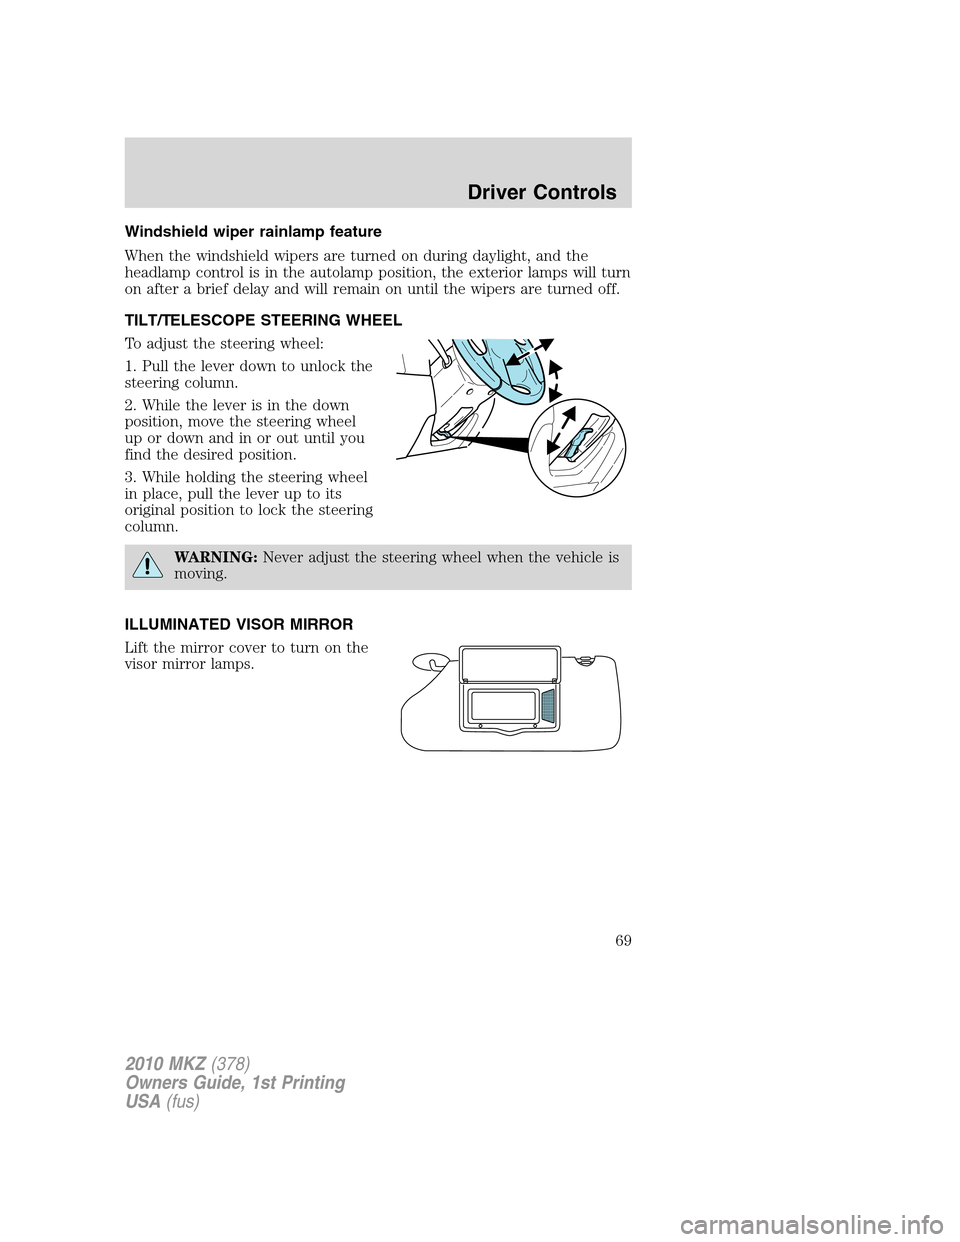
TILT/TELESCOPE STEERING WHEEL
To adjust the steering wheel:
1. Pull the lever down to unlock the
steering column.
2. While the lever is in the down
position, move the steering wheel
up or down and in or out until you
find the desired position.
3. While holding the steering wheel
in place, pull the lever up to its
original position to lock the steering
column.
WARNING:Never adjust the steering wheel when the vehicle is
moving.
ILLUMINATED VISOR MIRROR
Lift the mirror cover to turn on the
visor mirror lamps.
2010 MKZ(378)
Owners Guide, 1st Printing
USA(fus)
Driver Controls
69
Page 70 of 318
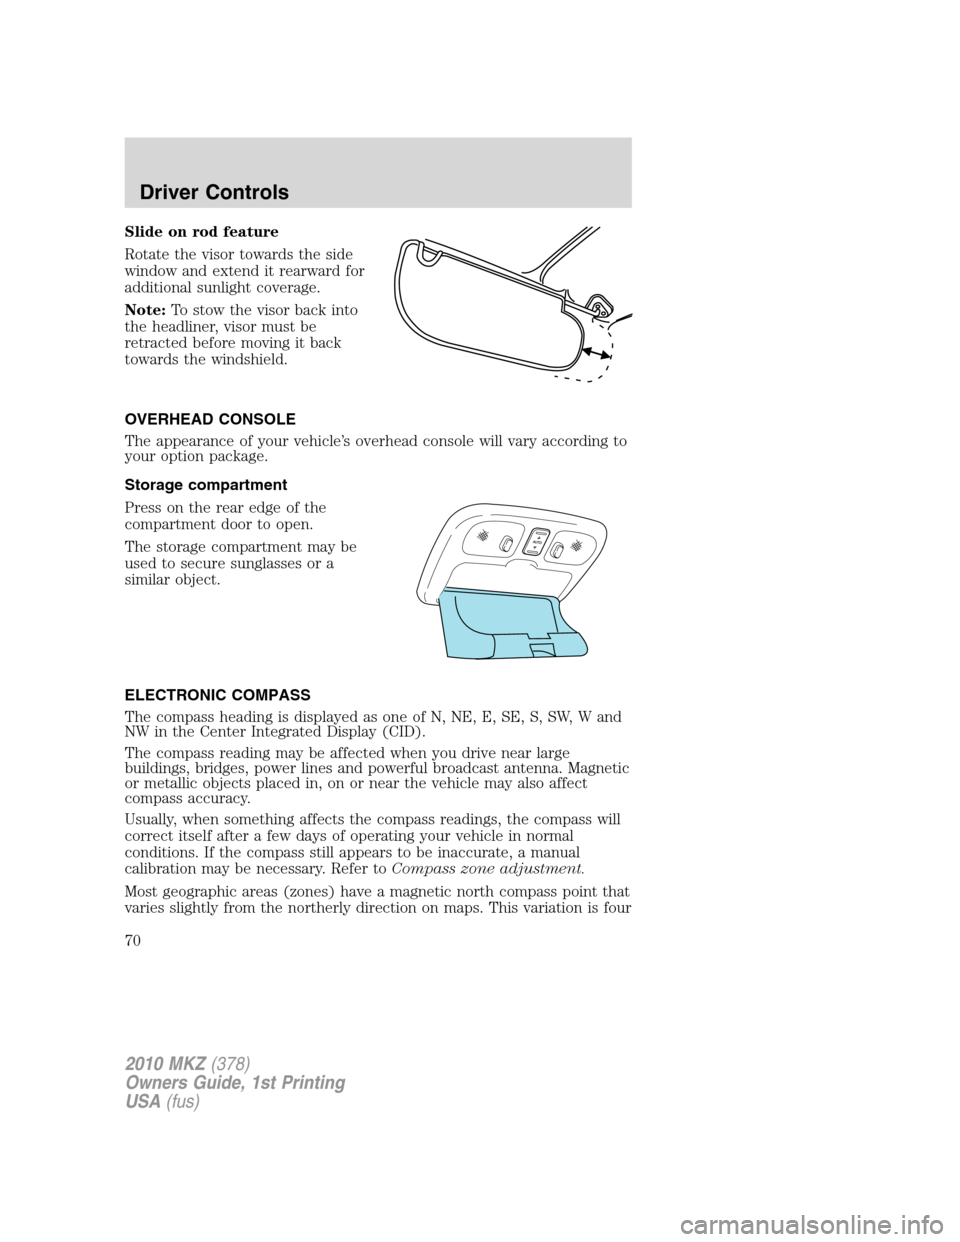
Slide on rod feature
Rotate the visor towards the side
window and extend it rearward for
additional sunlight coverage.
Note:To stow the visor back into
the headliner, visor must be
retracted before moving it back
towards the windshield.
OVERHEAD CONSOLE
The appearance of your vehicle’s overhead console will vary according to
your option package.
Storage compartment
Press on the rear edge of the
compartment door to open.
The storage compartment may be
used to secure sunglasses or a
similar object.
ELECTRONIC COMPASS
The compass heading is displayed as one of N, NE, E, SE, S, SW, W and
NW in the Center Integrated Display (CID).
The compass reading may be affected when you drive near large
buildings, bridges, power lines and powerful broadcast antenna. Magnetic
or metallic objects placed in, on or near the vehicle may also affect
compass accuracy.
Usually, when something affects the compass readings, the compass will
correct itself after a few days of operating your vehicle in normal
conditions. If the compass still appears to be inaccurate, a manual
calibration may be necessary. Refer toCompass zone adjustment.
Most geographic areas (zones) have a magnetic north compass point that
varies slightly from the northerly direction on maps. This variation is four
2010 MKZ(378)
Owners Guide, 1st Printing
USA(fus)
Driver Controls
70
Page 71 of 318
degrees between adjacent zones and will become noticeable as the
vehicle crosses multiple zones. A correct zone setting will eliminate this
error. Refer toCompass calibration adjustment.
Compass zone adjustment
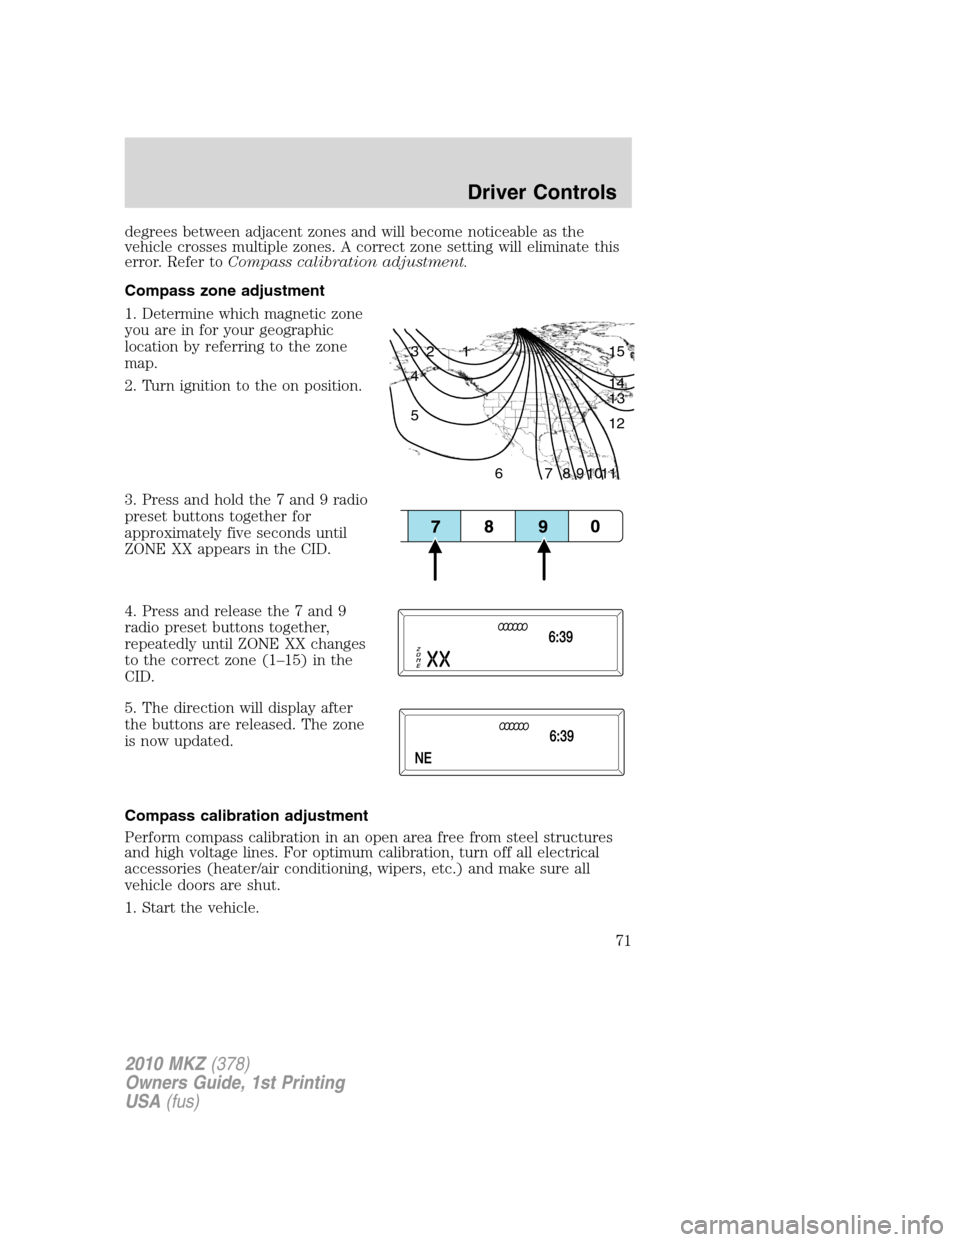
1. Determine which magnetic zone
you are in for your geographic
location by referring to the zone
map.
2. Turn ignition to the on position.
3. Press and hold the 7 and 9 radio
preset buttons together for
approximately five seconds until
ZONE XX appears in the CID.
4. Press and release the 7 and 9
radio preset buttons together,
repeatedly until ZONE XX changes
to the correct zone (1–15) in the
CID.
5. The direction will display after
the buttons are released. The zone
is now updated.
Compass calibration adjustment
Perform compass calibration in an open area free from steel structures
and high voltage lines. For optimum calibration, turn off all electrical
accessories (heater/air conditioning, wipers, etc.) and make sure all
vehicle doors are shut.
1. Start the vehicle.
1 2 3
4
5
6 7 8 9 101112 13 14 15
2010 MKZ(378)
Owners Guide, 1st Printing
USA(fus)
Driver Controls
71
Page 72 of 318
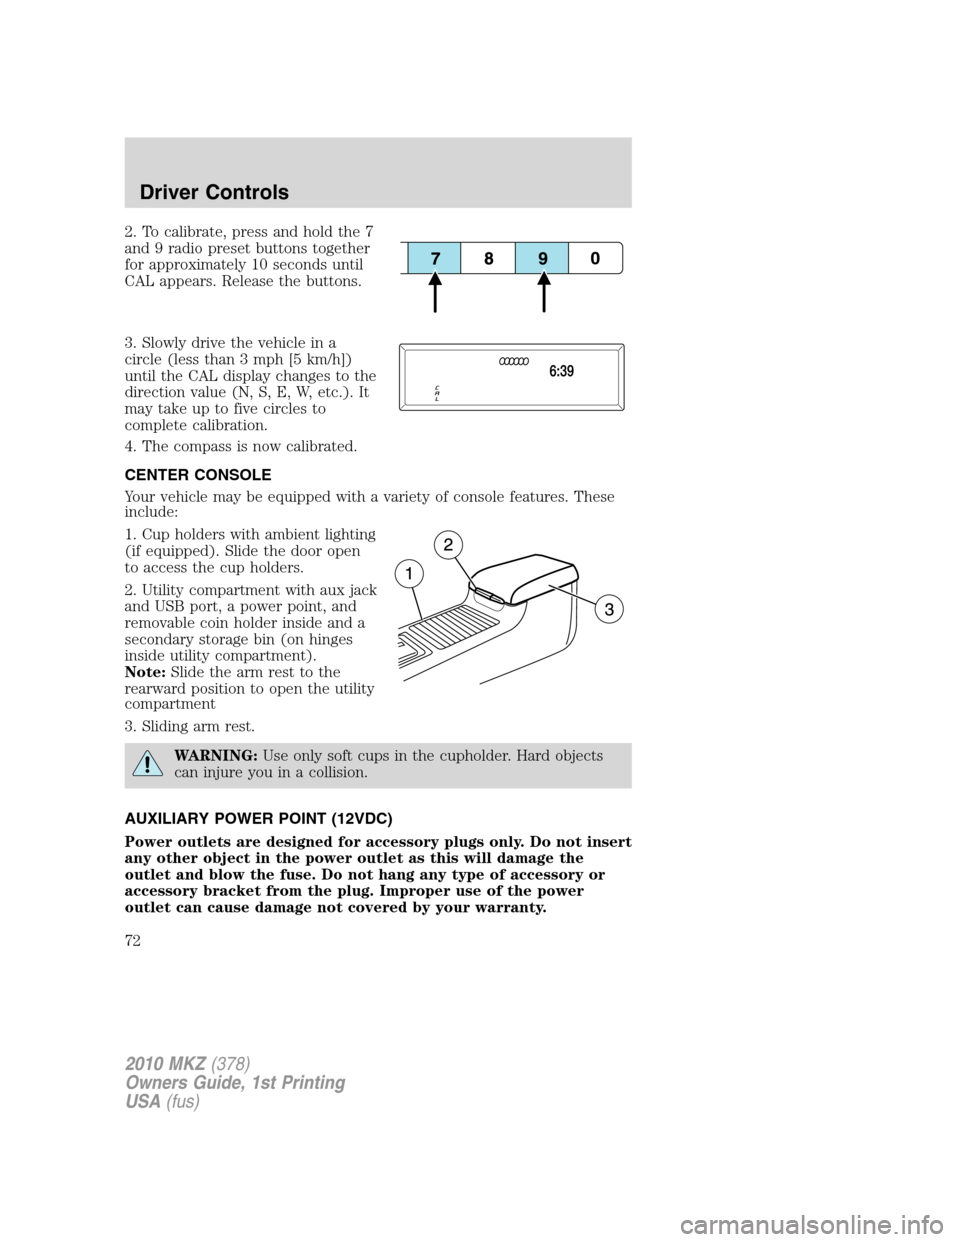
2. To calibrate, press and hold the 7
and 9 radio preset buttons together
for approximately 10 seconds until
CAL appears. Release the buttons.
3. Slowly drive the vehicle in a
circle (less than 3 mph [5 km/h])
until the CAL display changes to the
direction value (N, S, E, W, etc.). It
may take up to five circles to
complete calibration.
4. The compass is now calibrated.
CENTER CONSOLE
Your vehicle may be equipped with a variety of console features. These
include:
1. Cup holders with ambient lighting
(if equipped). Slide the door open
to access the cup holders.
2. Utility compartment with aux jack
and USB port, a power point, and
removable coin holder inside and a
secondary storage bin (on hinges
inside utility compartment).
Note:Slide the arm rest to the
rearward position to open the utility
compartment
3. Sliding arm rest.
WARNING:Use only soft cups in the cupholder. Hard objects
can injure you in a collision.
AUXILIARY POWER POINT (12VDC)
Power outlets are designed for accessory plugs only. Do not insert
any other object in the power outlet as this will damage the
outlet and blow the fuse. Do not hang any type of accessory or
accessory bracket from the plug. Improper use of the power
outlet can cause damage not covered by your warranty.
2010 MKZ(378)
Owners Guide, 1st Printing
USA(fus)
Driver Controls
72
Page 73 of 318
The auxiliary power point is located in the center console utility
compartment.
Do not use the power point for operating the cigarette lighter element (if
equipped).
To prevent the fuse from being blown, do not use the power point(s)
over the vehicle capacity of 12 VDC/180W. If the power point or cigar
lighter socket is not working, a fuse may have blown. Refer toFuses and
relaysin theRoadside Emergencieschapter for information on
checking and replacing fuses.
To have full capacity usage of your power point, the engine is required to
be running to avoid unintentional discharge of the battery. To prevent
the battery from being discharged:
•do not use the power point longer than necessary when the engine is
not running,
•do not leave battery chargers, video game adapters, computers and
other devices plugged in overnight or when the vehicle is parked for
extended periods.
Always keep the power point caps closed when not being used.
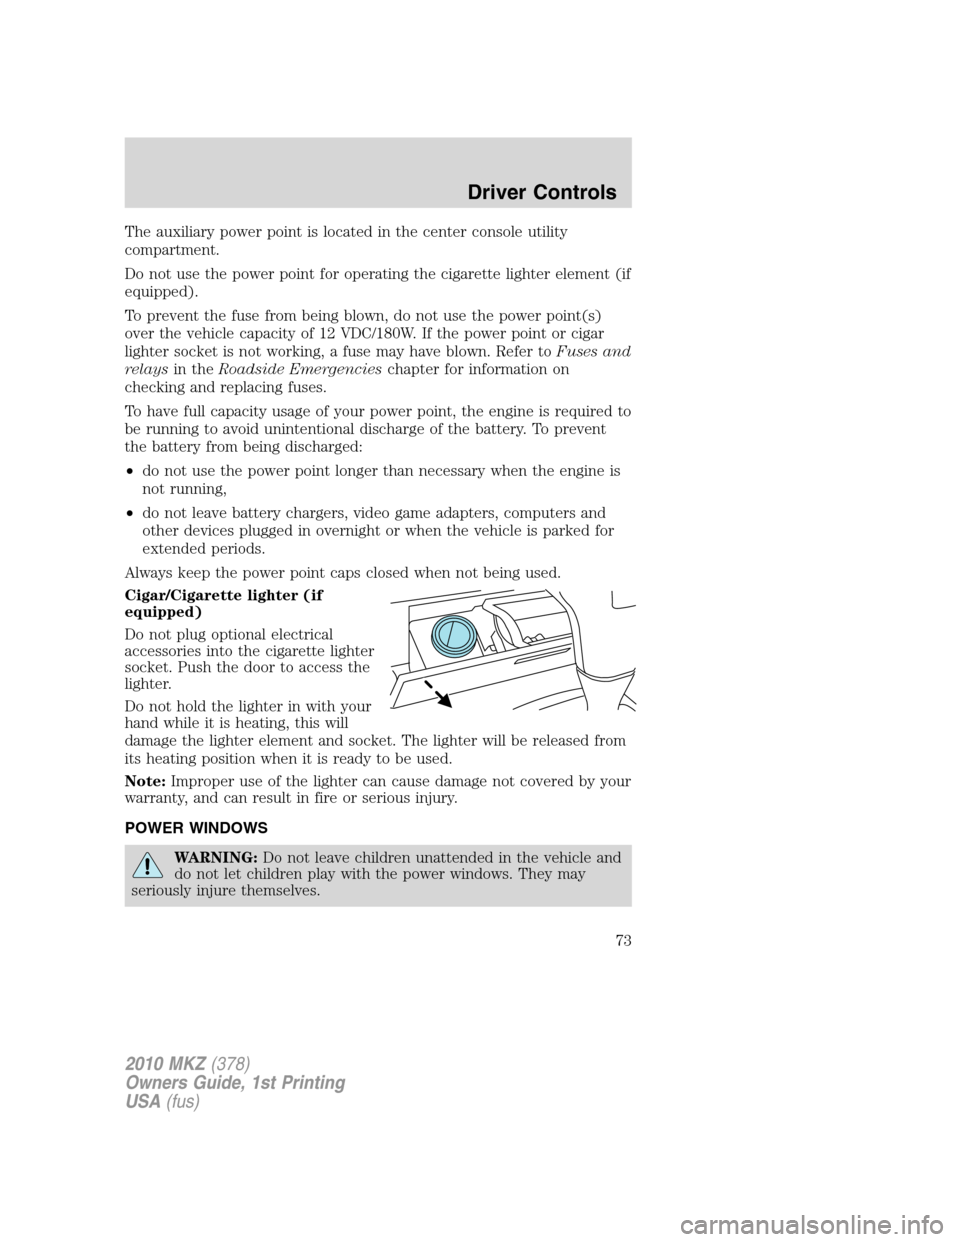
Cigar/Cigarette lighter (if
equipped)
Do not plug optional electrical
accessories into the cigarette lighter
socket. Push the door to access the
lighter.
Do not hold the lighter in with your
hand while it is heating, this will
damage the lighter element and socket. The lighter will be released from
its heating position when it is ready to be used.
Note:Improper use of the lighter can cause damage not covered by your
warranty, and can result in fire or serious injury.
POWER WINDOWS
WARNING:Do not leave children unattended in the vehicle and
do not let children play with the power windows. They may
seriously injure themselves.
2010 MKZ(378)
Owners Guide, 1st Printing
USA(fus)
Driver Controls
73
Page 74 of 318
WARNING:When closing the power windows, you should verify
they are free of obstructions and ensure that children and/or
pets are not in the proximity of the window openings.
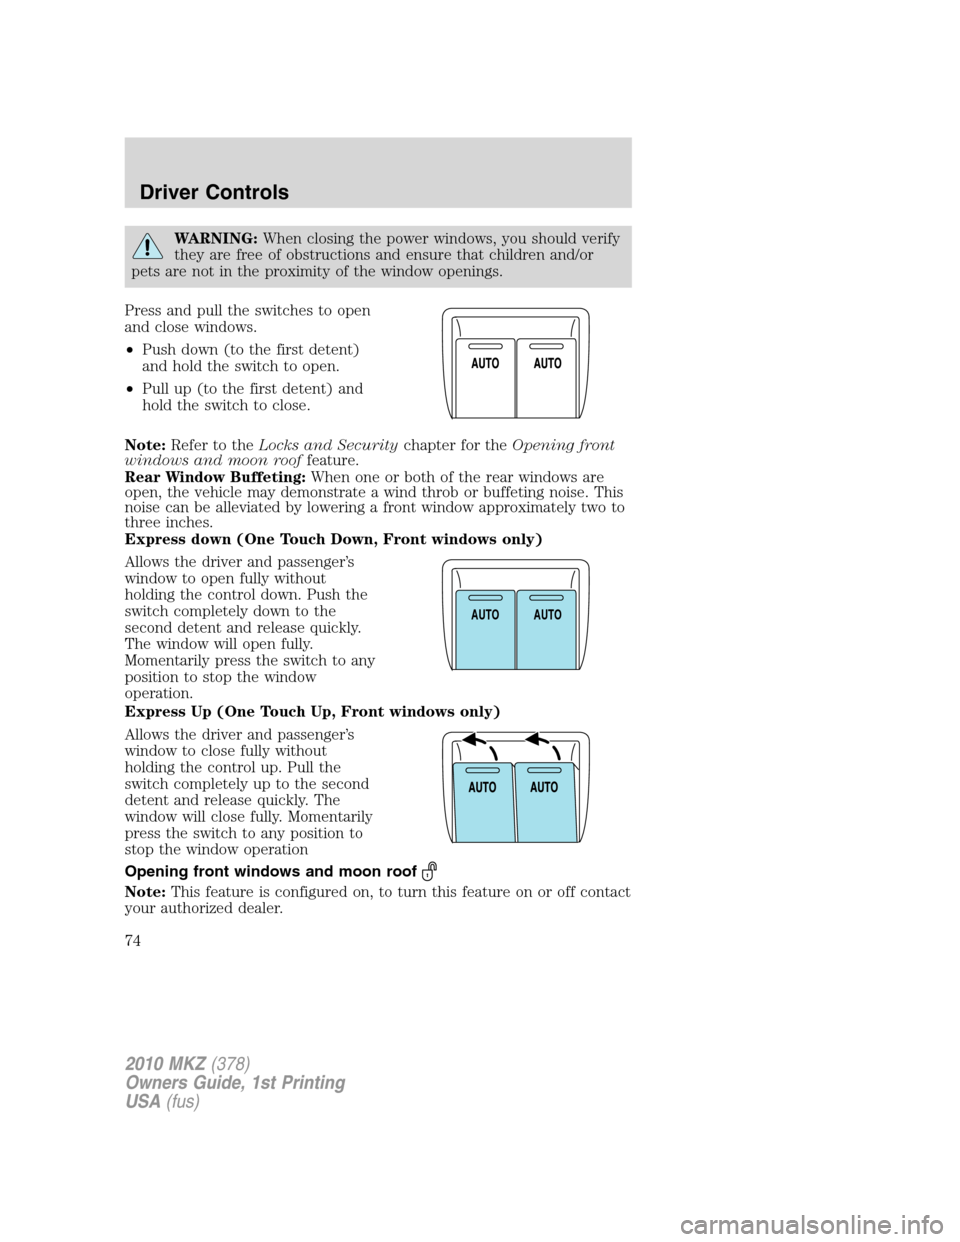
Press and pull the switches to open
and close windows.
• Push down (to the first detent)
and hold the switch to open.
• Pull up (to the first detent) and
hold the switch to close.
Note: Refer to the Locks and Security chapter for theOpening front
windows and moon roof feature.
Rear Window Buffeting: When one or both of the rear windows are
open, the vehicle may demonstrate a wind throb or buffeting noise. This
noise can be alleviated by lowering a front window approximately two to
three inches.
Express down (One Touch Down, Front windows only)
Allows the driver and passenger’s
window to open fully without
holding the control down. Push the
switch completely down to the
second detent and release quickly.
The window will open fully.
Momentarily press the switch to any
position to stop the window
operation.
Express Up (One Touch Up, Front windows only)
Allows the driver and passenger’s
window to close fully without
holding the control up. Pull the
switch completely up to the second
detent and release quickly. The
window will close fully. Momentarily
press the switch to any position to
stop the window operation
Opening front windows and moon roof
Note: This feature is configured on, to turn this feature on or off contact
your authorized dealer.
A UTO A
UTO
2010 MKZ (378)
Owners Guide, 1st Printing
USA (fus)
Driver Controls
74