auto hold LINCOLN MKZ 2016 Owners Manual
[x] Cancel search | Manufacturer: LINCOLN, Model Year: 2016, Model line: MKZ, Model: LINCOLN MKZ 2016Pages: 544, PDF Size: 5.77 MB
Page 22 of 544
When installing a child safety seat with
combination lap and shoulder belts:
• Use the correct safety belt buckle for thatseating position.
• Insert the belt tongue into the proper buckle until you hear a snap and feel it
latch. Make sure the tongue is securely
fastened in the buckle.
• Keep the buckle release button pointing up and away from the safety seat, with
the tongue between the child seat and
the release button, to prevent accidental
unbuckling.
• Place the vehicle seat upon which the child seat will be installed in the upright
position.
• Put the safety belt in the automatic locking mode. See Step 5. This vehicle
does not require the use of a locking clip.
Perform the following steps when installing
the child seat with combination lap and
shoulder belts:
Note: Although the child seat illustrated is a
forward facing child seat, the steps are the
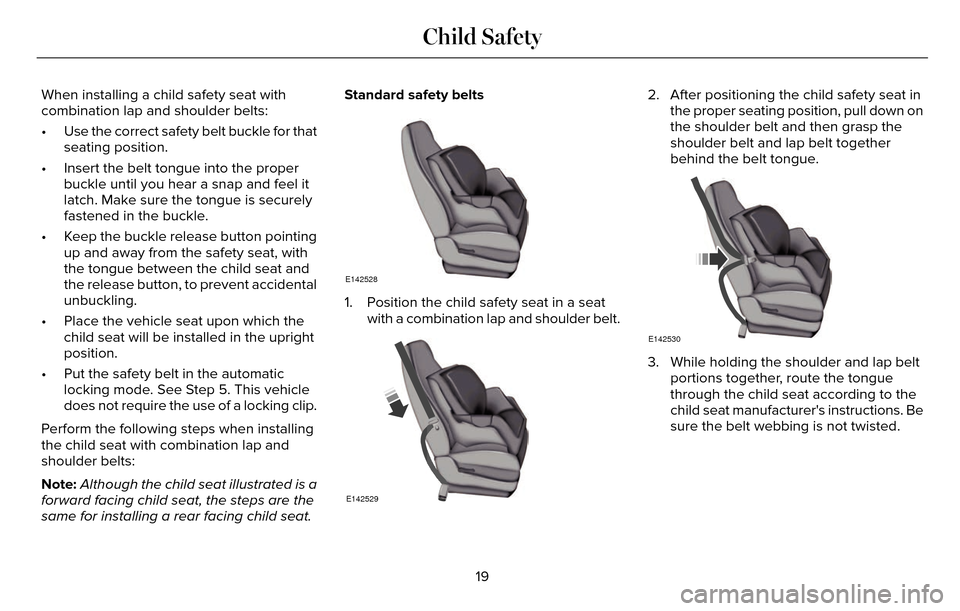
same for installing a rear facing child seat. Standard safety belts
E142528
1. Position the child safety seat in a seat
with a combination lap and shoulder belt.
E142529
2. After positioning the child safety seat inthe proper seating position, pull down on
the shoulder belt and then grasp the
shoulder belt and lap belt together
behind the belt tongue.
E142530
3. While holding the shoulder and lap beltportions together, route the tongue
through the child seat according to the
child seat manufacturer's instructions. Be
sure the belt webbing is not twisted.
19
Child Safety
Page 25 of 544
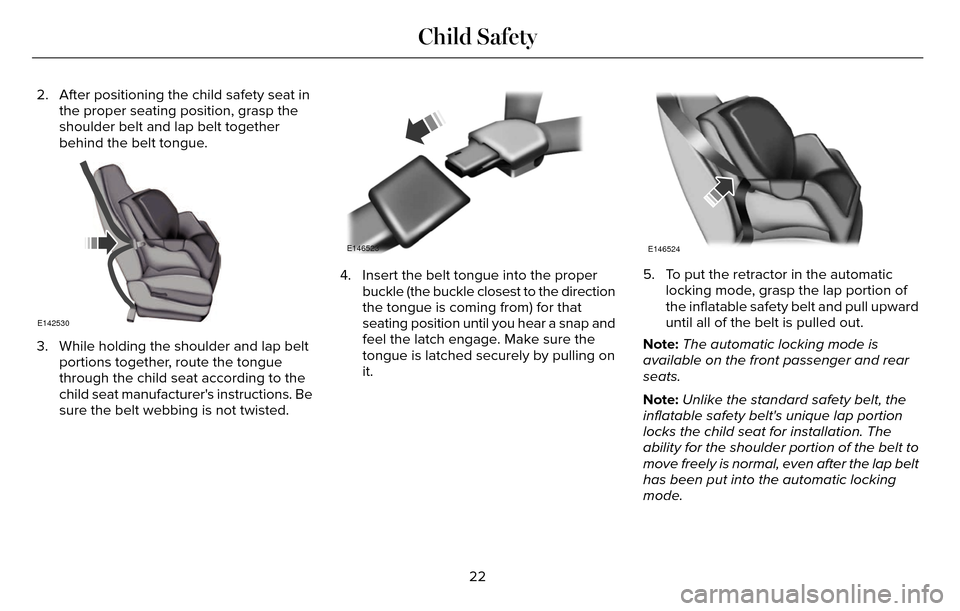
2. After positioning the child safety seat inthe proper seating position, grasp the
shoulder belt and lap belt together
behind the belt tongue.
E142530
3. While holding the shoulder and lap beltportions together, route the tongue
through the child seat according to the
child seat manufacturer's instructions. Be
sure the belt webbing is not twisted.
E146523
4. Insert the belt tongue into the properbuckle (the buckle closest to the direction
the tongue is coming from) for that
seating position until you hear a snap and
feel the latch engage. Make sure the
tongue is latched securely by pulling on
it.
E146524
5. To put the retractor in the automaticlocking mode, grasp the lap portion of
the inflatable safety belt and pull upward
until all of the belt is pulled out.
Note: The automatic locking mode is
available on the front passenger and rear
seats.
Note: Unlike the standard safety belt, the
inflatable safety belt's unique lap portion
locks the child seat for installation. The
ability for the shoulder portion of the belt to
move freely is normal, even after the lap belt
has been put into the automatic locking
mode.
22
Child Safety
Page 36 of 544
PRINCIPLE OF OPERATION
WARNINGS
Always drive and ride with your
seatback upright and the lap belt snug
and low across the hips.
To reduce the risk of injury, make sure
children sit where they can be properly
restrained.
Never let a passenger hold a child on
his or her lap while your vehicle is
moving. The passenger cannot protect the
child from injury in a crash.
All occupants of your vehicle, including
the driver, should always properly wear
their safety belts, even when an airbag
supplemental restraint system is provided.
Failure to properly wear your safety belt
could seriously increase the risk of injury or
death.
WARNINGS
It is extremely dangerous to ride in a
cargo area, inside or outside of a
vehicle. In a crash, people riding in these
areas are more likely to be seriously injured
or killed. Do not allow people to ride in any
area of your vehicle that is not equipped with
seats and safety belts. Be sure everyone in
your vehicle is in a seat and using a safety
belt properly.
In a rollover crash, an unbelted person
is significantly more likely to die than
a person wearing a safety belt.
Each seating position in your vehicle
has a specific safety belt assembly
which is made up of one buckle and one
tongue that are designed to be used as a
pair. 1) Use the shoulder belt on the outside
shoulder only. Never wear the shoulder belt
under the arm. 2) Never swing the safety belt
around your neck over the inside shoulder.
3) Never use a single belt for more than one
person.
WARNINGS
When possible, all children 12 years old
and under should be properly
restrained in a rear seating position. Failure
to follow this could seriously increase the
risk of injury or death.
Safety belts and seats can become hot
in a vehicle that has been closed up in
sunny weather; they could burn a small child.
Check seat covers and buckles before you
place a child anywhere near them.
Front and rear seat occupants,
including pregnant women, should
wear safety belts for optimum protection in
an accident.
All seating positions in your vehicle have lap
and shoulder safety belts. All occupants of
the vehicle should always properly wear their
safety belts, even when an airbag
supplemental restraint system is provided.
The safety belt system consists of:
• Lap and shoulder safety belts.
• Shoulder safety belt with automatic locking mode, (except driver safety belt).
33
Safety Belts
Page 40 of 544
Note:The rear inflatable safety belts are
compatible with most infant and child safety
car seats and belt positioning booster seats
when properly installed. This is because they
are designed to fill with a cooled gas at a
lower pressure and at a slower rate than
traditional airbags. After inflation, the
shoulder portion of the safety belt remains
cool to the touch.
The rear inflatable safety belt consists of the
following:
• An inflatable bag located in the shoulder safety belt webbing.
• Lap safety belt webbing with automatic locking mode.
• The same warning light, electronic control and diagnostic unit as used for
the front safety belts.
• Impact sensors located in various parts of the vehicle.
How does the rear inflatable safety belt
system work?
The rear inflatable safety belts will function
like standard restraints in everyday usage.
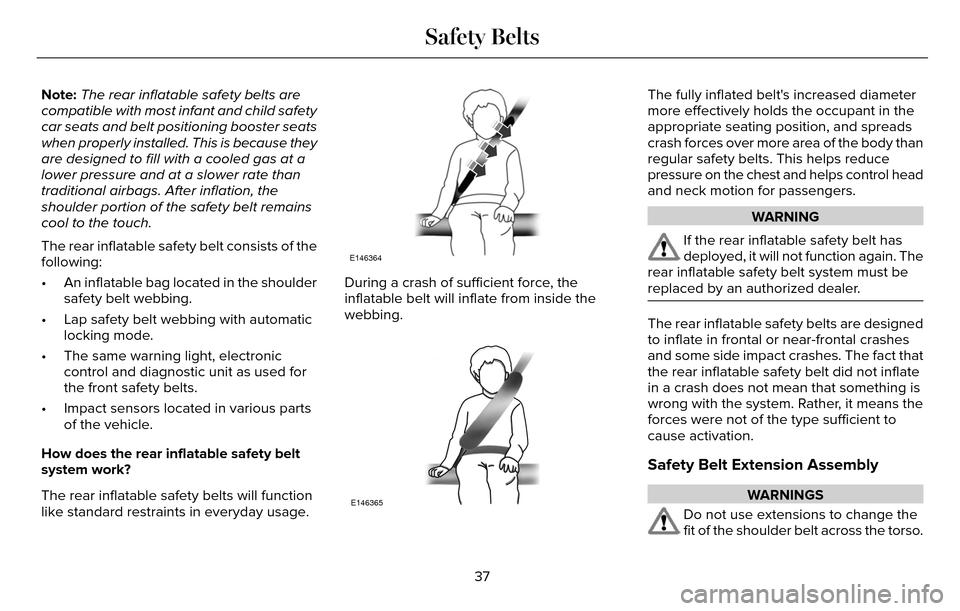
E146364
During a crash of sufficient force, the
inflatable belt will inflate from inside the
webbing.
E146365
The fully inflated belt's increased diameter
more effectively holds the occupant in the
appropriate seating position, and spreads
crash forces over more area of the body than
regular safety belts. This helps reduce
pressure on the chest and helps control head
and neck motion for passengers.
WARNING
If the rear inflatable safety belt has
deployed, it will not function again. The
rear inflatable safety belt system must be
replaced by an authorized dealer.
The rear inflatable safety belts are designed
to inflate in frontal or near-frontal crashes
and some side impact crashes. The fact that
the rear inflatable safety belt did not inflate
in a crash does not mean that something is
wrong with the system. Rather, it means the
forces were not of the type sufficient to
cause activation.
Safety Belt Extension Assembly
WARNINGS
Do not use extensions to change the
fit of the shoulder belt across the torso.
37
Safety Belts
Page 64 of 544
• Various vehicle speed minders can beset. Once you select a speed, it will be
shown in the display, followed by an
audible tone when the preselected
vehicle speed is exceeded.
• Audio system maximum volume of 45%. A message will be shown in the display
when you attempt to exceed the limited
volume. Also, the speed-sensitive or
compensated automatic volume control
will be disabled. • Always on setting. When this is selected,
you will not be able to switch off Advance
Trac or traction control, 911 Assist or
Emergency Assist, or the do not disturb
feature (if your vehicle is equipped with
these features).
CREATING A MYKEY
Use the information display to create a
MyKey: 1. Insert the key you want to program into the
ignition. If your vehicle is equipped with a
push-button start, place the intelligent access
key fob into the backup slot. The location of
your backup slot is in another chapter. See
Starting and Stopping the Engine
(page 161).
2. Switch the ignition on.
3. Access the main menu on the information
display controls. Use the arrow keys to get
to the following menu selections:
Action and Description
Message
Press the OK button or the right arrow key.
Settings
Press the OK button or the right arrow key.
MyKey
Press the OK button or the right arrow key.
Create MyKey
When prompted, hold the OK button until
you see a message informing you to label
this key as a MyKey. The key will be
restricted at the next start.
MyKey is successfully created. Make sure
you label it so you can distinguish it from the
admin keys. You can also program configurable settings
for the key(s). See Programming/Changing
Configurable Settings.
Programming/Changing Configurable
Settings
Use the information display to access your
configurable MyKey settings.
1. Switch the ignition on using an admin key
or fob.
61
MyKey™
Page 92 of 544
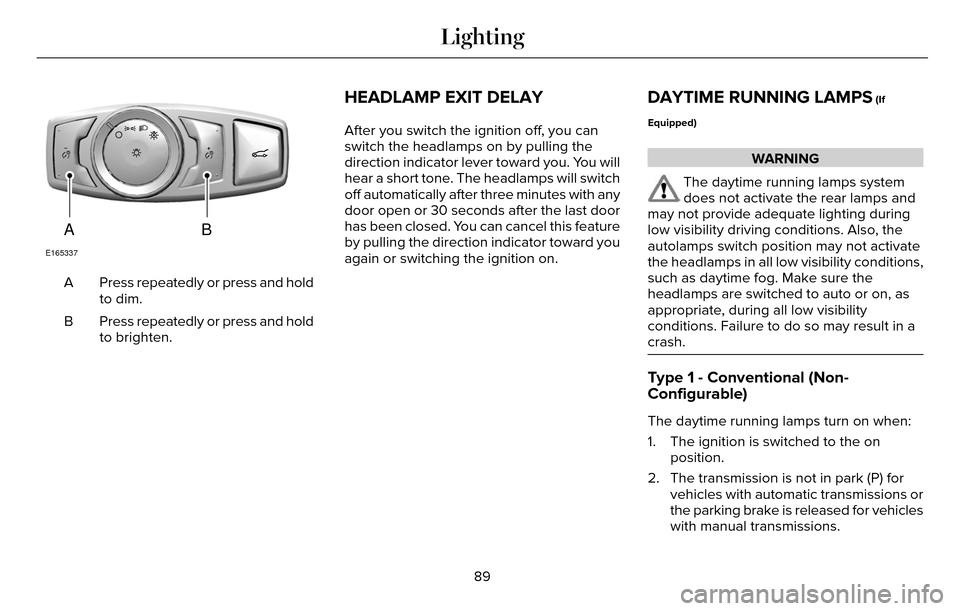
AB
E165337
Press repeatedly or press and hold
to dim.
A
Press repeatedly or press and hold
to brighten.
B
HEADLAMP EXIT DELAY
After you switch the ignition off, you can
switch the headlamps on by pulling the
direction indicator lever toward you. You will
hear a short tone. The headlamps will switch
off automatically after three minutes with any
door open or 30 seconds after the last door
has been closed. You can cancel this feature
by pulling the direction indicator toward you
again or switching the ignition on.
DAYTIME RUNNING LAMPS (If
Equipped)
WARNING
The daytime running lamps system
does not activate the rear lamps and
may not provide adequate lighting during
low visibility driving conditions. Also, the
autolamps switch position may not activate
the headlamps in all low visibility conditions,
such as daytime fog. Make sure the
headlamps are switched to auto or on, as
appropriate, during all low visibility
conditions. Failure to do so may result in a
crash.
Type 1 - Conventional (Non-
Configurable)
The daytime running lamps turn on when:
1. The ignition is switched to the on position.
2. The transmission is not in park (P) for vehicles with automatic transmissions or
the parking brake is released for vehicles
with manual transmissions.
89
Lighting
Page 98 of 544
POWER WINDOWS
WARNINGS
Do not leave children unattended in
your vehicle and do not let them play
with the power windows. They may seriously
injure themselves.
When closing the power windows, you
should verify they are free of
obstructions and make sure that children and
pets are not in the proximity of the window
openings.
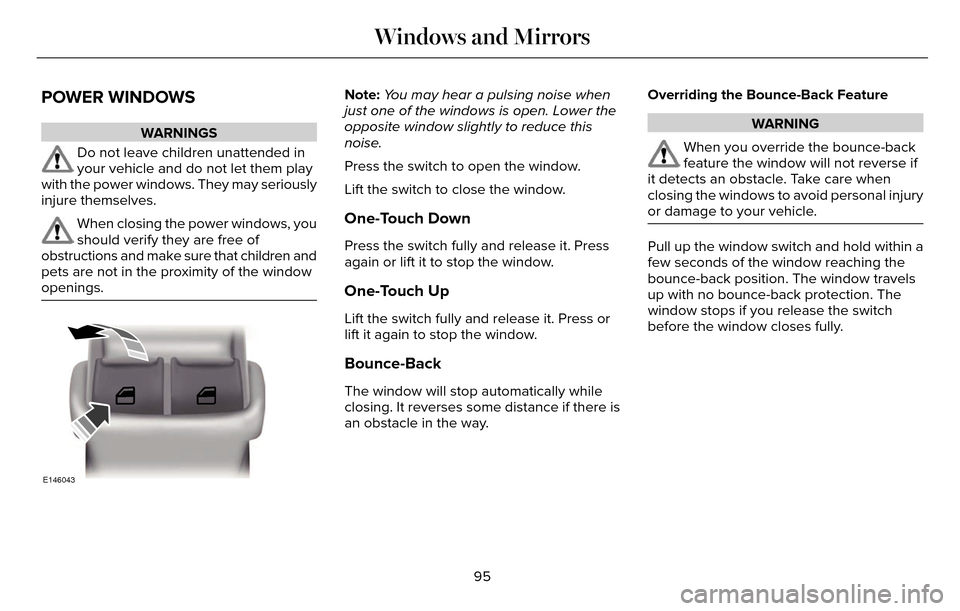
E146043
Note: You may hear a pulsing noise when
just one of the windows is open. Lower the
opposite window slightly to reduce this
noise.
Press the switch to open the window.
Lift the switch to close the window.
One-Touch Down
Press the switch fully and release it. Press
again or lift it to stop the window.
One-Touch Up
Lift the switch fully and release it. Press or
lift it again to stop the window.
Bounce-Back
The window will stop automatically while
closing. It reverses some distance if there is
an obstacle in the way. Overriding the Bounce-Back Feature
WARNING
When you override the bounce-back
feature the window will not reverse if
it detects an obstacle. Take care when
closing the windows to avoid personal injury
or damage to your vehicle.
Pull up the window switch and hold within a
few seconds of the window reaching the
bounce-back position. The window travels
up with no bounce-back protection. The
window stops if you release the switch
before the window closes fully.
95
Windows and Mirrors
Page 104 of 544
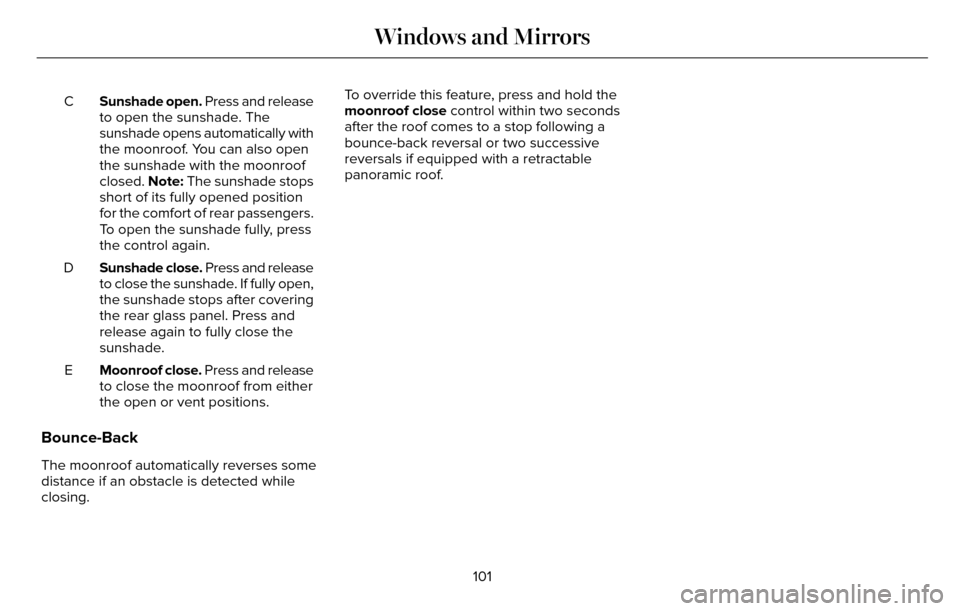
Sunshade open. Press and release
to open the sunshade. The
sunshade opens automatically with
the moonroof. You can also open
the sunshade with the moonroof
closed. Note: The sunshade stops
short of its fully opened position
for the comfort of rear passengers.
To open the sunshade fully, press
the control again.
C
Sunshade close. Press and release
to close the sunshade. If fully open,
the sunshade stops after covering
the rear glass panel. Press and
release again to fully close the
sunshade.
D
Moonroof close. Press and release
to close the moonroof from either
the open or vent positions.
E
Bounce-Back
The moonroof automatically reverses some
distance if an obstacle is detected while
closing. To override this feature, press and hold the
moonroof close control within two seconds
after the roof comes to a stop following a
bounce-back reversal or two successive
reversals if equipped with a retractable
panoramic roof.
101
Windows and Mirrors
Page 113 of 544
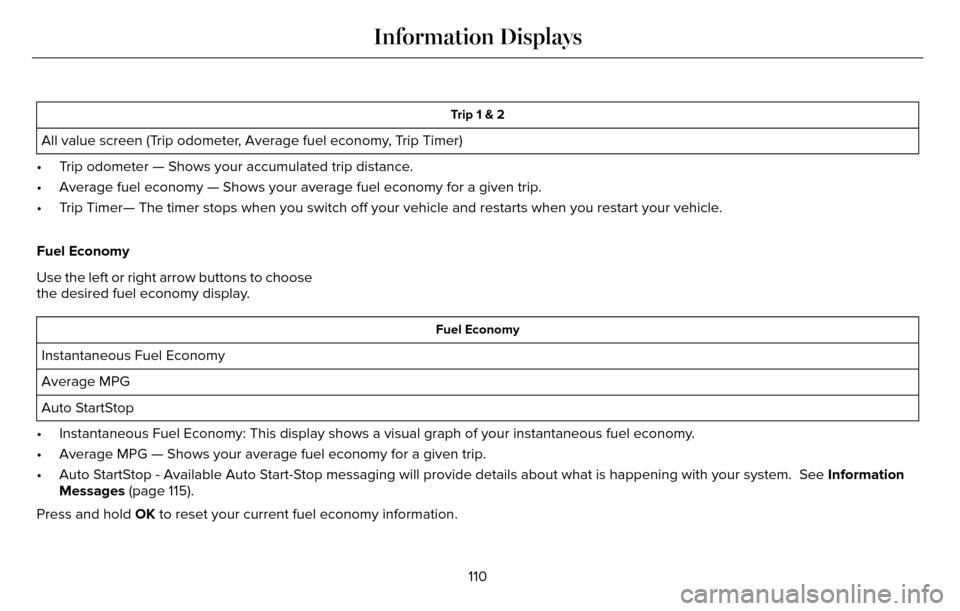
Trip 1 & 2
All value screen (Trip odometer, Average fuel economy, Trip Timer)
• Trip odometer — Shows your accumulated trip distance.
• Average fuel economy — Shows your average fuel economy for a given tr\
ip.
• Trip Timer— The timer stops when you switch off your vehicle and resta\
rts when you restart your vehicle.
Fuel Economy
Use the left or right arrow buttons to choose
the desired fuel economy display.
Fuel Economy
Instantaneous Fuel Economy
Average MPG
Auto StartStop
• Instantaneous Fuel Economy: This display shows a visual graph of your in\
stantaneous fuel economy.
• Average MPG — Shows your average fuel economy for a given trip.
• Auto StartStop - Available Auto Start-Stop messaging will provide details about what is happening with your sys\
tem. See Information
Messages (page 115).
Press and hold OK to reset your current fuel economy information.
110
Information Displays
Page 116 of 544
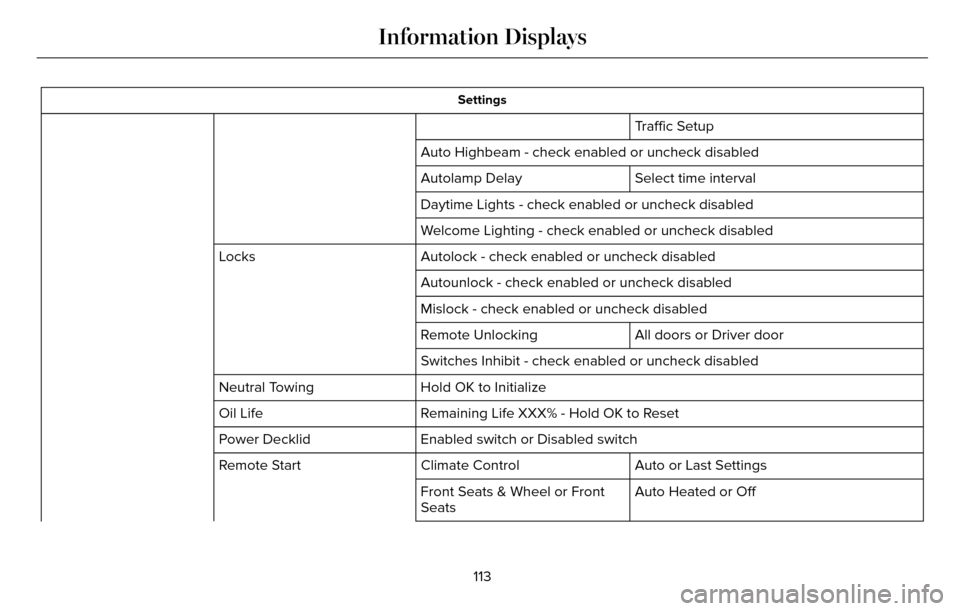
Settings
Traffic Setup
Auto Highbeam - check enabled or uncheck disabled Select time interval
Autolamp Delay
Daytime Lights - check enabled or uncheck disabled
Welcome Lighting - check enabled or uncheck disabled
Autolock - check enabled or uncheck disabled
Locks
Autounlock - check enabled or uncheck disabled
Mislock - check enabled or uncheck disabled
All doors or Driver door
Remote Unlocking
Switches Inhibit - check enabled or uncheck disabled
Hold OK to Initialize
Neutral Towing
Remaining Life XXX% - Hold OK to Reset
Oil Life
Enabled switch or Disabled switch
Power Decklid
Auto or Last Settings
Climate Control
Remote Start
Auto Heated or Off
Front Seats & Wheel or Front
Seats
113
Information Displays