trunk LINCOLN MKZ 2016 Owners Manual
[x] Cancel search | Manufacturer: LINCOLN, Model Year: 2016, Model line: MKZ, Model: LINCOLN MKZ 2016Pages: 544, PDF Size: 5.77 MB
Page 19 of 544
GENERAL INFORMATION
See the following sections for directions on
how to properly use safety restraints for
children.
WARNINGS
Always make sure your child is secured
properly in a device that is appropriate
for their height, age and weight. Child safety
restraints must be bought separately from
your vehicle. Failure to follow these
instructions and guidelines may result in an
increased risk of serious injury or death to
your child.
WARNINGS
All children are shaped differently. The
recommendations for safety restraints
are based on probable child height, age and
weight thresholds from National Highway
Traffic Safety Administration and other safety
organizations, or are the minimum
requirements of law. Ford recommends
checking with a NHTSA Certified Child
Passenger Safety Technician (CPST) and
consult your pediatrician to make sure your
child seat is appropriate for your child, and
is compatible with and properly installed in
your vehicle. To locate a child seat fitting
station and CPST, contact the NHTSA toll
free at 1-888-327-4236 or go to
http://www.nhtsa.dot.gov. In Canada, check
with your local St. John Ambulance office for
referral to a CPST or for further information,
contact your provincial ministry of
WARNINGS
transportation, locate your local St. John
Ambulance office by searching for St. John
Ambulance on the internet, or Transport
Canada at 1-800-333-0371
(http://www.tc.gc.ca). Failure to properly
restrain children in safety seats made
especially for their height, age, and weight
may result in an increased risk of serious
injury or death to your child.
Do not leave children or animals
unattended in the vehicle. On hot days,
the temperature in the trunk or vehicle
interior can rise very quickly. Exposure of
people or animals to these high
temperatures for even a short time can cause
death or serious heat-related injuries,
including brain damage. Small children are
particularly at risk.
16
Child Safety
Page 70 of 544
LOCKING AND UNLOCKING
You can use the power door lock control or
the remote control to lock and unlock your
vehicle.
Power Door Locks
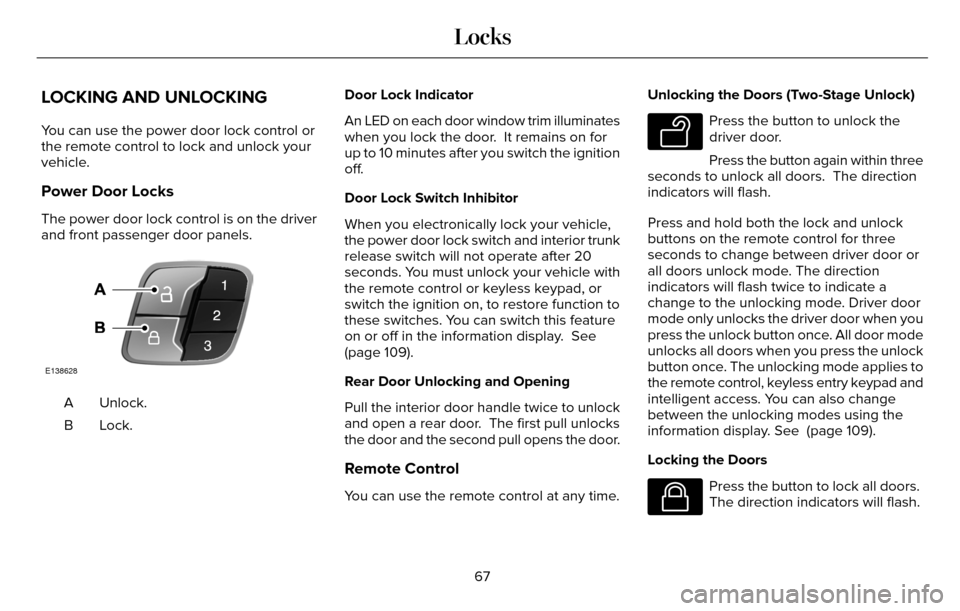
The power door lock control is on the driver
and front passenger door panels.
E138628
Unlock.
A
Lock.B Door Lock Indicator
An LED on each door window trim illuminates
when you lock the door. It remains on for
up to 10 minutes after you switch the ignition
off.
Door Lock Switch Inhibitor
When you electronically lock your vehicle,
the power door lock switch and interior trunk
release switch will not operate after 20
seconds. You must unlock your vehicle with
the remote control or keyless keypad, or
switch the ignition on, to restore function to
these switches. You can switch this feature
on or off in the information display. See
(page 109).
Rear Door Unlocking and Opening
Pull the interior door handle twice to unlock
and open a rear door. The first pull unlocks
the door and the second pull opens the door.
Remote Control
You can use the remote control at any time. Unlocking the Doors (Two-Stage Unlock)
E138629
Press the button to unlock the
driver door.
Press the button again within three
seconds to unlock all doors. The direction
indicators will flash.
Press and hold both the lock and unlock
buttons on the remote control for three
seconds to change between driver door or
all doors unlock mode. The direction
indicators will flash twice to indicate a
change to the unlocking mode. Driver door
mode only unlocks the driver door when you
press the unlock button once. All door mode
unlocks all doors when you press the unlock
button once. The unlocking mode applies to
the remote control, keyless entry keypad and
intelligent access. You can also change
between the unlocking modes using the
information display. See (page 109).
Locking the Doors
E138623
Press the button to lock all doors.
The direction indicators will flash.
67
Locks
Page 75 of 544
From Outside Your Vehicle
E205262
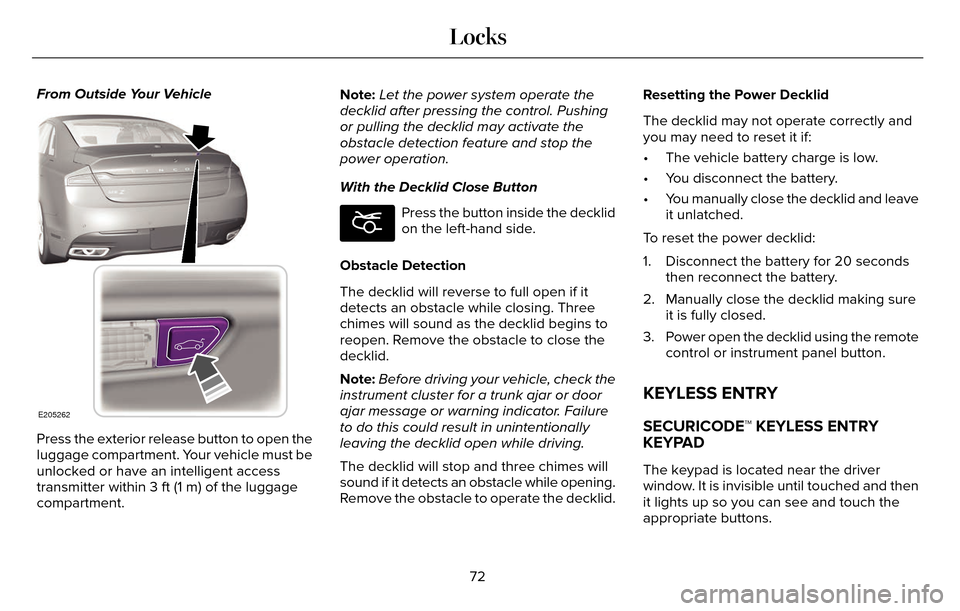
Press the exterior release button to open the
luggage compartment. Your vehicle must be
unlocked or have an intelligent access
transmitter within 3 ft (1 m) of the luggage
compartment.Note:
Let the power system operate the
decklid after pressing the control. Pushing
or pulling the decklid may activate the
obstacle detection feature and stop the
power operation.
With the Decklid Close Button
E194407
Press the button inside the decklid
on the left-hand side.
Obstacle Detection
The decklid will reverse to full open if it
detects an obstacle while closing. Three
chimes will sound as the decklid begins to
reopen. Remove the obstacle to close the
decklid.
Note: Before driving your vehicle, check the
instrument cluster for a trunk ajar or door
ajar message or warning indicator. Failure
to do this could result in unintentionally
leaving the decklid open while driving.
The decklid will stop and three chimes will
sound if it detects an obstacle while opening.
Remove the obstacle to operate the decklid. Resetting the Power Decklid
The decklid may not operate correctly and
you may need to reset it if:
• The vehicle battery charge is low.
• You disconnect the battery.
• You manually close the decklid and leave
it unlatched.
To reset the power decklid:
1. Disconnect the battery for 20 seconds then reconnect the battery.
2. Manually close the decklid making sure it is fully closed.
3. Power open the decklid using the remote control or instrument panel button.
KEYLESS ENTRY
SECURICODE™ KEYLESS ENTRY
KEYPAD
The keypad is located near the driver
window. It is invisible until touched and then
it lights up so you can see and touch the
appropriate buttons.
72
Locks
Page 76 of 544
Note:If you enter your entry code too fast
on the keypad, the unlock function may not
work. Re-enter your entry code more slowly.
E138637
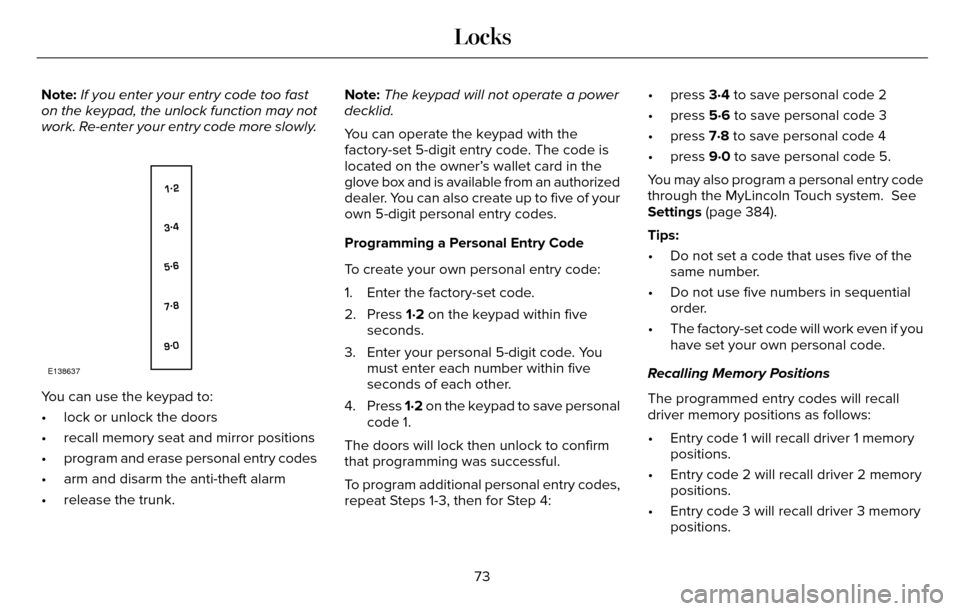
You can use the keypad to:
• lock or unlock the doors
• recall memory seat and mirror positions
• program and erase personal entry codes
• arm and disarm the anti-theft alarm
• release the trunk. Note:
The keypad will not operate a power
decklid.
You can operate the keypad with the
factory-set 5-digit entry code. The code is
located on the owner’s wallet card in the
glove box and is available from an authorized
dealer. You can also create up to five of your
own 5-digit personal entry codes.
Programming a Personal Entry Code
To create your own personal entry code:
1. Enter the factory-set code.
2. Press 1·2 on the keypad within five seconds.
3. Enter your personal 5-digit code. You must enter each number within five
seconds of each other.
4. Press 1·2 on the keypad to save personal
code 1.
The doors will lock then unlock to confirm
that programming was successful.
To program additional personal entry codes,
repeat Steps 1-3, then for Step 4: • press 3·4 to save personal code 2
• press 5·6 to save personal code 3
• press 7·8 to save personal code 4
• press 9·0 to save personal code 5.
You may also program a personal entry code
through the MyLincoln Touch system. See
Settings (page 384).
Tips:
• Do not set a code that uses five of the
same number.
• Do not use five numbers in sequential order.
• The factory-set code will work even if you have set your own personal code.
Recalling Memory Positions
The programmed entry codes will recall
driver memory positions as follows:
• Entry code 1 will recall driver 1 memory positions.
• Entry code 2 will recall driver 2 memory positions.
• Entry code 3 will recall driver 3 memory positions.
73
Locks
Page 77 of 544
Note:Personal entry codes 4 and 5 will not
recall memory positions.
Erasing a Personal Code
1. Enter the factory-set 5-digit code.
2. Press and release 1·2 on the keypad within five seconds.
3. Press and hold 1·2 for two seconds. You must do this within five seconds of
completing Step 2.
All personal codes are now erased and only
the factory-set 5–digit code will work.
Anti-Scan Feature
The keypad will go into an anti-scan mode
if you enter the wrong code seven times (35
consecutive button presses). This mode
disables the keypad for one minute and the
keypad lamp will flash.
The anti-scan feature will turn off after:
• one minute of keypad inactivity
• pressing the unlock button on the remote control • switching the ignition on
• unlocking your vehicle using intelligent
access.
Unlocking and Locking the Doors
To Unlock the Driver Door
Enter the factory-set 5-digit code or your
personal code. You must press each number
within five seconds of each other. The
interior lamps will illuminate.
Note: All doors will unlock if you enable the
all-door unlocking mode. See Locking and
Unlocking (page 67).
To Unlock All Doors
Enter the factory-set code or your personal
code, then press 3·4 within five seconds.
To Lock All Doors
Press and hold 7·8 and 9·0 at the same time
(with the driver door closed). You do not
need to enter the keypad code first. To Release the Trunk
Enter the factory-set code or your personal
code, then press 5·6 within five seconds.
Displaying the Factory Set Code
Note:
You will need to have two
programmed intelligent access keys for this
procedure.
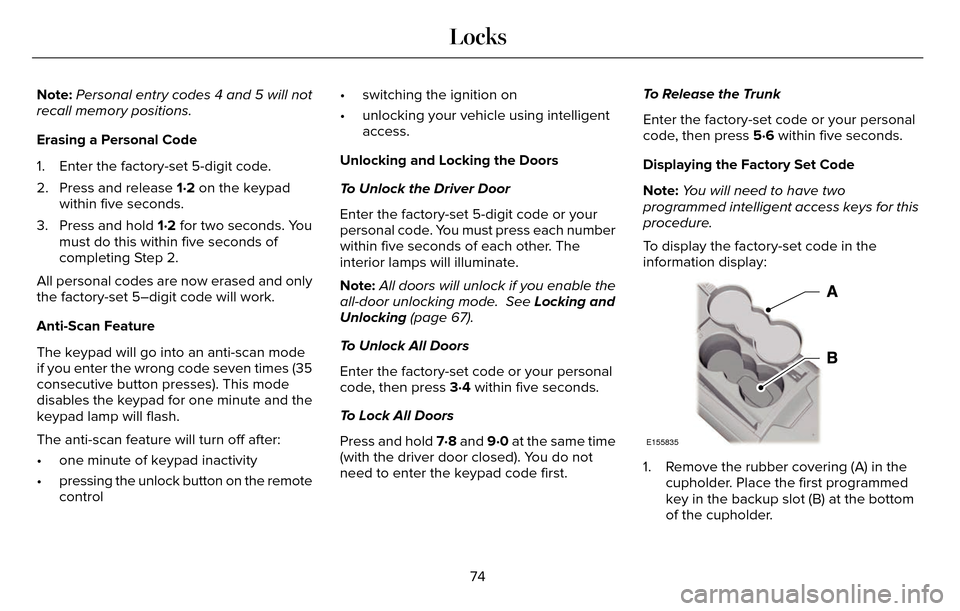
To display the factory-set code in the
information display:
E155835
1. Remove the rubber covering (A) in the cupholder. Place the first programmed
key in the backup slot (B) at the bottom
of the cupholder.
74
Locks
Page 78 of 544
2. Press the START/STOP button once andwait a few seconds.
3. Press the START/STOP button again and
remove the key.
4. Insert the second programmed key into the backup slot, then press the
START/STOP button.
The factory-set code will appear in the
information display for a few seconds.
Note: The code may not display until after
any other warning messages first display.
INTERIOR LUGGAGE
COMPARTMENT RELEASE
WARNINGS
Keep vehicle doors and luggage
compartment locked and keep keys
and remote transmitters out of a child’s
reach. Unsupervised children could lock
themselves in the trunk and risk injury.
Children should be taught not to play in
vehicles.
WARNINGS
Do not leave children or animals
unattended in the vehicle. On hot days,
the temperature in the trunk or vehicle
interior can rise very quickly. Exposure of
people or animals to these high
temperatures for even a short time can cause
death or serious heat-related injuries,
including brain damage. Small children are
particularly at risk.
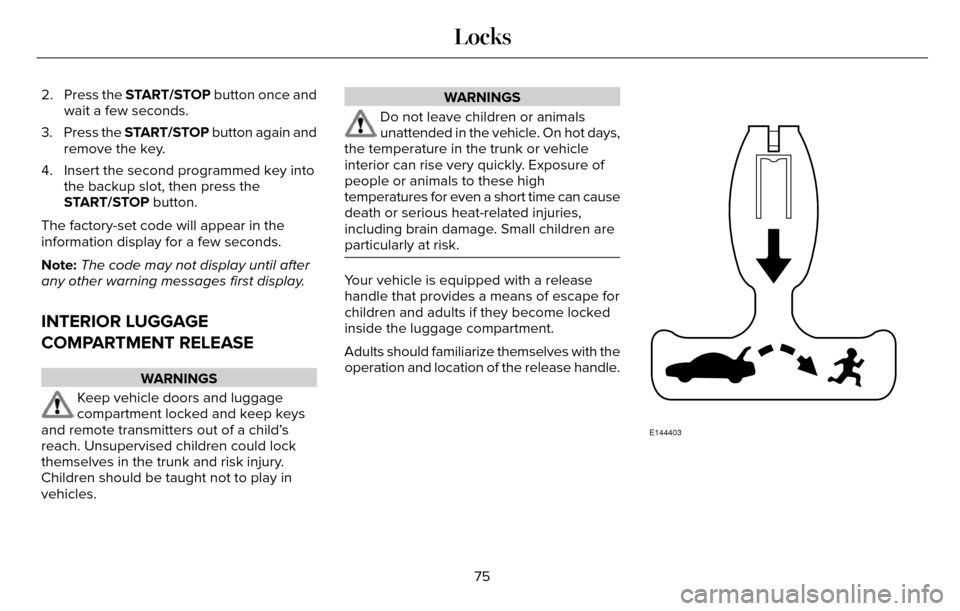
Your vehicle is equipped with a release
handle that provides a means of escape for
children and adults if they become locked
inside the luggage compartment.
Adults should familiarize themselves with the
operation and location of the release handle.
E144403
75
Locks
Page 110 of 544
Service Engine Soon
If the service engine soon indicator
light stays illuminated after the
engine is started, it indicates that
the On Board Diagnostics system (OBD) has
detected a malfunction of the vehicle
emissions control system. Refer to On board
diagnostics (OBD) in the Fuel and Refueling
chapter for more information about having
your vehicle serviced. See Emission Control
System (page 172).
If the light is blinking, engine misfire is
occurring which could damage your catalytic
converter. Drive in a moderate fashion (avoid
heavy acceleration and deceleration) and
have your vehicle serviced immediately.
WARNING
Under engine misfire conditions,
excessive exhaust temperatures could
damage the catalytic converter, the fuel
system, interior floor coverings or other
vehicle components, possibly causing a fire.
Have an authorized dealer service your
vehicle immediately.
The service engine soon indicator light
illuminates when the ignition is first turned
on prior to engine start to check the bulb and
to indicate whether the vehicle is ready for
Inspection/Maintenance (I/M) testing.
Normally, the service engine soon light will
stay on until the engine is cranked, then turn
itself off if no malfunctions are present.
However, if after 15 seconds the service
engine soon light blinks eight times, it means
that the vehicle is not ready for I/M testing.
See Emission Control System (page 172).
Stability Control
E138639
It will flash when the system is
active. If it remains illuminated or
does not illuminate when you
switch the ignition on, this indicates a
malfunction. During a malfunction the system
will switch off. Have the system checked by
your authorized dealer immediately. See
Using Stability Control (page 195).
Stability Control Off
It will illuminate when you switch
the system off. It will go out when
you switch the system back on or
when you switch the ignition off. See Using
Stability Control (page 195).
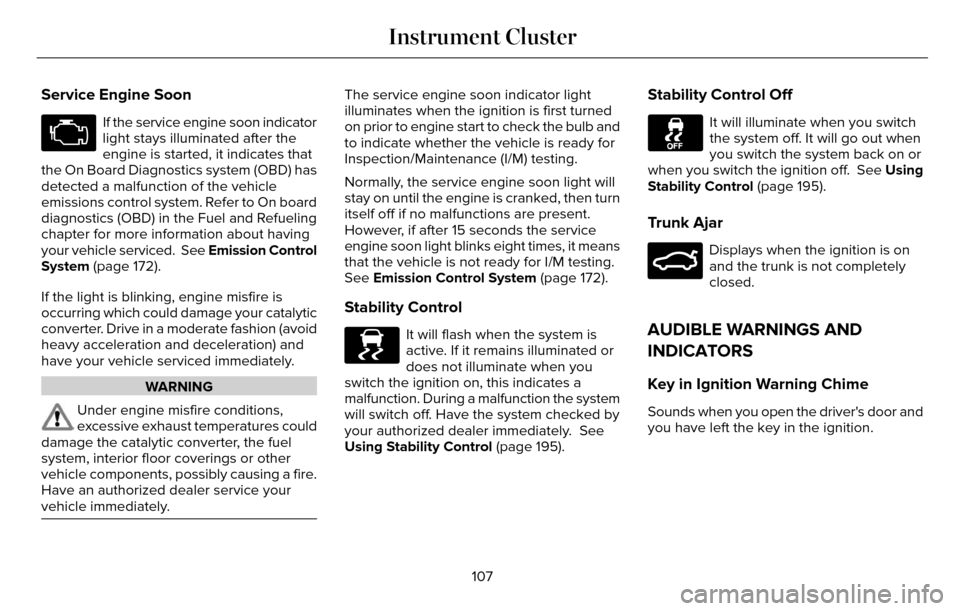
Trunk Ajar
E159323
Displays when the ignition is on
and the trunk is not completely
closed.
AUDIBLE WARNINGS AND
INDICATORS
Key in Ignition Warning Chime
Sounds when you open the driver's door and
you have left the key in the ignition.
107
Instrument Cluster
Page 124 of 544
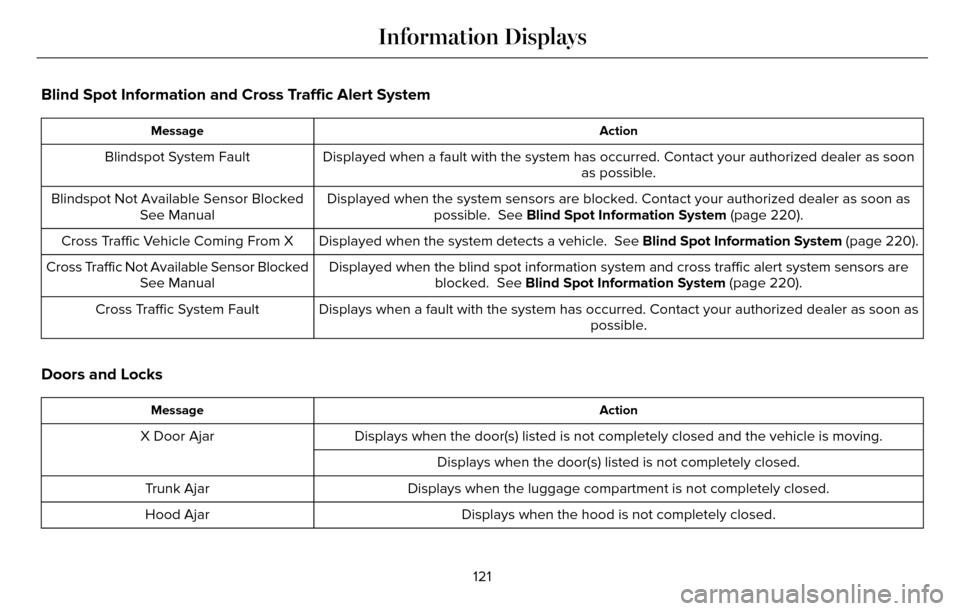
Blind Spot Information and Cross Traffic Alert System
Action
Message
Displayed when a fault with the system has occurred. Contact your author\
ized dealer as soon
as possible.
Blindspot System Fault
Displayed when the system sensors are blocked. Contact your authorized d\
ealer as soon aspossible. See Blind Spot Information System (page 220).
Blindspot Not Available Sensor Blocked
See Manual
Displayed when the system detects a vehicle. See Blind Spot Information System (page 220).
Cross Traffic Vehicle Coming From X
Displayed when the blind spot information system and cross traffic alert\
system sensors areblocked. See Blind Spot Information System (page 220).
Cross Traffic Not Available Sensor Blocked
See Manual
Displays when a fault with the system has occurred. Contact your authori\
zed dealer as soon as possible.
Cross Traffic System Fault
Doors and Locks
Action
Message
Displays when the door(s) listed is not completely closed and the vehi\
cle is moving.
X Door Ajar
Displays when the door(s) listed is not completely closed.
Displays when the luggage compartment is not completely closed.
Trunk Ajar
Displays when the hood is not completely closed.
Hood Ajar
121
Information Displays
Page 205 of 544
![LINCOLN MKZ 2016 Owners Manual The system does not position the vehicle where I want in the space
Your vehicle is rolling in the opposite direction of the transmission (r\
olling forward when Reverse [R] is selected)
An irregular c LINCOLN MKZ 2016 Owners Manual The system does not position the vehicle where I want in the space
Your vehicle is rolling in the opposite direction of the transmission (r\
olling forward when Reverse [R] is selected)
An irregular c](/img/15/6986/w960_6986-204.png)
The system does not position the vehicle where I want in the space
Your vehicle is rolling in the opposite direction of the transmission (r\
olling forward when Reverse [R] is selected)
An irregular curb along the parking space prevents the system from align\
ing your vehicle properly
Vehicles or objects bordering the space may not be positioned correctly
You pulled your vehicle too far past the parking space. The system performs best when you drive the same distance past the par\
king space
The tires may not be installed or maintained correctly (not inflated co\
rrectly, improper size, or of different sizes)
A repair or alteration has changed detection capabilities
A parked vehicle has a high attachment (salt sprayer, snowplow, moving truck bed, etc.)
The parking space length or position of parked objects changed after you\
r vehicle passed
The temperature around your vehicle changes quickly (driving from a hea\
ted garage into the cold, or after leaving a car wash)
REAR VIEW CAMERA (If Equipped)
WARNINGS
The rear view camera system is a
reverse aid supplement device that still
requires the driver to use it in conjunction
with the interior and exterior mirrors for
maximum coverage.
WARNINGS
Objects that are close to either corner
of the bumper or under the bumper,
might not be seen on the screen due to the
limited coverage of the camera system.
Back up as slow as possible since
higher speeds might limit your reaction
time to stop your vehicle.
WARNINGS
Use caution when using the rear video
camera and the trunk is ajar. If the trunk
is ajar, the camera will be out of position and
the video image may be incorrect. All
guidelines (if enabled) have been removed
when the trunk is ajar.
202
Parking Aids (If Equipped)
Page 206 of 544
WARNINGS
Use caution when turning camera
features on or off while in reverse (R).
Make sure your vehicle is not moving.
The rear view camera system provides a
video image of the area behind your vehicle.
The image will display in either the rear view
mirror or the display in the center of the
instrument panel.
During operation, lines will appear in the
display that represent your vehicle’s path
and proximity to objects behind your vehicle.
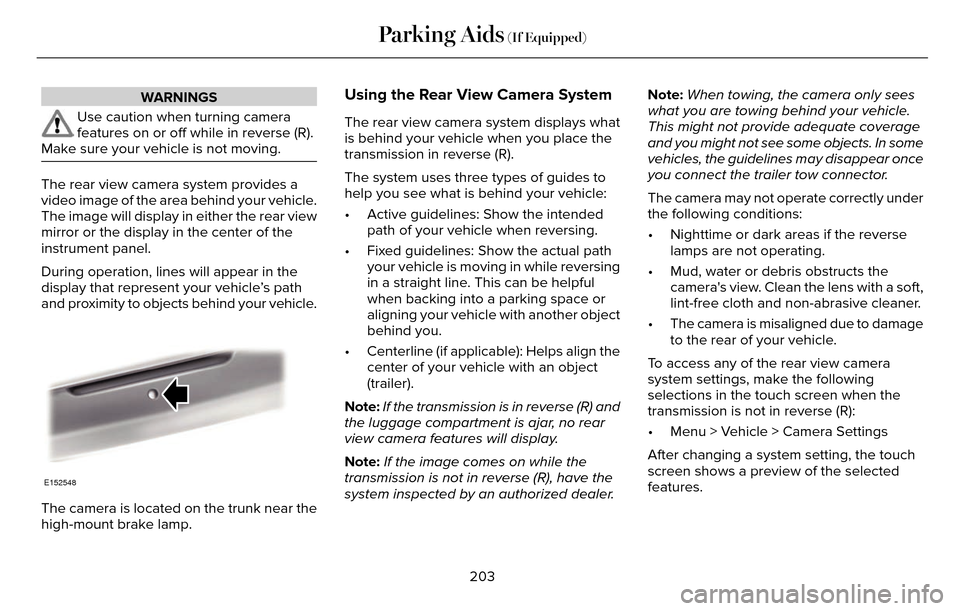
E152548
The camera is located on the trunk near the
high-mount brake lamp.
Using the Rear View Camera System
The rear view camera system displays what
is behind your vehicle when you place the
transmission in reverse (R).
The system uses three types of guides to
help you see what is behind your vehicle:
• Active guidelines: Show the intended path of your vehicle when reversing.
• Fixed guidelines: Show the actual path your vehicle is moving in while reversing
in a straight line. This can be helpful
when backing into a parking space or
aligning your vehicle with another object
behind you.
• Centerline (if applicable): Helps align the center of your vehicle with an object
(trailer).
Note: If the transmission is in reverse (R) and
the luggage compartment is ajar, no rear
view camera features will display.
Note: If the image comes on while the
transmission is not in reverse (R), have the
system inspected by an authorized dealer. Note:
When towing, the camera only sees
what you are towing behind your vehicle.
This might not provide adequate coverage
and you might not see some objects. In some
vehicles, the guidelines may disappear once
you connect the trailer tow connector.
The camera may not operate correctly under
the following conditions:
• Nighttime or dark areas if the reverse lamps are not operating.
• Mud, water or debris obstructs the camera's view. Clean the lens with a soft,
lint-free cloth and non-abrasive cleaner.
• The camera is misaligned due to damage to the rear of your vehicle.
To access any of the rear view camera
system settings, make the following
selections in the touch screen when the
transmission is not in reverse (R):
• Menu > Vehicle > Camera Settings
After changing a system setting, the touch
screen shows a preview of the selected
features.
203
Parking Aids (If Equipped)