buttons LINCOLN MKZ HYBRID 2016 Owners Manual
[x] Cancel search | Manufacturer: LINCOLN, Model Year: 2016, Model line: MKZ HYBRID, Model: LINCOLN MKZ HYBRID 2016Pages: 543, PDF Size: 5.04 MB
Page 70 of 543
LOCKING AND UNLOCKING
You can use the power door lock control or
the remote control to lock and unlock your
vehicle.
Power Door Locks
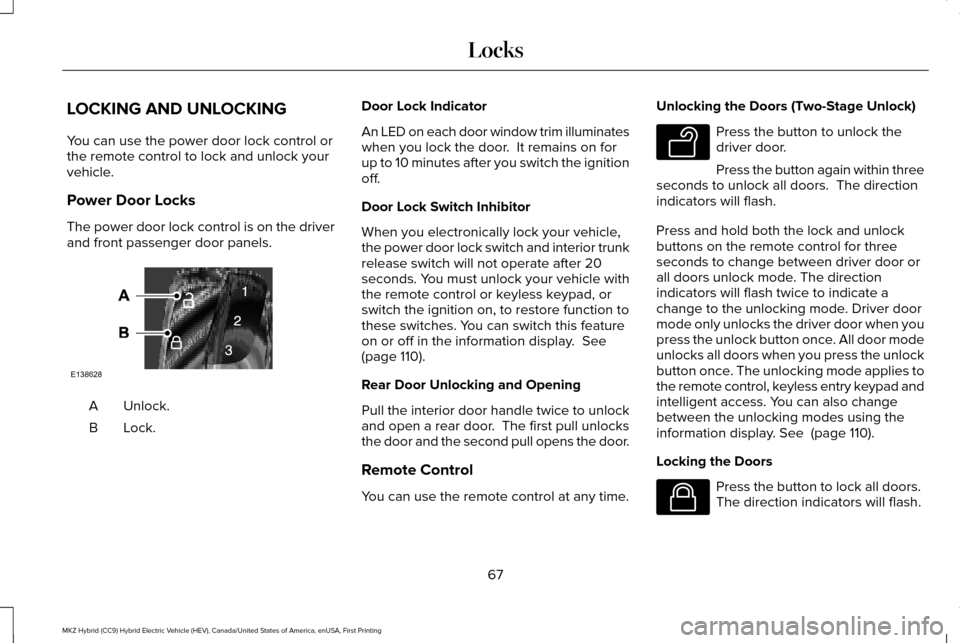
The power door lock control is on the driver
and front passenger door panels.
Unlock.
A
Lock.B Door Lock Indicator
An LED on each door window trim illuminates
when you lock the door. It remains on for
up to 10 minutes after you switch the ignition
off.
Door Lock Switch Inhibitor
When you electronically lock your vehicle,
the power door lock switch and interior trunk
release switch will not operate after 20
seconds. You must unlock your vehicle with
the remote control or keyless keypad, or
switch the ignition on, to restore function to
these switches. You can switch this feature
on or off in the information display. See
(page 110).
Rear Door Unlocking and Opening
Pull the interior door handle twice to unlock
and open a rear door. The first pull unlocks
the door and the second pull opens the door.
Remote Control
You can use the remote control at any time. Unlocking the Doors (Two-Stage Unlock) Press the button to unlock the
driver door.
Press the button again within three
seconds to unlock all doors. The direction
indicators will flash.
Press and hold both the lock and unlock
buttons on the remote control for three
seconds to change between driver door or
all doors unlock mode. The direction
indicators will flash twice to indicate a
change to the unlocking mode. Driver door
mode only unlocks the driver door when you
press the unlock button once. All door mode
unlocks all doors when you press the unlock
button once. The unlocking mode applies to
the remote control, keyless entry keypad and
intelligent access. You can also change
between the unlocking modes using the
information display.
See (page 110).
Locking the Doors Press the button to lock all doors.
The direction indicators will flash.
67
MKZ Hybrid (CC9) Hybrid Electric Vehicle (HEV), Canada/United States of America, enUSA, First Printing LocksE138628 E138629 E138623
Page 75 of 543
From Outside Your Vehicle
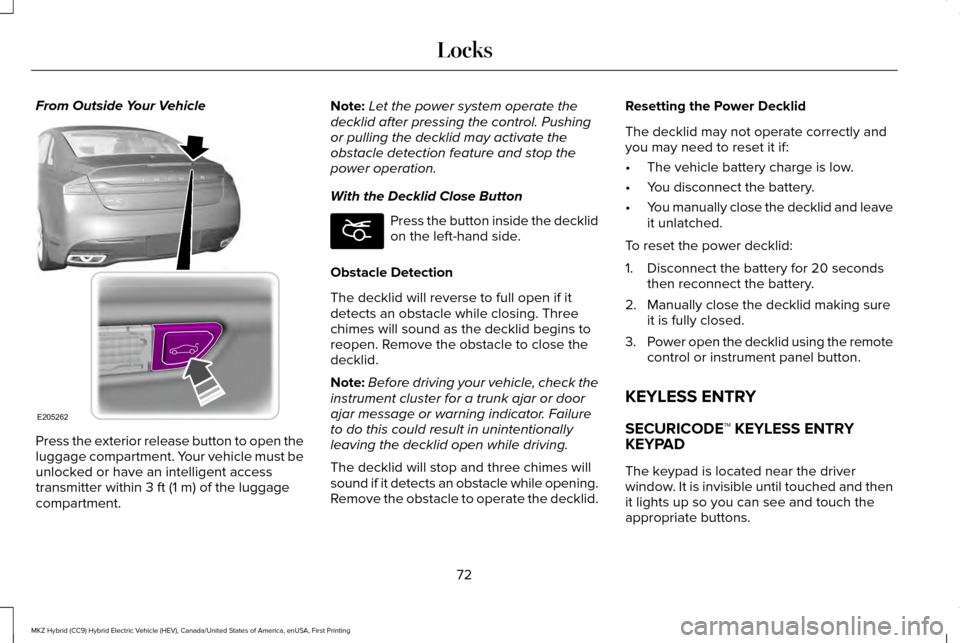
Press the exterior release button to open the
luggage compartment. Your vehicle must be
unlocked or have an intelligent access
transmitter within 3 ft (1 m) of the luggage
compartment. Note:
Let the power system operate the
decklid after pressing the control. Pushing
or pulling the decklid may activate the
obstacle detection feature and stop the
power operation.
With the Decklid Close Button Press the button inside the decklid
on the left-hand side.
Obstacle Detection
The decklid will reverse to full open if it
detects an obstacle while closing. Three
chimes will sound as the decklid begins to
reopen. Remove the obstacle to close the
decklid.
Note: Before driving your vehicle, check the
instrument cluster for a trunk ajar or door
ajar message or warning indicator. Failure
to do this could result in unintentionally
leaving the decklid open while driving.
The decklid will stop and three chimes will
sound if it detects an obstacle while opening.
Remove the obstacle to operate the decklid. Resetting the Power Decklid
The decklid may not operate correctly and
you may need to reset it if:
•
The vehicle battery charge is low.
• You disconnect the battery.
• You manually close the decklid and leave
it unlatched.
To reset the power decklid:
1. Disconnect the battery for 20 seconds then reconnect the battery.
2. Manually close the decklid making sure it is fully closed.
3. Power open the decklid using the remote
control or instrument panel button.
KEYLESS ENTRY
SECURICODE™ KEYLESS ENTRY
KEYPAD
The keypad is located near the driver
window. It is invisible until touched and then
it lights up so you can see and touch the
appropriate buttons.
72
MKZ Hybrid (CC9) Hybrid Electric Vehicle (HEV), Canada/United States of America, enUSA, First Printing LocksE205262 E194407
Page 97 of 543
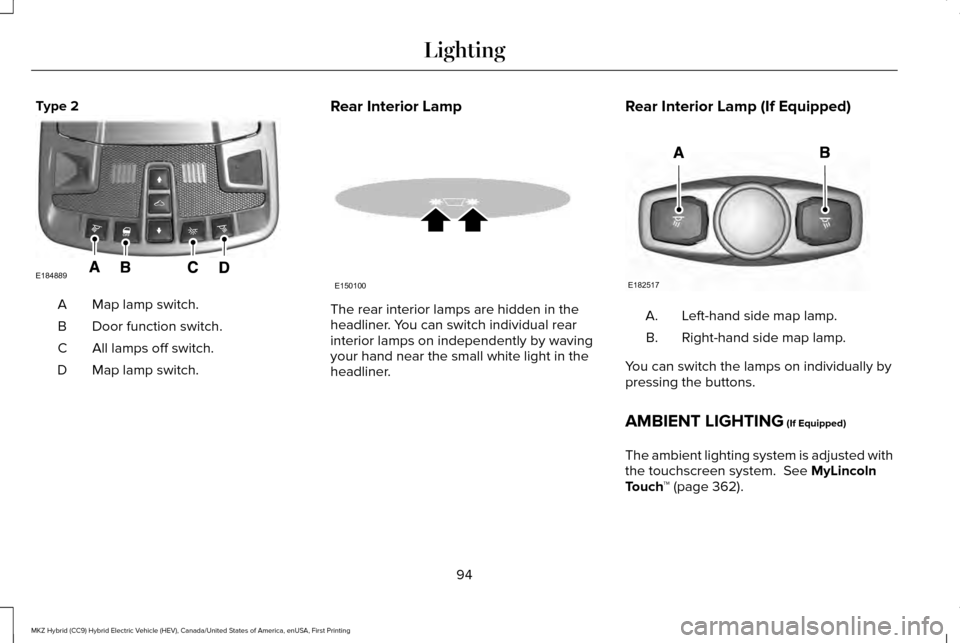
Type 2
Map lamp switch.
A
Door function switch.
B
All lamps off switch.
C
Map lamp switch.
D Rear Interior Lamp The rear interior lamps are hidden in the
headliner. You can switch individual rear
interior lamps on independently by waving
your hand near the small white light in the
headliner.
Rear Interior Lamp (If Equipped) Left-hand side map lamp.
A.
Right-hand side map lamp.
B.
You can switch the lamps on individually by
pressing the buttons.
AMBIENT LIGHTING (If Equipped)
The ambient lighting system is adjusted with
the touchscreen system.
See MyLincoln
Touch ™ (page 362).
94
MKZ Hybrid (CC9) Hybrid Electric Vehicle (HEV), Canada/United States of America, enUSA, First Printing LightingE184889 E150100 E182517
Page 113 of 543
GENERAL INFORMATION
WARNING
Driving while distracted can result in
loss of vehicle control, crash and injury.
We strongly recommend that you use
extreme caution when using any device that
may take your focus off the road. Your
primary responsibility is the safe operation
of your vehicle. We recommend against the
use of any hand-held device while driving
and encourage the use of voice-operated
systems when possible. Make sure you are
aware of all applicable local laws that may
affect the use of electronic devices while
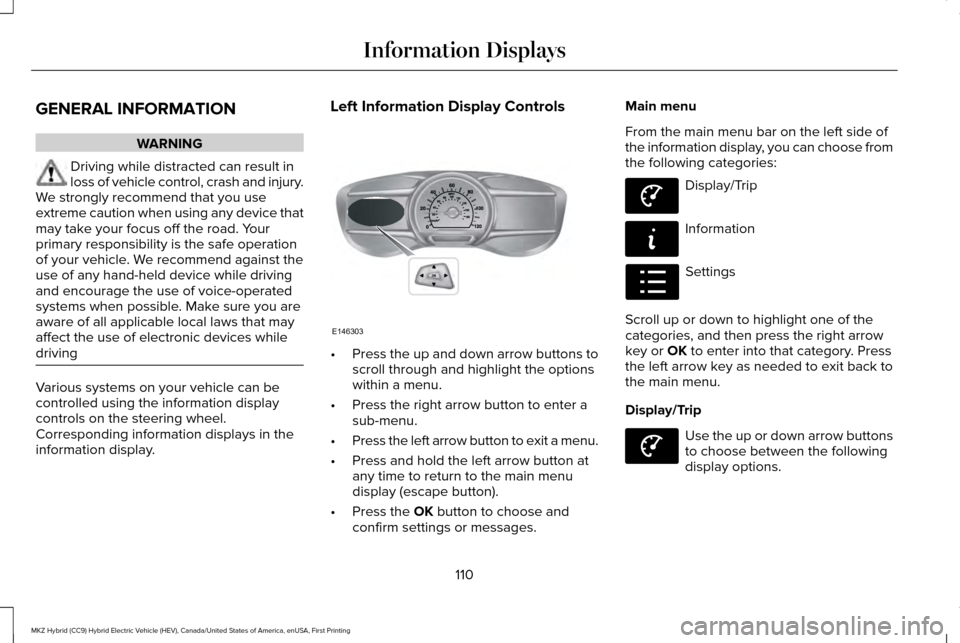
driving Various systems on your vehicle can be
controlled using the information display
controls on the steering wheel.
Corresponding information displays in the
information display. Left Information Display Controls
•
Press the up and down arrow buttons to
scroll through and highlight the options
within a menu.
• Press the right arrow button to enter a
sub-menu.
• Press the left arrow button to exit a menu.
• Press and hold the left arrow button at
any time to return to the main menu
display (escape button).
• Press the OK button to choose and
confirm settings or messages. Main menu
From the main menu bar on the left side of
the information display, you can choose from
the following categories:
Display/Trip
Information
Settings
Scroll up or down to highlight one of the
categories, and then press the right arrow
key or
OK to enter into that category. Press
the left arrow key as needed to exit back to
the main menu.
Display/Trip Use the up or down arrow buttons
to choose between the following
display options.
110
MKZ Hybrid (CC9) Hybrid Electric Vehicle (HEV), Canada/United States of America, enUSA, First Printing Information DisplaysE146303 E144639 E144642 E100023 E144639
Page 117 of 543
Information
Displays a number of different system tutorials. Use the up or down arro\
ws to scroll
through the tutorials. Then press OK to view.
Tutorial
Warnings
Displays the associated driver alert graphic.
Driver Alert
MyKeys (Number of MyKeys programmed)
MyKey
MyKey Miles (km) (Distance traveled using a programmed MyKey)
Admin Keys (Number of admin keys)
All active warnings will display first if applicable. The system check menu may appear
different based upon equipment options and current vehicle status. Use t\
he up or down
arrow buttons to scroll through the list.
System Check
Settings In this mode, you can configure
different driver setting choices.
Note:
Some items are optional and may not
appear.
Note: Some MyKey items will only appear if
a MyKey is set.
114
MKZ Hybrid (CC9) Hybrid Electric Vehicle (HEV), Canada/United States of America, enUSA, First Printing Information DisplaysE100023
Page 122 of 543
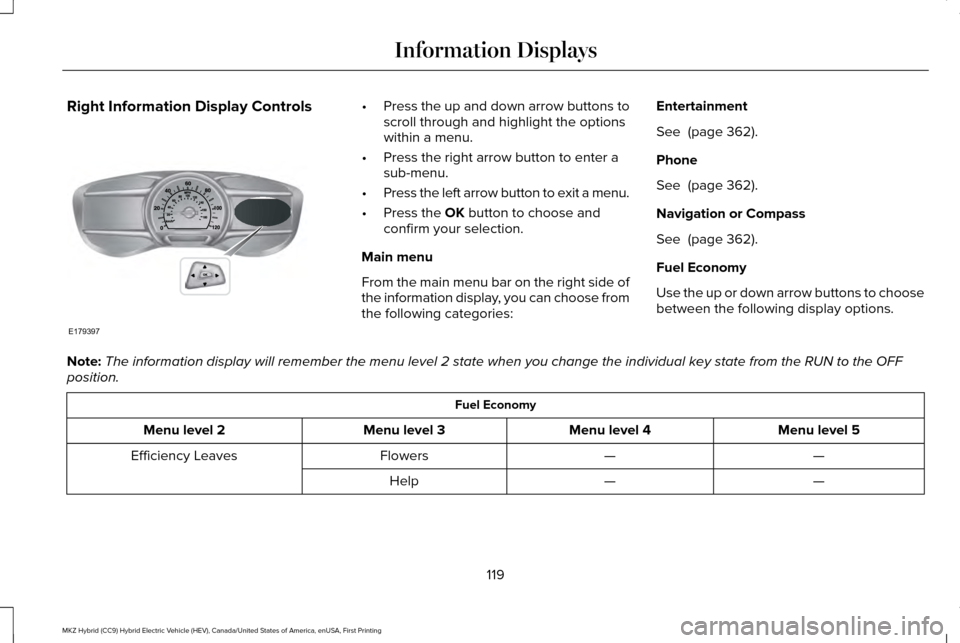
Right Information Display Controls •
Press the up and down arrow buttons to
scroll through and highlight the options
within a menu.
• Press the right arrow button to enter a
sub-menu.
• Press the left arrow button to exit a menu.
• Press the OK button to choose and
confirm your selection.
Main menu
From the main menu bar on the right side of
the information display, you can choose from
the following categories: Entertainment
See
(page 362).
Phone
See
(page 362).
Navigation or Compass
See
(page 362).
Fuel Economy
Use the up or down arrow buttons to choose
between the following display options.
Note: The information display will remember the menu level 2 state when you ch\
ange the individual key state from the RUN to the OFF
position. Fuel Economy
Menu level 5
Menu level 4
Menu level 3
Menu level 2
—
—
Flowers
Efficiency Leaves
—
—
Help
119
MKZ Hybrid (CC9) Hybrid Electric Vehicle (HEV), Canada/United States of America, enUSA, First Printing Information DisplaysE179397
Page 151 of 543
Lowering the Head Restraint
1. Press and hold button C.
2. Push the head restraint down.
Removing the Head Restraint
1.
Pull the head restraint up until it reaches
its highest position.
2. Press and hold buttons C and D.
3. Pull the head restraint up.
Installing the Head Restraint
Align the steel stems into the guide sleeves
and push the head restraint down until it
locks. Tilting Head Restraints
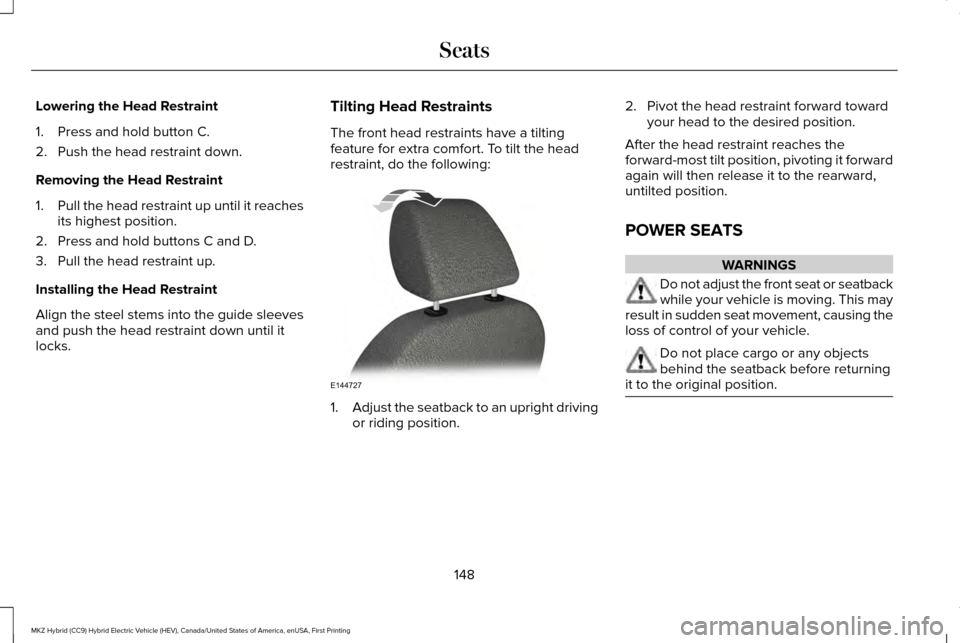
The front head restraints have a tilting
feature for extra comfort. To tilt the head
restraint, do the following:
1.
Adjust the seatback to an upright driving
or riding position. 2. Pivot the head restraint forward toward
your head to the desired position.
After the head restraint reaches the
forward-most tilt position, pivoting it forward
again will then release it to the rearward,
untilted position.
POWER SEATS WARNINGS
Do not adjust the front seat or seatback
while your vehicle is moving. This may
result in sudden seat movement, causing the
loss of control of your vehicle. Do not place cargo or any objects
behind the seatback before returning
it to the original position. 148
MKZ Hybrid (CC9) Hybrid Electric Vehicle (HEV), Canada/United States of America, enUSA, First Printing SeatsE144727
Page 161 of 543
HomeLink Wireless Control System (If
Equipped) WARNING
Do not use the system with any garage
door opener that does not have the
safety stop and reverse feature as required
by U.S. Federal Safety Standards (this
includes any garage door opener
manufactured before April 1, 1982). A garage
door opener which cannot detect an object,
signaling the door to stop and reverse, does
not meet current federal safety standards.
Using a garage door opener without these
features increases the risk of serious injury
or death. Note:
Make sure that the garage door and
security device are free from obstruction
when you are programming. Do not program
the system with the vehicle in the garage.
Note: Make sure you keep the original
remote control transmitter for use in other
vehicles as well as for future system
programming. Note:
We recommend that upon the sale or
lease termination of your vehicle, you erase
the programmed function buttons for security
reasons. See Erasing the function button
codes later in this section.
Note: You can program a maximum of three
devices. To change or replace any of the
three devices after it has been initially
programmed, you must first erase the current
settings. See Erasing the function button
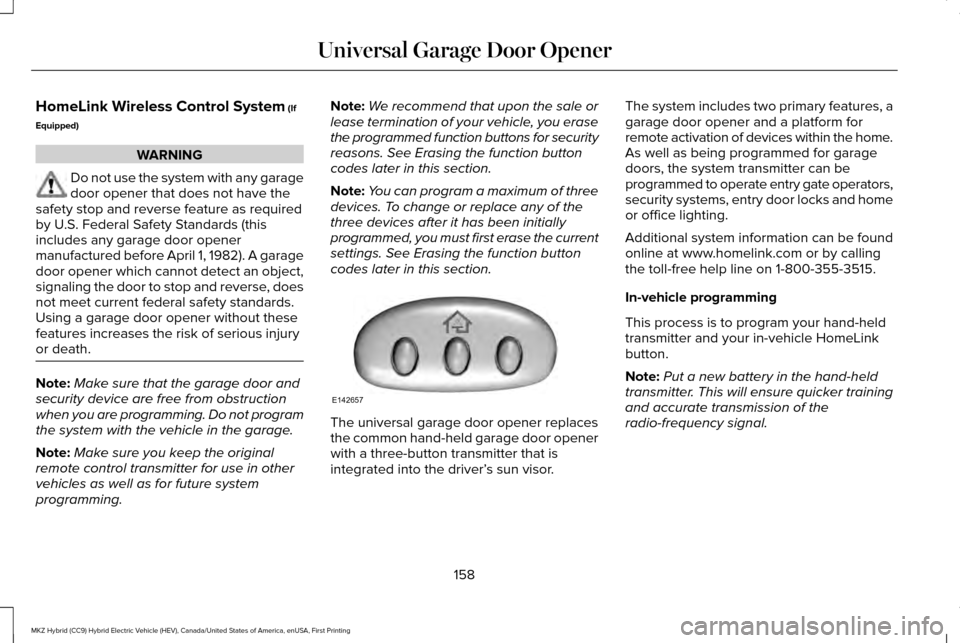
codes later in this section. The universal garage door opener replaces
the common hand-held garage door opener
with a three-button transmitter that is
integrated into the driver’
s sun visor.The system includes two primary features, a
garage door opener and a platform for
remote activation of devices within the home.
As well as being programmed for garage
doors, the system transmitter can be
programmed to operate entry gate operators,
security systems, entry door locks and home
or office lighting.
Additional system information can be found
online at www.homelink.com or by calling
the toll-free help line on 1-800-355-3515.
In-vehicle programming
This process is to program your hand-held
transmitter and your in-vehicle HomeLink
button.
Note:
Put a new battery in the hand-held
transmitter. This will ensure quicker training
and accurate transmission of the
radio-frequency signal.
158
MKZ Hybrid (CC9) Hybrid Electric Vehicle (HEV), Canada/United States of America, enUSA, First Printing Universal Garage Door OpenerE142657
Page 162 of 543
1. With your vehicle parked outside of the
garage, turn your ignition to the on
position, but do not start your vehicle.
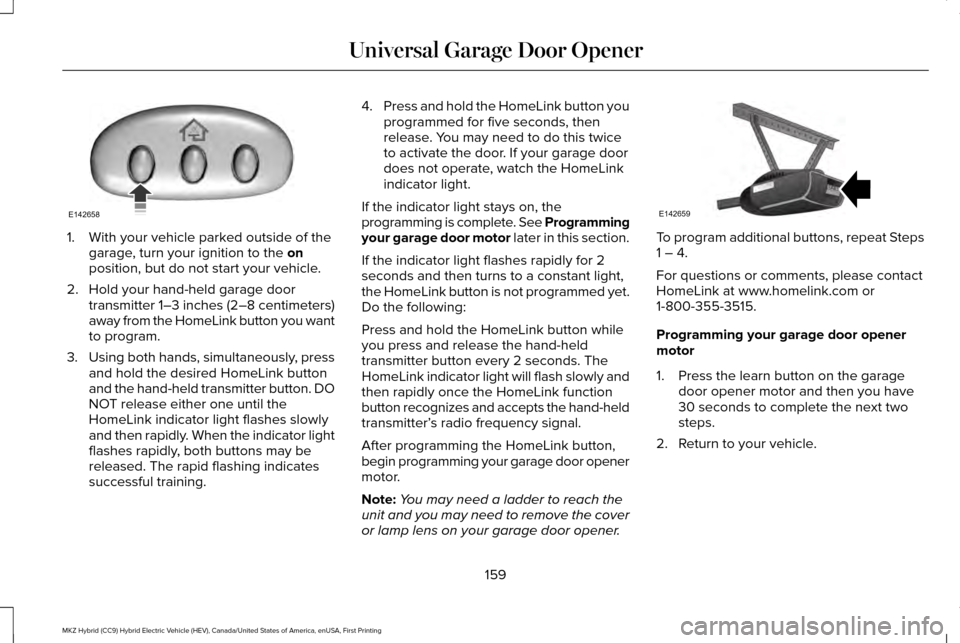
2. Hold your hand-held garage door transmitter 1–3 inches (2–8 centimeters)
away from the HomeLink button you want
to program.
3. Using both hands, simultaneously, press
and hold the desired HomeLink button
and the hand-held transmitter button. DO
NOT release either one until the
HomeLink indicator light flashes slowly
and then rapidly. When the indicator light
flashes rapidly, both buttons may be
released. The rapid flashing indicates
successful training. 4.
Press and hold the HomeLink button you
programmed for five seconds, then
release. You may need to do this twice
to activate the door. If your garage door
does not operate, watch the HomeLink
indicator light.
If the indicator light stays on, the
programming is complete. See Programming
your garage door motor later in this section.
If the indicator light flashes rapidly for 2
seconds and then turns to a constant light,
the HomeLink button is not programmed yet.
Do the following:
Press and hold the HomeLink button while
you press and release the hand-held
transmitter button every 2 seconds. The
HomeLink indicator light will flash slowly and
then rapidly once the HomeLink function
button recognizes and accepts the hand-held
transmitter’ s radio frequency signal.
After programming the HomeLink button,
begin programming your garage door opener
motor.
Note: You may need a ladder to reach the
unit and you may need to remove the cover
or lamp lens on your garage door opener. To program additional buttons, repeat Steps
1 – 4.
For questions or comments, please contact
HomeLink at www.homelink.com or
1-800-355-3515.
Programming your garage door opener
motor
1. Press the learn button on the garage
door opener motor and then you have
30 seconds to complete the next two
steps.
2. Return to your vehicle.
159
MKZ Hybrid (CC9) Hybrid Electric Vehicle (HEV), Canada/United States of America, enUSA, First Printing Universal Garage Door OpenerE142658 E142659
Page 163 of 543
3. Press and hold the function button you
want to program for 2 seconds, then
release. Repeat this step. Depending on
your brand of garage door opener, you
may need to repeat this sequence a third
time.
Erasing the Function Button Codes
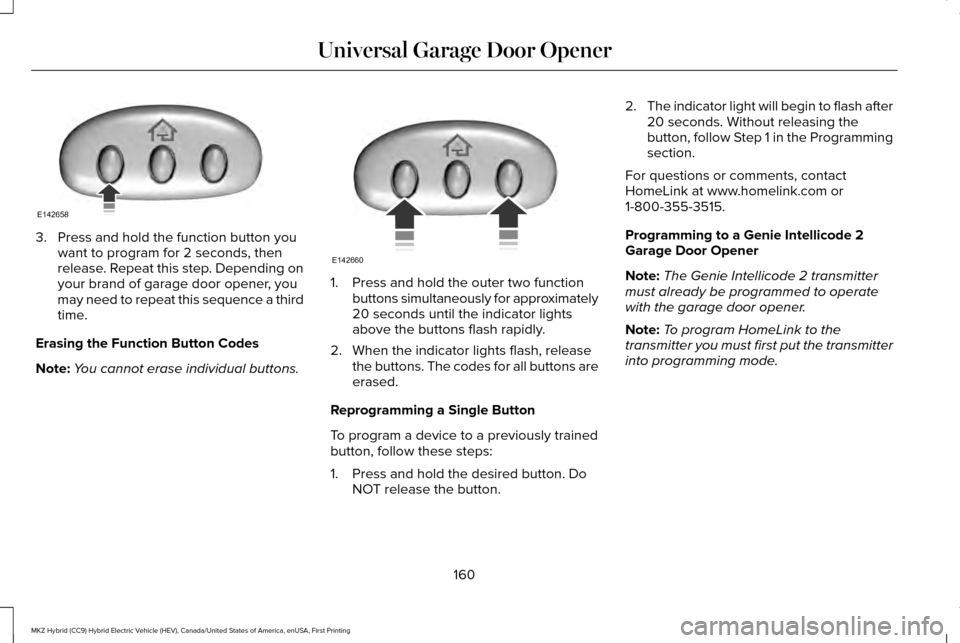
Note: You cannot erase individual buttons. 1. Press and hold the outer two function
buttons simultaneously for approximately
20 seconds until the indicator lights
above the buttons flash rapidly.
2. When the indicator lights flash, release the buttons. The codes for all buttons are
erased.
Reprogramming a Single Button
To program a device to a previously trained
button, follow these steps:
1. Press and hold the desired button. Do NOT release the button. 2.
The indicator light will begin to flash after
20 seconds. Without releasing the
button, follow Step 1 in the Programming
section.
For questions or comments, contact
HomeLink at www.homelink.com or
1-800-355-3515.
Programming to a Genie Intellicode 2
Garage Door Opener
Note: The Genie Intellicode 2 transmitter
must already be programmed to operate
with the garage door opener.
Note: To program HomeLink to the
transmitter you must first put the transmitter
into programming mode.
160
MKZ Hybrid (CC9) Hybrid Electric Vehicle (HEV), Canada/United States of America, enUSA, First Printing Universal Garage Door OpenerE142658 E142660