tire type LINCOLN NAUTILUS 2020 User Guide
[x] Cancel search | Manufacturer: LINCOLN, Model Year: 2020, Model line: NAUTILUS, Model: LINCOLN NAUTILUS 2020Pages: 596, PDF Size: 5.88 MB
Page 366 of 596
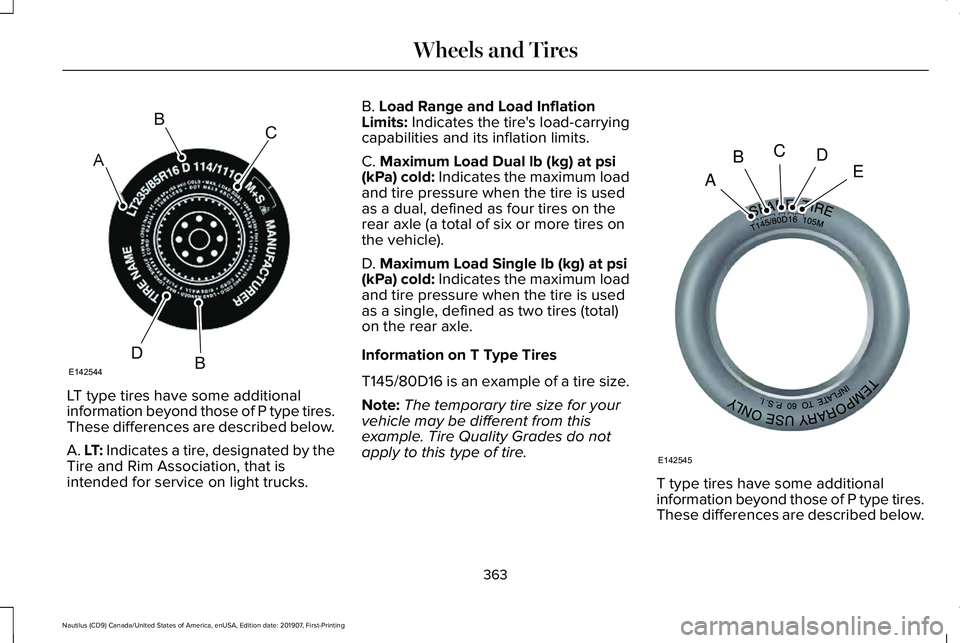
LT type tires have some additional
information beyond those of P type tires.
These differences are described below.
A. LT: Indicates a tire, designated by the
Tire and Rim Association, that is
intended for service on light trucks. B. Load Range and Load Inflation
Limits: Indicates the tire's load-carrying
capabilities and its inflation limits.
C.
Maximum Load Dual lb (kg) at psi
(kPa) cold: Indicates the maximum load
and tire pressure when the tire is used
as a dual, defined as four tires on the
rear axle (a total of six or more tires on
the vehicle).
D.
Maximum Load Single lb (kg) at psi
(kPa) cold: Indicates the maximum load
and tire pressure when the tire is used
as a single, defined as two tires (total)
on the rear axle.
Information on T Type Tires
T145/80D16 is an example of a tire size.
Note: The temporary tire size for your
vehicle may be different from this
example. Tire Quality Grades do not
apply to this type of tire. T type tires have some additional
information beyond those of P type tires.
These differences are described below.
363
Nautilus (CD9) Canada/United States of America, enUSA, Edition date: 201907, First-Printing Wheels and TiresA
BC
BDE142544 A
BCDE
E142545
Page 367 of 596
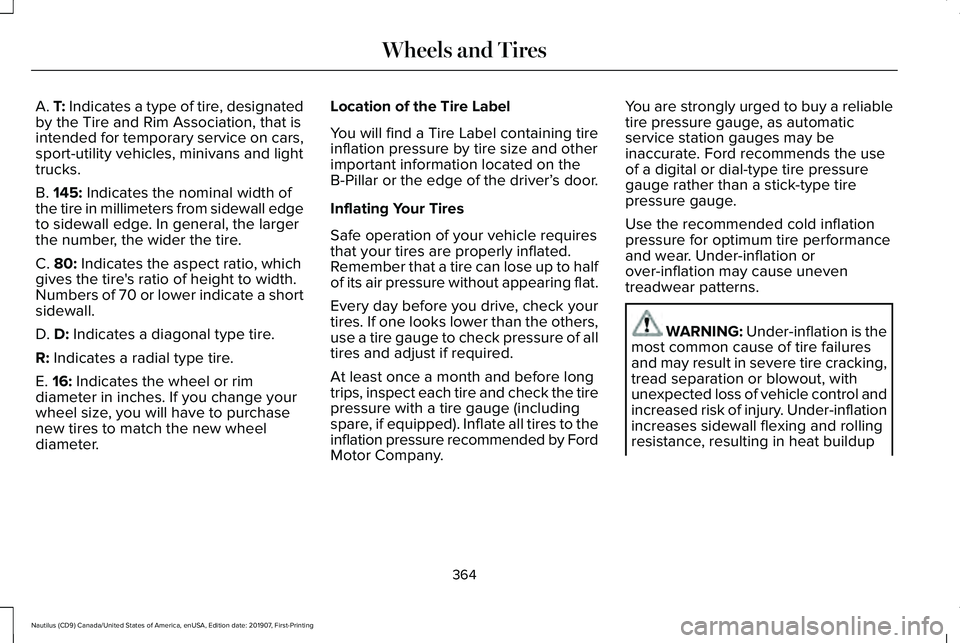
A. T: Indicates a type of tire, designated
by the Tire and Rim Association, that is
intended for temporary service on cars,
sport-utility vehicles, minivans and light
trucks.
B.
145: Indicates the nominal width of
the tire in millimeters from sidewall edge
to sidewall edge. In general, the larger
the number, the wider the tire.
C.
80: Indicates the aspect ratio, which
gives the tire's ratio of height to width.
Numbers of 70 or lower indicate a short
sidewall.
D.
D: Indicates a diagonal type tire.
R:
Indicates a radial type tire.
E.
16: Indicates the wheel or rim
diameter in inches. If you change your
wheel size, you will have to purchase
new tires to match the new wheel
diameter. Location of the Tire Label
You will find a Tire Label containing tire
inflation pressure by tire size and other
important information located on the
B-Pillar or the edge of the driver’
s door.
Inflating Your Tires
Safe operation of your vehicle requires
that your tires are properly inflated.
Remember that a tire can lose up to half
of its air pressure without appearing flat.
Every day before you drive, check your
tires. If one looks lower than the others,
use a tire gauge to check pressure of all
tires and adjust if required.
At least once a month and before long
trips, inspect each tire and check the tire
pressure with a tire gauge (including
spare, if equipped). Inflate all tires to the
inflation pressure recommended by Ford
Motor Company. You are strongly urged to buy a reliable
tire pressure gauge, as automatic
service station gauges may be
inaccurate. Ford recommends the use
of a digital or dial-type tire pressure
gauge rather than a stick-type tire
pressure gauge.
Use the recommended cold inflation
pressure for optimum tire performance
and wear. Under-inflation or
over-inflation may cause uneven
treadwear patterns.
WARNING: Under-inflation is the
most common cause of tire failures
and may result in severe tire cracking,
tread separation or blowout, with
unexpected loss of vehicle control and
increased risk of injury. Under-inflation
increases sidewall flexing and rolling
resistance, resulting in heat buildup
364
Nautilus (CD9) Canada/United States of America, enUSA, Edition date: 201907, First-Printing Wheels and Tires
Page 369 of 596
3. Add enough air to reach the
recommended air pressure.
Note:
If you overfill the tire, release air
by pressing on the metal stem in the
center of the valve. Then recheck the
pressure with your tire gauge.
4. Replace the valve cap.
5. Repeat this procedure for each tire,
including the spare.
Note: Some spare tires operate at a
higher inflation pressure than the other
tires. For T type mini-spare tires, see the
Dissimilar Spare Wheel and Tire
Assembly section. Store and maintain
at 60 psi (4.15 bar). For full-size and
dissimilar spare tires, see the Dissimilar
Spare Wheel and Tire Assembly
Information section. Store and maintain
at the higher of the front and rear
inflation pressure as shown on the Tire
Label.
6. Visually inspect the tires to make sure
there are no nails or other objects
embedded that could poke a hole in the
tire and cause an air leak. 7. Check the sidewalls to make sure
there are no gouges, cuts or bulges.
Inspecting Your Tires and Wheel Valve
Stems
Periodically inspect the tire treads for
uneven or excessive wear and remove
objects such as stones, nails or glass
that may be wedged in the tread
grooves. Check the tire and valve stems
for holes, cracks, or cuts that may permit
air leakage and repair or replace the tire
and replace the valve stem. Inspect the
tire sidewalls for cracking, cuts, bruises
and other signs of damage or excessive
wear. If internal damage to the tire is
suspected, have the tire demounted and
inspected in case it needs to be repaired
or replaced. For your safety, tires that
are damaged or show signs of excessive
wear should not be used because they
are more likely to blow out or fail.
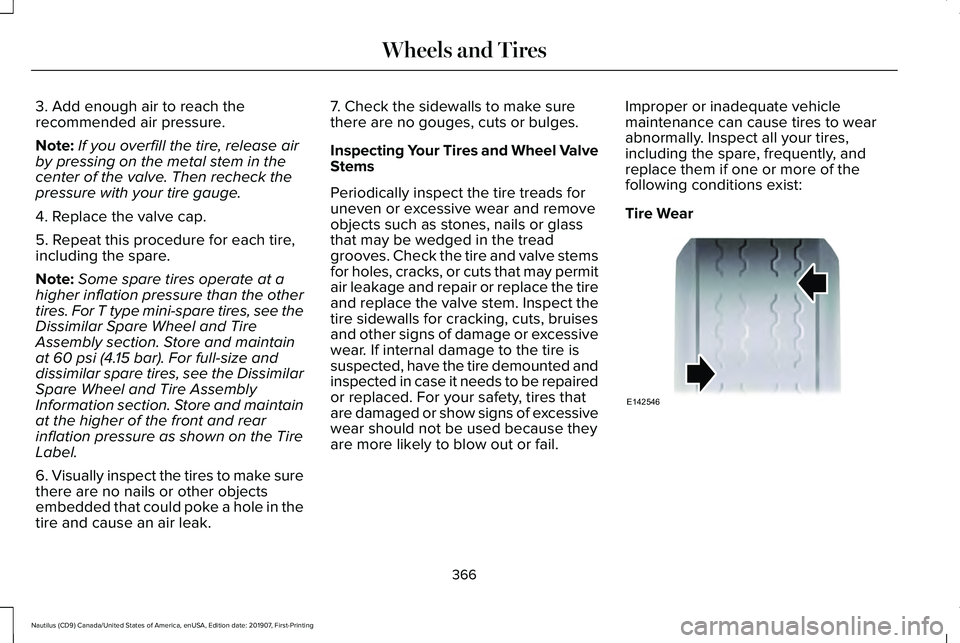
Improper or inadequate vehicle
maintenance can cause tires to wear
abnormally. Inspect all your tires,
including the spare, frequently, and
replace them if one or more of the
following conditions exist:
Tire Wear
366
Nautilus (CD9) Canada/United States of America, enUSA, Edition date: 201907, First-Printing Wheels and TiresE142546
Page 371 of 596
Tire Replacement Requirements
Your vehicle is equipped with tires
designed to provide a safe ride and
handling capability.
WARNING: Only use replacement
tires and wheels that are the same
size, load index, speed rating and type
(such as P-metric versus LT-metric or
all-season versus all-terrain) as those
originally provided by Ford. The
recommended tire and wheel size may
be found on either the Safety
Compliance Certification Label (affixed
to either the door hinge pillar,
door-latch post, or the door edge that
meets the door-latch post, next to the
driver's seating position), or the Tire
Label which is located on the B-Pillar
or edge of the driver's door. If this
information is not found on these
labels, then you should contact your
authorized dealer as soon as possible.
Use of any tire or wheel not recommended by Ford can affect the
safety and performance of your
vehicle, which could result in an
increased risk of loss of vehicle
control, vehicle rollover, personal
injury and death.
WARNING: To reduce the risk of
serious injury, when mounting
replacement tires and wheels, you
should not exceed the maximum
pressure indicated on the sidewall of
the tire to set the beads without
additional precautions listed below. If
the beads do not seat at the maximum
pressure indicated, re-lubricate and
try again. WARNING:
When inflating the
tire for mounting pressures up to
20 psi (1.38 bar)
greater than the
maximum pressure on the tire sidewall,
the following precautions must be
taken to protect the person mounting
the tire: •
Make sure that you have the correct
tire and wheel size.
• Lubricate the tire bead and wheel
bead seat area again.
• Stand at a minimum of
12 ft (3.66 m)
away from the wheel and tire
assembly.
• Use both eye and ear protection. WARNING:
For a mounting
pressure more than 20 psi (1.38 bar)
greater than the maximum pressure,
a Ford dealer or other tire service
professional should do the mounting. WARNING:
Always inflate steel
carcass tires with a remote air fill with
the person inflating standing at a
minimum of
12 ft (3.66 m) away from
the wheel and tire assembly.
Important:
Remember to replace the
wheel valve stems when the road tires
are replaced on your vehicle.
The two front tires or two rear tires
should generally be replaced as a pair.
368
Nautilus (CD9) Canada/United States of America, enUSA, Edition date: 201907, First-Printing Wheels and Tires
Page 380 of 596
Have a flat serviced by an authorized dealer
in order to prevent damage to the tire
pressure monitoring system sensors. See
Tire Pressure Monitoring System (page 371).
Replace the spare tire with a road tire as
soon as possible. During repairing or
replacing of the flat tire, have an authorized
dealer inspect the tire pressure monitoring
system sensor for damage.
Dissimilar Spare Wheel and Tire
Assembly Information WARNING:
Failure to follow these
guidelines could result in an increased risk
of loss of vehicle control, injury or death.
If you have a dissimilar spare wheel and tire,
then it is intended for temporary use only.
This means that if you need to use it, you
should replace it as soon as possible with a
road wheel and tire assembly that is the
same size and type as the road tires and
wheels that were originally provided by us.
If the dissimilar spare tire or wheel is
damaged, replace it instead of repairing it. A dissimilar spare wheel and tire assembly
is defined as a spare wheel and tire assembly
that is different in brand, size or appearance
from the road tires and wheels and can be
one of three types:
1.
T-type mini-spare: This spare tire begins
with the letter T for tire size and may have
Temporary Use Only molded in the sidewall.
2.
Full-size dissimilar spare with label on
wheel: This spare tire has a label on the
wheel that states: THIS WHEEL AND TIRE
ASSEMBLY FOR TEMPORARY USE ONLY.
When driving with one of the dissimilar spare
tires listed above, do not:
• Exceed
50 mph (80 km/h).
• Load the vehicle beyond maximum
vehicle load rating listed on the Safety
Compliance Label.
• Tow a trailer.
• Use snow chains on the end of the
vehicle with the dissimilar spare tire.
• Use more than one dissimilar spare tire
at a time. •
Use commercial car washing equipment.
• Try to repair the dissimilar spare tire.
Use of one of the dissimilar spare tires listed
above at any one wheel location can lead to
impairment of the following:
• Handling, stability and braking
performance.
• Comfort and noise.
• Ground clearance and parking at curbs.
• Winter weather driving capability.
• Wet weather driving capability.
• All-wheel driving capability, if applicable.
3. Full-size dissimilar spare without label
on wheel
When driving with the full-size dissimilar
spare wheel and tire assembly, do not:
• Exceed
70 mph (113 km/h).
• Use more than one dissimilar spare
wheel and tire assembly at a time.
• Use commercial car washing equipment.
• Use snow chains on the end of the
vehicle with the dissimilar spare wheel
and tire assembly.
377
Nautilus (CD9) Canada/United States of America, enUSA, Edition date: 201907, First-Printing Wheels and Tires
Page 567 of 596
DECLARATION OF CONFORMITY
Radio Frequency Statement
IC Identification Number
FCC Identification Number
SYNC Version
216B-SYNCG3-L
ACJ-SYNCG3-L
3.0
216B-FA170BCARHS
ACJ-FA-170-BCARHS
3.1
216B-FG185SG32MH
ACJ-FG-185-SG32MH
3.2 WARNING: Changes or modifications
not expressively approved by the party
responsible for compliance could void the
user's authority to operate the equipment.
The term "IC:" before the radio certification
number only signifies that Industry Canada
technical specifications were met. These devices comply with Part 15 of the
FCC Rules and with RSS-210 of Industry
Canada. Operation is subject to the following
two conditions:
1. The device does not cause harmful
interference.
2. The device accepts any interference received, including interference that
could cause undesired operation. TYPE APPROVALS
Radio Frequency Certifications for Tire
Pressure Monitoring Sensor(s)
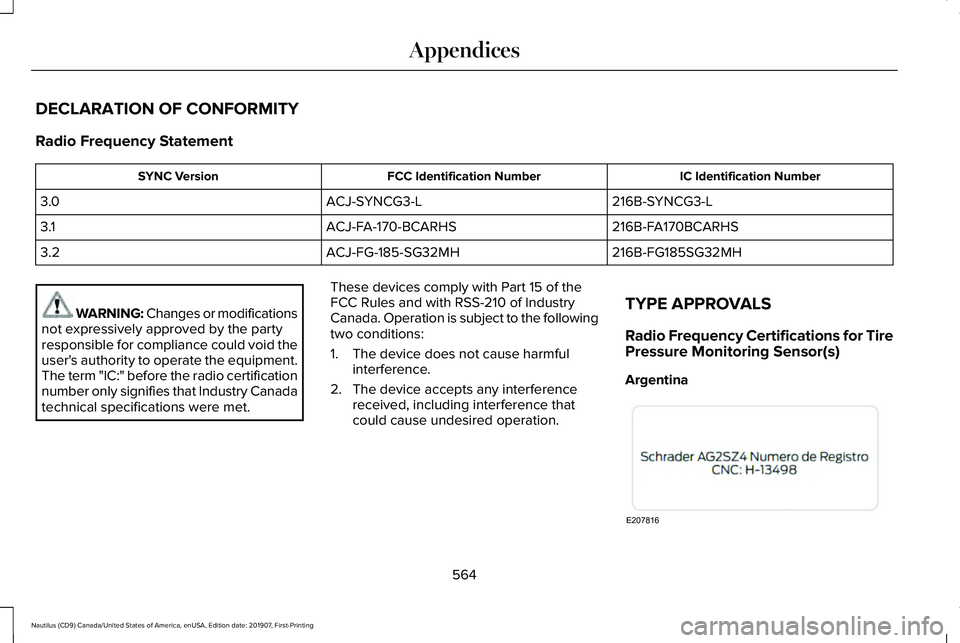
Argentina
564
Nautilus (CD9) Canada/United States of America, enUSA, Edition date: 201907, First-Printing AppendicesE207816
Page 589 of 596
Power Steering....................................................136
Pre-Collision Assist..............................................137
Remote Start.........................................................137
Seats.......................................................................137
Stability Control....................................................138
Starting System ...................................................138
Tire Pressure Monitoring System....................139
Transmission.........................................................139
Installing Child Restraints.............................23 Child Seats..............................................................23
Using Lap and Shoulder Belts...........................23
Using Lower Anchors and Tethers for
CHildren (LATCH).............................................26
Using Tether Straps..............................................28
Instrument Cluster........................................109
Instrument Lighting Dimmer........................96
Instrument Panel..............................................19
Interior Lamps
..................................................98
Front Interior Lamp...............................................98
Interior Lamp Function........................................99
Rear Interior Lamps..............................................99
Switching All of the Interior Lamps Off...........99
Switching All of the Interior Lamps On...........99
Switching the Individual Map Lamps On and
Off........................................................................\
.99
Interior Mirror
.................................................106
Auto-Dimming Mirror..........................................106
Introduction
.........................................................7 J
Jump Starting the Vehicle..........................290
Connecting the Jumper Cables......................
291
Jump Starting.......................................................291
Preparing Your Vehicle.....................................290
Removing the Jumper Cables........................292
K
Keyless Entry....................................................74 SECURICODE™ Keyless Entry Keypad.............
74
Keyless Starting
.............................................172
Ignition Modes......................................................172
Keys and Remote Controls..........................58
L
Lane Keeping System
..................................247
Switching the System On and Off..................248
Liftgate...............................................................78
Lighting Control
...............................................94
Flashing the Headlamp High Beam.................95
Headlamp High Beam.........................................95
Lighting..............................................................94 General Information.............................................94
Lincoln Automotive Financial Services......14 Lincoln Protect
..............................................492
Lincoln Protect (CANADA ONLY)....................493
Lincoln Protect Extended Service Plans (U.S.
Only)..................................................................492
Load Carriers See: Roof Racks and Load Carriers...............272
Load Carrying
................................................270
Load Limit.......................................................273
Special Loading Instructions for Owners of
Pick-up Trucks and Utility-type
Vehicles............................................................277
Vehicle Loading - with and without a Trailer.................................................................273
Locking and Unlocking..................................70 Activating Intelligent Access..............................
72
Autolock..................................................................73
Auto Relock............................................................73
Autounlock..............................................................74
Battery Saver..........................................................74
Illuminated Entry....................................................74
Illuminated Exit.......................................................74
Locking and Unlocking the Doors with the Key Blade.............................................................71
Power Door Locks................................................70
Remote Control.....................................................70
Smart Unlocks for Intelligent Access Keys......................................................................73
586
Nautilus (CD9) Canada/United States of America, enUSA, Edition date: 201907, First-Printing Index
Page 594 of 596
Towing a Trailer.............................................278
Load Placement..................................................278
Towing the Vehicle on Four Wheels - 2.0L...............................................................283
Emergency Towing............................................283
Recreational Towing..........................................283
Towing the Vehicle on Four Wheels - 2.7L................................................................283
Emergency Towing............................................283
Recreational Towing..........................................284
Towing.............................................................278
Traction Control.............................................210 Principle of Operation........................................210
Trailer Sway Control....................................279
Transmission Code Designation..............390
Transmission...................................................192
Transporting the Vehicle............................293
Type Approvals.............................................564 China......................................................................576
Radio Frequency Certification for Keys and
Remote Controls.............................................577
Radio Frequency Certifications for Blind Spot Information System........................................574
Radio Frequency Certifications for Body Control Module...............................................576
Radio Frequency Certifications for Cruise Control Module...............................................576 Radio Frequency Certifications for Mid Range
Radar.................................................................568
Radio Frequency Certifications for Passive Anti-Theft System..........................................569
Radio Frequency Certifications for Radio Transceiver Module.......................................572
Radio Frequency Certifications for SYNC 3........................................................................\
..576
Radio Frequency Certifications for Tire Pressure Monitoring Sensor(s)...................564
Radio Frequency Certifications for Wireless Charging...........................................................575
Radio Frequency Statement for Audio Unit.....................................................................577
U
Under Hood Overview - 2.0L....................324
Under Hood Overview - 2.7L....................325
Unique Driving Characteristics..................178
Universal Garage Door Opener................162 HomeLink Wireless Control System...............162
USB Port..........................................................427
Using Adaptive Cruise Control - Vehicles With: Adaptive Cruise Control With Lane
Centering.....................................................235
Automatic Cancellation.....................................239
Blocked Sensor....................................................241 Canceling the Set Speed.................................
239
Changing the Set Speed..................................238
Detection Issues.................................................239
Following a Vehicle............................................237
Following a Vehicle to a Complete Stop....................................................................237
Hilly Condition Usage.......................................239
Overriding the Set Speed................................238
Park Brake Application.....................................239
Resuming the Set Speed..................................239
Setting the Adaptive Cruise Speed...............236
Setting the Adaptive Cruise Speed When Your Vehicle is Stationary......................................236
Setting the Gap Distance.................................237
Switching Adaptive Cruise Control Off.........239
Switching Adaptive Cruise Control On.........236
Switching to Normal Cruise Control..............243
System Not Available.........................................241
Using Lane Centering.......................................243
Using All-Wheel Drive..................................199 Driving in Special Conditions with All-Wheel
Drive (AWD)......................................................199
Using MyKey With Remote Start Systems..........................................................68
Using Snow Chains
......................................370
Using Stability Control.................................212
Electronic Stability Control ..............................212
591
Nautilus (CD9) Canada/United States of America, enUSA, Edition date: 201907, First-Printing Index