audio LINCOLN NAUTILUS 2022 Owners Manual
[x] Cancel search | Manufacturer: LINCOLN, Model Year: 2022, Model line: NAUTILUS, Model: LINCOLN NAUTILUS 2022Pages: 586, PDF Size: 13.97 MB
Page 16 of 586
Tire Sealant and Inflator Kit
What Is the Tire Sealant and Inflator Kit......................................................................385
Tire Sealant and Inflator Kit Precautions......................................................................385
Locating the Tire Sealant and Inflator Kit......................................................................385
Tire Sealant and Inflator Kit Components......................................................................386
Using the Tire Sealant and Inflator Kit......................................................................386
Tire Pressure Monitoring System
What Is the Tire Pressure MonitoringSystem.......................................................392
Tire Pressure Monitoring System Overview......................................................................392
Tire Pressure Monitoring SystemPrecautions...............................................393
Tire Pressure Monitoring SystemLimitations.................................................393
Viewing the Tire Pressures......................394
Resetting Tire Pressure Monitoring System......................................................................394
Tire Pressure Monitoring System –Troubleshooting......................................395
Changing a Road Wheel
Changing a Flat Tire...................................397
Wheel Nuts...................................................402
Capacities and Specifications
Engine Specifications - 2.0L.....................404
Engine Specifications - 2.7L.....................405
Motorcraft Parts - 2.0L...............................406
Motorcraft Parts - 2.7L................................407
Engine Oil Capacity and Specification -2.0L.............................................................408
Engine Oil Capacity and Specification -2.7L..............................................................410
Cooling System Capacity and Specification- 2.0L...........................................................413
Cooling System Capacity and Specification- 2.7L............................................................414
Fuel Tank Capacity......................................415
Air Conditioning System Capacity andSpecification - 2.0L..................................416
Air Conditioning System Capacity andSpecification - 2.7L..................................418
Washer Fluid Specification........................419
Brake Fluid Specification..........................420
Vehicle Identification
Vehicle Identification Number.................422
Connected Vehicle
What Is a Connected Vehicle...................423
Connected Vehicle Requirements..........423
Connected Vehicle Limitations................423
Connecting the Vehicle to a MobileNetwork.....................................................423
Connecting the Vehicle to a Wi-Fi Network......................................................................423
Connected Vehicle – Troubleshooting......................................................................424
Vehicle Wi-Fi Hotspot
Creating a Vehicle Wi-Fi Hotspot............427
Changing the Vehicle Wi-Fi Hotspot Nameor Password..............................................427
Audio System
Audio System Precautions.......................429
12
2022 Nautilus (CD9) Canada/United States of America, enUSA, Edition date: 202108, First-PrintingTable of Contents
Page 17 of 586
Identifying the Audio Unit.........................429
Switching the Audio Unit On and Off.....429
Selecting the Audio Source.....................429
Playing or Pausing the Audio Source.....429
Adjusting the Volume.................................430
Switching Shuffle Mode On and Off......430
Switching Repeat Mode On and Off......430
Setting a Memory Preset..........................430
Muting the Audio.........................................430
Adjusting the Sound Settings..................430
Setting the Clock and Date.......................431
AM/FM Radio.................................................431
Switching the Display On and Off...........432
Digital Radio.................................................432
Satellite Radio..............................................434
Center Display Overview
Center Display Precautions......................437
Center Display Limitations........................437
Status Bar......................................................437
Feature Bar...................................................438
Information On Demand Screen.............438
Voice Interaction
What is Voice Interaction..........................440
Setting the Wake Word..............................440
Beginning a Voice Interaction.................440
Voice Interaction Examples......................440
Phone
Phone Precautions......................................442
Connecting Your Phone............................442
Phone Menu.................................................442
Making and Receiving a Phone Call.......444
Sending and Receiving a Text Message......................................................................446
Switching Text Message Notification Onand Off.......................................................447
Bluetooth®
Connecting a Bluetooth® Device............448
Playing Media Using Bluetooth®.............448
Apps
App Precautions..........................................449
App Requirements......................................449
Accessing Apps...........................................449
Enabling Apps on an iOS Device............449
Enabling Apps on an Android Device......................................................................449
Switching Apple CarPlay On and Off......450
Switching Android Auto On and Off......450
Personal Profiles
How Do Personal Profiles Work..............452
Enabling or Disabling Personal Profiles......................................................................452
Creating a Personal Profile.......................452
Linking or Unlinking a Personal Profile toa Remote Control....................................453
Linking or Unlinking a Personal Profile toa Device....................................................453
Navigation
Accessing Navigation................................454
Navigation Map Updates..........................454
Adjusting the Map.......................................454
Live Traffic.....................................................454
Setting a Destination..................................454
Waypoints......................................................455
13
2022 Nautilus (CD9) Canada/United States of America, enUSA, Edition date: 202108, First-PrintingTable of Contents
Page 32 of 586
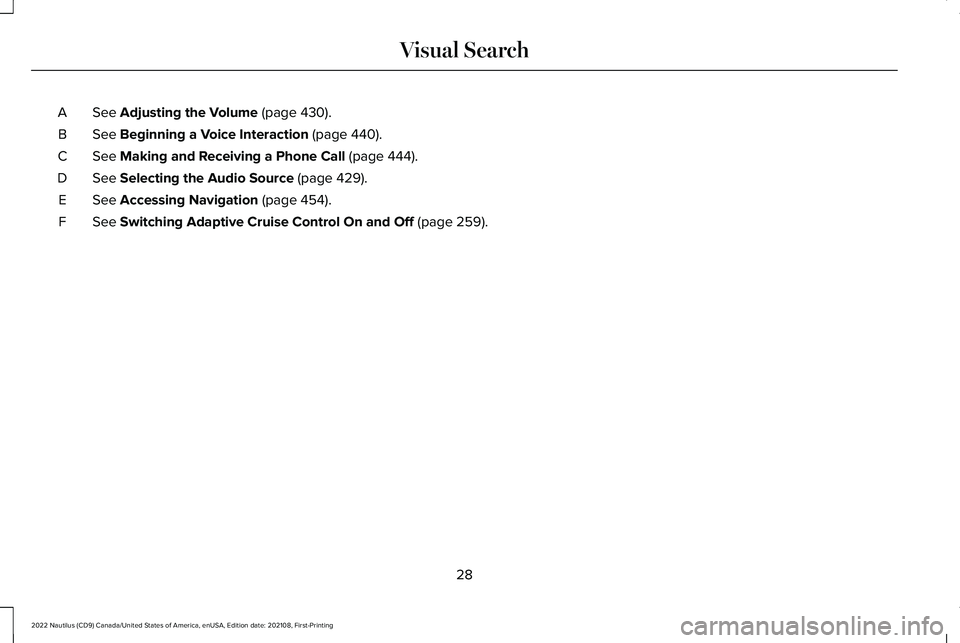
See Adjusting the Volume (page 430).A
See Beginning a Voice Interaction (page 440).B
See Making and Receiving a Phone Call (page 444).C
See Selecting the Audio Source (page 429).D
See Accessing Navigation (page 454).E
See Switching Adaptive Cruise Control On and Off (page 259).F
28
2022 Nautilus (CD9) Canada/United States of America, enUSA, Edition date: 202108, First-PrintingVisual Search
Page 36 of 586
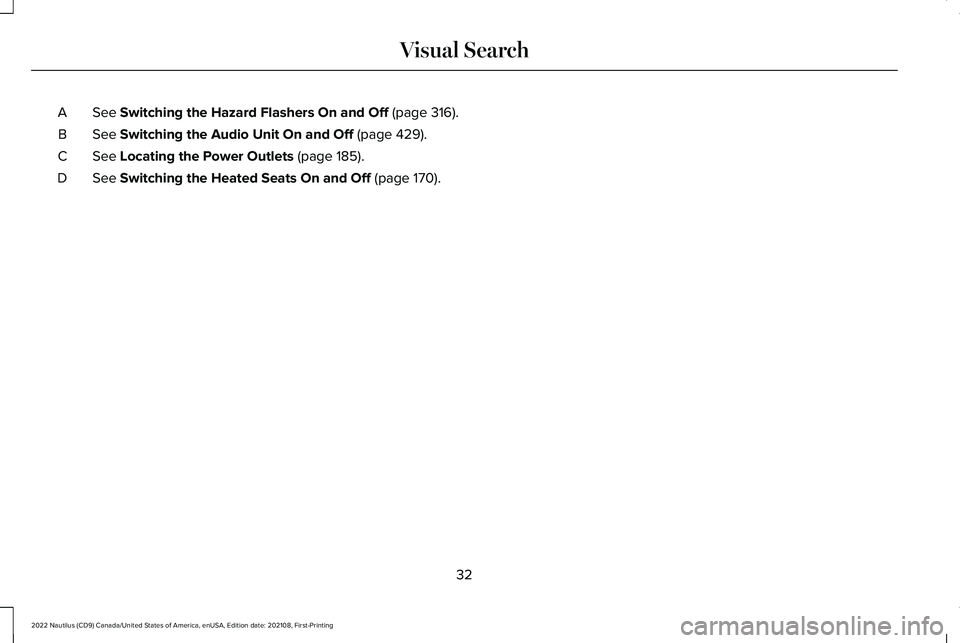
See Switching the Hazard Flashers On and Off (page 316).A
See Switching the Audio Unit On and Off (page 429).B
See Locating the Power Outlets (page 185).C
See Switching the Heated Seats On and Off (page 170).D
32
2022 Nautilus (CD9) Canada/United States of America, enUSA, Edition date: 202108, First-PrintingVisual Search
Page 89 of 586
PRINCIPLE OF OPERATION
MyKey allows you to program keys withrestricted driving modes to promote gooddriving habits. All but one of the keys can beactivated with these restricted modes.
Any keys that remain unprogrammed arereferred to as administrator keys or adminkeys. They can be used to:
•Create a MyKey.
•Program configurable MyKey settings.
•Clear all MyKey features.
When you have created a MyKey, you canaccess the following information by usingthe information display to determine:
•How many admin keys and MyKeys areprogrammed to your vehicle.
•The total distance your vehicle traveledwith a MyKey.
Note:Switch the vehicle on to use thesystem.
Note:All MyKeys are programmed to thesame settings. You cannot program themindividually.
Note:For vehicles with push-button start,when both a MyKey and an admin key arepresent, the vehicle will recognize the adminkey when you switch the vehicle on.
Non-Configurable Settings
The following settings cannot be changedby an admin key user:
•Seatbelt reminder. You cannot disablethis feature. The audio system will mutewhen the driver and front-seat passengerseatbelts are not fastened.
•Early low fuel or charge. The low-fuel orlow charge warning activates earlier,giving the MyKey user more time to refuelor recharge.
•Restricted touchscreen operation in somemarkets. For example, MyKey mayprevent manual navigation destinationinput when the vehicle is in any gearother than park (P), or when the vehiclereaches a certain rate of speed.
•Satellite radio adult content restrictions,if available on your vehicle.
Note:If a phone is connected using AppleCarPlay or Android Auto when driving witha MyKey, the driver can receive phone callsand text messages even if the do not disturbrestriction is on. If the vehicle comes withsatellite radio, the adult content is notrestricted.
Note:The audio system may not mute witha basic AM/FM radio.
Note:You may be able to turn the lanedeparture warning feature off, but thefeature will automatically re-activate withevery new key cycle.
Configurable Settings
With an admin key, you can configure certainMyKey settings when you first create aMyKey and before you restart the vehicle.You can also change the settings afterwardwith an admin key.
Note:Available vehicle features will appearin your information display, providing youwith choices to switch them on or off, or toselect a more specific setting.
85
2022 Nautilus (CD9) Canada/United States of America, enUSA, Edition date: 202108, First-PrintingMyKey™
Page 90 of 586
WARNING: Do not set MyKeymaximum speed limit to a limit that willprevent the driver from maintaining a safespeed considering posted speed limits andprevailing road conditions. The driver isalways responsible to drive in accordancewith local laws and prevailing conditions.Failure to do so could result in accident orinjury.
•A vehicle speed limit can be set.Warnings will be shown in the displayfollowed by an audible tone when yourvehicle reaches the set speed. Youcannot override the set speed by fullydepressing the accelerator pedal or bysetting cruise control.
•Various vehicle speed minders can beset. Once you select a speed, it will beshown in the display, followed by anaudible tone when the preselectedvehicle speed is exceeded.
•Audio system maximum volume of 45%.A message will be shown in the displaywhen you attempt to exceed the limitedvolume. Also, the speed-sensitive orcompensated automatic volume controlwill be disabled.
•Always on setting. When this is selected,you will not be able to switch offAdvanceTrac™ or traction control, 911Assist or Emergency Assistance, or thedo not disturb feature, if your vehiclecomes with these features.
CREATING A MYKEY
Use the information display to create aMyKey:
86
2022 Nautilus (CD9) Canada/United States of America, enUSA, Edition date: 202108, First-PrintingMyKey™E203693
Page 149 of 586
USING THE INSTRUMENT
CLUSTER DISPLAY CONTROLS
WARNING: Driving while distractedcan result in loss of vehicle control, crashand injury. We strongly recommend thatyou use extreme caution when using anydevice that may take your focus off theroad. Your primary responsibility is the safeoperation of your vehicle. We recommendagainst the use of any hand-held devicewhile driving and encourage the use ofvoice-operated systems when possible.Make sure you are aware of all applicablelocal laws that may affect the use ofelectronic devices while driving.
Note:Some options may appear slightlydifferent or not at all if the items are optional.
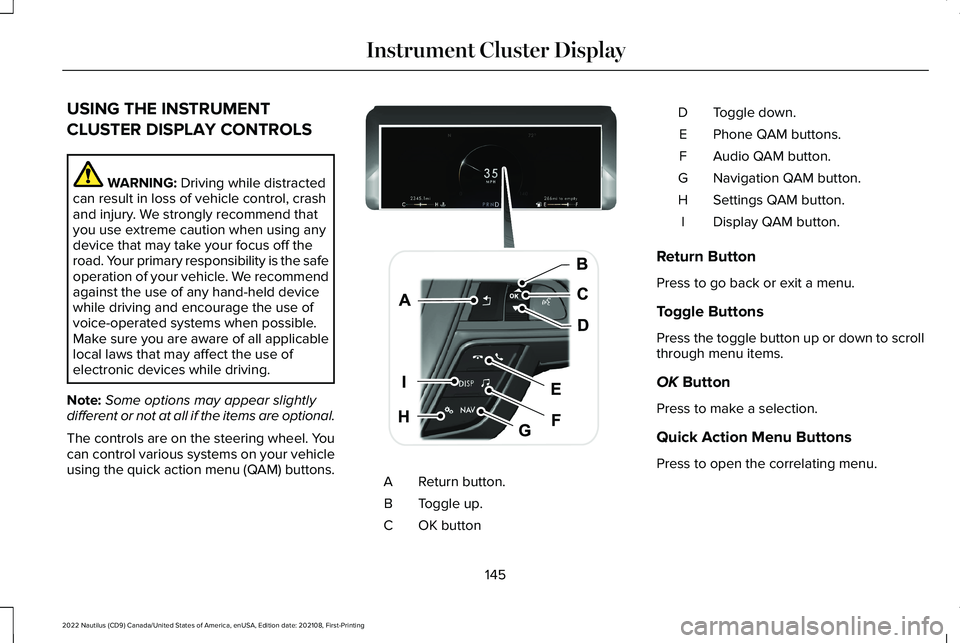
The controls are on the steering wheel. Youcan control various systems on your vehicleusing the quick action menu (QAM) buttons.Return button.A
Toggle up.B
OK buttonC
Toggle down.D
Phone QAM buttons.E
Audio QAM button.F
Navigation QAM button.G
Settings QAM button.H
Display QAM button.I
Return Button
Press to go back or exit a menu.
Toggle Buttons
Press the toggle button up or down to scrollthrough menu items.
OK Button
Press to make a selection.
Quick Action Menu Buttons
Press to open the correlating menu.
145
2022 Nautilus (CD9) Canada/United States of America, enUSA, Edition date: 202108, First-PrintingInstrument Cluster DisplayE247519
Page 185 of 586
LOCATING THE USB PORTS
Data Transfer USB Ports
The USB ports could be in the followinglocations:
•On the lower instrument panel below theclimate control.
•Inside the center console.
Note: These USB ports can also chargedevices.
Note: Not all USB ports in your vehicle havedata transfer capabilities.
Note: We recommend using only USB-IFcertified cables and adapters. Non-certifiedcables and adapters may not work.
Charge Only USB Ports
The USB ports could be in the followinglocations:
•On the lower instrument panel.
•On the upper instrument panel.
•Inside the media bin.
•Inside the center console.
•On the rear of the center console.
•In the cargo area.
PLAYING MEDIA USING THE USB
PORT
WARNING: Driving while distractedcan result in loss of vehicle control, crashand injury. We strongly recommend thatyou use extreme caution when using anydevice that may take your focus off theroad. Your primary responsibility is the safeoperation of your vehicle. We recommendagainst the use of any hand-held devicewhile driving and encourage the use ofvoice-operated systems when possible.Make sure you are aware of all applicablelocal laws that may affect the use ofelectronic devices while driving.
Connect your device to the USB port.
Press the audio button on thefeature bar.
Select Sources.
Select the USB option.
Press the button to play a track.Press the button again to pausethe track.
Press the button to skip to the nexttrack.
Press and hold the button to fastforward through the track.
Press the button once to return tothe beginning of a track.Repeatedly press the button toreturn to previous tracks.
Press and hold the button to fast rewind.
CHARGING A DEVICE
Connect your device to the USB port.
181
2022 Nautilus (CD9) Canada/United States of America, enUSA, Edition date: 202108, First-PrintingUSB Ports E100027
Page 242 of 586

REAR PARKING AID AUDIBLEWARNINGS
A warning tone sounds when your vehicleapproaches an object. As your vehiclemoves closer to an object, the rate of thetone increases. The warning tonecontinuously sounds when an object is 12 in(30 cm) or less from the rear bumper.
If your vehicle remains stationary for a fewseconds, the audible warning turns off. If yourvehicle moves backward the tone soundsagain.
Note:When the parking aid system soundsa tone, the audio system could reduce theset volume.
FRONT PARKING AID (IF EQUIPPED)
WHAT IS THE FRONT PARKING AID
Front parking sensors detect objects in frontof your vehicle.
FRONT PARKING AID LIMITATIONS
The front parking aid sensors are activewhen your vehicle is in any position otherthan park (P) and the vehicle speed is lessthan 5 mph (8 km/h).
The sensor coverage area is up to 28 in(70 cm) from the bumper.
If your vehicle is in reverse (R), the frontparking aid detects objects when yourvehicle is moving at a low speed or an objectis moving toward your vehicle and providesan audible warning, for example anothervehicle at a low speed. If your vehicleremains stationary for a few seconds, theaudible warning turns off. Visual indicationis always active in reverse (R).
If your vehicle is in any forward gear, thefront parking aid provides audible warningsand visual indication when your vehicle ismoving at a speed of 5 mph (8 km/h) orbelow and the system detects an objectwithin the detection zone. If your vehicleremains stationary for a few seconds, thevisual indication and audible warning turnsoff.
If your vehicle is in neutral (N), the front andrear sensors provide visual indication onlywhen your vehicle is moving below a speedof 5 mph (8 km/h) and obstacles are detectedinside the detection areas. Once your vehiclestops, the visual indication and audiblewarning stops after a few seconds.
LOCATING THE FRONT PARKING AIDSENSORS
The front parking aid sensors are in the frontbumper.
238
2022 Nautilus (CD9) Canada/United States of America, enUSA, Edition date: 202108, First-PrintingParking AidsE187330
Page 359 of 586
Note:To calibrate the steering angle sensor,drive the vehicle above 30 mph (50 km/h)for a minimum of 1.2 mi (2 km). Make sure todrive straight ahead for a minimum of 30seconds. Several vehicle functions aredisabled and a warning light could appearuntil the sensor is calibrated.
Note:The battery sensor must be reset whena new battery is installed. Install only abattery approved by Ford for use in thevehicle. Use the following procedure toperform the battery sensor reset:
1.1. Turn ignition to on and leave engineoff. Steps 2 and 3 must be completedwithin 10 seconds.
2.2. Flash the high beams 5 times, endingwith the high beams off.
3.3. Press and release the brake pedal 3times.
The battery warning light on the cluster willflash 3 times to confirm that the reset wassuccessful.
Battery Management System
The battery management system monitorsbattery conditions and takes actions toextend battery life. If excessive battery drainis detected, the system temporarily disablessome of the following features:
•Heated rear window.
•Heated seats.
•Climate control.
•Heated steering wheel.
•Audio unit.
•Navigation system.
A message may appear in the informationdisplay to alert you that battery protectionactions are active.
After battery replacement, or in some casesafter charging the battery with an externalcharger, the battery management systemrequires eight hours of vehicle sleep time torelearn the battery state of charge. Duringthis time your vehicle must remain fullylocked with the ignition off.
Note:If you add electrical accessories orcomponents to the vehicle, it may adverselyaffect battery performance and durability.This may also affect the performance ofother electrical systems in the vehicle.
Battery Disposal
Make sure that you dispose of oldbatteries in an environmentallyfriendly way. Seek advice fromyour local authority about recycling oldbatteries.
ADJUSTING THE HEADLAMPS
Vertical Aim Adjustment
The headlamps on your vehicle are properlyaimed at the assembly plant. If your vehiclehas been involved in a crash, have the aimof the headlamp beam checked by anauthorized dealer.
355
2022 Nautilus (CD9) Canada/United States of America, enUSA, Edition date: 202108, First-PrintingMaintenanceE107998