key LINCOLN NAVIGATOR 2009 Owner's Guide
[x] Cancel search | Manufacturer: LINCOLN, Model Year: 2009, Model line: NAVIGATOR, Model: LINCOLN NAVIGATOR 2009Pages: 375, PDF Size: 3.09 MB
Page 157 of 375
Memory seat/power mirrors/adjustable pedals/steering column
This system allows automatic
positioning of the driver seat,
outside rearview mirrors, adjustable
pedals, and steering column to two
programmable positions.
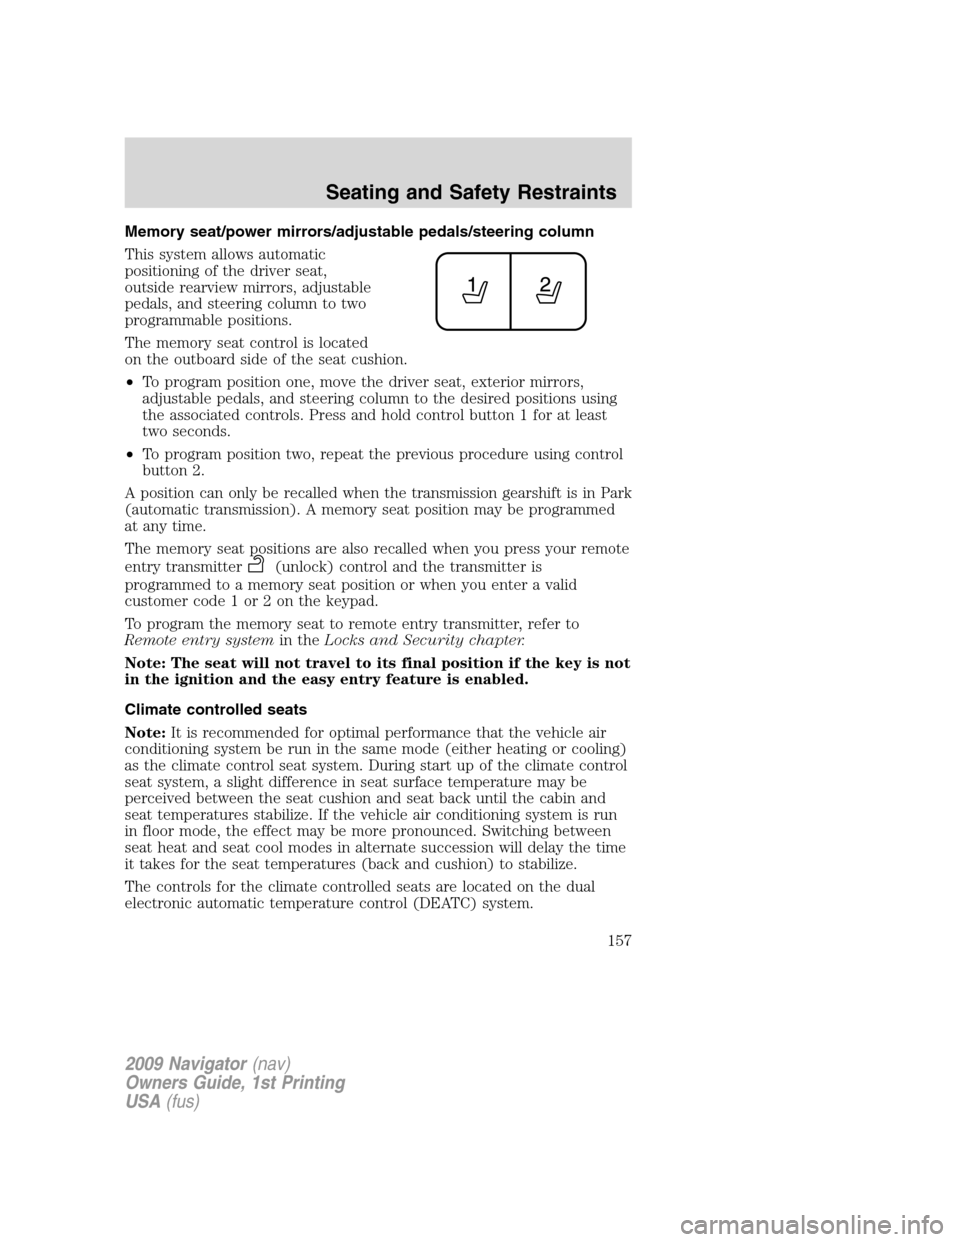
The memory seat control is located
on the outboard side of the seat cushion.
•To program position one, move the driver seat, exterior mirrors,
adjustable pedals, and steering column to the desired positions using
the associated controls. Press and hold control button 1 for at least
two seconds.
•To program position two, repeat the previous procedure using control
button 2.
A position can only be recalled when the transmission gearshift is in Park
(automatic transmission). A memory seat position may be programmed
at any time.
The memory seat positions are also recalled when you press your remote
entry transmitter
(unlock) control and the transmitter is
programmed to a memory seat position or when you enter a valid
customer code 1 or 2 on the keypad.
To program the memory seat to remote entry transmitter, refer to
Remote entry systemin theLocks and Security chapter.
Note: The seat will not travel to its final position if the key is not
in the ignition and the easy entry feature is enabled.
Climate controlled seats
Note:It is recommended for optimal performance that the vehicle air
conditioning system be run in the same mode (either heating or cooling)
as the climate control seat system. During start up of the climate control
seat system, a slight difference in seat surface temperature may be
perceived between the seat cushion and seat back until the cabin and
seat temperatures stabilize. If the vehicle air conditioning system is run
in floor mode, the effect may be more pronounced. Switching between
seat heat and seat cool modes in alternate succession will delay the time
it takes for the seat temperatures (back and cushion) to stabilize.
The controls for the climate controlled seats are located on the dual
electronic automatic temperature control (DEATC) system.
2009 Navigator(nav)
Owners Guide, 1st Printing
USA(fus)
Seating and Safety Restraints
157
Page 159 of 375
Climate controlled seats air filter replacement (if equipped)
The climate controlled seat system includes air filters that must be
replaced periodically. Refer to thescheduled maintenance information
for more information.
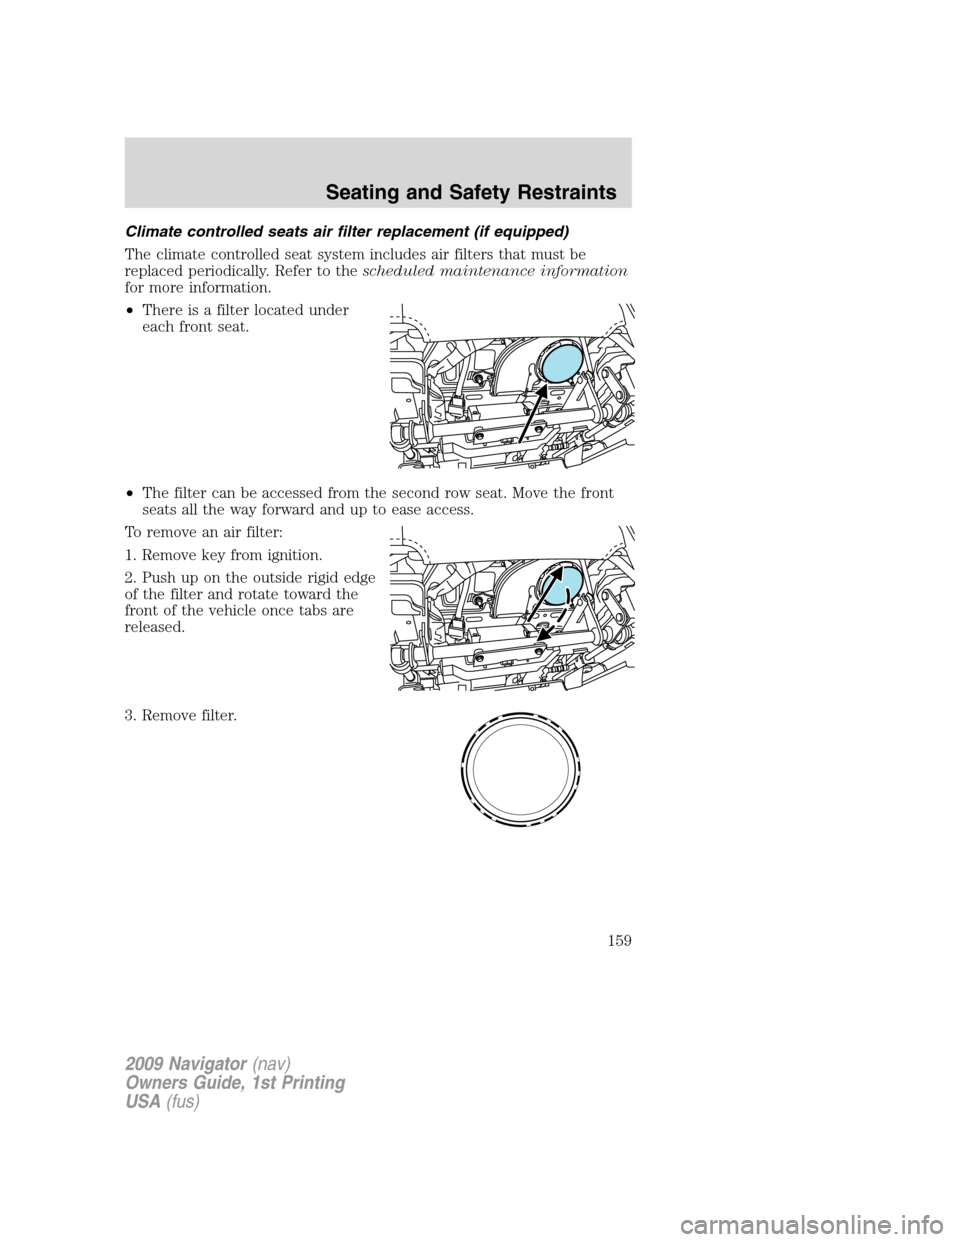
•There is a filter located under
each front seat.
•The filter can be accessed from the second row seat. Move the front
seats all the way forward and up to ease access.
To remove an air filter:
1. Remove key from ignition.
2. Push up on the outside rigid edge
of the filter and rotate toward the
front of the vehicle once tabs are
released.
3. Remove filter.
2009 Navigator(nav)
Owners Guide, 1st Printing
USA(fus)
Seating and Safety Restraints
159
Page 170 of 375
Third row power folding seat (if equipped)
Note: Be sure that the head
restraints are folded down before
powering the 3rd row seat down.
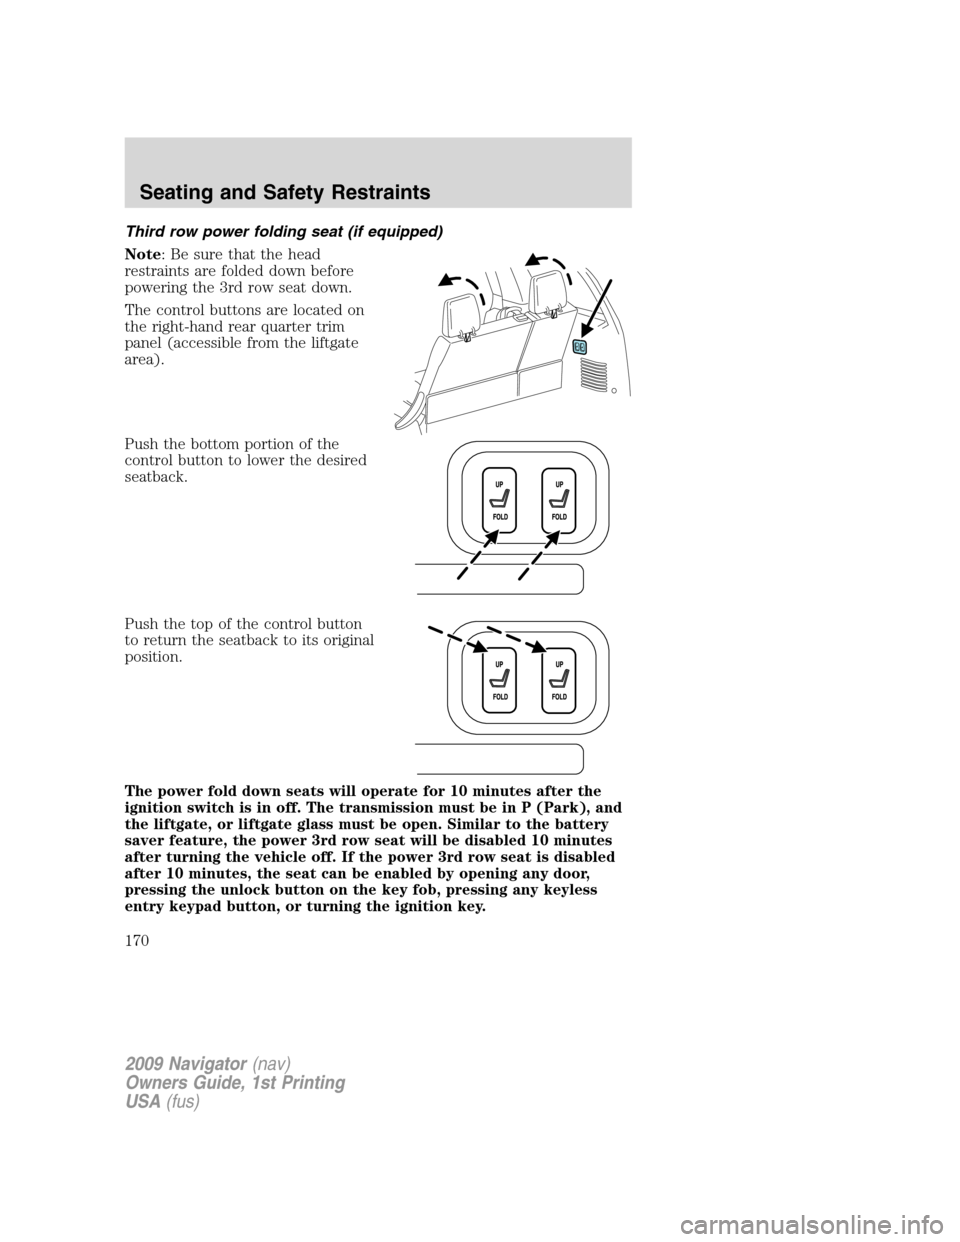
The control buttons are located on
the right-hand rear quarter trim
panel (accessible from the liftgate
area).
Push the bottom portion of the
control button to lower the desired
seatback.
Push the top of the control button
to return the seatback to its original
position.
The power fold down seats will operate for 10 minutes after the
ignition switch is in off. The transmission must be in P (Park), and
the liftgate, or liftgate glass must be open. Similar to the battery
saver feature, the power 3rd row seat will be disabled 10 minutes
after turning the vehicle off. If the power 3rd row seat is disabled
after 10 minutes, the seat can be enabled by opening any door,
pressing the unlock button on the key fob, pressing any keyless
entry keypad button, or turning the ignition key.
2009 Navigator(nav)
Owners Guide, 1st Printing
USA(fus)
Seating and Safety Restraints
170
Page 194 of 375
The S.O.S. Post Crash Alert can be turned off when any one of the
following actions are taken by the driver or any other person:
•pressing the hazard control button,
•or pressing the panic button on the remote key fob.
The feature will continue to operate until the vehicle runs out of power.
Disposal of airbags and airbag equipped vehicles
(including pretensioners)
See your authorized dealer. Airbags MUST BE disposed of by qualified
personnel.
SAFETY RESTRAINTS FOR CHILDREN
See the following sections for directions on how to properly use safety
restraints for children. Also seeAirbag supplemental restraint system
(SRS)in this chapter for special instructions about using airbags.
Important child restraint precautions
WARNING:Always make sure your child is secured properly in
a device that is appropriate for their height, age and weight.
Child safety restraints must be purchased separately from the vehicle.
Failure to follow these instructions and guidelines may result in an
increased risk of serious injury or death to your child.
WARNING:All children are shaped differently. The
Recommendations for Safety Restraints are based on probable
child height, age and weight thresholds from NHTSA and other safety
organizations or are the minimum requirements of law. Ford
recommends checking with a NHTSA Certified Child Passenger Safety
Technician (CPST) and your pediatrician to make sure your child seat
is appropriate for your child, and is compatible with and properly
installed in the vehicle. To locate a child seat fitting station and CPST
contact the NHTSA toll free at 1-888-327-4236 or on the internet at
http://www.nhtsa.dot.gov. Failure to properly restrain children in safety
seats made especially for their height, age, and weight may result in an
increased risk of serious injury or death to your child.
2009 Navigator(nav)
Owners Guide, 1st Printing
USA(fus)
Seating and Safety Restraints
194
Page 250 of 375
STARTING
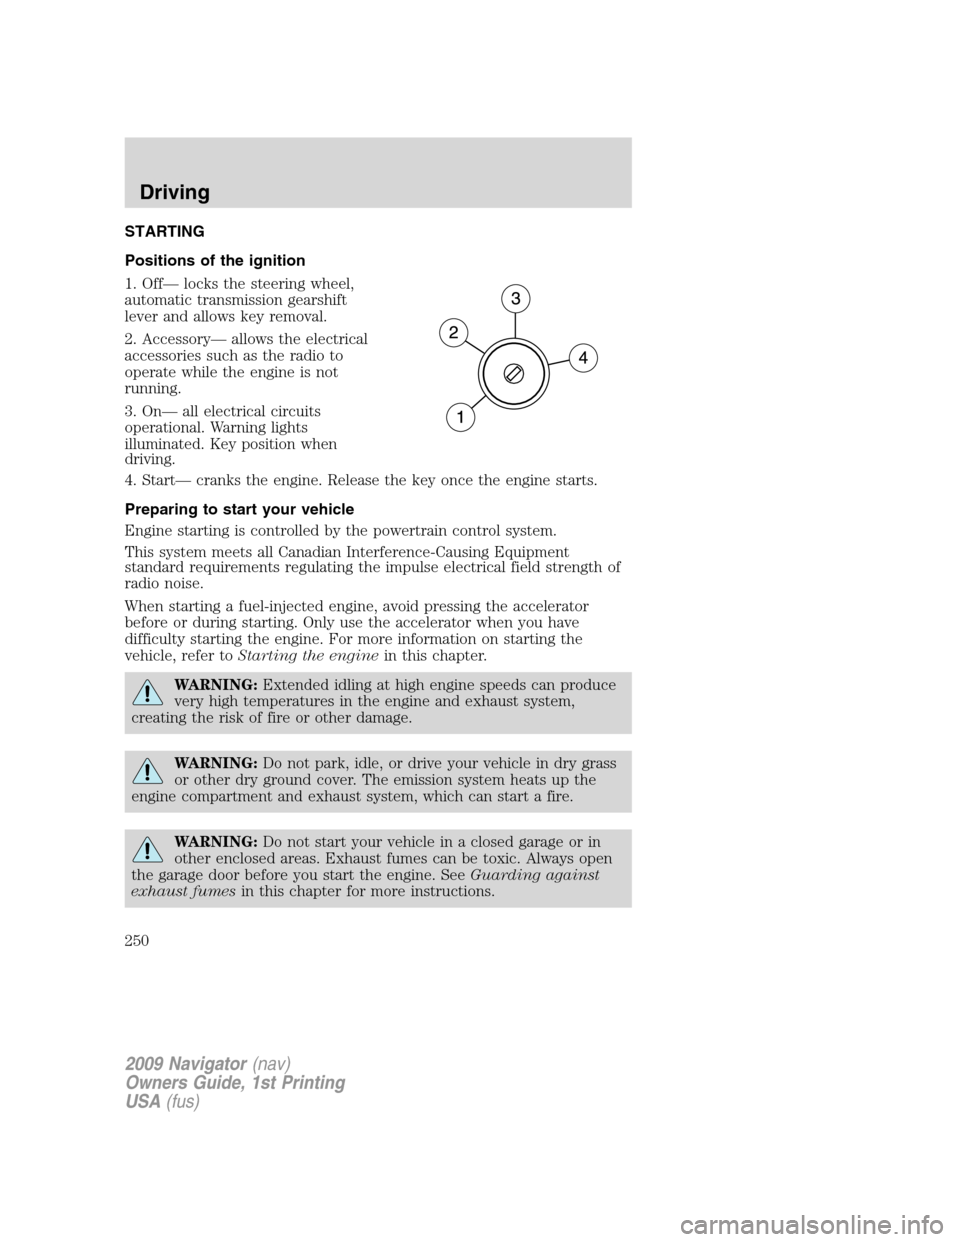
Positions of the ignition
1. Off— locks the steering wheel,
automatic transmission gearshift
lever and allows key removal.
2. Accessory— allows the electrical
accessories such as the radio to
operate while the engine is not
running.
3. On— all electrical circuits
operational. Warning lights
illuminated. Key position when
driving.
4. Start— cranks the engine. Release the key once the engine starts.
Preparing to start your vehicle
Engine starting is controlled by the powertrain control system.
This system meets all Canadian Interference-Causing Equipment
standard requirements regulating the impulse electrical field strength of
radio noise.
When starting a fuel-injected engine, avoid pressing the accelerator
before or during starting. Only use the accelerator when you have
difficulty starting the engine. For more information on starting the
vehicle, refer toStarting the enginein this chapter.
WARNING:Extended idling at high engine speeds can produce
very high temperatures in the engine and exhaust system,
creating the risk of fire or other damage.
WARNING:Do not park, idle, or drive your vehicle in dry grass
or other dry ground cover. The emission system heats up the
engine compartment and exhaust system, which can start a fire.
WARNING:Do not start your vehicle in a closed garage or in
other enclosed areas. Exhaust fumes can be toxic. Always open
the garage door before you start the engine. SeeGuarding against
exhaust fumesin this chapter for more instructions.
2009 Navigator(nav)
Owners Guide, 1st Printing
USA(fus)
Driving
250
Page 252 of 375
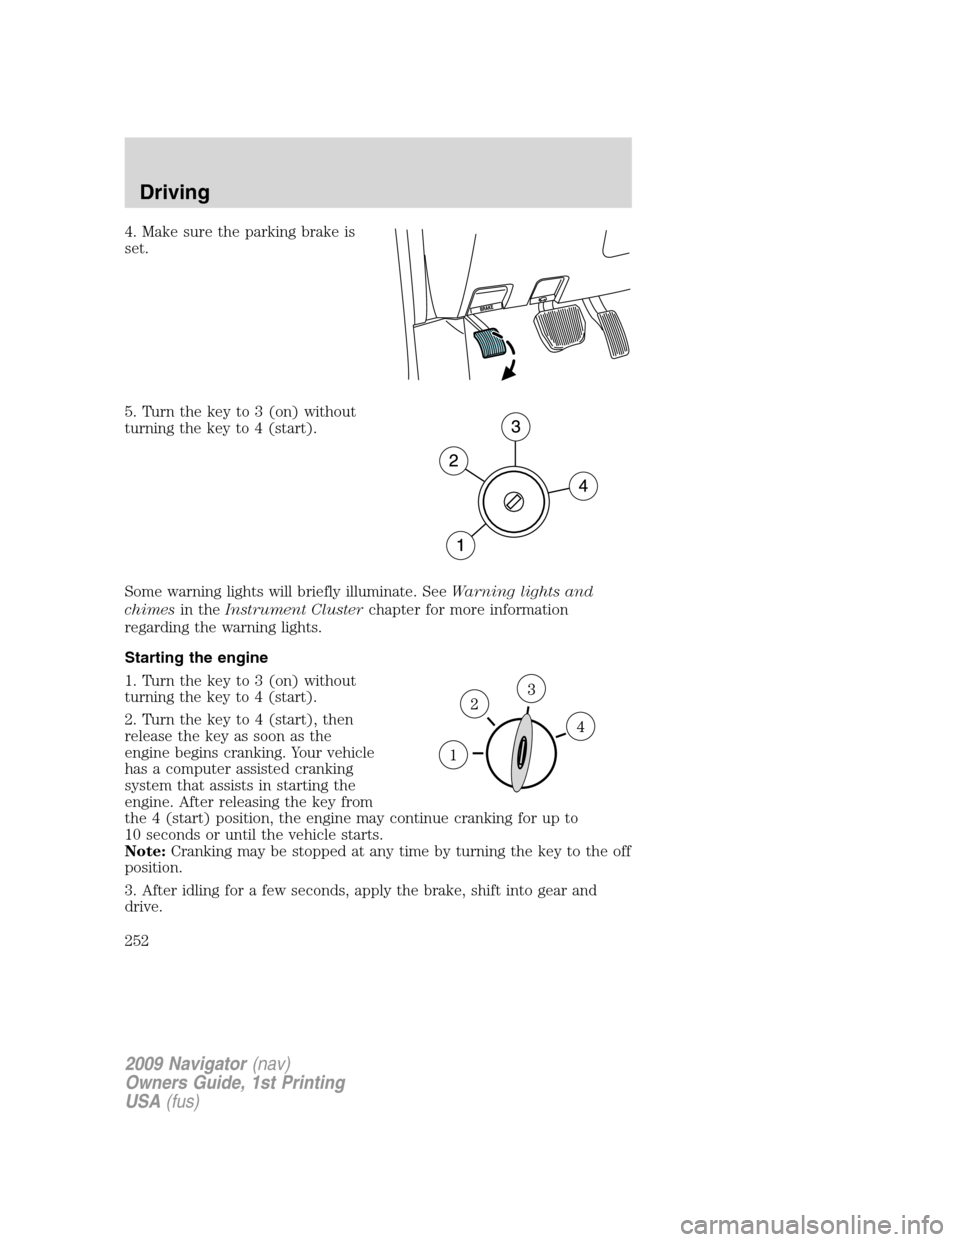
4. Make sure the parking brake is
set.
5. Turn the key to 3 (on) without
turning the key to 4 (start).
Some warning lights will briefly illuminate. SeeWarning lights and
chimesin theInstrument Clusterchapter for more information
regarding the warning lights.
Starting the engine
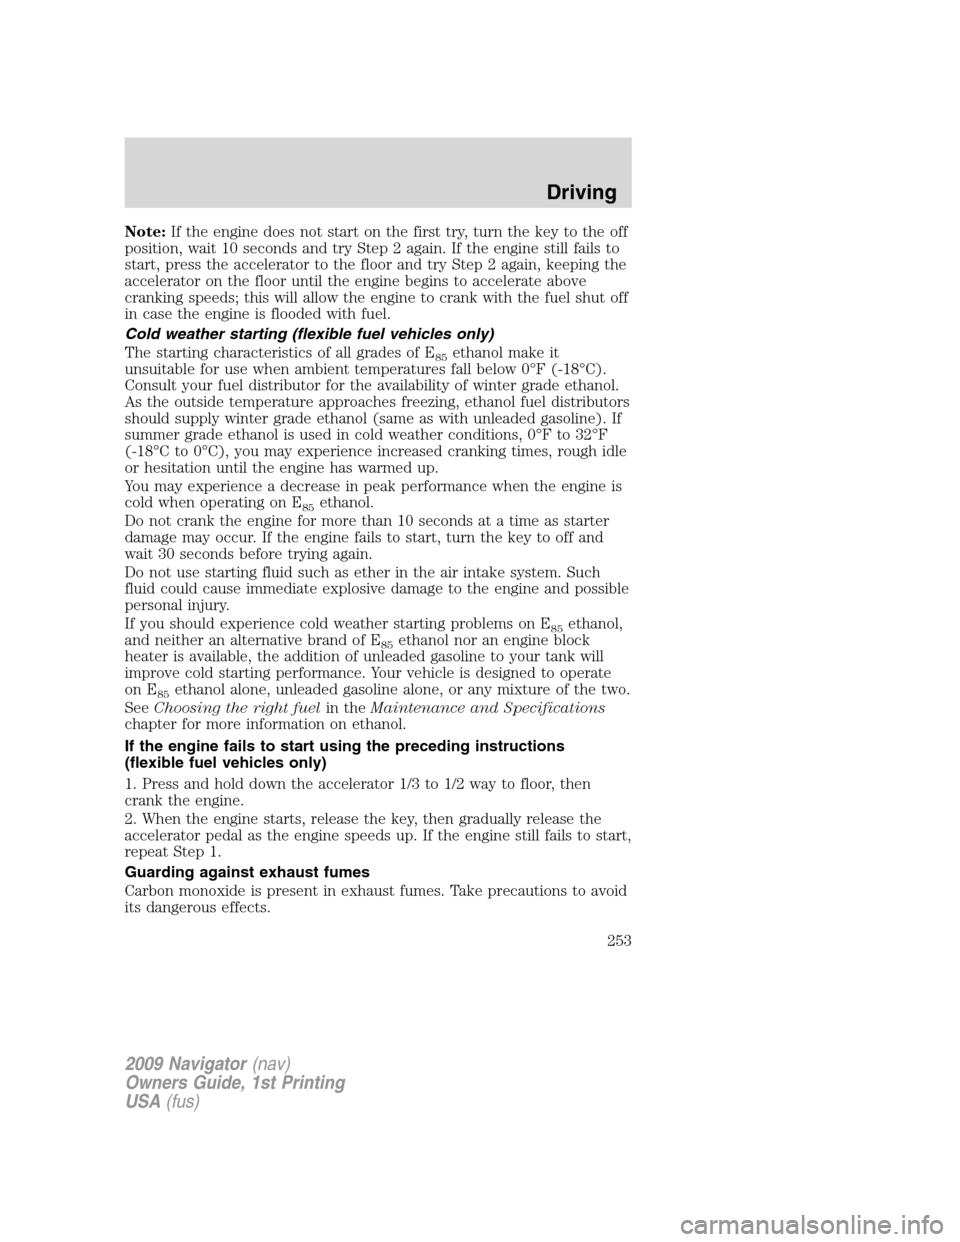
1. Turn the key to 3 (on) without
turning the key to 4 (start).
2. Turn the key to 4 (start), then
release the key as soon as the
engine begins cranking. Your vehicle
has a computer assisted cranking
system that assists in starting the
engine. After releasing the key from
the 4 (start) position, the engine may continue cranking for up to
10 seconds or until the vehicle starts.
Note:Cranking may be stopped at any time by turning the key to the off
position.
3. After idling for a few seconds, apply the brake, shift into gear and
drive.
2009 Navigator(nav)
Owners Guide, 1st Printing
USA(fus)
Driving
252
Page 253 of 375
Note:If the engine does not start on the first try, turn the key to the off
position, wait 10 seconds and try Step 2 again. If the engine still fails to
start, press the accelerator to the floor and try Step 2 again, keeping the
accelerator on the floor until the engine begins to accelerate above
cranking speeds; this will allow the engine to crank with the fuel shut off
in case the engine is flooded with fuel.
Cold weather starting (flexible fuel vehicles only)
The starting characteristics of all grades of E
85ethanol make it
unsuitable for use when ambient temperatures fall below 0°F (-18°C).
Consult your fuel distributor for the availability of winter grade ethanol.
As the outside temperature approaches freezing, ethanol fuel distributors
should supply winter grade ethanol (same as with unleaded gasoline). If
summer grade ethanol is used in cold weather conditions, 0°F to 32°F
(-18°C to 0°C), you may experience increased cranking times, rough idle
or hesitation until the engine has warmed up.
You may experience a decrease in peak performance when the engine is
cold when operating on E
85ethanol.
Do not crank the engine for more than 10 seconds at a time as starter
damage may occur. If the engine fails to start, turn the key to off and
wait 30 seconds before trying again.
Do not use starting fluid such as ether in the air intake system. Such
fluid could cause immediate explosive damage to the engine and possible
personal injury.
If you should experience cold weather starting problems on E
85ethanol,
and neither an alternative brand of E
85ethanol nor an engine block
heater is available, the addition of unleaded gasoline to your tank will
improve cold starting performance. Your vehicle is designed to operate
on E
85ethanol alone, unleaded gasoline alone, or any mixture of the two.
SeeChoosing the right fuelin theMaintenance and Specifications
chapter for more information on ethanol.
If the engine fails to start using the preceding instructions
(flexible fuel vehicles only)
1. Press and hold down the accelerator 1/3 to 1/2 way to floor, then
crank the engine.
2. When the engine starts, release the key, then gradually release the
accelerator pedal as the engine speeds up. If the engine still fails to start,
repeat Step 1.
Guarding against exhaust fumes
Carbon monoxide is present in exhaust fumes. Take precautions to avoid
its dangerous effects.
2009 Navigator(nav)
Owners Guide, 1st Printing
USA(fus)
Driving
253
Page 266 of 375
WARNING:Loaded vehicles, with a higher center of gravity,
may handle differently than unloaded vehicles. Do not overload
your vehicle and use extra precautions, such as driving at slower
speeds, avoiding abrupt steering changes and allowing for increased
stopping distance, when driving a heavily loaded vehicle. Over-loading
or loading the vehicle improperly can deteriorate handling capability
and contribute to loss of vehicle control and vehicle rollover.
AUTOMATIC TRANSMISSION OPERATION
Brake-shift interlock – floor-shift transmission
This vehicle is equipped with a brake-shift interlock feature that prevents
the gearshift lever from being moved from P (Park) when the ignition is
in the ON position unless the brake pedal is depressed.
If you cannot move the gearshift lever out of P (Park) with ignition in
the on position and the brake pedal depressed, or when the ignition is in
the off position, it is possible that a fuse has blown or the vehicle’s
brakelamps are not operating properly. Refer toFuses and relaysin the
Roadside Emergencieschapter.
If the fuse is not blown, perform the following procedure:
1. Apply the parking brake, turn the ignition to off, then remove the key.
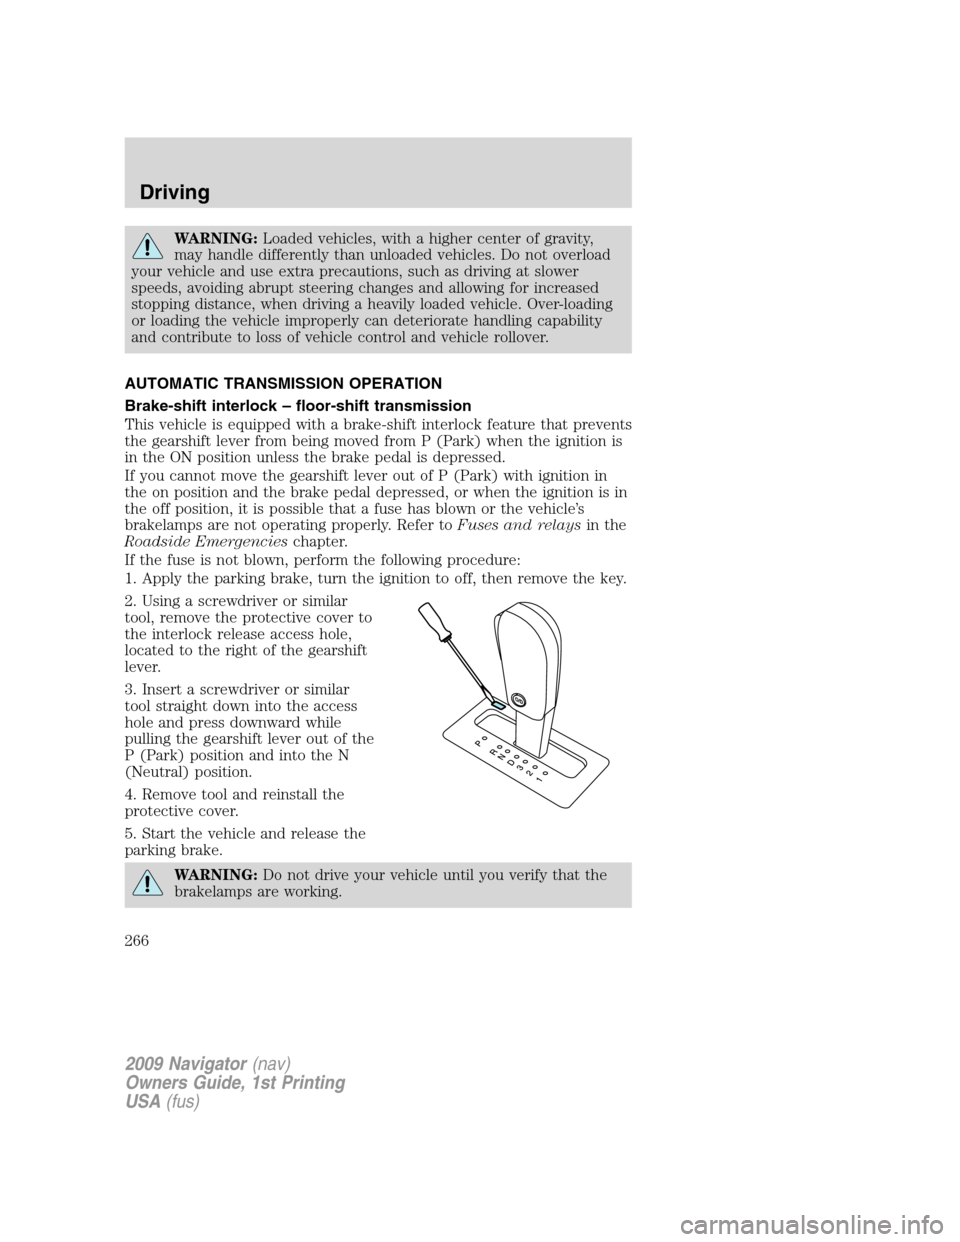
2. Using a screwdriver or similar
tool, remove the protective cover to
the interlock release access hole,
located to the right of the gearshift
lever.
3. Insert a screwdriver or similar
tool straight down into the access
hole and press downward while
pulling the gearshift lever out of the
P (Park) position and into the N
(Neutral) position.
4. Remove tool and reinstall the
protective cover.
5. Start the vehicle and release the
parking brake.
WARNING:Do not drive your vehicle until you verify that the
brakelamps are working.
2009 Navigator(nav)
Owners Guide, 1st Printing
USA(fus)
Driving
266
Page 267 of 375
WARNING:Always set the parking brake fully and make sure
the gearshift is latched in P (Park). Turn the ignition to the off
position and remove the key whenever you leave your vehicle.
WARNING:If the parking brake is fully released, but the brake
warning lamp remains illuminated, the brakes may not be
working properly. See your authorized dealer.
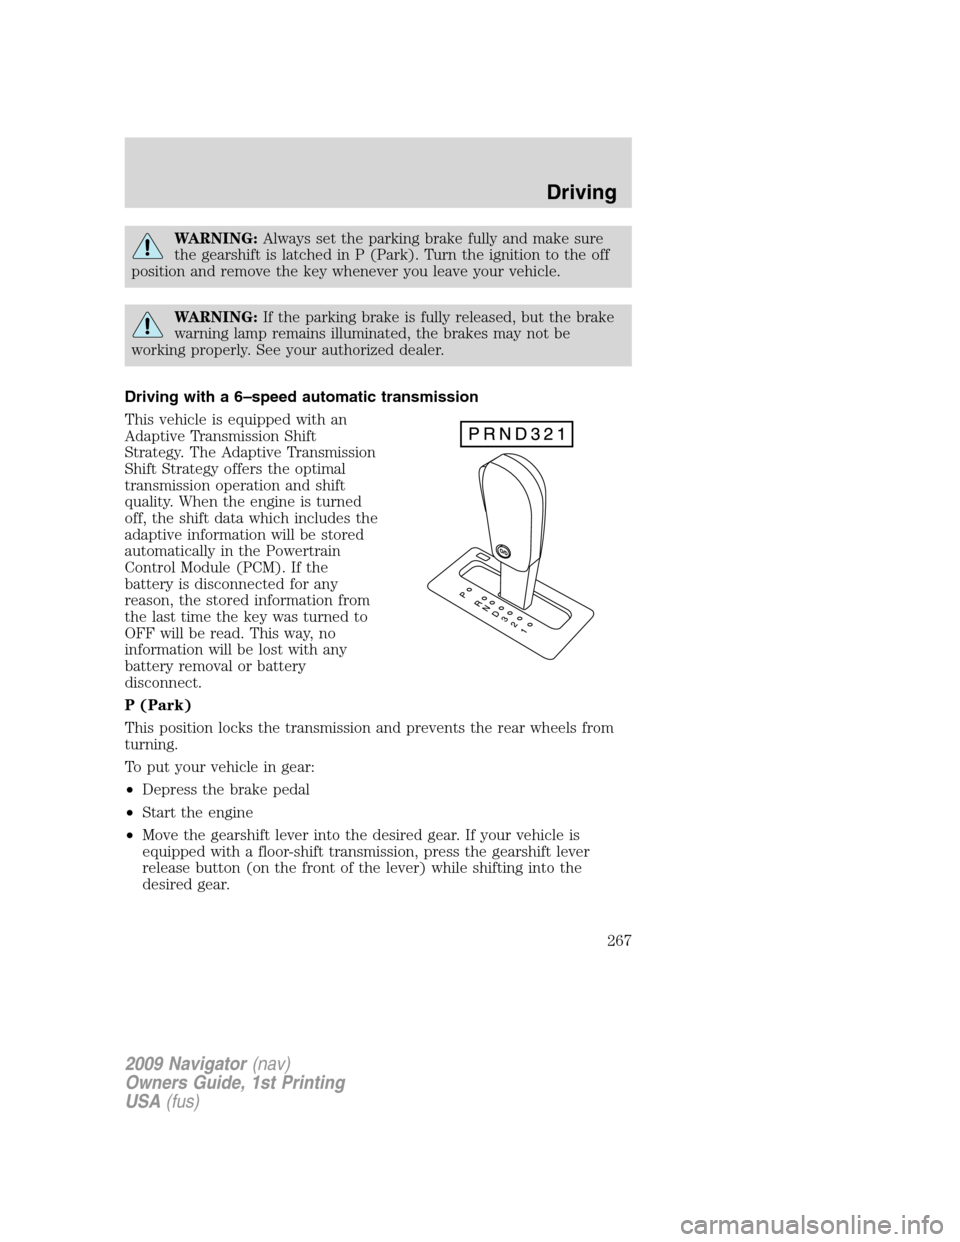
Driving with a 6–speed automatic transmission
This vehicle is equipped with an
Adaptive Transmission Shift
Strategy. The Adaptive Transmission
Shift Strategy offers the optimal
transmission operation and shift
quality. When the engine is turned
off, the shift data which includes the
adaptive information will be stored
automatically in the Powertrain
Control Module (PCM). If the
battery is disconnected for any
reason, the stored information from
the last time the key was turned to
OFF will be read. This way, no
information will be lost with any
battery removal or battery
disconnect.
P (Park)
This position locks the transmission and prevents the rear wheels from
turning.
To put your vehicle in gear:
•Depress the brake pedal
•Start the engine
•Move the gearshift lever into the desired gear. If your vehicle is
equipped with a floor-shift transmission, press the gearshift lever
release button (on the front of the lever) while shifting into the
desired gear.
2009 Navigator(nav)
Owners Guide, 1st Printing
USA(fus)
Driving
267
Page 268 of 375
To put your vehicle in P (Park):
•Come to a complete stop
•Move the gearshift lever and securely latch it in P (Park)
WARNING:Always set the parking brake fully and make sure
the gearshift is latched in P (Park). Turn the ignition to the
LOCK position and remove the key whenever you leave your vehicle.
R (Reverse)
With the gearshift lever in R (Reverse), the vehicle will move backward.
Always come to a complete stop before shifting into and out of R
(Reverse).
N (Neutral)
With the gearshift lever in N (Neutral), the vehicle can be started and is
free to roll. Hold the brake pedal down while in this position.
D (Overdrive) with Tow/Haul Off
D (Overdrive) with Tow/Haul OFF is the normal driving position for the
best fuel economy. Transmission operates in gears one through six.
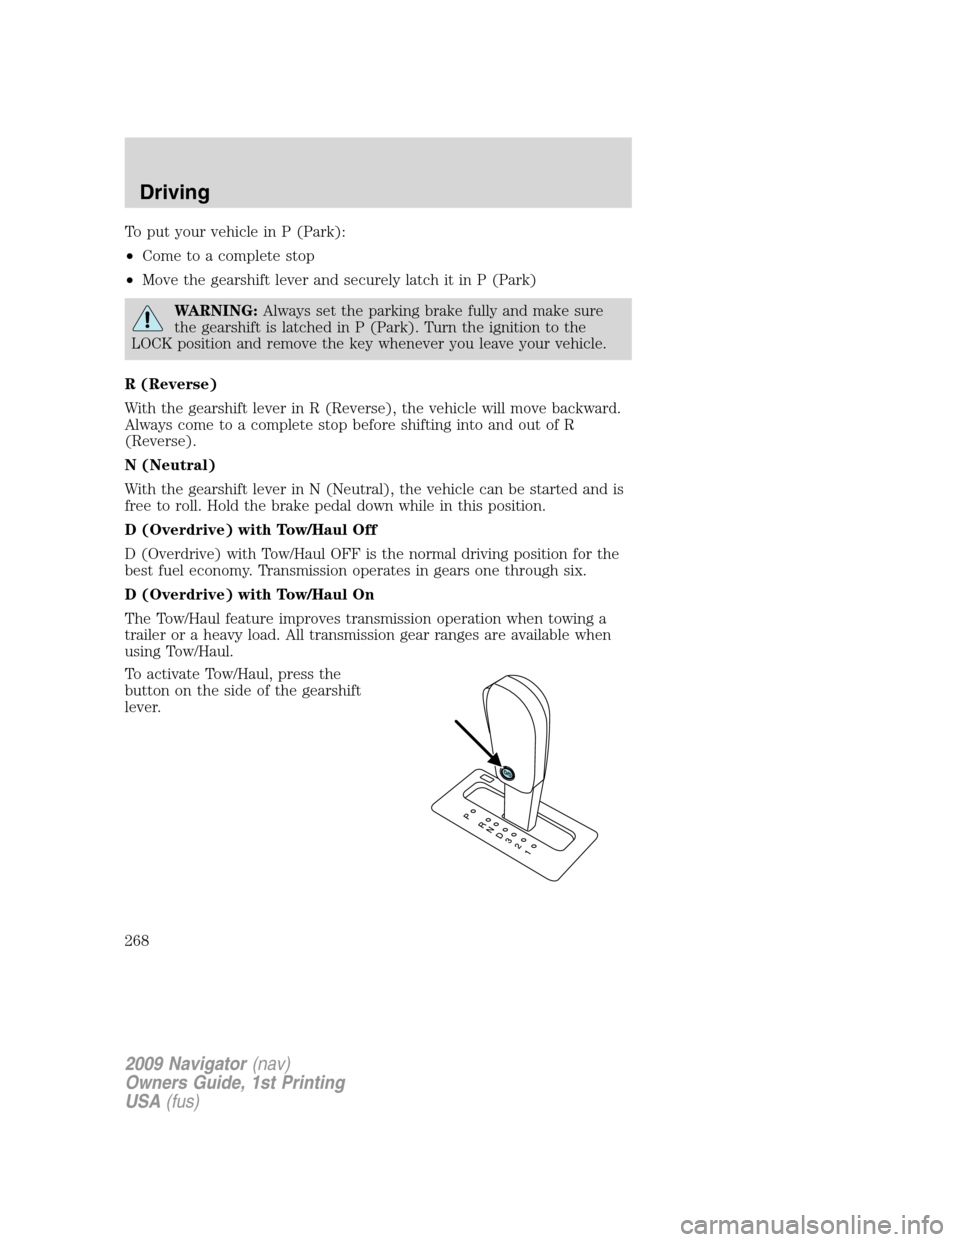
D (Overdrive) with Tow/Haul On
The Tow/Haul feature improves transmission operation when towing a
trailer or a heavy load. All transmission gear ranges are available when
using Tow/Haul.
To activate Tow/Haul, press the
button on the side of the gearshift
lever.
2009 Navigator(nav)
Owners Guide, 1st Printing
USA(fus)
Driving
268