light LINCOLN NAVIGATOR 2012 Navigation Manual
[x] Cancel search | Manufacturer: LINCOLN, Model Year: 2012, Model line: NAVIGATOR, Model: LINCOLN NAVIGATOR 2012Pages: 381, PDF Size: 2.53 MB
Page 173 of 381
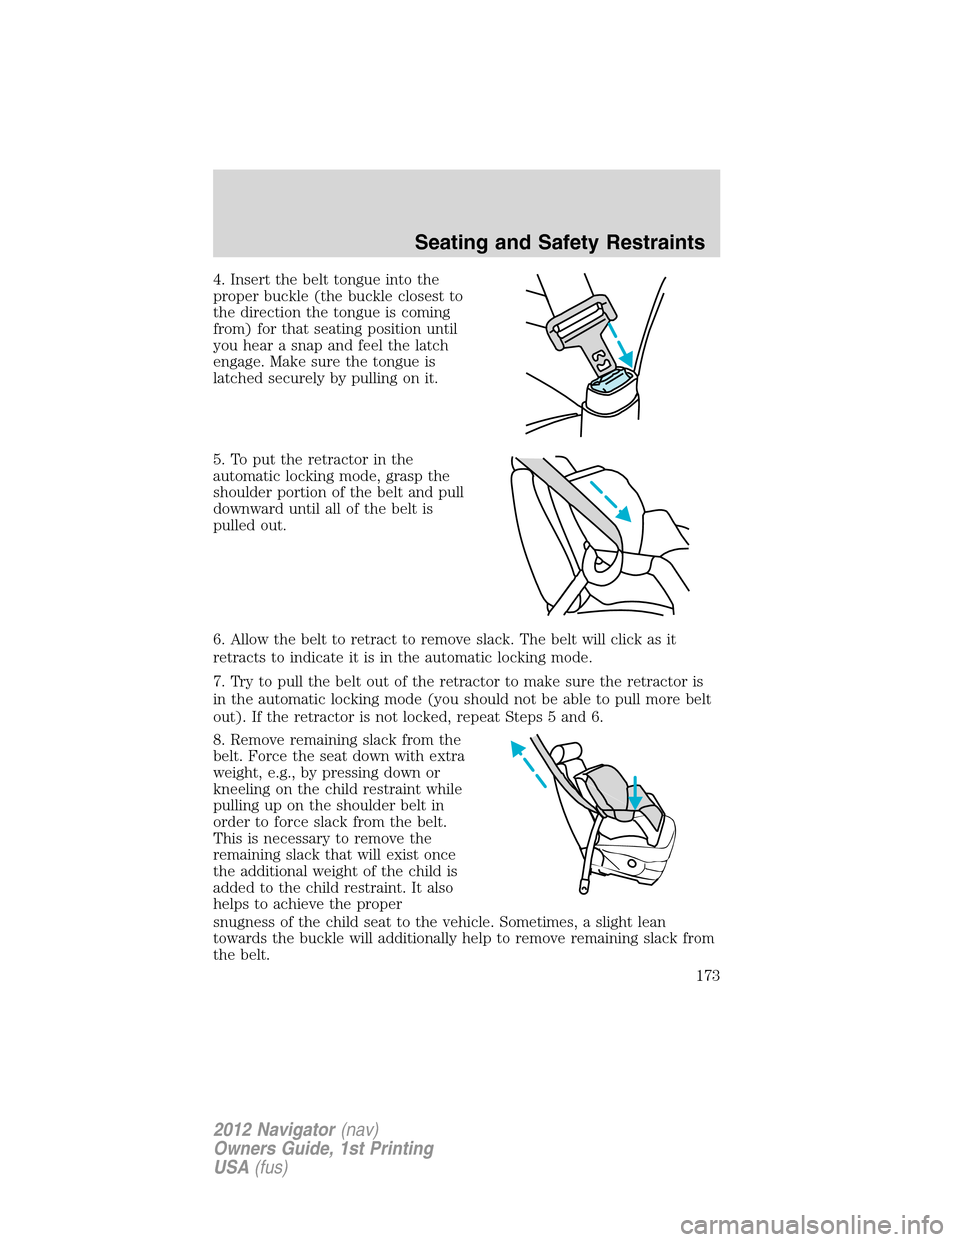
4. Insert the belt tongue into the
proper buckle (the buckle closest to
the direction the tongue is coming
from) for that seating position until
you hear a snap and feel the latch
engage. Make sure the tongue is
latched securely by pulling on it.
5. To put the retractor in the
automatic locking mode, grasp the
shoulder portion of the belt and pull
downward until all of the belt is
pulled out.
6. Allow the belt to retract to remove slack. The belt will click as it
retracts to indicate it is in the automatic locking mode.
7. Try to pull the belt out of the retractor to make sure the retractor is
in the automatic locking mode (you should not be able to pull more belt
out). If the retractor is not locked, repeat Steps 5 and 6.
8. Remove remaining slack from the
belt. Force the seat down with extra
weight, e.g., by pressing down or
kneeling on the child restraint while
pulling up on the shoulder belt in
order to force slack from the belt.
This is necessary to remove the
remaining slack that will exist once
the additional weight of the child is
added to the child restraint. It also
helps to achieve the proper
snugness of the child seat to the vehicle. Sometimes, a slight lean
towards the buckle will additionally help to remove remaining slack from
the belt.
Seating and Safety Restraints
173
2012 Navigator(nav)
Owners Guide, 1st Printing
USA(fus)
Page 177 of 381
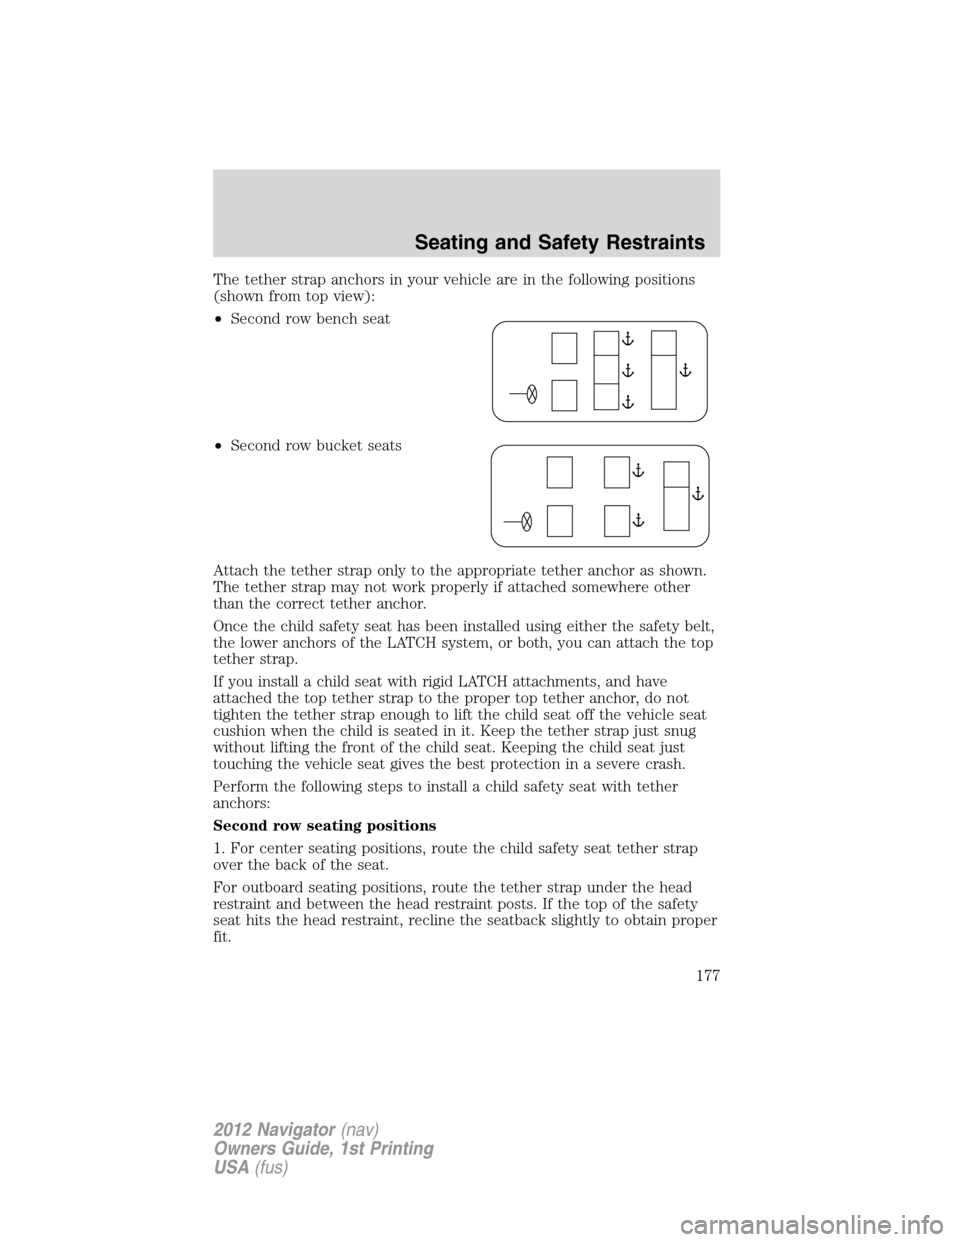
The tether strap anchors in your vehicle are in the following positions
(shown from top view):
•Second row bench seat
•Second row bucket seats
Attach the tether strap only to the appropriate tether anchor as shown.
The tether strap may not work properly if attached somewhere other
than the correct tether anchor.
Once the child safety seat has been installed using either the safety belt,
the lower anchors of the LATCH system, or both, you can attach the top
tether strap.
If you install a child seat with rigid LATCH attachments, and have
attached the top tether strap to the proper top tether anchor, do not
tighten the tether strap enough to lift the child seat off the vehicle seat
cushion when the child is seated in it. Keep the tether strap just snug
without lifting the front of the child seat. Keeping the child seat just
touching the vehicle seat gives the best protection in a severe crash.
Perform the following steps to install a child safety seat with tether
anchors:
Second row seating positions
1. For center seating positions, route the child safety seat tether strap
over the back of the seat.
For outboard seating positions, route the tether strap under the head
restraint and between the head restraint posts. If the top of the safety
seat hits the head restraint, recline the seatback slightly to obtain proper
fit.
Seating and Safety Restraints
177
2012 Navigator(nav)
Owners Guide, 1st Printing
USA(fus)
Page 188 of 381
INFORMATION ABOUT UNIFORM TIRE QUALITY GRADING
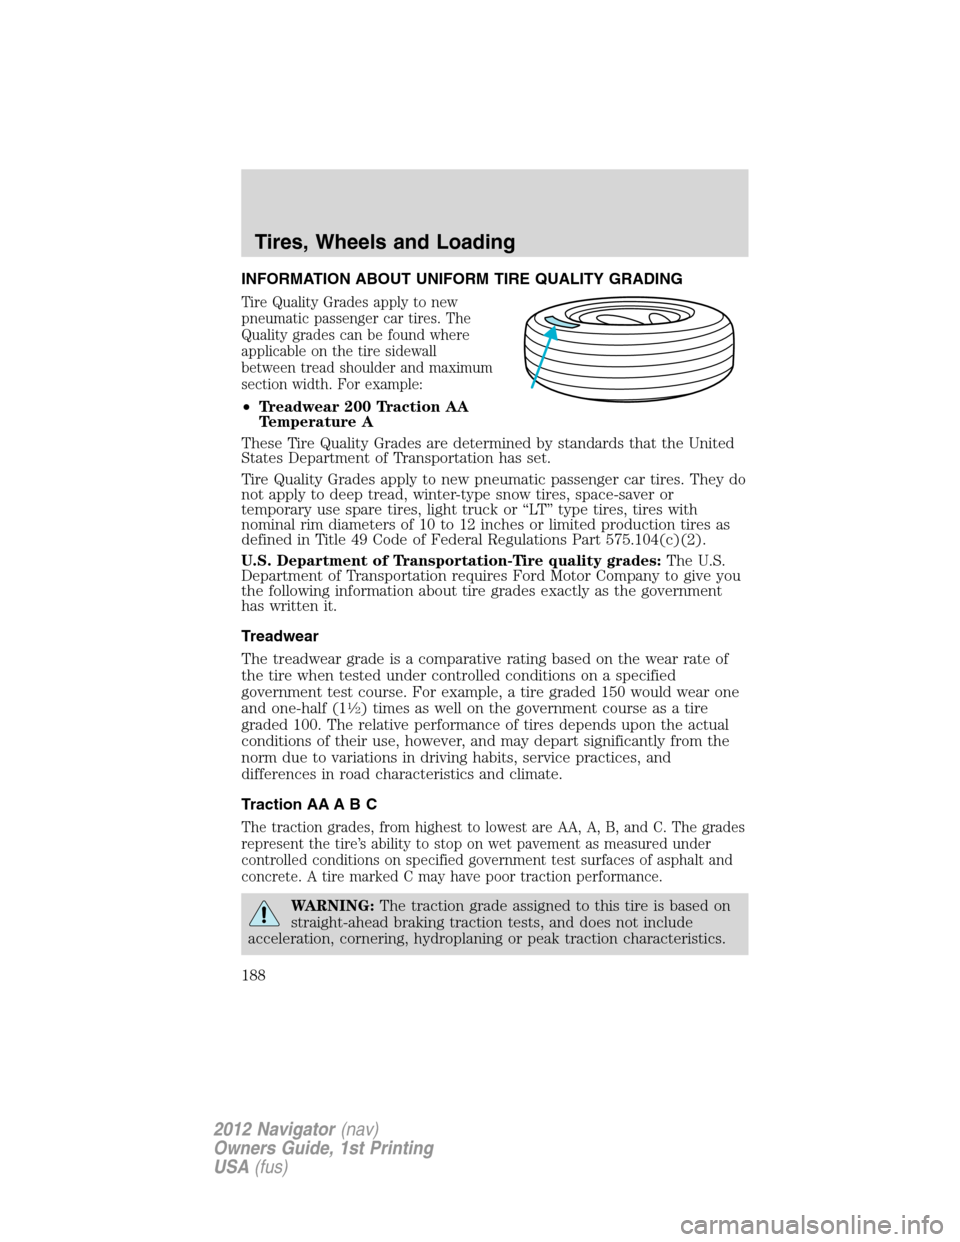
Tire Quality Grades apply to new
pneumatic passenger car tires. The
Quality grades can be found where
applicable on the tire sidewall
between tread shoulder and maximum
section width. For example:
•Treadwear 200 Traction AA
Temperature A
These Tire Quality Grades are determined by standards that the United
States Department of Transportation has set.
Tire Quality Grades apply to new pneumatic passenger car tires. They do
not apply to deep tread, winter-type snow tires, space-saver or
temporary use spare tires, light truck or “LT” type tires, tires with
nominal rim diameters of 10 to 12 inches or limited production tires as
defined in Title 49 Code of Federal Regulations Part 575.104(c)(2).
U.S. Department of Transportation-Tire quality grades:The U.S.
Department of Transportation requires Ford Motor Company to give you
the following information about tire grades exactly as the government
has written it.
Treadwear
The treadwear grade is a comparative rating based on the wear rate of
the tire when tested under controlled conditions on a specified
government test course. For example, a tire graded 150 would wear one
and one-half (1
1�2) times as well on the government course as a tire
graded 100. The relative performance of tires depends upon the actual
conditions of their use, however, and may depart significantly from the
norm due to variations in driving habits, service practices, and
differences in road characteristics and climate.
Traction AA A B C
The traction grades, from highest to lowest are AA, A, B, and C. The grades
represent the tire’s ability to stop on wet pavement as measured under
controlled conditions on specified government test surfaces of asphalt and
concrete. A tire marked C may have poor traction performance.
WARNING:The traction grade assigned to this tire is based on
straight-ahead braking traction tests, and does not include
acceleration, cornering, hydroplaning or peak traction characteristics.
Tires, Wheels and Loading
188
2012 Navigator(nav)
Owners Guide, 1st Printing
USA(fus)
Page 190 of 381
•PSI:Pounds per square inch, a standard unit of air pressure.
•Cold inflation pressure:The tire pressure when the vehicle has
been stationary and out of direct sunlight for an hour or more and
prior to the vehicle being driven for 1 mile (1.6 km).
•Recommended inflation pressure:The cold inflation pressure found
on the Safety Compliance Certification Label or Tire Label located on
the B-Pillar or the edge of the driver’s door.
•B-pillar:The structural member at the side of the vehicle behind the
front door.
•Bead area of the tire:Area of the tire next to the rim.
•Sidewall of the tire:Area between the bead area and the tread.
•Tread area of the tire:Area of the perimeter of the tire that
contacts the road when mounted on the vehicle.
•Rim:The metal support (wheel) for a tire or a tire and tube assembly
upon which the tire beads are seated.
INFLATING YOUR TIRES
Safe operation of your vehicle requires that your tires are properly
inflated. Remember that a tire can lose up to half of its air pressure
without appearing flat.
Every day before you drive, check your tires. If one looks lower than the
others, use a tire gauge to check pressure of all tires and adjust if
required.
At least once a month and before long trips, inspect each tire and check
the tire pressure with a tire gauge (including spare, if equipped). Inflate
all tires to the inflation pressure recommended by Ford Motor Company.
You are strongly urged to buy a reliable tire pressure gauge, as automatic
service station gauges may be inaccurate. Ford recommends the use of a
digital or dial-type tire pressure gauge rather than a stick-type tire
pressure gauge.
Use the recommended cold inflation pressure for optimum tire
performance and wear. Under-inflation or over-inflation may cause
uneven treadwear patterns.
Tires, Wheels and Loading
190
2012 Navigator(nav)
Owners Guide, 1st Printing
USA(fus)
Page 198 of 381
INFORMATION CONTAINED ON THE TIRE SIDEWALL
Both U.S. and Canada Federal regulations require tire manufacturers to
place standardized information on the sidewall of all tires. This
information identifies and describes the fundamental characteristics of
the tire and also provides a U.S. DOT Tire Identification Number for
safety standard certification and in case of a recall.
Information on “P” type tires
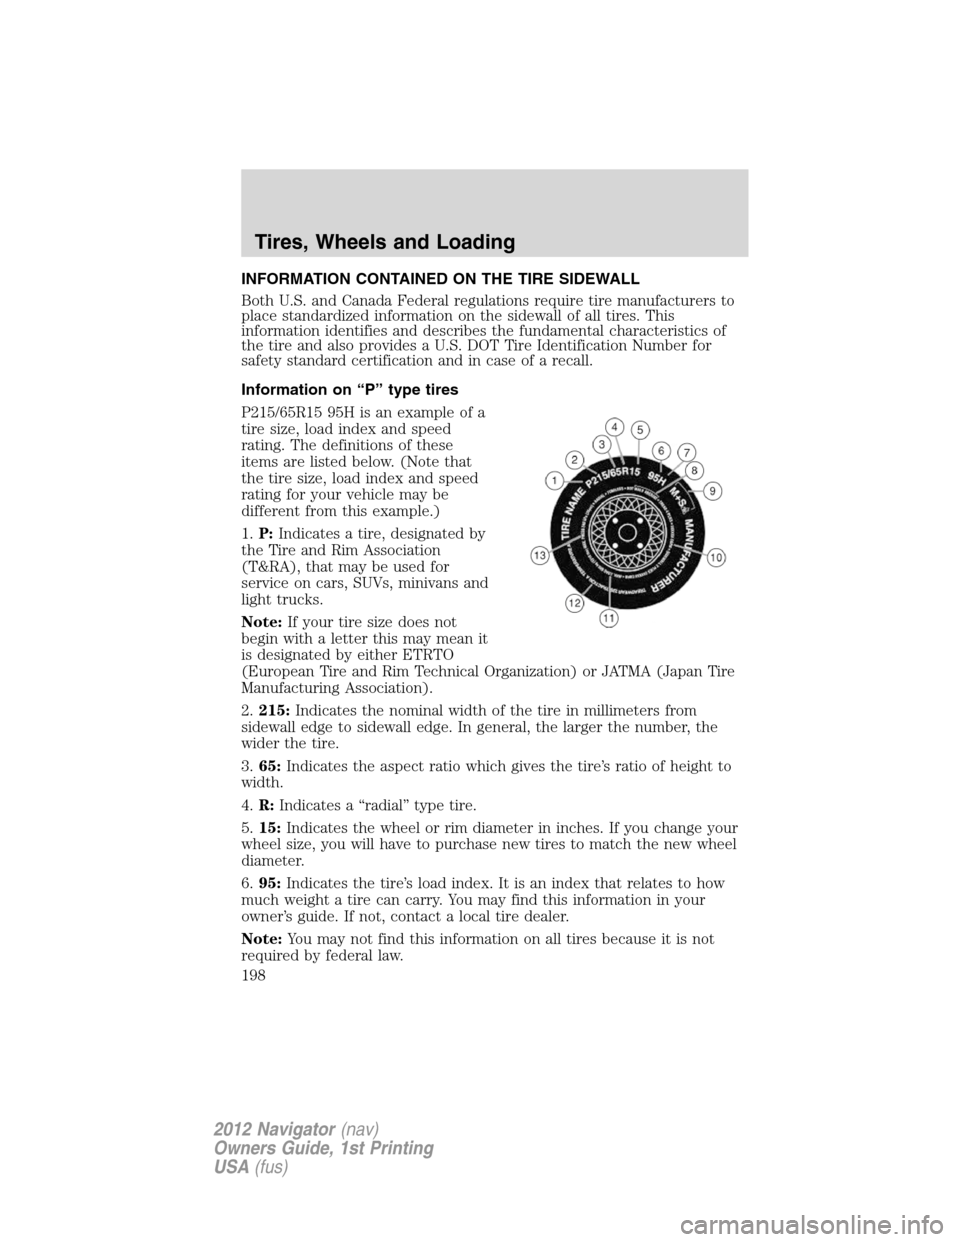
P215/65R15 95H is an example of a
tire size, load index and speed
rating. The definitions of these
items are listed below. (Note that
the tire size, load index and speed
rating for your vehicle may be
different from this example.)
1.P:Indicates a tire, designated by
the Tire and Rim Association
(T&RA), that may be used for
service on cars, SUVs, minivans and
light trucks.
Note:If your tire size does not
begin with a letter this may mean it
is designated by either ETRTO
(European Tire and Rim Technical Organization) or JATMA (Japan Tire
Manufacturing Association).
2.215:Indicates the nominal width of the tire in millimeters from
sidewall edge to sidewall edge. In general, the larger the number, the
wider the tire.
3.65:Indicates the aspect ratio which gives the tire’s ratio of height to
width.
4.R:Indicates a “radial” type tire.
5.15:Indicates the wheel or rim diameter in inches. If you change your
wheel size, you will have to purchase new tires to match the new wheel
diameter.
6.95:Indicates the tire’s load index. It is an index that relates to how
much weight a tire can carry. You may find this information in your
owner’s guide. If not, contact a local tire dealer.
Note:You may not find this information on all tires because it is not
required by federal law.
Tires, Wheels and Loading
198
2012 Navigator(nav)
Owners Guide, 1st Printing
USA(fus)
Page 201 of 381
Additional information contained on the tire sidewall for “LT” type
tires
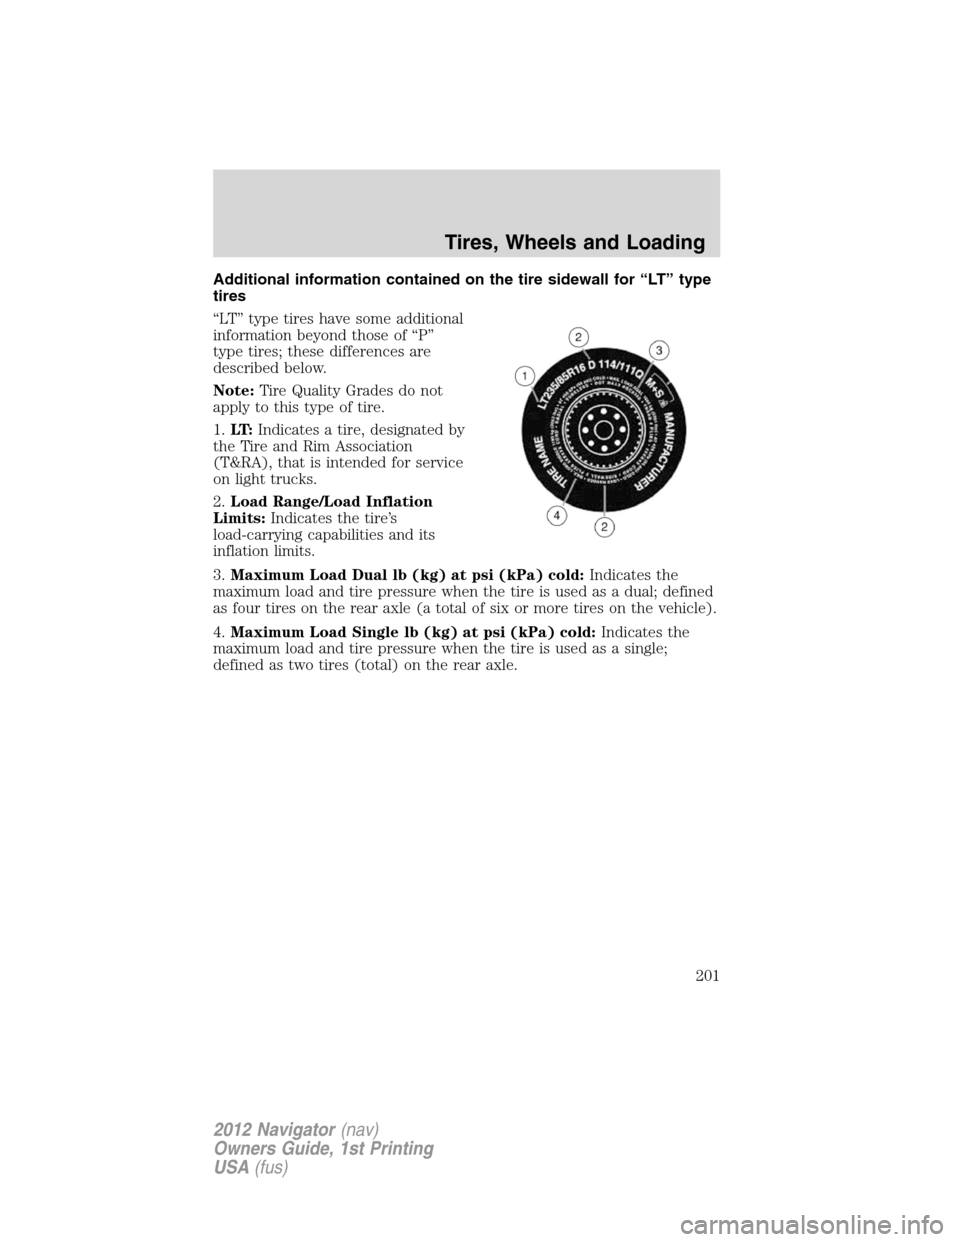
“LT” type tires have some additional
information beyond those of “P”
type tires; these differences are
described below.
Note:Tire Quality Grades do not
apply to this type of tire.
1.LT:Indicates a tire, designated by
the Tire and Rim Association
(T&RA), that is intended for service
on light trucks.
2.Load Range/Load Inflation
Limits:Indicates the tire’s
load-carrying capabilities and its
inflation limits.
3.Maximum Load Dual lb (kg) at psi (kPa) cold:Indicates the
maximum load and tire pressure when the tire is used as a dual; defined
as four tires on the rear axle (a total of six or more tires on the vehicle).
4.Maximum Load Single lb (kg) at psi (kPa) cold:Indicates the
maximum load and tire pressure when the tire is used as a single;
defined as two tires (total) on the rear axle.
Tires, Wheels and Loading
201
2012 Navigator(nav)
Owners Guide, 1st Printing
USA(fus)
Page 202 of 381
Information on “T” type tires
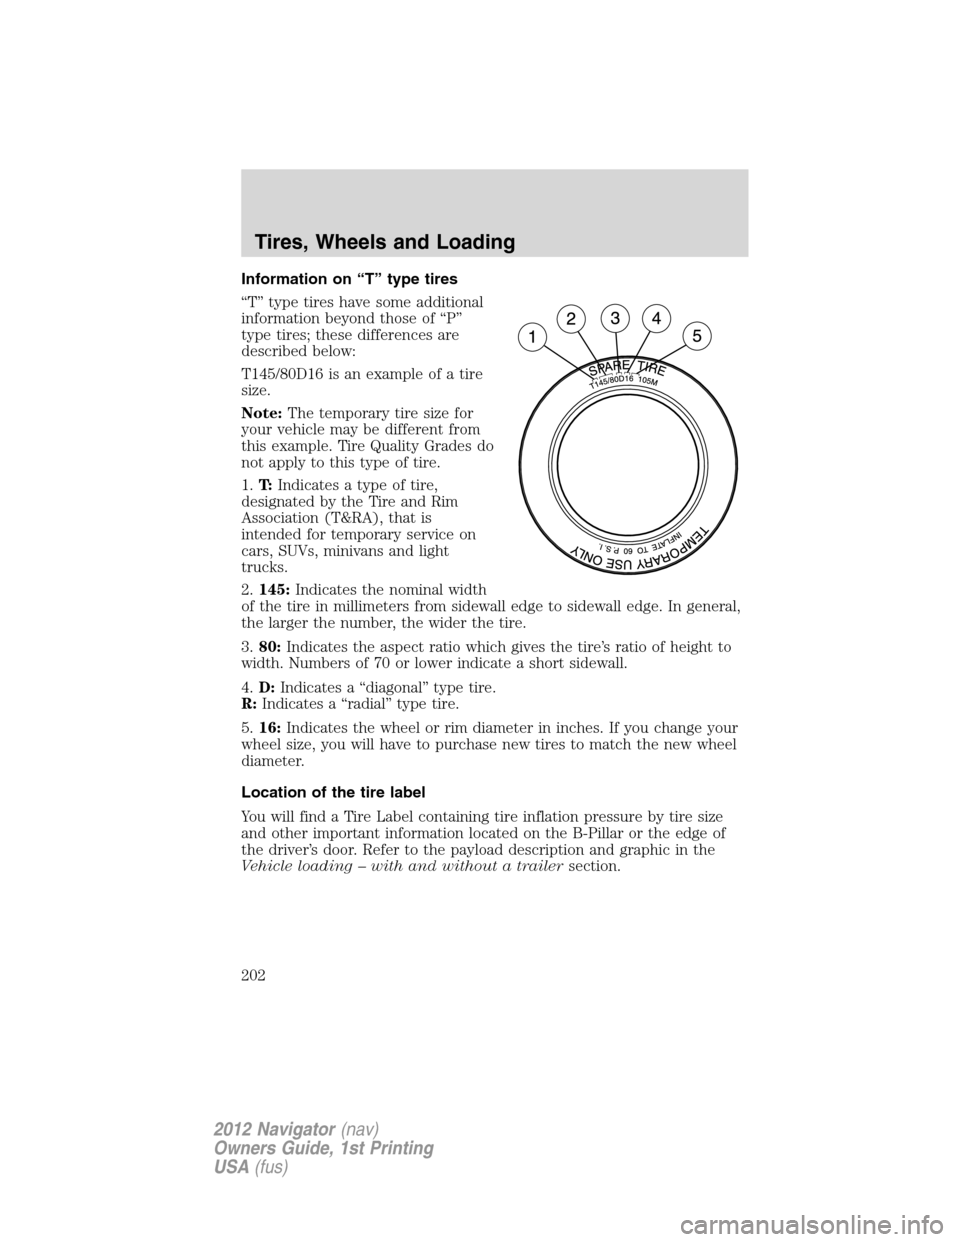
“T” type tires have some additional
information beyond those of “P”
type tires; these differences are
described below:
T145/80D16 is an example of a tire
size.
Note:The temporary tire size for
your vehicle may be different from
this example. Tire Quality Grades do
not apply to this type of tire.
1.T:Indicates a type of tire,
designated by the Tire and Rim
Association (T&RA), that is
intended for temporary service on
cars, SUVs, minivans and light
trucks.
2.145:Indicates the nominal width
of the tire in millimeters from sidewall edge to sidewall edge. In general,
the larger the number, the wider the tire.
3.80:Indicates the aspect ratio which gives the tire’s ratio of height to
width. Numbers of 70 or lower indicate a short sidewall.
4.D:Indicates a “diagonal” type tire.
R:Indicates a “radial” type tire.
5.16:Indicates the wheel or rim diameter in inches. If you change your
wheel size, you will have to purchase new tires to match the new wheel
diameter.
Location of the tire label
You will find a Tire Label containing tire inflation pressure by tire size
and other important information located on the B-Pillar or the edge of
the driver’s door. Refer to the payload description and graphic in the
Vehicle loading – with and without a trailersection.
Tires, Wheels and Loading
202
2012 Navigator(nav)
Owners Guide, 1st Printing
USA(fus)
Page 204 of 381
following two conditions: (1) This device may not cause harmful
interference, and (2) This device must accept any interference received,
including interference that may cause undesired operation.
WARNING:The tire pressure monitoring system is NOT a
substitute for manually checking tire pressure. The tire pressure
should be checked periodically (at least monthly) using a tire gauge,
seeInflating your tiresin this chapter. Failure to properly maintain
your tire pressure could increase the risk of tire failure, loss of control,
vehicle rollover and personal injury.
Changing tires with a TPMS
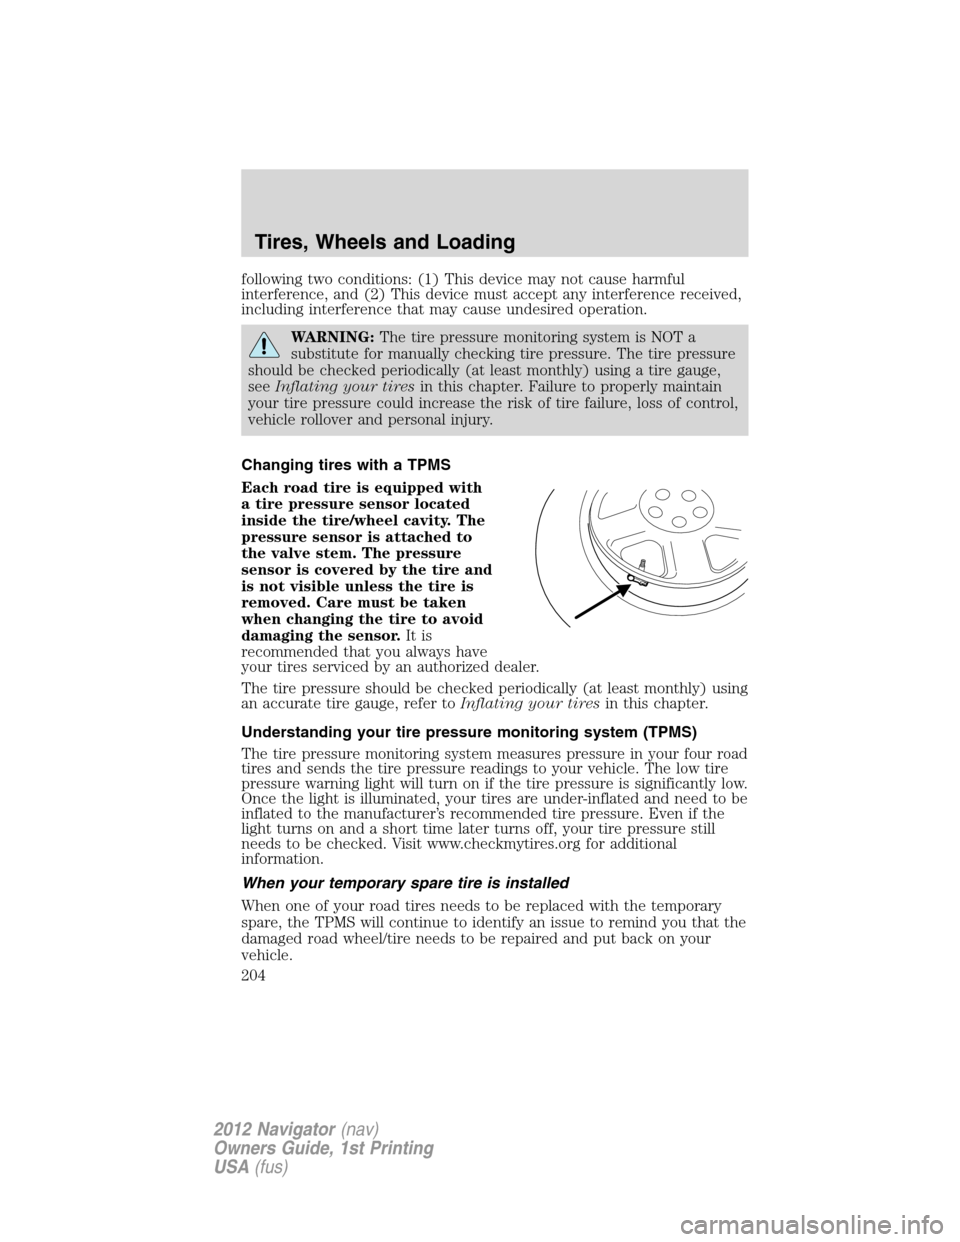
Each road tire is equipped with
a tire pressure sensor located
inside the tire/wheel cavity. The
pressure sensor is attached to
the valve stem. The pressure
sensor is covered by the tire and
is not visible unless the tire is
removed. Care must be taken
when changing the tire to avoid
damaging the sensor.It is
recommended that you always have
your tires serviced by an authorized dealer.
The tire pressure should be checked periodically (at least monthly) using
an accurate tire gauge, refer toInflating your tiresin this chapter.
Understanding your tire pressure monitoring system (TPMS)
The tire pressure monitoring system measures pressure in your four road
tires and sends the tire pressure readings to your vehicle. The low tire
pressure warning light will turn on if the tire pressure is significantly low.
Once the light is illuminated, your tires are under-inflated and need to be
inflated to the manufacturer’s recommended tire pressure. Even if the
light turns on and a short time later turns off, your tire pressure still
needs to be checked. Visit www.checkmytires.org for additional
information.
When your temporary spare tire is installed
When one of your road tires needs to be replaced with the temporary
spare, the TPMS will continue to identify an issue to remind you that the
damaged road wheel/tire needs to be repaired and put back on your
vehicle.
Tires, Wheels and Loading
204
2012 Navigator(nav)
Owners Guide, 1st Printing
USA(fus)
Page 205 of 381
To restore the full functionality of the tire pressure monitoring system,
have the damaged road wheel/tire repaired and remounted on your
vehicle. For additional information, refer toChanging tires with a
TPMSin this section.
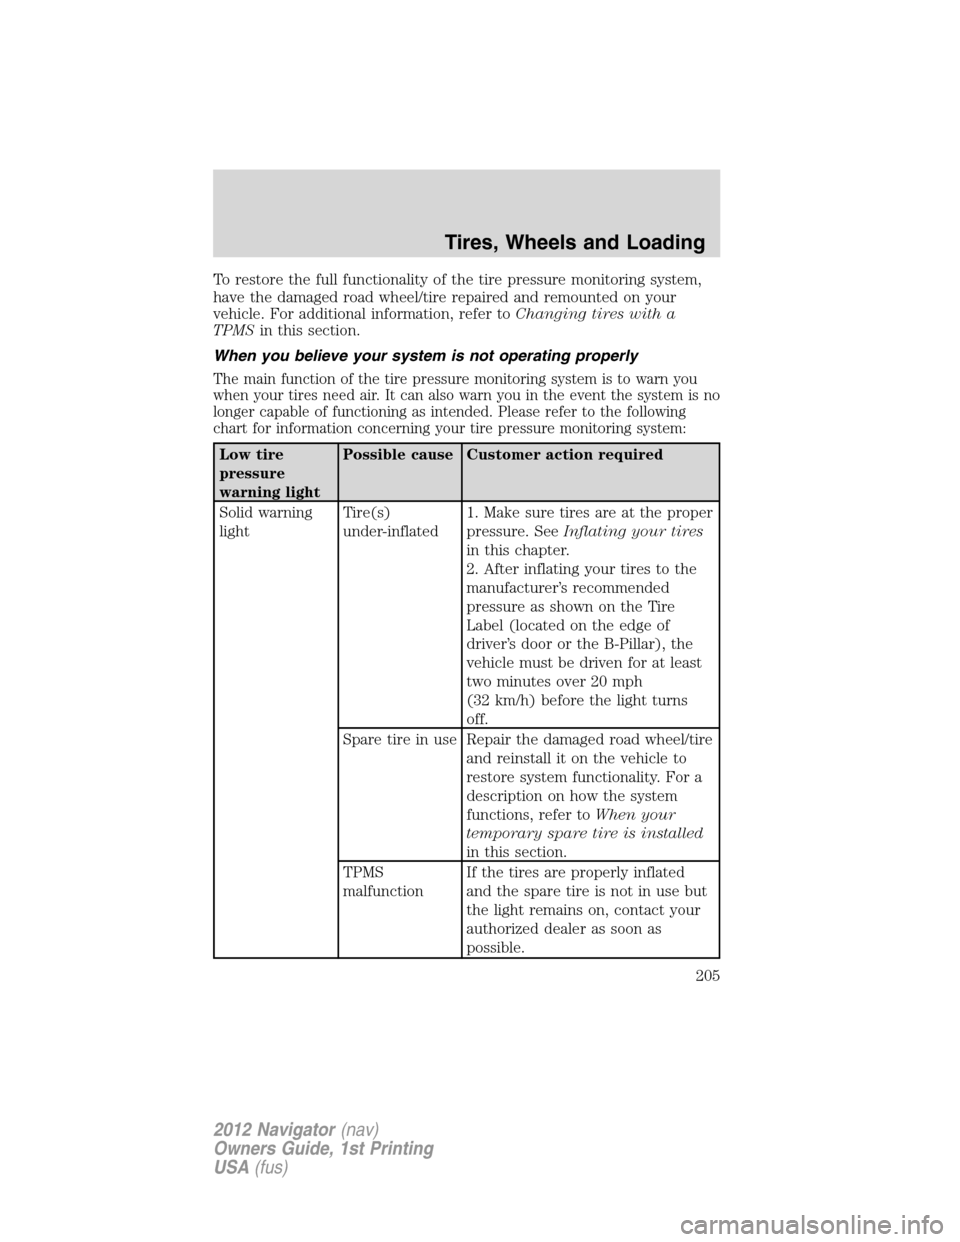
When you believe your system is not operating properly
The main function of the tire pressure monitoring system is to warn you
when your tires need air. It can also warn you in the event the system is no
longer capable of functioning as intended. Please refer to the following
chart for information concerning your tire pressure monitoring system:
Low tire
pressure
warning lightPossible cause Customer action required
Solid warning
lightTire(s)
under-inflated1. Make sure tires are at the proper
pressure. SeeInflating your tires
in this chapter.
2. After inflating your tires to the
manufacturer’s recommended
pressure as shown on the Tire
Label (located on the edge of
driver’s door or the B-Pillar), the
vehicle must be driven for at least
two minutes over 20 mph
(32 km/h) before the light turns
off.
Spare tire in use Repair the damaged road wheel/tire
and reinstall it on the vehicle to
restore system functionality. For a
description on how the system
functions, refer toWhen your
temporary spare tire is installed
in this section.
TPMS
malfunctionIf the tires are properly inflated
and the spare tire is not in use but
the light remains on, contact your
authorized dealer as soon as
possible.
Tires, Wheels and Loading
205
2012 Navigator(nav)
Owners Guide, 1st Printing
USA(fus)
Page 206 of 381
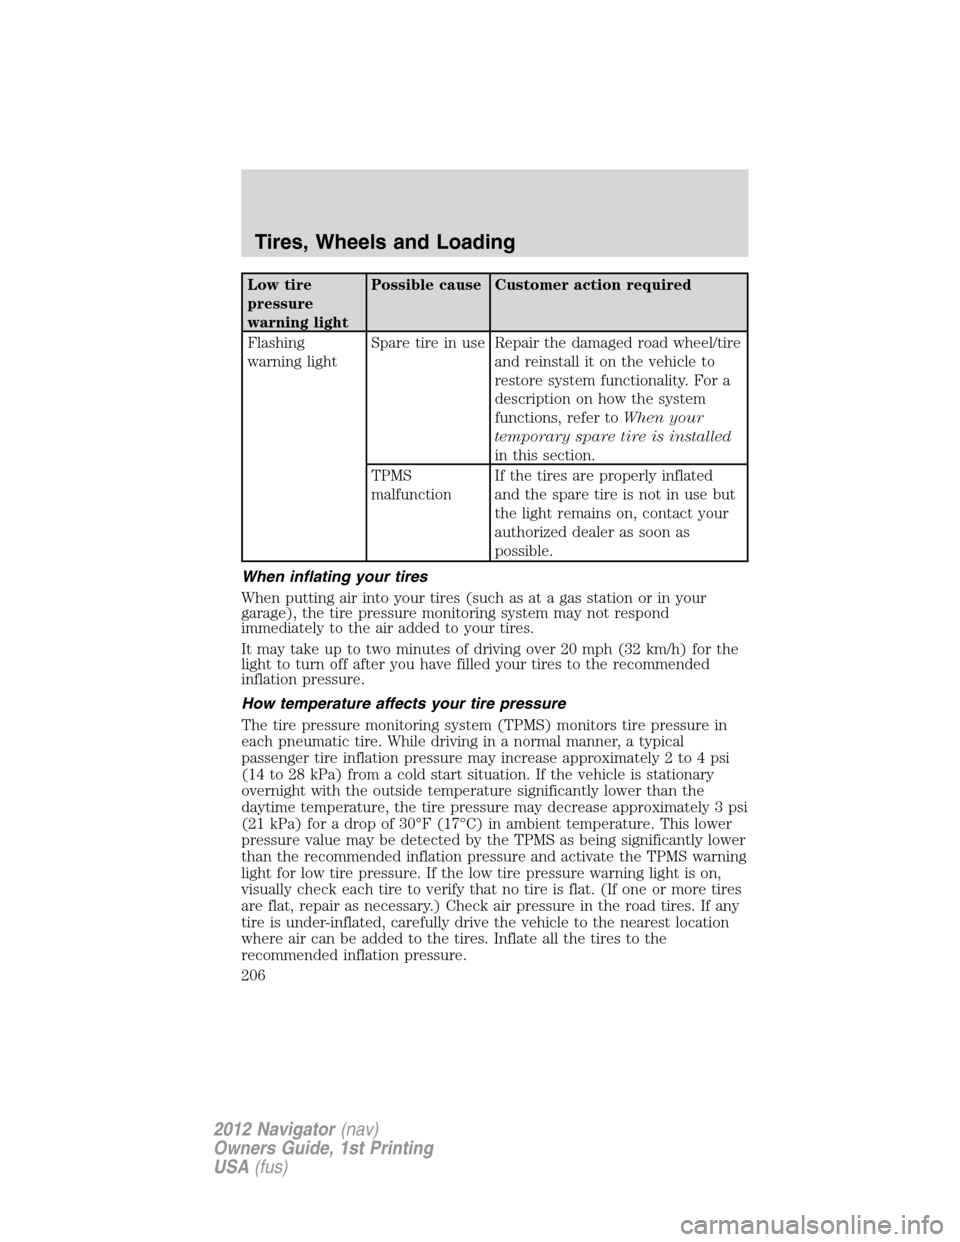
Low tire
pressure
warning lightPossible cause Customer action required
Flashing
warning lightSpare tire in use Repair the damaged road wheel/tire
and reinstall it on the vehicle to
restore system functionality. For a
description on how the system
functions, refer toWhen your
temporary spare tire is installed
in this section.
TPMS
malfunctionIf the tires are properly inflated
and the spare tire is not in use but
the light remains on, contact your
authorized dealer as soon as
possible.
When inflating your tires
When putting air into your tires (such as at a gas station or in your
garage), the tire pressure monitoring system may not respond
immediately to the air added to your tires.
It may take up to two minutes of driving over 20 mph (32 km/h) for the
light to turn off after you have filled your tires to the recommended
inflation pressure.
How temperature affects your tire pressure
The tire pressure monitoring system (TPMS) monitors tire pressure in
each pneumatic tire. While driving in a normal manner, a typical
passenger tire inflation pressure may increase approximately 2 to 4 psi
(14 to 28 kPa) from a cold start situation. If the vehicle is stationary
overnight with the outside temperature significantly lower than the
daytime temperature, the tire pressure may decrease approximately 3 psi
(21 kPa) for a drop of 30°F (17°C) in ambient temperature. This lower
pressure value may be detected by the TPMS as being significantly lower
than the recommended inflation pressure and activate the TPMS warning
light for low tire pressure. If the low tire pressure warning light is on,
visually check each tire to verify that no tire is flat. (If one or more tires
are flat, repair as necessary.) Check air pressure in the road tires. If any
tire is under-inflated, carefully drive the vehicle to the nearest location
where air can be added to the tires. Inflate all the tires to the
recommended inflation pressure.
Tires, Wheels and Loading
206
2012 Navigator(nav)
Owners Guide, 1st Printing
USA(fus)