release LINCOLN NAVIGATOR 2012 Owner's Guide
[x] Cancel search | Manufacturer: LINCOLN, Model Year: 2012, Model line: NAVIGATOR, Model: LINCOLN NAVIGATOR 2012Pages: 381, PDF Size: 2.53 MB
Page 115 of 381
You can store up to three personal entry codes. The above procedure
shows how to set the Driver 1 setting. To assign the additional settings,
repeat Steps 1 through 3, then for Step 4, do one of the following:
•Press 3•4 to assign the Driver 2 setting.
•Press 5•6, 7•8, or 9•0 to assign the Driver 3 setting.
Ti p s
•Do not use five numbers in sequential order.
•The factory set code will work even if you have set your own personal
code.
Erasing personal code
1. Enter the factory set 5–digit code.
2. Within five seconds, press the 1•2 on the keypad and release.
3. Press and hold the 1•2 for two seconds. This must be done within
five seconds of completing Step 2.
Your personal code is now erased and only the factory set 5–digit code
will work.
Anti-scan feature
If the wrong code has been entered seven times (35 consecutive button
presses), the keypad will go into an anti-scan mode. This mode disables
the keypad for one minute and the keypad lamp will flash.
The anti-scan feature will turn off after:
•one minute of keypad inactivity,
•pressing the
control on the remote entry transmitter,
•or the ignition position changes.
Unlocking and locking the doors and liftgate using keyless entry
To unlock the driver’s door,enter the factory set 5-digit code or your
personal code. Each number must be pressed within five seconds of each
other. The interior lamps will illuminate.
To unlock all doors and liftgate,press the 3•4 control within five
seconds of entering the factory set 5-digit code or your personal code.
Locks and Security
115
2012 Navigator(nav)
Owners Guide, 1st Printing
USA(fus)
Page 123 of 381
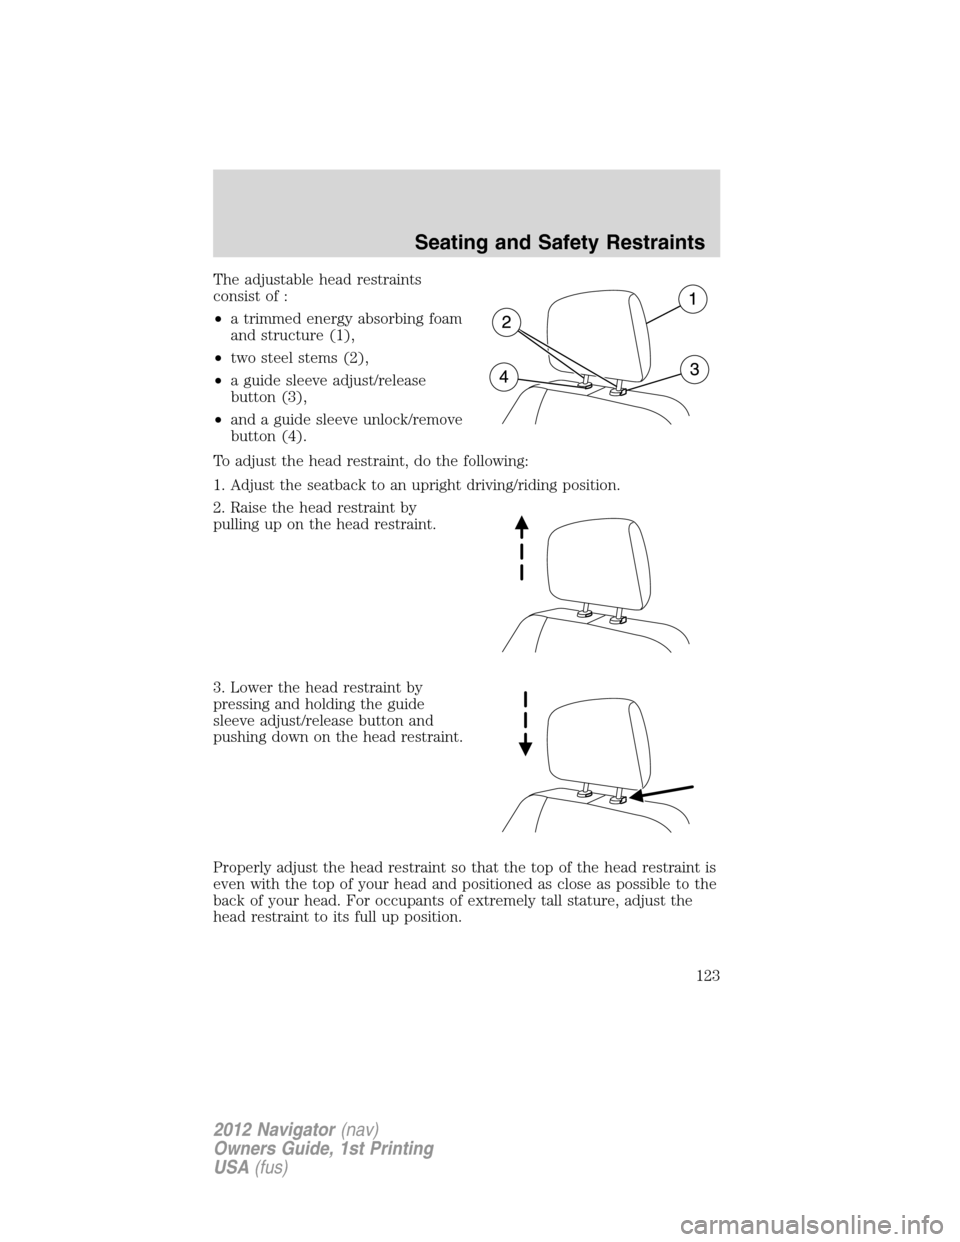
The adjustable head restraints
consist of :
•a trimmed energy absorbing foam
and structure (1),
•two steel stems (2),
•a guide sleeve adjust/release
button (3),
•and a guide sleeve unlock/remove
button (4).
To adjust the head restraint, do the following:
1. Adjust the seatback to an upright driving/riding position.
2. Raise the head restraint by
pulling up on the head restraint.
3. Lower the head restraint by
pressing and holding the guide
sleeve adjust/release button and
pushing down on the head restraint.
Properly adjust the head restraint so that the top of the head restraint is
even with the top of your head and positioned as close as possible to the
back of your head. For occupants of extremely tall stature, adjust the
head restraint to its full up position.
Seating and Safety Restraints
123
2012 Navigator(nav)
Owners Guide, 1st Printing
USA(fus)
Page 124 of 381
WARNING:The adjustable head restraint is a safety device.
Whenever possible it should be installed and properly adjusted
when the seat is occupied.
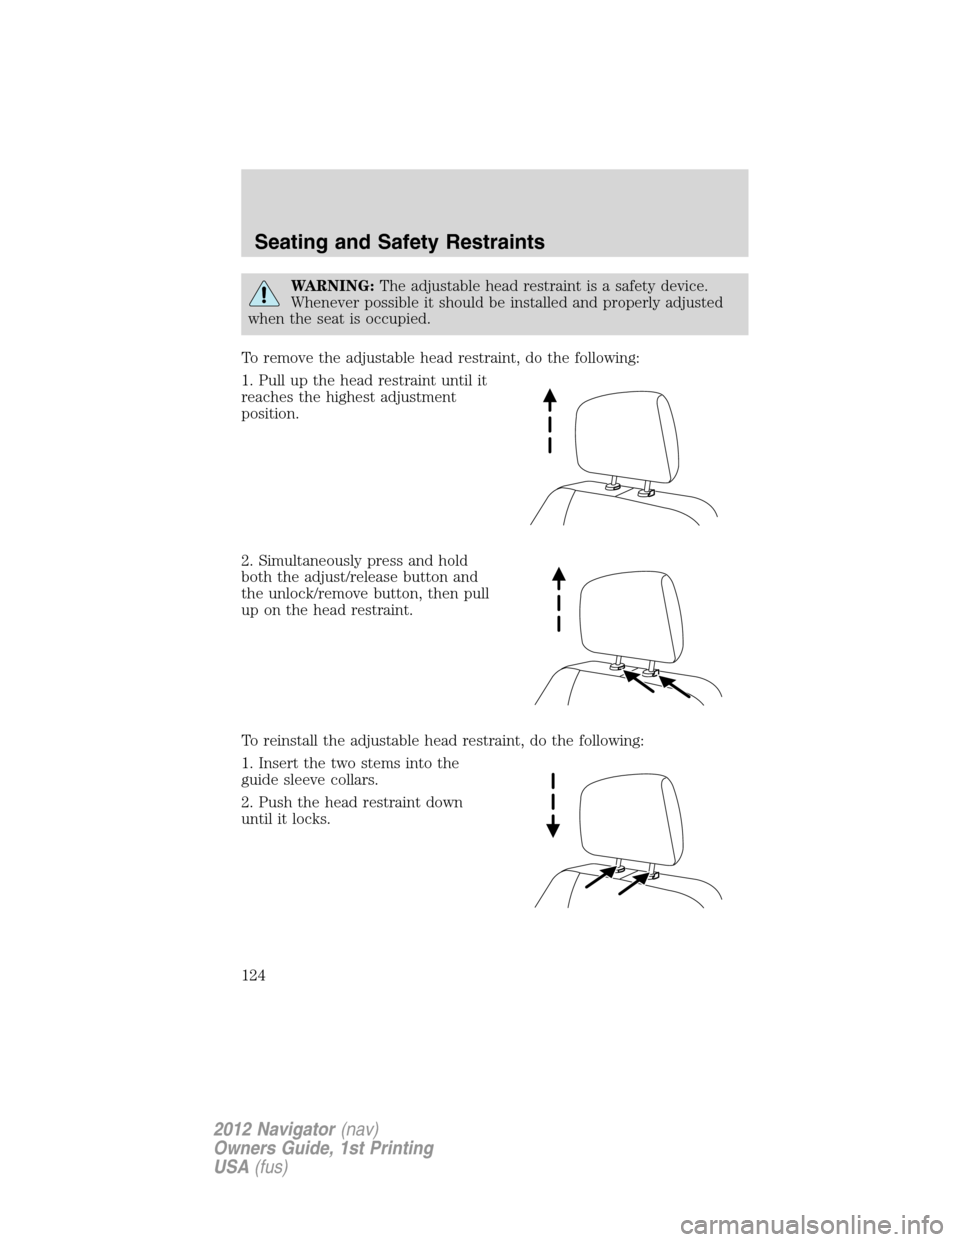
To remove the adjustable head restraint, do the following:
1. Pull up the head restraint until it
reaches the highest adjustment
position.
2. Simultaneously press and hold
both the adjust/release button and
the unlock/remove button, then pull
up on the head restraint.
To reinstall the adjustable head restraint, do the following:
1. Insert the two stems into the
guide sleeve collars.
2. Push the head restraint down
until it locks.
Seating and Safety Restraints
124
2012 Navigator(nav)
Owners Guide, 1st Printing
USA(fus)
Page 129 of 381
Cooled seats
The cooled seats will only function when the engine is running.
To operate the cooled seats:
Press the cooled seat symbol to
cycle through the various cooling
settings and off. Cooler settings are
indicated by more indicator lights.
The cooled seats will turn off after 30 minutes.
If the engine falls below 350 RPMs while the cooled seats are on, the
feature will turn itself off and will need to be reactivated.
Climate controlled seats air filter replacement (if equipped)
The climate controlled seat system includes air filters that must be
replaced periodically. Refer to theScheduled maintenance information
for more information.
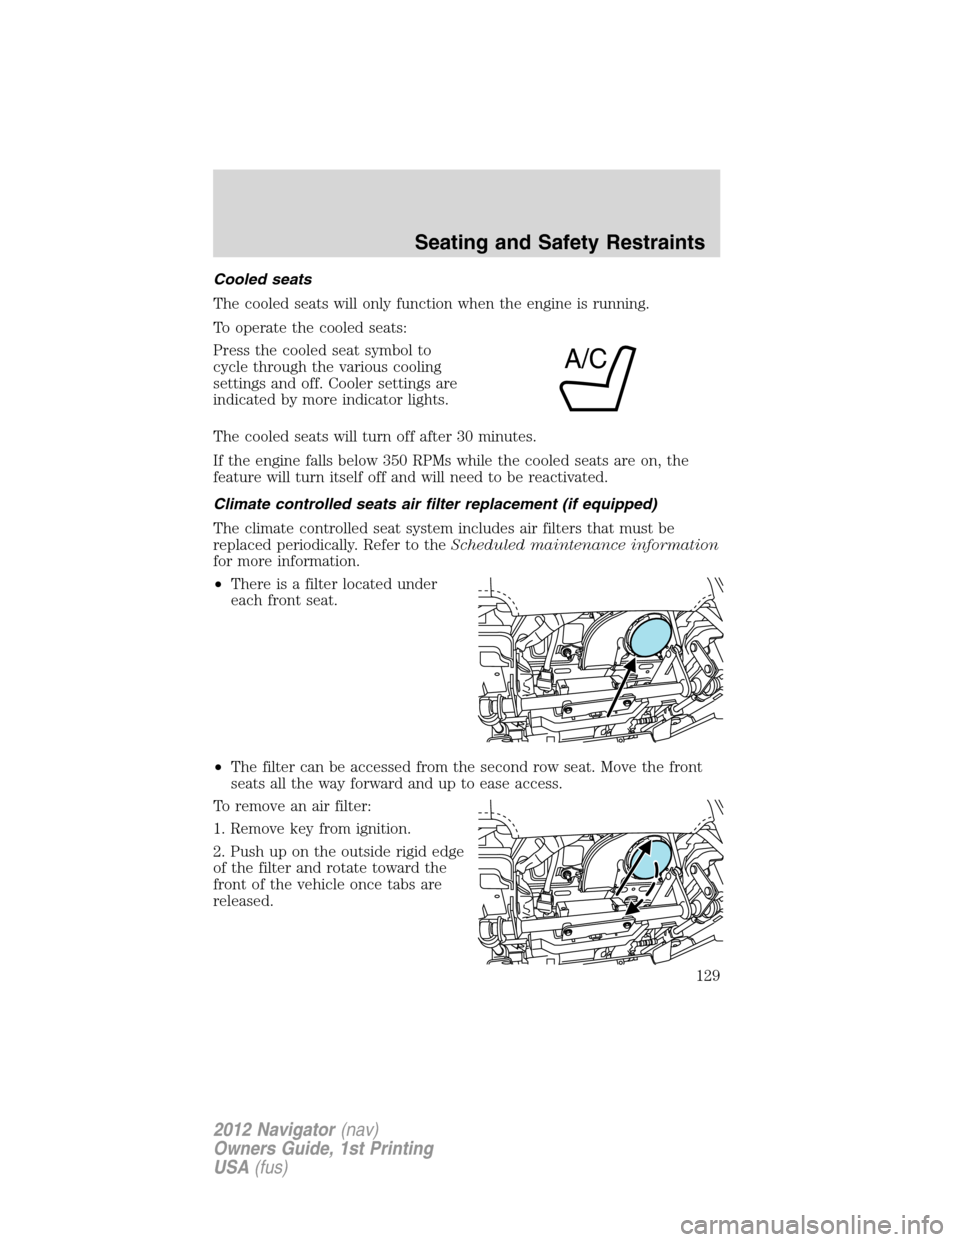
•There is a filter located under
each front seat.
•The filter can be accessed from the second row seat. Move the front
seats all the way forward and up to ease access.
To remove an air filter:
1. Remove key from ignition.
2. Push up on the outside rigid edge
of the filter and rotate toward the
front of the vehicle once tabs are
released.
A/C
Seating and Safety Restraints
129
2012 Navigator(nav)
Owners Guide, 1st Printing
USA(fus)
Page 131 of 381
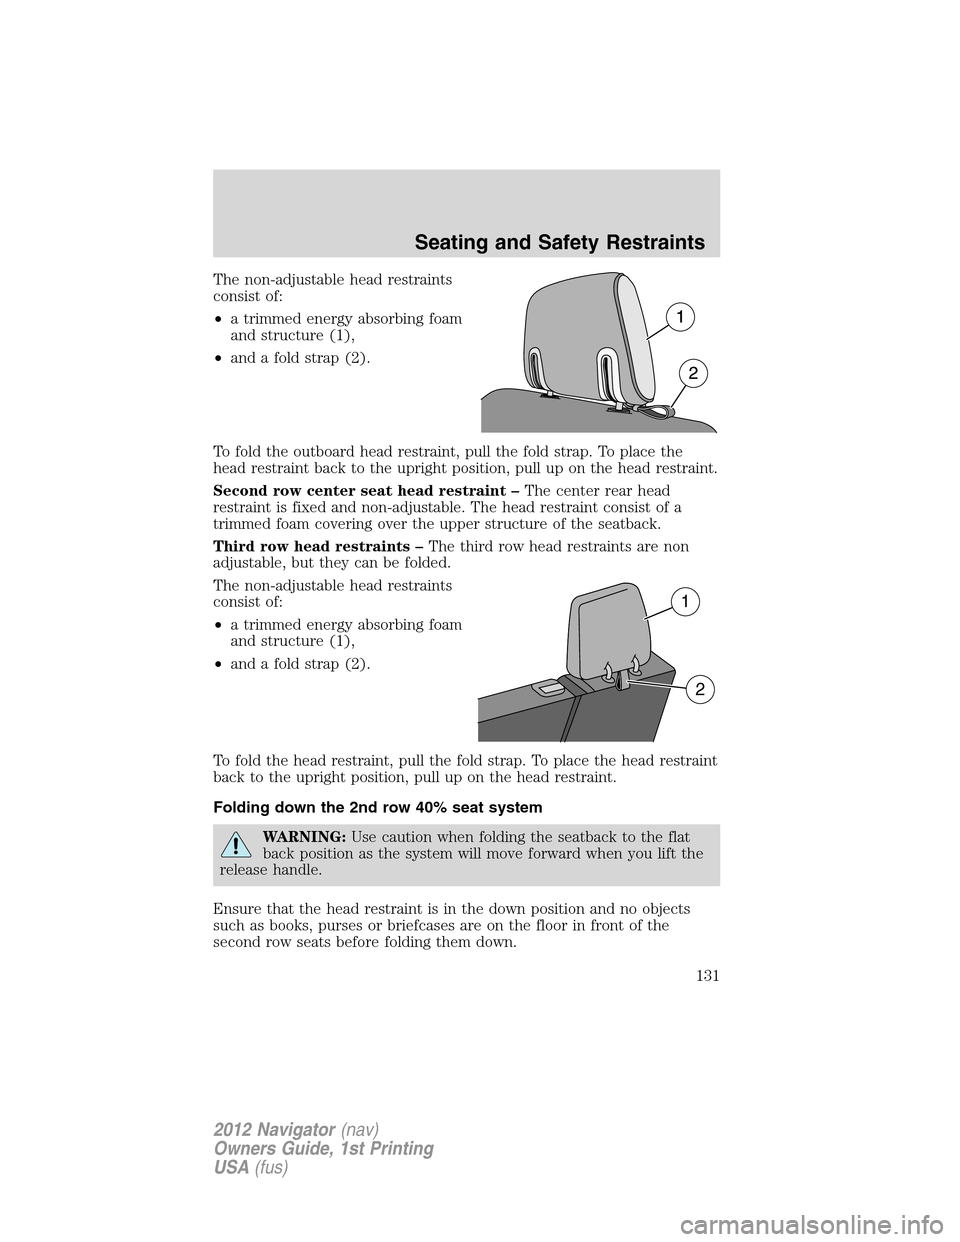
The non-adjustable head restraints
consist of:
•a trimmed energy absorbing foam
and structure (1),
•and a fold strap (2).
To fold the outboard head restraint, pull the fold strap. To place the
head restraint back to the upright position, pull up on the head restraint.
Second row center seat head restraint –The center rear head
restraint is fixed and non-adjustable. The head restraint consist of a
trimmed foam covering over the upper structure of the seatback.
Third row head restraints –The third row head restraints are non
adjustable, but they can be folded.
The non-adjustable head restraints
consist of:
•a trimmed energy absorbing foam
and structure (1),
•and a fold strap (2).
To fold the head restraint, pull the fold strap. To place the head restraint
back to the upright position, pull up on the head restraint.
Folding down the 2nd row 40% seat system
WARNING:Use caution when folding the seatback to the flat
back position as the system will move forward when you lift the
release handle.
Ensure that the head restraint is in the down position and no objects
such as books, purses or briefcases are on the floor in front of the
second row seats before folding them down.
1
2
Seating and Safety Restraints
131
2012 Navigator(nav)
Owners Guide, 1st Printing
USA(fus)
Page 133 of 381
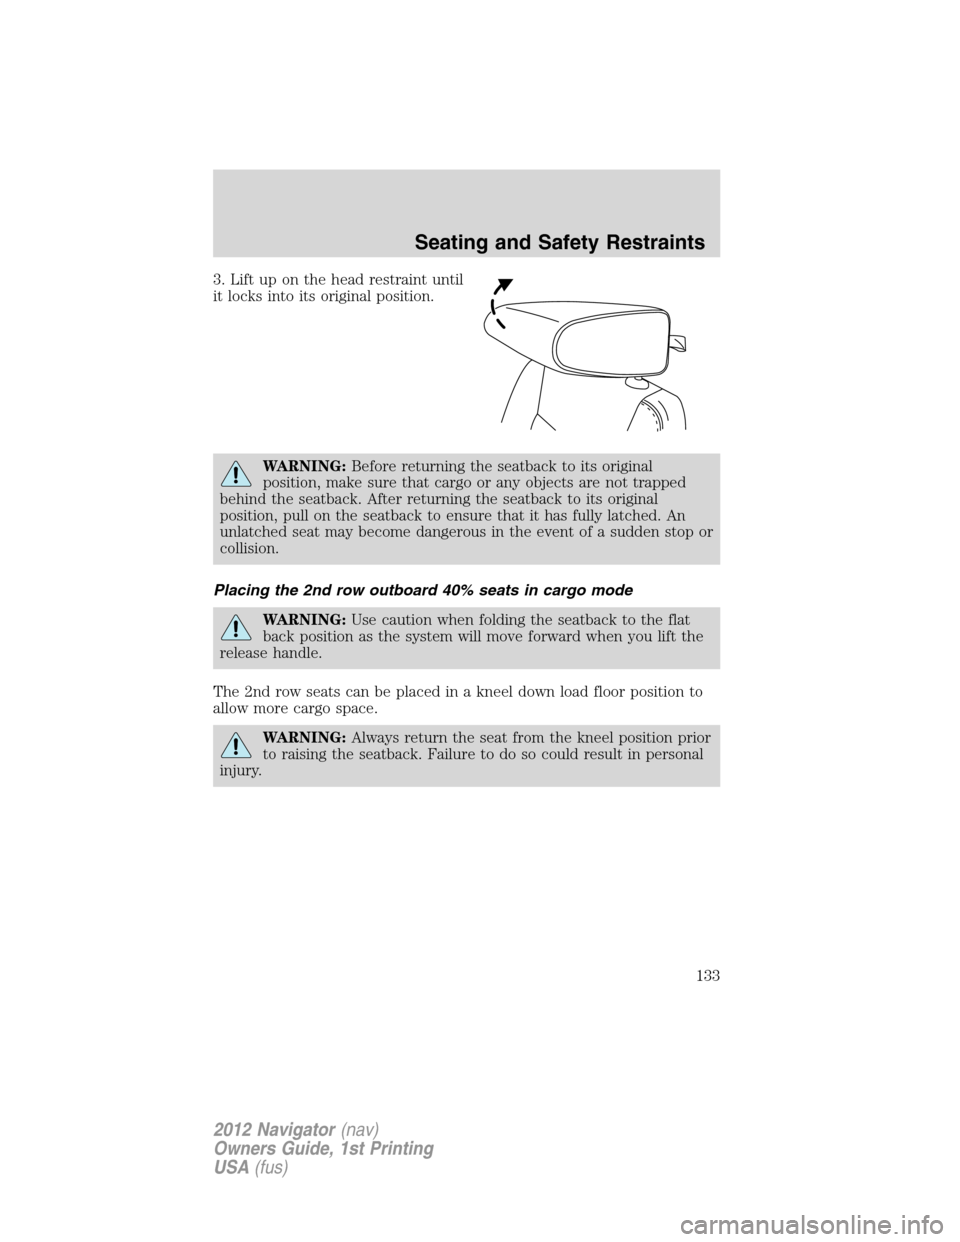
3. Lift up on the head restraint until
it locks into its original position.
WARNING:Before returning the seatback to its original
position, make sure that cargo or any objects are not trapped
behind the seatback. After returning the seatback to its original
position, pull on the seatback to ensure that it has fully latched. An
unlatched seat may become dangerous in the event of a sudden stop or
collision.
Placing the 2nd row outboard 40% seats in cargo mode
WARNING:Use caution when folding the seatback to the flat
back position as the system will move forward when you lift the
release handle.
The 2nd row seats can be placed in a kneel down load floor position to
allow more cargo space.
WARNING:Always return the seat from the kneel position prior
to raising the seatback. Failure to do so could result in personal
injury.
Seating and Safety Restraints
133
2012 Navigator(nav)
Owners Guide, 1st Printing
USA(fus)
Page 134 of 381
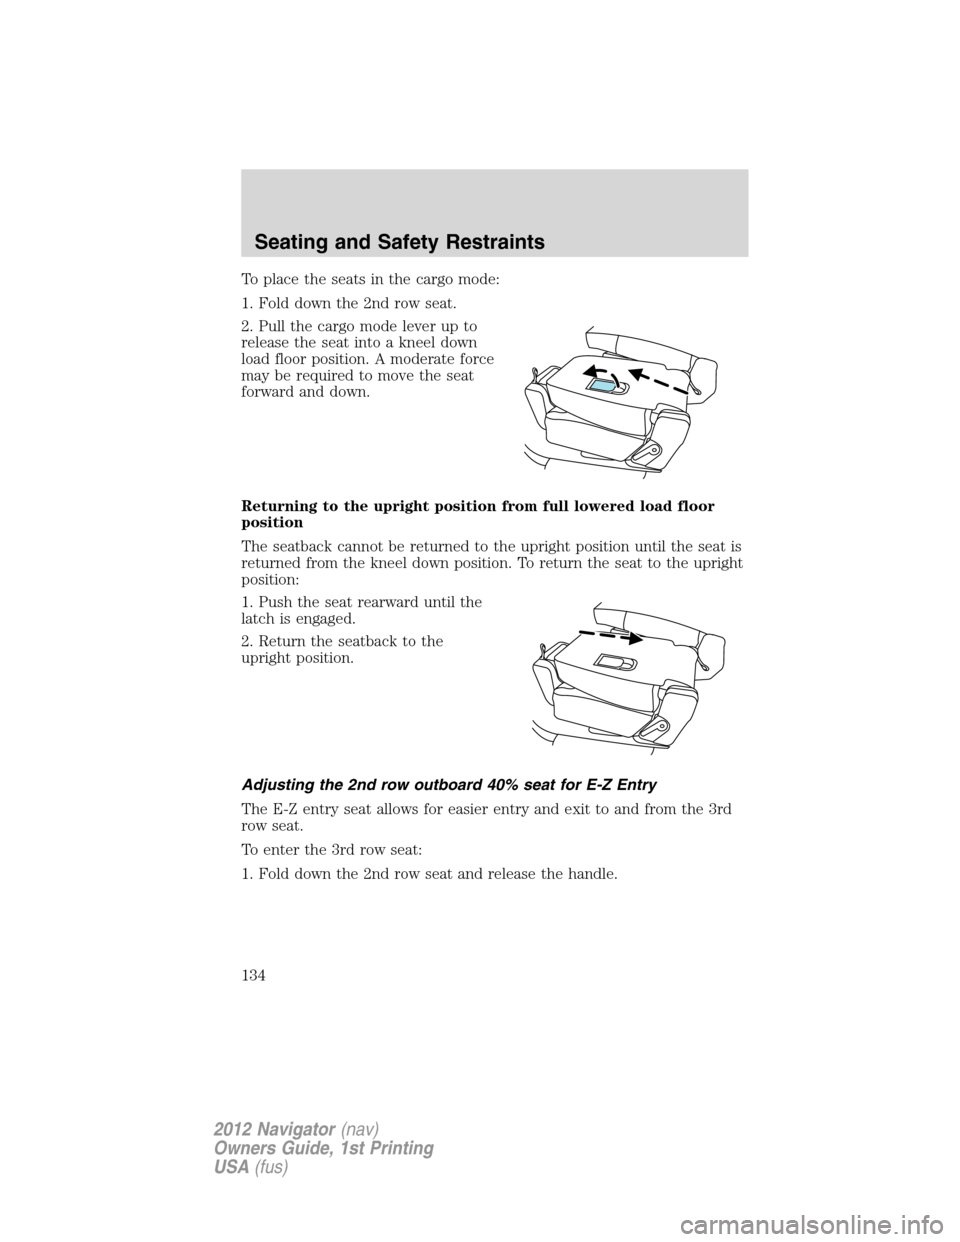
To place the seats in the cargo mode:
1. Fold down the 2nd row seat.
2. Pull the cargo mode lever up to
release the seat into a kneel down
load floor position. A moderate force
may be required to move the seat
forward and down.
Returning to the upright position from full lowered load floor
position
The seatback cannot be returned to the upright position until the seat is
returned from the kneel down position. To return the seat to the upright
position:
1. Push the seat rearward until the
latch is engaged.
2. Return the seatback to the
upright position.
Adjusting the 2nd row outboard 40% seat for E-Z Entry
The E-Z entry seat allows for easier entry and exit to and from the 3rd
row seat.
To enter the 3rd row seat:
1. Fold down the 2nd row seat and release the handle.
Seating and Safety Restraints
134
2012 Navigator(nav)
Owners Guide, 1st Printing
USA(fus)
Page 135 of 381
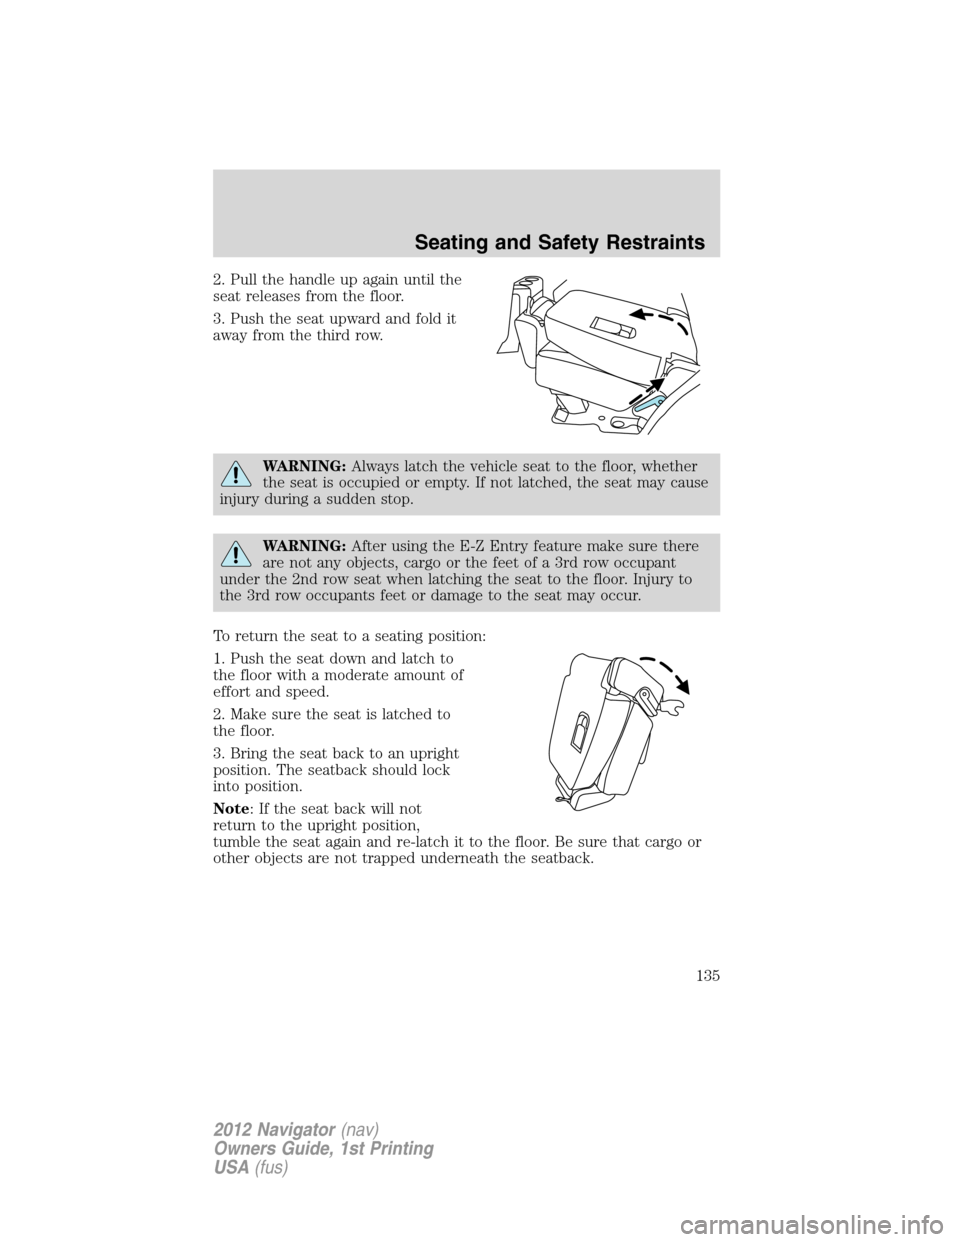
2. Pull the handle up again until the
seat releases from the floor.
3. Push the seat upward and fold it
away from the third row.
WARNING:Always latch the vehicle seat to the floor, whether
the seat is occupied or empty. If not latched, the seat may cause
injury during a sudden stop.
WARNING:After using the E-Z Entry feature make sure there
are not any objects, cargo or the feet of a 3rd row occupant
under the 2nd row seat when latching the seat to the floor. Injury to
the 3rd row occupants feet or damage to the seat may occur.
To return the seat to a seating position:
1. Push the seat down and latch to
the floor with a moderate amount of
effort and speed.
2. Make sure the seat is latched to
the floor.
3. Bring the seat back to an upright
position. The seatback should lock
into position.
Note: If the seat back will not
return to the upright position,
tumble the seat again and re-latch it to the floor. Be sure that cargo or
other objects are not trapped underneath the seatback.
Seating and Safety Restraints
135
2012 Navigator(nav)
Owners Guide, 1st Printing
USA(fus)
Page 136 of 381
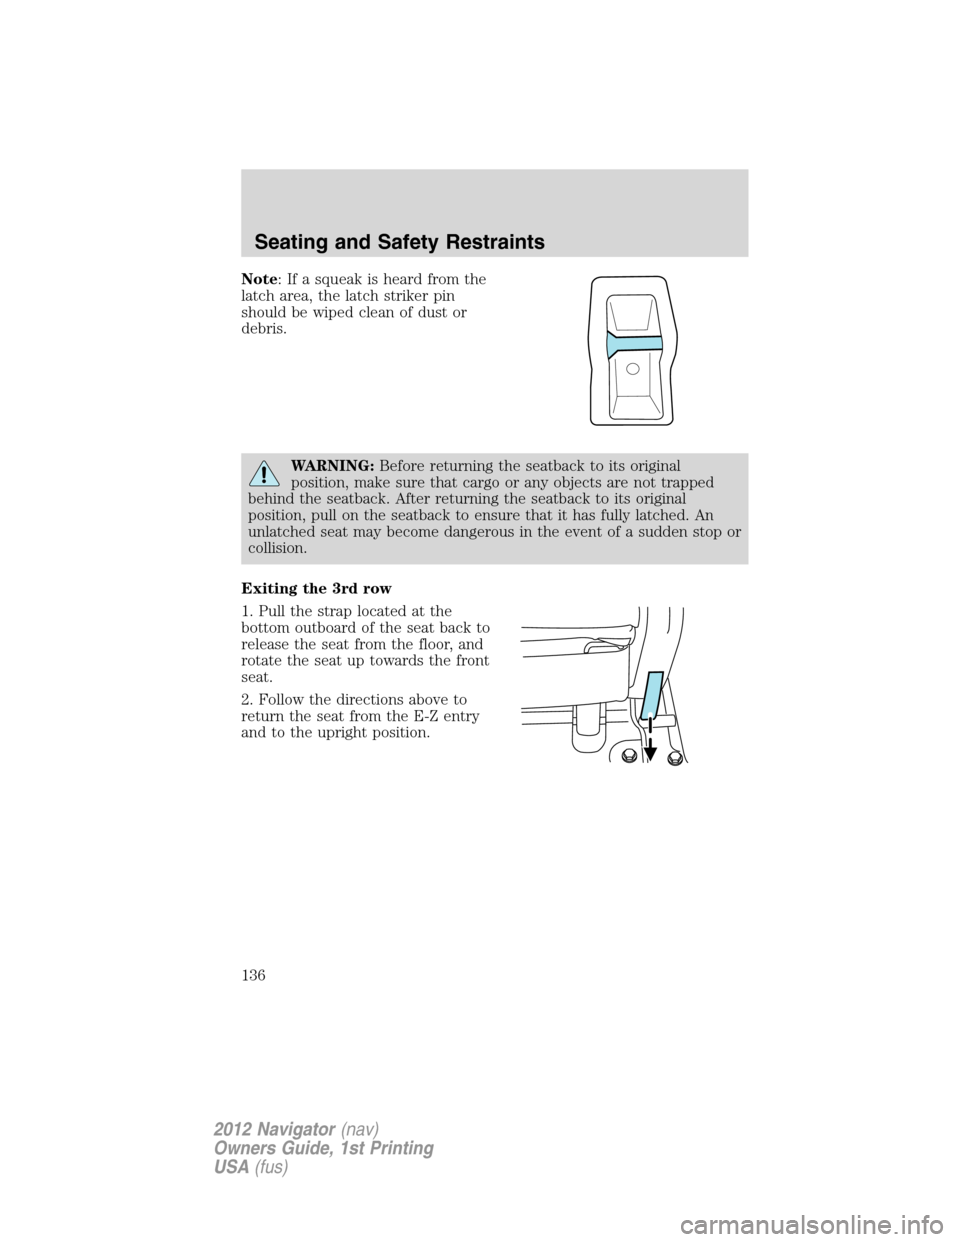
Note: If a squeak is heard from the
latch area, the latch striker pin
should be wiped clean of dust or
debris.
WARNING:Before returning the seatback to its original
position, make sure that cargo or any objects are not trapped
behind the seatback. After returning the seatback to its original
position, pull on the seatback to ensure that it has fully latched. An
unlatched seat may become dangerous in the event of a sudden stop or
collision.
Exiting the 3rd row
1. Pull the strap located at the
bottom outboard of the seat back to
release the seat from the floor, and
rotate the seat up towards the front
seat.
2. Follow the directions above to
return the seat from the E-Z entry
and to the upright position.
Seating and Safety Restraints
136
2012 Navigator(nav)
Owners Guide, 1st Printing
USA(fus)
Page 137 of 381

Reclining the 2nd row outboard 40% seatback
Locate the release handle on the
outboard side of the seat cushion
and lift gently to allow the seatback
to be adjusted to the desired
location.
WARNING:Reclining the seatback can cause an occupant to
slide under the seat’s safety belt, resulting in severe personal
injuries in the event of a collision.
Folding the 2nd row center 20% seat system (if equipped)
1. Locate the release handle located
in the upper left seat back, and pull
the handle to release the folding
seat latch.
WARNING:To prevent possible damage to the seat or safety
belts, ensure that the safety belts are not buckled when moving
the seat to the load floor position.
Seating and Safety Restraints
137
2012 Navigator(nav)
Owners Guide, 1st Printing
USA(fus)