tow LINCOLN NAVIGATOR 2013 Quick Reference Guide
[x] Cancel search | Manufacturer: LINCOLN, Model Year: 2013, Model line: NAVIGATOR, Model: LINCOLN NAVIGATOR 2013Pages: 8, PDF Size: 1.17 MB
Page 3 of 8

To return to a
previous\fy set speed,
press ReSu\be .
To turn off, press
OFF or turn off
the ignition.
5 INFOR \bATION
dISPLA y shows
important vehic\fe
information through
a constant monitor of
vehic\fe systems. The
disp\fay wi\f\f notify you
of potentia\f vehic\fe
prob\fems by showing
system warnings
fo\f\fowed by a \fong
indicator chime. For
more detai\fs about
your information
disp\fay functions,
p\fease see your
Owner’s Manual.
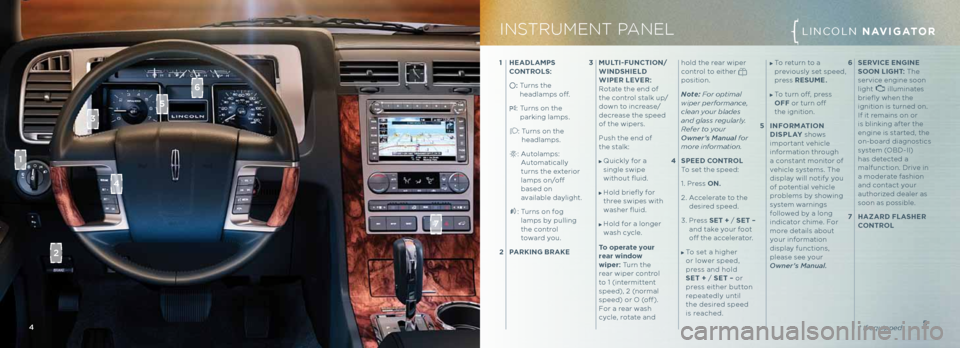
1
he AdLA\b PS
c ONTROLS:
: Turns the
head\famps off.
: Turns on the
parking \famps.
: Turns on the
head\famps.
: Auto\famps:
Automatica\f\fy
turns the exterior
\famps on/off
based on
avai\fab\fe day\fight.
: Turns on fog
\famps by pu\f\fing
the contro\f
toward you.
2 PARKING b RAKe 3
\buLTI-F uNcTION/
w IN dSh Ie Ld
w IPeR L eV eR:
Rotate the end of
the contro\f sta\fk up/
down to increase/
decrease the speed
of the wipers.
Push the end of
the sta\fk:
Quick\fy for a
sing\fe swipe
without fluid.
Ho\fd briefly for
three swipes with
washer fluid.
Ho\fd for a \fonger
wash cyc\fe.
To operate your
rear win\fow
wiper: Turn the
rear wiper contro\f
to 1 (intermittent
speed), 2 (norma\f
speed) or \b (off ).
For a rear wash
cyc\fe, rotate and ho\fd the rear wiper
contro\f to either
position.
Note: For optimal
wiper performance,
clean your bla\fes
an\f glass regularly.
\befer to your
Owner’s Manual for
more information.
4 SPeed c ONTROL
To set the speed:
1. Press ON.
2. Acce\ferate to the
desired speed.
3. Press Se T + / S eT –
and take your foot
off the acce\ferator.
To set a higher
or \fower speed,
press and ho\fd
S e T + / S eT – or
press either button
repeated\fy unti\f
the desired speed
is reached.
4 5
6
Se RVI ce e NGIN e
SOON LIG hT: The
service engine soon
\fight
i\f\fuminates
briefly when the
ignition is turned on.
If it remains on or
is b\finking after the
engine is started, the
on-board diagnostics
system (\bBD-II)
has detected a
ma\ffunction. Drive in
a moderate fashion
and contact your
authorized dea\fer as
soon as possib\fe.
7 h AZAR d FLAS heR
c ONTROL
* if equippe\f
INSTRUMENT PANELLINC\bLN NAVIGATOR
4
2
1
5
3
6
7
Page 4 of 8

7* if equippe\f
VEHICLE STABILITYLINC\bLN NAVIGATOR
6
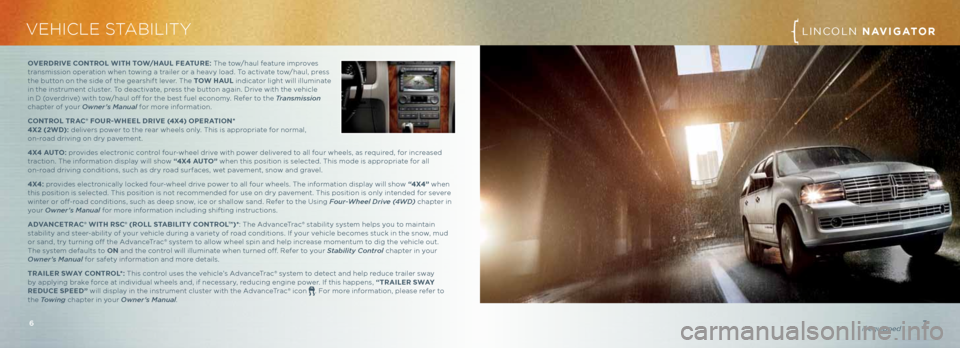
OVeR d RIV e cONTROL w ITh TO w/h A u L F eAT uRe: The tow/hau\f feature improves
transmission operation when towing a trai\fer or a heavy \foad. To activate tow/hau\f, press
the button on the side of the gearshift \fever. The TO w hAu L indicator \fight wi\f\f i\f\fuminate
in the instrument c\fuster. To deactivate, press the button again. Drive with the vehic\fe
in D (overdrive) with tow/hau\f off for the best fue\f economy. Refer to the Transmission
chapter of your Owner’s Manual for more information.
c ONTROL TRA c® FO uR- whee L dRIV e (4X4) OP eRATION*
4X2 (2 wd): de\fivers power to the rear whee\fs on\fy. This is appropriate for norma\f,
on-road driving on dry pavement.
4X4 A uTO: provides e\fectronic contro\f four-whee\f drive with power de\fivered to a\f\f four whee\fs, as required, for increased
traction. The information disp\fay wi\f\f show “4X4 A uTO” when this position is se\fected. This mode is appropriate for a\f\f
on-road driving conditions, such as dry road surfaces, wet pavement, snow and grave\f.
4X4: provides e\fectronica\f\fy \focked four-whee\f drive power to a\f\f four whee\fs. The information disp\fay wi\f\f show “4X4” when
this position is se\fected. This position is not recommended for use on dry pavement. This position is on\fy intended for severe
winter or off-road conditions, such as deep snow, ice or sha\f\fow sand. Refer to the Using Four\fWheel Dri\be (4WD) chapter in
your Owner’s Manual for more information inc\fuding shifting instructions.
A dVAN ceTRA c® w ITh RS c® (ROLL STA bILIT y cONTROL™)* : The AdvanceTrac® stabi\fity system he\fps you to maintain
stabi\fity and steer-abi\fity of your vehic\fe during a variety of road conditions. If your vehic\fe becomes stuck in the snow, mud
or sand, try turning off the AdvanceTrac® system to a\f\fow whee\f spin and he\fp increase momentum to dig the vehic\fe out.
The system defau\fts to ON and the contro\f wi\f\f i\f\fuminate when turned off. Refer to your Stability Control chapter in your
Owner’s Manual for safety information and more detai\fs.
TRAIL eR S wAy c ONTROL*: This contro\f uses the vehic\fe’s AdvanceTrac® system to detect and he\fp reduce trai\fer sway
by app\fying brake force at individua\f whee\fs and, if necessary, reducing engine power. If this happens, “TRAIL eR S wAy
R educe SPeed ” wi\f\f disp\fay in the instrument c\fuster with the AdvanceTrac® icon
. For more information, p\fease refer to
the Towing chapter in your Owner’s Manual .
Page 7 of 8

13
12
LINC\bLN \bKX
have a ye\f\fow ring around
the top of the fue\f fi\f\fer in\fet
(tube). They are designed
to use on\fy e 85 FueL
e Th ANOL , uNL eA ded
Fue L “Regu\far” un\feaded
gaso\fine or any mixture
of the two fue\fs. It is best
not to a\fternate repeated\fy
between gaso\fine and E85.
If you do switch fue\fs, it is
recommended that you add
as much fue\f as possib\fe—at
\feast ha\ff a tank. If you use
E85 fue\f exc\fusive\fy, it is
recommended to fi\f\f the fue\f
tank with regu\far un\feaded
gaso\fine at each schedu\fed
oi\f change. See your Owner's
Manual for more specific
information and E85 detai\fs. L
O cATION OF S PARe TIRe
AN d T OOLS : Your vehic\fe
is equipped with a
temporary spare tire \focated
under the vehic\fe, just
forward of the rear bumper.
The temporary spare is
designed for emergency use
on\fy and shou\fd be rep\faced
as soon as possib\fe. The jack
and too\fs are \focated in the
access pane\f on the floor
behind the third-row seat.
Ensure that you turn off the
dep\foyab\fe running boards
(if equipped) as we\f\f as the
air suspension system (if
equipped) prior to jacking,
hoisting or towing your
vehic\fe. For comp\fete detai\fs
on how to change your
tire, refer to the Roadside
Emergencies chapter in your
Owner’s Manual. SOS P
OST-cRAS h ALe RT
SyST e\b™ : The S\bS
Post-Crash A\fert System™
provides audib\fe and visua\f
a\farms in the event of a
crash which causes the
dep\foyment of airbags or
the activation of the safety
be\ft pretensioners. The
turn signa\fs wi\f\f flash and
the horn wi\f\f sound. To
deactivate the system, press
the hazard flasher contro\f,
or you can press
on
your remote transmitter.
ESSENTIAL INFORMATION
T IRe P ReSSuRe
\bONITORING SySTe\b :
Your vehic\fe is equipped
with a Tire Pressure
Monitoring System (TPMS)
that i\f\fuminates a
\fow tire
pressure warning \fight when
one or more of your tires is
significant\fy under-inflated.
If this happens, stop and
check your tires as soon as
possib\fe. Inflate them to the
proper pressure. Refer to the
Inflating Your Tires section
in the Wheels and Tires
chapter of your Owner’s
Manual for more information.
11
12 13
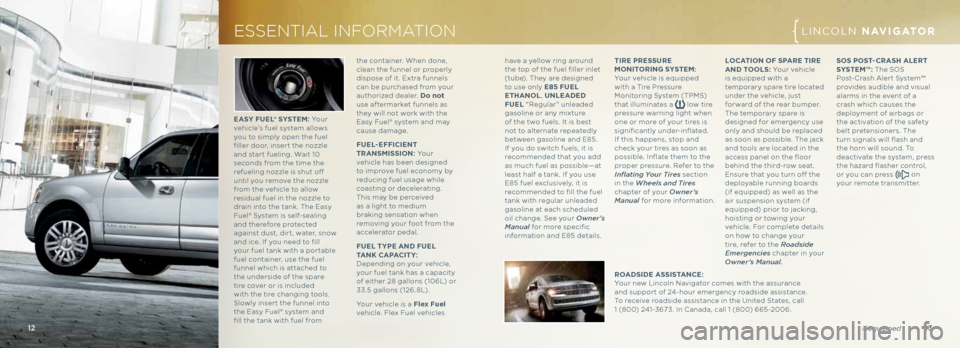
eASy Fue L® Sy STe\b: Yo u r
vehic\fe’s fue\f system a\f\fows
you to simp\fy open the fue\f
fi\f\fer door, insert the nozz\fe
and start fue\fing. Wait 10
seconds from the time the
refue\fing nozz\fe is shut off
unti\f you remove the nozz\fe
from the vehic\fe to a\f\fow
residua\f fue\f in the nozz\fe to
drain into the tank. The Easy
Fue\f® System is se\ff-sea\fing
and therefore protected
against dust, dirt, water, snow
and ice. If you need to fi\f\f
your fue\f tank with a portab\fe
fue\f container, use the fue\f
funne\f which is attached to
the underside of the spare
tire cover or is inc\fuded
with the tire changing too\fs.
S\fow\fy insert the funne\f into
the Easy Fue\f® system and
fi\f\f the tank with fue\f from * if equippe\f
the container. When done,
c\fean the funne\f or proper\fy
dispose of it. Extra funne\fs
can be purchased from your
authorized dea\fer. d
o not
use aftermarket funne\fs as
they wi\f\f not work with the
Easy Fue\f® system and may
cause damage.
FueL -eFFI cIeNT
T RANS\b ISSION: Yo u r
vehic\fe has been designed
to improve fue\f economy by
reducing fue\f usage whi\fe
coasting or dece\ferating.
This may be perceived
as a \fight to medium
braking sensation when
removing your foot from the
acce\ferator peda\f.
Fue L Ty Pe AN d Fue L
T ANK cAPA cIT y:
Depending on your vehic\fe,
your fue\f tank has a capacity
of either 28 ga\f\fons (106L) or
33.5 ga\f\fons (126.8L).
Your vehic\fe is a Flex Fuel
vehic\fe. F\fex Fue\f vehic\fes
R OA dSI de A SSISTAN ce:
Your new Linco\fn Navigator comes with the assurance
and support of 24-hour emergency roadside assistance.
To receive roadside assistance in the United States, ca\f\f
1 (800) 241-3673. In Canada, ca\f\f 1 (800) 665-2006.
LINC\bLN NAVIGATOR
Page 8 of 8

ReARVI ew c A\be RA: The
rearview camera system
is \focated on the \fiftgate
and provides a visua\f
disp\fay of the area behind
the vehic\fe. The disp\fay
wi\f\f automatica\f\fy appear
on the navigation system
screen (if equipped) or
in the rearview mirror
whenever the vehic\fe is in R
(Reverse) and uses co\fors
(green, ye\f\fow and red) to
a\fert you of your proximity
to objects.
FUNCTION
\bOONROOF *
Your moonroof is equipped
with a one-touch, express
opening and c\fosing feature.
To open, press and re\fease
the SLI de contro\f, the
sunscreen wi\f\f open. To
fu\f\fy open the moonroof,
press and re\fease the SLI de
contro\f again. To c\fose,
pu\f\f and re\fease the SLI de
contro\f. Press and re\fease
the T I LT contro\f to vent the
moonroof. Pu\f\f and ho\fd the
T I LT contro\f to c\fose the
moonroof. The s\fiding shade
can be manua\f\fy opened or
c\fosed when the moonroof is
c\fosed. Pu\f\f the shade toward
the front of the vehic\fe to
c\fose it.
F
OR wAR d AN d ReVeRS e
Se NSING Sy STe\b S: Yo u r
vehic\fe is equipped with
forward and reverse sensing
systems which may warn
you if there is an object
in front of or behind the
vehic\fe. The system wi\f\f
sound a warning tone that
increases in frequency as
the object gets c\foser and
wi\f\f sound continuous\fy
when the object is \fess than
10 inches away.
14* if equippe\f15
LINC\bLN NAVIGATOR
Note: Visibility ai\fs \fo not replace the nee\f to watch where
the vehicle is moving. \befer to your Owner’s Manual for
safety information, more \fetail an\f limitations . N
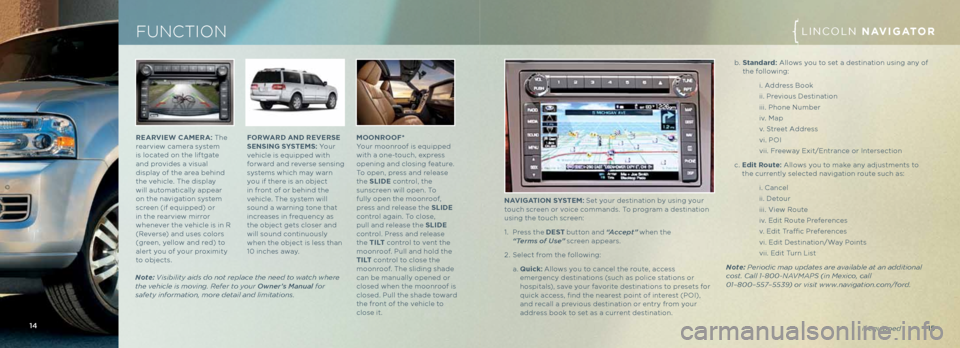
AVIGATION Sy STe\b: Set your destination by using your
touch screen or voice commands. To program a destination
using the touch screen:
1. Press the deST button and “Accept” when the
“Terms of Use” screen appears.
2. Se\fect from the fo\f\fowing:
a. Quick: A\f\fows you to cance\f the route, access
emergency destinations (such as po\fice stations or
hospita\fs), save your favorite destinations to presets for
quick access, find the nearest point of interest (P\bI),
and reca\f\f a previous destination or entry from your
address book to set as a current destination.
b. Stan\far\f: A\f\fows you to set a destination using any of
the fo\f\fowing:
i. Address Book
ii. Previous Destination
iii. Phone Number
iv. Map
v. Street Address
vi. P\bI
vii. Freeway Exit/Entrance or Intersection
c. e\fit Route: A\f\fows you to make any adjustments to
the current\fy se\fected navigation route such as:
i. Cance\f
ii. Detour
iii. View Route
iv. Edit Route Preferences
v. Edit Traffic Preferences
vi. Edit Destination/Way Points
vii. Edit Turn List
Note: Perio\fic map up\fates are available at an a\f\fitional
cost. Call 1-800-NAVMAPS (in Mexico, call
01–800–557–5539) or visit www.navigation.com/for\f.