transmission LINCOLN NAVIGATOR 2016 User Guide
[x] Cancel search | Manufacturer: LINCOLN, Model Year: 2016, Model line: NAVIGATOR, Model: LINCOLN NAVIGATOR 2016Pages: 419, PDF Size: 3.59 MB
Page 109 of 419
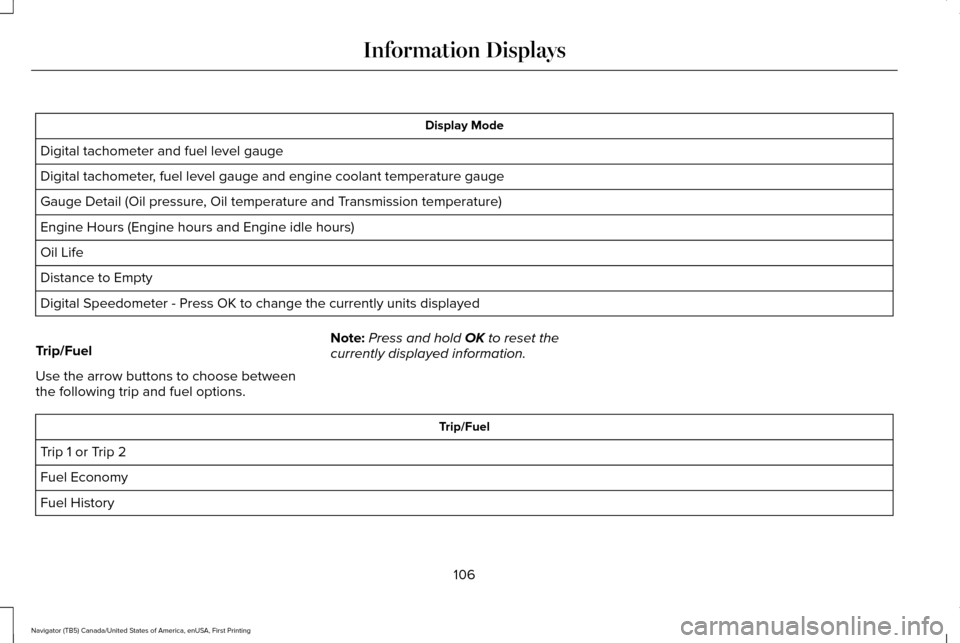
Display Mode
Digital tachometer and fuel level gauge
Digital tachometer, fuel level gauge and engine coolant temperature gauge
Gauge Detail (Oil pressure, Oil temperature and Transmission temperature)
Engine Hours (Engine hours and Engine idle hours)
Oil Life
Distance to Empty
Digital Speedometer - Press OK to change the currently units displayed
Trip/Fuel
Use the arrow buttons to choose between
the following trip and fuel options. Note:
Press and hold OK to reset the
currently displayed information. Trip/Fuel
Trip 1 or Trip 2
Fuel Economy
Fuel History
106
Navigator (TB5) Canada/United States of America, enUSA, First Printing Information Displays
Page 124 of 419
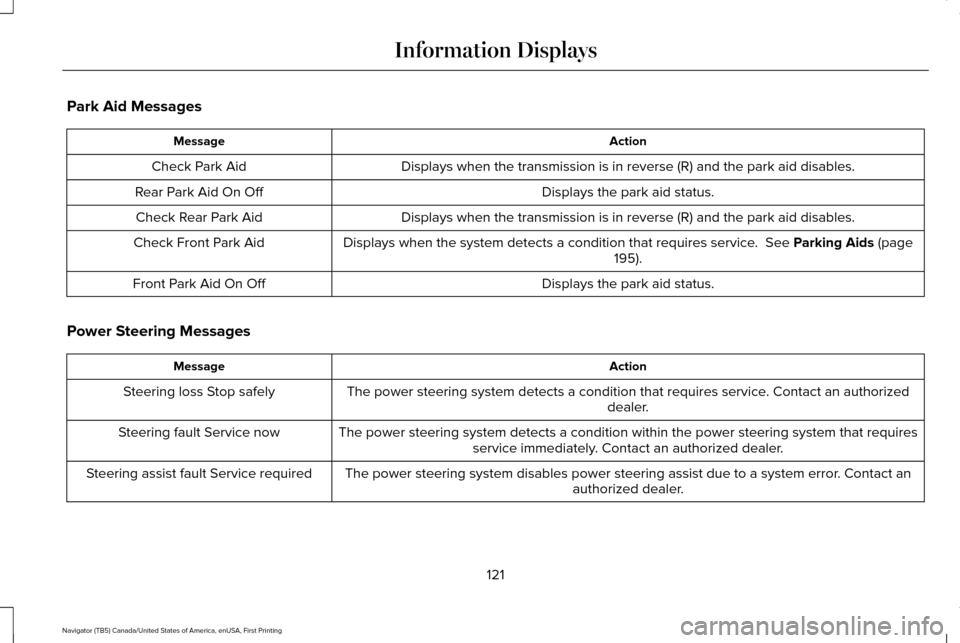
Park Aid Messages
Action
Message
Displays when the transmission is in reverse (R) and the park aid disa\
bles.
Check Park Aid
Displays the park aid status.
Rear Park Aid On Off
Displays when the transmission is in reverse (R) and the park aid disa\
bles.
Check Rear Park Aid
Displays when the system detects a condition that requires service. See Parking Aids (page
195).
Check Front Park Aid
Displays the park aid status.
Front Park Aid On Off
Power Steering Messages Action
Message
The power steering system detects a condition that requires service. Contact an authorized dealer.
Steering loss Stop safely
The power steering system detects a condition within the power steering \
system that requiresservice immediately. Contact an authorized dealer.
Steering fault Service now
The power steering system disables power steering assist due to a system\
error. Contact an authorized dealer.
Steering assist fault Service required
121
Navigator (TB5) Canada/United States of America, enUSA, First Printing Information Displays
Page 127 of 419
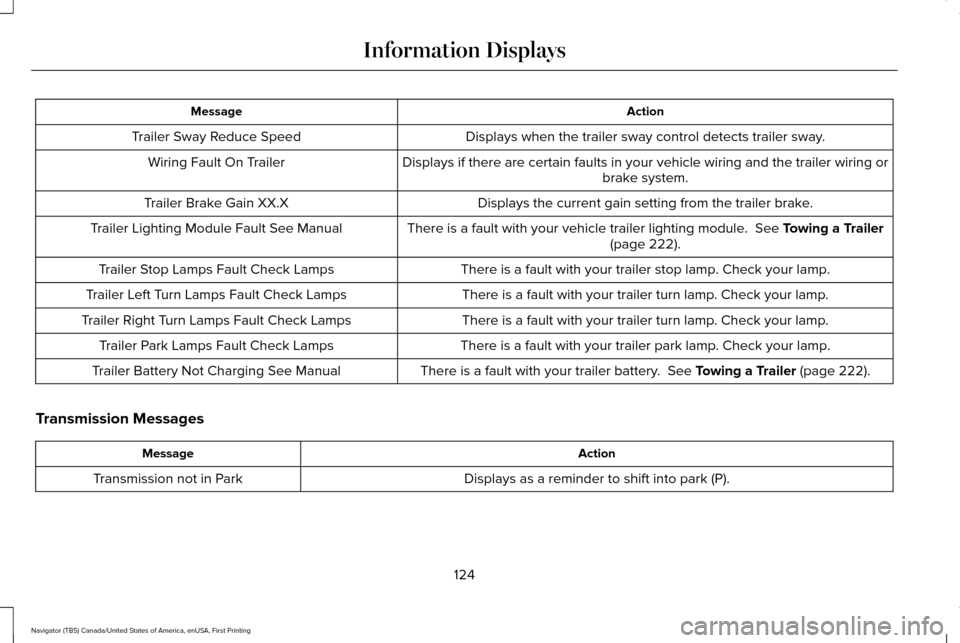
Action
Message
Displays when the trailer sway control detects trailer sway.
Trailer Sway Reduce Speed
Displays if there are certain faults in your vehicle wiring and the trai\
ler wiring orbrake system.
Wiring Fault On Trailer
Displays the current gain setting from the trailer brake.
Trailer Brake Gain XX.X
There is a fault with your vehicle trailer lighting module. See Towing a Trailer
(page 222).
Trailer Lighting Module Fault See Manual
There is a fault with your trailer stop lamp. Check your lamp.
Trailer Stop Lamps Fault Check Lamps
There is a fault with your trailer turn lamp. Check your lamp.
Trailer Left Turn Lamps Fault Check Lamps
There is a fault with your trailer turn lamp. Check your lamp.
Trailer Right Turn Lamps Fault Check Lamps
There is a fault with your trailer park lamp. Check your lamp.
Trailer Park Lamps Fault Check Lamps
There is a fault with your trailer battery.
See Towing a Trailer (page 222).
Trailer Battery Not Charging See Manual
Transmission Messages Action
Message
Displays as a reminder to shift into park (P).
Transmission not in Park
124
Navigator (TB5) Canada/United States of America, enUSA, First Printing Information Displays
Page 139 of 419
WARNINGS
Do not use the memory function when
your vehicle is moving.
This feature automatically recalls the position
of the following:
•
Driver seat.
• Power mirrors.
• Power steering column.
• Power adjustable foot pedals.
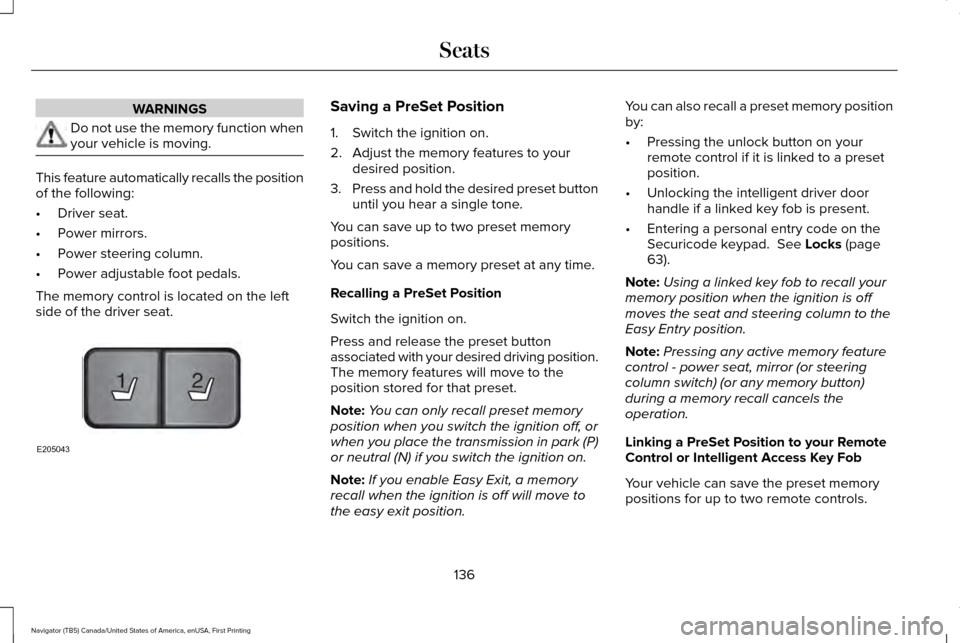
The memory control is located on the left
side of the driver seat. Saving a PreSet Position
1. Switch the ignition on.
2. Adjust the memory features to your
desired position.
3. Press and hold the desired preset button
until you hear a single tone.
You can save up to two preset memory
positions.
You can save a memory preset at any time.
Recalling a PreSet Position
Switch the ignition on.
Press and release the preset button
associated with your desired driving position.
The memory features will move to the
position stored for that preset.
Note: You can only recall preset memory
position when you switch the ignition off, or
when you place the transmission in park (P)
or neutral (N) if you switch the ignition on.
Note: If you enable Easy Exit, a memory
recall when the ignition is off will move to
the easy exit position. You can also recall a preset memory position
by:
•
Pressing the unlock button on your
remote control if it is linked to a preset
position.
• Unlocking the intelligent driver door
handle if a linked key fob is present.
• Entering a personal entry code on the
Securicode keypad. See Locks (page
63).
Note: Using a linked key fob to recall your
memory position when the ignition is off
moves the seat and steering column to the
Easy Entry position.
Note: Pressing any active memory feature
control - power seat, mirror (or steering
column switch) (or any memory button)
during a memory recall cancels the
operation.
Linking a PreSet Position to your Remote
Control or Intelligent Access Key Fob
Your vehicle can save the preset memory
positions for up to two remote controls.
136
Navigator (TB5) Canada/United States of America, enUSA, First Printing Seats21
E205043
Page 140 of 419
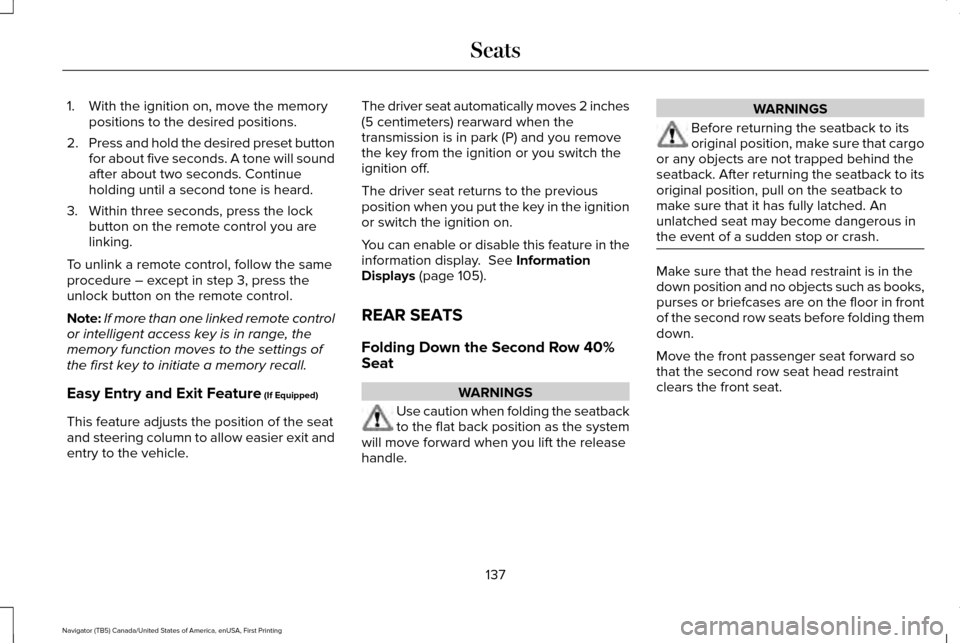
1. With the ignition on, move the memory
positions to the desired positions.
2. Press and hold the desired preset button
for about five seconds. A tone will sound
after about two seconds. Continue
holding until a second tone is heard.
3. Within three seconds, press the lock button on the remote control you are
linking.
To unlink a remote control, follow the same
procedure – except in step 3, press the
unlock button on the remote control.
Note: If more than one linked remote control
or intelligent access key is in range, the
memory function moves to the settings of
the first key to initiate a memory recall.
Easy Entry and Exit Feature (If Equipped)
This feature adjusts the position of the seat
and steering column to allow easier exit and
entry to the vehicle. The driver seat automatically moves 2 inches
(5 centimeters) rearward when the
transmission is in park (P) and you remove
the key from the ignition or you switch the
ignition off.
The driver seat returns to the previous
position when you put the key in the ignition
or switch the ignition on.
You can enable or disable this feature in the
information display.
See Information
Displays (page 105).
REAR SEATS
Folding Down the Second Row 40%
Seat WARNINGS
Use caution when folding the seatback
to the flat back position as the system
will move forward when you lift the release
handle. WARNINGS
Before returning the seatback to its
original position, make sure that cargo
or any objects are not trapped behind the
seatback. After returning the seatback to its
original position, pull on the seatback to
make sure that it has fully latched. An
unlatched seat may become dangerous in
the event of a sudden stop or crash. Make sure that the head restraint is in the
down position and no objects such as books,
purses or briefcases are on the floor in front
of the second row seats before folding them
down.
Move the front passenger seat forward so
that the second row seat head restraint
clears the front seat.
137
Navigator (TB5) Canada/United States of America, enUSA, First Printing Seats
Page 145 of 419
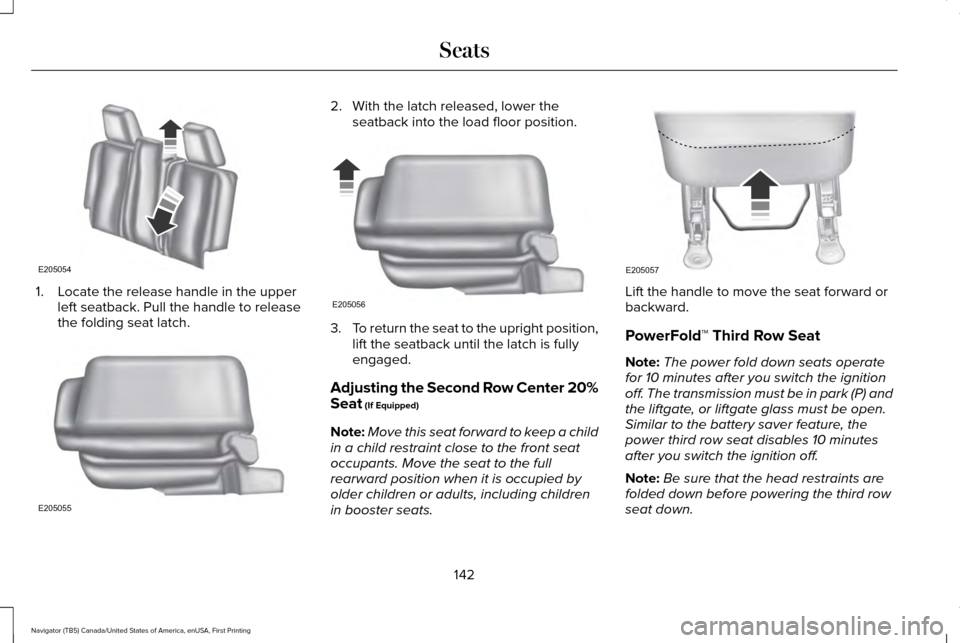
1. Locate the release handle in the upper
left seatback. Pull the handle to release
the folding seat latch. 2. With the latch released, lower the
seatback into the load floor position. 3.
To return the seat to the upright position,
lift the seatback until the latch is fully
engaged.
Adjusting the Second Row Center 20%
Seat (If Equipped)
Note: Move this seat forward to keep a child
in a child restraint close to the front seat
occupants. Move the seat to the full
rearward position when it is occupied by
older children or adults, including children
in booster seats. Lift the handle to move the seat forward or
backward.
PowerFold™ Third Row Seat
Note:
The power fold down seats operate
for 10 minutes after you switch the ignition
off. The transmission must be in park (P) and
the liftgate, or liftgate glass must be open.
Similar to the battery saver feature, the
power third row seat disables 10 minutes
after you switch the ignition off.
Note: Be sure that the head restraints are
folded down before powering the third row
seat down.
142
Navigator (TB5) Canada/United States of America, enUSA, First Printing SeatsE205054 E205055 E205056 E205057
Page 151 of 419
HomeLink Wireless Control System
WARNINGS
Make sure that the garage door and
security device are free from
obstruction when you are programming. Do
not program the system with the vehicle in
the garage. Do not use the system with any garage
door opener that does not have the
safety stop and reverse feature as required
by U.S. Federal Safety Standards (this
includes any garage door opener
manufactured before April 1, 1982). A garage
door opener which cannot detect an object,
signaling the door to stop and reverse, does
not meet current federal safety standards.
Using a garage door opener without these
features increases the risk of serious injury
or death. Note:
Make sure you keep the original
remote control transmitter for use in other
vehicles as well as for future system
programming. Note:
We recommend that upon the sale or
lease termination of your vehicle, you erase
the programmed function buttons for security
reasons. See Erasing the Function Button
Codes.
Note: You can program a maximum of three
devices. To change or replace any of the
three devices after it has been initially
programmed, you must first erase the current
settings. See
Erasing the Function Button
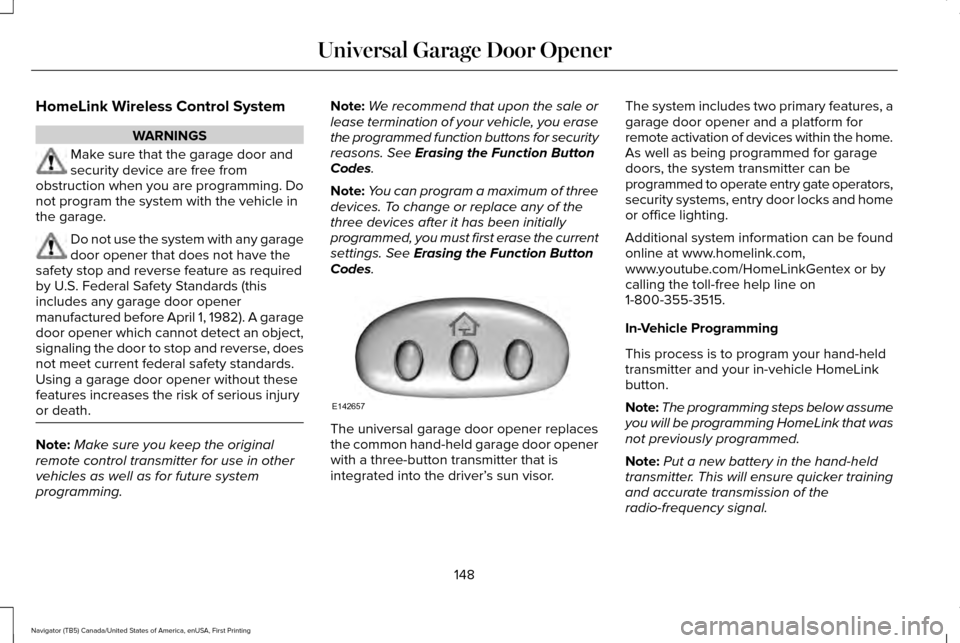
Codes. The universal garage door opener replaces
the common hand-held garage door opener
with a three-button transmitter that is
integrated into the driver’
s sun visor.The system includes two primary features, a
garage door opener and a platform for
remote activation of devices within the home.
As well as being programmed for garage
doors, the system transmitter can be
programmed to operate entry gate operators,
security systems, entry door locks and home
or office lighting.
Additional system information can be found
online at www.homelink.com,
www.youtube.com/HomeLinkGentex or by
calling the toll-free help line on
1-800-355-3515.
In-Vehicle Programming
This process is to program your hand-held
transmitter and your in-vehicle HomeLink
button.
Note:
The programming steps below assume
you will be programming HomeLink that was
not previously programmed.
Note: Put a new battery in the hand-held
transmitter. This will ensure quicker training
and accurate transmission of the
radio-frequency signal.
148
Navigator (TB5) Canada/United States of America, enUSA, First Printing Universal Garage Door OpenerE142657
Page 153 of 419
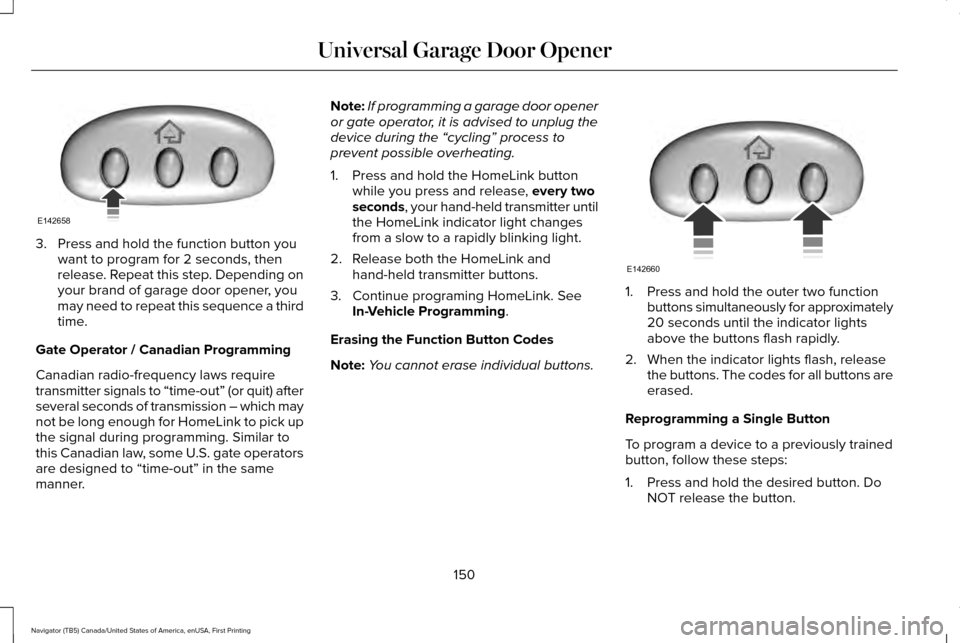
3. Press and hold the function button you
want to program for 2 seconds, then
release. Repeat this step. Depending on
your brand of garage door opener, you
may need to repeat this sequence a third
time.
Gate Operator / Canadian Programming
Canadian radio-frequency laws require
transmitter signals to “time-out” (or quit) after
several seconds of transmission – which may
not be long enough for HomeLink to pick up
the signal during programming. Similar to
this Canadian law, some U.S. gate operators
are designed to “time-out” in the same
manner. Note:
If programming a garage door opener
or gate operator, it is advised to unplug the
device during the “cycling” process to
prevent possible overheating.
1. Press and hold the HomeLink button while you press and release, every two
seconds, your hand-held transmitter until
the HomeLink indicator light changes
from a slow to a rapidly blinking light.
2. Release both the HomeLink and hand-held transmitter buttons.
3. Continue programing HomeLink. See In-Vehicle Programming
.
Erasing the Function Button Codes
Note: You cannot erase individual buttons. 1. Press and hold the outer two function
buttons simultaneously for approximately
20 seconds until the indicator lights
above the buttons flash rapidly.
2. When the indicator lights flash, release the buttons. The codes for all buttons are
erased.
Reprogramming a Single Button
To program a device to a previously trained
button, follow these steps:
1. Press and hold the desired button. Do NOT release the button.
150
Navigator (TB5) Canada/United States of America, enUSA, First Printing Universal Garage Door OpenerE142658 E142660
Page 160 of 419
Note:
You may have to press the push
button ignition switch twice to switch the
ignition on.
Start: Starts the engine.
• Press the brake pedal, and then press
the button for any length of time. An
indicator light on the button illuminates
when then ignition is on and when the
engine starts.
STARTING A GASOLINE ENGINE
When you start the engine, the idle speed
increases. This helps to warm up the engine.
If the engine idle speed does not slow down
automatically, have your vehicle checked by
an authorized dealer. Note:
You can crank the engine for a total
of 60 seconds without the engine starting
before the starting system temporarily
disables. The 60 seconds does not have to
be all at once. For example, if you crank the
engine three times for 20 seconds each time,
without the engine starting, you reached the
60-second time limit. A message appears
in the information display alerting you that
you exceeded the cranking time. You
cannot attempt to start the engine for at
least 15 minutes. After 15 minutes, you are
limited to a 15-second engine cranking time.
You need to wait 60 minutes before you can
crank the engine for 60 seconds again.
Before starting your vehicle, check the
following:
• Make sure all occupants have fastened
their safety belts.
• Make sure the headlamps and electrical
accessories are off.
• Make sure the parking brake is on.
• Make sure the transmission is in park (P).
Note: Do not touch the accelerator pedal. Note:
You must have your intelligent access
key in your vehicle to shift the transmission
out of park (P).
1. Fully depress the brake pedal.
2. Press the push button ignition switch.
The system does not function if:
• The passive key frequencies are jammed.
• The key battery has no charge.
If you are unable to start your vehicle, do the
following:
157
Navigator (TB5) Canada/United States of America, enUSA, First Printing Starting and Stopping the Engine
Page 170 of 419
1. Stop your vehicle as soon as safely
possible and shift the transmission into
park (P).
2. Switch the ignition off.
3. Open the fuel filler door and remove any
visible debris from the fuel fill opening.
4. Insert either the fuel fill nozzle or the fuel
fill funnel provided with the vehicle
several times to allow the inlet to close
properly. This will dislodge any debris
preventing the inlet from sealing.
If this action corrects the problem, the
message may not reset immediately. It may
take several driving cycles for the message
to turn off. A driving cycle consists of an
engine start-up (after 4 or more hours with
the engine off ) followed by city or highway
driving. Continuing to drive with the message
on may cause the service engine soon lamp
to turn on as well. FUEL CONSUMPTION
Empty reserve is the amount of fuel
remaining in the tank after the fuel gauge
indicates empty. The amount of usable fuel
in the empty reserve varies and should not
be relied upon to increase driving range.
•
The usable capacity of the fuel tank is
the amount of fuel that can be added into
the tank after the gauge indicates empty
• The advertised capacity is the total fuel
tank size. See Capacities and
Specifications (page 328). It is the
combined usable capacity plus the empty
reserve.
• Due to the empty reserve, you may not
be able to refuel the full amount of the
advertised capacity of the fuel tank even
when the fuel gauge reads empty. Filling the Tank
For consistent results when refueling:
•
Turn the ignition off before fueling; an
inaccurate reading results if the engine
is left running.
• Use the same fill rate (low-medium-high)
each time the tank is filled.
• Allow no more than two automatic
click-offs when filling.
Results are most accurate when the filling
method is consistent.
Calculating Fuel Economy
Do not measure fuel economy during the
first 1,000 mi (1,600 km) of driving (this is your
engine ’s break-in period). A more accurate
measurement is obtained after
2,000 mi
(3,200 km) to 3,000 mi (4,800 km). Also, fuel
expense, frequency of fill ups or fuel gauge
readings are not accurate ways to measure
fuel economy.
1. Fill the fuel tank completely and record the initial odometer reading.
167
Navigator (TB5) Canada/United States of America, enUSA, First Printing Fuel and Refueling