check engine light LINCOLN NAVIGATOR 2017 Owners Manual
[x] Cancel search | Manufacturer: LINCOLN, Model Year: 2017, Model line: NAVIGATOR, Model: LINCOLN NAVIGATOR 2017Pages: 532, PDF Size: 3.9 MB
Page 102 of 532
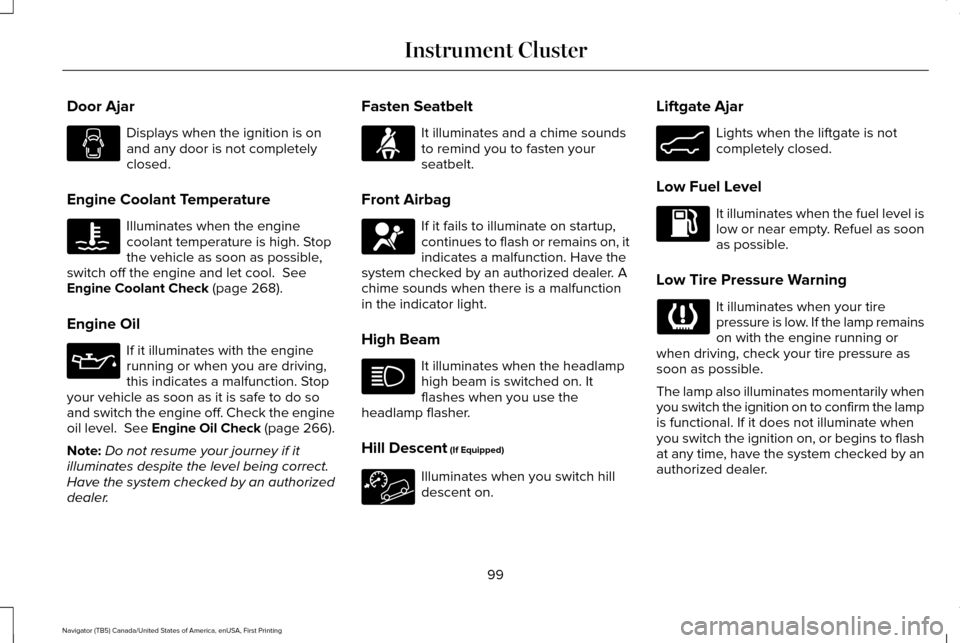
Door Ajar
Displays when the ignition is on
and any door is not completely
closed.
Engine Coolant Temperature Illuminates when the engine
coolant temperature is high. Stop
the vehicle as soon as possible,
switch off the engine and let cool. See
Engine Coolant Check (page 268).
Engine Oil If it illuminates with the engine
running or when you are driving,
this indicates a malfunction. Stop
your vehicle as soon as it is safe to do so
and switch the engine off. Check the engine
oil level. See Engine Oil Check (page 266).
Note: Do not resume your journey if it
illuminates despite the level being correct.
Have the system checked by an authorized
dealer. Fasten Seatbelt It illuminates and a chime sounds
to remind you to fasten your
seatbelt.
Front Airbag If it fails to illuminate on startup,
continues to flash or remains on, it
indicates a malfunction. Have the
system checked by an authorized dealer. A
chime sounds when there is a malfunction
in the indicator light.
High Beam It illuminates when the headlamp
high beam is switched on. It
flashes when you use the
headlamp flasher.
Hill Descent
(If Equipped) Illuminates when you switch hill
descent on.Liftgate Ajar Lights when the liftgate is not
completely closed.
Low Fuel Level It illuminates when the fuel level is
low or near empty. Refuel as soon
as possible.
Low Tire Pressure Warning It illuminates when your tire
pressure is low. If the lamp remains
on with the engine running or
when driving, check your tire pressure as
soon as possible.
The lamp also illuminates momentarily when
you switch the ignition on to confirm the lamp
is functional. If it does not illuminate when
you switch the ignition on, or begins to flash
at any time, have the system checked by an
authorized dealer.
99
Navigator (TB5) Canada/United States of America, enUSA, First Printing Instrument Cluster E162453
Page 103 of 532
Low Washer Fluid
It illuminates when the windshield
washer fluid is low.
Parking Lamps It illuminates when you switch the
parking lamps on.
Powertrain Fault Illuminates when a powertrain fault
has been detected. Contact an
authorized dealer as soon as
possible. Service Engine Soon If the service engine soon indicator
light stays illuminated after you
start the engine, it indicates that
the On Board Diagnostics system (OBD) has
detected a malfunction of the vehicle
emissions control system. Refer to On Board
Diagnostics (OBD) in the Fuel and Refueling
chapter for more information about having
your vehicle serviced. See Emission Control
System (page 166).
If the light is blinking, engine misfire is
occurring which could damage your catalytic
converter. Drive in a moderate fashion (avoid
heavy acceleration and deceleration) and
have your vehicle serviced immediately. WARNING
Under engine misfire conditions,
excessive exhaust temperatures could
damage the catalytic converter, the fuel
system, interior floor coverings or other
vehicle components, possibly causing a fire.
Have your vehicle checked as soon as
possible. The service engine soon indicator light
illuminates when you first switch on the
ignition before engine start to check the bulb
and to indicate whether the vehicle is ready
for Inspection/Maintenance (I/M) testing.
Normally, the service engine soon light stays
on until you crank the engine, then turns
itself off if no malfunctions are present.
However, if after 15 seconds the service
engine soon light blinks eight times, it means
that the vehicle is not ready for I/M testing.
See Emission Control System (page 166).
Stability Control System Displays when the
AdvanceTrac®/Traction control is
active. If the light remains on, have
the system serviced immediately. See Using
Stability Control
(page 188).
Stability Control System Off Illuminates when you disable
AdvanceTrac
™/Traction control.
See
Using Stability Control (page
188).
100
Navigator (TB5) Canada/United States of America, enUSA, First Printing Instrument ClusterE132353 E138639 E130458
Page 156 of 532
GENERAL INFORMATION
WARNINGS
Extended idling at high engine speeds
can produce very high temperatures
in the engine and exhaust system, creating
the risk of fire or other damage. Do not park, idle or drive your vehicle
on dry grass or other dry ground cover.
The emission system heats up the engine
compartment and exhaust system, creating
the risk of fire. Do not start the engine in a closed
garage or in other enclosed areas.
Exhaust fumes can be toxic. Always open
the garage door before you start the engine. If you smell exhaust fumes inside your
vehicle, have your vehicle checked by
an authorized dealer immediately. Do not
drive your vehicle if you smell exhaust fumes. If you disconnect the battery, your vehicle
may exhibit some unusual driving
characteristics for approximately 5 miles (8
kilometers) after you reconnect it. This is
because the engine management system
must realign itself with the engine. You can
disregard any unusual driving characteristics
during this period.
The powertrain control system meets all
Canadian interference-causing equipment
standard requirements regulating the
impulse electrical field or radio noise.
When you start the engine, avoid pressing
the accelerator pedal before and during
operation. Only use the accelerator pedal
when you have difficulty starting the engine.
KEYLESS STARTING
Note:
The system may not function if the
passive key is close to metal objects or
electronic devices, for example keys or a
cell phone.
Note: A valid passive key must be located
inside your vehicle to switch the ignition on
and start your vehicle. Note:
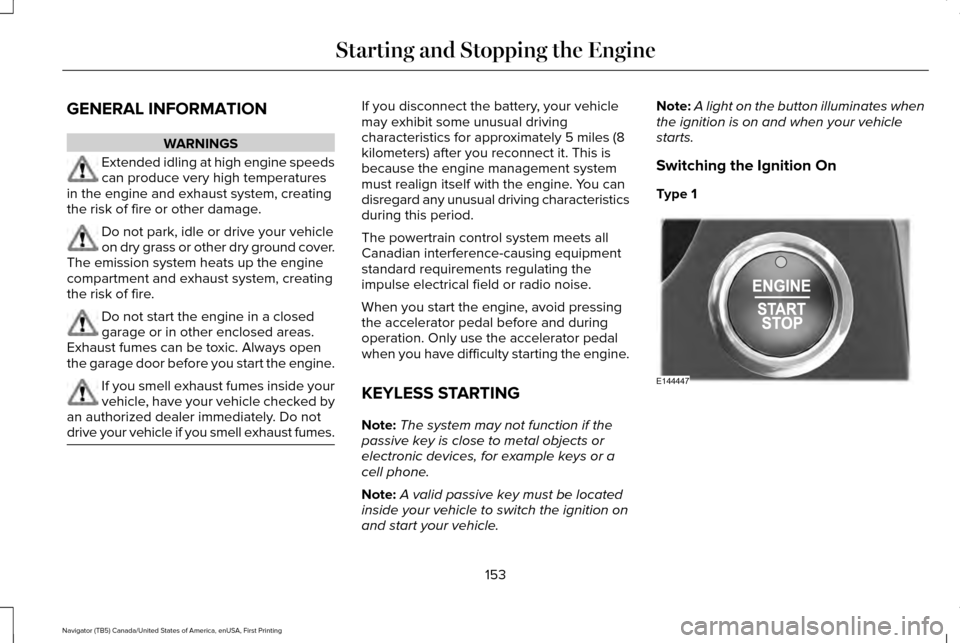
A light on the button illuminates when
the ignition is on and when your vehicle
starts.
Switching the Ignition On
Type 1 153
Navigator (TB5) Canada/United States of America, enUSA, First Printing Starting and Stopping the EngineE144447
Page 167 of 532
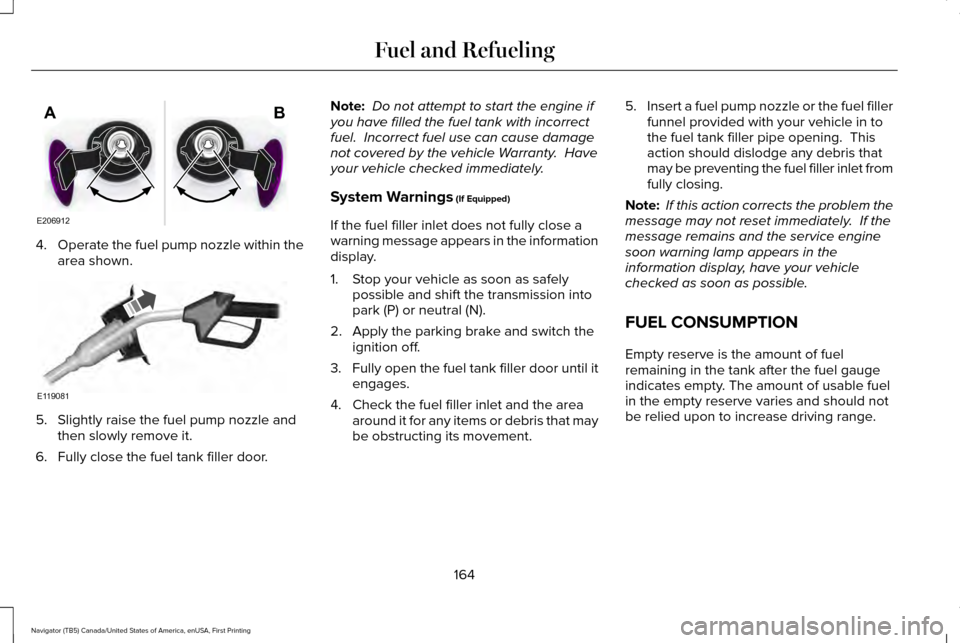
4.
Operate the fuel pump nozzle within the
area shown. 5. Slightly raise the fuel pump nozzle and
then slowly remove it.
6. Fully close the fuel tank filler door. Note:
Do not attempt to start the engine if
you have filled the fuel tank with incorrect
fuel. Incorrect fuel use can cause damage
not covered by the vehicle Warranty. Have
your vehicle checked immediately.
System Warnings (If Equipped)
If the fuel filler inlet does not fully close a
warning message appears in the information
display.
1. Stop your vehicle as soon as safely possible and shift the transmission into
park (P) or neutral (N).
2. Apply the parking brake and switch the ignition off.
3. Fully open the fuel tank filler door until it
engages.
4. Check the fuel filler inlet and the area around it for any items or debris that may
be obstructing its movement. 5.
Insert a fuel pump nozzle or the fuel filler
funnel provided with your vehicle in to
the fuel tank filler pipe opening. This
action should dislodge any debris that
may be preventing the fuel filler inlet from
fully closing.
Note: If this action corrects the problem the
message may not reset immediately. If the
message remains and the service engine
soon warning lamp appears in the
information display, have your vehicle
checked as soon as possible.
FUEL CONSUMPTION
Empty reserve is the amount of fuel
remaining in the tank after the fuel gauge
indicates empty. The amount of usable fuel
in the empty reserve varies and should not
be relied upon to increase driving range.
164
Navigator (TB5) Canada/United States of America, enUSA, First Printing Fuel and RefuelingE206912
AB E119081
Page 185 of 532
GENERAL INFORMATION
Note:
Occasional brake noise is normal. If a
metal-to-metal, continuous grinding or
continuous squeal sound is present, the
brake linings may be worn-out. Have the
system checked by an authorized dealer. If
your vehicle has continuous vibration or
shudder in the steering wheel while braking,
have it checked by an authorized dealer.
Note: Brake dust may accumulate on the
wheels, even under normal driving
conditions. Some dust is inevitable as the
brakes wear and does not contribute to
brake noise. See Cleaning the Alloy Wheels
(page 292). See
Warning Lamps and
Indicators (page 98).
Wet brakes result in reduced braking
efficiency. Gently press the brake pedal a
few times when driving from a car wash or
standing water to dry the brakes. Brake Over Accelerator
In the event the accelerator pedal becomes
stuck or entrapped, apply steady and firm
pressure to the brake pedal to slow the
vehicle and reduce engine power. If you
experience this condition, apply the brakes
and bring your vehicle to a safe stop. Move
the transmission to park (P), switch the
engine off and apply the parking brake.
Inspect the accelerator pedal for any
interference. If none are found and the
condition persists, have your vehicle towed
to the nearest authorized dealer.
Brake Assist
Brake assist detects when you brake rapidly
by measuring the rate at which you press the
brake pedal. It provides maximum braking
efficiency as long as you press the pedal,
and can reduce stopping distances in critical
situations.
Anti-lock Brake System
This system helps you maintain steering
control during emergency stops by keeping
the brakes from locking. This lamp momentarily illuminates
when you turn the ignition on. If
the light does not illuminate during
start up, remains on or flashes, the system
may be disabled. Have the system checked
by an authorized dealer. If the anti-lock brake
system is disabled, normal braking is still
effective. If the brake warning lamp remains
illuminated after you release the
parking brake, have the system
checked by an authorized dealer.
HINTS ON DRIVING WITH ANTI-
LOCK BRAKES
Note: When the system is operating, the
brake pedal may pulse and may travel
further. Maintain pressure on the brake
pedal. You may also hear a noise from the
system. This is normal.
182
Navigator (TB5) Canada/United States of America, enUSA, First Printing BrakesE144522 E144522
Page 220 of 532
RV & Trailer Towing Guide Online
http://www.fleet.ford.com/towing-guides/
Website
TRAILER SWAY CONTROL WARNING
Turning off trailer sway control
increases the risk of loss of vehicle
control, serious injury or death. Ford does
not recommend disabling this feature except
in situations where speed reduction may be
detrimental (such as hill climbing), the driver
has significant trailer towing experience, and
can control trailer sway and maintain safe
operation. Note:
This feature does not prevent trailer
sway, but reduces it once it begins.
Note: This feature cannot stop all trailers
from swaying. Note:
In some cases, if vehicle speed is too
high, the system may activate multiple times,
gradually reducing vehicle speed.
This feature applies your vehicle brakes at
individual wheels and, if necessary, reduces
engine power. If the trailer begins to sway,
the stability control light flashes and the
message TRAILER SWAY REDUCE SPEED
appears in the information display. The first
thing to do is slow your vehicle down, then
pull safely to the side of the road and check
for proper tongue load and trailer load
distribution.
See Load Carrying (page 209).
RECOMMENDED TOWING
WEIGHTS
Note: Do not exceed the trailer weight
for your vehicle configuration listed in
the chart below. Note:
Make sure to take into
consideration trailer frontal area. Do not
exceed 36.5 feet² (3.39 meters²) if your
vehicle is equipped with the standard
towing package, or 60 feet² (5.57
meters²) if your vehicle is equipped with
the optional heavy duty package.
Note: Exceeding this limitation may
significantly reduce the performance of
your towing vehicle. Selecting a trailer
with a low aerodynamic drag and
rounded front design helps optimize
performance and fuel economy.
Note: For high altitude operation,
reduce the gross combined weight by
2% per 1000 feet (300 meters) starting
at the 1000 foot (300 meter) elevation
point.
217
Navigator (TB5) Canada/United States of America, enUSA, First Printing Towing
Page 232 of 532
There are also some things you may want to
avoid doing because they reduce your fuel
economy:
•
Avoid sudden or hard accelerations.
• Avoid revving the engine before turning
off the car.
• Avoid long idle periods.
• Do not warm up your vehicle on cold
mornings.
• Reduce the use of air conditioning and
heat.
• Avoid using speed control in hilly terrain.
• Do not rest your foot on the brake pedal
while driving.
• Avoid carrying unnecessary weight.
• Avoid adding particular accessories to
your vehicle (e.g. bug deflectors,
rollbars/light bars, running boards, ski
racks).
• Avoid driving with the wheels out of
alignment. DRIVING THROUGH WATER WARNING
Do not drive through flowing or deep
water as you may lose control of your
vehicle. Note:
Driving through standing water can
cause vehicle damage.
Note: Engine damage can occur if water
enters the air filter.
Before driving through standing water, check
the depth. Never drive through water that is
higher than the bottom of the wheel hubs. When driving through standing water, drive
very slowly and do not stop your vehicle.
Your brake performance and traction may
be limited. After driving through water and
as soon as it is safe to do so:
•
Lightly press the brake pedal to dry the
brakes and to check that they work.
• Check that the horn works.
• Check that the exterior lights work.
• Turn the steering wheel to check that the
steering power assist works.
FLOOR MATS WARNINGS
Always use floor mats that are
designed to fit the foot well of your
vehicle. Only use floor mats that leave the
pedal area unobstructed. Only use floor mats
that are firmly secured to retention posts so
that they cannot slip out of position and
interfere with the pedals or impair safe
operation of your vehicle in other ways.
229
Navigator (TB5) Canada/United States of America, enUSA, First Printing Driving HintsE176913
Page 271 of 532
Action and description
Message
If the instrument cluster
displays one of the following
messages, repeat the
process.
Not Reset
Reset Cancelled
ENGINE COOLANT CHECK WARNINGS
Do not add engine coolant when the
engine is hot. Steam and scalding
liquids released from a hot cooling system
can burn you badly. Also, spilling coolant on
hot engine parts can burn you. Do not put engine coolant in the
windshield washer fluid container. If
sprayed on the windshield, engine coolant
could make it difficult to see through the
windshield. WARNINGS
To reduce the risk of personal injury,
make sure the engine is cool before
unscrewing the coolant pressure relief cap.
The cooling system is under pressure. Steam
and hot liquid can come out forcefully when
you loosen the cap slightly. Do not add coolant further than the
MAX mark.
When the engine is cold, check the
concentration and level of the coolant at the
intervals listed in the scheduled maintenance
information.
See Scheduled Maintenance
(page 456).
Note: Make sure that the coolant level is
between the
MIN and MAX marks on the
coolant reservoir.
Note: Coolant expands when it is hot. The
level may extend beyond the
MAX mark. Maintain coolant concentration within 48%
to 50%, which equates to a freeze point
between -30°F (-34°C) and -34°F (-37°C).
Coolant concentration should be checked
using a refractometer. We do not recommend
the use of hydrometers or coolant test strips
for measuring coolant concentration.
Adding Coolant WARNING
Never remove the coolant reservoir
cap while the engine is running or hot.
Note:
Automotive fluids are not
interchangeable. Take care not to put
engine coolant in the windshield washer fluid
reservoir or windshield washer fluid in the
engine coolant reservoir.
Note: Do not use stop leak pellets, cooling
system sealants, or non-specified additives
as they can cause damage to the engine
cooling or heating systems. Resulting
component damage may not be covered by
the vehicle Warranty.
268
Navigator (TB5) Canada/United States of America, enUSA, First Printing Maintenance
Page 272 of 532
It is very important to use prediluted coolant
approved to the correct specification in order
to avoid plugging the small passageways in
the engine cooling system. See Capacities
and Specifications (page 328). Do not mix
different colors or types of coolant in your
vehicle. Mixing of engine coolants or using
an incorrect coolant may harm the engine or
cooling system components and may not be
covered by the vehicle Warranty.
Note: If prediluted coolant is not available,
use the approved concentrated coolant
diluting it to 50/50 with distilled water.
See
Capacities and Specifications (page 328).
Using water that has not been deionised
may contribute to deposit formation,
corrosion and plugging of the small cooling
system passageways.
Note: Coolants marketed for all makes and
models may not be approved to Ford
specifications and may cause damage to
the cooling system. Resulting component
damage may not be covered by the vehicle
Warranty. If the coolant level is at or below the
minimum mark, add prediluted coolant
immediately.
To top up the coolant level do the following:
1. Unscrew the cap slowly. Any pressure
escapes as you unscrew the cap.
2. Add prediluted coolant approved to the correct specification. See Capacities and
Specifications
(page 328).
3. Add enough prediluted coolant to reach
the correct level.
4. Replace the coolant reservoir cap, turn it clockwise until you feel a strong
resistance.
5. Check the coolant level in the coolant reservoir the next few times you drive
your vehicle. If necessary, add enough
prediluted engine coolant to bring the
coolant level to the correct level.
If you have to add more than
1.1 qt (1 L) of
engine coolant per month, have your vehicle
checked as soon as possible. Operating an
engine with a low level of coolant can result
in engine overheating and possible engine
damage. Note:
During normal vehicle operation, the
coolant may change color from orange to
pink or light red. As long as the coolant is
clear and uncontaminated, this color change
does not indicate the coolant has degraded
nor does it require the coolant to be drained,
the system to be flushed, or the coolant to
be replaced.
Note: In case of emergency, you can add a
large amount of water without coolant in
order to reach a vehicle service location.
Water alone, without coolant, can cause
engine damage from corrosion, overheating
or freezing. When you reach a service
location, you must have the cooling system
drained and refilled with prediluted coolant
approved to the correct specification.
See
Capacities and Specifications (page 328).
Do not use the following as a coolant
substitute:
• Alcohol.
• Methanol.
• Brine.
• Any coolant mixed with alcohol or
methanol antifreeze.
269
Navigator (TB5) Canada/United States of America, enUSA, First Printing Maintenance
Page 321 of 532
If the low tire pressure warning light is on,
visually check each tire to verify that no tire
is flat. If one or more tires are flat, repair as
necessary. Check the air pressure in the road
tires. If any tire is under-inflated, carefully
drive the vehicle to the nearest location
where air can be added to the tires. Inflate
all the tires to the recommended inflation
pressure.
Tire Pressure Monitoring System Reset
Procedure
WARNING
To determine the required pressure(s)
for your vehicle, see the Safety
Compliance Certification Label (on the door
hinge pillar, door-latch post or the door edge
that meets the door-latch post, next to the
driver seat) or the Tire Label on the B-Pillar
or the edge of the driver door. Note:
You need to perform the tire pressure
monitoring system reset procedure after
each tire rotation on vehicles that require
different recommended tire pressures in the
front tires as compared to the rear tires. Overview
To provide the vehicle's load carrying
capability, some vehicles require different
recommended tire pressures in the front tires
as compared to the rear tires. The tire
pressure monitoring system equipped on
these vehicles is designed to illuminate the
low tire pressure warning light at two
different pressures; one for the front tires
and one for the rear tires.
Since tires need to be rotated to provide
consistent performance and maximum tire
life, the tire pressure monitoring system
needs to know when the tires are rotated to
determine which set of tires are on the front
and which are on the rear. With this
information, the system can detect and
properly warn of low tire pressures.
System reset tips:
•
To reduce the chances of interference
from another vehicle, perform the system
reset procedure at least three feet (one
meter) away from another Ford Motor
Company vehicle undergoing the system
reset procedure at the same time.
• Do not wait more than two minutes
between resetting each tire sensor or the
system will time-out and the entire
procedure will have to be repeated on
all four wheels.
• A double horn will sound indicating the
need to repeat the procedure.
Performing the System Reset Procedure
Read the entire procedure before attempting.
1. Drive the vehicle above 20 mph (32 km/h) for at least two minutes, then park
in a safe location where you can easily
get to all four tires and have access to
an air pump.
2. Place the ignition in the off position and keep the key in the ignition.
3. Cycle the ignition to the on position with
the engine off.
318
Navigator (TB5) Canada/United States of America, enUSA, First Printing Wheels and Tires