clock LINCOLN NAVIGATOR 2018 User Guide
[x] Cancel search | Manufacturer: LINCOLN, Model Year: 2018, Model line: NAVIGATOR, Model: LINCOLN NAVIGATOR 2018Pages: 649, PDF Size: 4.96 MB
Page 380 of 649
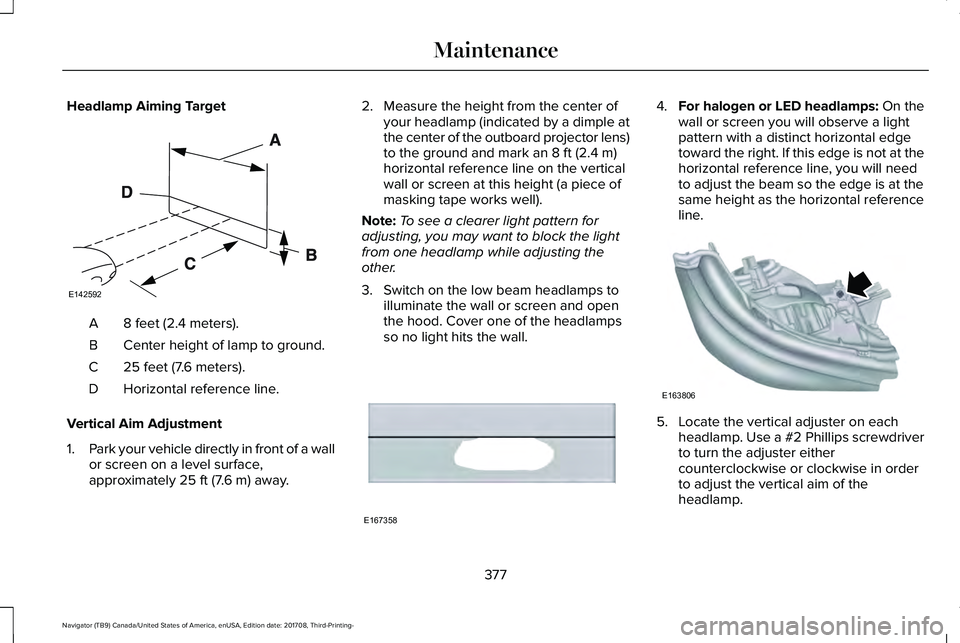
Headlamp Aiming Target
8 feet (2.4 meters).A
Center height of lamp to ground.B
25 feet (7.6 meters).C
Horizontal reference line.D
Vertical Aim Adjustment
1.Park your vehicle directly in front of a wallor screen on a level surface,approximately 25 ft (7.6 m) away.
2. Measure the height from the center ofyour headlamp (indicated by a dimple atthe center of the outboard projector lens)to the ground and mark an 8 ft (2.4 m)horizontal reference line on the verticalwall or screen at this height (a piece ofmasking tape works well).
Note:To see a clearer light pattern foradjusting, you may want to block the lightfrom one headlamp while adjusting theother.
3. Switch on the low beam headlamps toilluminate the wall or screen and openthe hood. Cover one of the headlampsso no light hits the wall.
4.For halogen or LED headlamps: On thewall or screen you will observe a lightpattern with a distinct horizontal edgetoward the right. If this edge is not at thehorizontal reference line, you will needto adjust the beam so the edge is at thesame height as the horizontal referenceline.
5. Locate the vertical adjuster on eachheadlamp. Use a #2 Phillips screwdriverto turn the adjuster eithercounterclockwise or clockwise in orderto adjust the vertical aim of theheadlamp.
377
Navigator (TB9) Canada/United States of America, enUSA, Edition date: 201708, Third-Printing-
MaintenanceE142592 E167358 E163806
Page 420 of 649
WARNING: Always use the jackprovided as original equipment with yourvehicle. If using a jack other than the oneprovided, make sure the jack capacity isadequate for the vehicle weight, includingany vehicle cargo or modifications. If youare unsure if the jack capacity is adequate,contact the authorized dealer.
WARNING: Switch off the runningboards before jacking or placing any objectunder your vehicle. Never place your handbetween the extended running board andyour vehicle. A moving running board maycause injury.
WARNING: Only use the spare wheelcarrier to stow the wheel provided withyour vehicle. Other wheel sizes couldcause the spare wheel carrier to fail if itdoes not fit securely or is too heavy.
1.Park the vehicle on firm, level ground andactivate the hazard flashers.
2. Apply the parking brake, place thetransmission in park (P) and switch theignition off.
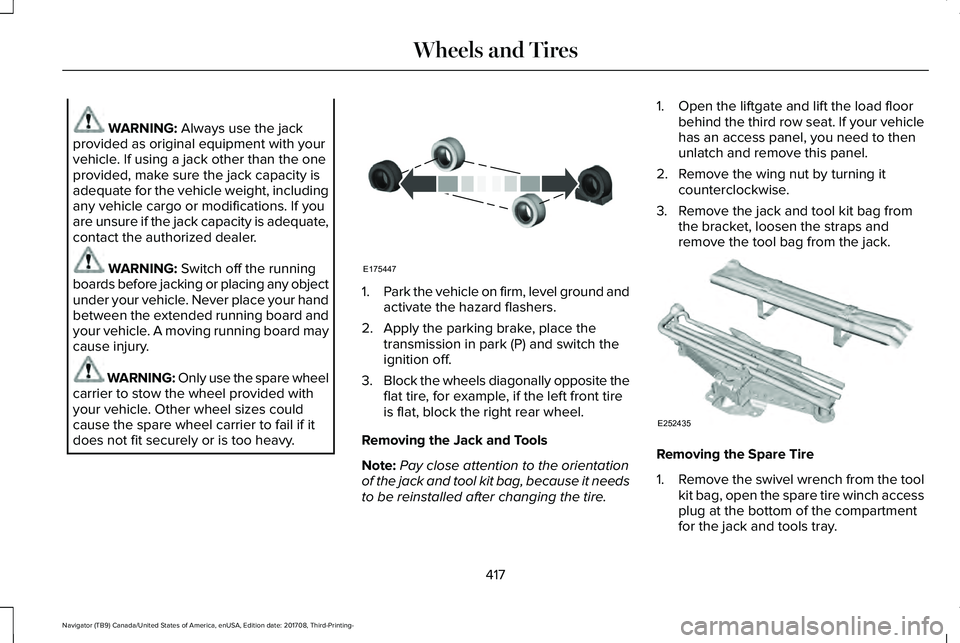
3.Block the wheels diagonally opposite theflat tire, for example, if the left front tireis flat, block the right rear wheel.
Removing the Jack and Tools
Note:Pay close attention to the orientationof the jack and tool kit bag, because it needsto be reinstalled after changing the tire.
1. Open the liftgate and lift the load floorbehind the third row seat. If your vehiclehas an access panel, you need to thenunlatch and remove this panel.
2. Remove the wing nut by turning itcounterclockwise.
3. Remove the jack and tool kit bag fromthe bracket, loosen the straps andremove the tool bag from the jack.
Removing the Spare Tire
1.Remove the swivel wrench from the toolkit bag, open the spare tire winch accessplug at the bottom of the compartmentfor the jack and tools tray.
417
Navigator (TB9) Canada/United States of America, enUSA, Edition date: 201708, Third-Printing-
Wheels and TiresE175447 E252435
Page 421 of 649
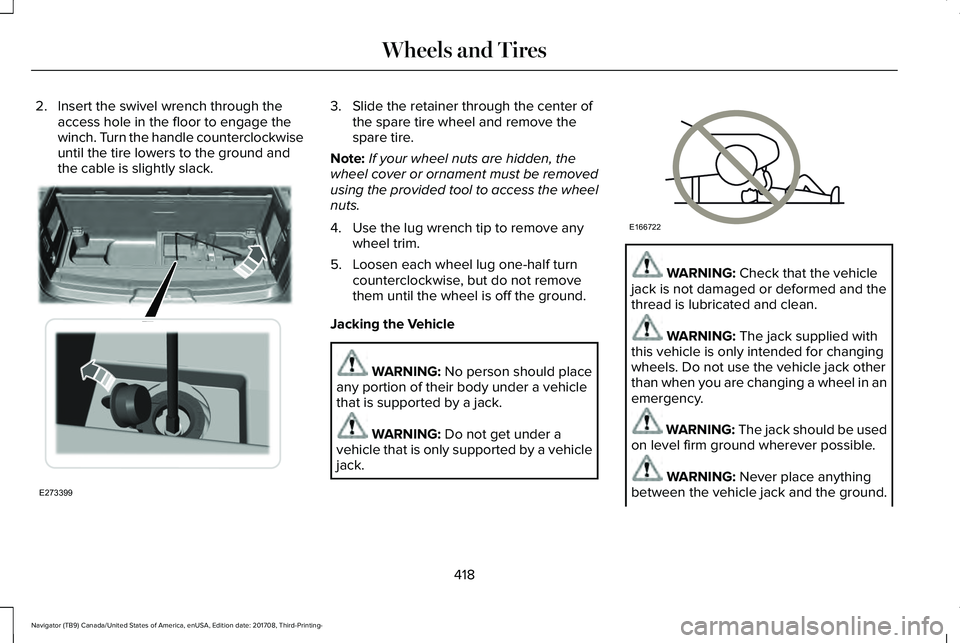
2. Insert the swivel wrench through theaccess hole in the floor to engage thewinch. Turn the handle counterclockwiseuntil the tire lowers to the ground andthe cable is slightly slack.
3. Slide the retainer through the center ofthe spare tire wheel and remove thespare tire.
Note:If your wheel nuts are hidden, thewheel cover or ornament must be removedusing the provided tool to access the wheelnuts.
4. Use the lug wrench tip to remove anywheel trim.
5. Loosen each wheel lug one-half turncounterclockwise, but do not removethem until the wheel is off the ground.
Jacking the Vehicle
WARNING: No person should placeany portion of their body under a vehiclethat is supported by a jack.
WARNING: Do not get under avehicle that is only supported by a vehiclejack.
WARNING: Check that the vehiclejack is not damaged or deformed and thethread is lubricated and clean.
WARNING: The jack supplied withthis vehicle is only intended for changingwheels. Do not use the vehicle jack otherthan when you are changing a wheel in anemergency.
WARNING: The jack should be usedon level firm ground wherever possible.
WARNING: Never place anythingbetween the vehicle jack and the ground.
418
Navigator (TB9) Canada/United States of America, enUSA, Edition date: 201708, Third-Printing-
Wheels and TiresE273399 E166722
Page 422 of 649
WARNING: Never place anythingbetween the vehicle jack and your vehicle.
WARNING: It is recommended thatthe wheels of the vehicle be chocked, andthat no person should remain in a vehiclethat is being jacked.
WARNING: Failure to follow theseguidelines could result in an increased riskof loss of vehicle control, injury or death.
Note:The jack does not requiremaintenance or additional lubrication overthe service life of your vehicle.
Note:Jack at the specified locations to avoiddamaging your vehicle.
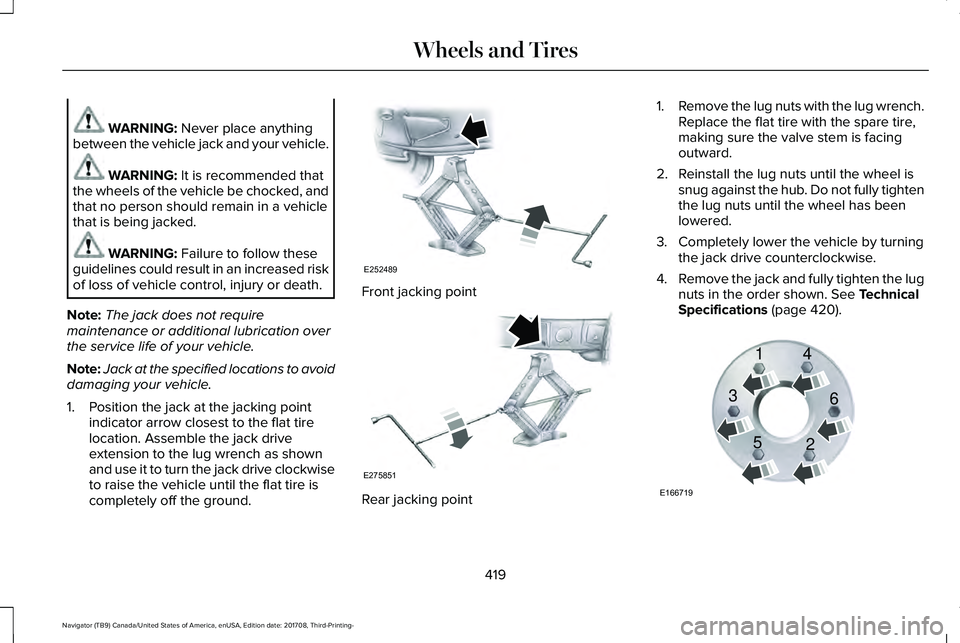
1. Position the jack at the jacking pointindicator arrow closest to the flat tirelocation. Assemble the jack driveextension to the lug wrench as shownand use it to turn the jack drive clockwiseto raise the vehicle until the flat tire iscompletely off the ground.
Front jacking point
Rear jacking point
1.Remove the lug nuts with the lug wrench.Replace the flat tire with the spare tire,making sure the valve stem is facingoutward.
2. Reinstall the lug nuts until the wheel issnug against the hub. Do not fully tightenthe lug nuts until the wheel has beenlowered.
3. Completely lower the vehicle by turningthe jack drive counterclockwise.
4.Remove the jack and fully tighten the lugnuts in the order shown. See TechnicalSpecifications (page 420).
419
Navigator (TB9) Canada/United States of America, enUSA, Edition date: 201708, Third-Printing-
Wheels and TiresE252489 E275851 E166719
1
3
5 4
6
2
Page 423 of 649
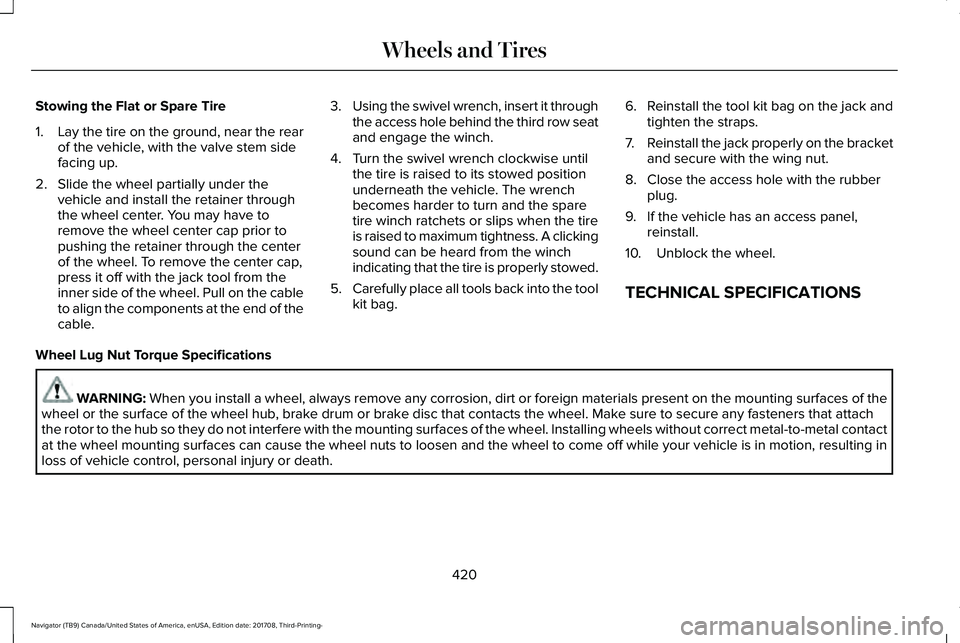
Stowing the Flat or Spare Tire
1.Lay the tire on the ground, near the rearof the vehicle, with the valve stem sidefacing up.
2. Slide the wheel partially under thevehicle and install the retainer throughthe wheel center. You may have toremove the wheel center cap prior topushing the retainer through the centerof the wheel. To remove the center cap,press it off with the jack tool from theinner side of the wheel. Pull on the cableto align the components at the end of thecable.
3.Using the swivel wrench, insert it throughthe access hole behind the third row seatand engage the winch.
4. Turn the swivel wrench clockwise untilthe tire is raised to its stowed positionunderneath the vehicle. The wrenchbecomes harder to turn and the sparetire winch ratchets or slips when the tireis raised to maximum tightness. A clickingsound can be heard from the winchindicating that the tire is properly stowed.
5.Carefully place all tools back into the toolkit bag.
6.Reinstall the tool kit bag on the jack andtighten the straps.
7.Reinstall the jack properly on the bracketand secure with the wing nut.
8. Close the access hole with the rubberplug.
9. If the vehicle has an access panel,reinstall.
10. Unblock the wheel.
TECHNICAL SPECIFICATIONS
Wheel Lug Nut Torque Specifications
WARNING: When you install a wheel, always remove any corrosion, dirt or foreign materials present on the mounting surfaces of thewheel or the surface of the wheel hub, brake drum or brake disc that contacts the wheel. Make sure to secure any fasteners that attachthe rotor to the hub so they do not interfere with the mounting surfaces of the wheel. Installing wheels without correct metal-to-metal contactat the wheel mounting surfaces can cause the wheel nuts to loosen and the wheel to come off while your vehicle is in motion, resulting inloss of vehicle control, personal injury or death.
420
Navigator (TB9) Canada/United States of America, enUSA, Edition date: 201708, Third-Printing-
Wheels and Tires
Page 444 of 649
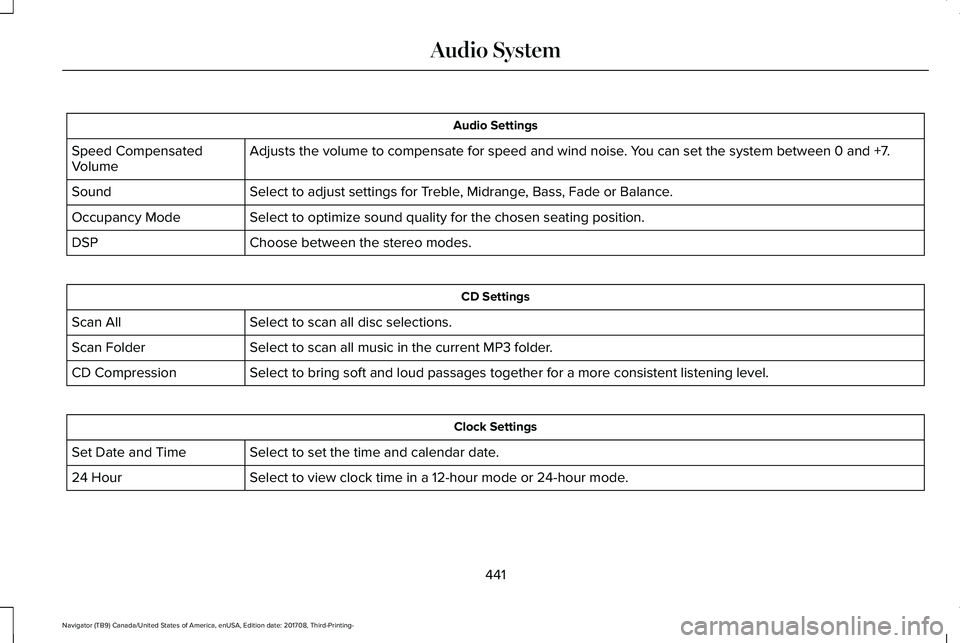
Audio Settings
Adjusts the volume to compensate for speed and wind noise. You can set the system between 0 and +7.Speed CompensatedVolume
Select to adjust settings for Treble, Midrange, Bass, Fade or Balance.Sound
Select to optimize sound quality for the chosen seating position.Occupancy Mode
Choose between the stereo modes.DSP
CD Settings
Select to scan all disc selections.Scan All
Select to scan all music in the current MP3 folder.Scan Folder
Select to bring soft and loud passages together for a more consistent listening level.CD Compression
Clock Settings
Select to set the time and calendar date.Set Date and Time
Select to view clock time in a 12-hour mode or 24-hour mode.24 Hour
441
Navigator (TB9) Canada/United States of America, enUSA, Edition date: 201708, Third-Printing-
Audio System
Page 451 of 649
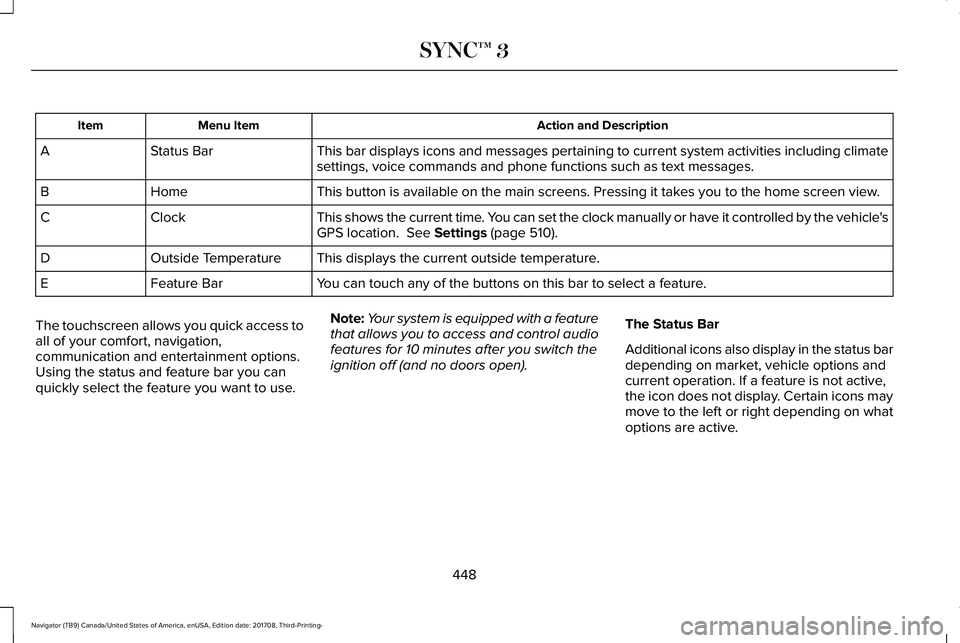
Action and DescriptionMenu ItemItem
This bar displays icons and messages pertaining to current system activities including climatesettings, voice commands and phone functions such as text messages.Status BarA
This button is available on the main screens. Pressing it takes you to the home screen view.HomeB
This shows the current time. You can set the clock manually or have it controlled by the vehicle'sGPS location. See Settings (page 510).ClockC
This displays the current outside temperature.Outside TemperatureD
You can touch any of the buttons on this bar to select a feature.Feature BarE
The touchscreen allows you quick access toall of your comfort, navigation,communication and entertainment options.Using the status and feature bar you canquickly select the feature you want to use.
Note:Your system is equipped with a featurethat allows you to access and control audiofeatures for 10 minutes after you switch theignition off (and no doors open).
The Status Bar
Additional icons also display in the status bardepending on market, vehicle options andcurrent operation. If a feature is not active,the icon does not display. Certain icons maymove to the left or right depending on whatoptions are active.
448
Navigator (TB9) Canada/United States of America, enUSA, Edition date: 201708, Third-Printing-
SYNC™ 3
Page 515 of 649
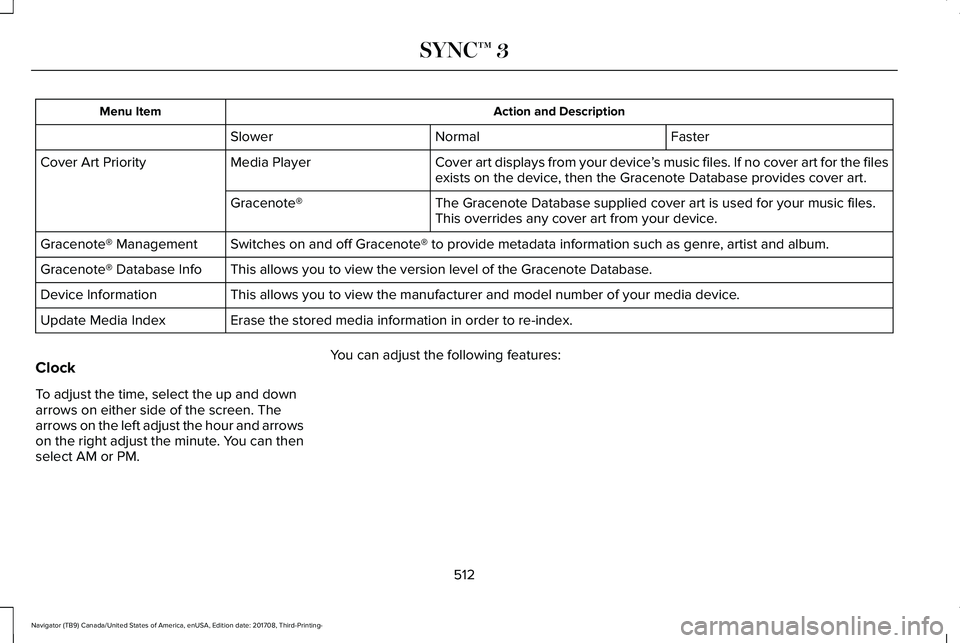
Action and DescriptionMenu Item
FasterNormalSlower
Cover art displays from your device’s music files. If no cover art for the filesexists on the device, then the Gracenote Database provides cover art.Media PlayerCover Art Priority
The Gracenote Database supplied cover art is used for your music files.This overrides any cover art from your device.Gracenote®
Switches on and off Gracenote® to provide metadata information such as genre, artist and album.Gracenote® Management
This allows you to view the version level of the Gracenote Database.Gracenote® Database Info
This allows you to view the manufacturer and model number of your media device.Device Information
Erase the stored media information in order to re-index.Update Media Index
Clock
To adjust the time, select the up and downarrows on either side of the screen. Thearrows on the left adjust the hour and arrowson the right adjust the minute. You can thenselect AM or PM.
You can adjust the following features:
512
Navigator (TB9) Canada/United States of America, enUSA, Edition date: 201708, Third-Printing-
SYNC™ 3
Page 516 of 649
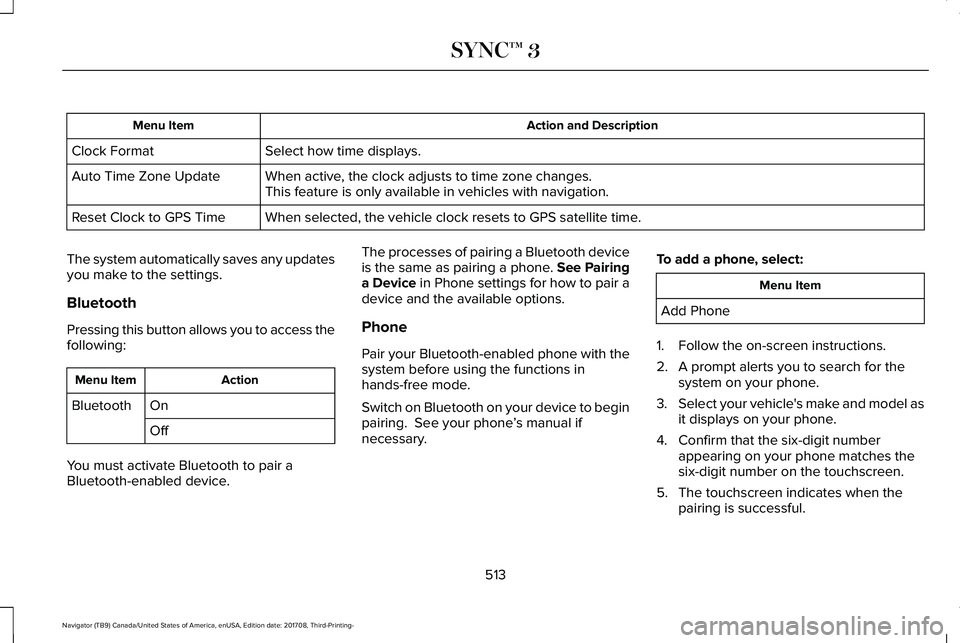
Action and DescriptionMenu Item
Select how time displays.Clock Format
When active, the clock adjusts to time zone changes.Auto Time Zone UpdateThis feature is only available in vehicles with navigation.
When selected, the vehicle clock resets to GPS satellite time.Reset Clock to GPS Time
The system automatically saves any updatesyou make to the settings.
Bluetooth
Pressing this button allows you to access thefollowing:
ActionMenu Item
OnBluetooth
Off
You must activate Bluetooth to pair aBluetooth-enabled device.
The processes of pairing a Bluetooth deviceis the same as pairing a phone. See Pairinga Device in Phone settings for how to pair adevice and the available options.
Phone
Pair your Bluetooth-enabled phone with thesystem before using the functions inhands-free mode.
Switch on Bluetooth on your device to beginpairing. See your phone’s manual ifnecessary.
To add a phone, select:
Menu Item
Add Phone
1. Follow the on-screen instructions.
2. A prompt alerts you to search for thesystem on your phone.
3.Select your vehicle's make and model asit displays on your phone.
4. Confirm that the six-digit numberappearing on your phone matches thesix-digit number on the touchscreen.
5. The touchscreen indicates when thepairing is successful.
513
Navigator (TB9) Canada/United States of America, enUSA, Edition date: 201708, Third-Printing-
SYNC™ 3
Page 645 of 649
Running-InSee: Breaking-In.................................................324
Running Out of Fuel.....................................201Adding Fuel From a Portable FuelContainer..........................................................201Filling a Portable Fuel Container.....................201
S
Safety Canopy™...............................................58Safety Precautions........................................199Satellite Radio...............................................442Satellite Radio Electronic Serial Number(ESN)..................................................................444Satellite Radio Reception Factors..................443SiriusXM Satellite Radio Service.....................443Troubleshooting..................................................444
Scheduled Maintenance Record..............563Scheduled Maintenance............................552Seatbelt Extension.........................................50Seatbelt Height Adjustment.........................46Seatbelt Reminder..........................................47Belt-Minder™...........................................................47
Seatbelts...........................................................40Principle of Operation.........................................40
Seatbelt Warning Lamp and IndicatorChime..............................................................46Conditions of operation.......................................47
Seats.................................................................158Security..............................................................83Settings............................................................510911 Assist................................................................517Ambient Lighting................................................526Bluetooth...............................................................513Clock.......................................................................512Display..................................................................528General.................................................................523Media Player..........................................................511Mobile Apps........................................................522Navigation.............................................................519Personal Profiles.................................................529Phone.....................................................................513Radio.......................................................................517SiriusXM.................................................................518Sound.....................................................................510Valet Mode...........................................................529Vehicle..................................................................526Voice Control.......................................................528Wi-Fi and Hotspot..............................................524
Side Airbags.....................................................57Side Sensing System..................................240Obstacle Distance Indicator............................240
Sitting in the Correct Position....................158Snow ChainsSee: Using Snow Chains..................................408
Spare WheelSee: Changing a Road Wheel..........................414
Special Notices.................................................13New Vehicle Limited Warranty...........................13On Board Diagnostics Data LinkConnector............................................................14Special Instructions...............................................13
Special Operating Conditions ScheduledMaintenance...............................................560Exceptions............................................................563
Speed ControlSee: Cruise Control...........................................256
Stability Control.............................................233Principle of Operation.......................................233
Starting a Gasoline Engine.........................192Automatic Engine Shutdown............................193Failure to Start......................................................193Guarding Against Exhaust Fumes...................194Important Ventilating Information...................194Stopping the Engine When Your Vehicle isMoving...............................................................194Stopping the Engine When Your Vehicle isStationary..........................................................194
Starting and Stopping the Engine..............191General Information.............................................191
Steering..........................................................280Electric Power Steering....................................280
Steering Wheel................................................89
642
Navigator (TB9) Canada/United States of America, enUSA, Edition date: 201708, Third-Printing-
Index