sensor LINCOLN NAVIGATOR 2018 User Guide
[x] Cancel search | Manufacturer: LINCOLN, Model Year: 2018, Model line: NAVIGATOR, Model: LINCOLN NAVIGATOR 2018Pages: 649, PDF Size: 4.96 MB
Page 62 of 649
WARNING: Do not attempt to service,repair, or modify the supplementaryrestraint system or associated components.Failure to follow this instruction could resultin personal injury or death.
WARNING: All occupants of yourvehicle, including the driver, should alwaysproperly wear their seatbelts, even whenan airbag supplemental restraint system isprovided. Failure to properly wear yourseatbelt could seriously increase the riskof injury or death.
WARNING: To reduce risk of injury,do not obstruct or place objects in thedeployment path of the airbag.
WARNING: If a supplementaryrestraint system component has deployed,it will not function again. Have the systemand associated components inspected assoon as possible. Failure to follow thisinstruction could result in personal injuryor death.
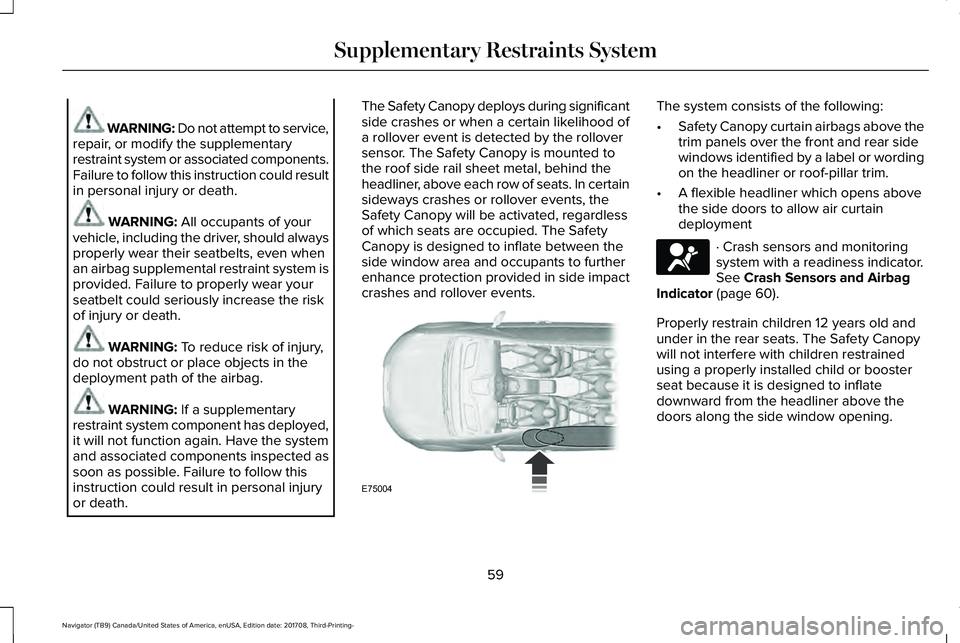
The Safety Canopy deploys during significantside crashes or when a certain likelihood ofa rollover event is detected by the rolloversensor. The Safety Canopy is mounted tothe roof side rail sheet metal, behind theheadliner, above each row of seats. In certainsideways crashes or rollover events, theSafety Canopy will be activated, regardlessof which seats are occupied. The SafetyCanopy is designed to inflate between theside window area and occupants to furtherenhance protection provided in side impactcrashes and rollover events.
The system consists of the following:
•Safety Canopy curtain airbags above thetrim panels over the front and rear sidewindows identified by a label or wordingon the headliner or roof-pillar trim.
•A flexible headliner which opens abovethe side doors to allow air curtaindeployment
· Crash sensors and monitoringsystem with a readiness indicator.See Crash Sensors and AirbagIndicator (page 60).
Properly restrain children 12 years old andunder in the rear seats. The Safety Canopywill not interfere with children restrainedusing a properly installed child or boosterseat because it is designed to inflatedownward from the headliner above thedoors along the side window opening.
59
Navigator (TB9) Canada/United States of America, enUSA, Edition date: 201708, Third-Printing-
Supplementary Restraints SystemE75004 E67017
Page 63 of 649
The design and development of the SafetyCanopy included recommended testingprocedures that were developed by a groupof automotive safety experts known as theSide Airbag Technical Working Group. Theserecommended testing procedures helpreduce the risk of injuries related to thedeployment of side airbags (including theSafety Canopy).
CRASH SENSORS AND AIRBAG
INDICATOR
WARNING: Modifying or addingequipment to the front end of your vehicle(including hood, bumper system, frame,front end body structure, tow hooks andhood pins) may affect the performance ofthe airbag system, increasing the risk ofinjury. Do not modify or add equipment tothe front end of your vehicle.
Your vehicle has a collection of crash andoccupant sensors which provide informationto the restraints control module whichdeploys (activates) the front seatbeltpretensioners, driver airbag, passengerairbag, rear inflatable belts, seat mountedside airbags, and the Safety Canopy. Basedon the type of crash, the restraints controlmodule will deploy the appropriate safetydevices.
The restraints control module also monitorsthe readiness of the above safety devicesplus the crash and occupant sensors. Thereadiness of the safety system is indicatedby a warning indicator light in the instrumentcluster or by a backup tone if the warninglight is not working. See Instrument Cluster(page 112). Routine maintenance of theairbag is not required.
A difficulty with the system is indicated byone or more of the following:
The readiness light will notilluminate immediately after youswitch the ignition on.
•The readiness light either flashes or stayslit.
•A series of five beeps will be heard. Thetone pattern will repeat periodically untilthe problem, the light or both arerepaired.
If any of these things happen, evenintermittently, have the supplementalrestraint system serviced at an authorizeddealer immediately. Unless serviced, thesystem may not function properly in theevent of a crash.
60
Navigator (TB9) Canada/United States of America, enUSA, Edition date: 201708, Third-Printing-
Supplementary Restraints SystemE67017
Page 65 of 649
GENERAL INFORMATION ON
RADIO FREQUENCIES
This device complies with Part 15 of the FCCRules and with Licence exempt RSSStandards of Industry Canada. Operation issubject to the following two conditions:
•This device may not cause harmfulinterference, and
•This device must accept any interferencereceived, including interference that maycause undesired operation.
Note:Changes or modifications notexpressively approved by the partyresponsible for compliance could void theuser's authority to operate the equipment.The term "IC:" before the radio certificationnumber only signifies that Industry Canadatechnical specifications were met.
The typical operating range for yourtransmitter is approximately 33 ft (10 m).Vehicles with the remote start feature willhave a greater range. One of the followingcould cause a decrease in operating range:
•Weather conditions.
•Nearby radio towers.
•Structures around the vehicle.
•Other vehicles parked next to yourvehicle.
The radio frequency used by your remotecontrol can also be used by other radiotransmitters, for example amateur radios,medical equipment, wireless headphones,wireless remote controls, cell phones, batterychargers and alarm systems. If thefrequencies are jammed, you will not be ableto use your remote control. You can lockand unlock the doors with the key.
Note:Make sure you lock your vehiclebefore leaving it unattended.
Note:If you are within range of your vehicle,the remote control will operate if youunintentionally press any button.
Intelligent Access
The system uses a radio frequency signal tocommunicate with your vehicle andauthorizes your vehicle to unlock when oneof the following conditions are met:
•You touch the unlock sensor on the backof the door handle with the intelligentaccess key within 3 ft (1 m) of yourvehicle.
•You press the luggage compartmentbutton.
•You press the unlock button on thetransmitter.
If excessive radio frequency interference ispresent in the area or if the transmitterbattery is low, you may need to mechanicallyunlock your door. You can use themechanical key blade in your intelligentaccess key to open the driver door in thissituation. See Remote Control (page 63).
62
Navigator (TB9) Canada/United States of America, enUSA, Edition date: 201708, Third-Printing-
Keys and Remote Controls
Page 76 of 649
you press the unlock button once. Theunlocking mode applies to the remotecontrol, keyless entry keypad and intelligentaccess. You can also change between theunlocking modes using the informationdisplay. See General Information (page 119).
Reprogramming the Unlocking Function
Note: When you press the unlock button,either all the doors are unlocked or only thedriver door is unlocked. Pressing the unlockbutton again unlocks all the doors.
Press and hold the unlock and lock buttonson the remote control simultaneously for atleast four seconds with the ignition off. Thedirection indicators flash twice to confirm thechange.
To return to the original unlocking function,repeat the process.
Locking the Doors
Press the button to lock all doors. The direction indicators will flash.
Press the button again within three secondsto confirm that all the doors are closed. Thedoor lock again, the horn sounds and thedirection indicators flash if all the doors andthe liftgate are closed.
Note:If the system does not function, usethe key blade to lock and unlock yourvehicle.
Mislock
If any door or the liftgate is open, or if
the hood is open on vehicles with an
anti-theft alarm or remote start, the horn
sounds twice and the direction
indicators do not flash. You can switch
this feature on or off in the information
display. See General Information (page
119).
Opening the Liftgate
Press twice within three secondsto open the liftgate.
Activating Intelligent Access
General Information
You can unlock and lock the vehicle withouttaking the keys out of your pocket or pursewhen your intelligent access key is within3 ft (1 m) of your vehicle. Intelligent accessuses a sensor on the back of the door handlefor unlocking and a separate sensor on theface of each door handle for locking.
The system does not function if:
•Your vehicle battery has no charge.
•The key battery has no charge.
•The key frequencies are jammed.
Note:The system may not function if the keyis close to metal objects or electronicdevices, for example keys or a cell phone.
Note:If the system does not function, usethe key blade to lock and unlock yourvehicle. See Remote Control (page 63).
73
Navigator (TB9) Canada/United States of America, enUSA, Edition date: 201708, Third-Printing-
Doors and LocksE138623 E267940
Page 77 of 649
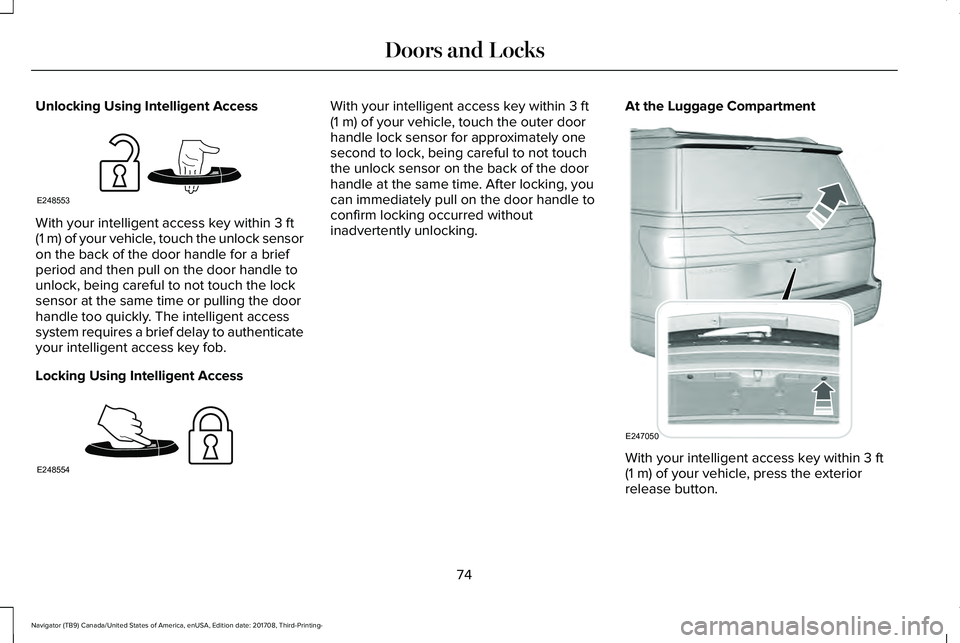
Unlocking Using Intelligent Access
With your intelligent access key within 3 ft(1 m) of your vehicle, touch the unlock sensoron the back of the door handle for a briefperiod and then pull on the door handle tounlock, being careful to not touch the locksensor at the same time or pulling the doorhandle too quickly. The intelligent accesssystem requires a brief delay to authenticateyour intelligent access key fob.
Locking Using Intelligent Access
With your intelligent access key within 3 ft(1 m) of your vehicle, touch the outer doorhandle lock sensor for approximately onesecond to lock, being careful to not touchthe unlock sensor on the back of the doorhandle at the same time. After locking, youcan immediately pull on the door handle toconfirm locking occurred withoutinadvertently unlocking.
At the Luggage Compartment
With your intelligent access key within 3 ft(1 m) of your vehicle, press the exteriorrelease button.
74
Navigator (TB9) Canada/United States of America, enUSA, Edition date: 201708, Third-Printing-
Doors and LocksE248553 E248554 E247050
Page 88 of 649
ANTI-THEFT ALARM - VEHICLES
WITH: INTERIOR SENSOR
Alarm System
Perimeter Alarm
The perimeter alarm is a deterrent againstunauthorized access to your vehicle throughthe doors and the hood.
Interior Sensors
Note:Do not cover up the interior lamp unitsensors.
The interior lamp unit sensors are in theoverhead console. The sensors act as adeterrent against unauthorized intrusion bysensing any movement inside your vehicle.
Inclination Sensors
When you lock your vehicle and arm thealarm, the sensors are designed to detectan attempt to raise your vehicle, for exampleto remove a wheel or to tow it away.
Alarm Settings
ALL SENSORS ACTIVE is the standardsetting. In this mode, the interior sensors areon when you arm the alarm.
In PERIMETER SENSING mode, the interiorsensors are off when you arm the alarm.
You can change the setting through theinformation display. See General Information(page 119).
Ask on Exit (If Equipped)
You can set the information display to askyou each time which level of guard you wishto set.
Triggering the Alarm
Once armed, the alarm triggers in any of thefollowing ways:
•If someone opens a door, the liftgate orthe hood without a valid key or remotecontrol.
•If you switch your vehicle on without acorrectly coded key.
•If the interior sensors detect movementwithin your vehicle.
If the alarm triggers, the alarm horn soundsfor 30 seconds and the hazard flashers turnon for five minutes.
Any further attempts to perform one of theabove triggers the alarm again.
Arming the Alarm
To arm the alarm, lock your vehicle. SeeDoors and Locks (page 72).
85
Navigator (TB9) Canada/United States of America, enUSA, Edition date: 201708, Third-Printing-
Security
Page 95 of 649
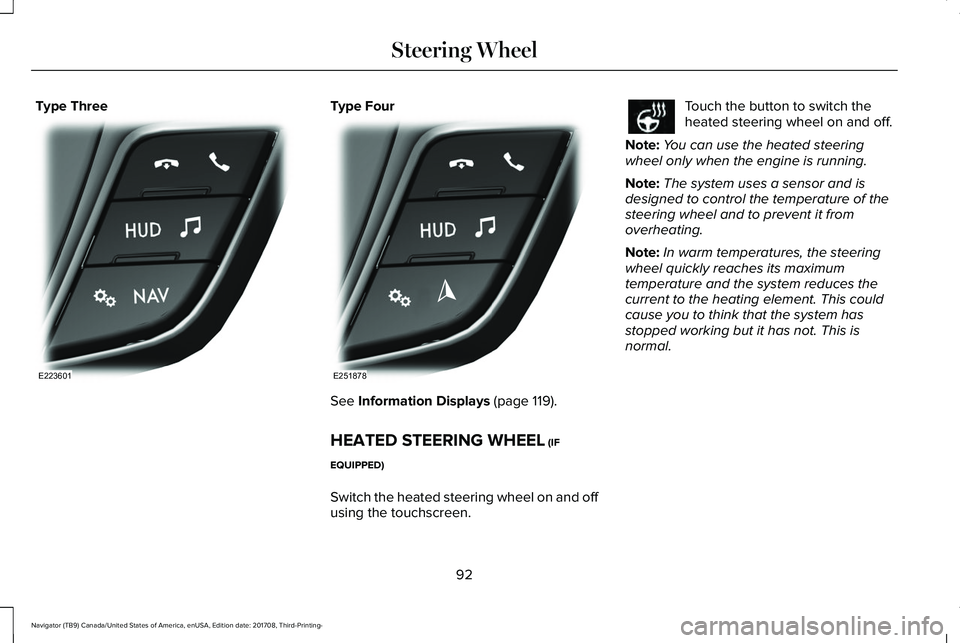
Type ThreeType Four
See Information Displays (page 119).
HEATED STEERING WHEEL (IF
EQUIPPED)
Switch the heated steering wheel on and offusing the touchscreen.
Touch the button to switch theheated steering wheel on and off.
Note:You can use the heated steeringwheel only when the engine is running.
Note:The system uses a sensor and isdesigned to control the temperature of thesteering wheel and to prevent it fromoverheating.
Note:In warm temperatures, the steeringwheel quickly reaches its maximumtemperature and the system reduces thecurrent to the heating element. This couldcause you to think that the system hasstopped working but it has not. This isnormal.
92
Navigator (TB9) Canada/United States of America, enUSA, Edition date: 201708, Third-Printing-
Steering WheelE223601 E251878
Page 97 of 649
AUTOWIPERS
Note:Fully defrost the windshield before youswitch the windshield wipers on.
Note:Make sure you switch the windshieldwipers off before entering a car wash.
Note: If streaks or smears appear on thewindshield, clean the windshield and thewiper blades. If that does not resolve theissue, install new wiper blades.
Note:If you switch autolamps andautowipers on, the headlamps automaticallyturn on when the windshield wiperscontinuously operate.
Wet or winter driving conditions with ice,snow or salty road mist can causeinconsistent and unexpected wiping orsmearing.
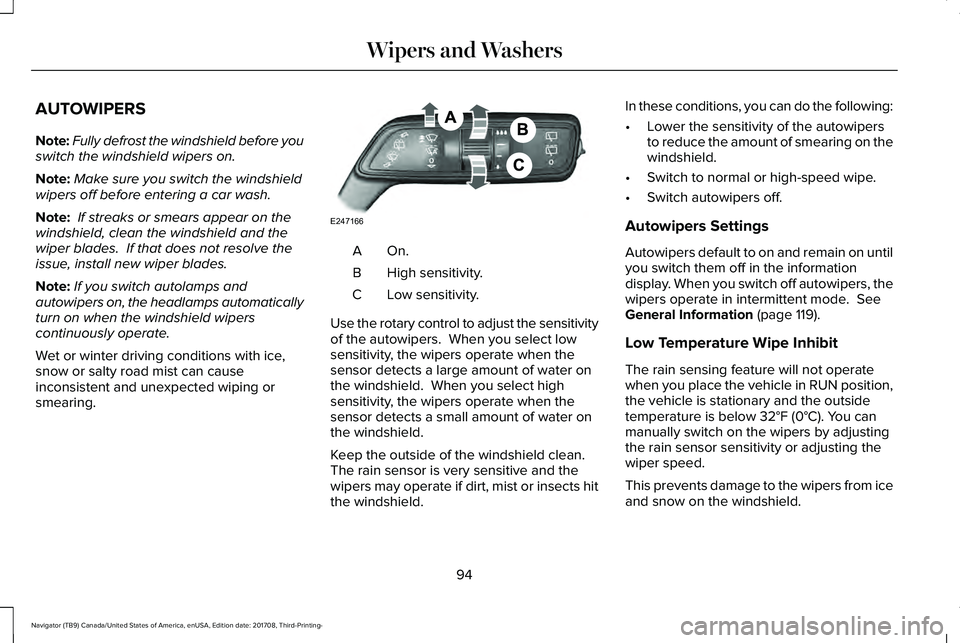
On.A
High sensitivity.B
Low sensitivity.C
Use the rotary control to adjust the sensitivityof the autowipers. When you select lowsensitivity, the wipers operate when thesensor detects a large amount of water onthe windshield. When you select highsensitivity, the wipers operate when thesensor detects a small amount of water onthe windshield.
Keep the outside of the windshield clean. The rain sensor is very sensitive and thewipers may operate if dirt, mist or insects hitthe windshield.
In these conditions, you can do the following:
•Lower the sensitivity of the autowipersto reduce the amount of smearing on thewindshield.
•Switch to normal or high-speed wipe.
•Switch autowipers off.
Autowipers Settings
Autowipers default to on and remain on untilyou switch them off in the informationdisplay. When you switch off autowipers, thewipers operate in intermittent mode. SeeGeneral Information (page 119).
Low Temperature Wipe Inhibit
The rain sensing feature will not operatewhen you place the vehicle in RUN position,the vehicle is stationary and the outsidetemperature is below 32°F (0°C). You canmanually switch on the wipers by adjustingthe rain sensor sensitivity or adjusting thewiper speed.
This prevents damage to the wipers from iceand snow on the windshield.
94
Navigator (TB9) Canada/United States of America, enUSA, Edition date: 201708, Third-Printing-
Wipers and WashersE247166
Page 102 of 649
Type Two - Configurable
Switch the daytime running lamps on or offusing the information display. SeeInformation Displays (page 119).
The daytime running lamps turn on when:
1. The lamps are on in the informationdisplay.
2. Switching the ignition on.
3. The transmission is not in park (P) forvehicles with automatic transmissions, orreleasing the parking brake for vehicleswith manual transmissions.
4. The lighting control is in the autolampsposition.
5. The headlamps are off.
The other lighting control switch positionsdo not turn on the daytime running lamps.
If the daytime running lamps are off in theinformation display, the lamps stay off in allswitch positions.
AUTOMATIC HIGH BEAM
CONTROL (IF EQUIPPED)
WARNING: The system does notrelieve you of your responsibility to drivewith due care and attention. You may needto override the system if it does not turnthe high beams on or off.
The system turns on high beams if it is darkenough and no other traffic is present. If itdetects an approaching vehicle’s headlampsor tail lamps, or street lighting ahead, thesystem turns off high beams before they candistract other road users. Low beams remainon.
Note:The system may not operate properlyif the sensor is blocked. Keep the windshieldfree from obstruction or damage.
Note:The system may not operate properlyin cold or inclement conditions. You canswitch on the high beams by overriding thesystem.
Note:If the system detects a blockage, forexample bird droppings, bug splatter, snowor ice, the system goes into low beam modeuntil you clear the blockage. A message mayappear in the information display if thecamera is blocked.
Note:Using much larger tires or equippingvehicle accessories such as snowplows canmodify your vehicle's ride height anddegrade automatic high beam controlperformance.
A camera sensor, centrally mounted behindthe windshield of your vehicle, continuouslymonitors conditions to turn the high beamson and off.
Once the system is active, the high beamsturn on if:
•The ambient light level is low enough.
•There is no traffic in front of your vehicle.
•The vehicle speed is greater thanapproximately 32 mph (51 km/h).
99
Navigator (TB9) Canada/United States of America, enUSA, Edition date: 201708, Third-Printing-
Lighting
Page 110 of 649
Loose Mirror
If your power-folding mirrors are manuallyfolded, they may not work properly evenafter you re-position them. You need to resetthem if:
•The mirrors vibrate when you drive.
•The mirrors feel loose.
•The mirrors do not stay in the folded orunfolded position.
•One of the mirrors is not in its normaldriving position.
To reset the power-fold feature, use thepower-folding mirror control to fold andunfold the mirrors. You may hear a loud noiseas you reset the power-folding mirrors. Thissound is normal. Repeat this process asneeded each time the mirrors are manuallyfolded.
Heated Exterior Mirrors
See Heated Windows and Mirrors (page156).
Memory Mirrors
You can save and recall the mirror positionsthrough the memory function. See MemoryFunction (page 167).
Auto-Dimming Feature
The driver’s exterior mirror automaticallydims when the interior auto-dimming mirrorturns on.
Signal Indicator Mirrors (If Equipped)
The outer portion of the appropriate mirrorhousing blinks when you switch on thedirection indicator.
Lincoln Welcome Mat
Projection lights, on the bottom of the mirrorhousings, project an image onto the grounda short distance from the vehicle.
360-Degree Camera (If Equipped)
See 360 Degree Camera (page 253).
Blind Spot Monitor
See Blind Spot Information System (page272).
INTERIOR MIRROR
WARNING: Do not adjust the mirrorwhen your vehicle is moving.
Note:Do not clean the housing or glass ofany mirror with harsh abrasives, fuel or otherpetroleum or ammonia-based cleaningproducts.
You can adjust the interior mirror to yourpreference. Some mirrors also have a secondpivot point. This lets you move the mirrorhead up or down and from side to side.
Auto-Dimming Mirror
Note:Do not block the sensors on the frontand back of the mirror. Mirror performancemay be affected. A rear center passengeror raised rear center head restraint may alsoblock light from reaching the sensor.
107
Navigator (TB9) Canada/United States of America, enUSA, Edition date: 201708, Third-Printing-
Windows and Mirrors