display LINCOLN NAVIGATOR 2018 Owner's Manual
[x] Cancel search | Manufacturer: LINCOLN, Model Year: 2018, Model line: NAVIGATOR, Model: LINCOLN NAVIGATOR 2018Pages: 649, PDF Size: 4.96 MB
Page 95 of 649
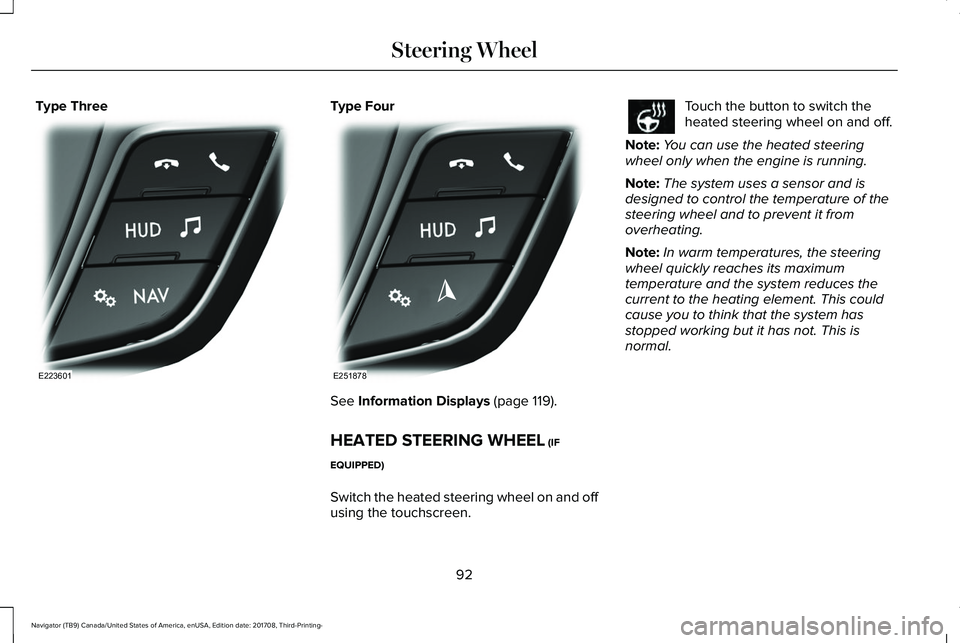
Type ThreeType Four
See Information Displays (page 119).
HEATED STEERING WHEEL (IF
EQUIPPED)
Switch the heated steering wheel on and offusing the touchscreen.
Touch the button to switch theheated steering wheel on and off.
Note:You can use the heated steeringwheel only when the engine is running.
Note:The system uses a sensor and isdesigned to control the temperature of thesteering wheel and to prevent it fromoverheating.
Note:In warm temperatures, the steeringwheel quickly reaches its maximumtemperature and the system reduces thecurrent to the heating element. This couldcause you to think that the system hasstopped working but it has not. This isnormal.
92
Navigator (TB9) Canada/United States of America, enUSA, Edition date: 201708, Third-Printing-
Steering WheelE223601 E251878
Page 97 of 649
AUTOWIPERS
Note:Fully defrost the windshield before youswitch the windshield wipers on.
Note:Make sure you switch the windshieldwipers off before entering a car wash.
Note: If streaks or smears appear on thewindshield, clean the windshield and thewiper blades. If that does not resolve theissue, install new wiper blades.
Note:If you switch autolamps andautowipers on, the headlamps automaticallyturn on when the windshield wiperscontinuously operate.
Wet or winter driving conditions with ice,snow or salty road mist can causeinconsistent and unexpected wiping orsmearing.
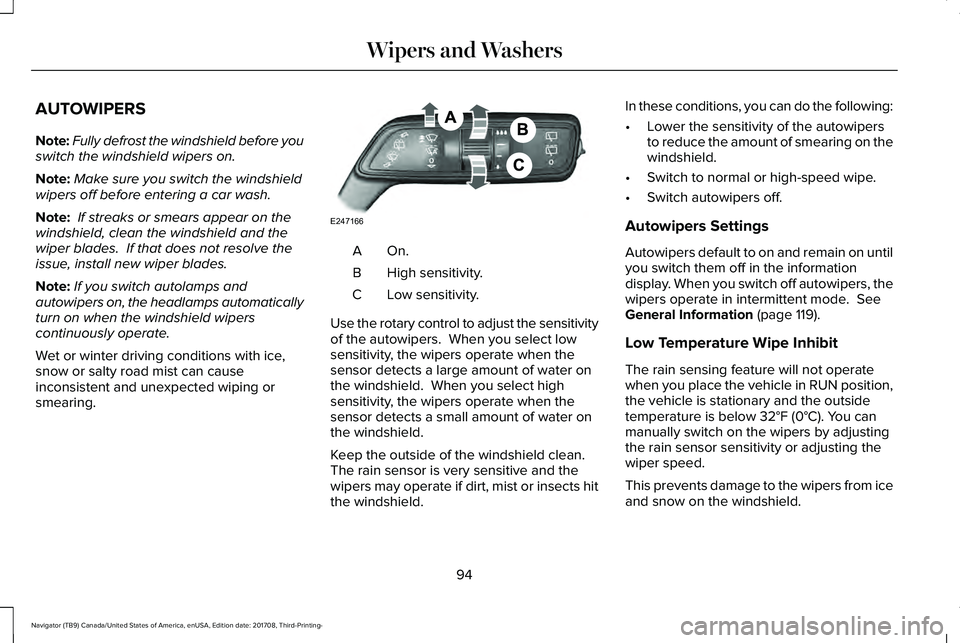
On.A
High sensitivity.B
Low sensitivity.C
Use the rotary control to adjust the sensitivityof the autowipers. When you select lowsensitivity, the wipers operate when thesensor detects a large amount of water onthe windshield. When you select highsensitivity, the wipers operate when thesensor detects a small amount of water onthe windshield.
Keep the outside of the windshield clean. The rain sensor is very sensitive and thewipers may operate if dirt, mist or insects hitthe windshield.
In these conditions, you can do the following:
•Lower the sensitivity of the autowipersto reduce the amount of smearing on thewindshield.
•Switch to normal or high-speed wipe.
•Switch autowipers off.
Autowipers Settings
Autowipers default to on and remain on untilyou switch them off in the informationdisplay. When you switch off autowipers, thewipers operate in intermittent mode. SeeGeneral Information (page 119).
Low Temperature Wipe Inhibit
The rain sensing feature will not operatewhen you place the vehicle in RUN position,the vehicle is stationary and the outsidetemperature is below 32°F (0°C). You canmanually switch on the wipers by adjustingthe rain sensor sensitivity or adjusting thewiper speed.
This prevents damage to the wipers from iceand snow on the windshield.
94
Navigator (TB9) Canada/United States of America, enUSA, Edition date: 201708, Third-Printing-
Wipers and WashersE247166
Page 100 of 649
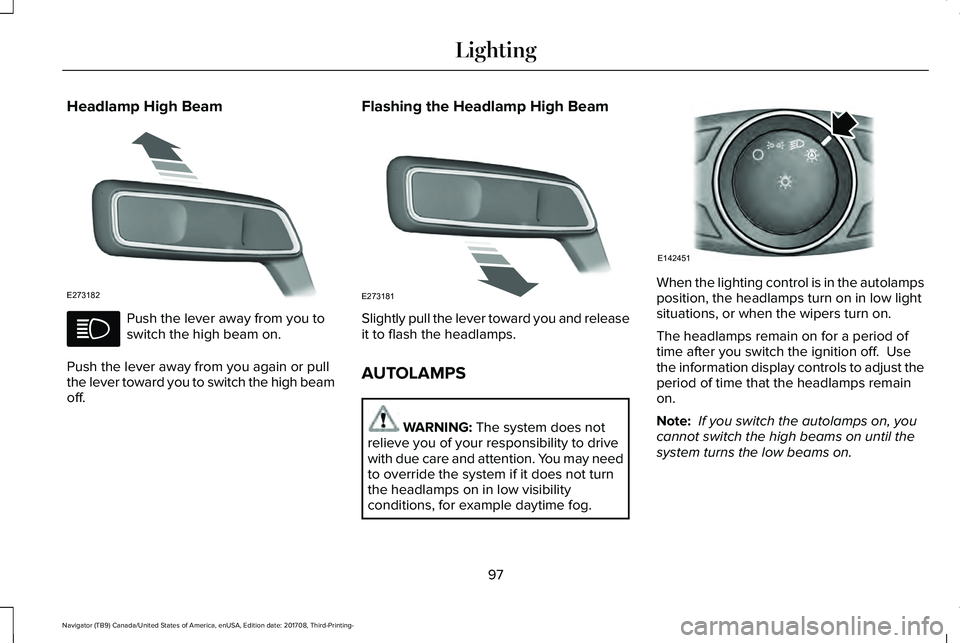
Headlamp High Beam
Push the lever away from you toswitch the high beam on.
Push the lever away from you again or pullthe lever toward you to switch the high beamoff.
Flashing the Headlamp High Beam
Slightly pull the lever toward you and releaseit to flash the headlamps.
AUTOLAMPS
WARNING: The system does notrelieve you of your responsibility to drivewith due care and attention. You may needto override the system if it does not turnthe headlamps on in low visibilityconditions, for example daytime fog.
When the lighting control is in the autolampsposition, the headlamps turn on in low lightsituations, or when the wipers turn on.
The headlamps remain on for a period oftime after you switch the ignition off. Usethe information display controls to adjust theperiod of time that the headlamps remainon.
Note: If you switch the autolamps on, youcannot switch the high beams on until thesystem turns the low beams on.
97
Navigator (TB9) Canada/United States of America, enUSA, Edition date: 201708, Third-Printing-
LightingE273182 E273181 E142451
Page 102 of 649
Type Two - Configurable
Switch the daytime running lamps on or offusing the information display. SeeInformation Displays (page 119).
The daytime running lamps turn on when:
1. The lamps are on in the informationdisplay.
2. Switching the ignition on.
3. The transmission is not in park (P) forvehicles with automatic transmissions, orreleasing the parking brake for vehicleswith manual transmissions.
4. The lighting control is in the autolampsposition.
5. The headlamps are off.
The other lighting control switch positionsdo not turn on the daytime running lamps.
If the daytime running lamps are off in theinformation display, the lamps stay off in allswitch positions.
AUTOMATIC HIGH BEAM
CONTROL (IF EQUIPPED)
WARNING: The system does notrelieve you of your responsibility to drivewith due care and attention. You may needto override the system if it does not turnthe high beams on or off.
The system turns on high beams if it is darkenough and no other traffic is present. If itdetects an approaching vehicle’s headlampsor tail lamps, or street lighting ahead, thesystem turns off high beams before they candistract other road users. Low beams remainon.
Note:The system may not operate properlyif the sensor is blocked. Keep the windshieldfree from obstruction or damage.
Note:The system may not operate properlyin cold or inclement conditions. You canswitch on the high beams by overriding thesystem.
Note:If the system detects a blockage, forexample bird droppings, bug splatter, snowor ice, the system goes into low beam modeuntil you clear the blockage. A message mayappear in the information display if thecamera is blocked.
Note:Using much larger tires or equippingvehicle accessories such as snowplows canmodify your vehicle's ride height anddegrade automatic high beam controlperformance.
A camera sensor, centrally mounted behindthe windshield of your vehicle, continuouslymonitors conditions to turn the high beamson and off.
Once the system is active, the high beamsturn on if:
•The ambient light level is low enough.
•There is no traffic in front of your vehicle.
•The vehicle speed is greater thanapproximately 32 mph (51 km/h).
99
Navigator (TB9) Canada/United States of America, enUSA, Edition date: 201708, Third-Printing-
Lighting
Page 103 of 649
The high beams turn off if:
•The ambient light level is high enoughthat high beams are not required.
•The system detects an approachingvehicle's headlamps or tail lamps.
•The vehicle speed falls belowapproximately 27 mph (44 km/h).
•The system detects severe rain, snow orfog.
•The camera is blocked.
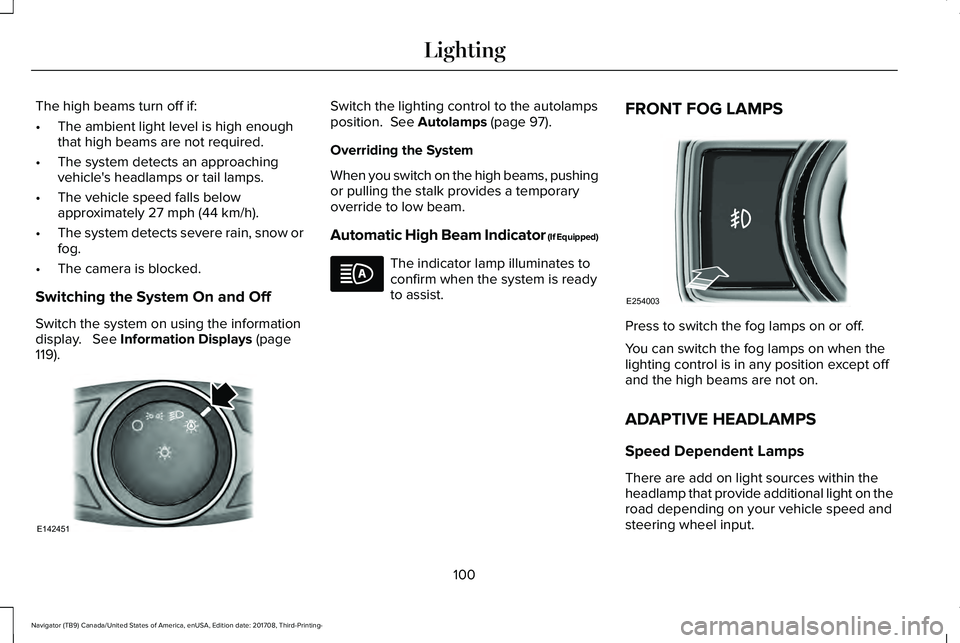
Switching the System On and Off
Switch the system on using the informationdisplay. See Information Displays (page119).
Switch the lighting control to the autolampsposition. See Autolamps (page 97).
Overriding the System
When you switch on the high beams, pushingor pulling the stalk provides a temporaryoverride to low beam.
Automatic High Beam Indicator (If Equipped)
The indicator lamp illuminates toconfirm when the system is readyto assist.
FRONT FOG LAMPS
Press to switch the fog lamps on or off.
You can switch the fog lamps on when thelighting control is in any position except offand the high beams are not on.
ADAPTIVE HEADLAMPS
Speed Dependent Lamps
There are add on light sources within theheadlamp that provide additional light on theroad depending on your vehicle speed andsteering wheel input.
100
Navigator (TB9) Canada/United States of America, enUSA, Edition date: 201708, Third-Printing-
LightingE142451 E254003
Page 104 of 649
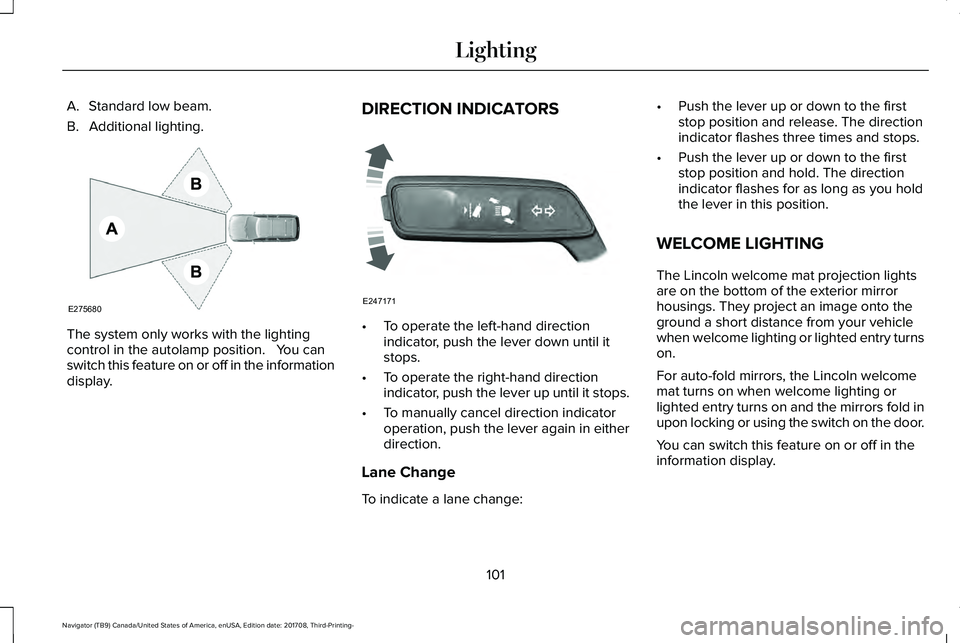
A. Standard low beam.
B. Additional lighting.
The system only works with the lightingcontrol in the autolamp position. You canswitch this feature on or off in the informationdisplay.
DIRECTION INDICATORS
•To operate the left-hand directionindicator, push the lever down until itstops.
•To operate the right-hand directionindicator, push the lever up until it stops.
•To manually cancel direction indicatoroperation, push the lever again in eitherdirection.
Lane Change
To indicate a lane change:
•Push the lever up or down to the firststop position and release. The directionindicator flashes three times and stops.
•Push the lever up or down to the firststop position and hold. The directionindicator flashes for as long as you holdthe lever in this position.
WELCOME LIGHTING
The Lincoln welcome mat projection lightsare on the bottom of the exterior mirrorhousings. They project an image onto theground a short distance from your vehiclewhen welcome lighting or lighted entry turnson.
For auto-fold mirrors, the Lincoln welcomemat turns on when welcome lighting orlighted entry turns on and the mirrors fold inupon locking or using the switch on the door.
You can switch this feature on or off in theinformation display.
101
Navigator (TB9) Canada/United States of America, enUSA, Edition date: 201708, Third-Printing-
LightingE275680 E247171
Page 108 of 649

Window Lock
Press the control to lock or unlock the rearwindow controls. It illuminates when youlock the rear window controls.
Accessory Delay
You can use the window switches for severalminutes after you switch the ignition off oruntil you open either front door.
GLOBAL OPENING AND CLOSING
You can use the remote control to operatethe windows with the ignition off.
Note:You can enable or disable this featurein the information display or see anauthorized dealer. See General Information(page 119).
Note:To operate this feature, accessorydelay must not be active.
Opening the Windows
You can only open the windows for a shorttime after you unlock your vehicle with theremote control. After you unlock your vehicle,press and hold the remote control unlockbutton to open the windows. Release thebutton once movement starts. Press the lockor unlock button to stop movement.
Closing the Windows
WARNING: When closing the powerwindows, you should verify they are freeof obstructions and make sure that childrenand pets are not in the proximity of thewindow openings.
To close the windows, press and hold theremote control lock button. Release thebutton once movement starts. Press the lockor unlock button to stop movement.
EXTERIOR MIRRORS
Power Exterior Mirrors
WARNING: Do not adjust the mirrorswhen your vehicle is moving. This couldresult in the loss of control of your vehicle,serious personal injury or death.
Note:Do not use an ice scraper on the mirrorglass or housing.
105
Navigator (TB9) Canada/United States of America, enUSA, Edition date: 201708, Third-Printing-
Windows and MirrorsE144072
Page 109 of 649
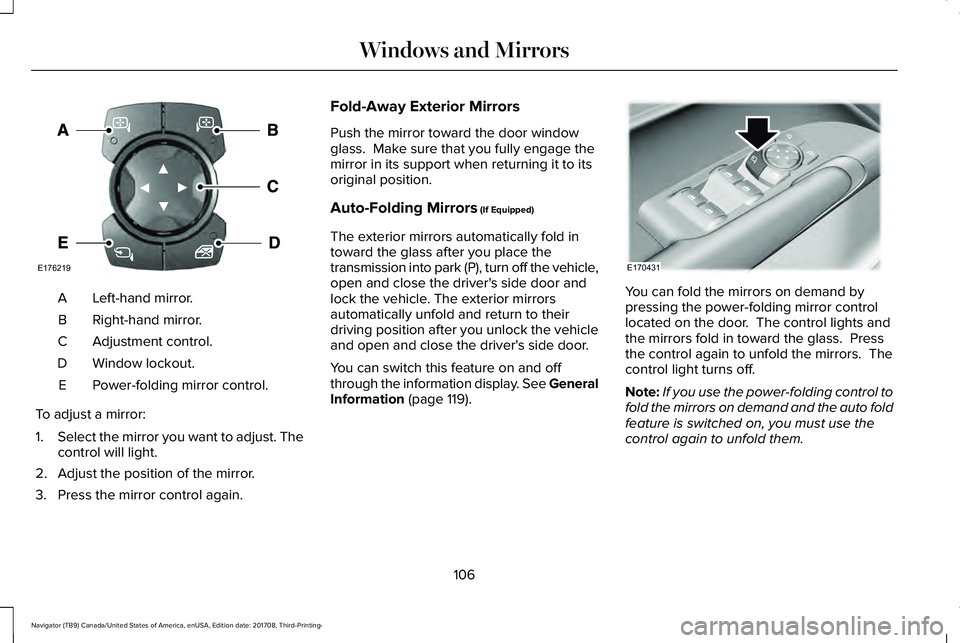
Left-hand mirror.A
Right-hand mirror.B
Adjustment control.C
Window lockout.D
Power-folding mirror control.E
To adjust a mirror:
1.Select the mirror you want to adjust. Thecontrol will light.
2. Adjust the position of the mirror.
3. Press the mirror control again.
Fold-Away Exterior Mirrors
Push the mirror toward the door windowglass. Make sure that you fully engage themirror in its support when returning it to itsoriginal position.
Auto-Folding Mirrors (If Equipped)
The exterior mirrors automatically fold intoward the glass after you place thetransmission into park (P), turn off the vehicle,open and close the driver's side door andlock the vehicle. The exterior mirrorsautomatically unfold and return to theirdriving position after you unlock the vehicleand open and close the driver's side door.
You can switch this feature on and offthrough the information display. See GeneralInformation (page 119).
You can fold the mirrors on demand bypressing the power-folding mirror controllocated on the door. The control lights andthe mirrors fold in toward the glass. Pressthe control again to unfold the mirrors. Thecontrol light turns off.
Note:If you use the power-folding control tofold the mirrors on demand and the auto foldfeature is switched on, you must use thecontrol again to unfold them.
106
Navigator (TB9) Canada/United States of America, enUSA, Edition date: 201708, Third-Printing-
Windows and MirrorsE176219 E170431
Page 116 of 649
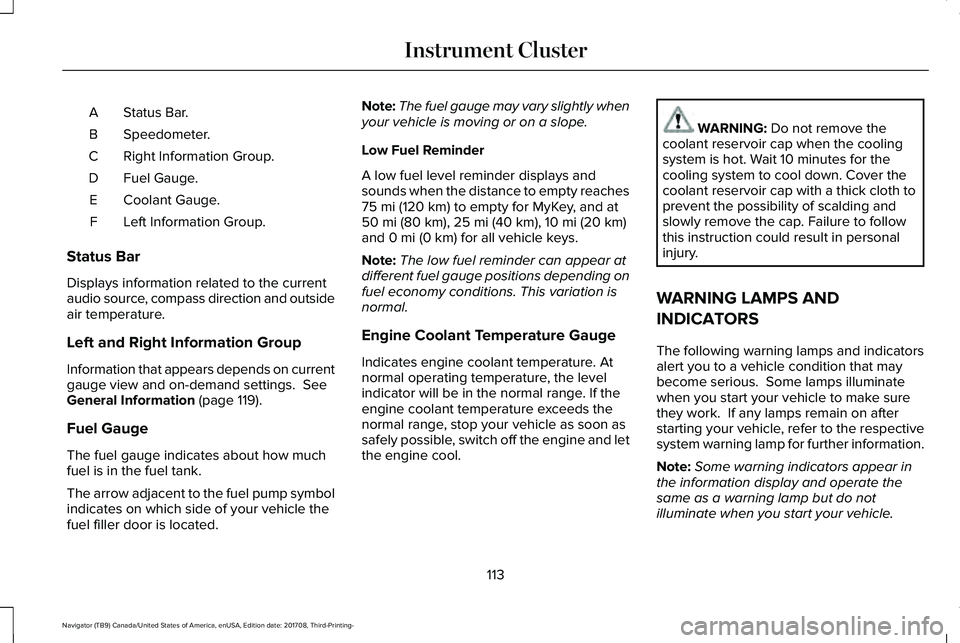
Status Bar.A
Speedometer.B
Right Information Group.C
Fuel Gauge.D
Coolant Gauge.E
Left Information Group.F
Status Bar
Displays information related to the currentaudio source, compass direction and outsideair temperature.
Left and Right Information Group
Information that appears depends on currentgauge view and on-demand settings. SeeGeneral Information (page 119).
Fuel Gauge
The fuel gauge indicates about how muchfuel is in the fuel tank.
The arrow adjacent to the fuel pump symbolindicates on which side of your vehicle thefuel filler door is located.
Note:The fuel gauge may vary slightly whenyour vehicle is moving or on a slope.
Low Fuel Reminder
A low fuel level reminder displays andsounds when the distance to empty reaches75 mi (120 km) to empty for MyKey, and at50 mi (80 km), 25 mi (40 km), 10 mi (20 km)and 0 mi (0 km) for all vehicle keys.
Note:The low fuel reminder can appear atdifferent fuel gauge positions depending onfuel economy conditions. This variation isnormal.
Engine Coolant Temperature Gauge
Indicates engine coolant temperature. Atnormal operating temperature, the levelindicator will be in the normal range. If theengine coolant temperature exceeds thenormal range, stop your vehicle as soon assafely possible, switch off the engine and letthe engine cool.
WARNING: Do not remove thecoolant reservoir cap when the coolingsystem is hot. Wait 10 minutes for thecooling system to cool down. Cover thecoolant reservoir cap with a thick cloth toprevent the possibility of scalding andslowly remove the cap. Failure to followthis instruction could result in personalinjury.
WARNING LAMPS AND
INDICATORS
The following warning lamps and indicatorsalert you to a vehicle condition that maybecome serious. Some lamps illuminatewhen you start your vehicle to make surethey work. If any lamps remain on afterstarting your vehicle, refer to the respectivesystem warning lamp for further information.
Note:Some warning indicators appear inthe information display and operate thesame as a warning lamp but do notilluminate when you start your vehicle.
113
Navigator (TB9) Canada/United States of America, enUSA, Edition date: 201708, Third-Printing-
Instrument Cluster
Page 119 of 649
Note:Do not resume your journey if itilluminates despite the level being correct.Have the system checked by your authorizeddealer immediately.
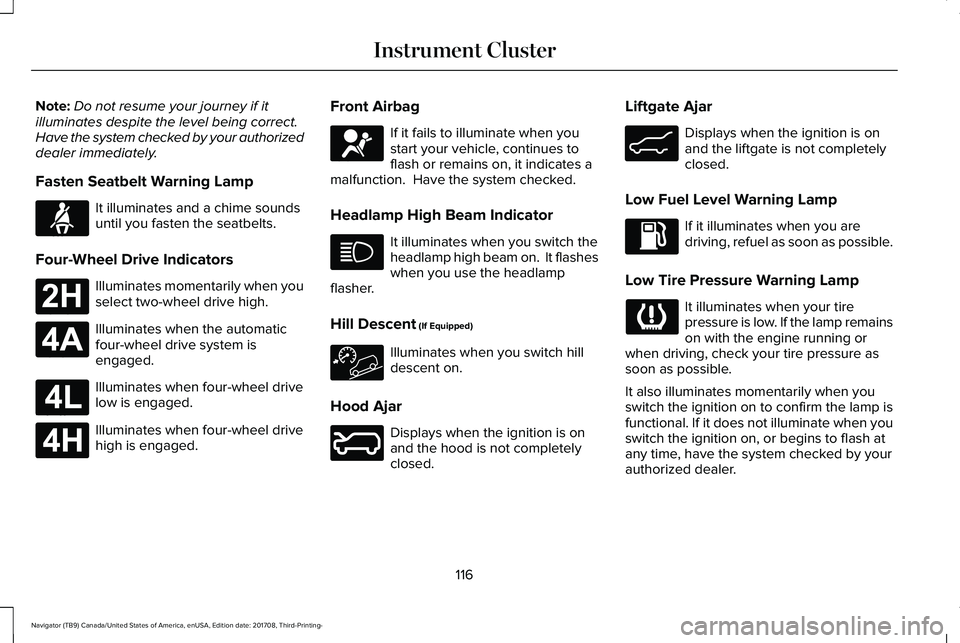
Fasten Seatbelt Warning Lamp
It illuminates and a chime soundsuntil you fasten the seatbelts.
Four-Wheel Drive Indicators
Illuminates momentarily when youselect two-wheel drive high.
Illuminates when the automaticfour-wheel drive system isengaged.
Illuminates when four-wheel drivelow is engaged.
Illuminates when four-wheel drivehigh is engaged.
Front Airbag
If it fails to illuminate when youstart your vehicle, continues toflash or remains on, it indicates amalfunction. Have the system checked.
Headlamp High Beam Indicator
It illuminates when you switch theheadlamp high beam on. It flasheswhen you use the headlampflasher.
Hill Descent (If Equipped)
Illuminates when you switch hilldescent on.
Hood Ajar
Displays when the ignition is onand the hood is not completelyclosed.
Liftgate Ajar
Displays when the ignition is onand the liftgate is not completelyclosed.
Low Fuel Level Warning Lamp
If it illuminates when you aredriving, refuel as soon as possible.
Low Tire Pressure Warning Lamp
It illuminates when your tirepressure is low. If the lamp remainson with the engine running orwhen driving, check your tire pressure assoon as possible.
It also illuminates momentarily when youswitch the ignition on to confirm the lamp isfunctional. If it does not illuminate when youswitch the ignition on, or begins to flash atany time, have the system checked by yourauthorized dealer.
116
Navigator (TB9) Canada/United States of America, enUSA, Edition date: 201708, Third-Printing-
Instrument ClusterE71880 E181778 E181781 E181780 E181779 E67017 E246598 E162453