fuel cap LINCOLN NAVIGATOR 2018 Owners Manual
[x] Cancel search | Manufacturer: LINCOLN, Model Year: 2018, Model line: NAVIGATOR, Model: LINCOLN NAVIGATOR 2018Pages: 649, PDF Size: 4.96 MB
Page 8 of 649
Reporting Safety Defects (U.S. Only)......340
Reporting Safety Defects (Canada Only).......................................................................341
Fuses
Fuse Specification Chart...........................342
Changing a Fuse.........................................358
Maintenance
General Information.....................................361
Opening and Closing the Hood...............361
Under Hood Overview...............................362
Engine Oil Dipstick.....................................364
Engine Oil Check........................................364
Oil Change Indicator Reset......................365
Engine Coolant Check...............................366
Automatic Transmission Fluid Check......371
Transfer Case Fluid Check.........................371
Brake Fluid Check.......................................372
Washer Fluid Check....................................373
Fuel Filter.......................................................373
Changing the 12V Battery.........................373
Checking the Wiper Blades......................375
Changing the Wiper Blades......................376
Adjusting the Headlamps..........................376
Changing a Bulb..........................................378
Bulb Specification Chart............................378
Changing the Engine Air Filter.................381
Vehicle Care
General Information....................................382
Cleaning Products......................................382
Cleaning the Exterior.................................383
Waxing...........................................................384
Cleaning the Engine...................................385
Cleaning the Windows and Wiper Blades......................................................................385
Cleaning the Interior..................................386
Cleaning the Instrument Panel andInstrument Cluster Lens........................388
Cleaning Leather Seats.............................388
Repairing Minor Paint Damage................389
Cleaning the Wheels..................................389
Vehicle Storage...........................................390
Body Styling Kits...........................................391
Wheels and Tires
General Information...................................392
Tire Care........................................................394
Using Snow Chains....................................408
Tire Pressure Monitoring System...........409
Changing a Road Wheel.............................414
Technical Specifications............................420
Capacities and Specifications
Engine Specifications.................................422
Motorcraft Parts...........................................423
Vehicle Identification Number.................424
Vehicle Certification Label........................424
Transmission Code Designation.............425
Capacities and Specifications..................426
Audio System
General Information....................................434
Audio Unit.....................................................436
Satellite Radio..............................................442
USB Port........................................................445
5
Navigator (TB9) Canada/United States of America, enUSA, Edition date: 201708, Third-Printing-
Table of Contents
Page 11 of 649
Anti-lock braking system
Avoid smoking, flames or sparks
Battery
Battery acid
Brake fluid - non petroleum based
Brake system
Brake system
Cabin air filter
Check fuel cap
Child safety door lock or unlock
Child seat lower anchor
Child seat tether anchor
Cruise control
Do not open when hot
Engine air filter
Engine coolant
Engine coolant temperature
Engine oil
Explosive gas
Fan warning
Fasten seatbelt
Flammable
Front airbag
Front fog lamps
Fuel pump reset
Fuse compartment
Hazard flashers
Heated rear window
8
Navigator (TB9) Canada/United States of America, enUSA, Edition date: 201708, Third-Printing-
Introduction E270480 E71340 E71880 E231160 E67017
Page 15 of 649
Note:Including to the extent that any lawpertaining to Event Data Recorders appliesto SYNC or its features, please note thefollowing: Once 911 Assist (if equipped) isenabled (set ON), 911 Assist may, throughany paired and connected cell phone,disclose to emergency services that thevehicle has been in a crash involving thedeployment of an airbag or, in certainvehicles, the activation of the fuel pumpshut-off. Certain versions or updates to 911Assist may also be capable of being usedto electronically or verbally provide to 911operators the vehicle location (such aslatitude and longitude), and/or other detailsabout the vehicle or crash or personalinformation about the occupants to assist911 operators to provide the mostappropriate emergency services. If you donot want to disclose this information, donot activate the 911 Assist feature. SeeSYNC™ 3 (page 446).
Additionally, when you connect to Traffic,Directions and Information (if equipped,U.S. only), the service uses GPS technologyand advanced vehicle sensors to collectthe vehicle’s current location, traveldirection, and speed (“vehicle travelinformation”), only to help provide you withthe directions, traffic reports, or businesssearches that you request. If you do notwant Ford or its vendors to receive thisinformation, do not activate the service. Formore information, see Traffic, Directionsand Information, Terms and Conditions.See SYNC™ 3 (page 446).
PERCHLORATE
Certain components in your vehicle such asairbag modules, seatbelt pretensioners andremote control batteries may containperchlorate material. Special handling mayapply for service or vehicle end of lifedisposal.
For more information visit:
Web Address
www.dtsc.ca.gov/hazard-ouswaste/perchlorate
LINCOLN AUTOMOTIVE
FINANCIAL SERVICES
Lincoln Automotive Financial Services offersa full range of financing and lease plans tohelp you acquire your vehicle. We arededicated to providing answers, informationand a truly extraordinary experience.
Use the options below to contact us withquestions about your account or financingand we will respond promptly:
Web Address
www.LincolnAFS.com
Phone: 1-888-498-8801
Mail: Lincoln Automotive Financial Services
12
Navigator (TB9) Canada/United States of America, enUSA, Edition date: 201708, Third-Printing-
Introduction
Page 116 of 649
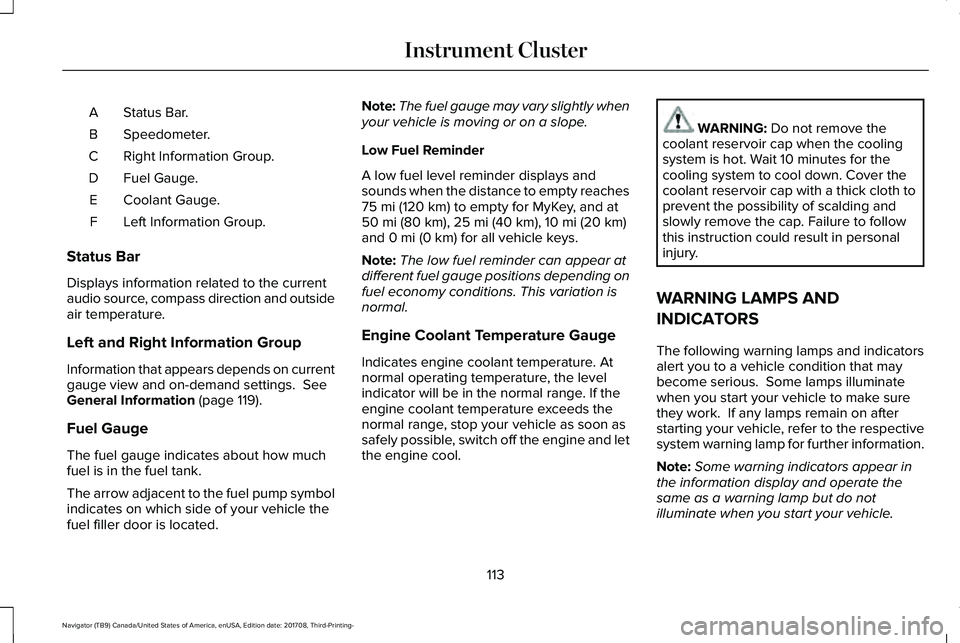
Status Bar.A
Speedometer.B
Right Information Group.C
Fuel Gauge.D
Coolant Gauge.E
Left Information Group.F
Status Bar
Displays information related to the currentaudio source, compass direction and outsideair temperature.
Left and Right Information Group
Information that appears depends on currentgauge view and on-demand settings. SeeGeneral Information (page 119).
Fuel Gauge
The fuel gauge indicates about how muchfuel is in the fuel tank.
The arrow adjacent to the fuel pump symbolindicates on which side of your vehicle thefuel filler door is located.
Note:The fuel gauge may vary slightly whenyour vehicle is moving or on a slope.
Low Fuel Reminder
A low fuel level reminder displays andsounds when the distance to empty reaches75 mi (120 km) to empty for MyKey, and at50 mi (80 km), 25 mi (40 km), 10 mi (20 km)and 0 mi (0 km) for all vehicle keys.
Note:The low fuel reminder can appear atdifferent fuel gauge positions depending onfuel economy conditions. This variation isnormal.
Engine Coolant Temperature Gauge
Indicates engine coolant temperature. Atnormal operating temperature, the levelindicator will be in the normal range. If theengine coolant temperature exceeds thenormal range, stop your vehicle as soon assafely possible, switch off the engine and letthe engine cool.
WARNING: Do not remove thecoolant reservoir cap when the coolingsystem is hot. Wait 10 minutes for thecooling system to cool down. Cover thecoolant reservoir cap with a thick cloth toprevent the possibility of scalding andslowly remove the cap. Failure to followthis instruction could result in personalinjury.
WARNING LAMPS AND
INDICATORS
The following warning lamps and indicatorsalert you to a vehicle condition that maybecome serious. Some lamps illuminatewhen you start your vehicle to make surethey work. If any lamps remain on afterstarting your vehicle, refer to the respectivesystem warning lamp for further information.
Note:Some warning indicators appear inthe information display and operate thesame as a warning lamp but do notilluminate when you start your vehicle.
113
Navigator (TB9) Canada/United States of America, enUSA, Edition date: 201708, Third-Printing-
Instrument Cluster
Page 199 of 649

AUTO-START-STOP
The system helps reduce fuel consumptionby automatically stopping and restarting theengine when your vehicle has stopped. Theengine restarts automatically when yourelease the brake pedal.
In some situations, your vehicle may restartautomatically, for example:
•To maintain interior comfort.
•To recharge the battery.
Note:Power assist steering turns off whenthe engine is off.
Note:If your vehicle is flex fuel capable,Auto-Start-Stop is inhibited for a short timeafter a refuel event when the system isverifying the fuel type being used.
WARNING: Always fully apply theparking brake. Make sure you shift intopark (P) for vehicles with an automatictransmission. Switch the ignition off andremove the key whenever you leave yourvehicle.
WARNING: Before opening the hoodor performing any maintenance, fully applythe parking brake, shift into park (P) orneutral (N) and switch the ignition off.
WARNING: Always switch the ignitionoff before leaving the vehicle. If the ignitionis switched on an automatic restart mayoccur at any time.
WARNING: The system may requirethe engine to automatically restart whenthe auto-start-stop indicator illuminatesgreen or flashes amber. Failure to followthis instruction could result in personalinjury.
The Auto-Start-Stop system status isavailable at a glance within the informationdisplay. See Information Displays (page119).
Enabling Auto-Start-Stop
The system automatically enables every timeyou start your vehicle if:
•You do not press the Auto-Start-Stopbutton (not illuminated).
•Your vehicle exceeds an initial speed of3 mph (5 km/h) after you have initiallystarted your vehicle.
•You have stopped your vehicle.
•Your foot is on the brake pedal.
•The transmission is in drive.
•Not in Excite mode (enable by pressingthe Auto-Start-Stop button).
•The driver door is closed.
•There is adequate brake vacuum.
•The interior compartment has cooled orwarmed to an acceptable level.
•The front windshield defroster is off.
•You have not turned the steering wheelrapidly or you do not have it at a sharpangle.
•The vehicle is not on a steep road grade.
•The battery is within optimal operatingconditions, (with the battery state ofcharge and temperature in range).
•The engine coolant is at operatingtemperature.
196
Navigator (TB9) Canada/United States of America, enUSA, Edition date: 201708, Third-Printing-
Unique Driving Characteristics
Page 204 of 649
RUNNING OUT OF FUEL
Running out of fuel can cause damage notcovered by the vehicle Warranty.
If your vehicle runs out of fuel:
•Add a minimum of 1.3 gal (5 L) of fuel torestart the engine.
•You may need to switch the ignition fromoff to on several times after refueling toallow the fuel system to pump the fuelfrom the tank to the engine. Whenrestarting, cranking time takes a fewseconds longer than normal.
Note:If your vehicle is on a steep slope,more fuel may be required.
Filling a Portable Fuel Container
WARNING: Flow of fuel through afuel pump nozzle can produce staticelectricity. This can cause a fire if you arefilling an ungrounded fuel container.
Use the following guidelines to avoidelectrostatic charge build-up, which canproduce a spark, when filling an ungroundedfuel container:
•Only use an approved fuel container totransfer fuel to your vehicle. Place thecontainer on the ground when filling it.
•Do not fill a fuel container when it isinside your vehicle (including the cargoarea).
•Keep the fuel pump nozzle in contactwith the fuel container when filling it.
•Do not use a device that holds the fuelpump nozzle lever in the fill position.
Adding Fuel From a Portable FuelContainer
WARNING: Do not insert the nozzleof a fuel container or an aftermarket funnelinto the fuel filler neck. This may damagethe fuel system filler neck or its seal andcause fuel to run onto the ground.
WARNING: Do not try to pry open orpush open the capless fuel system withforeign objects. This could damage the fuelsystem and its seal and cause injury to youor others.
WARNING: Do not dispose of fuel inthe household refuse or the public sewagesystem. Use an authorized waste disposalfacility.
When refueling the vehicle fuel tank from afuel container, use the fuel filler funnelincluded with your vehicle. See Fuel FillerFunnel Location (page 200).
Note:Do not use aftermarket funnels as theymay not work with the capless fuel systemand can damage it.
When refueling the vehicle fuel tank from afuel container, do the following:
1. Fully open the fuel filler door.
2. Fully insert the fuel filler funnel into thefuel filler inlet.
201
Navigator (TB9) Canada/United States of America, enUSA, Edition date: 201708, Third-Printing-
Fuel and Refueling
Page 205 of 649
3. Add fuel to your vehicle from the fuelcontainer.
4. Remove the fuel filler funnel.
5. Fully close the fuel filler door.
6. Clean the fuel filler funnel and place itback in your vehicle or correctly disposeof it.
Note:Extra funnels can be purchased froman authorized dealer if you choose todispose of the funnel.
REFUELING
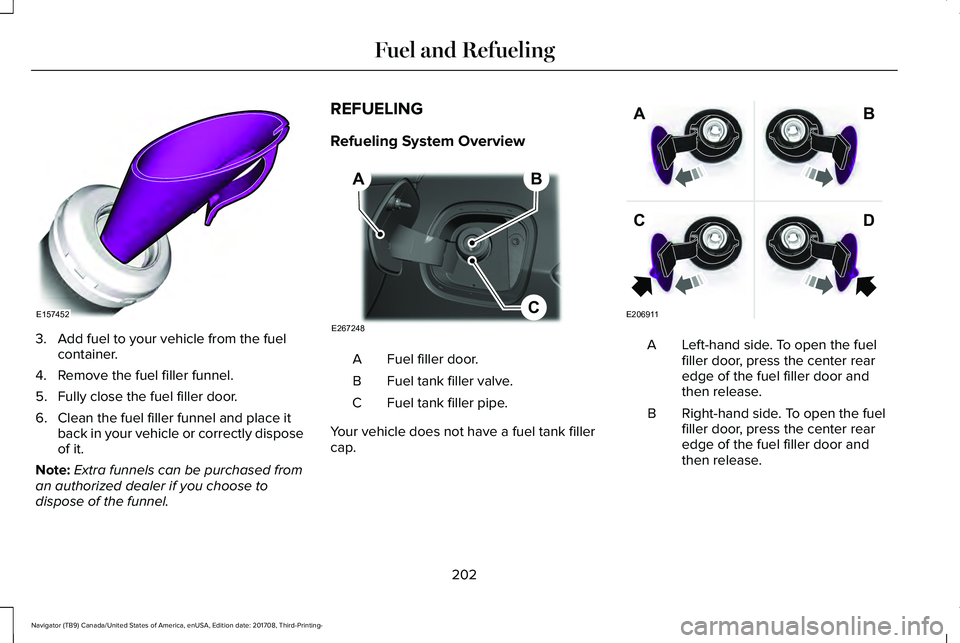
Refueling System Overview
Fuel filler door.A
Fuel tank filler valve.B
Fuel tank filler pipe.C
Your vehicle does not have a fuel tank fillercap.
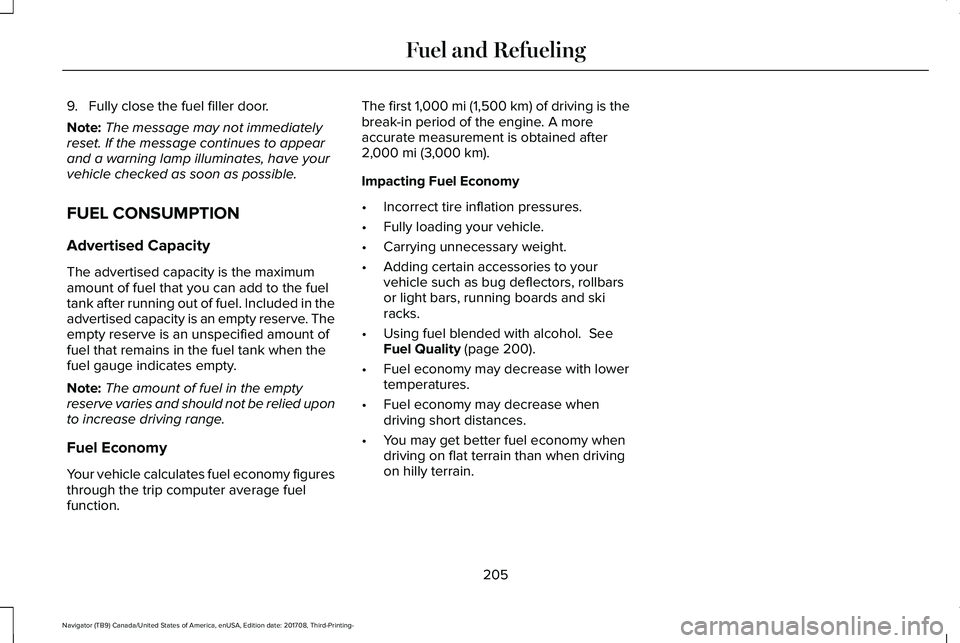
Left-hand side. To open the fuelfiller door, press the center rearedge of the fuel filler door andthen release.
A
Right-hand side. To open the fuelfiller door, press the center rearedge of the fuel filler door andthen release.
B
202
Navigator (TB9) Canada/United States of America, enUSA, Edition date: 201708, Third-Printing-
Fuel and RefuelingE157452 E267248
B
C
A E206911
AB
CD
Page 208 of 649
9. Fully close the fuel filler door.
Note:The message may not immediatelyreset. If the message continues to appearand a warning lamp illuminates, have yourvehicle checked as soon as possible.
FUEL CONSUMPTION
Advertised Capacity
The advertised capacity is the maximumamount of fuel that you can add to the fueltank after running out of fuel. Included in theadvertised capacity is an empty reserve. Theempty reserve is an unspecified amount offuel that remains in the fuel tank when thefuel gauge indicates empty.
Note:The amount of fuel in the emptyreserve varies and should not be relied uponto increase driving range.
Fuel Economy
Your vehicle calculates fuel economy figuresthrough the trip computer average fuelfunction.
The first 1,000 mi (1,500 km) of driving is thebreak-in period of the engine. A moreaccurate measurement is obtained after2,000 mi (3,000 km).
Impacting Fuel Economy
•Incorrect tire inflation pressures.
•Fully loading your vehicle.
•Carrying unnecessary weight.
•Adding certain accessories to yourvehicle such as bug deflectors, rollbarsor light bars, running boards and skiracks.
•Using fuel blended with alcohol. SeeFuel Quality (page 200).
•Fuel economy may decrease with lowertemperatures.
•Fuel economy may decrease whendriving short distances.
•You may get better fuel economy whendriving on flat terrain than when drivingon hilly terrain.
205
Navigator (TB9) Canada/United States of America, enUSA, Edition date: 201708, Third-Printing-
Fuel and Refueling
Page 322 of 649
Before Towing a Trailer
Practice turning, stopping and backing up toget the feel of your vehicle-trailercombination before starting on a trip. Whenturning, make wider turns so the trailerwheels clear curbs and other obstacles.
When Towing a Trailer
•Do not drive faster than 70 mph(113 km/h) during the first 500 mi(800 km).
•Do not make full-throttle starts.
•Check your hitch, electrical connectionsand trailer wheel lug nuts thoroughly afteryou have traveled 50 mi (80 km).
•When stopped in congested or heavytraffic during hot weather, place thetransmission in park (P) to aid engine andtransmission cooling and to help A/Cperformance.
•Turn off the speed control when carryingheavy loads or in hilly terrain. The speedcontrol may turn off automatically whenyou are towing on long, steep grades.
•Shift to a lower gear when driving downa long or steep hill. Do not apply thebrakes continuously, as they mayoverheat and become less effective.
•If your transmission has a Grade Assistor Tow/Haul feature, use this featurewhen towing. This provides enginebraking and helps eliminate excessivetransmission shifting for optimum fueleconomy and transmission cooling.
•If your vehicle has AdvanceTrac withRSC, this system may turn on duringtypical cornering maneuvers with aheavily loaded trailer. This is normal.Turning the corner at a slower speedwhile towing may reduce this tendency.
•If your vehicle has Adaptive suspension,you can select NORMAL or SPORT drivecontrol modes for better experiencewhen towing a trailer. See InformationDisplays (page 119).
•If you are towing a trailer frequently inhot weather, hilly conditions, at the grosscombined weight rating (or anycombination of these factors), considerrefilling your rear axle with synthetic gearlubricant (if the axle is not already filledwith it). See Capacities andSpecifications (page 422).
•Allow more distance for stopping with atrailer attached. Anticipate stops andbrake gradually.
•Avoid parking on a grade. However, ifyou must park on a grade:
1. Turn the steering wheel to point yourvehicle tires away from traffic flow.
2. Set your vehicle parking brake.
3. Place the transmission in park (P).
4.Place wheel chocks in the front and backof the trailer wheels.
Note:Chocks are not included with yourvehicle.
319
Navigator (TB9) Canada/United States of America, enUSA, Edition date: 201708, Third-Printing-
Towing
Page 368 of 649
Note:Do not remove the dipstick when theengine is running.
Note: If the oil level is between themaximum and minimum marks, the oil levelis acceptable. Do not add oil.
Note:The oil consumption of new enginesreaches its normal level after approximately3,000 mi (5,000 km).
Adding Engine Oil
WARNING: Do not remove the fillercap when the engine is running.
Do not use supplemental engine oil additivesbecause they are unnecessary and couldlead to engine damage that may not becovered by the vehicle Warranty.
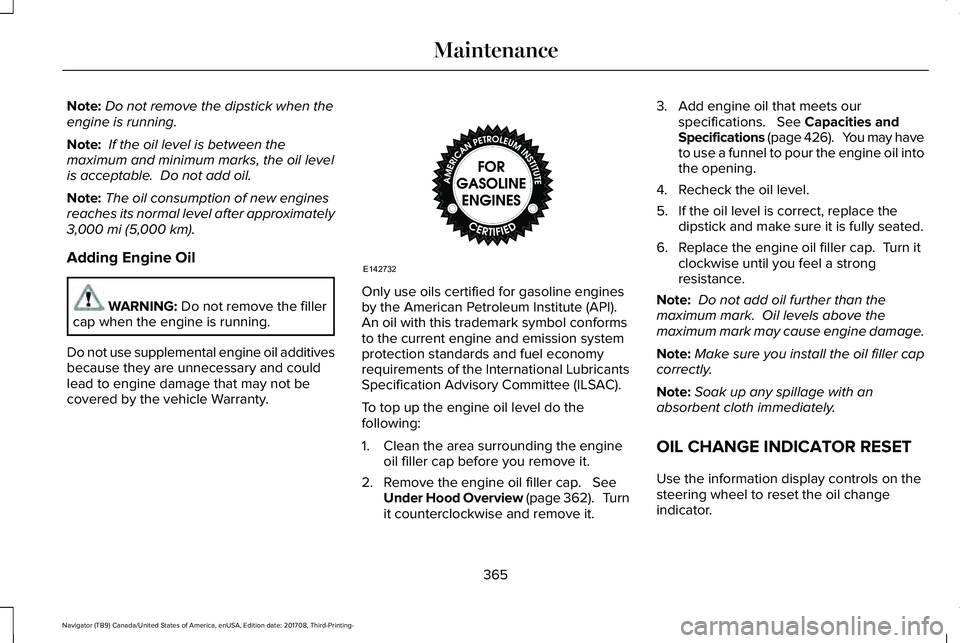
Only use oils certified for gasoline enginesby the American Petroleum Institute (API). An oil with this trademark symbol conformsto the current engine and emission systemprotection standards and fuel economyrequirements of the International LubricantsSpecification Advisory Committee (ILSAC).
To top up the engine oil level do thefollowing:
1. Clean the area surrounding the engineoil filler cap before you remove it.
2. Remove the engine oil filler cap. SeeUnder Hood Overview (page 362). Turnit counterclockwise and remove it.
3. Add engine oil that meets ourspecifications. See Capacities andSpecifications (page 426). You may haveto use a funnel to pour the engine oil intothe opening.
4. Recheck the oil level.
5. If the oil level is correct, replace thedipstick and make sure it is fully seated.
6. Replace the engine oil filler cap. Turn itclockwise until you feel a strongresistance.
Note: Do not add oil further than themaximum mark. Oil levels above themaximum mark may cause engine damage.
Note:Make sure you install the oil filler capcorrectly.
Note:Soak up any spillage with anabsorbent cloth immediately.
OIL CHANGE INDICATOR RESET
Use the information display controls on thesteering wheel to reset the oil changeindicator.
365
Navigator (TB9) Canada/United States of America, enUSA, Edition date: 201708, Third-Printing-
MaintenanceE142732